
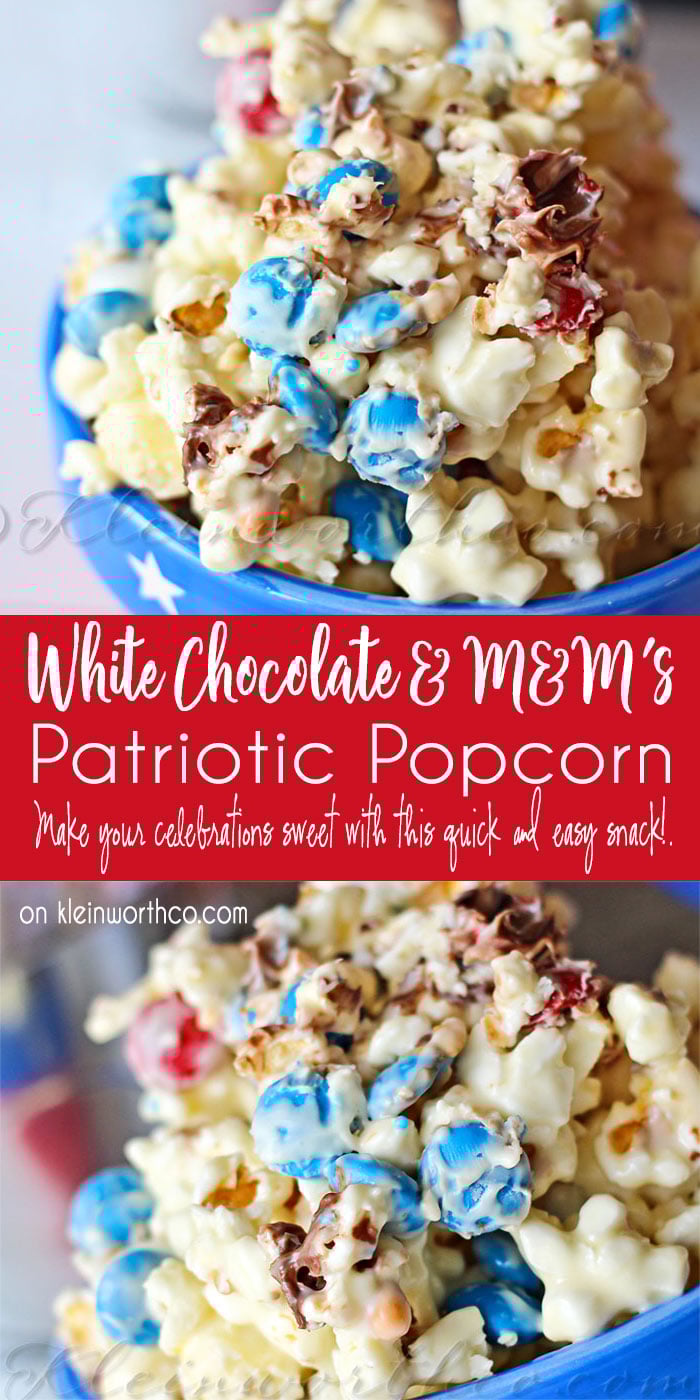
White Chocolate M&M Popcorn is an easy dessert recipe for popcorn coated with melted white chocolate & loaded with patriotic M&M’s. Perfect holiday treat!

Deliciously Easy Recipes
White Chocolate M&M Popcorn is an easy dessert recipe for popcorn coated with melted white chocolate & loaded with patriotic M&M’s. Perfect holiday treat!
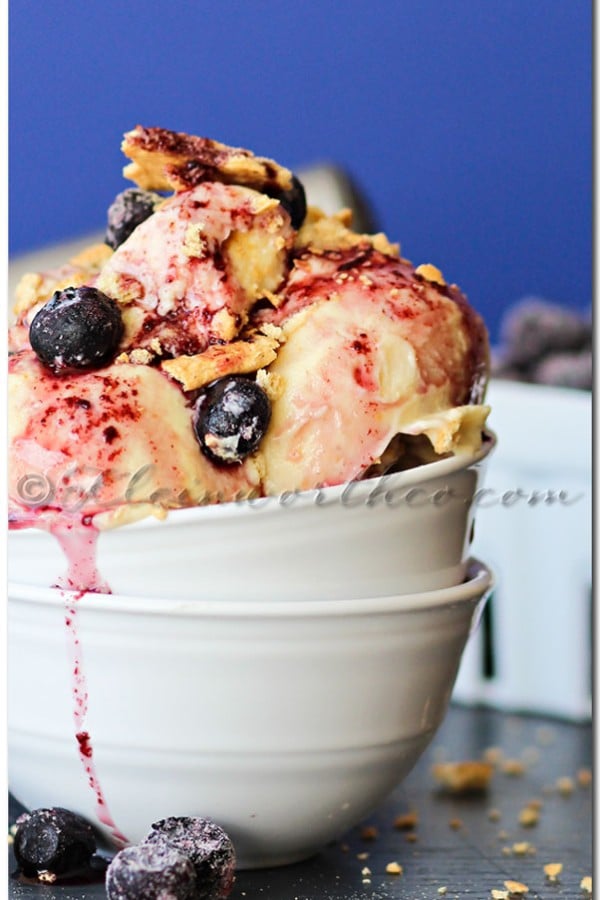
One of my favorite frozen summer recipes is frozen yogurt. I love making my own & I certainly love jazzing it up to create my own flavors for more fun. I got really good at making frozen treats when we lived near Death Valley & spent most of our year hovering around 100 degrees. I was making some sort of easy frozen dessert almost every day. This time I decided to use some of the blueberry syrup that I made & add it to my simple vanilla frozen yogurt. It was SO GOOD!

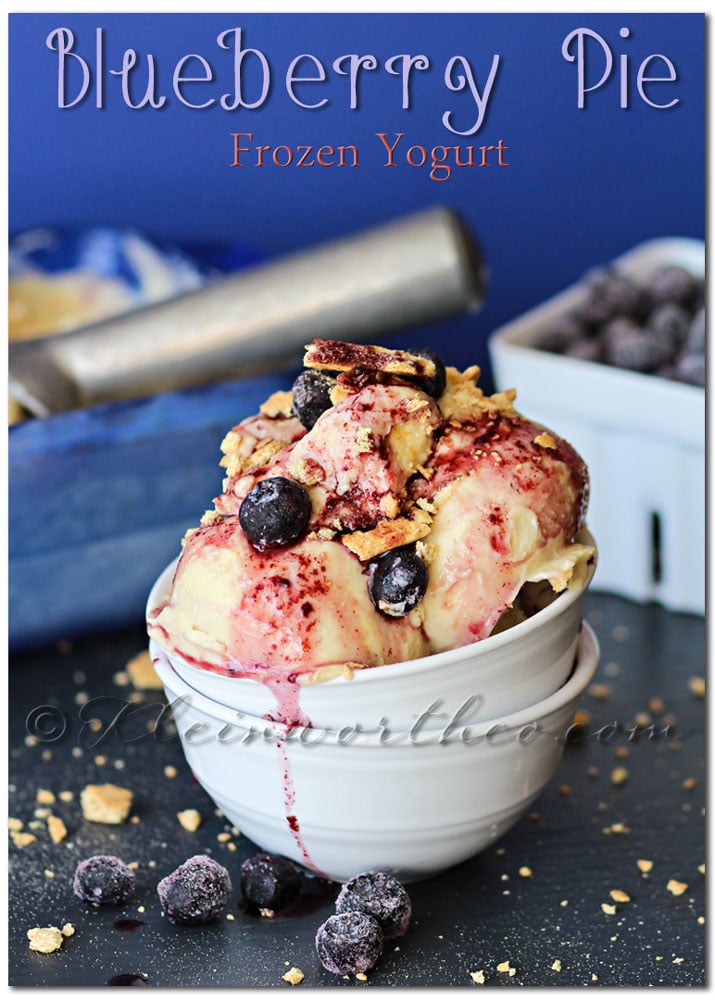
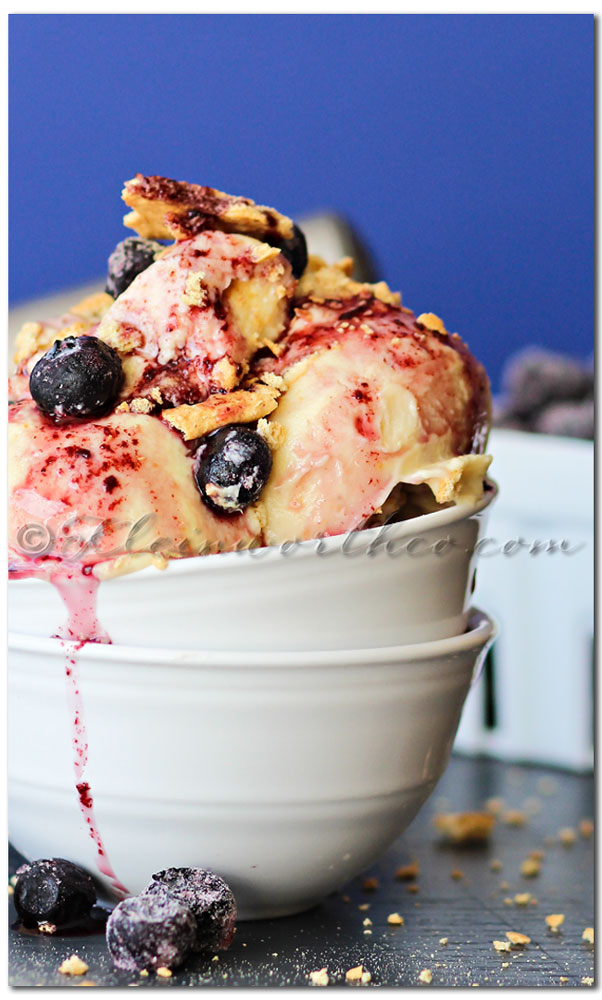
This is so simple & a great way to cool off this summer!
Also- We are wrapping up Watermelon week today. Be sure to check out these AMAZING ideas from these talented ladies.
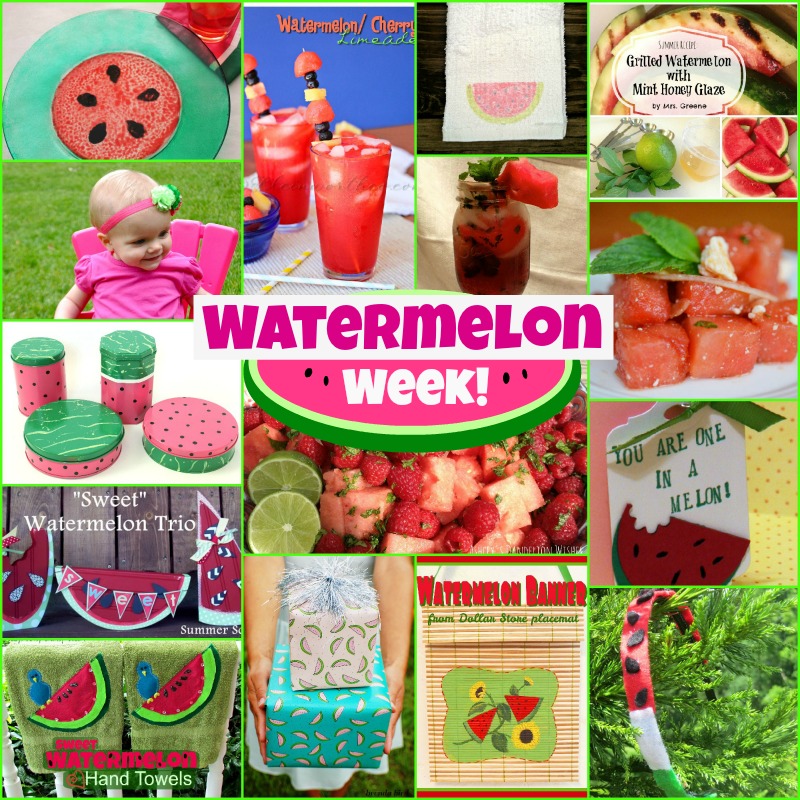
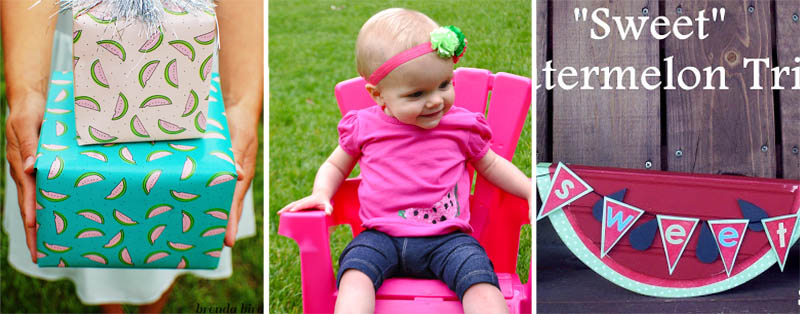
Brenda: https://wp.me/p39A28-jU wrapping paper
Sarah https://www.craftquickies.com/a-sweet-watermelon-inspired-outfit-for-a-sweet-little-lady/
Summer https://www.summerscraps.com/2013/06/sweet-watermelon-trio.html
Don’t forget to come back & join me on Mondays for Project 52
To see where I am linking today- visit HERE

[jetpack_subscription_form]
So I decided what better way to celebrate than to make Ice Cream Sodas our theme for the June Recipe Round-Up.
We have grown our monthly part this month & we have 10 of us together sharing our favorite take/ spin or twist on the classic Ice Cream Soda.
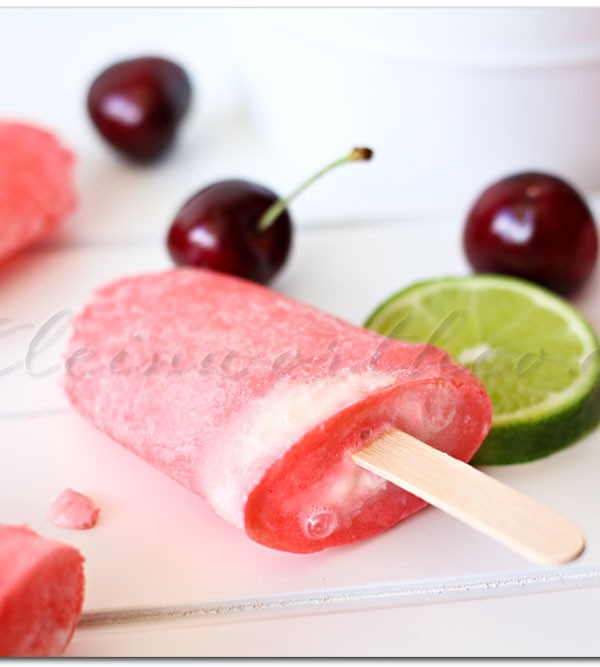
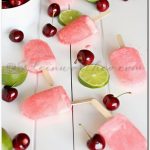
After doing a more traditional ice cream soda recipe & the images not working out at all- I decided to try again with a different take. I decided to take my favorite drink- Cherry Limeade & turn it into not only an ice cream soda but to then turn it into a frozen dessert & make ice popsicles with it. Turned out SO GOOD!


You have GOT TO try these this summer!!!!
Check out all the fabulous Ice Cream Soda Recipes posting for June’s Recipe Round-Up
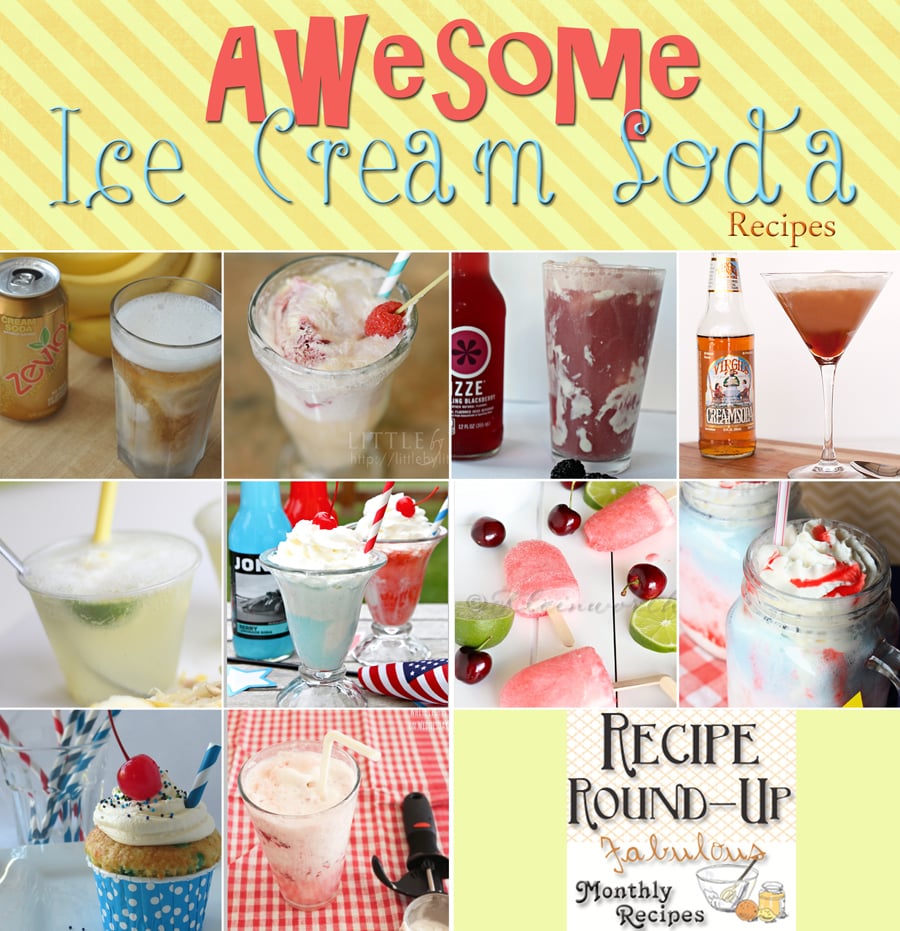

Ice Cream Soda Cupcake from Chrissy @ The Taylor-House
Patriotic Ice Cream Soda from Kelly @ Mostly Homemade Mom
Ice Cream Soda from Emily @ Nap-Time Creations
Ice Cream Soda Cocktail from Jessica @ One Martini at a Time
Independence Day Ice Cream Soda Bar from Danelle @ Let’s Dish
Blackberry Vanilla Bean Ice Cream Soda from Krista @ Joyful Healthy Eats
Raspberry Ginger Ice Cream Soda from Julie @ White Lights on Wednesday
Vegan Ice Cream Soda from Tamar @ Random-osity
Ice Cream Sodas from Kim @ Little by Little
Cherry Limeade Ice Cream Soda Pops from Gina @ Kleinworth & Co.
Do you want to participate in future Recipe Round-Up’s & join in on the fun??
email Gina at Kleinworth & Co (chichomeschoolmama{at}att{dot}net) for details.
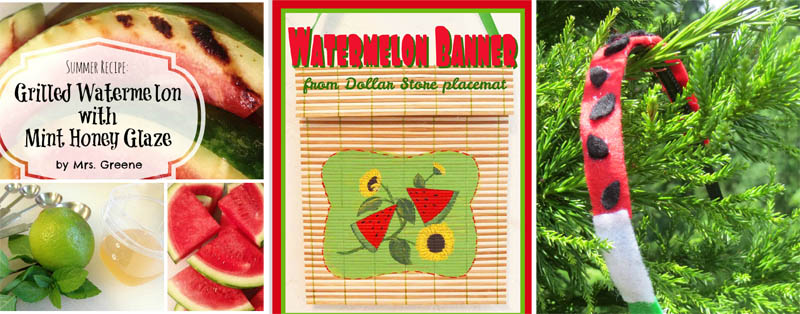
Also continuing on with Watermelon Week- be sure to catch the fun ideas shared today by these great bloggers.
Don’t forget to come back & join me on Mondays for Project 52
To see where I am linking today- visit HERE
[jetpack_subscription_form]
You all know that we have our weekly food co-op. We don’t get to pick & choose what gets put in it. We pay a flat rate each week & when we pick up our basket it’s always a surprise as to what we will get for the week. This sometimes ends up with us getting a bunch of things that we don’t typically eat- or flat out dislike altogether.
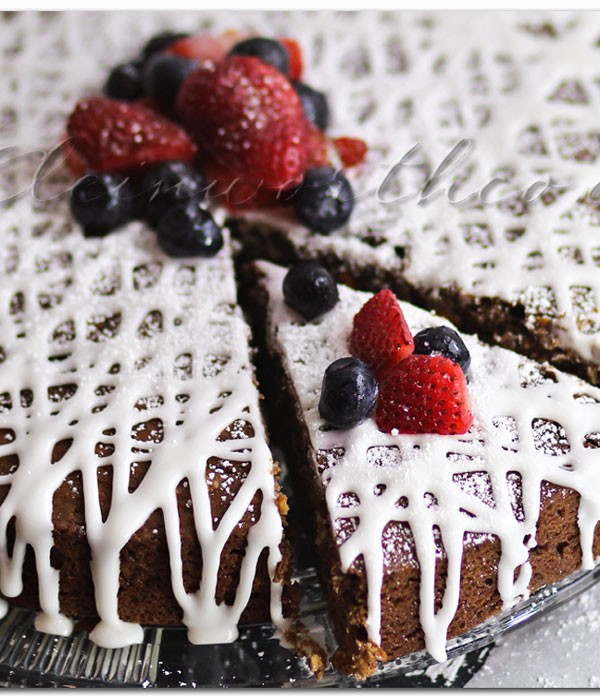
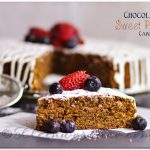
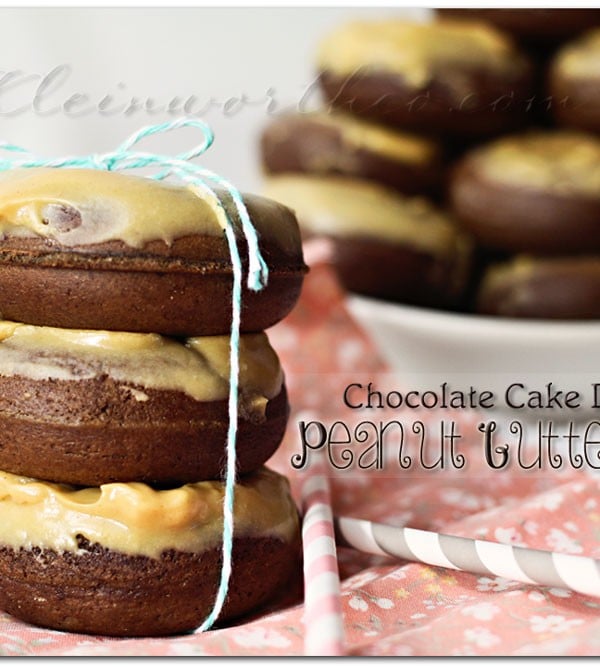
This past basket we received a sweet potato. NONE of us like them- not even a little bit. So we did have a fleeting thought to mail it to my mom as a joke since they like them. But we thought better of it. I decided to push my creativity & find a way to make it into something we would like. I knew that back in the 1940’s, during & after the war- things like sugar & butter were hard to come by & people like our great grandmothers & grandmothers were doing what they could to get creative in the kitchen while doing without. They made Potato Cake. I decided to adapt a recipe for potato cake & see if it would still come out good with the sweet potato. So I made…
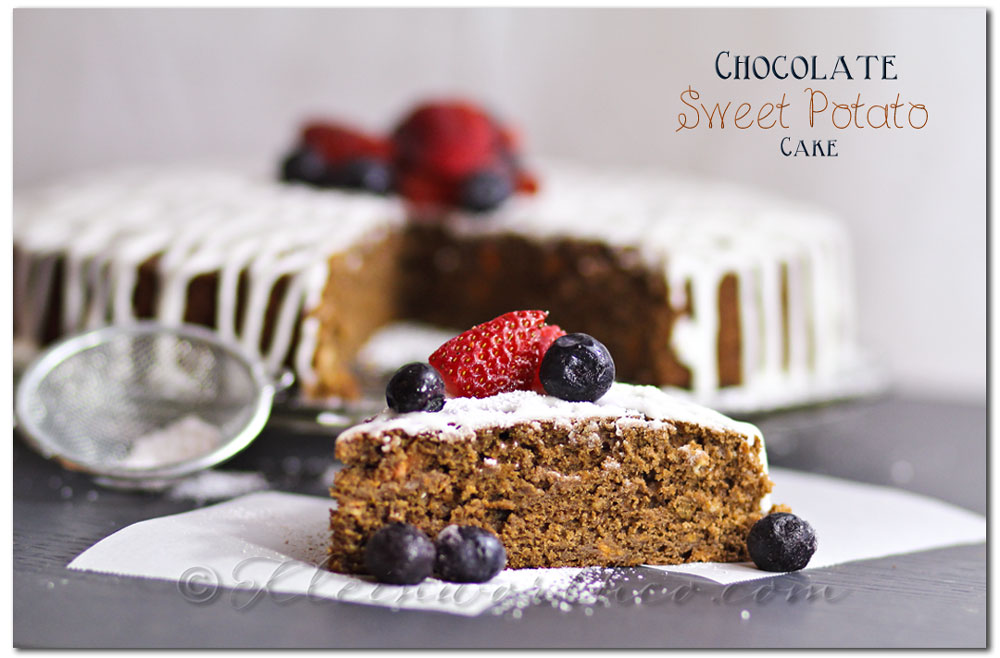
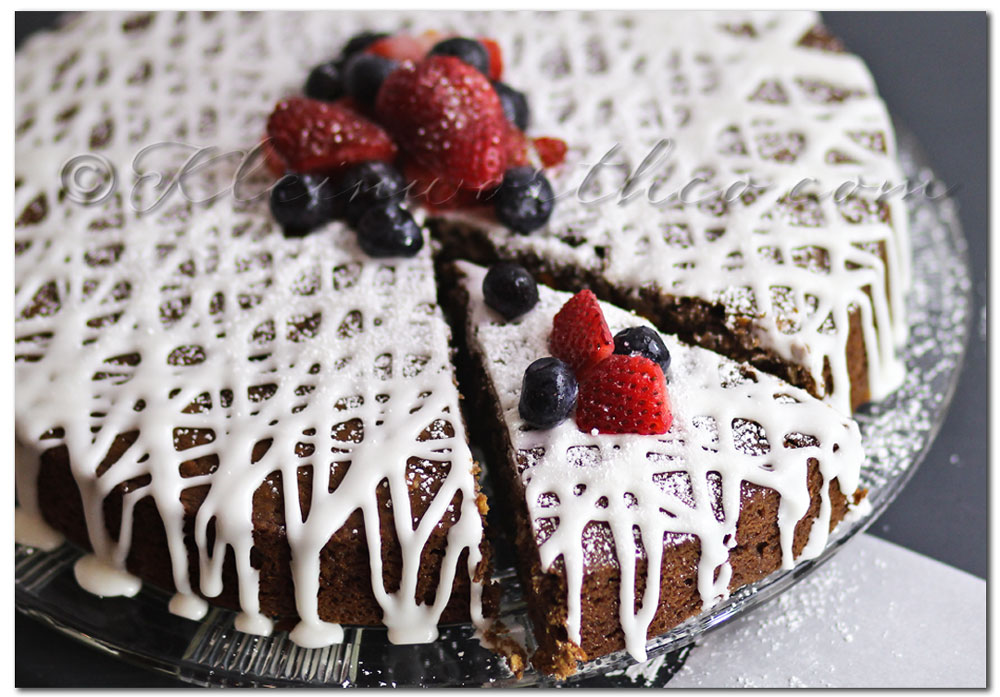
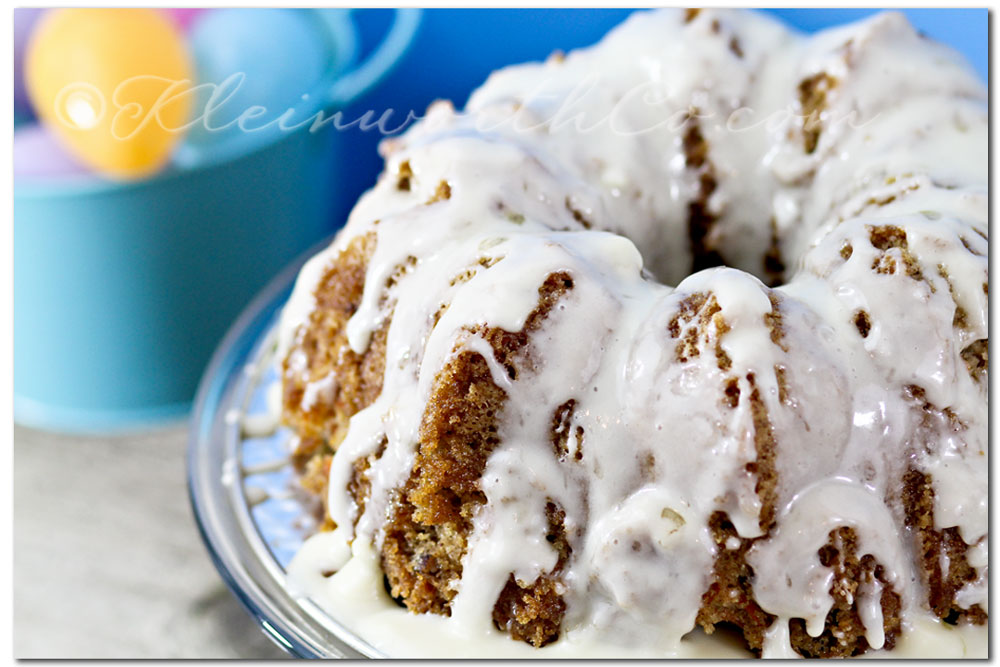
I used a standard donut glaze & just drizzled it on in a pattern. This cake didn’t really need heavy frosting.
Add some berries & you have yourself a 4th of July party treat.
Don’t forget to come back & join me on Mondays for Project 52
To see where I am linking today- visit HERE
[jetpack_subscription_form]
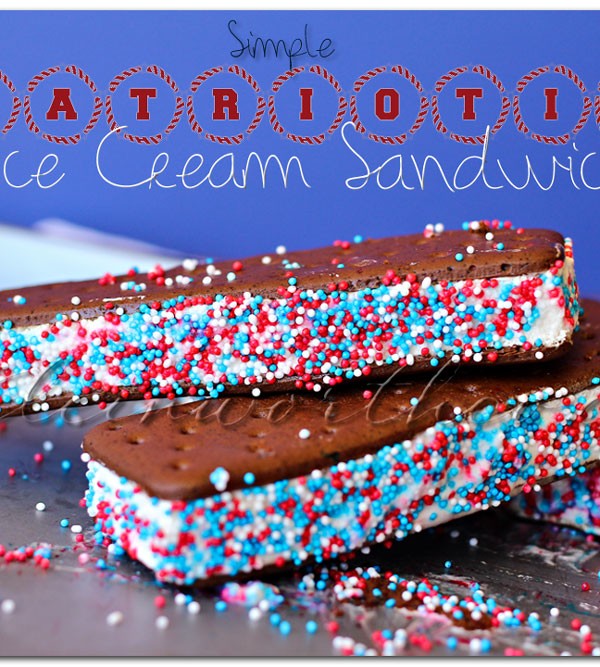
Sometimes it’s the little things that make me smile. I love when something so effortless & yet fun brings a little light into my day. This is especially true with desserts. I love things I don’t have to slave in the kitchen for hours on & yet end up being huge hits at a gathering. I am not the fist person to think of this idea- in fact I’m know of at least a few other of my favorite bloggers that have done this for various different holidays in various different ways. But for me- I’m all about these little 4th of July nonpareils. I love them in all color combos but I think the red, white & blue make me the happiest. Which means that I had to use them for this little 4th of July dessert.
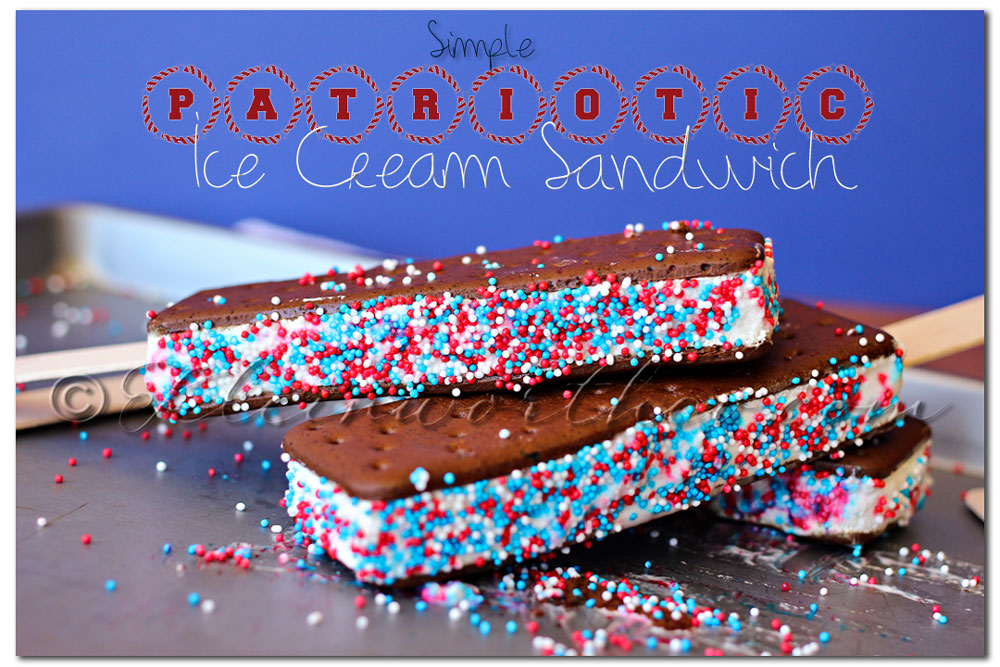
As you can see- it’s as simple as inserting a Popsicle stick (I used tongue depressors because they are easier to hold) into a semi-soft ice cream sandwich. Then I just sprinkled on the nonpareils & pressed them in a bit. Had to work fast because they were melting quickly. I stuck them back in the freezer to harden again. So easy & yet guests at your party will love the festive touch.
Don’t forget to come back & join me on Mondays for Project 52
To see where I am linking today- visit HERE
[jetpack_subscription_form]
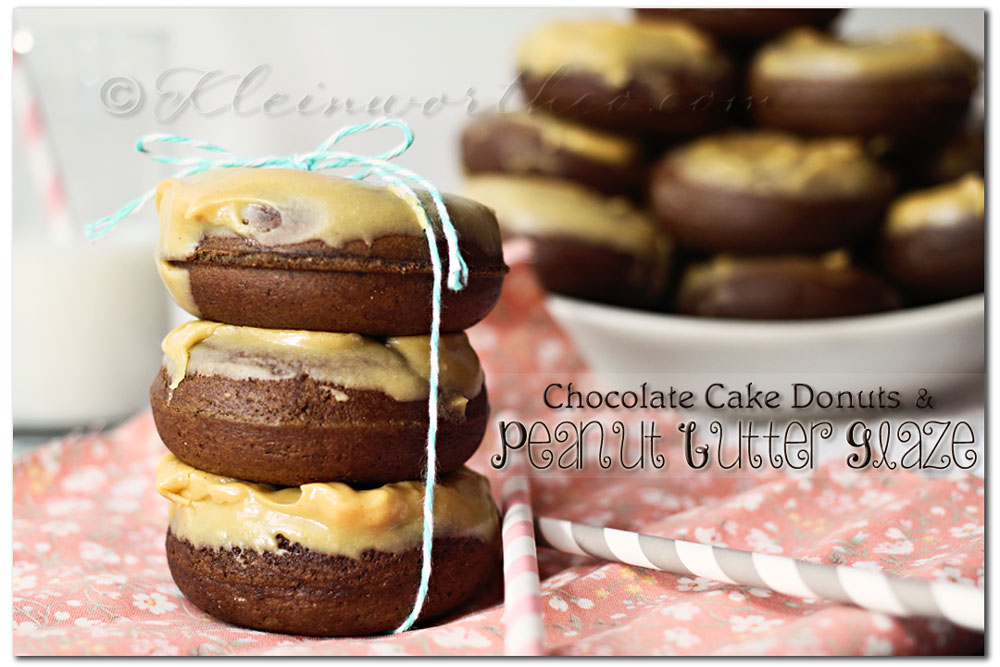
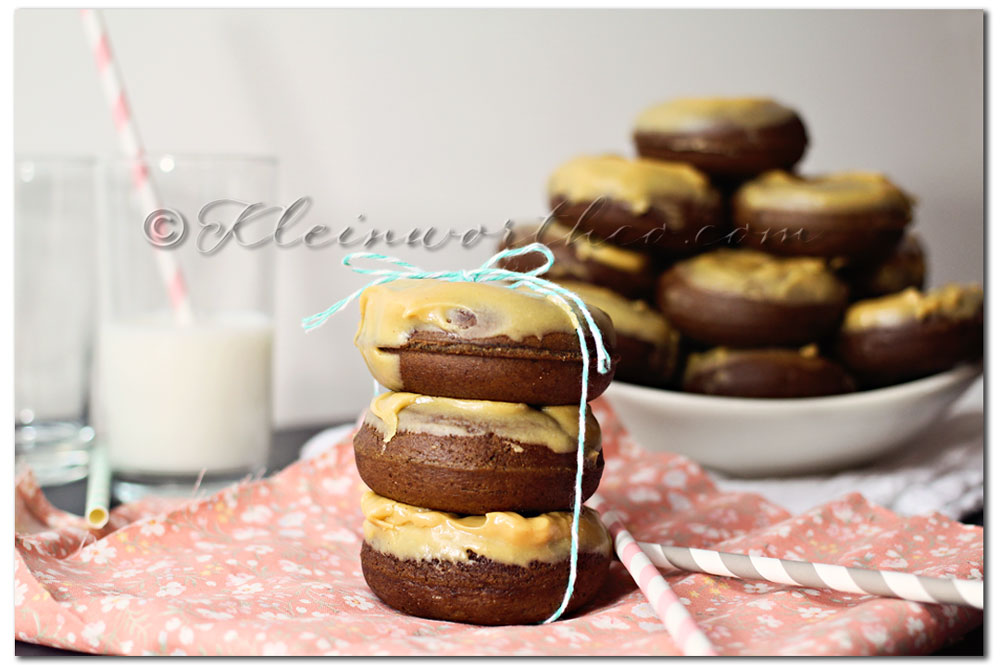
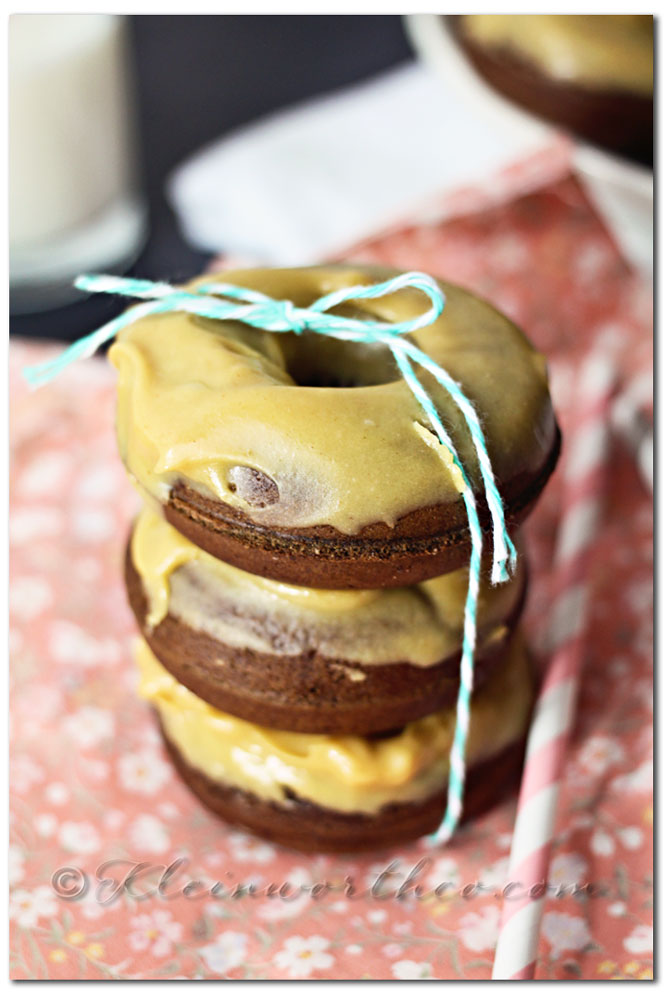
It’s National Donut Day!!!! It’s time to celebrate with some….
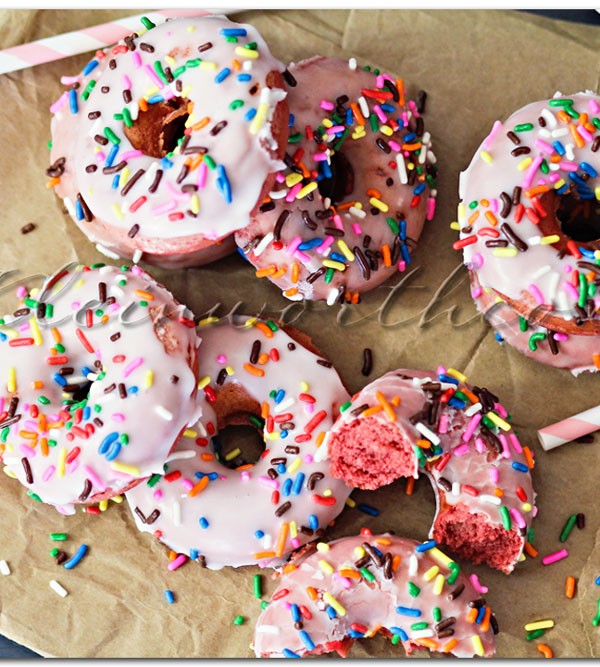
You know I wasn’t going to let National Donut Day go by without making something to celebrate right??!!! I mean- every donut should be celebrated. I have so much fun with my little mini-donut maker. I try to make some for a Saturday morning at least once a month to sort of break the cycle of muffins & breakfast cakes & other things. Besides- don’t you just have those days when you just REALLY CRAVE a donut?? I definitely do.
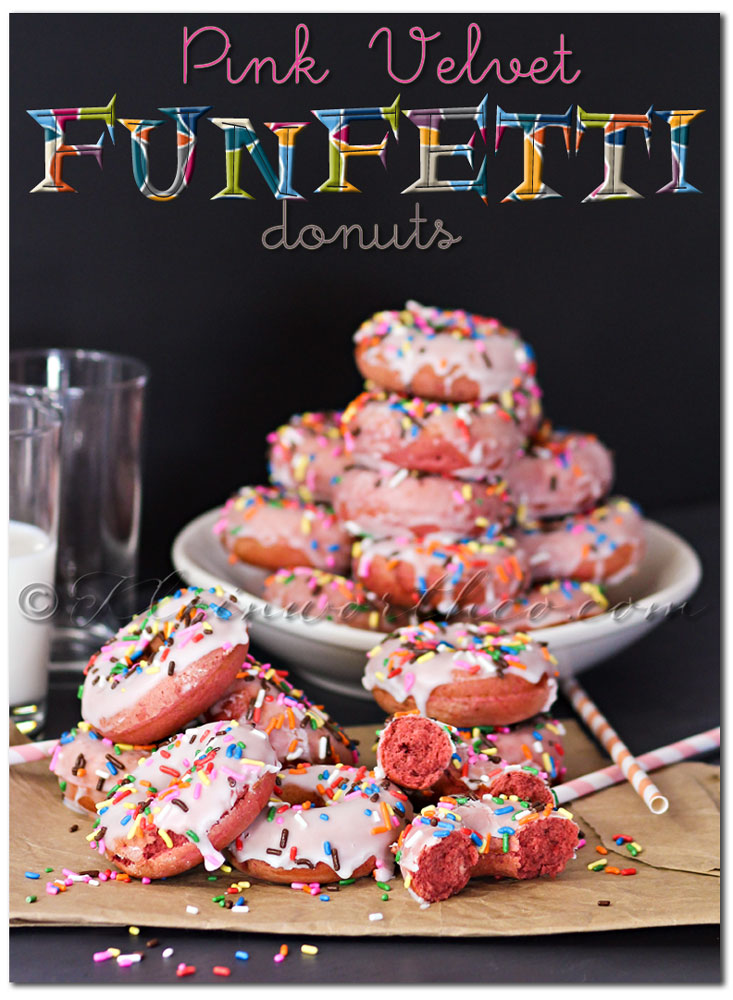
These were SO MUCH FUN!!!!
I was going to do red velvet but as I was adding the food color the pink just grabbed me
& I thought it was better for summer to do something a little lighter.

Want more Donut recipes- head HERE
Don’t forget to come back & join me on Mondays for Project 52
To see where I am linking today- visit HERE
[jetpack_subscription_form]
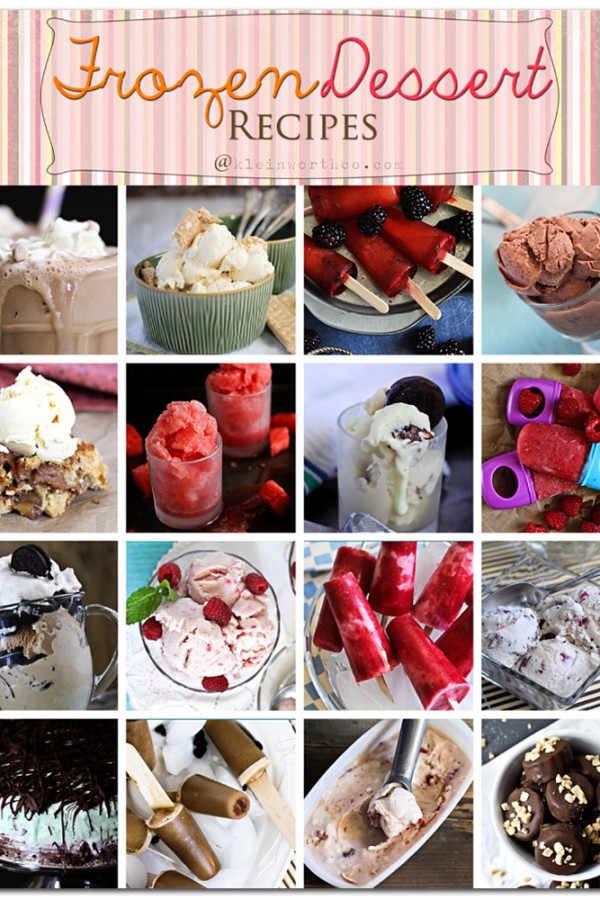
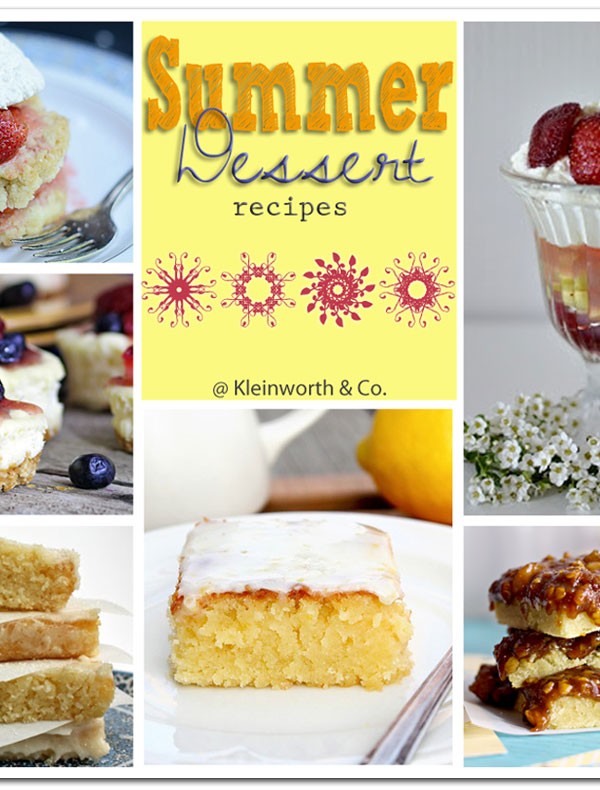
It’s June!!! That means it’s time to revisit some great
My criteria for making recipes in the summer is that it has to be simple & quick. I don’t want to spend a lot of time in the kitchen- especially now that we live in a place where it’s nice to be outdoors this time of year. I’m not sitting in a puddle of sweat anymore- however that doesn’t mean I don’t want to still enjoy some great frozen treats. I will use any excuse I can to have something sweet. 🙂
I have compiled my top favorites here for you today.
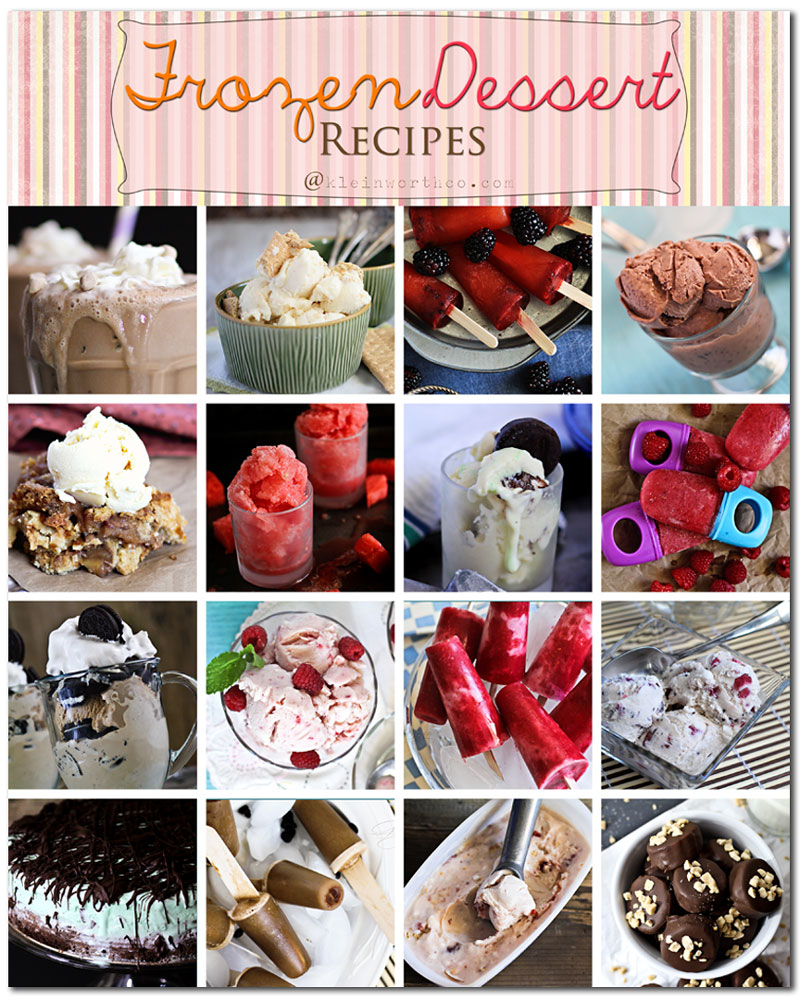
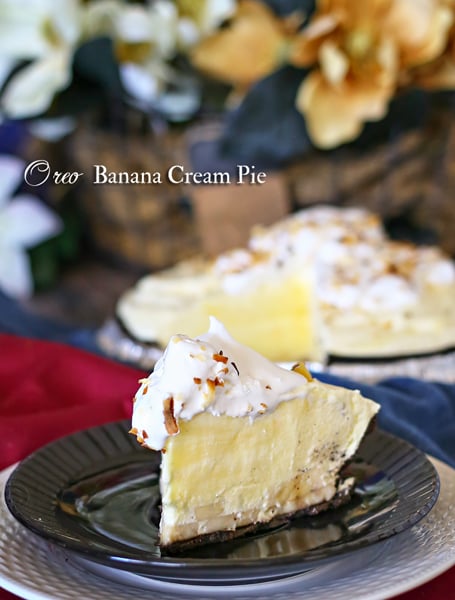
Banana Cream Pie Frozen Yogurt
Vanilla Frozen Yogurt
Peppermint Patty Frozen Yogurt
Raspberry Pineapple Frozen Fruit Pops
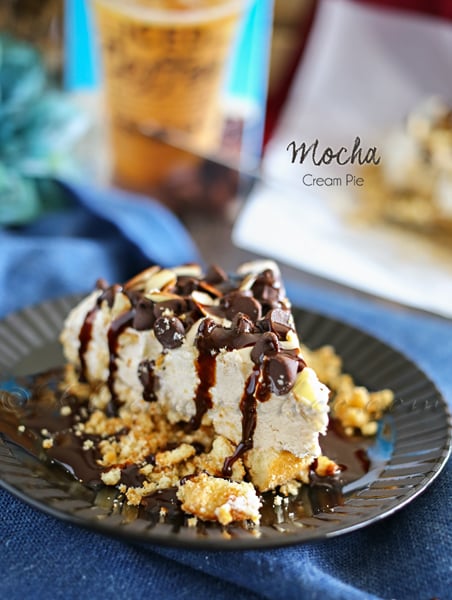
Coffee Ice Cream, Oreos & Cool Whip
Raspberry White Chocolate Frozen Yogurt
Raspberry & Cream Pops
Iced Espresso Pops
Strawberry Cheesecake Frozen Yogurt
YEP- I think it’s safe to say I have a healthy obsession with all things sweet. 🙂
Hope these help you all cool down this summer.
Don’t forget to come back & join me on Mondays for Project 52 & Wednesdays for Your Best Weekly
[jetpack_subscription_form]

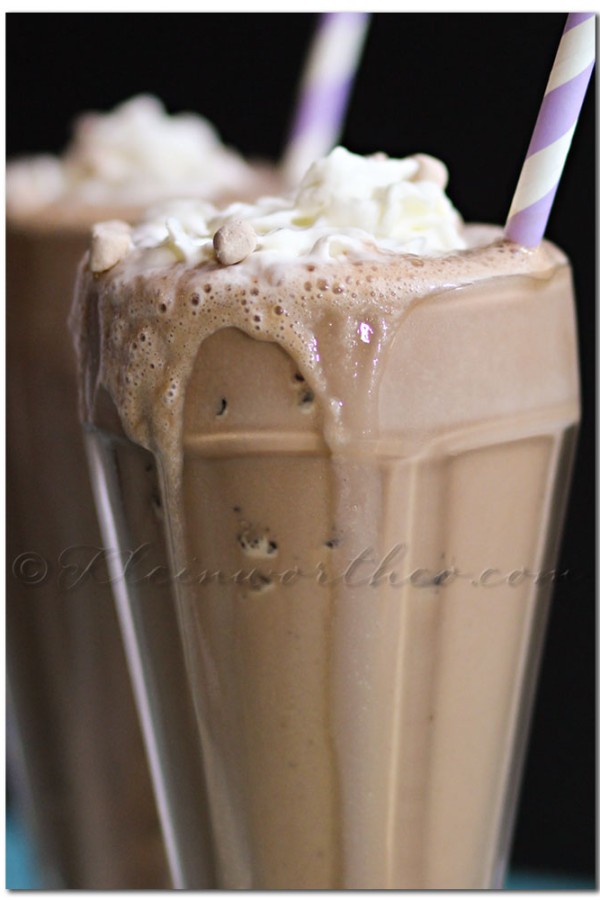
We decided to change it up a bit- they turned out SO GOOD!!!!
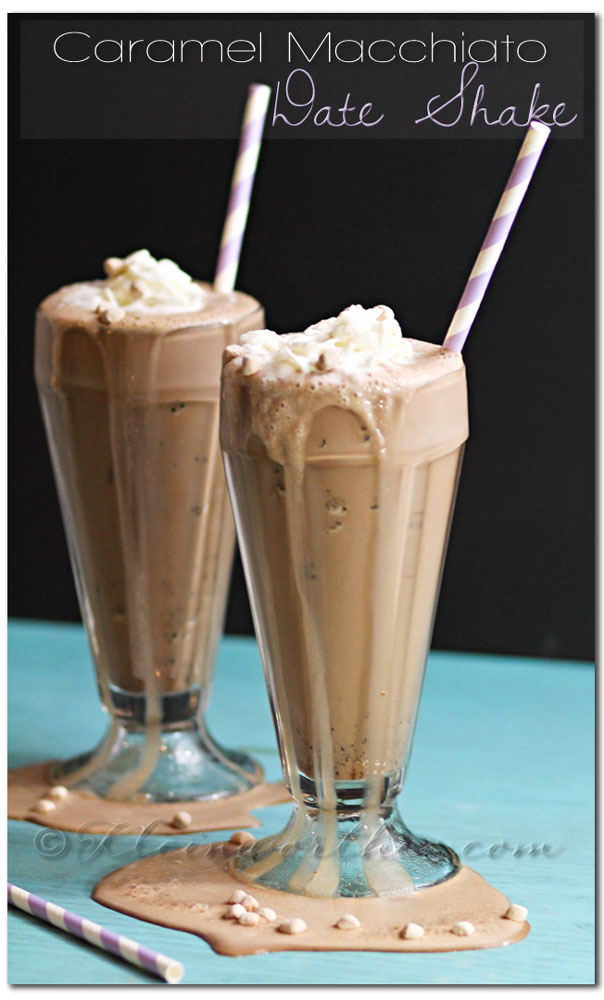
When I was doing my searches for Date Shakes to see what else was out there- I realized that this really is a So Cal thing. So now all of you that have not had the pleasure of visiting Hadley’s can now give a similar recipe a try. I wasn’t able to find much of any other recipes out there- which is what prompted this one. I am so happy I can have my beloved date shakes now. It will be my summer staple again. BTW- I used International Delight Iced Coffee for mine. They have been so good to me through these campaigns that I have worked on with them. I was not compensated for this post & I purchased the iced coffee in addition to the free creamers I received from them during my last campaign.
Don’t forget to come back & join me on Mondays for Project 52 & Wednesdays for Your Best Weekly
To see where I am linking today- visit HERE
[jetpack_subscription_form]
There were so many yummy things shared this past week for Your Best Weekly.
I saw a theme going- so I thought I would run with it & create…
Oh so many things for me to try. I can’t wait. Especially with the long weekend- I will be spending my fair share of time in the kitchen making all these goodies you all have shared. I can’t wait to see what you all come up with for next week. I’m sure you have some goodies planned for this long holiday weekend. We will be at the ready- I’m sure the hubs will be busy. So probably won’t plan anything that requires the BBQ unfortunately. If he were to get called out while we were grilling- I would be lost on what I needed to do to wrap it up. That is totally his gig & he’s great at it. I have the backside to prove it.
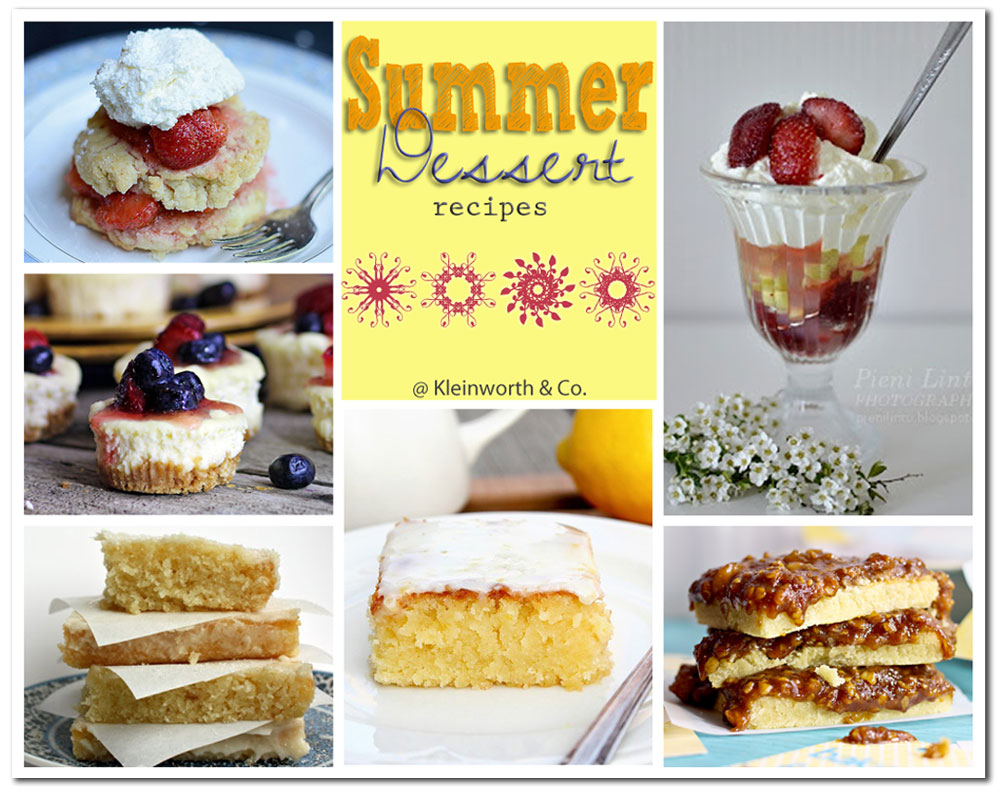
Rhubarb Dessert from Pieni Lintu
Fudgy Vanilla Brownies from Peanut Butter & Jelly
Patriotic Mini-Cheesecakes from Me- Kleinworth & Co.
Lemon Blondies with Lemon Glaze from Let’s Dish
Caramel Pear Bars from Me- Kleinworth & Co.
Don’t forget to pick up my free printable for the First Aid checklist so you can make your own easy First Aid Kit.

While you are over there grabbing your checklist- don’t miss your chance to enter my giveaway happening now!!

Most importantly this weekend- be sure to THANK A VET!!
Have a great weekend everyone!
[jetpack_subscription_form]
Hi Everyone! Happy Your Best Weekly Party day!!
So happy to have you join me.
Tip Hero’s Father’s Day Giveaway Event
Sign-ups are now open for this great new giveaway event!
Please send all payments to tiphero@gmail.com as a “gift” via PayPal.
Sign up for this event here.
I am totally a chocolate person. But my hubs- he’s all about the caramel. He is always asking me when I will make more recipes with caramel for him instead of things that I’m most fond of. So I started taking a look at my recipes here & noticed that he’s right. I have only posted a few caramel recipes. So I decided to oblige & make something yummy.

I made these Caramel Pear Bars originally with the idea that it was just going to be the caramel with the mix ins in there as a good recipe for a heartier homemade caramel. Then I quickly changed my mind & decided that it really would be so much better if I added a shortbread crust to make it easier to package up for gifts.

I loved that I had the perfect chance to pair these up with these ADORABLE bag toppers & gift tags from the Sunshine collection at Life n’ Reflection. They are so cute. I just love blue & yellow together so these just made me smile. Kristy has the most adorable things in her store. If you are planning a party or like to scrapbook or love to play in photoshop- you have got to head on over & see all the things she has to offer. You can pick up this Sunshine set for just $5. Really- can’t beat that.

**I was given this Sunshine set in exchange for this post as part of being a member of the affiliate design team.

Now it’s time for you to share!
Everyone is Welcome as long as you link back to Kleinworth & Co. or Button Up. (Buttons HERE)
Please also connect with me on Pinterest and/or Twitter

Don’t forget to come back & join me on Mondays for Project 52 & Wednesdays for Your Best Weekly
To see where I am linking today- visit HERE
[jetpack_subscription_form]
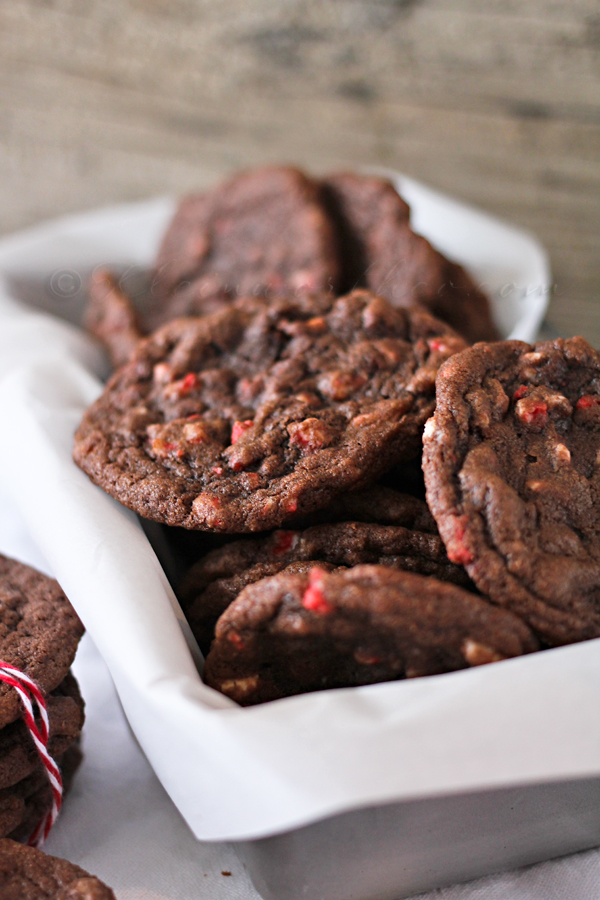
Today I have a VERY special treat for you all.
My dear friend Chrissy – the AMAZING Chrissy, from The Taylor House is here today sharing her favorite Chocolate Dessert Recipes.
Please give her a nice warm welcome & check out all these awesome recipes that will have you drooling for sure.
Hi, everyone! It’s Chrissy from The Taylor House! I am so excited to be sharing some of my families favorite Chocolate dessert recipes with you today here at Kleinworth & Co. I have picked ten of our favorites that range from brownies to hot chocolate and all of them contain our favorite ingredient – Chocolate!
I love trying new recipes or creating my own new version of a recipe for my family. My boys love it when I make desserts and they seem to always be requesting desserts with either chocolate, peanut butter or caramel. So, I have quite a list of chocolate dessert recipes in my file and have tried to share them with my readers and fans. I think that it is my mission in life to make as many delicious looking and tasting recipes as I can!
What are your favorite dessert recipes? Do you always make them the same or do you change them up and try new things? Does your favorites include chocolate or do you prefer peanut butter or maybe even fruit?

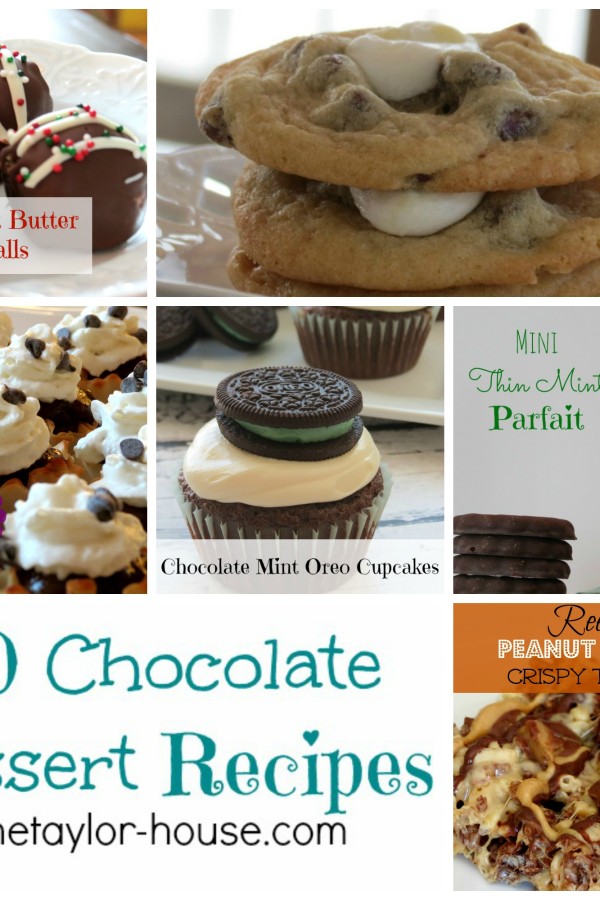
10 Chocolate Dessert Recipes
1. Smore Chocolate Chip Cookies – Traditional Chocolate Chip Cookies with a Marshmallow surprise baked in.

2. Chocolate Mint Parfait – Layers of Mint, fudge, cool whip and cream cheese mix make these an amazing treat.

3. Chocolate Brownie Smore Pie – A delicious combination of Brownies & Smores in a graham cracker crust.

4. Chocolate Mint Oreo Cupcakes – Mint Oreos topped these chocolate cupcakes with a mint flavored frosting.

5. High Fiber Brownies – Who knew Brownies could be good for you?

6. Chocolate Mini Pie Bites – Mini Fillo Cups filled with chocolate pie filling.

7. Reese’s Peanut Butter Crispy Treats – A twist on Crispy Treats using Reese’s candy.

8. Oreo Cupcake Recipe – Oreo Cookies and Cream Cupcake Recipe.

9. Peppermint Hot Chocolate – Hot Chocolate with Peppermint and whip cream.

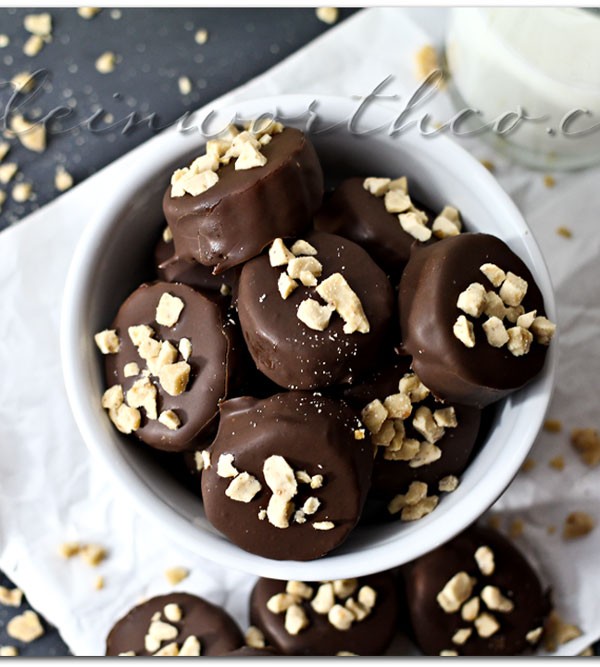
10. Peanut Butter Balls – Peanut Butter Balls dipped in Chocolate.

I hope you enjoy looking through these recipes and try making them yourself. If you are anything like me, one of these chocolate dessert recipes is doing to hit the spot! I would love to hear about new dessert recipes, so leave a comment below and share them with us!
Chrissy Taylor is a wife, Mom, blogger and property manager. She and her husband of 15 years are raising two active boys in the Twin Cities area of Minnesota. Chrissy enjoys blogging about cooking, crafts, gifts and household tips.
You can connect with her at:
The Taylor House * Facebook * Twitter * Pinterest * Google+
Don’t forget to head on over to Chrissy’s place & check out my Top 12 Chocolate Recipes.
Don’t forget to come back & join me on Mondays for Project 52 & Wednesdays for Your Best Weekly
To see where I am linking today- visit HERE
[jetpack_subscription_form]
YAY!! I’m so excited for today!!
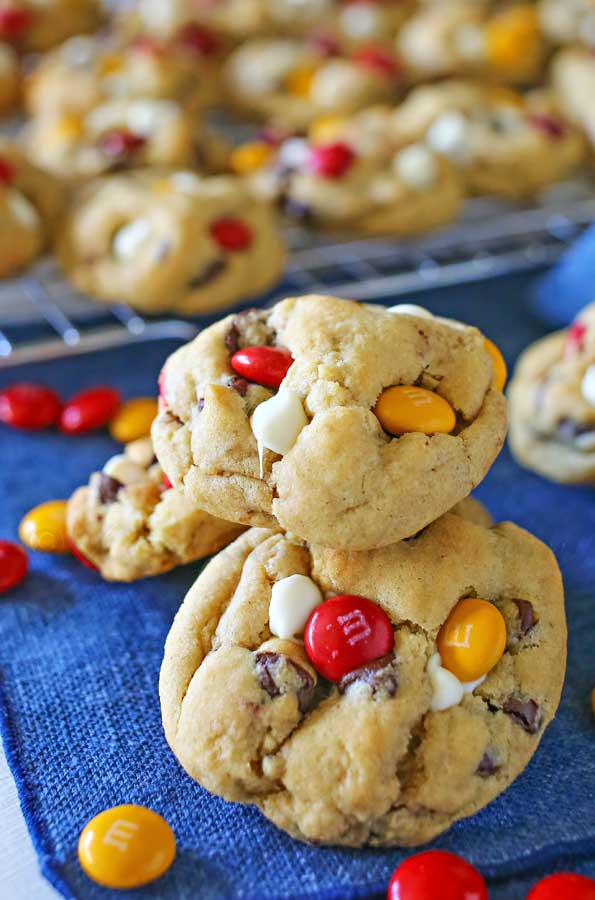
Today is National Chocolate Chip Day!!! I think you all know that I love chocolate chips & will find a way to add them to as many dishes as I can.
So today gave me a HUGE excuse to make something new with chocolate chips. What a fun thing to celebrate – right??!!

Don’t they look so good????
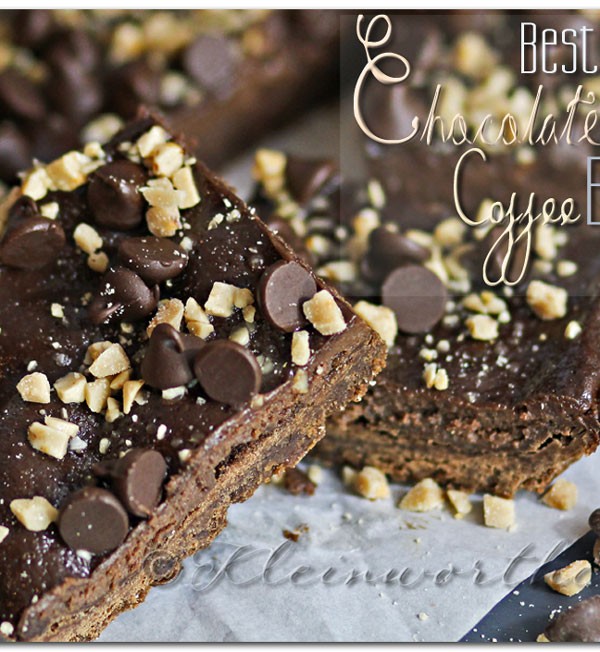
Oh my word- I even got my hubs (who isn’t a huge fan of chocolate chips – I know) to really love these. It could be that they are infused with coffee extract instead of vanilla. That made them pretty yummy. You could substitute with a different extract if you have another that is a favorite of your’s.


I’m super excited to announce that I have teamed up with 5 other amazing bloggers to celebrate National Chocolate Chip Day today. We are also kicking off a monthly venture called Recipe Round-Up. Today we are ALL sharing Chocolate Chip Recipes together- stay tuned to see what we share next month. Please visit all the other blogs listed here & gather these amazing recipes for your book.

Recipe Round-Up May:
1. Best Chocolate Chip Coffee Bars from Kleinworth & Co.
2. Best Chocolate Chip Banana Bread Ever from Nap-Time Creations
3. Best Chocolate Chip Brownies with Kahlua from One Martini at a Time
4. S’Mores Chocolate Chip Cookie Recipe from The Taylor House
5. Chocolate Chip Cannoli Bites from Let’s Dish
6. Chocolate Chip Cookie Lava Cakes from Mostly-Homemade Mom
Do you want to participate in future Recipe Round-Up’s & join in on the fun??
email Gina at Kleinworth & Co (chichomeschoolmama{at}att{dot}net) for details.
Now it’s time for you to share! Everyone is Welcome as long as you link back to Kleinworth & Co. or Button Up. (Buttons HERE)
Please also connect with me on Pinterest and/or Twitter
Don’t forget to come back & join me on Mondays for Project 52 & Wednesdays for Your Best Weekly
To see where I am linking today- visit HERE
[jetpack_subscription_form]
To see where I am linking today- visit HERE
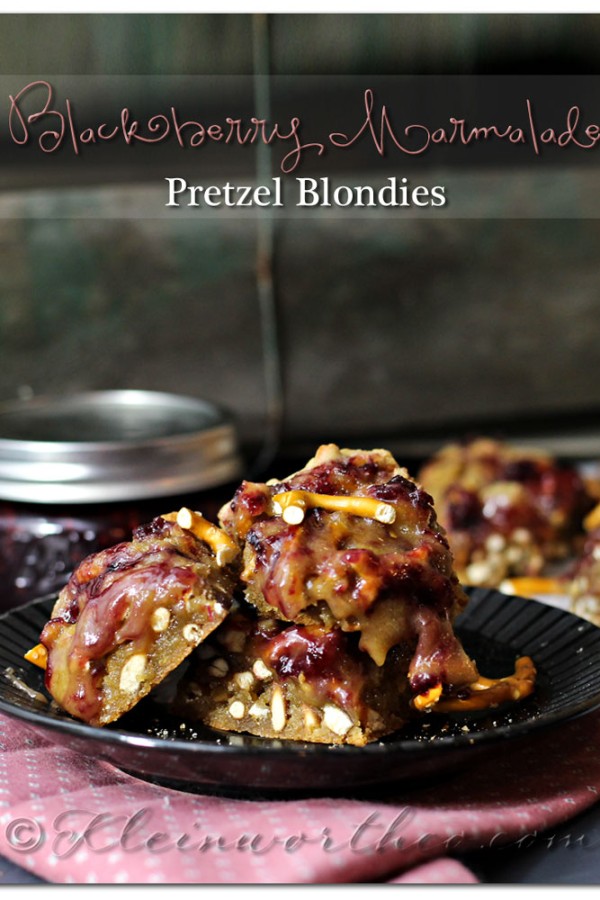
Friday is National Pretzel Day. I thought I would give you all a quick & easy recipe you can make to help celebrate if you like. 🙂 These Blackberry Marmalade Pretzel Blondies were so good. The mix of the chewy part of the blondie that gives you that cookie/brownie flavor & then the salty crunch of the pretzels mixed with the sweet of the blackberry marmalade- YUM. These salty sweet treats are the perfect combination & yet not too rich.

These were gone almost as soon as I cut them- definitely a hit. I was really happy that the hubs loved them. He isn’t always quick to try a lot of the things I share here- he’s not a huge sweets fan. So I was happy when he grabbed one right up & loved them.


You can get my Raspberry marmalade recipe HERE & just substitute the berries for whatever kind you like.

Celebrate National Pretzel Day & make these yummy blondies. You will LOVE them.
Don’t forget to come back & join me on Mondays for Project 52 & Wednesdays for Your Best Weekly
To see where I am linking today- visit HERE
[jetpack_subscription_form]
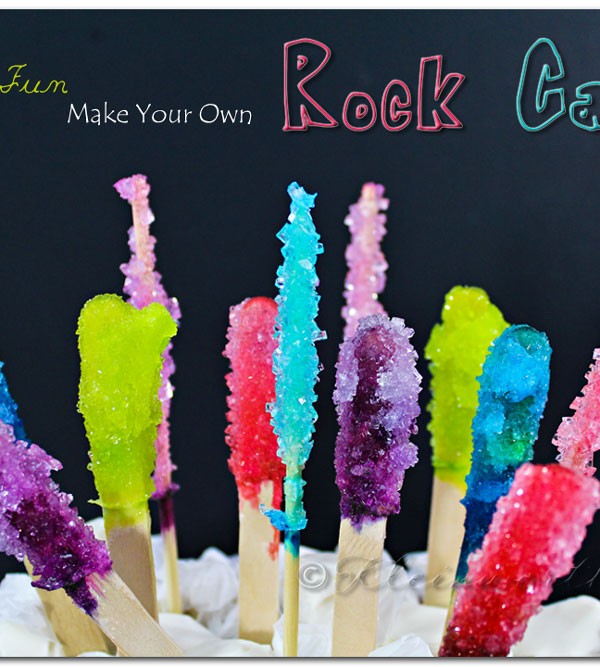
Happy Your Best Weekly Everyone!!!
I have been waiting ever so patiently to share this with you all. I figured back around Easter time that I would make rock candy with the kids. Only thing is- you have to be very patient because it takes a while. Then I wanted to make more than one batch- so yet again, the waiting. So anyhow- they are finally done growing (for now- I will probably make more again soon) so I can show you these & you can hopefully make some with your kids or for a party or gathering you have coming up.


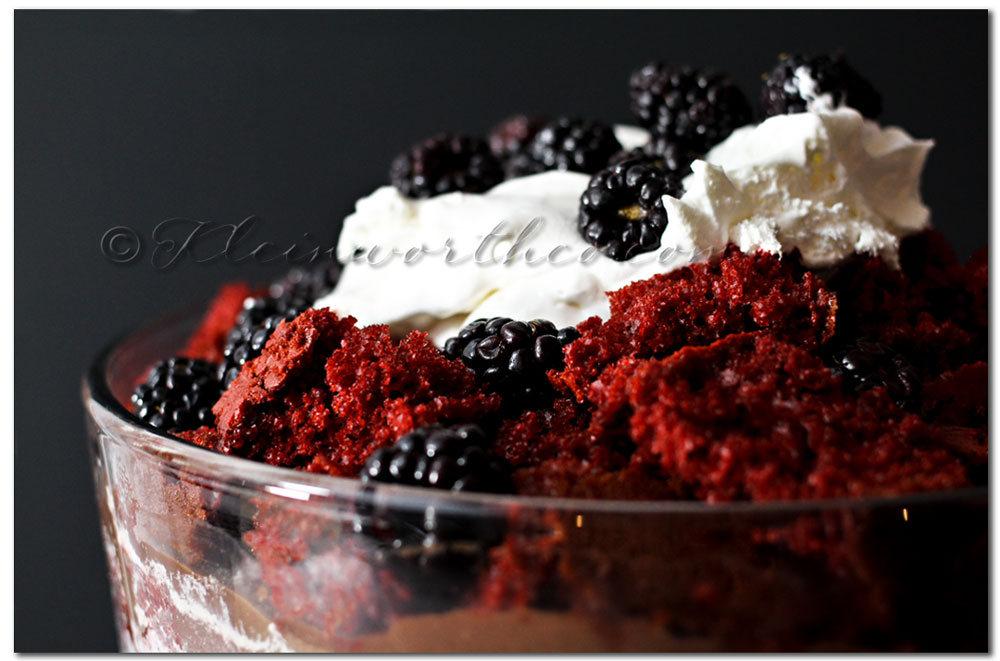
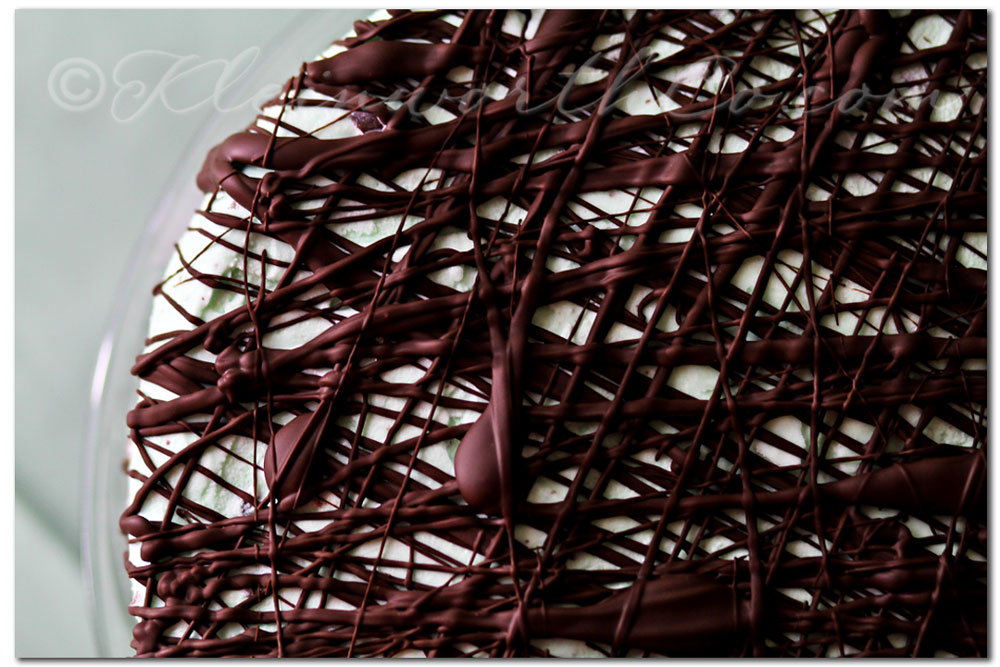
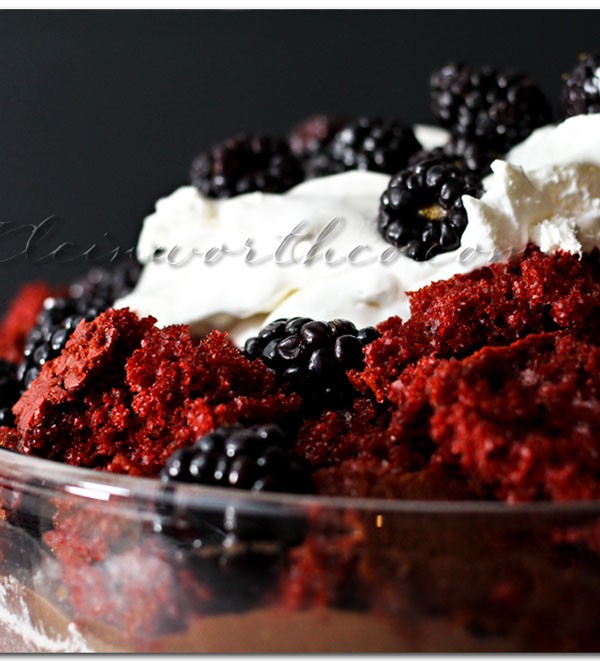
Do you have times when you wish making a dessert wasn’t such a chore?? Wish you could just throw something together that was simple & quick but that looked amazing & your family would gush over?? Yeah- me too!! All the time. Insert the crash cake!! It’s so crazy easy & my family LOVED it. Especially the hubs because he’s not a huge fan of frosting. So for him- being able to have cake without the frosting was great.
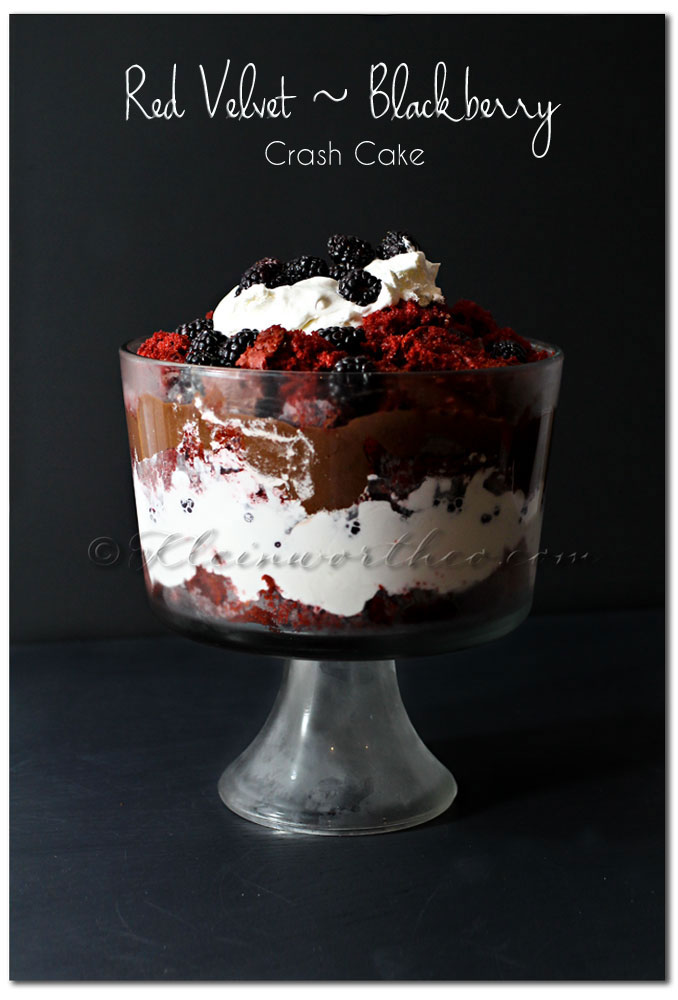
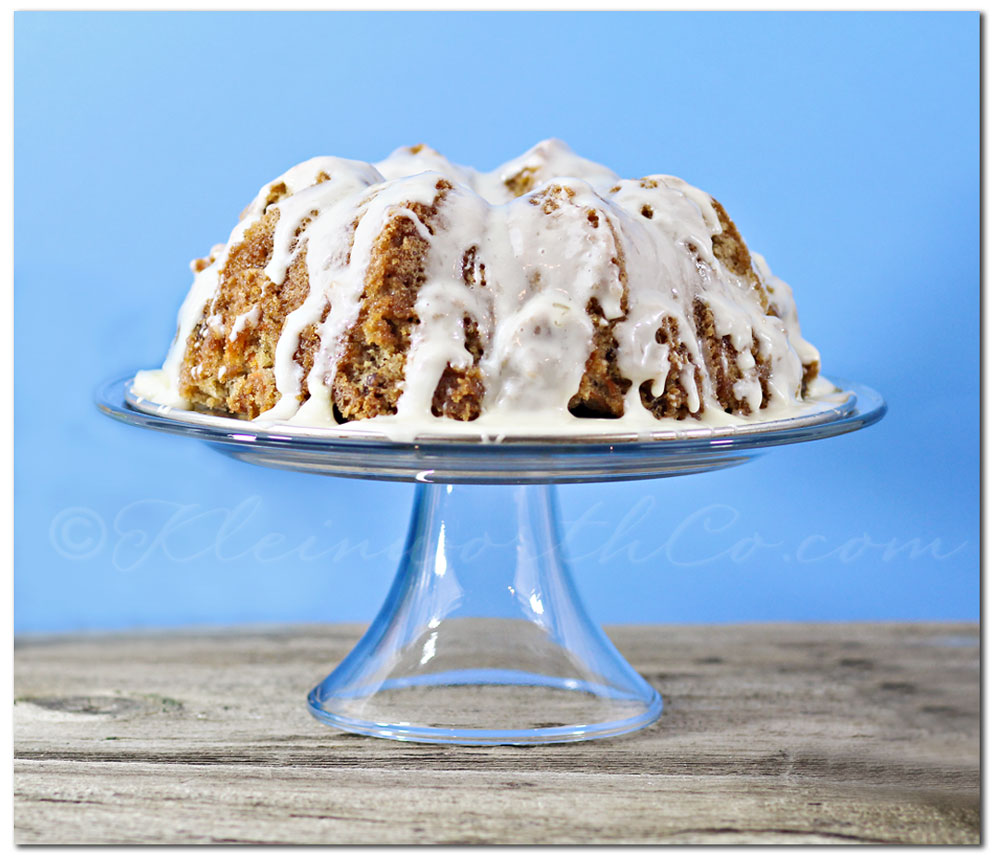
This all came about because I went to Wal-Mart. Yeah- I usually don’t do the shopping because it’s dangerous for me to do so. But the circumstances were such that I had to head into town & take care of it. So as luck would have it- right as I walked in the door they had this huge display of glassware on sale. All sorts of things that would have made a lovely addition to my prop cabinet. I tried to use restraint but the one thing I couldn’t pass up with this trifle dish. I have always wanted one & it was just calling me. For the price I couldn’t pass it up. I would have kicked myself for not buying it- so I did.
Then I sat & looked at it for about another week before I actually did something with it. I just couldn’t decide what I would make first. I finally decided on a crash cake- mainly for it’s ease & secondly because I was craving all those flavors & what better way to nix that craving than to put them together.
I told you it was easy!
Have a great Thursday everyone!
Don’t miss my current giveaway posted on Tuesday from Erin Condren through Daily Mom!!
Head back & enter- she has some really awesome things in her store.
Don’t forget to come back & join me on Mondays for Project 52 & Wednesdays for Your Best Weekly
To see where I am linking today- visit HERE
Happy National Peanut Butter & Jelly Day!!
But the good part is that- even though these are not super healthy, they are not packed full of preservatives or chemicals. My kids are now eating home made goods for breakfast more often than they are pulling out the cereal or Pop Tarts. I know these have sugar- but my guess is that since they are minis- it’s probably less than the standard kid breakfast. I’m probably just justifying it to myself. But at the same time- I really am trying to be far more conscious about the chemicals we are ingesting on a daily basis. Plus- I just like that I can make something myself that they like. 🙂
Enjoy with your morning coffee!!
Don’t forget to come back & join me on Mondays for Project 52 & Wednesdays for Your Best WeeklyTo see where I am linking today- visit HERE
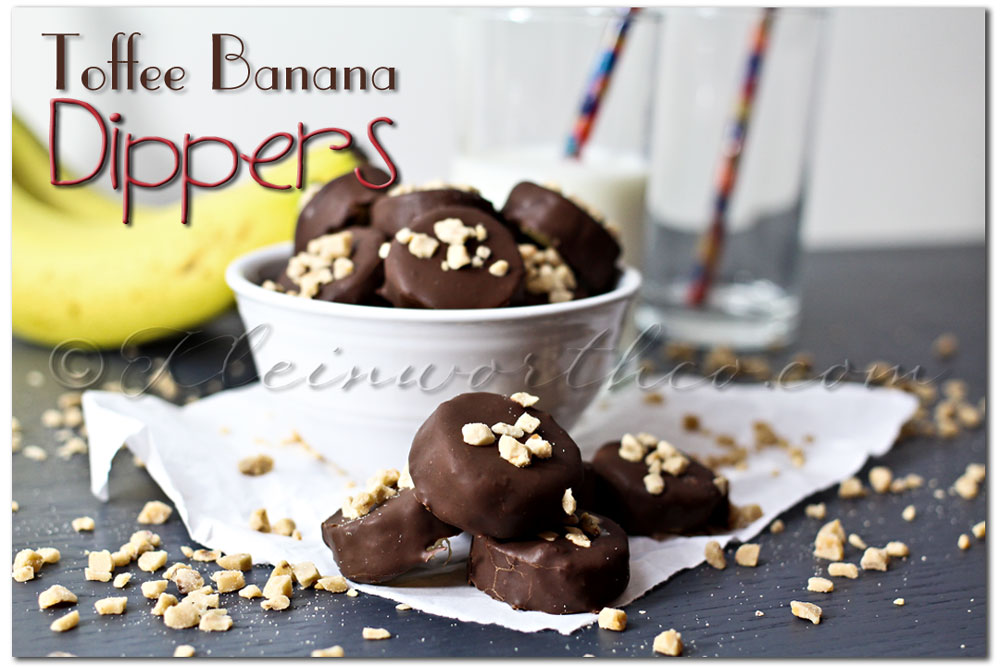
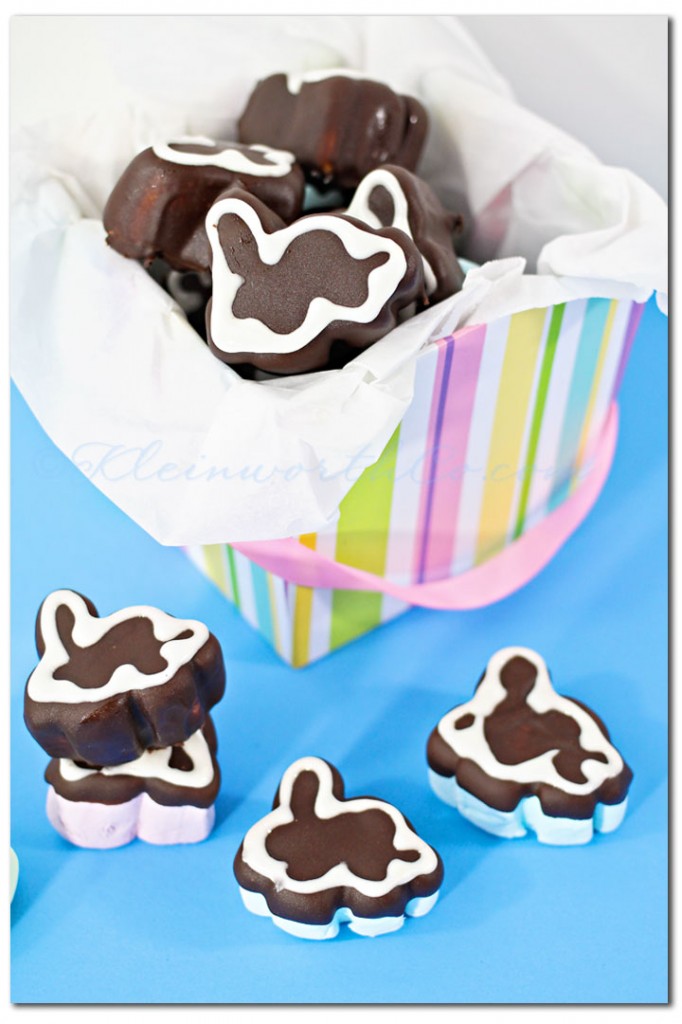
I have said it before & I will say it again….I LOVE MARSHMALLOWS!!!
Yep! I sure do!! Every year the hubs is really good about buying me some Peeps- which is great. Especially since he thinks they are disgusting. But he is also the one that does the Easter basket shopping & that means he chooses what goes into them. I love that he does this for me but you know what…..he NEVER buys enough chocolate covered marshmallow bunnies!!! He usually picks up a pack of 6- which means each kid gets 2. So if I steal one- they notice. So I can’t really do that you know??!!
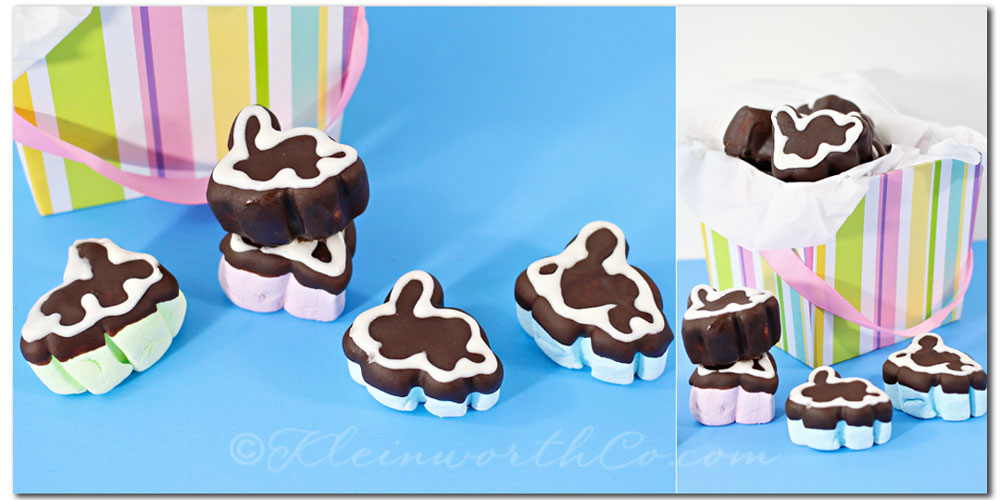
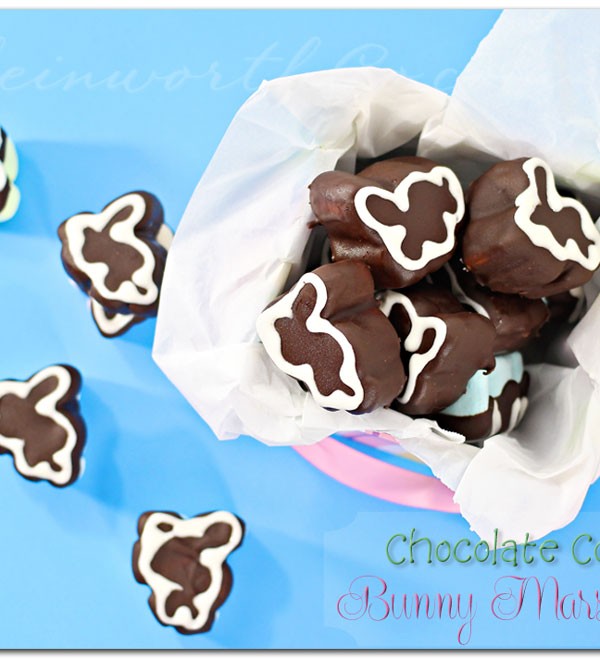
A little while ago I was surprised when he came home from a trip to the store with not only a bag of the GIANT regular shaped marshmallows for me but also in the bag was a huge bag of these pastel colored bunny shaped marshmallows too. I was JUMPING THROUGH THE ROOF excited!!!!! Oh yes I was!! I knew at that very moment I would be covering them in chocolate & swooning in delight. I am not wanting for more chocolate covered marshmallows now. I have all I could want & then some. I am a happy girl.
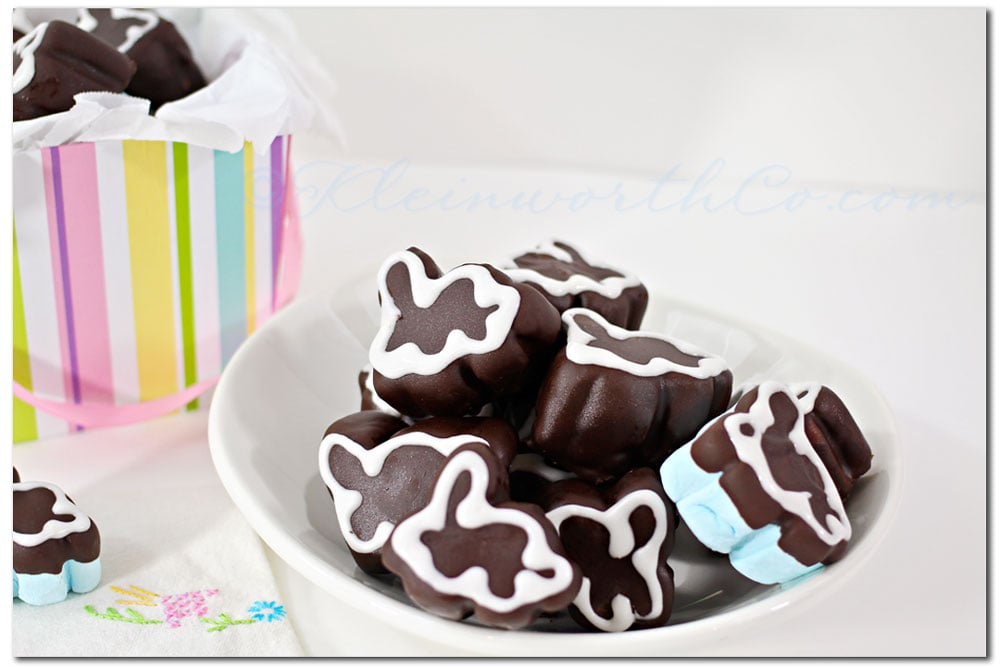
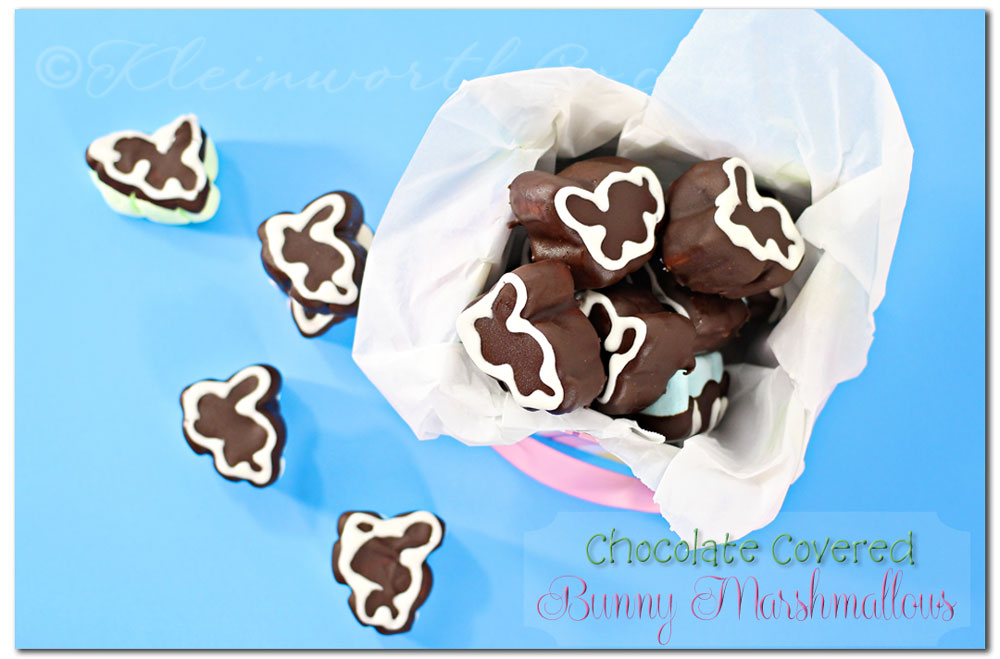
So simple that I can’t even really justify putting in a recipe plug-in here.
Just take a 12 ounce bag of chocolate chips & 1 1/2 tbsp shortening & melt in a glass bowl in the microwave in 30 second increments.
Stir in between each 30 seconds.
Do this until the chocolate is hot & very fluid. I did mine for nearly 2 minutes.
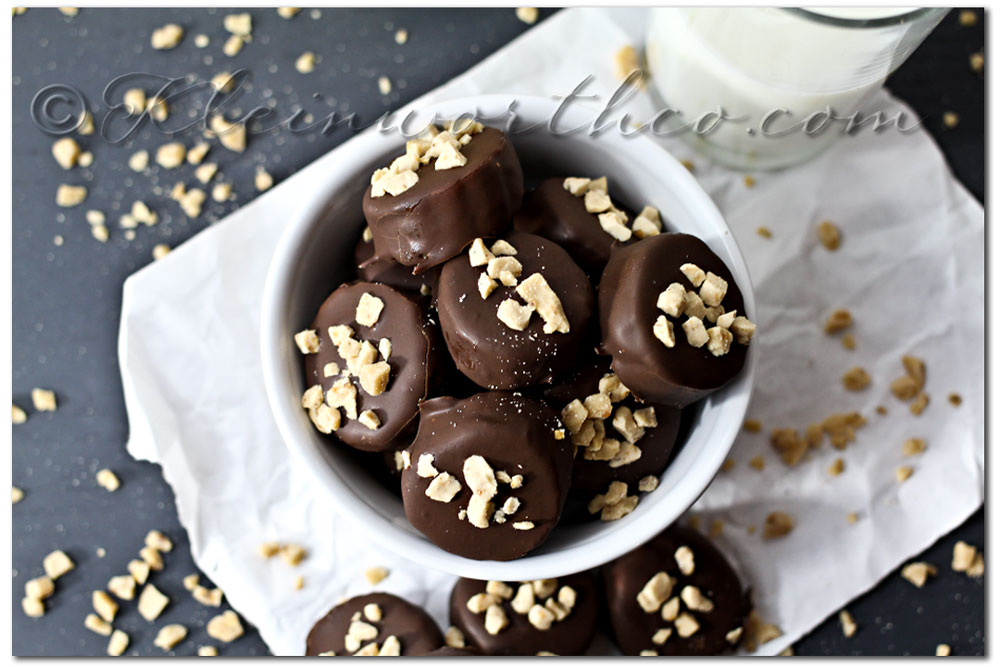
Then dunk each marshmallow in the chocolate- turn to coat both sides if desired.
Set on wire rack to harden. I stuck mine in the freezer- because I’m impatient & wanted to try them as soon as possible.
I also piped some royal frosting on them just so you could better make out the shape of the bunny- obviously optional.
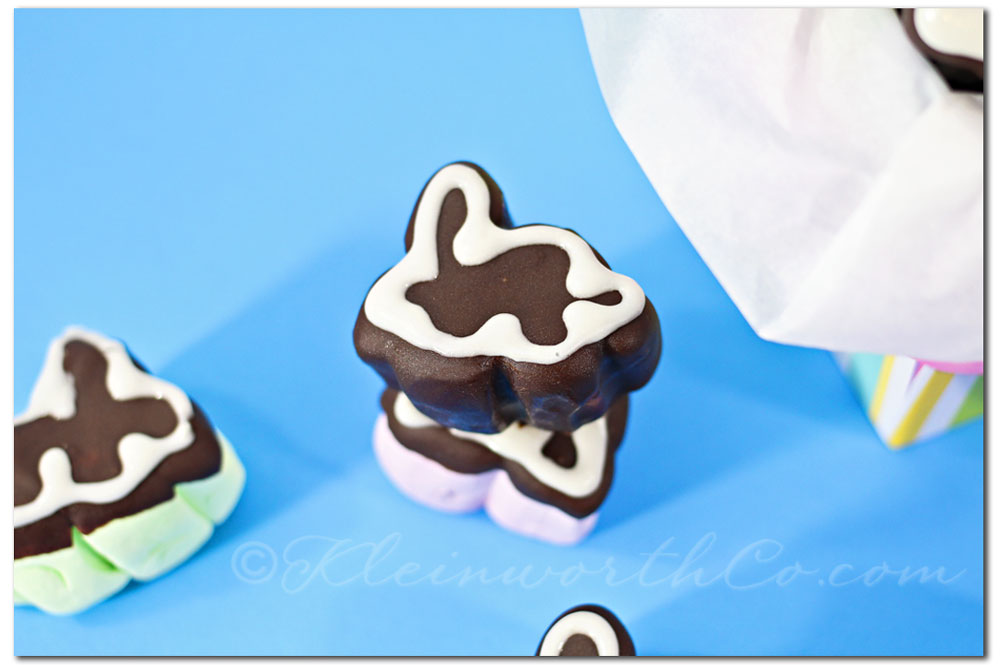
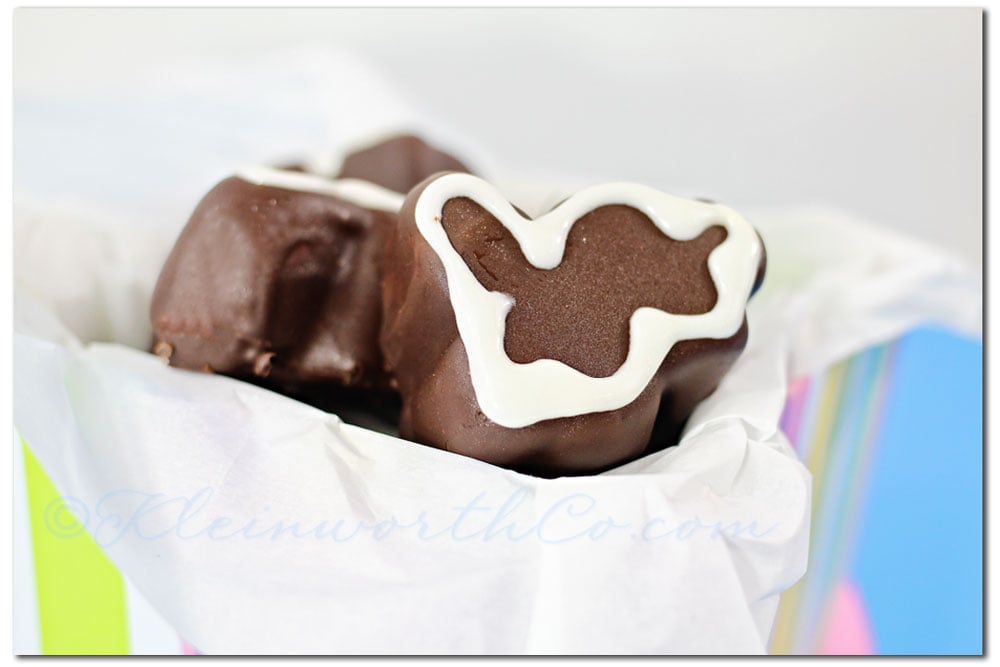
They were so good- they didn’t last long after they were photographed.
To see where I am linking today- visit HERE
Did you all remember to enter my giveaway for some goodies from the new Disney DreamWorks movie The Croods?? (Saturday’s post)
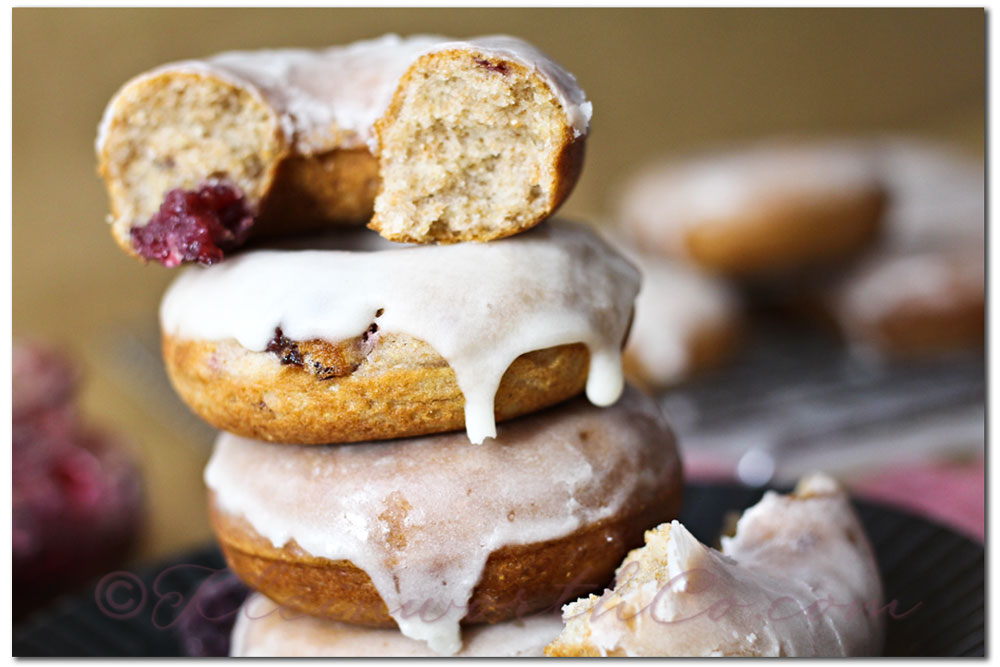
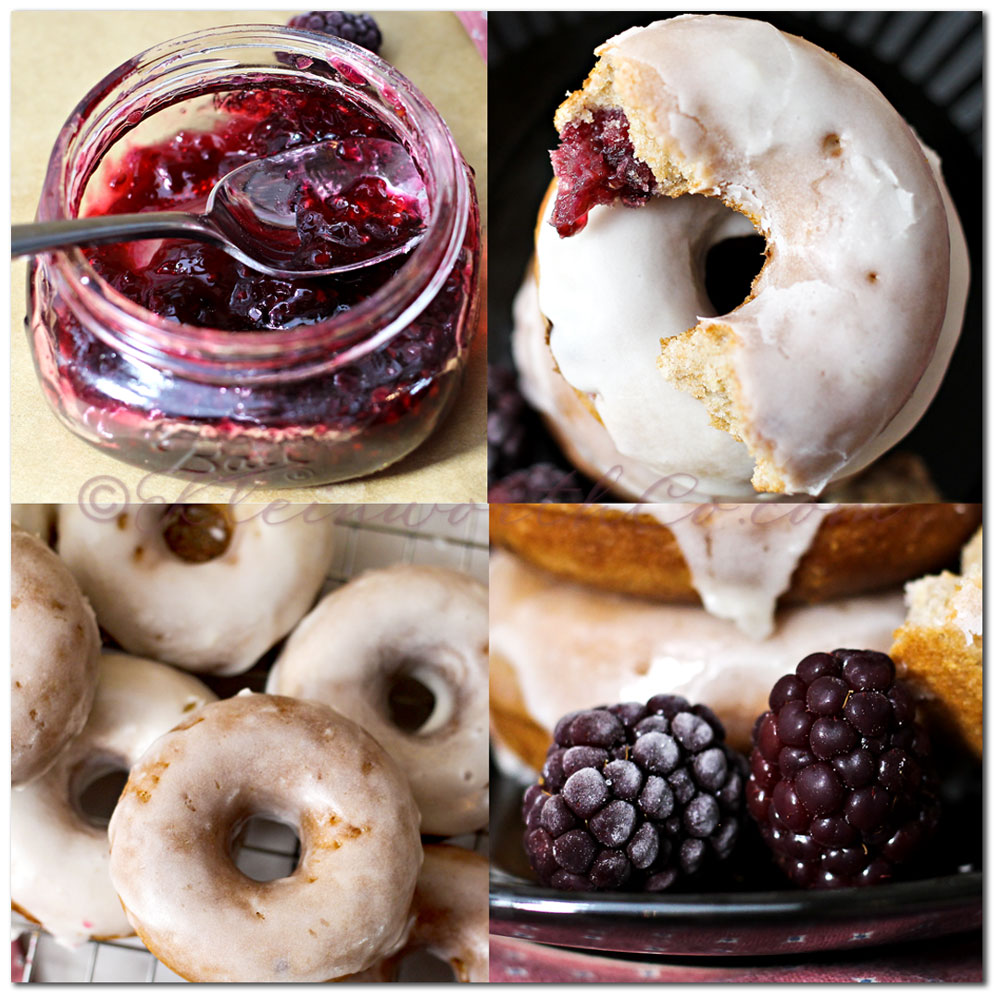
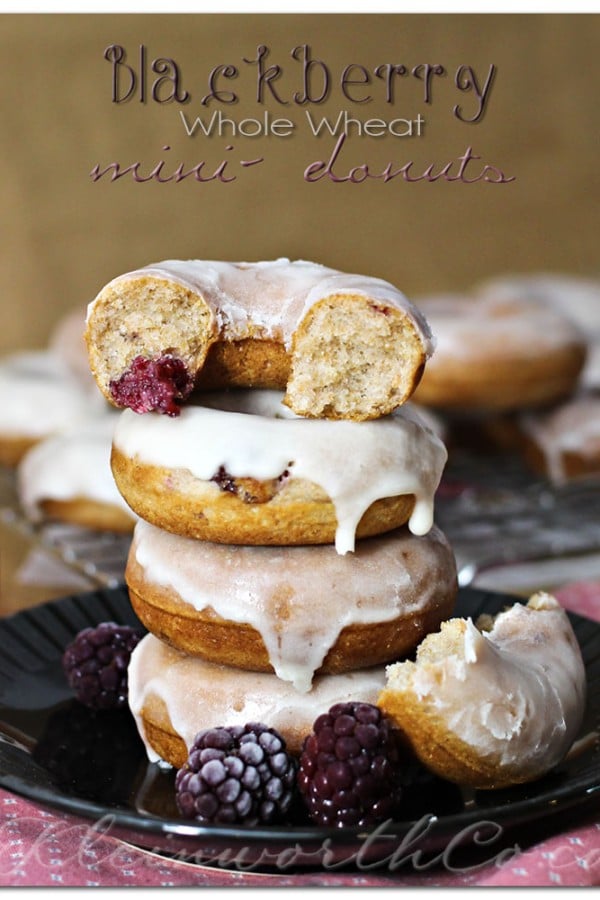
Okay- so you have probably seen them all over Pinterest. Seems like EVERYONE has been making donuts lately. I have been DYING over them I tell you!!! I kept wanting to purchase a donut pan but something was holding me back. Then we were out at Target- when we really had no business going in there because we are really dangerous when we shop together. So there we were milling about when I saw the little Sunbeam mini-donut maker. Really- it was on sale for only $14!!!! I couldn’t pass it up. SOOOOOO now I can make donuts in a flash, they are mini- so less guilt & I don’t even have to turn on the oven to do it. YAY!!!
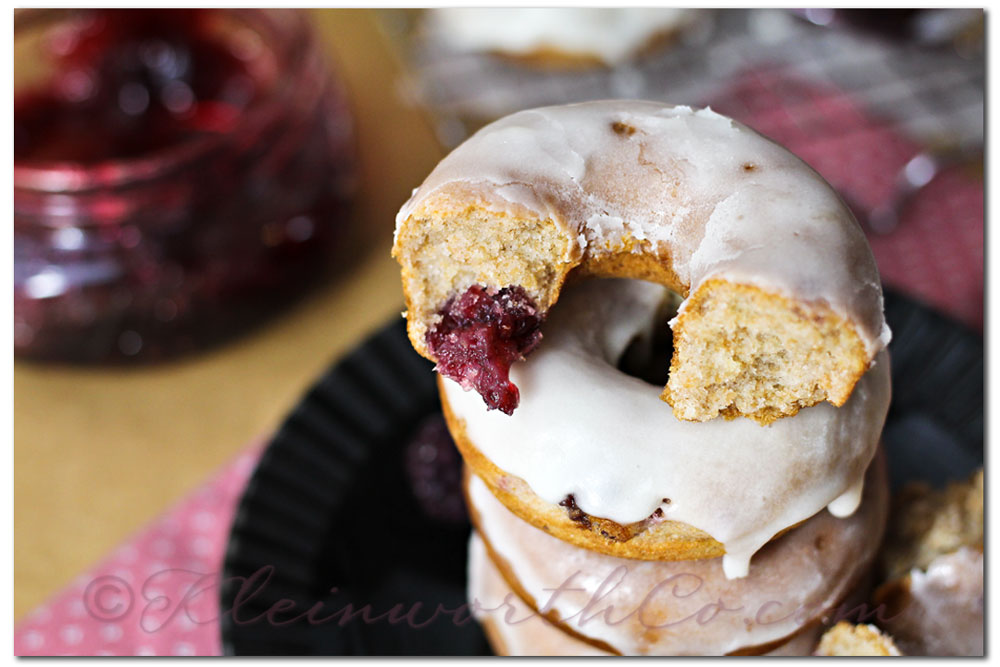
I decided to jazz up these by making them whole wheat – again, less guilt.
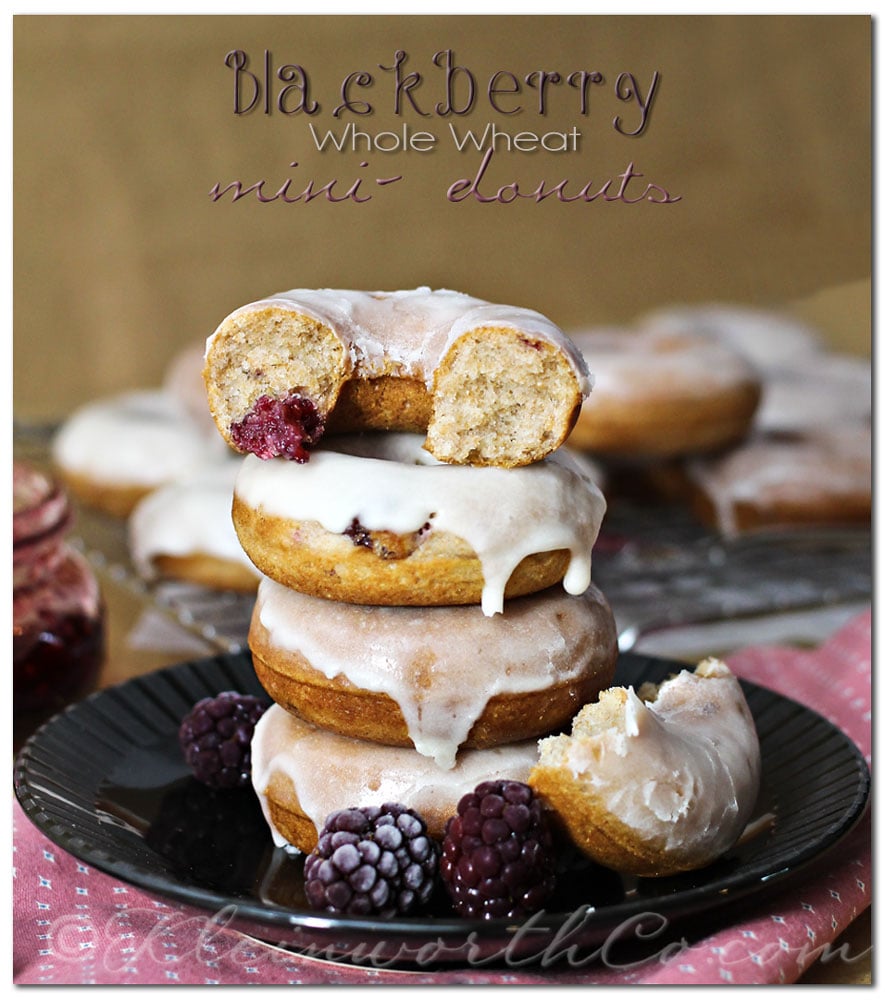
I also decided that I would add in some blackberry marmalade that I had made for a little something extra.
You can catch that recipe in the raspberry version HERE.

Oh my word- they were SO GOOD!!!!!! Definitely making these again.
Now it’s time for you to share!
Everyone is Welcome as long as you link back to Kleinworth & Co. or Button Up. (Buttons HERE)
Please also connect with me on Pinterest and/or Twitter
To see where I am linking today- visit HERE
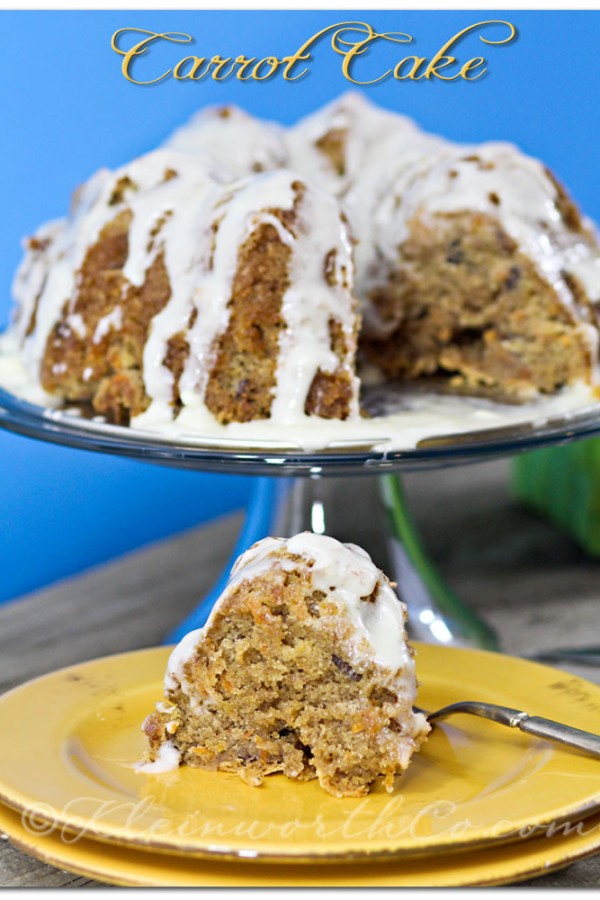
Two things inspired this post today. First is that we joined the co-op & now I have an abundance of fresh produce here in the house & second is that while we were doing our monthly stock up at Costco we came across this Nordic Ware Cast Aluminum Fleur de Lis Bundt Pan with Cake Keeper set (Costco website wasn’t showing it so this link is to Amazon). I was dying to pick up a bundt pan & so I was so happy to have found this one. It also gave me the perfect excuse to make the carrot cake that I have been meaning to do for YEARS!!
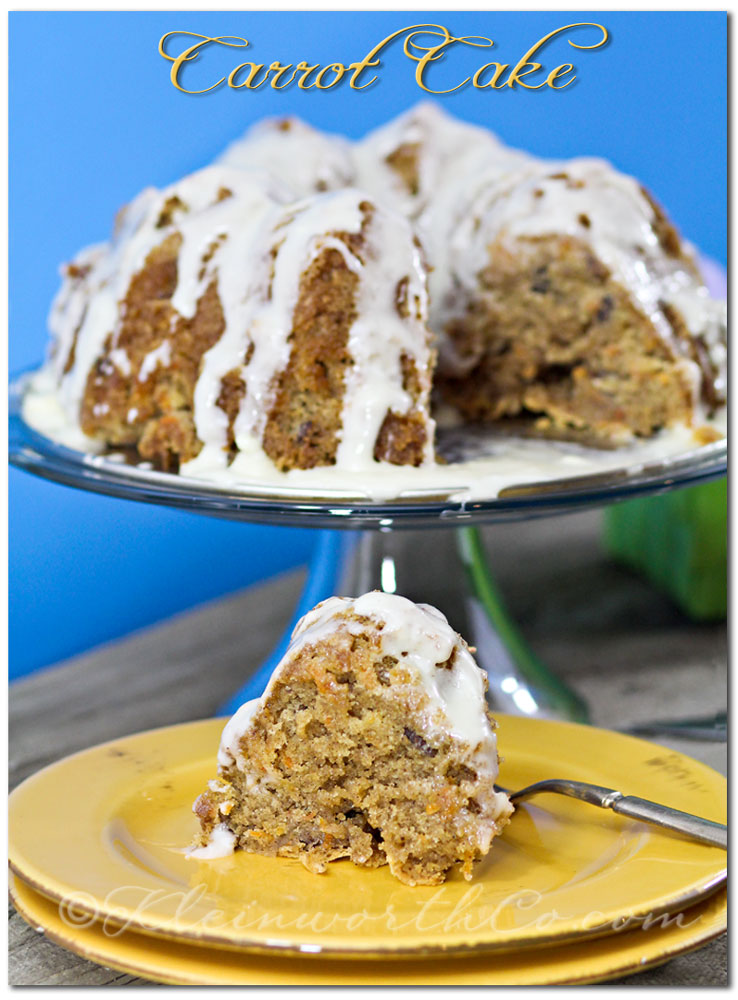
The day after we picked up our basket I spent about 5 hours in the kitchen prepping the food, slicing, dicing & packaging it up so that most of it would go into the freezer for future use & the rest was ready to grab & use on a moments notice depending on what we chose to make. It was well worth my time & I made sure to keep out just enough carrots to make this recipe.
Frosting recipe below
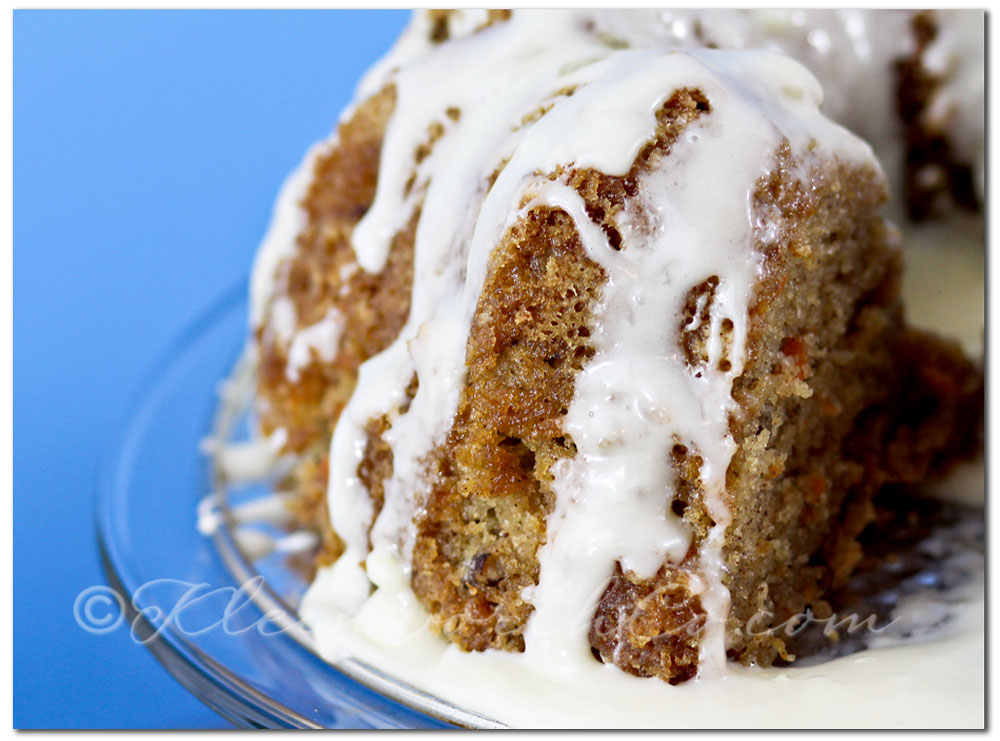
This would make an excellent addition to your Easter menu. This was enough to give our family of 5 dessert for 2 nights- or 10 slices. If you were to slice a bit thinner, I’m sure you could get closer to 16 servings. We like to have a good size wedge – which is a good thing we don’t have it around all that often.
I wasn’t as successful in getting the fleur de lis shape to show like they product image does.
This will take some practice so be ready- more things to come using my new pan.
Enjoy!
To see where I am linking today- visit HERE
Happy Thursday Everyone!
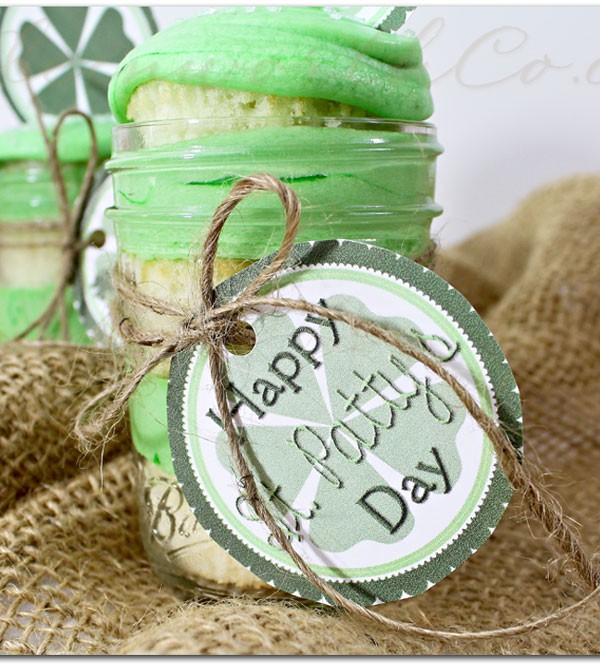
I have been running around here like a headless chicken this week- but I wanted to share with you all the FREE printable that I created for you. You may have already grabbed it in my sidebar- that’s so awesome. But I wanted to share these cute little St. Patrick’s Day cupcake jars that I use the printable on over the weekend. This makes the best little gift for your neighbor- or if you are like me- treats that are going to the firehouse. So go ahead & grab it & get creative!
Free Printable Checklist Templates
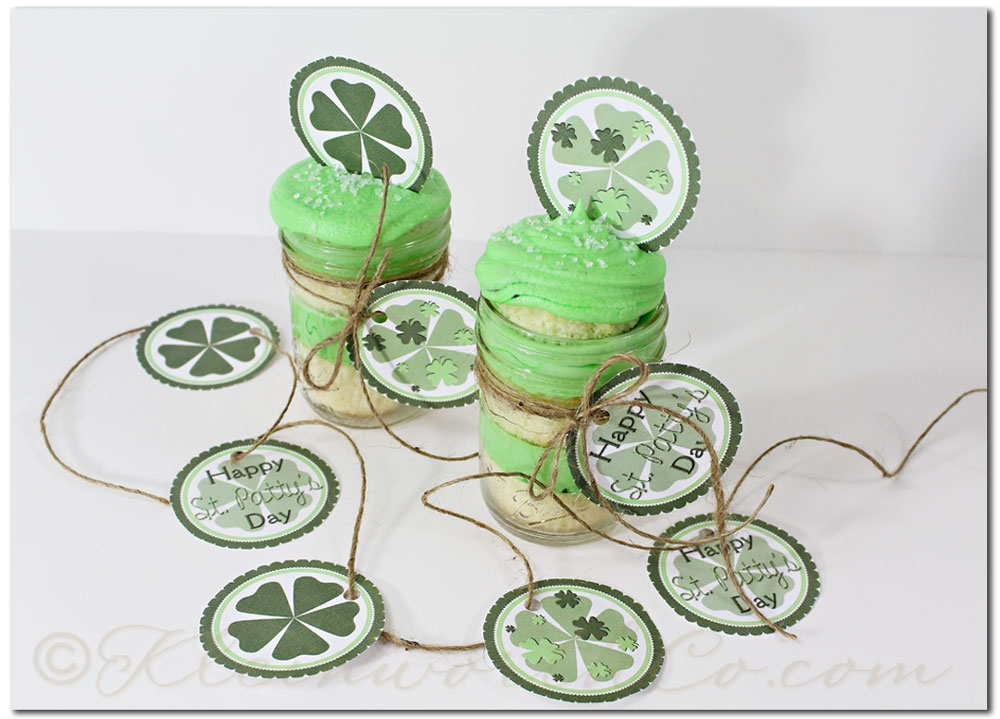
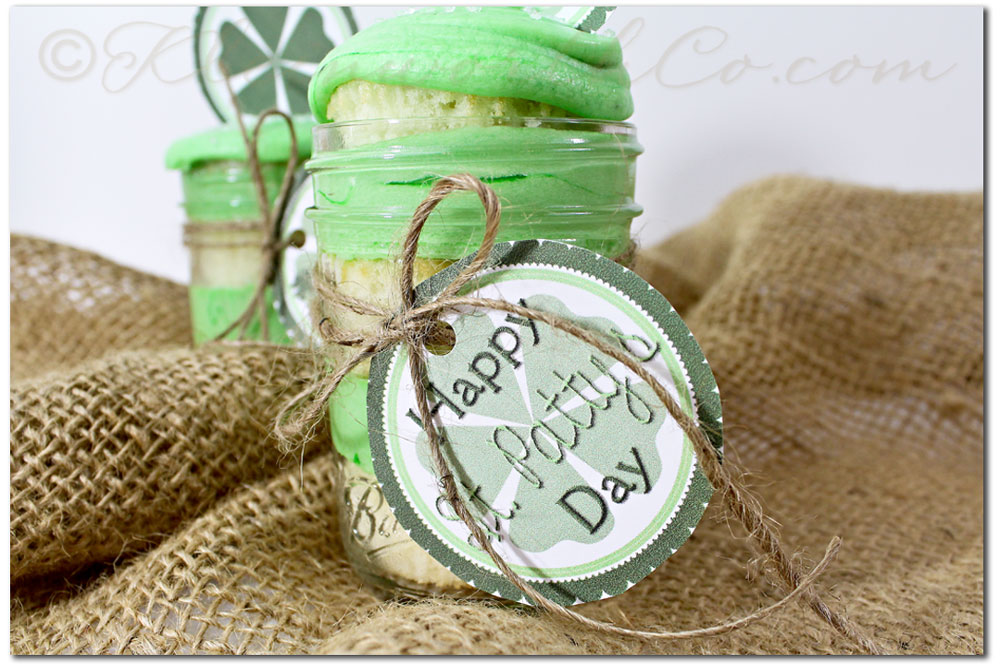
Just take your cupcakes, stick them in the jar- pipe a little frosting on each one before adding the next.
Then just add the printable cupcake decoration topper & then tie another on around the jar with bakers twine for added flare.
Easy, simple & oh so adorable.
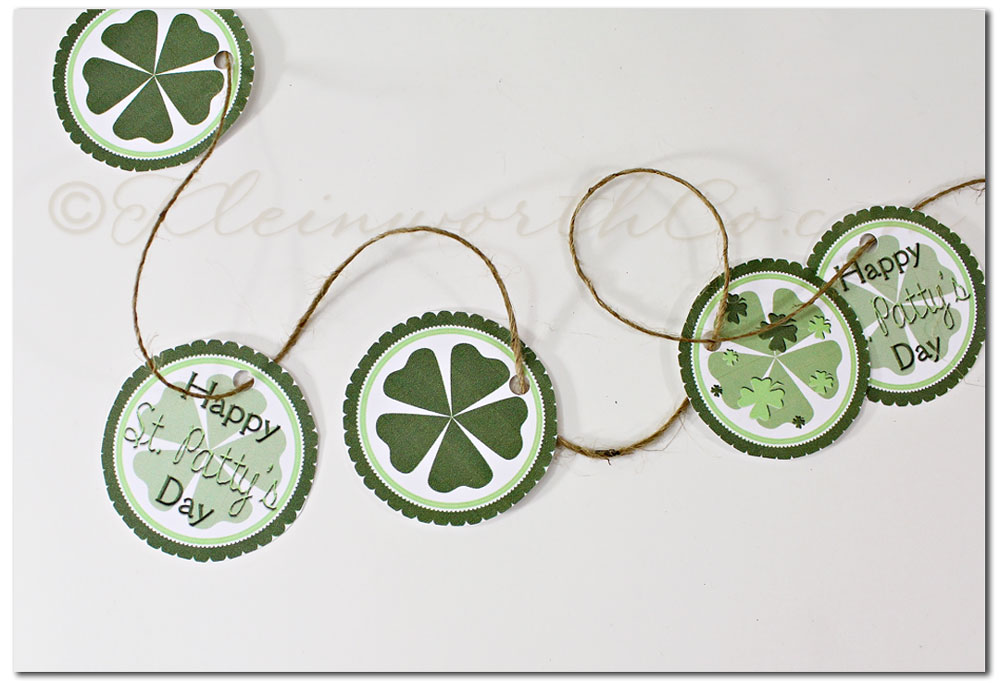
You could also string them all up as a garland for a simple St. Patrick’s Day decoration too.
They are just so happy! Who wouldn’t love to receive a jar stuffed with cupcakes??!! 🙂

Linking with: Live Laugh {Linky} Thursday | The 36th Avenue | I’m Lovin’ It Party | One Creative Weekend |Little Things Thursday | Inspiration Gallery|Show & Share
I am having so much fun seeing what you all have created. You all amaze me!
Here are some of the FABULOUS things that were shared last week!!
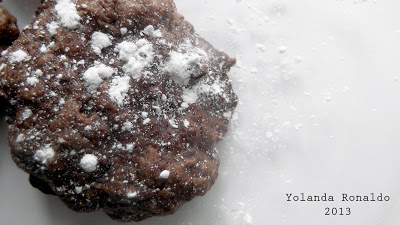
Triple Chocolate from Yolanda @ Peanut Butter & Jelly
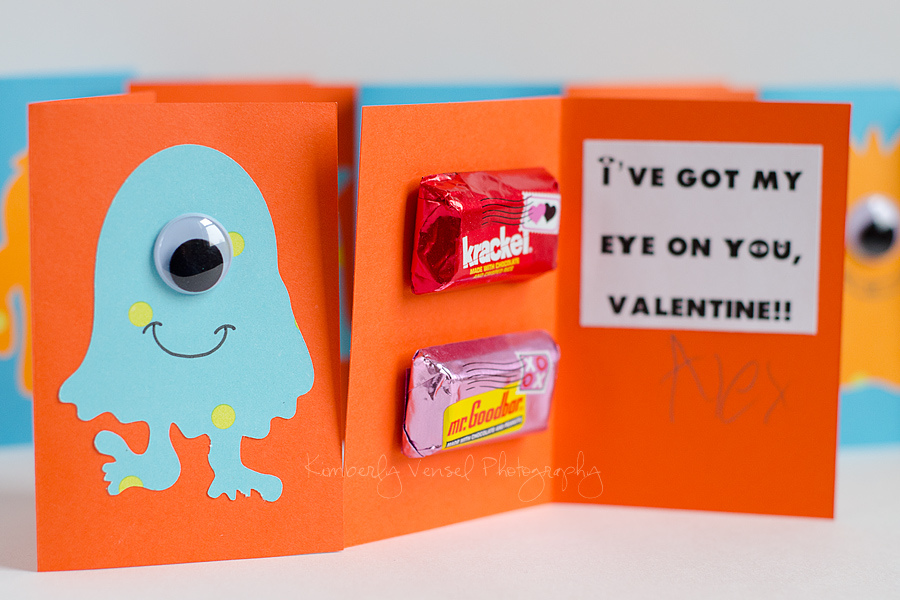
Adorable Valentines from Kimberly @ A Fresh Perspective
Dipped Oreos from Tiffany @ June Makes Six

& this AWESOME photoshop tutorial from Melissa @ Serendipity is Sweet

Thank you all for not only sharing your creativity with me each week (it truly warms my heart) but for being oh so fabulous ALL THE TIME!!!
You guys ROCK!!!!!!!
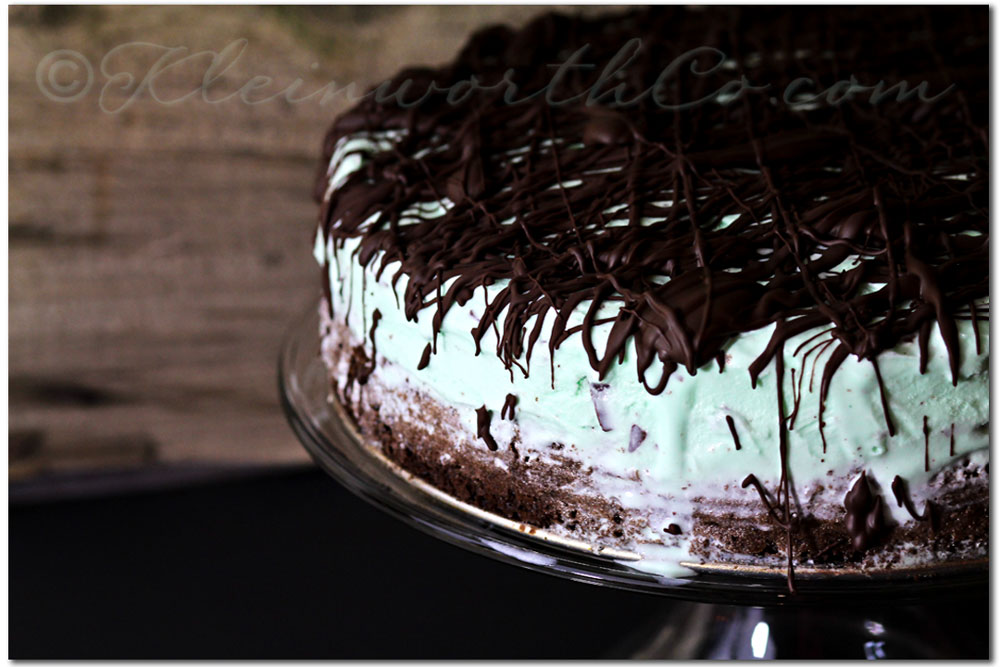
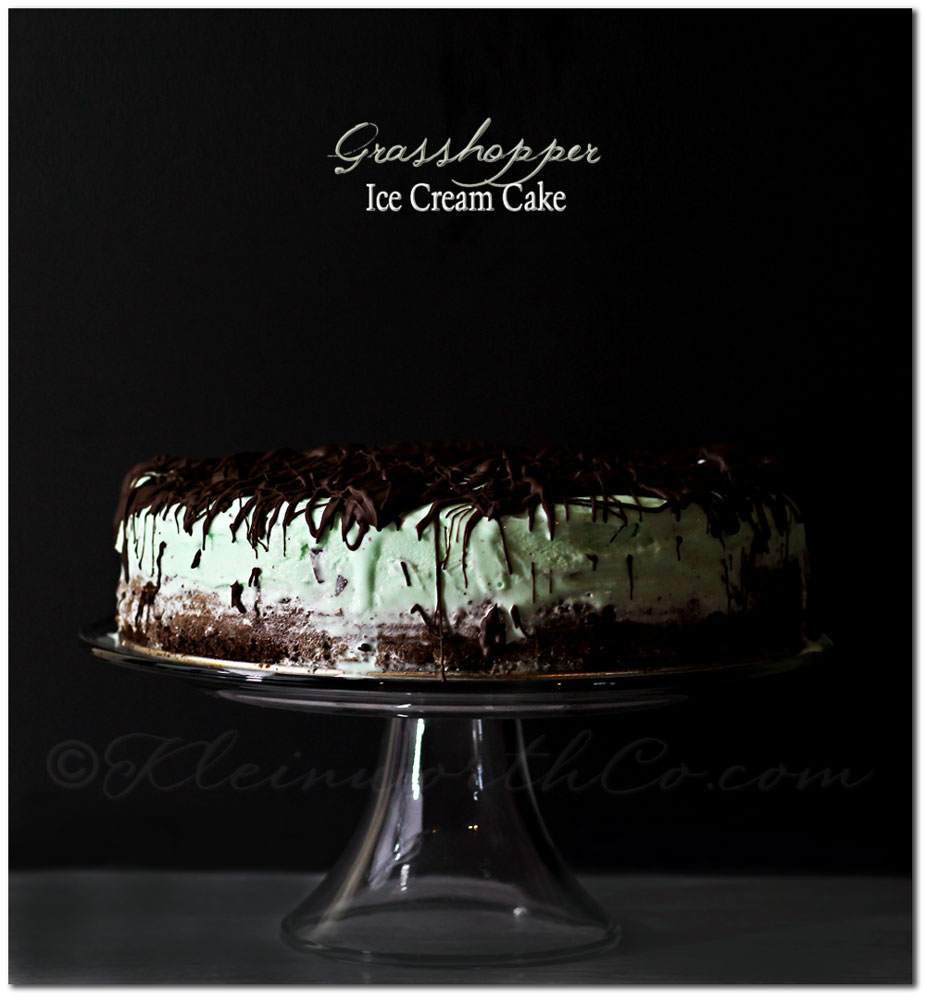
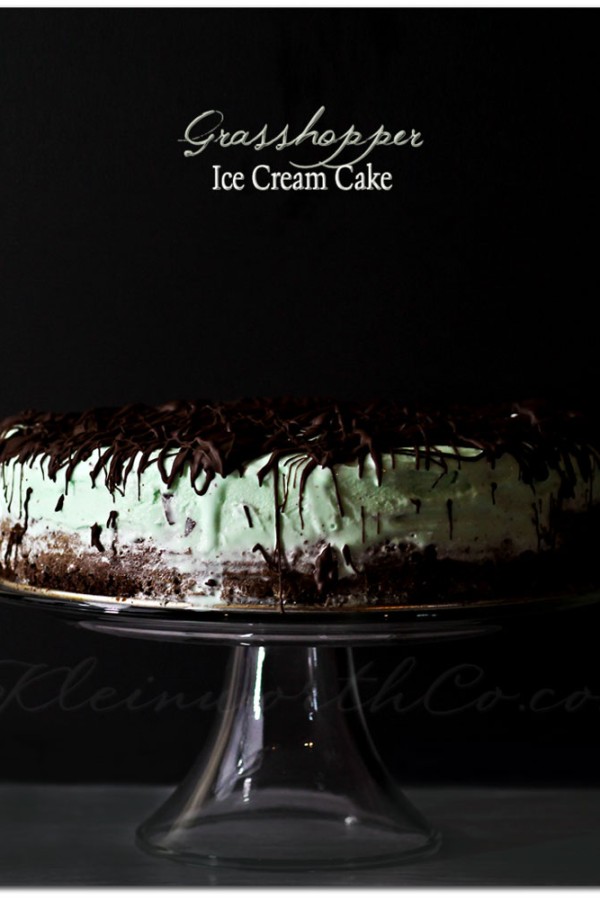
For mine this week- I thought I would share with you the Grasshopper Ice Cream Cake I made for the boy’s birthday. It was so easy that I may be doing these more often than a traditional frosted cake. It was so good too. Plus- it would be great to make for St. Patty’s Day!!!
Sarah Halstead | Jenni from the Blog | Project Alicia | Live & Love Outloud | Parenting by Dummies |
Now it’s time for you to share!
Everyone is Welcome as long as you link back to Kleinworth & Co. or Button Up. (Buttons HERE)
Please also connect with me on Pinterest and/or Twitter
Oh boy. Can I tell you something???
Michael’s is DANGEROUS!!
I was in there the other day to pick up one thing- hot glue sticks. I ended up walking out of there with $50 worth of stuff in my cart. One of those things were these ADORABLE heart shaped cookie cutters. I wasn’t going to do any more Valentine’s Day treats. I really wasn’t. I have plenty of candy in the house. I didn’t need these. But once I bought the cookie cutters- well…. I obviously had to make the cookies.
I decided to not make these as carefully as I normally would have tried to do.
Yep- I purposely decorated these quick & IMPERFECT to give them a more whimsical feel. I felt it added to the marbled dough.
They were fun & didn’t last too long either.


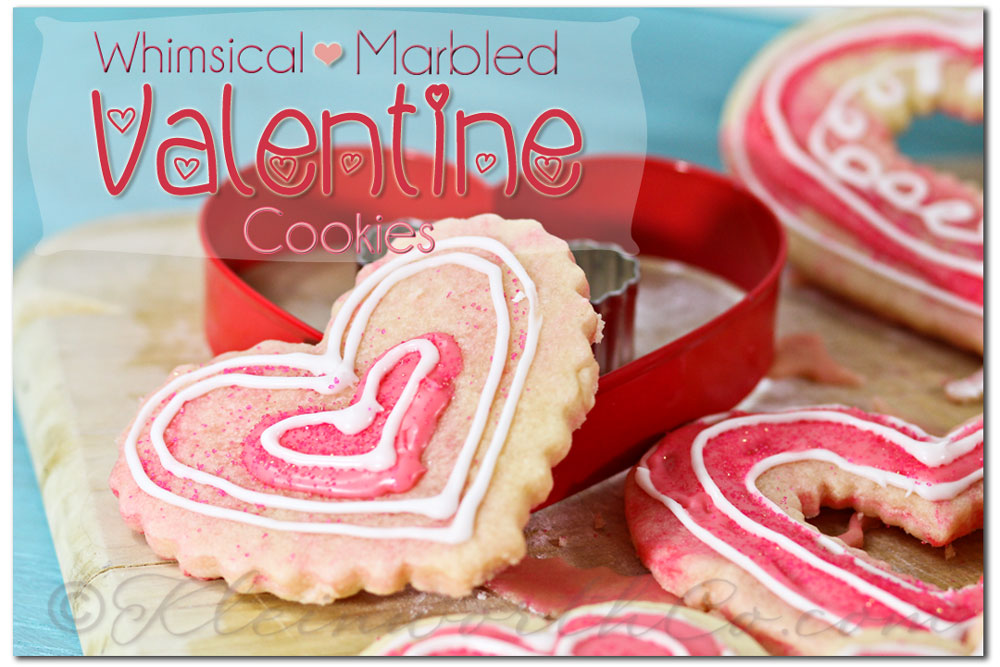
You can print the recipe HERE.
Only thing to change is to add a couple dabs of gel food color & hand kneed in so it doesn’t color the whole batch throughout.
Then roll out instead of ball up & cut & bake according to recipe. Allow to cool before icing.
Want more Valentine cookies- you can make these
Peanut Butter Cookie Recipe HERE!
When you pull them out- just push in the chocolate heart before the cookie cools.
Linking with: Live Laugh {Linky} Thursday | The 36th Avenue | I’m Lovin’ It Party | One Creative Weekend | This or That Thursday | Little Things Thursday | Inspiration Gallery|Show & Share
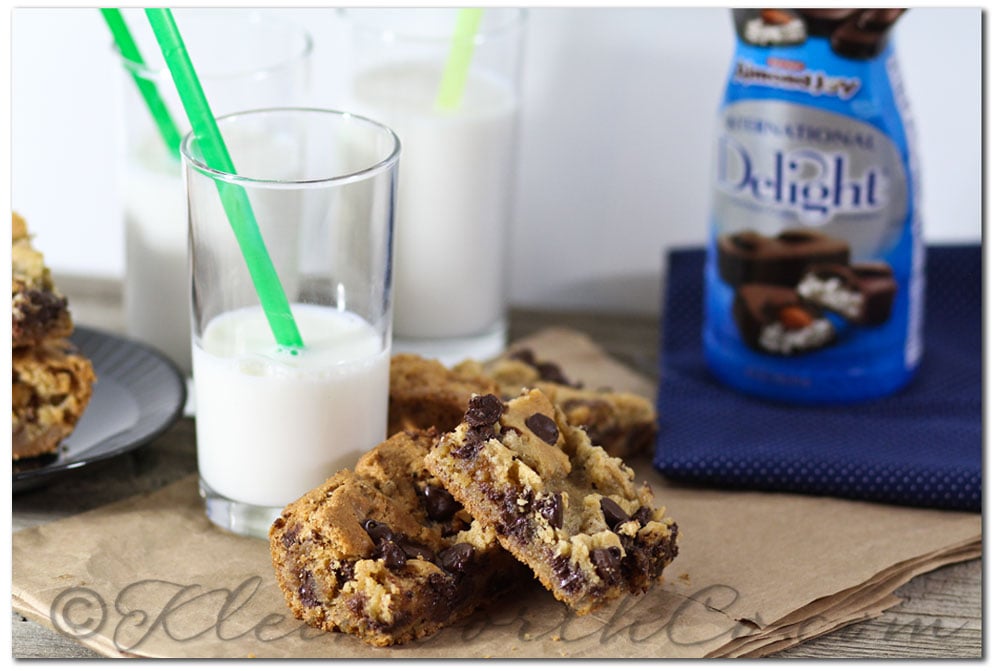
I am a coffee NUT I tell you. Last week we ran out of our usual SUPER STRONG coffee from Costco & couldn’t get back there to pick up some right away. We had to go several days with some regular (what they called strong) coffee that was beyond weak. I was going through withdrawals So you can imagine how seriously I take my creamers too. I love them in my coffee & I love to use them (& the flavors I love so much) in the other things I make.
I have completely fallen in love with the current flavors available from International Delight & had to pick up a few. This also meant that I was already dreaming up recipes while I was standing in line at the checkout counter. So while I was standing there waiting, I found the Almond Joy bars that just happened to match the flavor of one of the creamers that I was buying. That really got the gears turning. So I decided to add them to the cart & get creative when I got home.
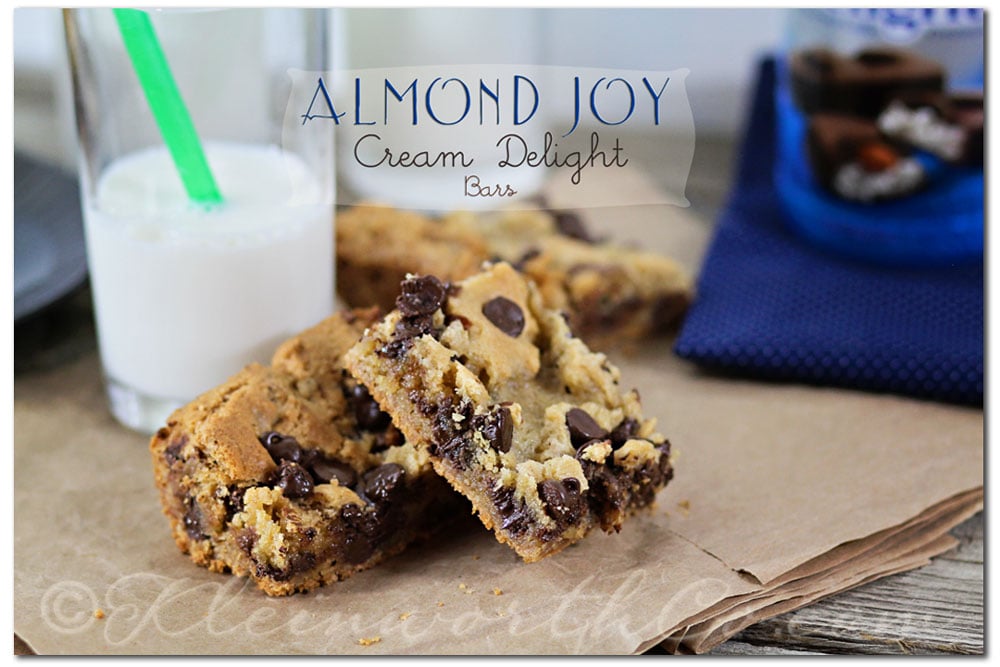
These are so good. You can’t go wrong with chocolate chip bars. Rich, chewy & oh so delicious!
The kids would barely let me take the time to photograph them before they were beating down the door of the studio to get some.
If you make this recipe- please leave a link or tag me on Instagram @KleinworthCo
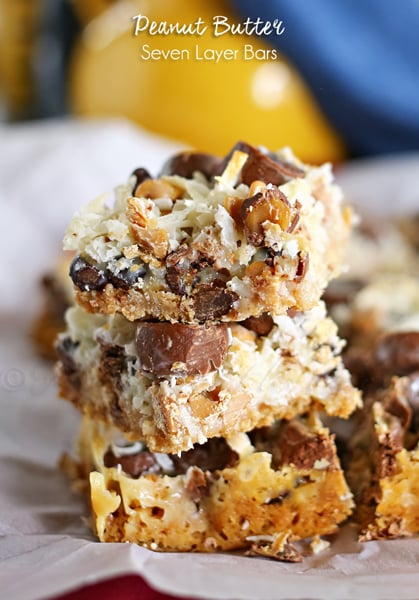
Peanut Butter Seven Layer Bars
Don’t miss these great ideas from these bloggers….
Chef in Training – Caramel Pretzel Magic Bars
Sugar Apron – Delicious Strawberry Shortcake Kabobs
Natashas Kitchen – Strawberry Pretzel Salad
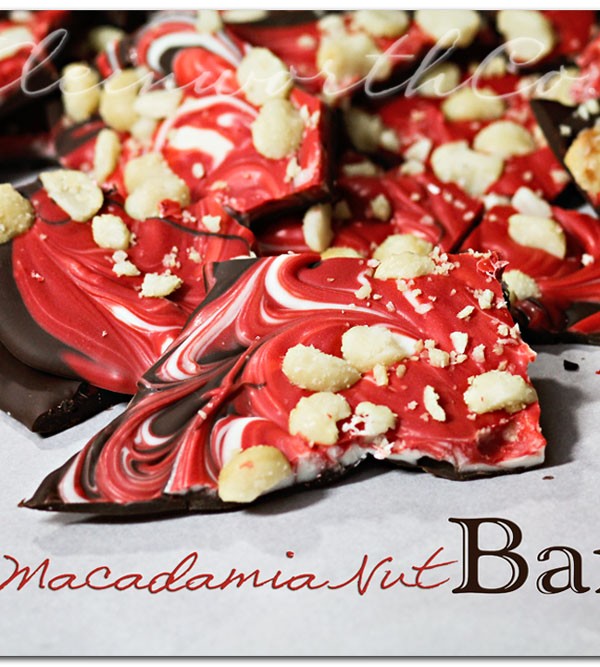
For years I have wanted to make bark during the holidays. Remember when I told you that I have this list of holiday treats I want to make?? Yeah- this has been on it for a really long time. I really don’t know why I never got around to making it before. I guess I always thought it would be more time consuming than it really is. Or maybe I already had so many treats in the house that I really didn’t NEED to make anything else. I don’t know- but I can finally cross this one off my list & probably move it to the yearly staples list of things I just automatically do. It’s so quick, no-bake & SIMPLE. I can see me making many variations of this Macadamia Nut Bark {Recipe} for other occasions too throughout the year. This is a great thing to make as food gifts for friends for all sorts of occasions. There are so many gatherings we will have coming up where I can tweak this to work as a quick & easy treat to bring. Anything that looks like it took a ton of time but is simple gets an “A” in my book.

Enjoy!!!
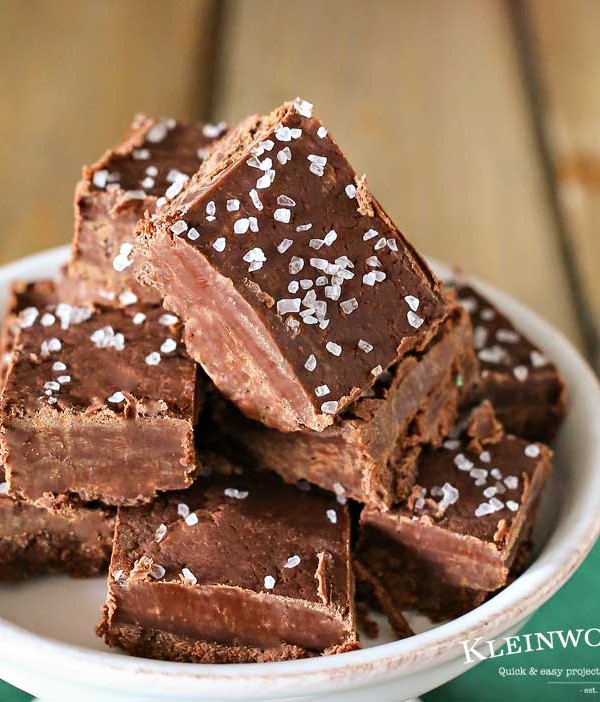
Semi-Sweet chocolate fudge topped with sea salt makes this Sea-Salted Fudge. A classic fudge recipe is easy to make & so incredibly creamy & delicious. The absolute perfect blend of salty & sweet.
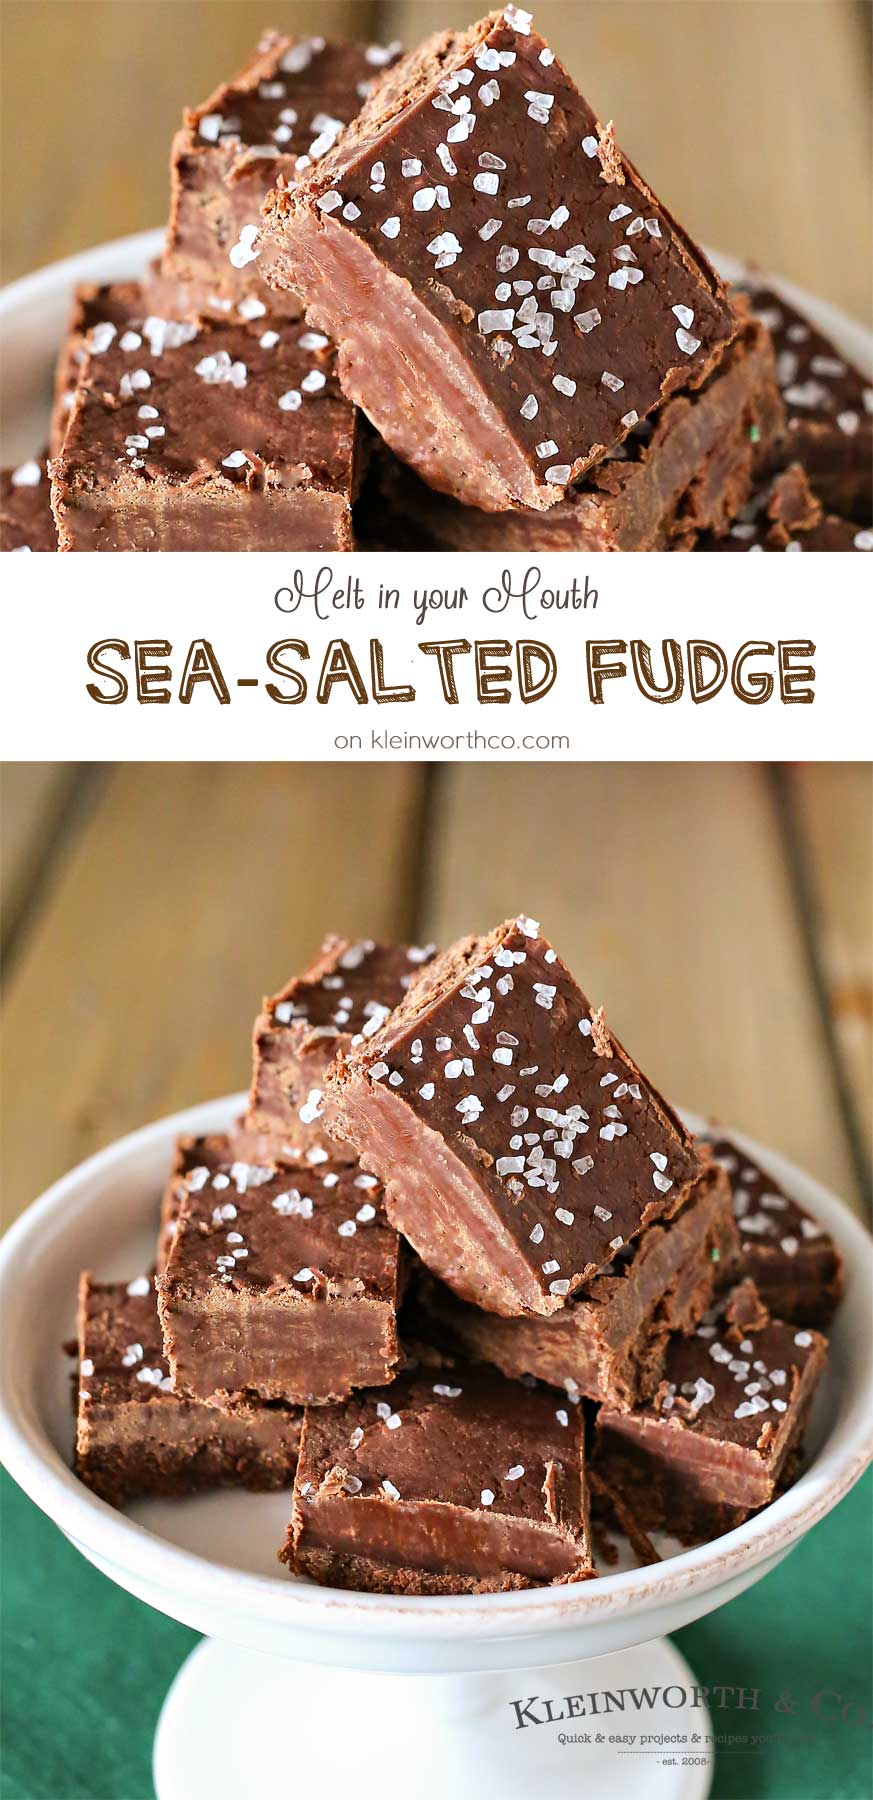
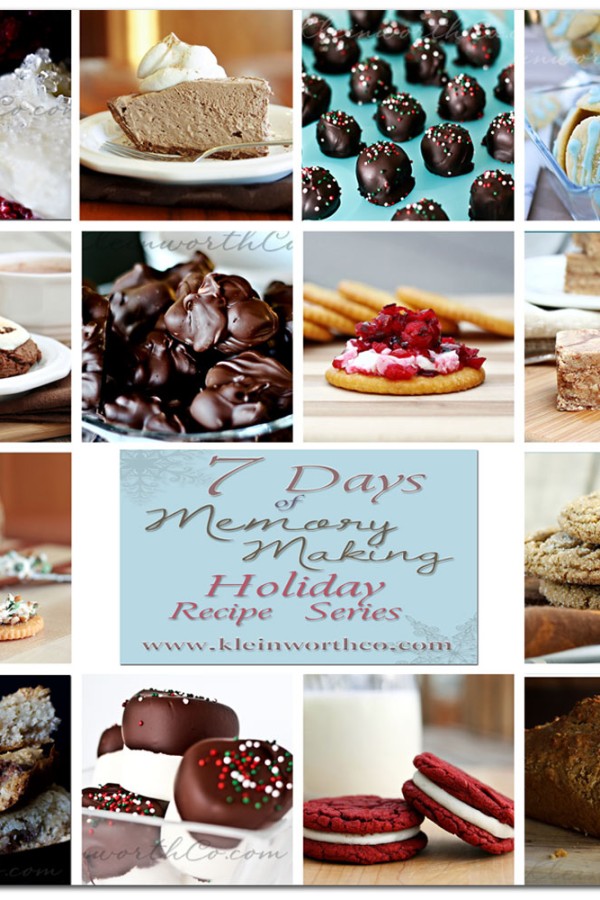
Welcome to Day 7 of my 7 Days of Memory Making ~ Holiday Recipe Series
This past week I took a much needed blogging break to prepare for our long distance move. Over the past 6 days I shared with you some recipes that have been part of my family traditions & so has Danelle. We hope that these recipes become memory makers for you & your family too.

Did you miss a post this week?? You can find all the links to all 14 of these fabulous recipes here today. We have it all covered, appetizers like Beer Bread, Cranberry Cream Cheese Dip & a Green Onion Cheeseball. Cookies for every craving- Sugar Cookies, Hot Cocoa Cookies & Four Spice Crackles. German Sweet Chocolate Pie, Easy Peanut Butter Fudge, Snickers Cake Mix Bars & Chocolate Nut Clusters. These are all quick & easy recipes that are sure to be the hit of your holiday gatherings this season.

Here they are…………

Red Velvet Sandwich Cookies


Chocolate Dipped Marshmallows


Hot Cocoa Cookies


Beer Bread

Cranberry Cream Cheese Dip

Hope you all have a FABULOUS Thanksgiving!
Thanks for joining me this week.
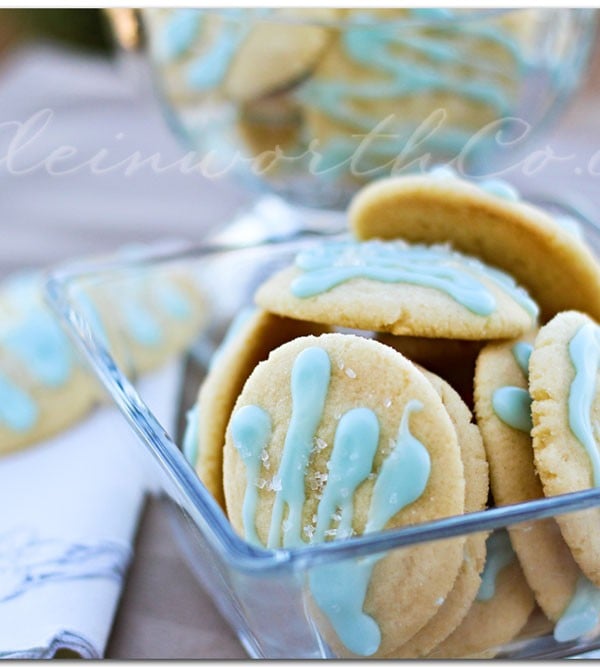
Welcome to Day 4 of my 7 Days of Memory Making ~ Holiday Recipe Series
While I am taking a MUCH NEEDED break from my usual blogging routine this week in preparation for prepare for our long distance move. I have teamed up with the FABULOUS Danelle from Let’s Dish Recipes to bring you some really great recipes this week.
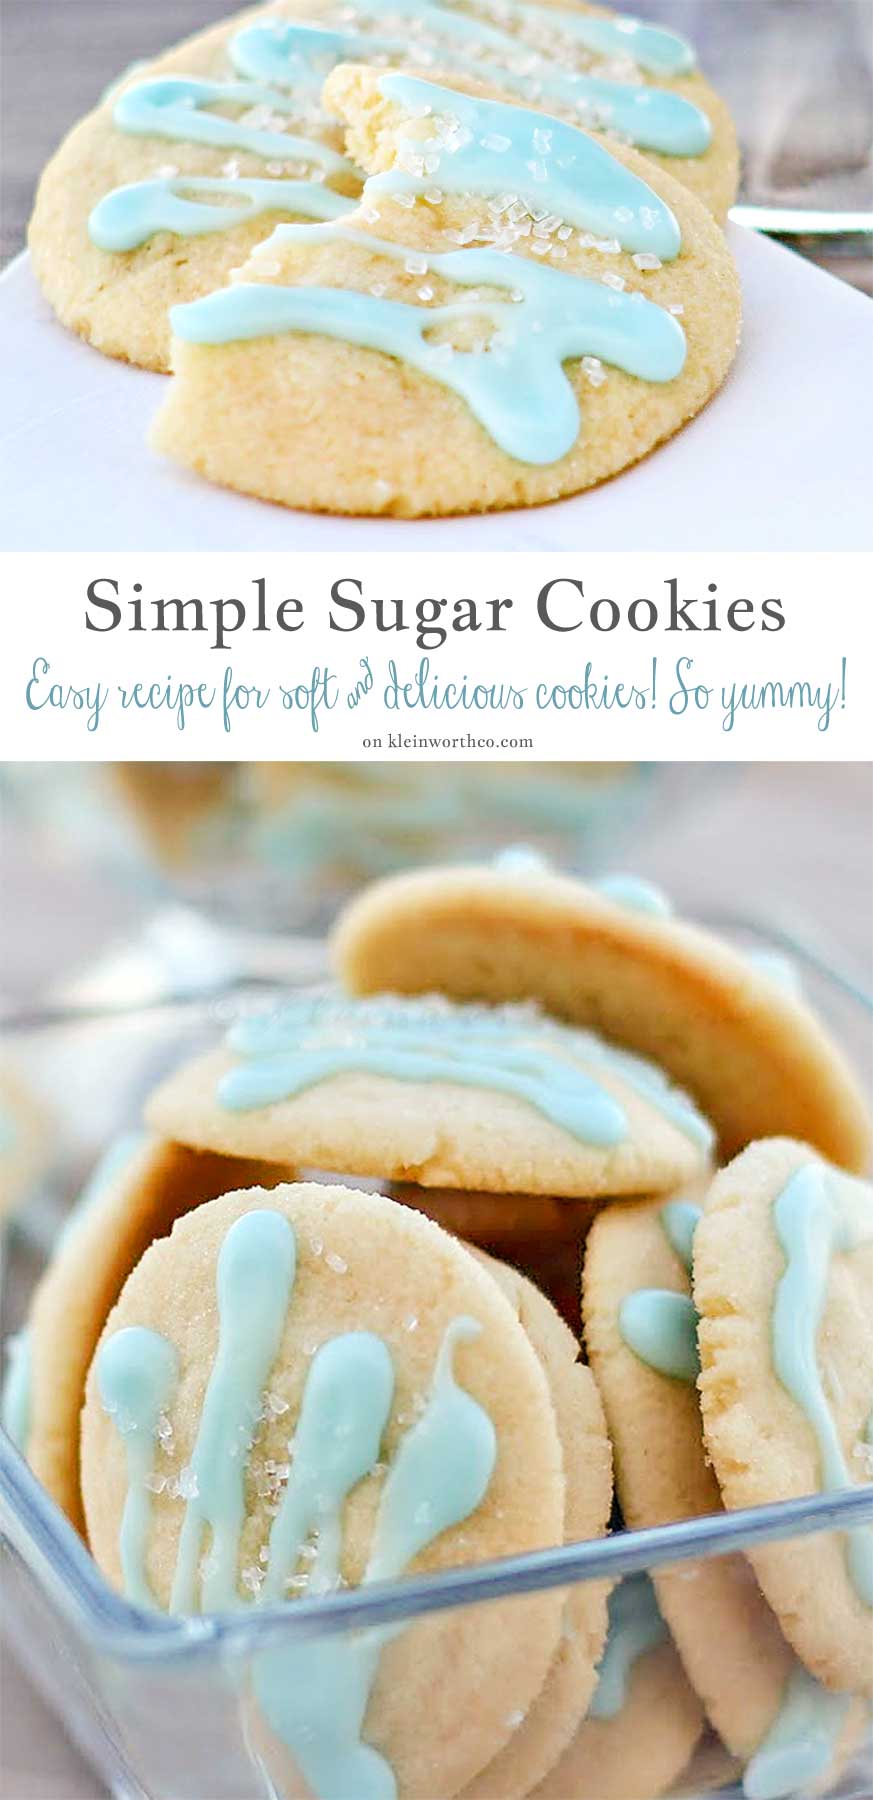
The holidays are just not the holidays without Sugar Cookies. Yes I do make the regular kind that you roll out, cut into shapes & then frost. I swear- I do that…..sometimes. But when the hubs asks for Sugar Cookies & I just don’t feel like that kind of mess- I go this route. This recipe is easy, quick & you just roll them in a ball like you would Snickerdoodles. The frosting is quick & everyone is happy. You can make these as easy or as complicated as you have time for & that is what I love about them. PLUS they are chewy. They never last long. Hubs likes to have some with his morning coffee & then I find him grabbing a few more throughout the day.

Hot Cocoa Cookies
AND
Check back tomorrow for Snickers Cake Mix Bars & more.
Linking with: Live Laugh {Linky} Thursday | The 36th Avenue | I’m Lovin’ It Party | One Creative Weekend
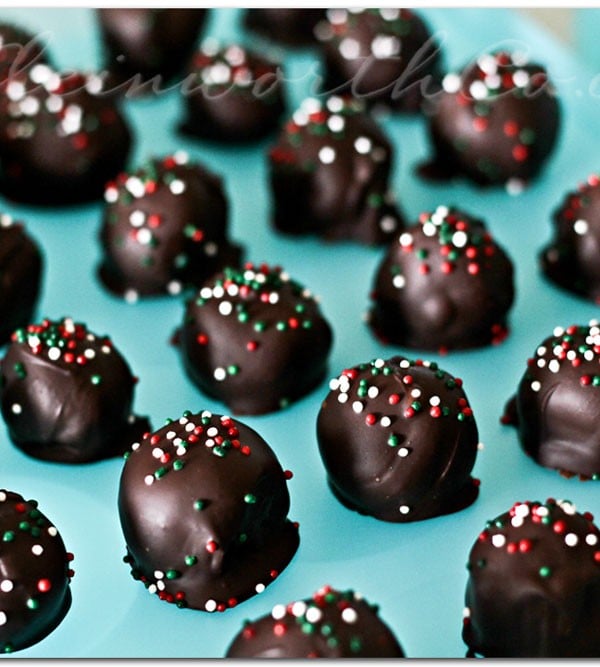
Welcome to Day 3 of my 7 Days of Memory Making ~ Holiday Recipe Series
I am taking a MUCH NEEDED break from my usual blogging routine this week in preparation for prepare for our long distance move. But don’t worry, this blog will not be abandoned.I have teamed up with the FABULOUS Danelle from Let’s Dish Recipes to bring you some really great recipes this week.
Be sure to check out my Chocolate Dipped Marshmallows too.
Be sure to come back tomorrow for a Day of Cookies
Welcome to Day 2 of my 7 Days of Memory Making ~ Holiday Recipe Series
As I mentioned yesterday, I am taking a MUCH NEEDED break from my usual blogging routine this week in preparation for prepare for our long distance move. But don’t worry, this blog will not be abandoned. I have teamed up with the FABULOUS Danelle from Let’s Dish Recipes to bring you some really great recipes this week.
Welcome Danelle!!!! So honored to have you posting here today in my space.
I was so excited when Gina asked me to share some favorite holiday recipes this week at Kleinworth and Co. She’s always sharing delicious food, and beautiful food photography, and I can’t wait to see what tasty treats she has in store for us this week!
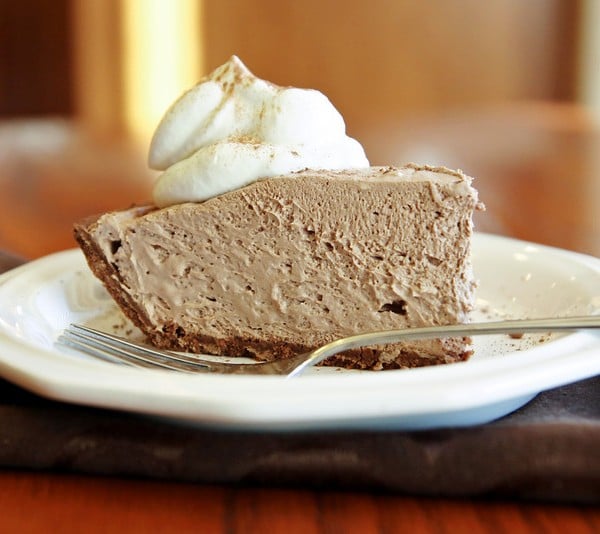
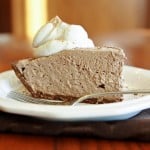
Today I’m sharing a German Sweet Chocolate Pie recipe that my mom first started making for the holidays back when I was a teenager. She found it on the bottom of the Cool Whip lid and it’s been a family tradition ever since. I’ve been making it for my family for the past 18 years.
Sometimes we have it for Thanksgiving, sometimes for Christmas, and sometimes for both! Which is really easy to do, because this pie goes in the freezer, which means I can make two pies at once for both holidays! And it’s so nice to have a make ahead dessert when you’re going to be busy in the kitchen with other things.
German Sweet Chocolate Pie
This recipe also works well with a traditional baked crust, and you can certainly make your own chocolate crumb crust, although I usually use a pre-made one. I definitely recommend using the German Sweet Chocolate though. It give the pie a very distinctive chocolate flavor. I’ve always been able to find it in the baking aisle near the other Baker’s brand chocolate.
In contrast to so many holiday desserts, this is not too sweet or rich, which means I can easily eat more than one piece! Although that may not be a good thing. I always get compliments and requests for the recipe when I serve this pie to company. I hope you and your family will love it too!
Check out another MUST MAKE Holiday recipe courtesy of Danelle
Be sure to come back tomorrow for Chocolate Truffles.
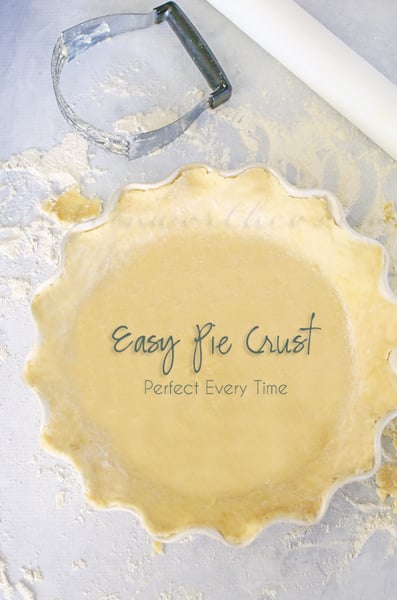
Easy Pie Crust – Perfect Every Time
To see where I am linking today- visit HERE
Welcome to Day 1 of my 7 Days of Memory Making ~ Holiday Recipe Series
I am taking a MUCH NEEDED break from my usual blogging routine this week in preparation for prepare for our long distance move. But don’t worry, this blog will not be abandoned. I have teamed up with the FABULOUS Danelle from Let’s Dish Recipes to bring you some really great recipes this week.
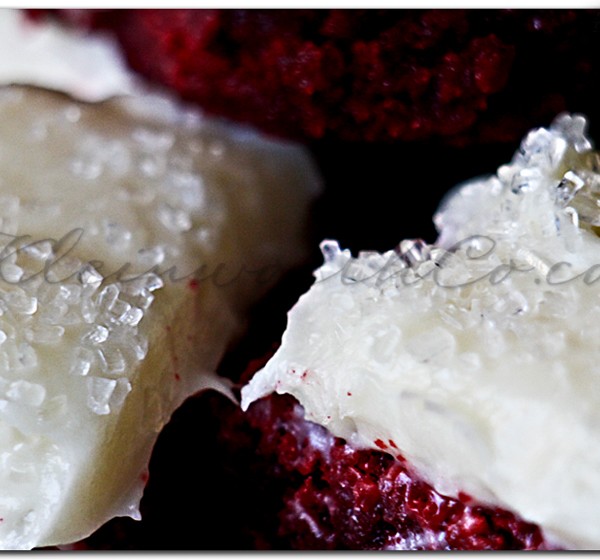
Thank you so much for joining me as I share with you some of our family’s favorite recipes during the holiday season. I wanted to kick it off with these Red Velvet Brownie Bites. I really love red velvet ANYTHING & the hubs really loves cream cheese frosting on just about anything. So these have become a HUGE family favorite in this house. They are SO GOOD! I know that when I look back on my childhood memories of the holidays most of them are tied to food in some way. I remember making gingerbread houses or popcorn balls with my mom. She also makes the very best fudge in the world. My goal during the holidays is to create those same sort of memories with my kids in hopes that they want to do the same when they are grown. These Red Velvet Brownie Bites are definitely something I know they will make with their families.

Check out Danelle’s
Red Velvet Sandwich Cookies
Be sure to come back tomorrow for Danelle’s German Sweet Chocolate Pie

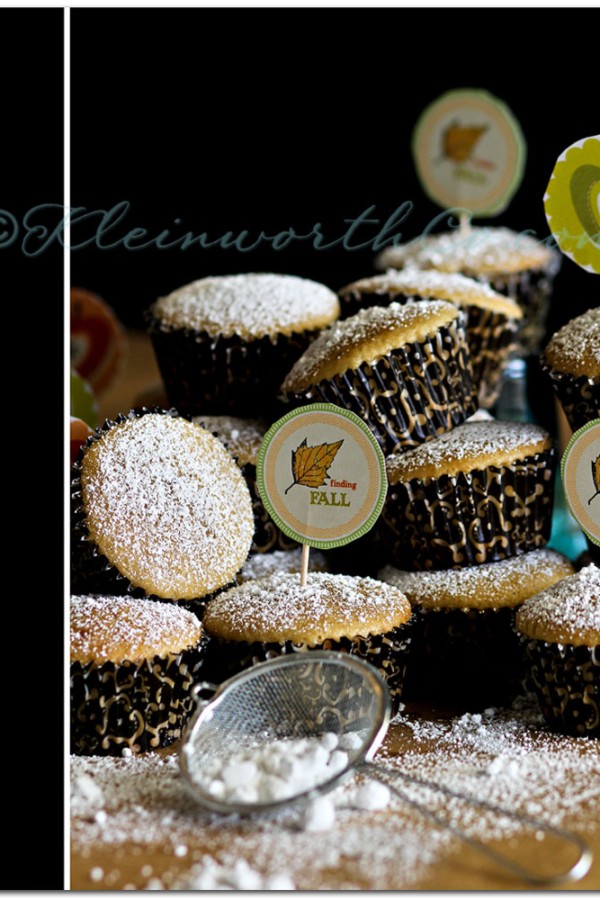
Anyhow- before all this happened I had baked these cupcakes. I had started with trying the Nutella swirl cupcakes I had found only I just did a quickie by mixing it with a butter pecan box cake.
They totally didn’t come out like they should have but I really did it for the sole purpose of showing you all these adorable transfers from Life n’ Reflection.

I originally was going to use them as printed recipe cards but then decided I wanted to scale them down & print a bunch for cupcake decorations. I love how cute they are.
I will probably do the recipe cards another time when my head is more in the game. But for now I have these.

If you want to print these cute cupcake toppers for fall – you can find them over at Life n’ Reflection. Be sure to head over there (link below) and check out all the amazing ideas Kristy shares.

Head on over & give Kristy some love!


