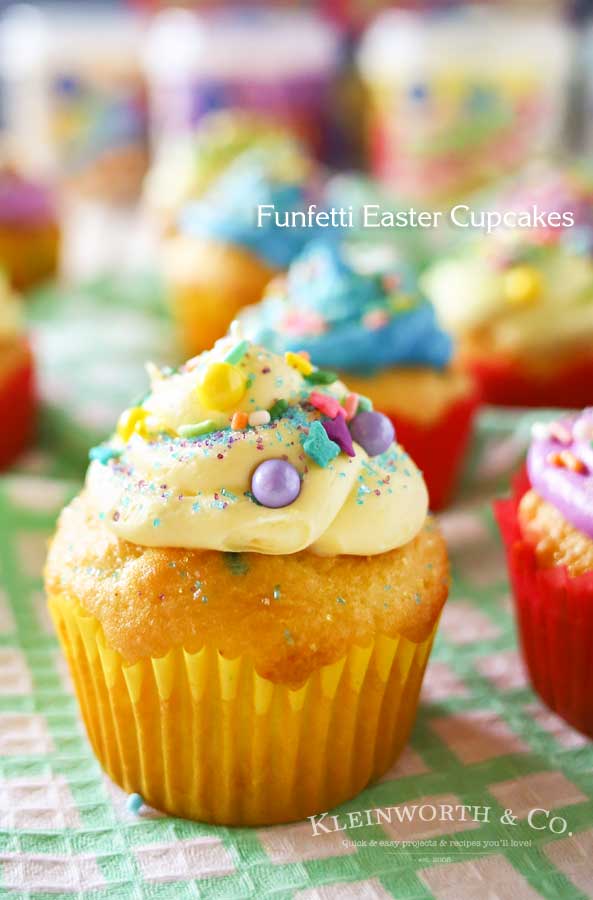
Fluffy puff pastry coated with butter & sprinkled with cinnamon & sugar makes these Churro Twists the perfect little fall dessert. Quick, easy & delicious!
DESSERT
Pumpkin Dessert Dip
This Pumpkin Dessert Dip is a delicious treat for dipping all those wonderful fall-flavored cookies. Quick and easy desserts on the go.
It’s no secret that we love our football. Good games, friends & delicious food is where it’s at for us! So, of course, I’m always creating delicious recipes to enjoy during game time.
While I tend to do a good portion of savory & snacky type foods, I also love to offer a little dessert too. So something like this pumpkin dip is perfect.
This post has been updated in 2022 to include new images and additional FAQs.
PIN THIS TO SAVE FOR LATER
Cinnamon & Sugar Donuts {w/ Pumpkin Spice Glaze}
Making homemade donuts like these Cinnamon & Sugar Donuts with Pumpkin Spice Glaze is so easy. What a perfect treat with your coffee on a cool fall morning.
Cinnamon & Sugar Donuts
Peanut Butter Apple Dump Cake
Love apple & peanut butter recipes? Then this easy cake recipe is for you. Peanut Butter Apple Dump Cake, just 5 ingredients & a slow cooker is all you need.
Apple Dump Cake
Halloween Brownies
This shop has been compensated by Collective Bias, Inc. and its advertiser. All opinions are mine alone. #FallFlavors #CollectiveBias
These Halloween Brownies are a fudgy brownie topped with white chocolate frosting, black icing, funfetti sprinkles & DOVE® Milk Chocolate Eyeballs. Making Halloween treats just got easier!
Halloween Brownies
Pink Rock Candy Fudge
In honor of Breast Cancer Awareness Month, I’m sharing this Pink Rock Candy Fudge. Delicious & easy white chocolate fudge recipe topped with pink rock candy.
Pink Rock Candy Fudge
Birthday Cake Oreo Cream Dessert
Simple & easy dessert recipes are always great. This Birthday Cake Oreo Cream Dessert is a delicious no-bake treat that everyone will love.
No Bake Treat
Sugar Skull Cupcakes
Adding Sugar Skulls to your Halloween celebrations is easy with these double chocolate Sugar Skull Cupcakes. They are adorable, delicious & so easy to make.
Sugar Skull Cupcakes
Butterscotch Cake
This single-layer Butterscotch Cake with Butterscotch Frosting is the perfect dessert for all your family gatherings, parties, and more.
Imagine a cake that transports you to a world where every bite tastes like a spoonful of golden sunshine. Haha! Maybe I went a little overboard there.
These layers of moist cake, a hint of vanilla, and the deep, sweet tones of brown sugar. Now, imagine it all cloaked in a creamy, dreamy butterscotch frosting. That’s the magic of our Butterscotch Cake.
View postMonster Brownies
Fudgy, frosting covered Halloween brownies with monster eyes like these Monster Brownies are delicious & so much fun. Great Halloween treats for all ages.
Crock Pot Baked Apples
Need a perfect fall recipe? Crock Pot Baked Apples are simple, delicious & packed full of all that great fall flavor you love. Apples, cinnamon & caramel.
Fall is in the air and that means it’s time to enjoy all of the delicious fruits and vegetables that nature has to offer. Today, I’m going to show you how to make a simple recipe for Crock Pot Baked Apples.
This recipe is perfect for a quick snack or a light dessert. So, let’s get slow cooking!
PIN NOW TO SAVE FOR LATER
Are you excited about fall? Here in North Idaho, we had a week of ’90s like summer’s last whopper. Then a cold front came on in & we have been in the ’60s & ’70s. Fall blasted on in here & it’s been so lovely.
However, I hope these 70’s stick around for a while. I love the time when the weather is just perfect in the day where I can leave the windows open & let the breeze come on through without being too hot or cold.
But these chilly nights have me in full fall mode when it comes to food. The crock pot is making an appearance more times through the week & the smells drifting through here are wonderful.
Things like these baked apples in the crock pot just make me happy. All that cinnamon & caramel mixed with apples – wow! It’s no wonder this is my favorite season.
I can’t wait to show you all the glorious sights around here this time of year. That will come soon. But for now- I’m sharing my favorite flavors.
Here are some commonly asked questions
What kind of apples should I use for baked apples?
Well- we didn’t pick the types of trees that were planted on our property. That was decided by the first owners and we are the lucky recipients. So I have no idea what types we have here. I’m just using what I have and it’s working just fine.
However – since I’m sure most of you will be buying your apples at the store – here are some suggestions.
When you are making baked apples, there are different kinds of apples that work best. Some apples have a higher water content, so they aren’t the best for this recipe because they will fall apart faster than others.
When picking an apple to bake, you want to focus on ones that are sweeter since this will be a dessert. I like to use Fiji apples for this recipe. You can also use Honeycrisp, Golden Delicious, and Red Delicious.
How to store Crock Pot Baked Apples
Once you have made your delicious Crock Pot Baked Apples, you will want to know how to store them so they will be just as fresh when you are ready to eat them again.
The good news is that these apples can be stored in the fridge for up to a week or in the freezer for up to two months.
I used this Crock Pot Dulce de Leche to drizzle on these apples!
Ingredients for Crock Pot Baked Apples
- all-purpose flour
- brown sugar
- oats
- granulated sugar
- butter – chilled & cubed
- cinnamon
- salt
- apples
Apple Equivalents & Measures – rough estimates
- 1 bushel of apples is the dry equivalent to 2 gallons of produce
- 2 large apples = 1 pound
- 3-4 medium apples = 1 pound
- 3 cups cored, sliced or chopped apples = 1 pound
- 1-1/3 cups applesauce = 1 pound apples
- 1 pound dried apples = 8 cups cooked apples
- 1 pound dried apples = 4 1/3 cups
- 4 pounds fresh apples = 1 pound dried apples
- 4 pounds fresh apples = 4 cups applesauce
- 1/2 cup mashed apples = 1 medium apple
- 3/4 cup cored, chopped apples = 1 medium apple
- 1 cup cored, sliced apples = 1 medium apple
- 2 pounds fresh apples = filling for ONE 9″ pie
- Small apples are approx 2 1/4 inches in diameter.
- Medium apples are approx 2 3/4 inches in diameter.
- Large apples are approx 3 3/4 inches in diameter.
How to Make Crock Pot Baked Apples
- In a medium bowl combine the flour, brown sugar, oats, granulated sugar, butter, cinnamon, and salt.
- Using a pastry cutter (or with your hands) work the butter into the dry ingredients until the mixture is crumbly, then set aside.
- Wash the apples & cut off the tops.
- Spoon out some of the core & the inner flesh to make a “bowl”.
- Fill each hollow apple with the crumble mixture & then place them inside the cooker insert.
- Cover & cook for 2-2.5 hours – just enough that the apples soften but are not falling apart.
- Serve with a scoop of ice cream or whipped cream on top (I like to add some caramel drizzle too)
How long do Crock Pot Baked Apples last?
Crock Pot Baked Apples will last for up to a week in the fridge or up to two months in the freezer.
How to make Baked Apples in the air fryer
These (apples or peaches) can be made in the air fryer too! Just cook at 350 for 5 minutes. Then sprinkle on the toppings. Cook for another 5 minutes or until tender.
Can I use this recipe to make baked peaches instead?
Yep! This also works with peaches – sprinkle with a pinch of crushed graham cracker crumbs, cinnamon, butter, and brown sugar. Cook on low for the same amount of time.
It’s really all the sweet goodness of a rich caramel apple crisp – in a neat little apple bowl.
The perfect fall treat for sure.
What slow cooker do you use?
We actually have several slow cookers that we have acquired over the years from doing this job. I have a smaller one that is great for half recipes.
But the one I use the most is this standard, no-frills slow cooker that is perfect for this particular recipe.
If you love this easy-baked apple recipe, you’re going to love these other apple recipes too. Please click each link below to find the easy, printable recipe!
If you love this recipe for Slow Cooker Baked Apples as much as I do, please write a five-star review, and be sure to help me share on Facebook and Pinterest!
CONNECT WITH YUMMI HAUS!
Be sure to follow me on my social media, so you never miss a post!
Crock Pot Baked Apples
Equipment
- 1 slow cooker
Ingredients
- ½ cup all-purpose flour
- ⅓ cup brown sugar
- ¼ cup oats
- ¼ cup granulated sugar
- 4 tbsp butter – chilled & cubed
- 1 tbsp cinnamon
- ¼ tsp salt
- 6 apples fuji preferable
Instructions
- In a medium bowl combine the flour, brown sugar, oats, granulated sugar, butter, cinnamon, and salt.
- Using a pastry cutter (or with your hands) work the butter into the dry ingredients until the mixture is crumbly, then set aside.
- Wash the apples & cut off the tops.
- Spoon out some of the core & the inner flesh to make a "bowl".
- Fill each hollow apple with the crumble mixture & then place them inside the cooker insert.
- Cover & cook for 2-2.5 hours – just enough that the apples soften but are not falling apart.
- Serve with a scoop of ice cream or whipped cream on top (I like to add some caramel drizzle too)
Notes
Nutrition
Caramel Macchiato Cinnamon Rolls
Caramel Macchiato Cinnamon Rolls are perfect for fall mornings. Cinnamon, caramel & frosting- what could be better with your coffee? With this no-rise recipe, homemade cinnamon rolls just became easier than ever too.
You all know how much I cherish my morning coffee time. I actually go to bed looking forward to my morning cup, especially in the fall when I can get great creamer flavors like Pumpkin Spice & one of my favorites, Caramel Macchiato.
Something about caramel when it’s chilly outside just makes me feel all warm & cozy. So of course I like to add that great flavor to as many things as I can – like these homemade cinnamon rolls.
coffee cinnamon roll recipe
I love making little goodies to have with our coffee on the weekends. Most mornings it’s just coffee while we get straight to work- even on the weekends.
However there are some weekends where we have a few moments of peace where we can sip alongside a tasty little goodie. Those are the mornings I cherish most, which is why I made this super simple no-rise recipe for cinnamon rolls.
I don’t have a whole lot of time & I certainly have very little patience when it comes to making treats. I like it quick, simple & delicious whenever possible. So I’m so in love with this recipe – I don’t know why it was buried in my recipe cabinet. I tucked it away & completely forgot about it.
Once in a while I would remember & think “gee, I should make those” & then life & schedules took over & it never really happened. Until I was organizing & found it. I immediately got to making them. I didn’t want to forget again. The hubs was sure happy & we had a lovely coffee time this weekend.
Just a little bit of this Caramel Macchiato creamer & it takes these cinnamon rolls to whole new level of delicious.
You absolutely must give them a try!!! They will be your new favorite too.
Find out more about International Delight Delightful Moments & sign up for their newsletter.
Connect with them on Delightful Moments, Facebook, Twitter, Instagram & Pinterest.
More Great Cinnamon Roll Recipes
Super Easy Pumpkin Cinnamon Rolls
One-Hour Carrot Cake Cinnamon Rolls
Caramel Macchiato Cinnamon Rolls
Ingredients
Dough
- 2 cups all-purpose flour
- 2 tbsp granulated sugar
- 4 tsp baking powder
- 1 tsp salt
- 3 tbsp butter- room temperature
- 1/2 cup milk
- 1/4 cup Caramel Macchiato Creamer
Filling
- 5 tbsp butter
- 1 cup brown sugar
- 4 tsp cinnamon
Glaze
- 3/4 cup confectioners sugar
- 3-4 tbsp Caramel Macchiato creamer
Instructions
- Preheat oven to 400 degrees
- Line 9x9 baking pan with parchment & set aside
- In a small bowl combine filling ingredients & use a fork or pastry cutter to work together until mixture is crumbly.
- Sprinkle about 1/4 of the mixture in the bottom of your parchment lined pan
- In a large bowl, combine flour, sugar, baking powder & salt
- Cut in butter & mix until well combined
- Add in milk & creamer & mix well to form a soft dough
- Roll dough out on lightly floured surface forming a rectangle
- Sprinkle remaining filling mixture over rolled dough & spread out evenly to cover well
- Starting on one long end - roll dough into a tight log
- Use a sharp knife to cut into 12 even rolls - I like to cut in half & half again, repeating until I reach 12
- Place rolls into prepared pan
- Bake 20-25 minutes
- While baking prepare glaze by whisking creamer into confectioners sugar until smooth
- When rolls are done baking, remove & allow to cool about 5-10 minutes before adding glaze
- Pour glaze over rolls & enjoy while warm
Want more great breakfast recipes?
This conversation is sponsored by International Delight. The opinions and text are all mine.
Cannoli Sugar Cookie Cups
Simple & delicious go to a whole new level with these Cannoli Sugar Cookie Cups. Easy sugar cookie cups topped with cannoli filling & chocolate chips. YUM!
Do you love a good pastry? I sure do. Whenever we can stop in a little specialty pastry shop I always get a variety of goodies to take home & enjoy over a couple of days.
I especially love it when I can get there on a Friday so that I have treats to have along with my coffee over the weekend while we read the paper.
Those seem to be the best weekends when we have little on the calendar & we can just snack, sip & read until lunchtime. Sigh…… that doesn’t happen all that often. Guess that’s why I love & cherish it so much.
So since we don’t get to do that all that often, I decided to create a little cannoli-like treat to have one weekend.
mini cannoli cups
These are a sugar cookie cup, topped with cannoli filling & sprinkled with extra mini chocolate chips & confectioners sugar. Oh my word – so delicious.
So if you love a good cannoli & sugar cookies, you have to give this twist a try.
You will be so happy you did!
cannoli cups
Here are some commonly asked questions
What is the best way to store leftover cannoli sugar cookie cups?
The key here is that once they are assembled, you need to enjoy them right away. You can keep the filling separately in the refrigerator in an airtight container for several days. Just give it a good stir before using again.
For the cookies, place them in an airtight container and keep them at room temperature for up to 4 days
HOW DO YOU MAKE CANNOLI SUGAR COOKIE CUPS?
Cookies
- In a small bowl whisk together the flour and baking powder – set aside.
- In a large mixer bowl, beat the butter until soft.
- Add the sugar and mix well.
- Add the egg and vanilla – mix again just until incorporated.
- Slowly add the flour/baking powder mixture and stir until the dough begins to pull together.
- Roll the dough into a ball and wrap with plastic wrap- refrigerate for 1 hour.
- Once the dough has chilled, preheat the oven to 350 degrees.
- Pull off pieces of dough and roll it into balls. Then press into the wells of a greased muffin tin pan making the cup shape.
- Bake for 12-15 minutes and allow to cool in the pan before removing.
- To remove, slide a butter knife along the inside- they should pop right out.
Filling
- Whisk the ricotta in a large bowl until smooth.
- Stir in the confectioner’s sugar and vanilla and whisk until combined.
- Fold in the whipped topping and chocolate chips.
- Do not assemble until ready to serve as the filling will start to soften the cookie cup.
- Once ready to serve spoon about a tablespoon of your filling into the cookie cup.
- Dust with confectioner’s sugar and add a couple more mini chocolate chips to the top.
cannoli cookie
Can these cookies be made ahead of time?
You bet. This cookie dough can be made ahead of time and kept in the refrigerator for up to 4 days prior to baking. Make sure to cover tightly with plastic wrap so it doesn’t dry out. Let it sit out at room temperature for about 20-30 minutes before rolling and baking.
Ingredients for Cannoli Sugar Cookie Cups
Sugar Cookie Cups
- all-purpose flour -spooned and leveled- not scooped
- baking powder
- butter
- granulated sugar
- egg
- vanilla extract
Filling
- ricotta cheese
- whipped topping
- confectioners sugar
- vanilla extract
- mini chocolate chips
- confectioner’s sugar for dusting
Do I really need to chill the dough?
Yes, Yes, Yes! Chilling the dough is important for a couple of reasons. First – while the dough is chilling the ingredients are coming together. It gives a better overall flavor to the cookie.
The second and probably even more important than the first – is that chilling helps the dough hold together during the baking process.
Without chilling, the dough would not only be too sticky to really roll it into balls. But it would also spread way too much while baking – leaving flat and not very appealing cookies in the end. Please don’t skip the chilling process.
If you love this Easy Cannoli Cups recipe, you’re going to love these other treats too. Please click each link below to find the easy, printable recipe!
If you love this recipe for Cannoli Sugar Cookie Cups as much as I do, please write a five-star review, and be sure to help me share on Facebook and Pinterest!
CONNECT WITH YUMMI HAUS!
Be sure to follow me on my social media, so you never miss a post!
Cannoli Sugar Cookie Cups
Ingredients
Sugar Cookie Cups
- 3 cups all-purpose flour spooned and leveled- not scooped
- 1 tsp baking powder
- 1 cup butter
- 1 cup granulated sugar
- 1 large egg
- 1 tsp vanilla extract
Filling
- 2 cups ricotta cheese
- 3 tbsp whipped topping
- ½ cup confectioners sugar
- 1 tsp vanilla extract
- ¼ cup mini chocolate chips
- *additional confectioners sugar for dusting
Instructions
Cookies
- In a small bowl whisk together the flour and baking powder – set aside.
- In a large mixer bowl, beat the butter until soft.
- Add the sugar and mix well.
- Add the egg and vanilla – mix again just until incorporated.
- Slowly add the flour/baking powder mixture and stir until the dough begins to pull together.
- Roll the dough into a ball and wrap with plastic wrap- refrigerate for 1 hour.
- Once the dough has chilled, preheat the oven to 350 degrees.
- Pull off pieces of dough and roll it into balls. Then press into the wells of a greased muffin tin pan making the cup shape.
- Bake for 12-15 minutes and allow to cool in the pan before removing.
- To remove, slide a butter knife along the inside- they should pop right out.
Filling
- Whisk the ricotta in a large bowl until smooth.
- Stir in the confectioner's sugar and vanilla and whisk until combined.
- Fold in the whipped topping and chocolate chips.
- Do not assemble until ready to serve as the filling will start to soften the cookie cup.
- Once ready to serve spoon about a tablespoon of your filling into the cookie cup.
- Dust with confectioner's sugar and add a couple more mini chocolate chips to the top.
Strawberry & Banana Dessert Dip
This Strawberry & Banana Dessert Dip is a quick & easy no bake dessert idea that everyone loves. If your crowd loves strawberries & bananas this is for you.
It’s tailgate, party, game time season. We really look forward to this time of year because it’s when we come together as a family, make a great spread of food & enjoy the games together. We have everything from wings, to chips & salsa & all sorts of goodies like this easy to make dessert dip. I love no bake desserts to add to the mix. My family loves strawberries & bananas – so even though we are getting into fall flavors, they always beg for this flavor combo. I may transition into a fall flavored dip next month- stay tuned, I’ll be sure to share it if I do.
I just love it because I can hand one of the kids the recipe & they can literally do it by themselves. It’s super easy & I can have them set up on the table & out from where I’m working in the kitchen on all the other dishes for the day. They don’t need to be at the stove or getting in & out of the oven to help me make something delicious for us to enjoy later. HUGE bonus because I’m sure a lot of you have heard me talk about how difficult it can be to get things done when everyone is in the kitchen all at once.
If you love a good strawberry & banana combo- you will love this! It’s sooooo good. I just pull up a chair & snack all through the game. (probably not the best thing for my waistline- but I’m just keepin’ it real here)
Strawberry & Banana Dessert Dip
Ingredients
- 2 3.4oz boxes of banana instant pudding
- 32 oz vanilla yogurt
- 8 oz whip topping
- 3 cups washed hulled & chopped strawberries
Instructions
- Combine pudding mix & yogurt in a medium mixing bowl
- Whisk together until fully combined
- Fold in whip topping
- Fold in strawberries
- Cover & refrigerate until ready to enjoy
- **Serve with regular or chocolate graham crackers for dipping
Looking for more great no bake dessert ideas?
No Bake Chocolate Caramel Oat Bars
Cake Batter Oreo Cheesecake Dessert
Check out these great dip ideas…
Key Lime Pie Dip from Life with the Crust Cut Off
Lemon Cream Pie Cheesecake Dip from Food, Folks & Fun
To see where I am linking today- visit HERE
Reese’s Caramel Popcorn
Homemade caramel popcorn & Reese’s mini cups combined together to make this Reese’s Caramel Popcorn is a peanut butter & caramel lovers dream. Delicious!
My friends, I have a treat for you today. It’s time for our monthly Peanut Butter Bash! That means a group of us creative food bloggers have come together to bring you all the wonderful recipes we could dream up combining peanut butter with another key ingredient. This month- Caramel!!! So since I am already obsessing over homemade caramel popcorn this time of year, it’s no wonder I decided to whip up some more & add in some Reese’s mini peanut butter cups for this month’s challenge.
The key here is to add half the peanut butter cups while the popcorn & caramel is still hot- so they melt on though the popcorn. Then add in the remainder once it’s cooled down so you still have some whole peanut butter cups. WOW! I have to say, this was beyond delicious. Right after I took this photo I walked the bowl down to the hub’s office so he could give it a try. He took one bite & snagged this whole bowl from me. Before I knew it, the whole thing was gone. Good thing I had a separate, super large bowl full waiting in the kitchen. Otherwise the rest of us would have missed out. It’s AMAZING! That’s for sure!
Reese's Caramel Popcorn
Ingredients
- 2 packs Caramel flavored microwave popcorn
- 1/4 cup butter
- 1/2 cup corn syrup
- 1 cup packed brown sugar
- 7 oz sweetened condensed milk
- 1/8 tsp salt
- 1 - 8 oz bag Reese's minis
Instructions
- Pop both bags of popcorn in microwave to package directions & combine in a large bowl - set aside
- Combine butter, corn syrup, brown sugar, sweetened condensed milk & salt in a saucepan
- Attach a candy thermometer to the side- don't let the tip touch the bottom of the pan- but make sure it's well within the liquid.
- Heat over medium-high -stirring constantly until mixture boils
- Once it boils reduce heat to medium & continue stirring until thermometer reaches 220 degrees
- Remove from heat, carefully remove your thermometer & drizzle mixture over the popcorn
- Fold with a spatula to coat the popcorn with caramel
- Add in 1/2 the bag of peanut butter cups & continue to fold in - allowing them to melt a bit
- Once the popcorn has cooled enough that it won't melt the peanut butter cups anymore- add in the remainder of your bag & mix until incorporated
- Enjoy immediately
Don’t miss all these other fabulous peanut butter & caramel combos being shared today!
Reese’s Caramel Popcorn from Gina of Kleinworth & Co
Peanut Butter Caramel Stuffed Chocolate Chip Cookies from Rebecca of Living Better Together
Peanut Butter Twix Bars from Carisa of Messes to Memories
Dark Chocolate Peanut Butter Carmelitas from Maggie of The Love Nerds
Peanut Butter Caramel Oreo Ice Box Cake from Miranda of Cookie Dough and Oven Mitt
Caramel Peanut Butter Cookie Ice Cream from Ellie of Peanut Butter and Ellie
Peanut Butter Cheesecake Brownie Cups from Stephanie of The TipToe Fairy
Looking for more great caramel recipes?
Dulce de Leche Pumpkin Muffins
To see where I am linking today- visit HERE
Bacon Caramel Apple Wedges
The great taste of caramel apples is easy with wedges. Add bacon to make Bacon Caramel Apple Wedges & you have the best caramel apple recipe ever
One thing I love about this wonderful season of fall is caramel apples. I used to not be such a caramel lover as I am now. However a good caramel apple is where my weakness was. When we lived near Virginia City we would go up on the weekends & walk the boardwalk & stop in the shops. One shop we always made a point to stop in was the fudge shop because they had these huge, over the top caramel apples. I always bought one & it took a fork, knife & 2 sittings to get through one. These days I’m looking to scale back on that a bit – as much as I would love to enjoy that every single day, I really can’t anymore. So I came up with a slightly lighter version of that with these Bacon Caramel Apple Wedges for our last post of bacon month.
You see – by cutting the apples into wedges it’s so much easier to share. Using a thin caramel sauce instead of coating a whole apple with thick & chewy caramel & all the other additions gives the flavor of a caramel apple with far less heaviness. Then I added bacon. Instead of chocolate or nuts or anything else – adding bacon gave the perfect amount of chewy & salty perfection to these. Oh my – simple & absolutely delicious. I love this snack.
Bacon Caramel Apple Wedges
Ingredients
- 2-3 large apples -I like granny smith for this
- 3-4 tbsp Caramel Sauce
- 3-5 pieces cooked bacon- crumbled
Instructions
- Core & cut apples into wedges & arrange on platter
- Sprinkle with bacon crumbles
- Liberally drizzle with caramel sauce so there is enough for each piece
- Enjoy!
Don’t miss all these other great bacon recipes by my bacon loving blogging friends!
Loaded Potato and Chicken Casserole
BBQ Pulled Chicken BLT Sandwich
Wedge Salad with Bacon & Bleu Cheese
Looking for more great bacon recipes from our bacon month celebration?
To see where I am linking today- visit HERE
Caramel Apple Pie Filling
Apple pie, is America’s favorite. Packed full of cinnamon-coated apples in a thick caramel glaze makes it positively delicious. This homemade Caramel Apple Pie Filling makes it so easy to make your own.
If you love apple pie – this caramel apple pie filling will be your new favorite fall recipe. It’s simple, easy and so delicious. Definitely the perfect way to use up all those apples from the orchard.
View postApple Fritter Cupcakes
These Apple Fritter Cupcakes are the perfect way to kick off the fall season. Bursting with apples & cinnamon in a moist little cupcake. Everything you love about fall.
It’s FALL!!! (or nearly there) Can you tell I’m excited? I love baking for fall. All the apple & cinnamon recipes just make me happy. My family loves it too This is a sponsored conversation written by me on behalf of KitchenAid. All opinions and text are mine.apple cupcakes
So I thought I would break out the ol’ KitchenAid Stand Mixer & whip up some Apple Fritter Cupcakes. They are really simple to make, line your tins, whip up your batter, fill your wrappers & add a little dollop of pie filling & bake. That simple!
Fall baking doesn’t have to be complicated. But it’s always delicious & makes the house smell amazing. Which is why you should jump in & start baking!!! While you’re at it you should enter this AWESOME GIVEAWAY….
Food Network and Food.com invites passionate connectors to show how to take simple to extraordinary!cupcakes with apple filling
Fall baking doesn’t have to be complicated. But it’s always delicious & makes the house smell amazing. Which is why you should jump in & start baking!!! While you’re at it you should enter this AWESOME GIVEAWAY….
Food Network and Food.com invites passionate connectors to show how to take simple to extraordinary! Enter the “apple” recipe cooking challenge – submit a photo and description of your best dish incorporating the use of an apple! Submissions can be uploaded through Twitter or Instagram, FoodNetwork.com/applechallenge or food.com/applechallenge Food Network Kitchens will select the top 4 recipe submissions and the 4 finalist will win a trip for 2 to NYC to push their limits in a live cook-off to cook their dish to be judged by FN chef Geoffrey Zakarian 1 winner will receive the grand prize of a suite of KitchenAid Black Stainless Steel Appliances and a private cooking lesson with Geoffrey Zakarian. Contest Dates: 8/17 – 9/14Best Apple Cupcakes for Fall
That’s a pretty fabulous prize! Have you seen those new KitchenAid black & stainless steel appliances? I’m swooning.
They are so sleek & luxurious. Plus they would go nicely with my red mixer – even though it’s knocking on 15 years old now. Someday I can upgrade that to a new professional line KitchenAid Stand Mixer.
Just thinking of new applicances gives me motivation to make some more apple recipes. I know the family is already begging me to make more of these cupcakes. They are so delicious.
Other Creative Cupcakes
Funfetti Cupcakes Coconut Cupcakes S’mores Cupcakes Blueberry CupcakesApple Fritter Cupcakes
Ingredients
- 1/3 cup butter - room temperature
- 3/4 cup granulated sugar
- 1/2 cup cinnamon applesauce
- 1 tsp vanilla extract
- 2 eggs
- 2-1/4 cup all-purpose flour
- 1 tsp baking powder
- 1 tsp baking soda
- 1/2 tsp salt
- 1-1/2 tsp cinnamon
- 1 cup sour cream
- 10 ounces apple pie filling
Topping
- caramel drizzle
- confectioners sugar
Instructions
- Preheat oven to 350 degrees
- Line 24 muffin tin wells with wrappers
- In mixer bowl combine butter & sugar - beat until fluffy
- Add applesauce, eggs, vanilla - mix until just combined
- Add flour, baking powder, baking soda, salt & cinnamon
- Stir in slowly & add in your sour cream to keep moist
- Mix until just combined
- Scoop out into your cupcake wrappers filling about 2/3 full
- Top each with 1-2 tsp of apple pie filling
- Bake 30-35 minutes or until the center springs back when touched
- Remove & cool on wire rack before adding caramel drizzle & confectioners sugar
Looking for more great apple recipes?
Crock Pot Cinnamon & Brown Sugar Apple Sauce
To see where I am linking today- visit HERE
Cherry Pie Pops
Need a quick & easy dessert recipe that everyone will love? These Cherry Pie Pops are perfect. Vanilla pudding pops packed with cherry pie filling, delicious!
Oh my friends, this is the last of the frozen desserts for the season. I still have so much to share with you but it will have to wait for next year. I just have SO MANY fall recipes that I need to start sharing them with you before the seasons change again. It’s already going to be so hard to narrow them down to the few weeks we have for that. But I just had to share these Cherry Pie Pops with you to send off summer with a smile.
I spend a good portion of the summer making homemade pie fillings & packing my freezer full. This way when I decide to make some sort of dessert that calls for pie filling, I’m ahead of the game. It just makes dessert prep that much faster. So at the moment I have an overload of homemade cherry pie filling & so I just couldn’t resist packing a little into these pudding pops. It’s was absolutely delicious. The whole family was begging for more. You really can’t go wrong with a simple & easy dessert like this.
These are SOOOOO GOOD!
Cherry Pie Pops
Ingredients
- 1 box vanilla pudding mix
- 3 cups cold milk
- 1/2 of an 8oz tub whipped topping
- 1/2 cup cherry pie filling
- Popsicle sticks
Instructions
- In a large bowl combine pudding mix & milk- whisk until fully combined
- Fold in whip topping & stir until smooth
- Add about 1 tbsp pie filling into each pop mold
- Fill each mold with pudding mixture & swirl around to mix a little
- Add sticks
- Freeze 8-10 hours, preferably overnight
Looking for more easy cherry recipes?
To see where I am linking today- visit HERE
Caramel Macchiato Frosting
Caramel Macchiato Frosting made with International Delight coffee creamer is the perfect frosting recipe for fall. Simple, easy & delicious dessert recipe
My morning coffee is something I go to bed looking forward to. The first thing I do in the morning is head downstairs to fill my mug. It’s not only how I wake up & get going for the day but I often find my inspiration during that first cup of jo. Something about those hot sips of strong coffee long before the sun comes up really gets my creativity flowing & I feel ready to tackle my day head on.
While I was sipping my coffee with Caramel Macchiato creamer from International Delight the other morning I was brainstorming on ideas for yet another birthday celebration in this house. You see – the oldest in the house & the youngest have birthdays exactly a week apart from each other. So the first part of August is a busy time for us. Fortunately my morning coffee gave me more than a pick-me-up that day. I was inspired to use that wonderful caramel macchiato flavor to create a delicious frosting that I would use for the birthday cake I was ready to make.
Let me tell you – it was a HUGE HIT! The delicious hints of caramel macchiato flavor in this frosting were the perfect compliment to the cake. It definitely was a great way to get more creative in the birthday cake making – all starting with my morning cup of coffee. We ended up having a wonderful birthday celebration full of food, laughter & family time. I love it when something as dear to me as my morning coffee can continue on through my day & be a part of something as special as a birthday celebration.
So when do you find your inspiration?
Caramel Macchiato Frosting
Ingredients
- 8 tbsp 1 stick butter - room temperature
- 4 cups confectioners sugar
- 1/3 cup International Delight Caramel Macchiato Creamer
Instructions
- In a mixer with a paddle attachment cream butter until light & fluffy
- Add in confectioners sugar & beat slowly
- Once mixture looks moist but crumbly add in creamer & beat until fluffy again - if you want it a little softer add additional creamer 1-2 tsp at a time
- Store in refrigerator for up to 1 week
Find out more about International Delight Delightful Moments & sign up for their newsletter.
Connect with them on Facebook, Twitter, Instagram & Pinterest.
This conversation is sponsored by International Delight. The opinions and text are all mine.
Looking for more great recipes using International Delight?
To see where I am linking today- visit HERE
Bacon Caramel Kettle Corn
If you love kettle corn & unique popcorn recipes then this Bacon Caramel Kettle Corn is perfect for you. This makes a caramel popcorn recipe AMAZING.
Popcorn recipes
Do you love caramel popcorn? How about kettle corn? Me too – so much so that I had a hard time deciding which I would use for my latest popcorn recipe when planning our family movie time. So I decided to mix the two & add a little extra special too.
You see – I love to pick up a variety of flavors of Pop Secret when I’m at Walmart doing my weekly shopping. We try to have some sort of family time during the week & if it’s a movie, then it always involves popcorn.
Before my son got a job we would have family movie night on the weekends. Now he works until quite late on the weekend & so we have had to shift our movie time to week day afternoons. Which is fine with me – I just have to break away from the studio earlier. I usually grumble about having way too much to do but I’m always so happy once I’m finally sitting with my family & finding a little breather in my week.
RIGHT NOW: Buy any 3 Pop-Secret items between 7/31 – 8/31 and get a Free ticket to the Fantastic Four movie (up to $5) while supplies last!
Seems that the older my kids get the harder it is to get time with all 5 of us together. So I really cherish these times when we can make some goodies, gather around & enjoy each other’s company for a little while.
What’s your favorite thing to make for movie night?
Bacon Caramel Kettle Corn
Ingredients
- 1 pack Pop Secret Sweet 'n Crunchy Caramel
- 1 pack Pop Secret Sweet 'n Crunchy Kettlecorn
- 1/4 cup butter
- 1/2 cup corn syrup
- 1 cup packed brown sugar
- 7 oz sweetened condensed milk
- 1/8 tsp salt
- 1 cup bacon crumbles
Instructions
- Pop both bags of popcorn in microwave to package directions & combine in a large bowl with your bacon crumbles - set aside
- Combine butter, corn syrup, brown sugar, sweetened condensed milk & salt in a saucepan
- Attach a candy thermometer to the side- don't let the tip touch the bottom of the pan- but make sure it's well within the liquid.
- Heat over medium-high -stirring constantly until mixture boils
- Once it boils reduce heat to medium & continue stirring until thermometer reaches 220 degrees
- Remove from heat, carefully remove your thermometer & drizzle mixture over the popcorn
- Fold with a spatula to coat the popcorn & bacon with caramel
- Enjoy immediately - the bacon should not be left out at room temperature for very long. This is best enjoyed at the time of preparation.
This post is part of a social shopper marketing insight campaign with Pollinate Media Group® and Pop Secret, but all my opinions are my own. #pmedia #pop4Fantastic4
Want more great popcorn recipes?
Here are a couple other great popcorn recipes from some great bloggers!
25 Popcorn Recipes – from Reasons to Skip the Housework
100 of the Best Popcorn Recipes from Yellow Bliss Road
To see where I am linking today- visit HERE
Bacon Banana Split
This Bacon Banana Split is the most over the top banana split dessert ever! One of my favorite bacon recipes because of it’s salty sweet combo, it’s delicious
Bacon month continues & this has got to be my all time favorite way to take my bacon in the oven & turn it into something so delicious that I can’t get enough! I wanted this to really be an over the top banana split for adults. So I chose to pass on things like rainbow sprinkles & traditional banana split flavors. Instead, I chose to use butter pecan & salted caramel ice cream along with a rich vanilla bean. Then I topped it with homemade dulce de leche – whipped cream & of course I still had to have my cherry with all those bacon crumbles.
All that salty & sweet come together like nothing ever before. Even my hubs (who claims to be anti “sweet with meat”) was LOVING this creation. I’m not sure why he doesn’t like things like syrup touching his bacon or sausage during breakfast. But this is somehow quite different for him because he was having a hard time sharing with me. I however happen to love mixing bacon with sweet & savory dishes – so stay tuned for more fabulous bacon recipes to come this month. I have a few that I CAN’T WAIT to share with you!!!
But for now- check out this crazy, over the top banana split that I know you will LOVE!
Bacon Banana Split
Ingredients
- 2-3 bananas per boat depending on the size of each boat
- 1 scoop each ice cream flavor - butter pecan vanilla bean & salted caramel
- 2 tbsp salted peanuts
- 2 tbsp dulce de leche
- Whipped cream
- 3 tbsp bacon crumbles
- 1 cherry
Instructions
- Peel bananas & slice them lengthwise - place in boat
- Top with ice cream, followed by dulce de leche, then peanuts, whipped cream, bacon & cherry
- ENJOY!!
Don’t forget to grab all these other FABULOUS bacon recipes by my fellow bacon month bloggers!!
Chocolate Peanut Butter Bacon Cake
Roasted Brussels Sprouts with Bacon and Almonds
Looking for more bacon recipes?
Check out some great bacon recipes from my friends:
50 Maple Bacon Dessert Recipes
Slow Cooker Cheesy Bacon Ranch Potatoes
To see where I am linking today- visit HERE
Mint Chocolate Chip Ice Cream
Need an easy no-bake dessert to wow your crowd? This homemade Mint Chocolate Chip Ice Cream is so easy & beyond delicious! Perfect for mint chocolate lovers everywhere!
I know we are nearing the end of frozen treat season. At least here in North Idaho anyway. By the end of the month, our highs typically don’t even reach 80 degrees anymore.
It’s sort of sad because I have to stop sharing all these delicious frozen desserts with you all. But at the same time, I’m excited because I have SO MANY fall recipes headed your way. But before we get to that- you have to make this Mint Chocolate Chip Ice Cream.
Scroll to the bottom for the Printable Recipe
Blackberry Lemon Oreo Parfait
I love a simple dessert recipe! This Blackberry Lemon Oreo Parfait – is the perfect easy dessert recipe to brings the big smiles. Just 3 ingredients & a couple minutes is all it takes.
My family loves blackberry jam. Like- can’t get enough LOVE it! So I’m always getting ideas from them on what we should use it on. It’s not good enough with breakfast. They want it at lunch & dessert too. If they could find a way to add it to dinner, I’m sure that would be happening. So when they came up with this idea to use it in a parfait with lemon flavored Oreo cookies I knew we were in for something yummy.
Lemon & blackberry are so great together! Add to that a recipe as simple & easy as this & I’m all in. You know how I love things that the kids can make on their own. It’s great to find them in the kitchen making some sort of tasty treat that I can enjoy. They can be so imaginative & I love seeing their kitchen creativity come out.
So if you are looking for a quick & easy dessert idea, you definitely have to give these a try. It’s effortless, quick & delicious.
Blackberry Lemon Oreo Parfait
Ingredients
- per 8oz glass
- 4 Lemon filled Oreo cookies
- 4 ounces vanilla pudding
- you can either make your own with the mix & milk or use the ready made packs
- 4 tbsp homemade blackberry jam
Instructions
- Crumble 2 Oreo cookies in the bottom of the glass
- Add 2 tbsp jam on top of the cookies
- Top with all 4 ounces of pudding
- Crumble 2 more cookies
- Spoon on remaining jam
- Enjoy
Looking for more great dessert recipes?
Peanut Butter & Jelly Ice Cream
To see where I am linking today- visit HERE
Cannoli Pancakes
If you love a good Cannoli, then you will love these easy Cannoli Pancakes! Deliciously decadent but easy breakfast idea to bring big smiles!
So the other day I had some Cannoli filling left over from some other recipes I was working on. I started thinking of ways I could use it – I certainly couldn’t let it go to waste.
Then it hit me. One thing I do almost as good as dessert is an over the top breakfast idea.
Probably because I firmly believe that a breakfast that can rival the best dessert is a great way to start the day. That’s when I decided that the cannoli filling would be fabulous in Cannoli pancakes. I was sooooo right!
Oh boy. The hubs was sure happy that he was home on the day I made these. Usually he’s missing when it comes to deciding who’s going to get to eat some of the things I make.
The kids luck out most of the time. But on this day – he & I split this stack of delicious pancakes. I was in heaven. He looked at me & said “it’s a good thing I usually miss recipes like these around here”.
That’s probably true – because we would make certain things a lot more frequently if he were able to try them. 🙂 But in this case – these are the perfect easy breakfast recipe to make for the most special of guests & definitely for special occasions or holidays. I can’t wait to make them again.
What special occasion would you make these for?
More Awesome Pancake Recipes
Peppermint Chocolate Truffle Pancakes
3-Ingredient Chocolate Protein Pancakes
Peanut Butter Overload Pancakes
Cannoli Pancakes
Ingredients
Pancakes
- 1-1/2 cups all-purpose flour
- 1 tbsp granulated sugar
- 3-1/2 tsp baking powder
- 1 tsp salt
- 1 eggs
- 1-1/4 cups 2% milk
- 3 tbsp butter melted
- 1/4 cup mini chocolate chips
Cannoli Filling
- 2 cups ricotta cheese
- 3 tbsp whipped topping
- ½ cup confectioners sugar
- 1 tsp vanilla extract
- ¼ cup mini chocolate chips
- *additional confectioners sugar for dusting
- *chocolate syrup for garnish
Instructions
Pancakes
- Combine all ingredients in large bowl
- Whisk until combined
- Heat your griddle to approx 350 degrees
- Ladle batter into rounds & cook until bubbles start to form on the surface - flip
- Cook second side until golden brown
- Remove & create filling
Filling
- Whisk ricotta in a large bowl until smooth - or pulse in a food processor to make the process a little faster. It should be creamy - not gritty.
- Add in confectioners sugar & vanilla & whisk until combined
- Fold in whipped topping & chocolate chips
Assemble
- layer cannoli filling between pancakes & top with a large scoop of filling on top
- Dust with confectioners sugar & drizzle with chocolate syrup
- Enjoy
How about some more of our favorite easy breakfast ideas?
Peanut Butter Overload Pancakes
Peanut Butter Milkshake
This over the top Peanut Butter Milkshake is a peanut butter lovers dream. Thick, creamy & packed full of peanut butter makes this a perfect easy dessert.
It’s peanut butter bash time & this month we are pairing with ice cream!! Whooohoooo! So of course I had to create an awesome Peanut Butter Milkshake!! Oh my word I packed this so full of peanut butter – it was DELICIOUS!
My family loves it when it’s time to create for peanut butter bash because they all go bonkers for peanut butter. I love it because it’s full of protein & just a tablespoon will keep me feeling full for what seems like forever. So when we add it to a big ol’ over the top, decadent milkshake like this – WOW it’s GOOD! The hubs & I split the first half of this & had to bring the kids in the polish off the rest. It was filling & completely satisfying that’s for sure.
You absolutely HAVE TO make this – it’s INCREDIBLE!
Peanut Butter Milkshake
Ingredients
- 3 large scoops vanilla bean ice cream
- 2 heaping tbsp creamy peanut butter
- 1/2 cup milk
- peanuts chocolate jimmies, chocolate syrup & cherry or garnish - opt
Instructions
- Combine ice cream, milk & peanut butter in blender
- Blend on high until smooth & creamy
- Add a little drizzle of chocolate syrup in serving glass
- Pour milkshake in glass
- Top with peanuts, chocolate jimmies & a cherry
- Enjoy!
To see all the other AWESOME peanut butter & ice cream recipes being shared today – check them out below!
Looking for more great peanut butter recipes?
Peanut Butter Seven Layer Bars
Black Velvet Peanut Butter Parfait
Peanut Butter Overload Pancakes
To see where I am linking today- visit HERE
Monster Cookie Bars
If you are looking for more yummy bar recipes then these Monster Cookie Bars are perfect. Peanut butter & oats come together into an easy cookie bar recipe that is absolutely delicious!
I have been wanting to make monster cookies for what seems like forever. Every time I see another recipe for them I get inspired & then somehow it never seems to happen.
Probably because sometimes cookies can take a while to make. Letting certain ingredients sit out to come to room temperature, waiting for each batch to bake before the next can go in.
View postCookies & Cream Ice Cream
Easy to make homemade Cookies & Cream Ice Cream is an Oreo lover’s dream. Rich & creamy ice cream packed full of Oreo cookies is a tasty & yet simple dessert.
WOW, remember last week when I shared my cookies & cream pudding pops?
Even after enjoying those my craving for cookies & cream did not go away. I think I was on a mission from the start & I should have just begun with the ice cream. Because that is where we ended up anyhow. This Cookies & Cream Ice Cream is amazing!
Scroll to the bottom for the Printable Recipe
Dark Chocolate Blueberry Brownies
This shop has been compensated by Collective Bias, Inc. and its advertiser. All opinions are mine alone. #DiscoverBrookside #CollectiveBias
Perfectly moist & fudgy brownies packed full of dark chocolate covered blueberries, covered in cream cheese frosting & topped with a delicious blueberry & cranberry almond chocolate bar. These Dark Chocolate Blueberry Brownies are another one of my yummy bar recipes that are sure to wow the crowd.
If you are looking for a great dessert idea to bring to your next backyard bbq – I have just the thing.
Have you seen the chocolate covered fruits & chocolate bars by Brookside chocolates (sold exclusively at Target)? They are one of my favorite snacks. I pick some up every time I am in Target. They work great for adding on top of an evening treat, mixing in a morning granola recipe or just as a midafternoon snack.
I have been wanting to use them in more recipes, so I created these incredibly delicious Dark Chocolate Blueberry Brownies. Let me show you just how easy it is to make these!
First take your brownie ingredients & mix in a medium size bowl.
Then transfer to your prepared baking pan.
Then take your dark chocolate blueberries & sprinkle them on top.
Bake, remove & allow to cool completely on wire rack. In the meantime you can whip up your frosting.
Once the brownies are cool, spread your frosting on top in a nice even layer.
Keep chilled until ready to serve. When serving, remove brownies by pulling up & out with overhanging parchment. Then cut your squares.
Then take this gorgeous chocolate bar & break into squares. Top on each brownie. Done!
See, I told you it was easy & I promise that everyone will love them!
You can find these Brookside chocolates products to create your own brownies at the checkout area at Target.
Now through Aug 1, use the Cartwheel app to save 30% on Brookside Chocolate at Target & from Aug 23-Sept 19 you can save 15% on Brookside chocolate using Cartwheel.
To find out more – connect with Brookside chocolate on Facebook
Dark Chocolate Blueberry Brownies
Ingredients
Brownies
- 1 cup all-purpose flour
- 3/4 cup sugar
- 1/2 cup firmly packed brown sugar
- 1/2 cup unsweetened cocoa powder
- 1 tsp. baking powder
- 1/2 tsp. salt
- 1/2 cup applesauce
- 1/3 cup egg substitute
- 2 Tbsp. canola oil
- 2 squares 1 oz. each semi sweet baking chocolate, melted
- 1 tsp. vanilla
- 1 bag Brookside Chocolates- dark chocolate blueberry
- 1 Brookside Chocolate bar - Blueberry & Cranberry Almond
Frosting
- 8 oz cream cheese - softened
- 1/2 cup butter - softened
- 1-1/3 cup confectioners sugar
- 1/2 tsp vanilla extract
- pinch of salt
Instructions
Brownies
- Heat oven to 350°F.
- Spray 8-inch square baking pan with nonstick cooking spray.
- Stir together flour, sugar, brown sugar, cocoa powder, baking powder and salt until well mixed.
- Stir in applesauce, egg substitute, canola oil, melted baking chocolate and vanilla just until well mixed; careful not to over stir.
- Spread brownie mixture into prepared pan.
- Sprinkle with dark chocolate covered blueberries
- Bake 20 to 24 minutes or until toothpick inserted in center comes out clean.
- Do not over bake.
Frosting
- Combine cream cheese & butter in mixer bowl & beat on high until blended & airy
- Add vanilla, salt & confectioners sugar
- Beat until well combined
- Immediately spread on top of your cooled brownies
Cut & top with chocolate squares
Looking for more Yummy Bar Recipes?
Brownie Brittle
To see where I am linking today- visit HERE
Cookies & Cream Pudding Pops
These Cookies & Cream Pudding Pops are a great easy dessert recipe that is positively delicious! If you love traditional cookies cream, these are the treat for you.
For the longest time I have been craving traditional cookies & cream ice cream. The hubs & I were talking about our favorite things we remember about our childhood & he brought up cookies & cream. I remember when it first came on the market – it was huge. Everyone was obsessed & it was SO GOOD. I remember enjoying some with my friends & being super stoked if we found a nearly whole Oreo in our scoop. It was a big deal & just thinking back on those fond memories really had me wanting some. So since I didn’t have exactly what I needed at the time to make ice cream & I didn’t want to run out to the store- I improvised with these pops.
These are really so simple to make & it’s amazing how frozen pudding can taste just like ice cream. The creaminess & the Oreos will make cookies & cream lovers swoon. YUM!
These are definitley the perfect way to end my day. I hope that my kids can look back one day & have fond memories of enjoying a little cookies & cream with us.
You really have to give these a try!
Cookies & Cream Pudding Pops
Ingredients
- 1 box vanilla pudding mix
- 3 cups cold milk
- 1/2 of an 8oz tub whipped topping
- 1-2 Oreo cookies per pop mold
- Popsicle sticks
Instructions
- In a large bowl combine pudding mix & milk- whisk until fully combined
- Fold in whip topping & stir until smooth
- Break 1-2 Oreo cookies into each pop mold
- Fill each mold with pudding mixture
- Add sticks
- Freeze 8-10 hours, preferably overnight
I originally shared this over at Bloom Designs Online.
Looking for more easy dessert recipes?
To see where I am linking today- visit HERE
Almond Joy Sorbet
Looking for more easy dessert recipes? This delicious no-churn Almond Joy Sorbet is just the thing to wow your crowd. Coconut, almonds, chocolate make this one amazing dessert.
I am obsessed with coconut. All things coconut. It’s sort of become a joke around here because the whole family knows that if they see something that taste like coconut, made with coconut or even smells like coconut – it’s mine. No exceptions. I can’t get enough. So when I created this Almond Joy Sorbet to share over with my dear friend Desiree – I was swooning just as soon as I was able to wrap up shooting & enjoy some.
This sorbet, no-churn & dairy free. (except the mini chocolate chips) Just 3 ingredients & a blender is all you need to get this started – then you add your 3 mix-ins. Can’t go wrong with a dessert that comes together that easy & tastes oh so good.
If you are a coconut lover like I am, you absolutely must try this sorbet. You will fall in love!
Almond Joy Sorbet
Ingredients
- 2 cans 13.5 oz each coconut milk
- 12 ounces cream of coconut
- 1-1/2 cups water
- 1/4 cup toasted coconut
- 1/4 cup slivered almonds
- 1/4 cup mini-chocolate chips
Instructions
- Combine coconut milk & cream of coconut in blender & blend on high until smooth- about 1 minute
- Add in water & pulse to combine
- Transfer to freezer safe container, cover & place in freezer for about 2 hours
- After a couple hours in the freezer it should be thick enough to mix in your remaining ingredients
- Remove cover & slowly fold in your almonds, coconut & chocolate chips being careful to not let it all sink to the bottom
- Cover & return to freezer to finish setting for at least 6 hours or overnight
Looking for more easy dessert recipes?
To see where I am linking today- visit HERE
Sugar Cookie Strawberry Pies + Behind the Scenes Tip
This post is part of a social shopper marketing insight campaign with Pollinate Media Group® and Wet-Nap®, but all my opinions are my own. #pmedia #ConquerTheMess
These Sugar Cookie Strawberry Pies are the perfect alternative to a traditional homemade strawberry pie. Sugar cookie cup, strawberries & drizzled with glaze, then topped with whipped cream make a delectable treat. Psst… I’m also sharing a few behind the scenes pics on how I clean up after a messy shoot like this.
Look at these. Little mini strawberry pies made with sugar cookie cups. So good.
Putting together yummy treats like these can be really messy though. I’m constantly touching the food to position it just right. In this case the whipped cream kept sliding off the tops of the strawberries. I adjusted it more times than I can count before I decided to just let it be.
This is the aftermath of drizzling all that strawberry glaze on top of each one. It’s a STICKY MESS! I usually keep a wet washcloth near by for wiping my hands & cleaning up spills & things like this. I don’t want to have to keep running down the hall to wash my hands every time I touch the food.
But now I have a much better solution! Did you know that these Wet-Nap® Cleansing Wipes are perfect for this sort of thing? (I picked them up at Walmart) I can have the package right there in the studio with me all the time. It has an easy open/close top to keep them perfectly moist for whenever I need one. I sooooo love that they have just enough cleaner in them so my hands aren’t sticky before I pick up my camera again for the next shot. I can tell you – I would be lost without these!
Visit Walmart for all your Wet-Nap® needs: 110-Count Hands, Face, & Body Cleansing Wipes, 24-Count Packettes Antibacterial Hand Wipes and 40-Count Canister Antibacterial Hand Wipes (while supplies last)
These are positively delicious & worth all the mess they made so I could share them with you all here today.
You are going to want to make these with all those wonderful summer strawberries available right now!
For more info on Wet-Nap® Cleansing Wipes visit them on their website | Pinterest | Facebook | YouTube
Sugar Cookie Strawberry Pies
Ingredients
Sugar Cookie Cups
- 3 cups all-purpose flour spooned in & leveled- not scooped
- 1 tsp baking powder
- 1 cup butter
- 1 cup granulated sugar
- 1 large egg
- 1 tsp vanilla extract
Strawberry Glaze
- 1 cup water
- 1 cup granulated sugar
- 4 tbsp cornstarch
- 1 box strawberry jell-o powder
2 lbs strawberries - washed & hulled
whipped topping
Instructions
Bake cookie cups
- In a small bowl whisk together flour & baking powder - set aside
- In mixer bowl beat butter until soft
- Add sugar & mix well
- Add egg- mix again
- Add vanilla
- Add flour & mix until dough begins to clump together
- Roll dough into a ball & wrap with plastic wrap- refrigerate 1 hour
- Once dough has chilled, preheat oven to 350 degrees
- Pull off pieces of dough & roll into balls- then press into the wells of your muffin tin pan making the cup shape
- Bake 12-15 minutes & allow to cool in pan before removing
- To remove you can slide a butter knife along the side- they should pop right out
Prepare glaze
- Combine water, sugar & cornstarch in small saucepan & bring to a boil, whisking constantly until mixture is less white-more clear (you will notice it getting thicker & will be hazy)
- Remove from heat & whisk in jell-o powder
- Allow to cool for approx 5-10 minutes while you assemble your "pies"
- (don't wait too long, it will solidify as it cools)
Assemble
- Add your prepared strawberries to the tops of cooled cookie cups
- Drizzle with semi-cooled glaze
- Top with whipped cream
Looking for more great summer recipes?
Peanut Butter & Jelly Ice Cream
Banana Marshmallow Fudge Parfait
To see where I am linking today- visit HERE