


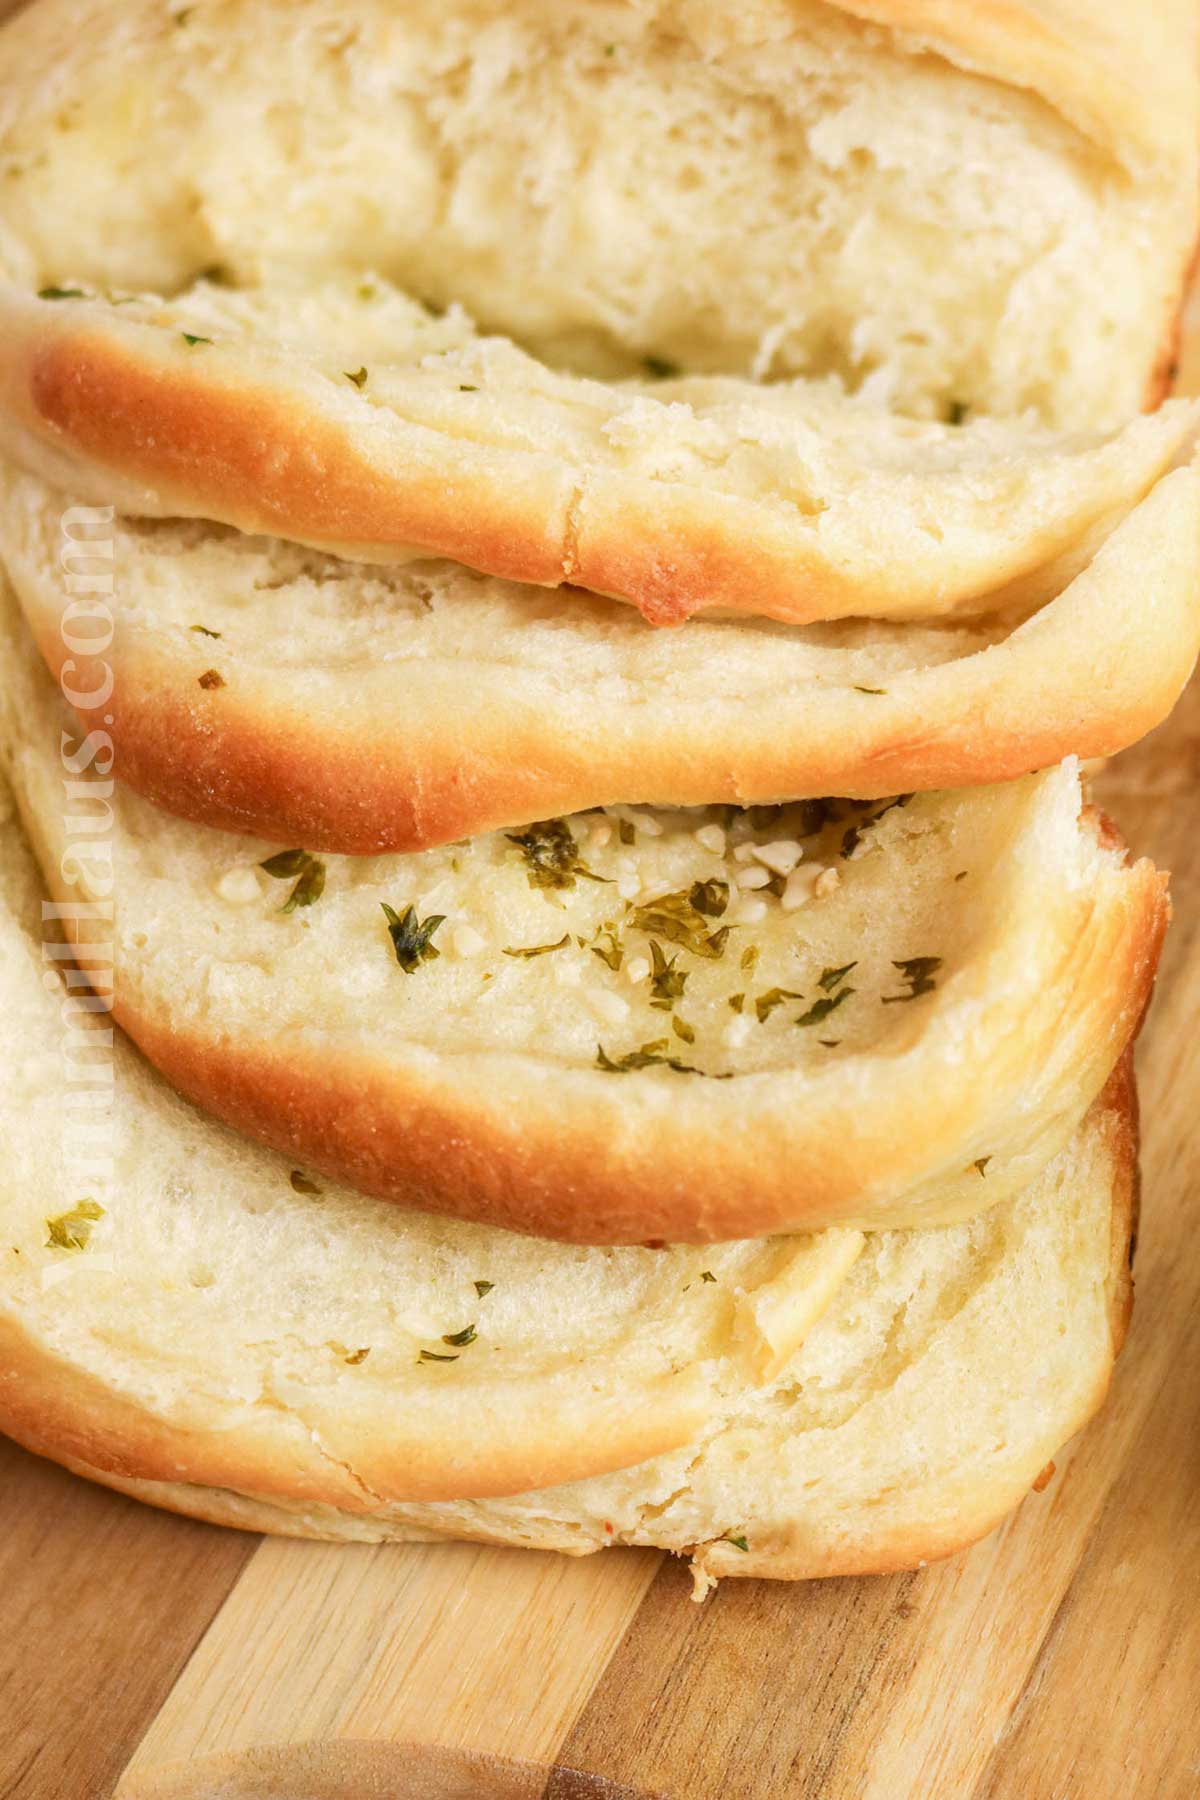
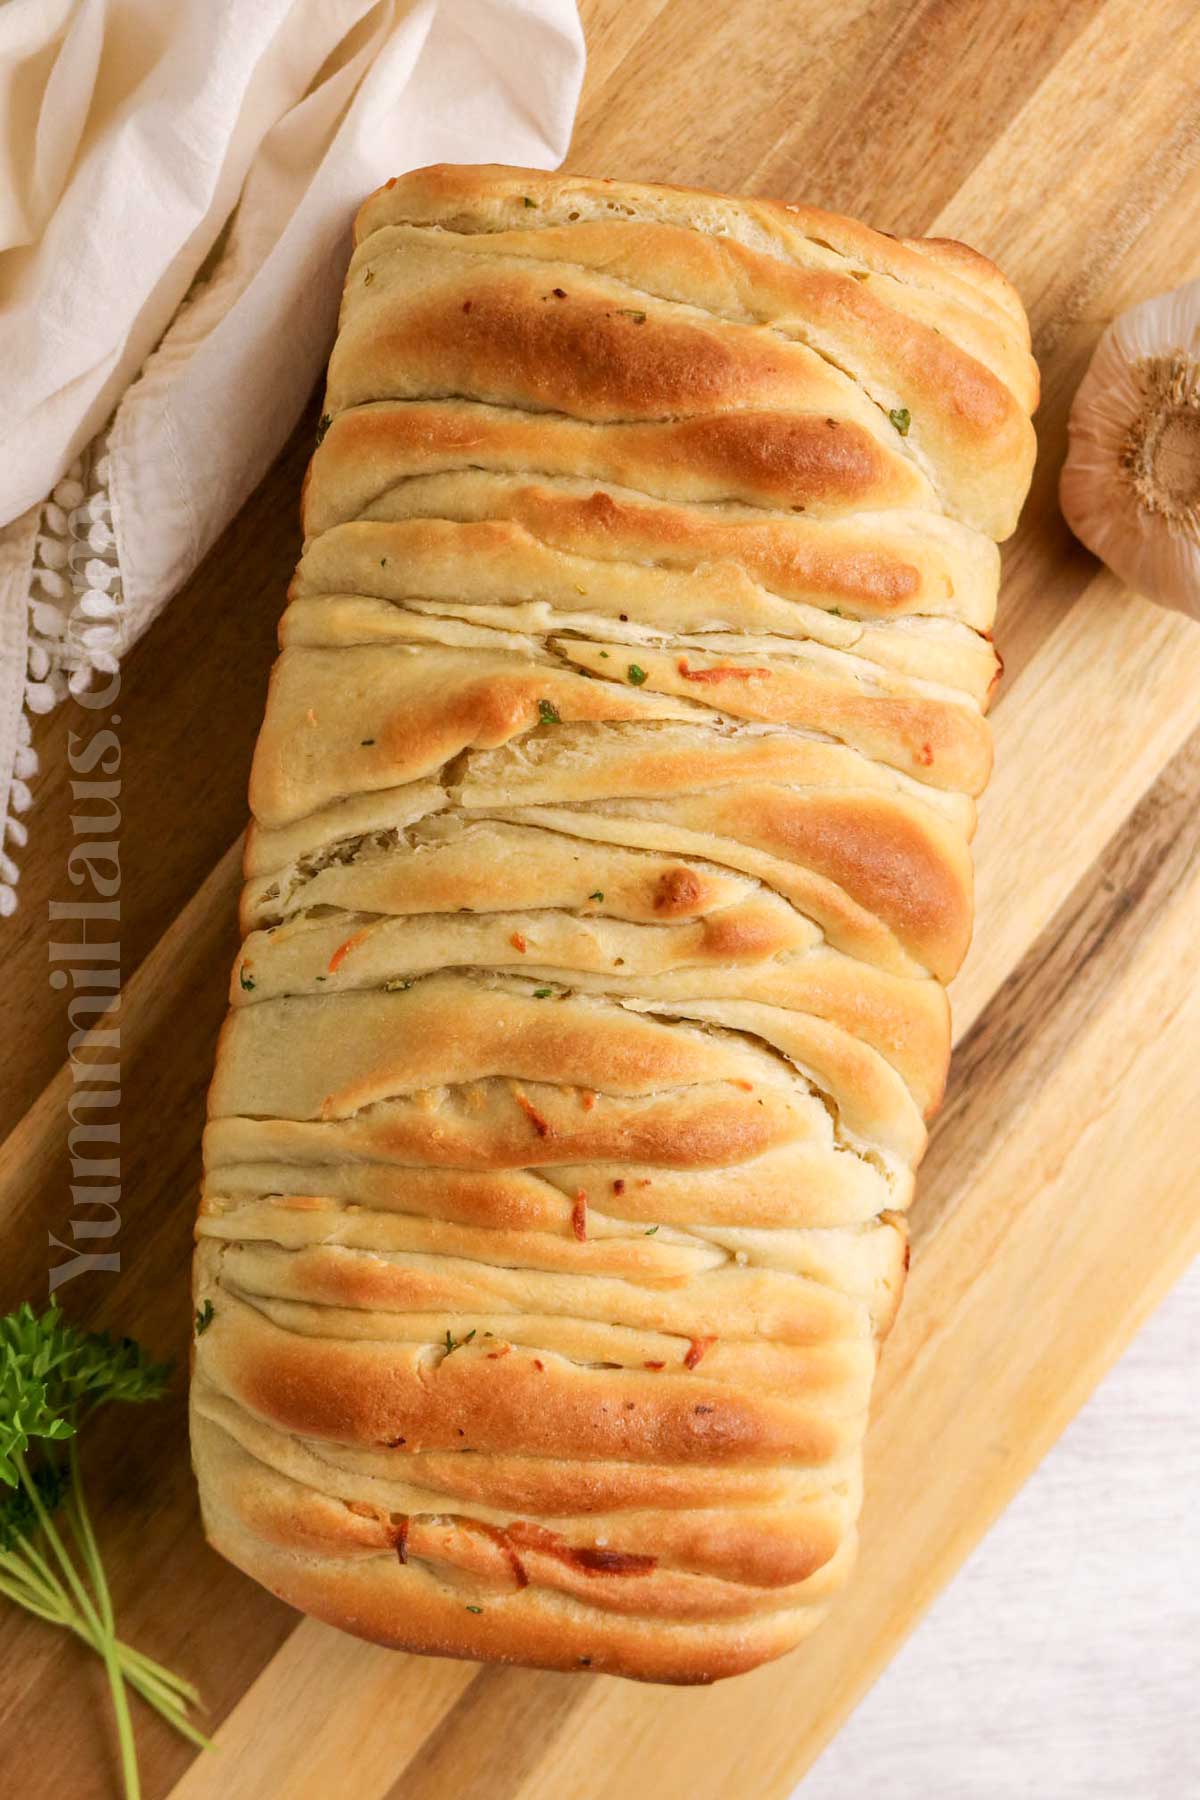
There’s something absolutely magical about fresh homemade bread, especially when it comes in the form of cheesy garlic pull-apart bread. This delicious loaf transforms simple ingredients into an impressive side dish that’ll have everyone reaching for another piece. Whether you’re serving it alongside minestrone soup or bringing it to a game day party, this fluffy bread is guaranteed to disappear in minutes.
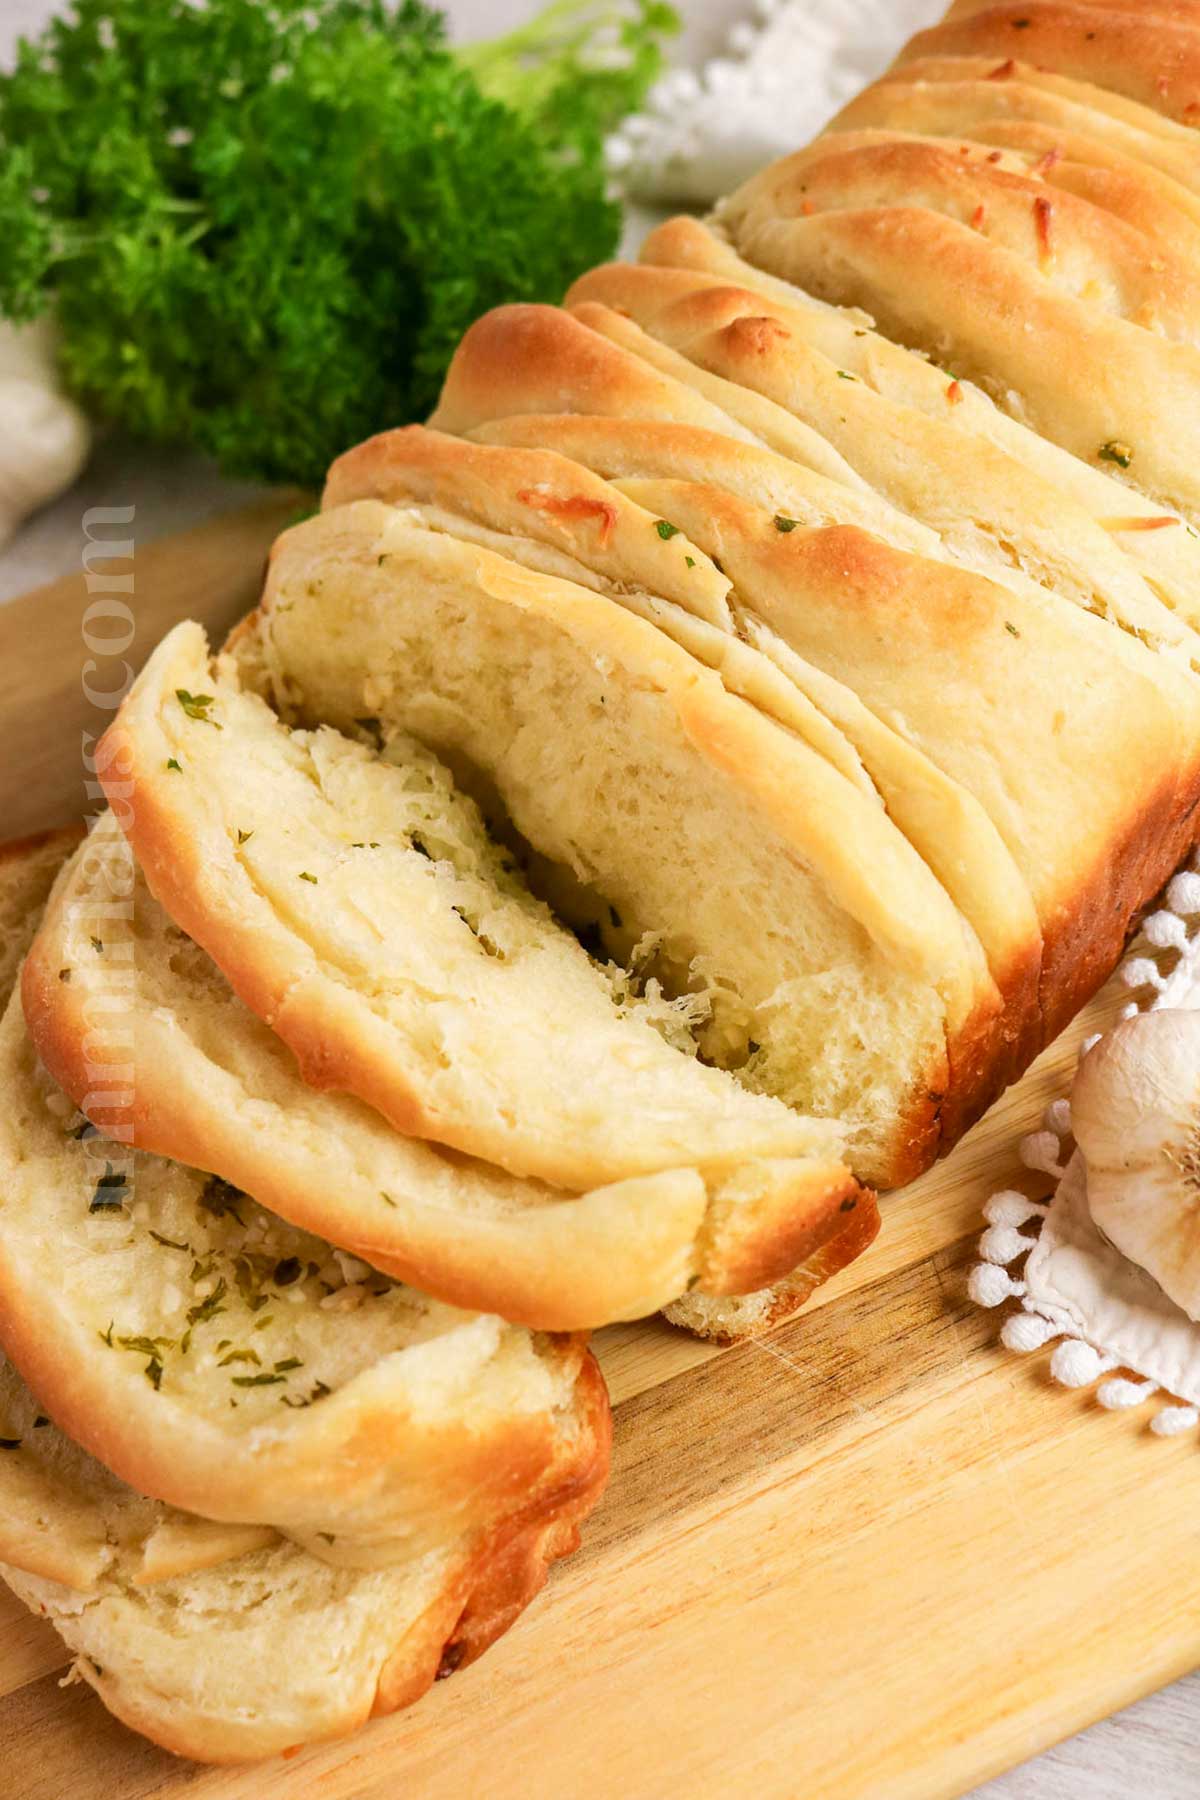
The best part about this recipe is watching everyone’s faces light up as they pull apart the garlicky bread layers to reveal all that melted cheese and butter goodness. It’s like cinnamon rolls met cheesy garlic bread and created the ultimate comfort food. Trust me, once you make this cheesy loaf, it’ll become your go-to recipe for gatherings, family dinners, or really any time you want to feel like a kitchen rockstar.
Gina’s Recipe Rundown:
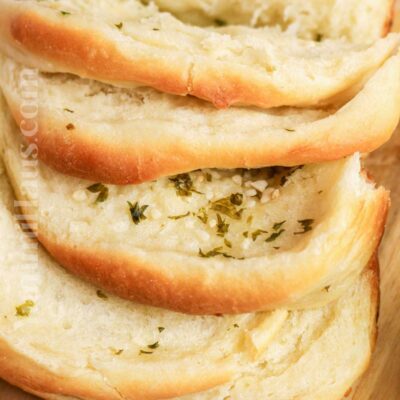
Texture: Soft, fluffy, and buttery with tender pull-apart layers filled with gooey melted cheese and a lightly golden crust.
Taste: Rich, buttery, and savory with garlicky flavor, melty cheese in every bite, and a hint of fresh herb brightness.
Ease to Make: Easy to make with simple ingredients and straightforward steps, making it a great homemade bread recipe for beginners and experienced bakers alike.
Why I love it: I love this recipe because it’s soft, cheesy, buttery, and packed with garlic flavor, plus it’s fun to pull apart and perfect for sharing.
Why You’ll Love This Recipe
This cheesy pull-apart garlic bread is seriously addictive. The layers of golden brown, buttery goodness make it impossible to eat just one piece. Unlike a regular loaf of bread, this one is designed for sharing and creates such a fun, interactive eating experience that your guests will absolutely love.
It’s also surprisingly easy to make, even if you’re new to bread baking. You don’t need fancy equipment or professional skills to achieve a beautiful, delicious loaf that looks like it came from a bakery. The active dry yeast does most of the work while the dough rises, and you get to have fun layering all the cheese and garlic butter mixture.
This recipe is incredibly versatile, too. You can customize it with your favorite cheeses, add fresh parsley for color, or even use it as a base for completely different flavor combinations. It works beautifully as a side dish for pasta, soups, or salads, but honestly, it’s good enough to be the star of the meal all on its own.


Ingredient Notes
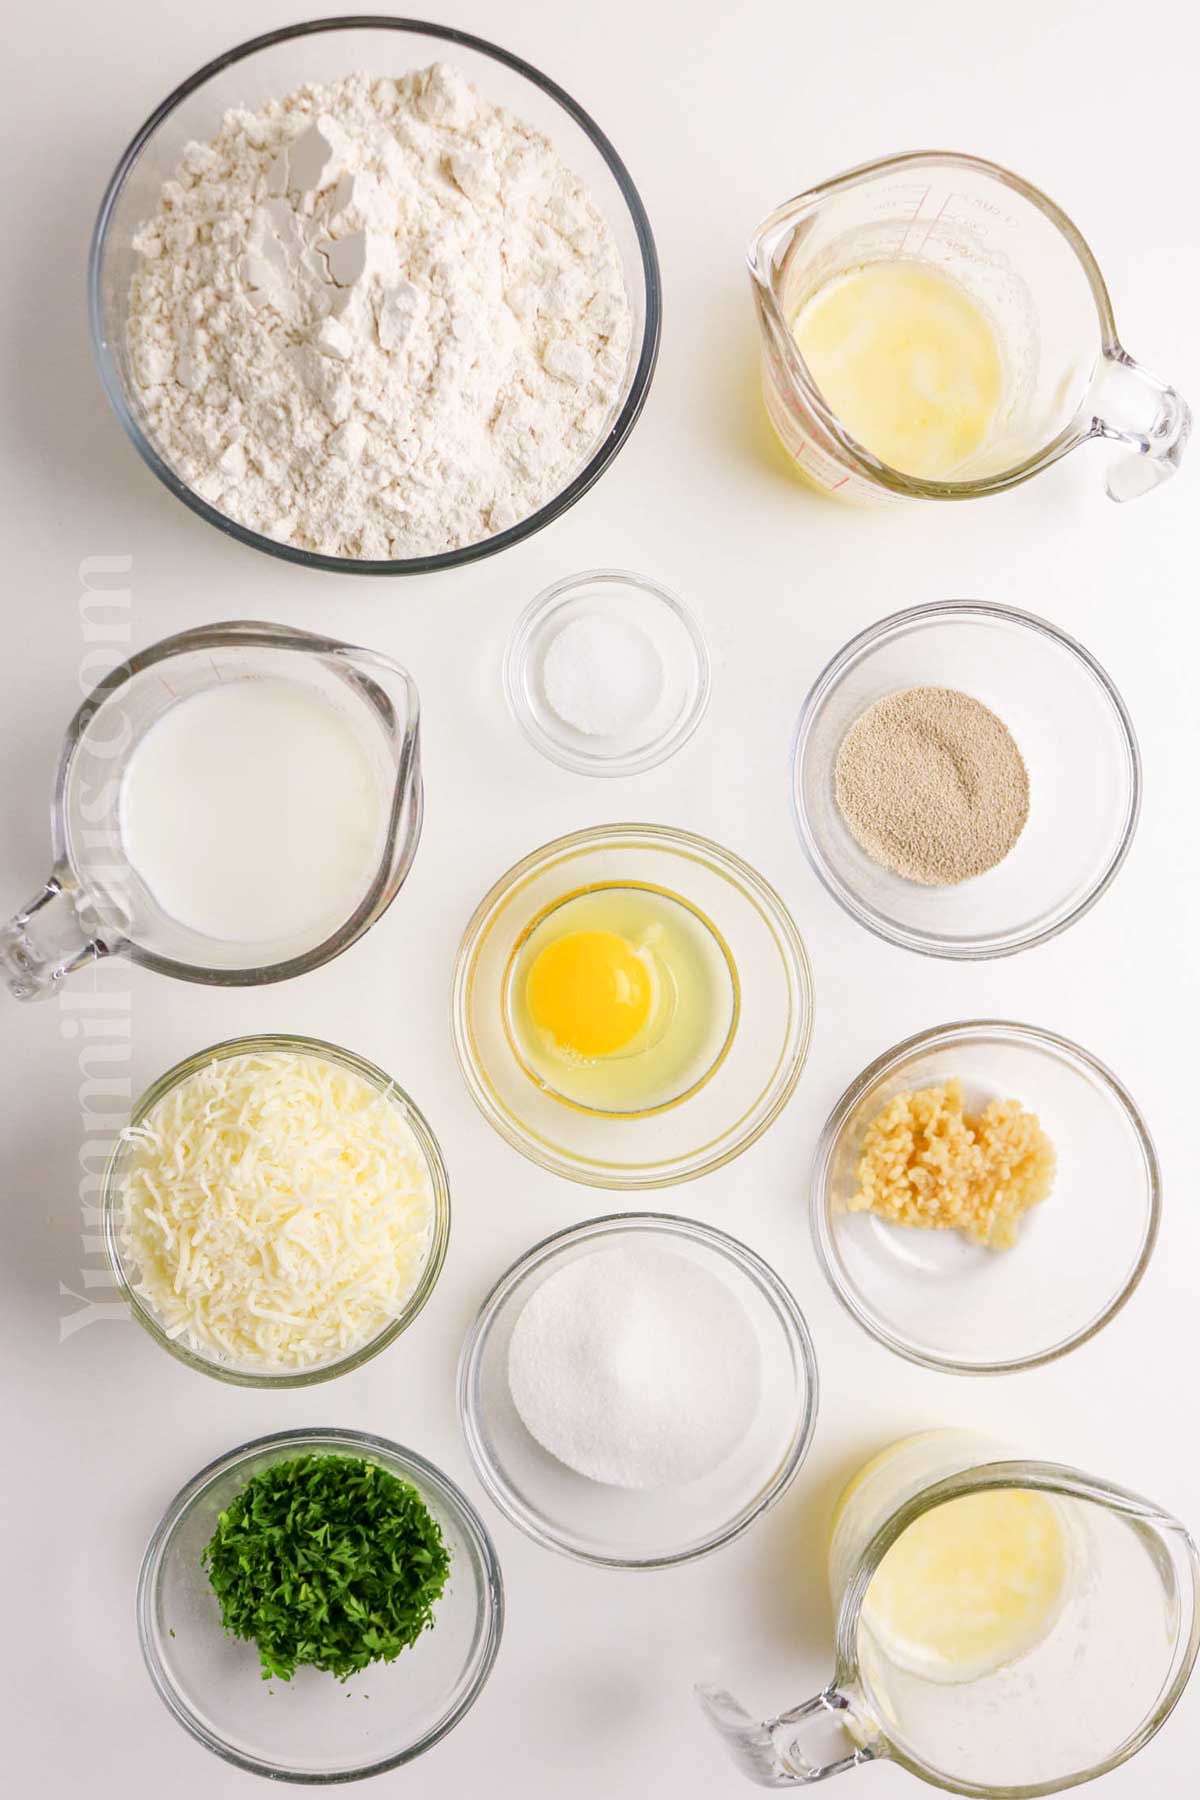
- All-purpose flour – Provides the structure for the bread and creates a soft, tender texture. Measure accurately for best results.
- Active dry yeast – Helps the dough rise and gives the bread its fluffy texture. Make sure it’s fresh and not expired.
- Milk (warm, 110°F) – Activates the yeast and adds richness to the dough. It should feel warm, not hot.
- Granulated sugar – Feeds the yeast and adds a touch of sweetness to balance the savory flavors.
- Butter – Adds richness, flavor, and softness to the dough.
- Egg – Helps bind the dough and adds tenderness and color.
- Salt – Enhances flavor and balances the sweetness in the dough.
- Butter, melted – Used for brushing the dough layers, adding moisture and buttery flavor.
- Garlic, minced – Adds bold savory flavor throughout the bread. Fresh garlic works best.
- Parsley (chopped fresh) – Adds fresh flavor and a pop of color. Dried parsley can be used if needed.
- Cheese (shredded: mozzarella, cheddar, or your choice) – Creates gooey, melty layers inside the bread. Use your favorite cheese or a blend for extra flavor.
Kitchen Equipment
- Large mixing bowl
- Small mixing bowl
- Measuring cups and spoons
- Whisk or spoon for mixing
- Large bowl for flour mixture
- Stand mixer with dough hook (optional)
- Rolling pin
- Pastry brush
- Loaf pan
- Clean kitchen towel or plastic wrap
- Oven
- Cooling rack (optional)
How to Make Layered Pull-Apart Bread
- Start by adding the warm milk, yeast, and 1 teaspoon of sugar to a mixing bowl. Give it a quick stir, then let it sit for 5–10 minutes until it gets nice and foamy. That means the yeast is ready to go.
- Once it’s proofed, mix in the melted butter and egg.
- In a separate large bowl, whisk together the flour, remaining sugar, and salt. Gradually add the dry ingredients to the wet ingredients, stirring until a dough starts to come together.
- Turn the dough out onto a lightly floured surface and knead for about 8–10 minutes, until it feels smooth and elastic. You can also use a dough hook in a stand mixer if you’d like. I wouldn’t recommend using a hand mixer with regular beaters for this step.
- Place the dough into a greased bowl, cover it, and let it rise for 1 to 1½ hours, or until it has doubled in size.
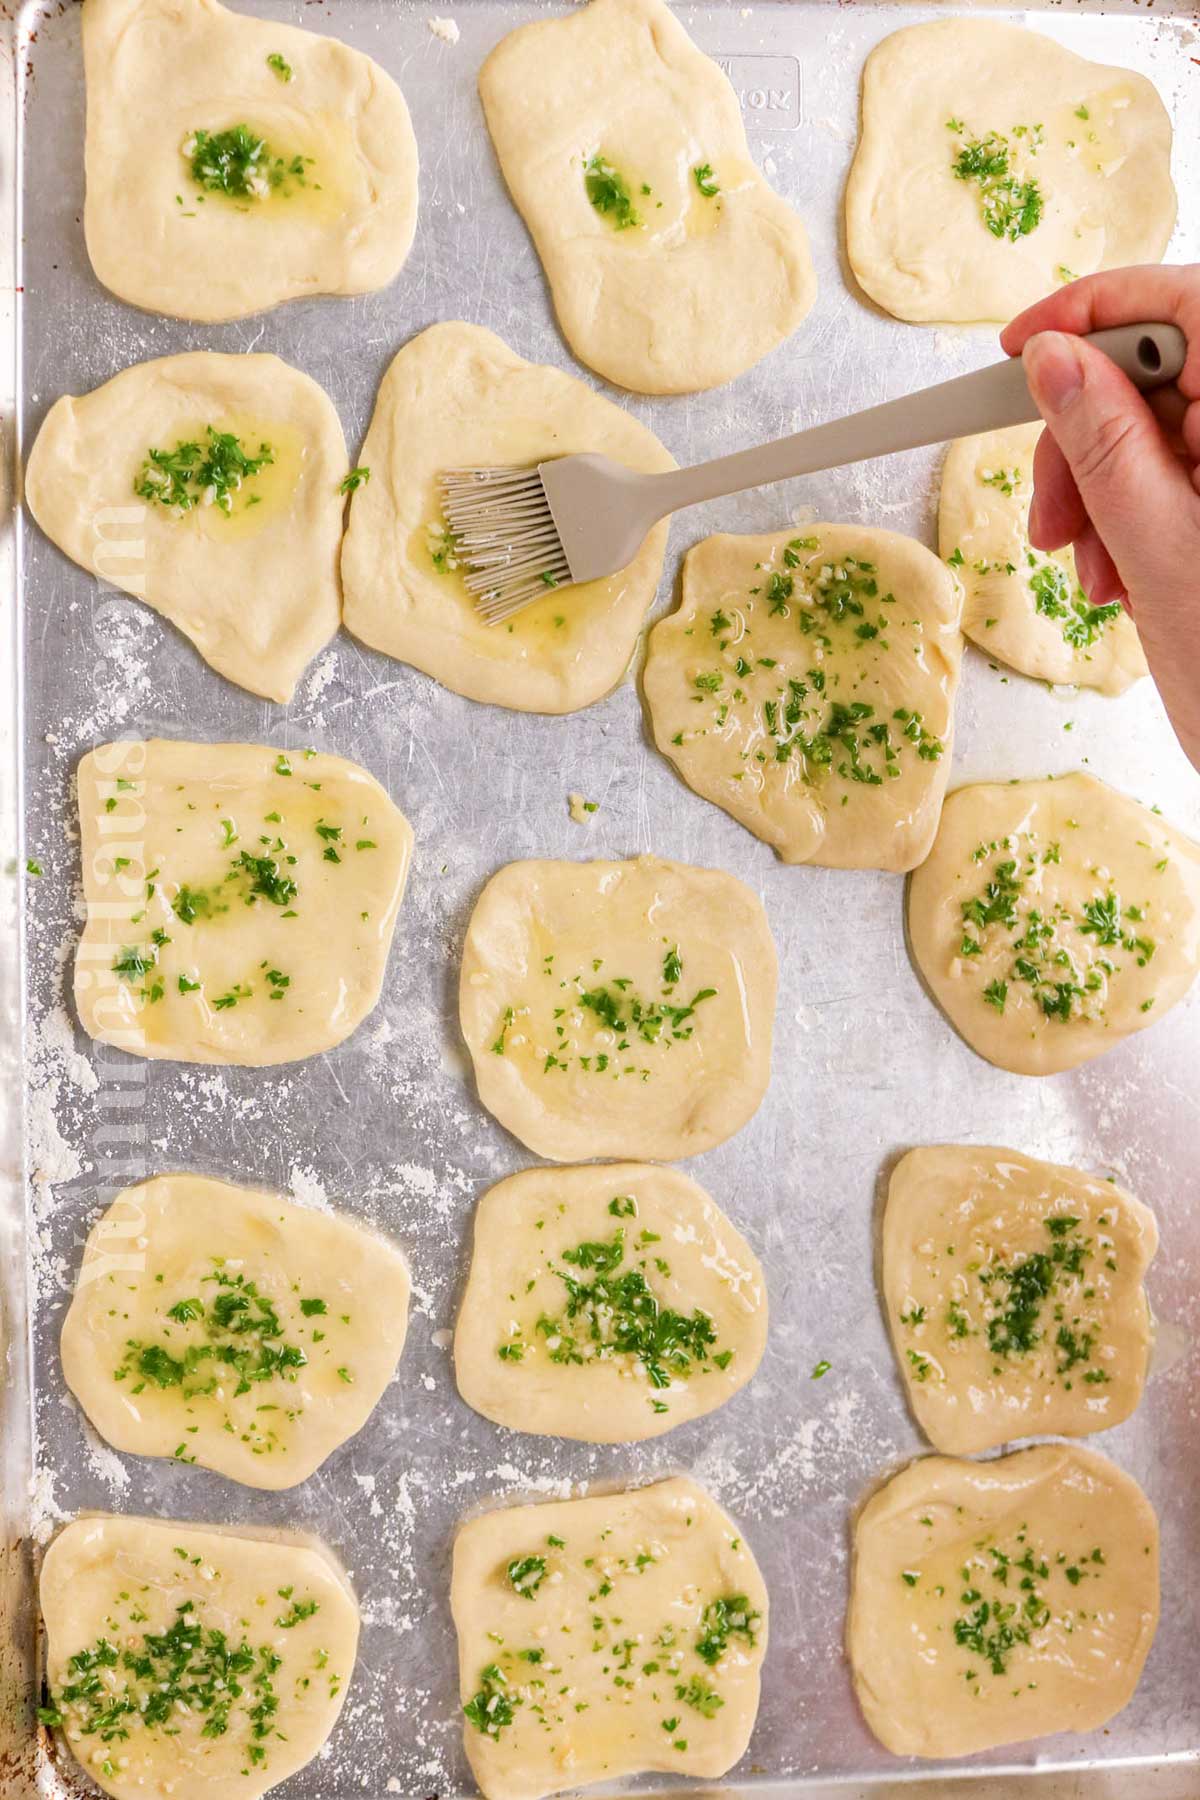
- Once risen, punch the dough down and divide it into 10–12 equal pieces. Roll each piece into a flat rectangle.
- In a small bowl, stir together the melted butter, garlic, and parsley. Brush this mixture evenly over each piece of dough, then sprinkle with shredded cheese.
- Fold each piece of dough in half to make a pocket, pressing lightly around the edges to help seal the cheese inside. Brush the tops with any leftover butter mixture.
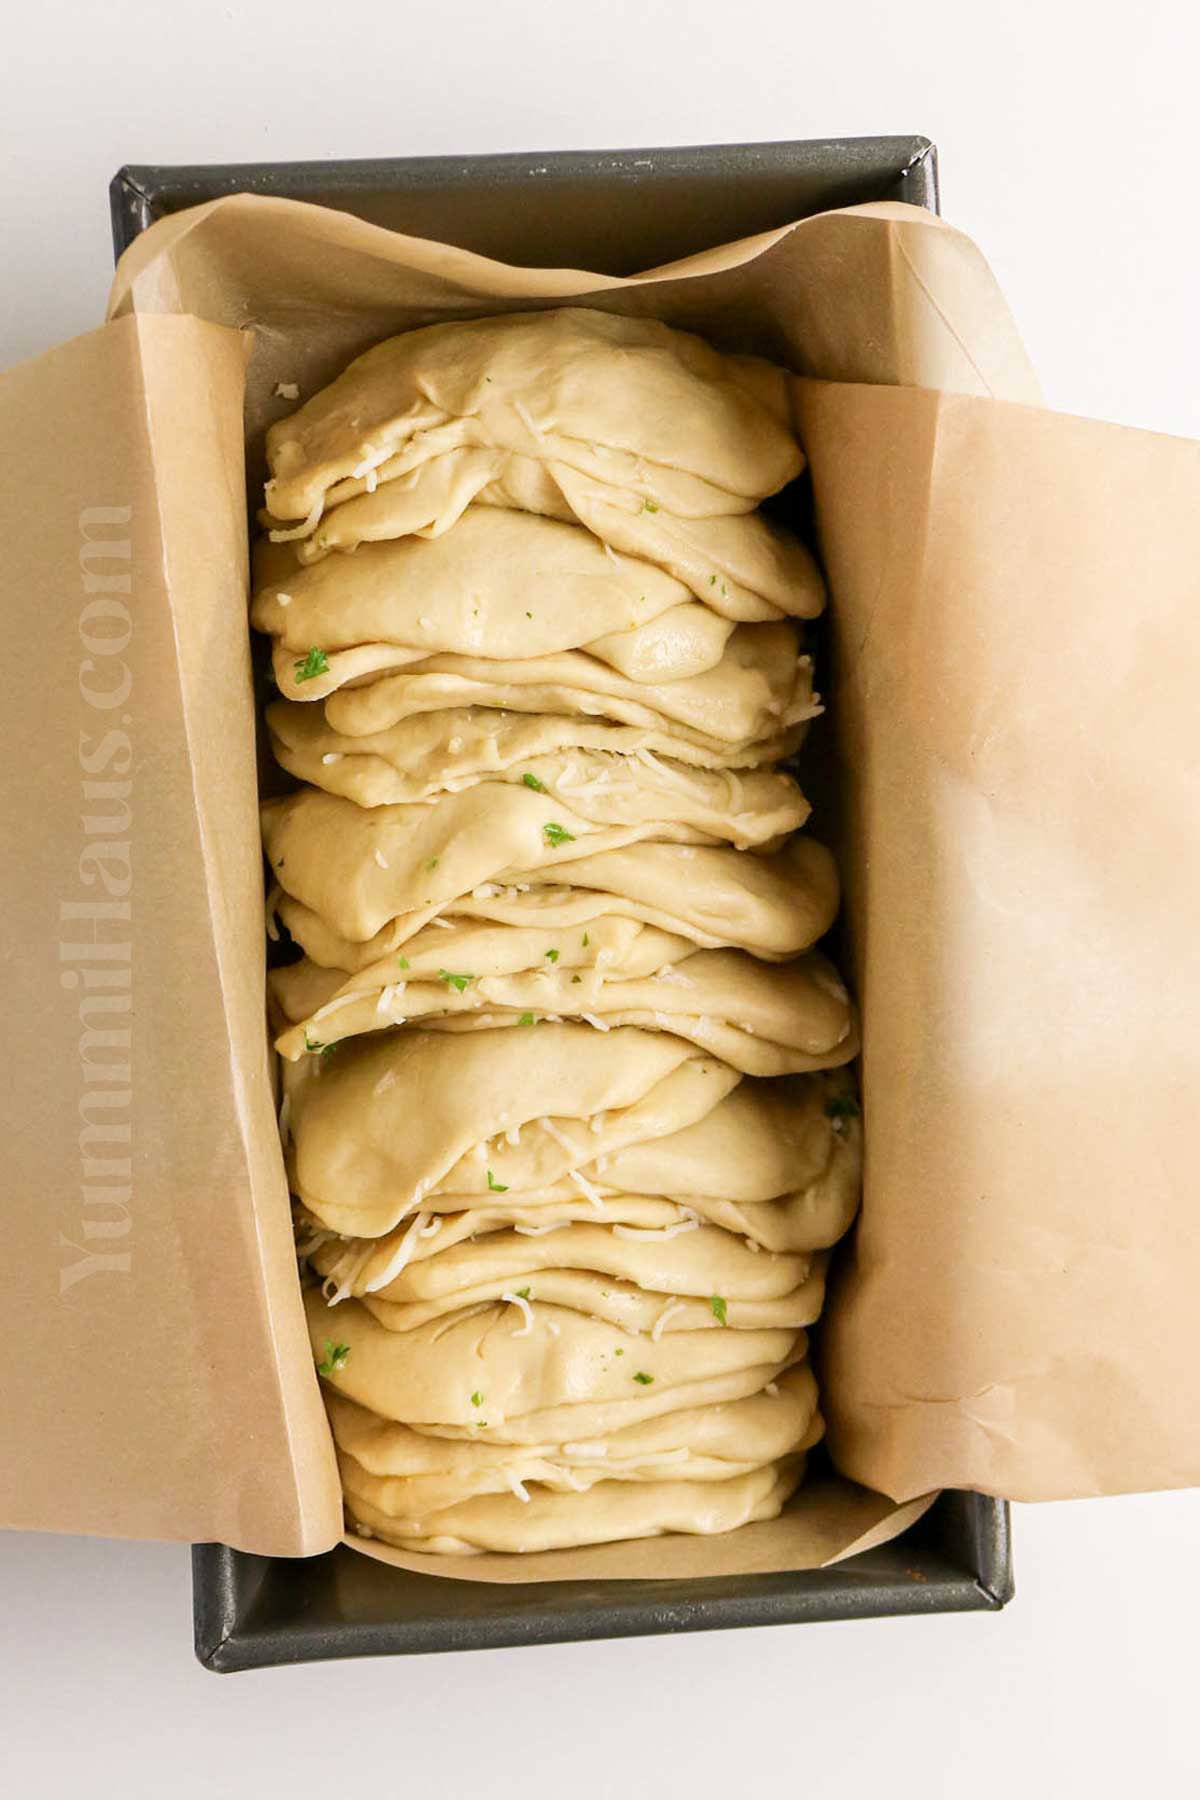
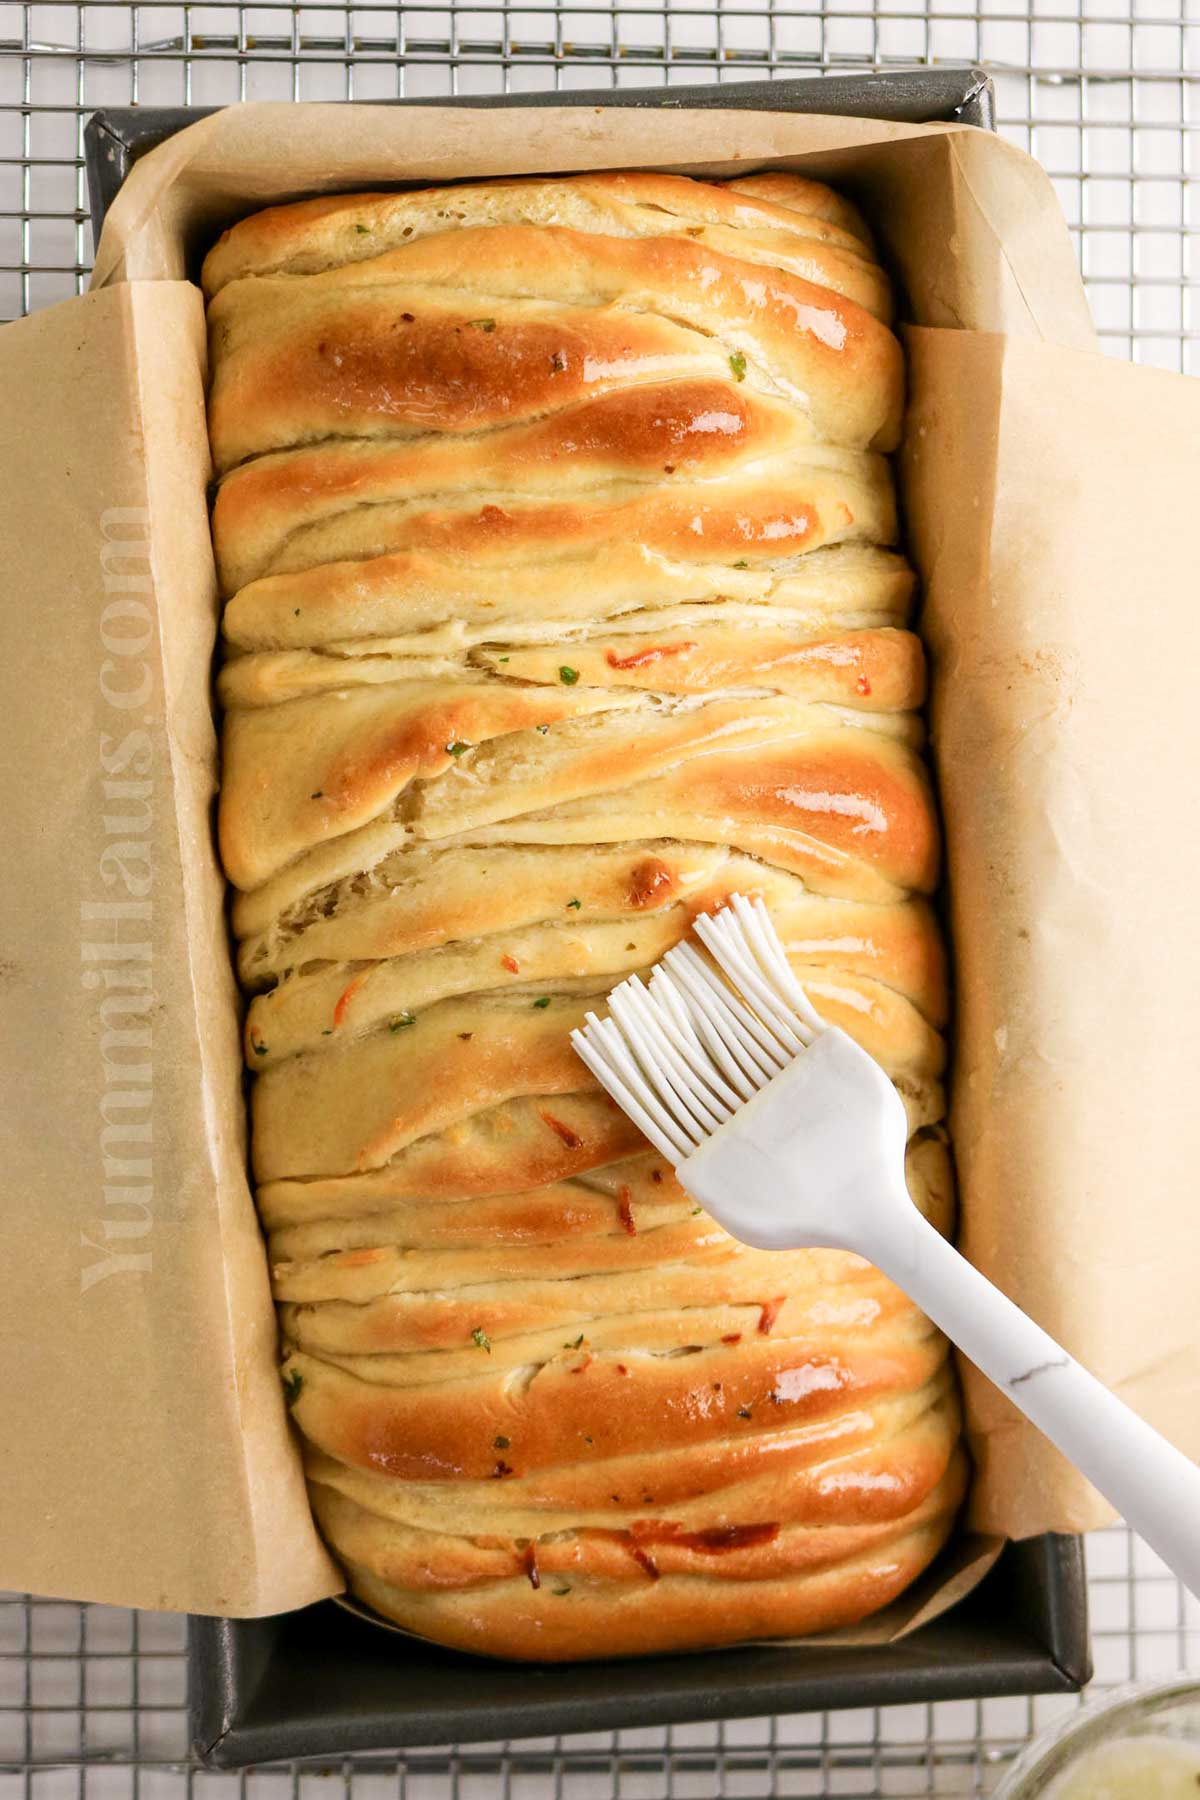
- Arrange the dough pockets upright in your prepared loaf pan, layering and stacking them as you go. Cover loosely with a clean kitchen towel and let them rise again for 20–30 minutes while you preheat the oven to 350°F.
- Bake for 30–35 minutes, or until the loaf is golden brown and cooked through. If the top starts browning too quickly, loosely cover it with foil.
- Let the bread cool for 5–10 minutes, then pull apart the warm, cheesy layers and enjoy!
Variations & Substitutions
Cheese Options: While Parmesan cheese is classic for this recipe, feel free to mix in mozzarella, cheddar, gruyere, or any combination you love. The whole loaf becomes even more indulgent with a blend of cheeses that melt beautifully together.
Dough Choices: Short on time? Store-bought pizza dough works perfectly and cuts your prep time significantly. You can also use bread flour instead of all-purpose flour for an even chewier texture, or experiment with different dough balls from your local bakery.
Flavor Twists: Transform this into a sweet treat by swapping the garlic butter mixture for cinnamon sugar and using softened butter instead. You can also add pizza sauce between layers for a pizza-inspired version, or try pesto, sun-dried tomatoes, or caramelized onions for totally different flavor profiles.
Butter Alternatives: If you don’t have unsalted butter on hand, salted butter works fine, just reduce any additional kosher salt or pinch of salt in the recipe. Olive oil can replace some of the melted butter for a lighter version, though you’ll lose some of that rich, buttery flavor.
Baking Vessel Changes: This recipe adapts well to cake pans for a different presentation, or you can shape it on a baking sheet for a free-form loaf. Just adjust your baking time by 5-10 minutes, depending on the pan size and shape.
Storage
Room Temperature: Keep your leftover pull-apart bread in an airtight container at room temperature for up to 2 days. Make sure it’s completely cooled before storing to prevent condensation from making it soggy. The bread stays softest when wrapped in aluminum foil and then placed in the container.
Refrigeration: For longer storage, refrigerate your cheesy garlic pull-apart bread for up to 5 days. Wrap it tightly in plastic wrap first, then cover with foil to prevent it from drying out. Let it come to room temperature before reheating for the best results.
Freezing: This bread freezes beautifully for up to 3 months. Wrap individual portions or the whole loaf tightly in plastic wrap, then place in a freezer bag with as much air removed as possible. Thaw overnight in the refrigerator before reheating.
Reheating: Warm the bread in a preheated oven at 350°F wrapped in foil for 10-15 minutes. For crispier edges, unwrap the foil for the last few minutes. You can also use an air fryer at 320°F for 5-10 minutes for quick reheating of individual portions.
Expert Tips
Getting the Perfect Rise
Always use warm water between 105-115°F when activating your yeast mixture. Too hot and you’ll kill the yeast, too cold and it won’t activate properly. Let your dough rise in a warm place, like an oven with just the light on, for the fluffiest bread possible. The dough should double in size during both the first and second rise.
Achieving Golden Brown Perfection
If the top of the bread is browning too quickly during baking, tent it loosely with aluminum foil about halfway through. This lets the inside continue cooking while preventing the outside from getting too dark. The bread is done when it’s golden brown all over and sounds hollow when tapped.
Texture Tips
Knead your dough with the dough hook attachment for the full recommended time to develop the gluten properly. This creates that perfect chewy yet fluffy bread texture. Work on a lightly floured surface when shaping, but don’t add too much flour or your bread will be dense.
FAQ’s
Can I make the dough ahead of time?
Absolutely! Prepare your dough and let it complete the first rise, then punch it down, cover with plastic wrap, and refrigerate for up to 24 hours. Let it come to room temperature for about 30 minutes before shaping and adding your fillings for the second rise.
Why didn’t my dough rise?
The most common culprit is expired yeast or water that was too hot or too cold. Make sure your active dry yeast is fresh, and your warm water is the right temperature. Also, ensure you’re placing the dough in a warm place away from drafts during the dough rise period.
What’s the difference between using all-purpose flour and bread flour?
All-purpose flour works perfectly fine and creates a tender, softer bread. Bread flour has more protein and will give you a chewier, more structured loaf. Either works great in this recipe, so use whatever you have on hand.
Why is my bread dense instead of fluffy?
This usually happens from adding too much flour, not kneading enough, or not allowing sufficient time for the dough to rise. Make sure you’re measuring your all-purpose flour correctly and giving the dough the full rise time in a warm place.
If you love this bread recipe, you’re going to love these other bread recipes, too. Please click each link below to find the easy, printable recipe!
More Great Pull-Apart Bread Recipes
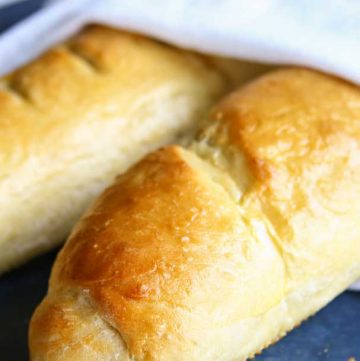
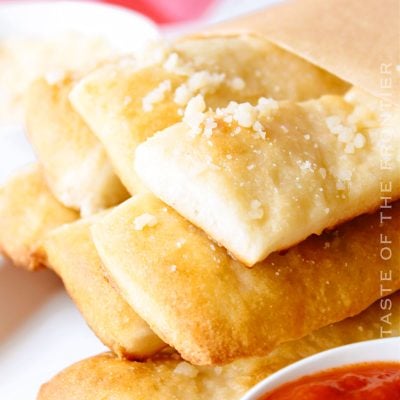
Garlic Parmesan Pull-Apart Biscuits
Cinnamon Roll Pull-Apart Bread
CONNECT WITH YUMMI HAUS!
Be sure to follow me on my social media, so you never miss a post!

Layered Pull-Apart Bread
Ingredients
Dough:
- 3 cups all-purpose flour
- 2 ¼ tsp active dry yeast 1 packet
- ¾ cup milk – warm – 110°F
- ¼ cup granulated sugar
- ¼ cup butter unsalted – melted
- 1 large egg
- 1 tsp salt
Filling:
- 4 tablespoons butter melted
- 2 cloves garlic minced
- 2 tablespoons parsley – chopped fresh
- 1 cup cheese – shredded – mozzarella, cheddar, or your choice
Instructions
- Dissolve the yeast in the warm milk with 1 tsp sugar in a mixing bowl. Let it sit for 5–10 minutes to proof. It should look foamy.
- Once proofed, add the melted butter and egg
- Combine the flour, remaining sugar, and salt in a large bowl.
- Stir the flour into the wet ingredients until a dough forms.
- Knead the dough on a lightly-floured smooth surface for 8–10 minutes. Alternatively, you can use a dough hook in a large mixing bowl or utilize a stand mixer with the dough hook attachment until smooth and elastic. I don’t recommend trying to use a hand mixer with the beaters.
- Place in a greased bowl, cover, and let rise for 1–1.5 hours or until it has doubled in size.
- Punch down the dough and divide it into 10 to 12 equal pieces.
- Roll each piece into a flat rectangle.
- Stir the melted butter, garlic, and parsley in a small bowl.
- Brush the mixture evenly over the flattened dough.
- Top with the shredded cheese
- Fold the pieces of dough in half and press lightly around the edges to seal the cheese inside the pocket.
- Brush the dough with any remaining butter mix.
- Layer the dough pockets into the prepared loaf pan, stacking them in the pan.
- Loosely cover the loaf with a clean kitchen towel and let it rise for 20–30 minutes while you preheat the oven to 350°F.
- Bake 30–35 minutes, until golden brown and cooked through. If the top browns too quickly, cover loosely with foil.
- Let the loaf cool for 5–10 minutes, then pull apart the layers and serve warm.
Nutrition
Nutritional information for the recipe is provided as a courtesy and is approximate. Please double-check with your own dietary calculator for the best accuracy. We at Yummi Haus cannot guarantee the accuracy of the nutritional information given for any recipe on this site.


Share Your Thoughts