

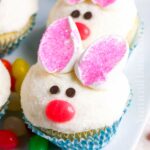
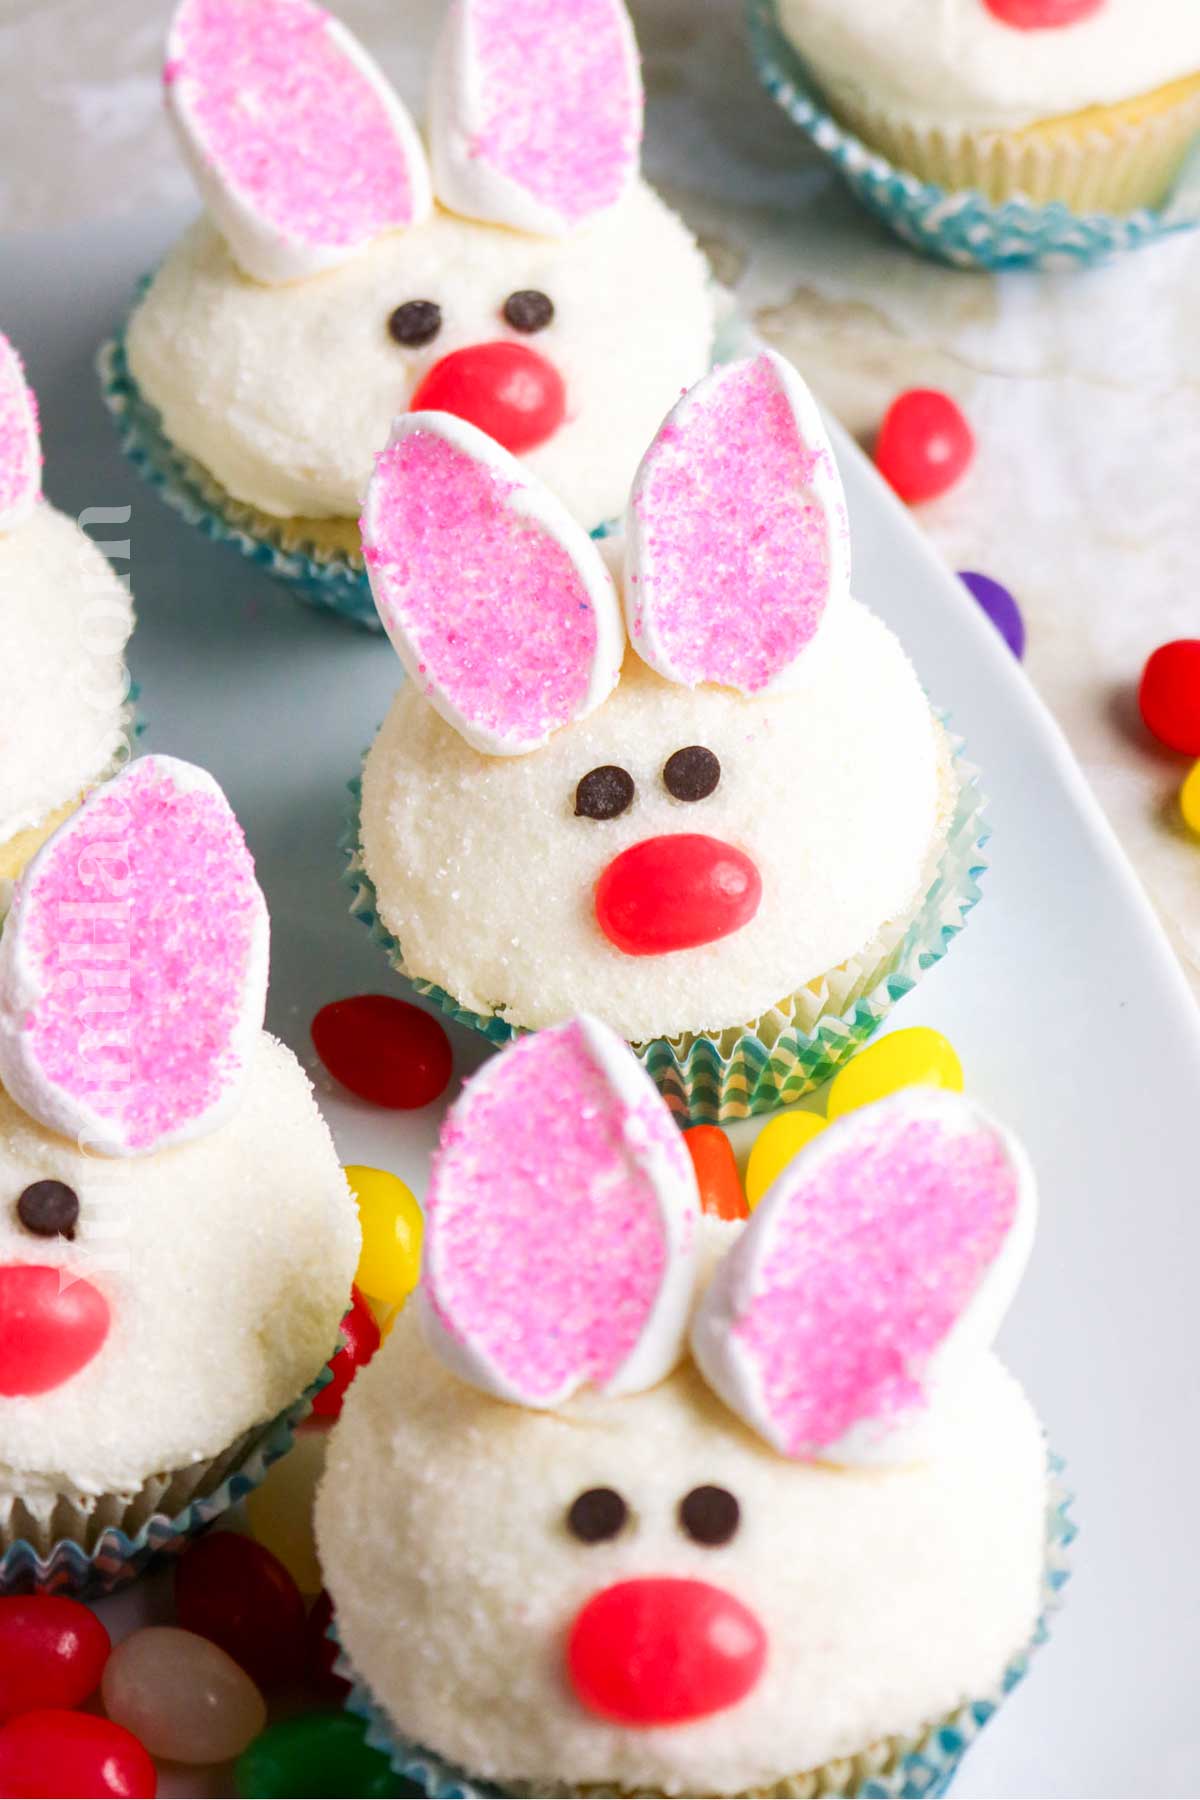
If you’re looking for the most adorable Easter cupcake recipe that will have everyone saying “aww” before they take a bite, these bunny rabbit cupcakes are exactly what you need! I still remember the first time I made these cute bunny cupcakes for my niece’s birthday party, and let me tell you, they were the star of the dessert table. Whether you’re planning for Easter celebrations or baby showers, these adorable easter bunny cupcakes are guaranteed to bring smiles to everyone’s faces.
What makes these so special is how much fun they are to create. You can whip up these adorable bunny cupcakes using either chocolate cupcakes or vanilla cupcakes as your base, then transform them into the sweetest little bunnies you’ve ever seen. The marshmallow ears are such a clever touch, and honestly, decorating these is almost as enjoyable as eating them!
Gina’s Recipe Rundown:
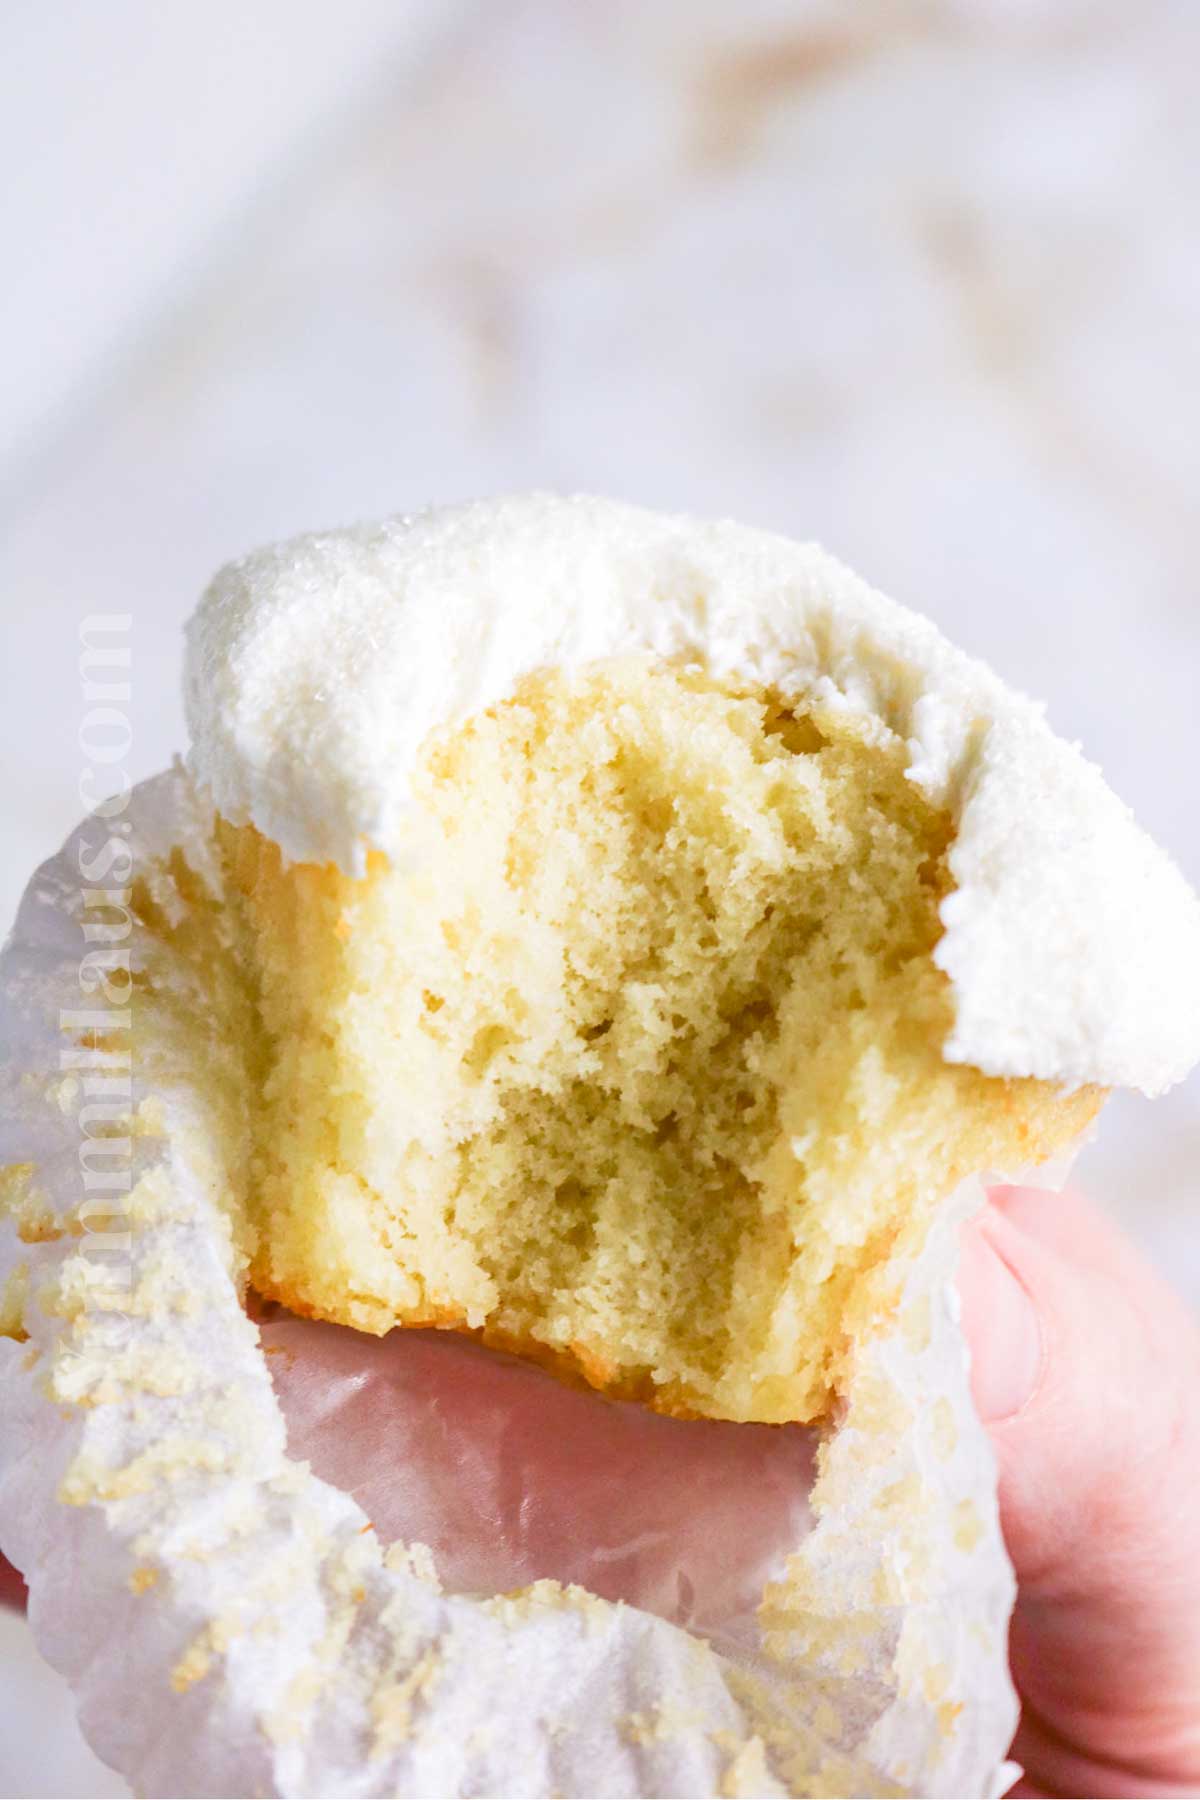
Texture: Soft and fluffy cupcakes topped with creamy frosting and a light, sugary coating that adds a slightly crisp, sparkly “fur” texture.
Taste: Sweet, buttery vanilla cupcakes with creamy frosting and a light sugary crunch from the decorative coating.
Ease: Easy to make with simple ingredients and fun decorating steps that are perfect for beginners and kids to help with.
Why I love it: I love these Bunny Rabbit Cupcakes because they’re adorable, easy to make, and always bring smiles to the table.
Why You’ll Love This Recipe
These bunny cupcakes are seriously the cutest easter dessert you’ll make this year. They look incredibly impressive, but here’s the secret: they’re actually super simple to put together. Even if this is your first time attempting decorated cupcakes, you’ll find these totally doable.
The best part? You can customize them in so many ways. Want to make bunny butt cupcakes instead of the bunny’s head? Go for it! Prefer chocolate bunnies over vanilla? Absolutely! These easter cupcake ideas are flexible enough to work with whatever you have in your pantry or whatever flavor combination you’re craving.
Kids absolutely love helping with these, making them perfect for baby showers or Easter gatherings where you want an activity that doubles as a wonderful treat. Plus, they’re so photogenic that they’re perfect for sharing on your YouTube channel or making a TikTok video that shows off your creation.
I also love that you can use store-bought frosting to save time, or make your own if you’re feeling ambitious. Either way, these turn out beautifully. And if you’re like me and always looking for new recipes to add to your collection, this one will quickly become a springtime favorite.

Ingredient Notes
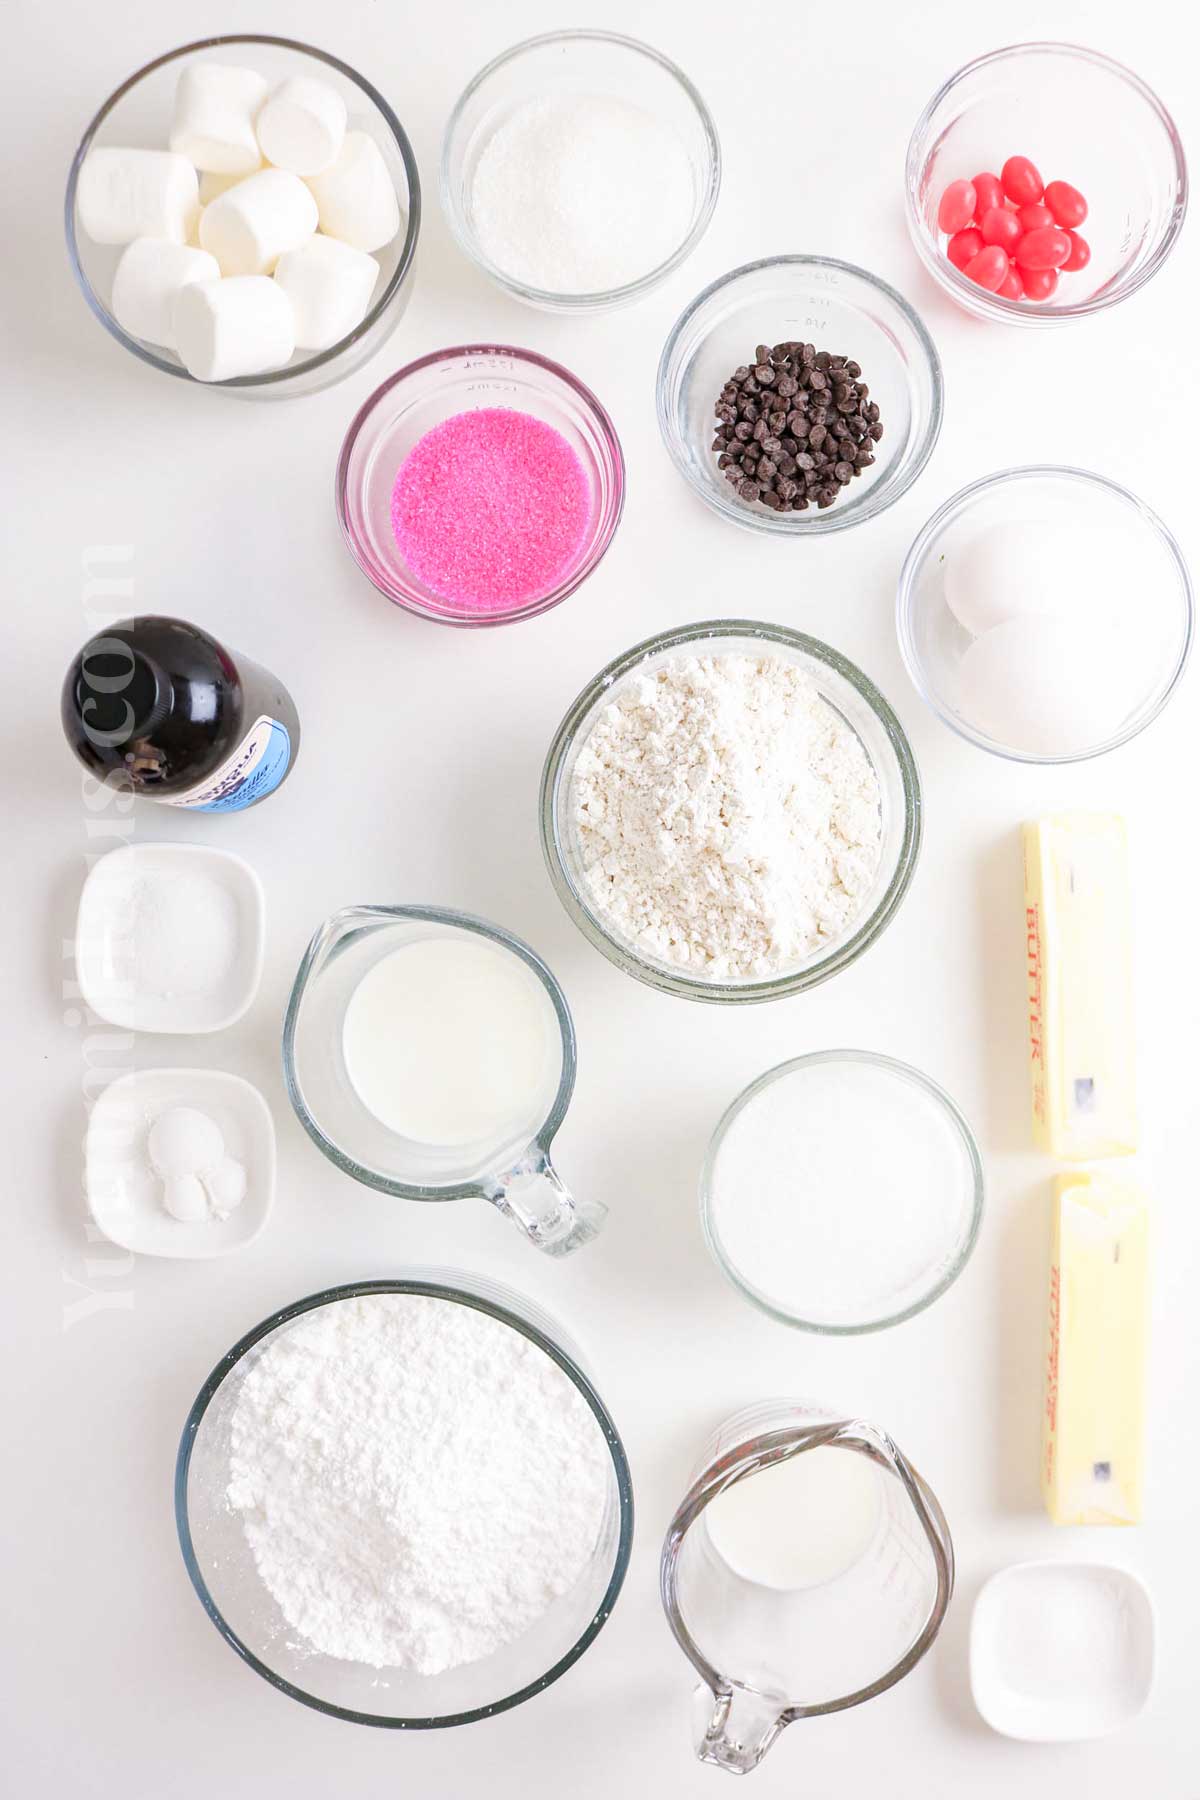
Cupcake Batter
- All-purpose flour – Provides structure and a soft crumb.
- Baking powder – Helps the cupcakes rise and become fluffy.
- Salt – Enhances flavor and balances the sweetness.
- Butter – Adds richness and tenderness.
- Granulated sugar – Sweetens and helps with browning.
- Large eggs – Bind ingredients and contribute to texture.
- Vanilla extract – Adds warm, sweet flavor.
- Whole milk – Moistens the batter and creates a tender crumb.
Frosting
- Butter – Creates a creamy, rich base.
- Confectioner’s sugar – Sweetens and thickens the frosting.
- Milk – Adjusts frosting consistency for spreading or piping.
- Vanilla extract – Enhances flavor.
- Pinch of salt – Balances sweetness and deepens flavor.
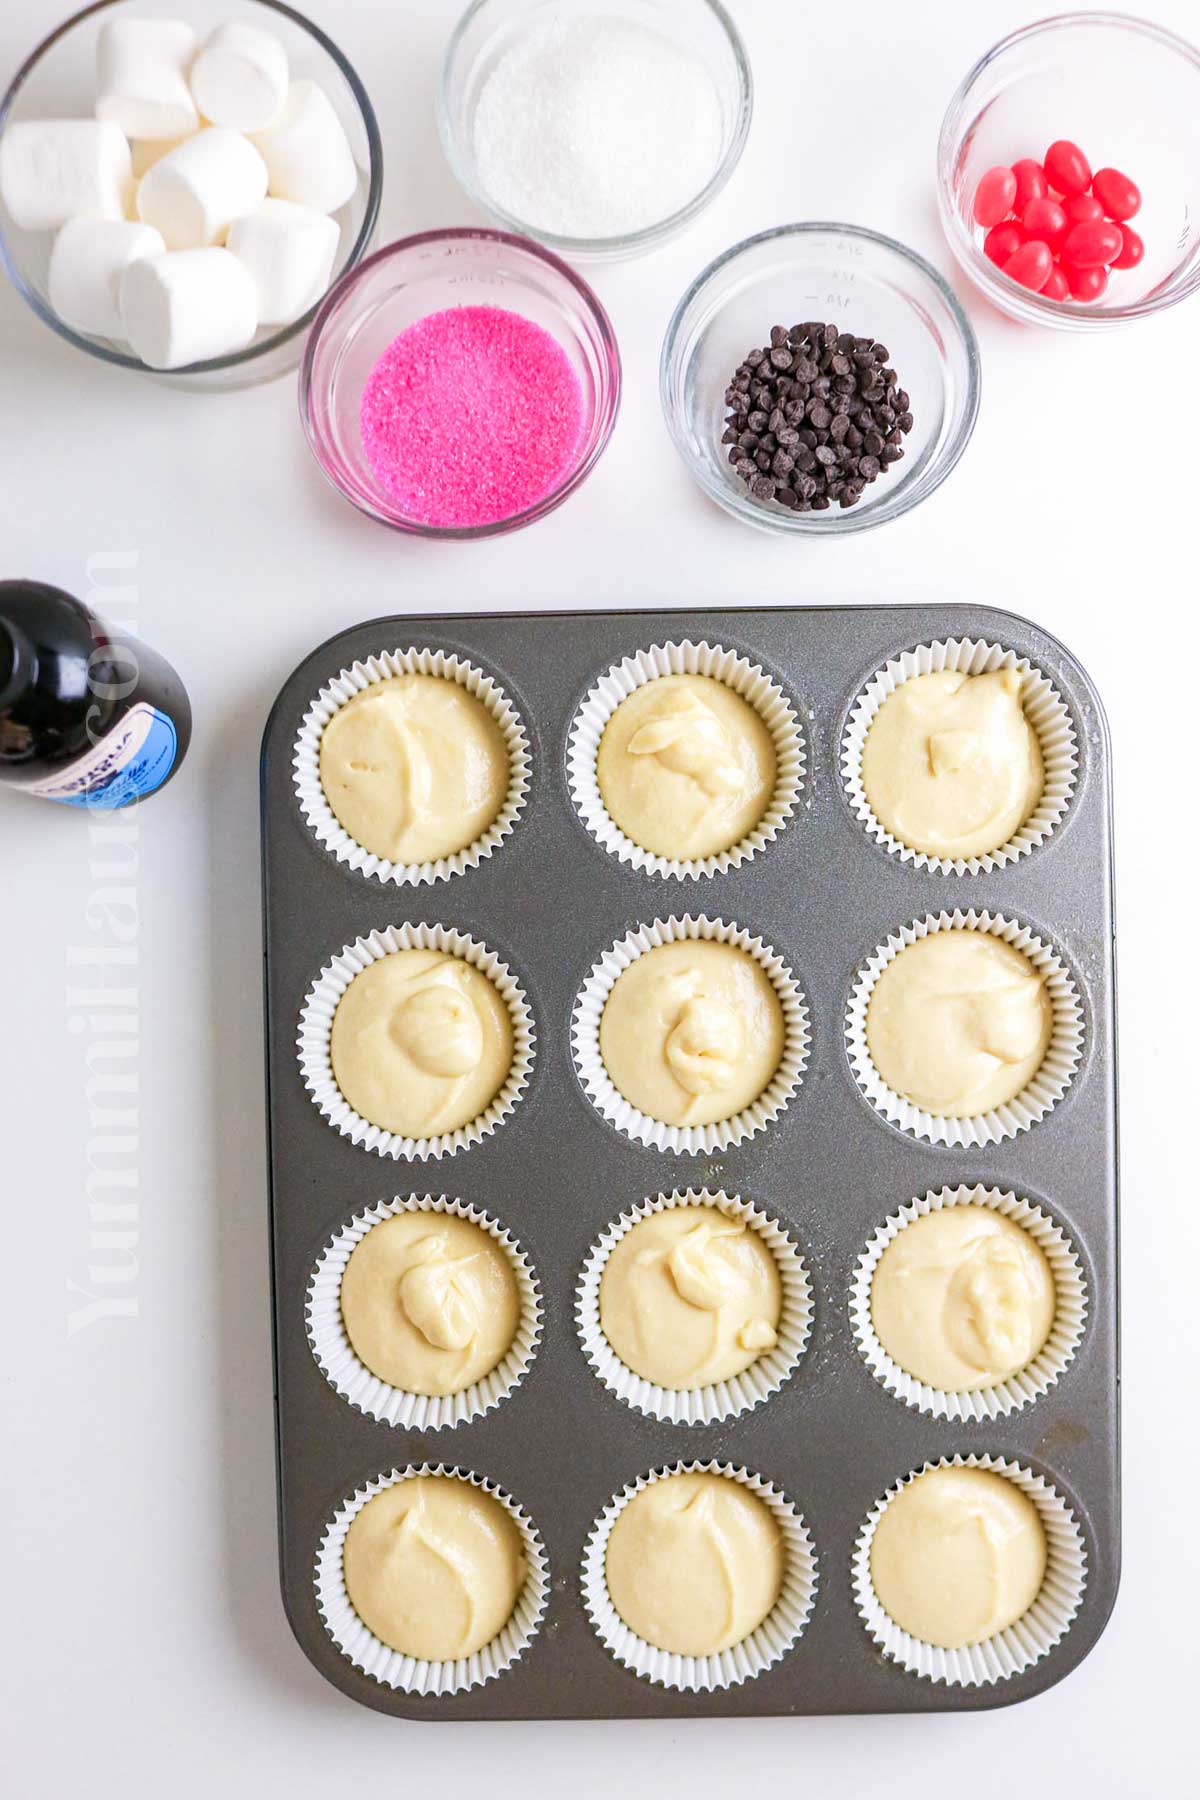
Decoration
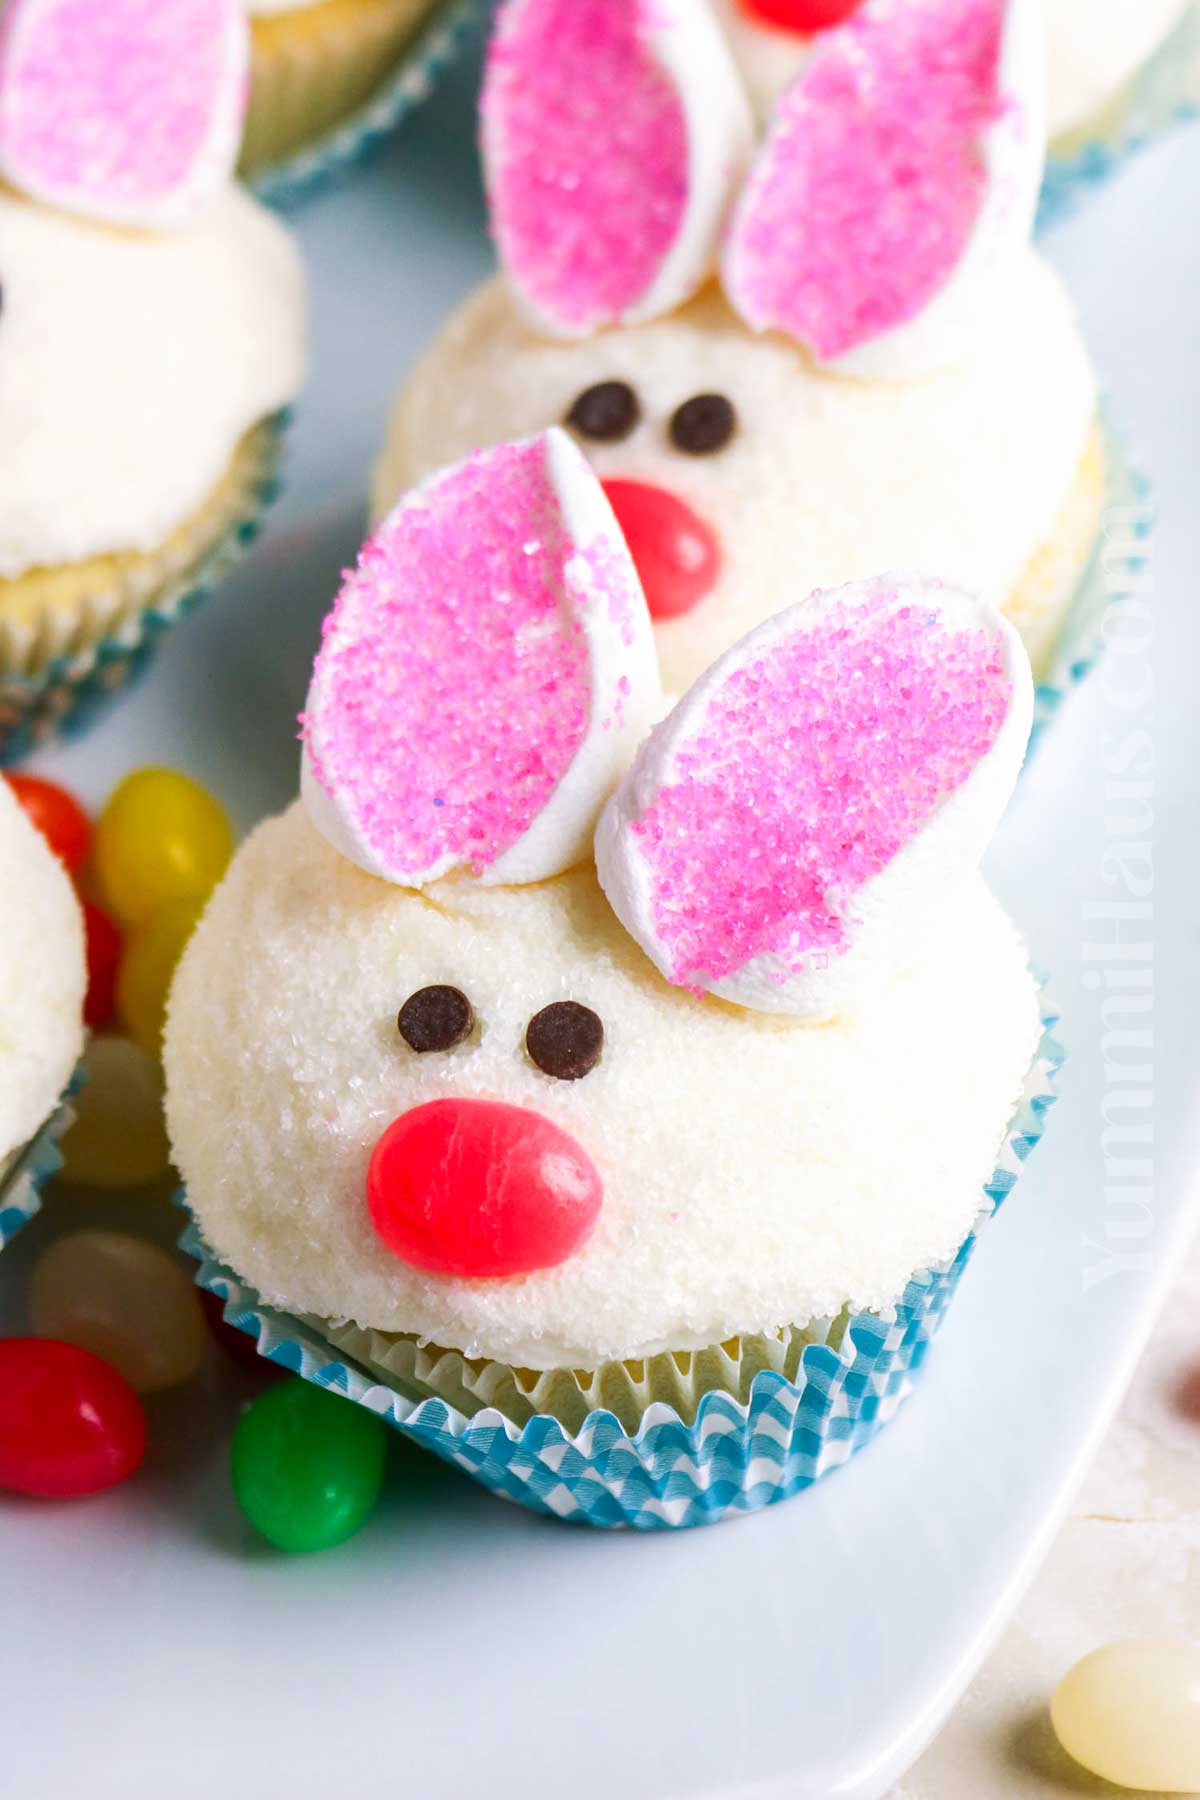
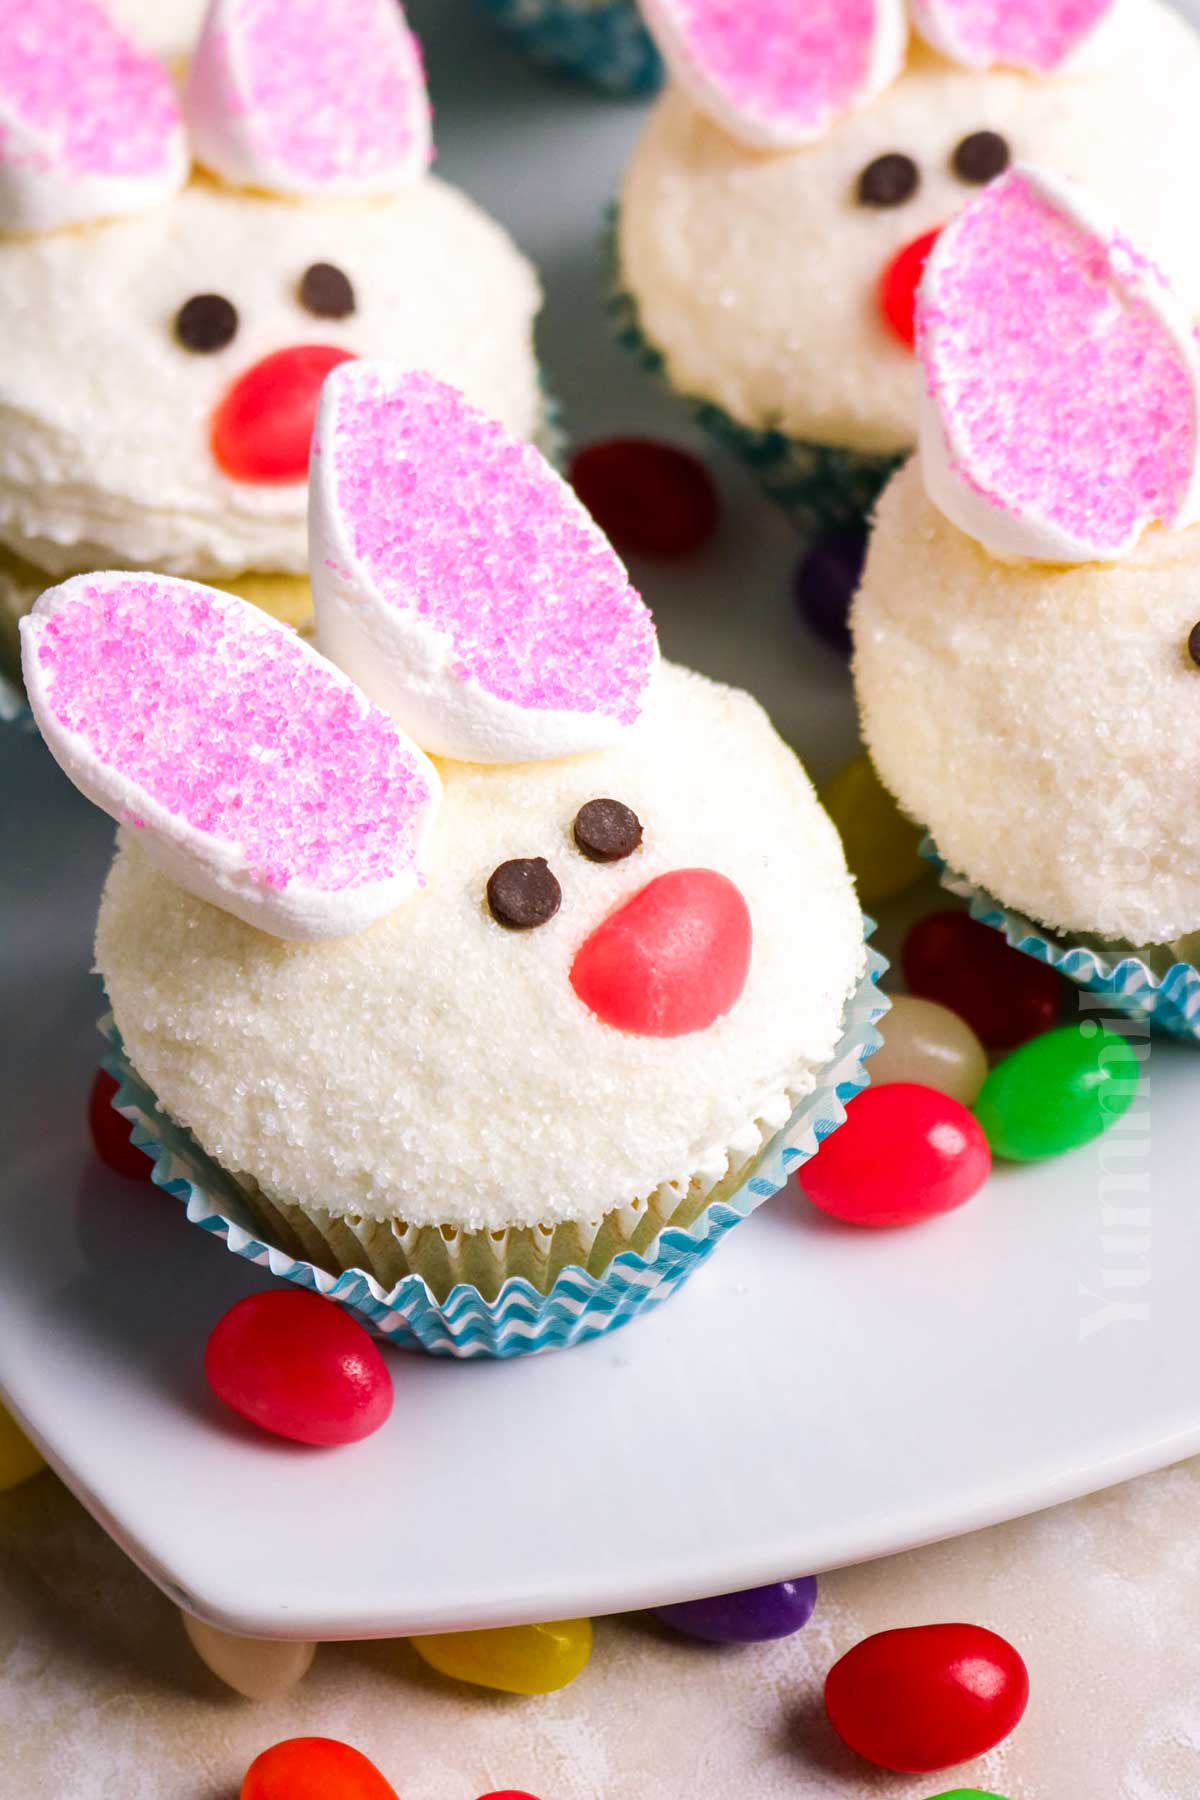
- Large marshmallows – Form the bunny’s head or body.
- Clear sanding sugar, white jimmies, or coconut – Adds fluffy, textured “fur.”
- Pink sanding sugar – Highlights ears and cheeks.
- Mini chocolate chips – Make cute eyes.
- Pink jelly beans – Serve as noses for the bunny.
Kitchen Equipment
- 12-cup muffin pan – For baking the cupcakes evenly.
- Paper cupcake liners – Prevent sticking and make serving easy.
- Mixing bowls (medium and large) – For preparing the batter and frosting.
- Whisk – To combine the dry ingredients.
- Electric mixer or hand mixer – Helps cream the butter and sugar smoothly.
- Measuring cups and spoons – For accurate ingredient measurements.
- Rubber spatula – Useful for scraping the bowl and folding ingredients.
- Small offset spatula or spoon – For spreading the frosting.
- Sharp knife or kitchen scissors – To cut marshmallows and jelly beans for decorations.
- Cooling rack – Allows the cupcakes to cool completely before decorating.
How to Make Bunny Cupcakes
- Start by preheating your oven to 350°F and lining a 12-cup muffin pan with paper liners, this makes cleanup and cupcake removal a breeze.
- In a medium bowl, whisk together the flour, baking powder, and salt. In a larger bowl, beat the butter and sugar together until light and fluffy, about 2–3 minutes; your arm will thank you for the extra fluff!
- Add the eggs one at a time, mixing well after each, and then stir in the vanilla for that sweet, cozy flavor.
- Now it’s time to bring it all together: add the dry ingredients in two parts, alternating with the milk. Mix just until everything is combined—don’t overdo it!
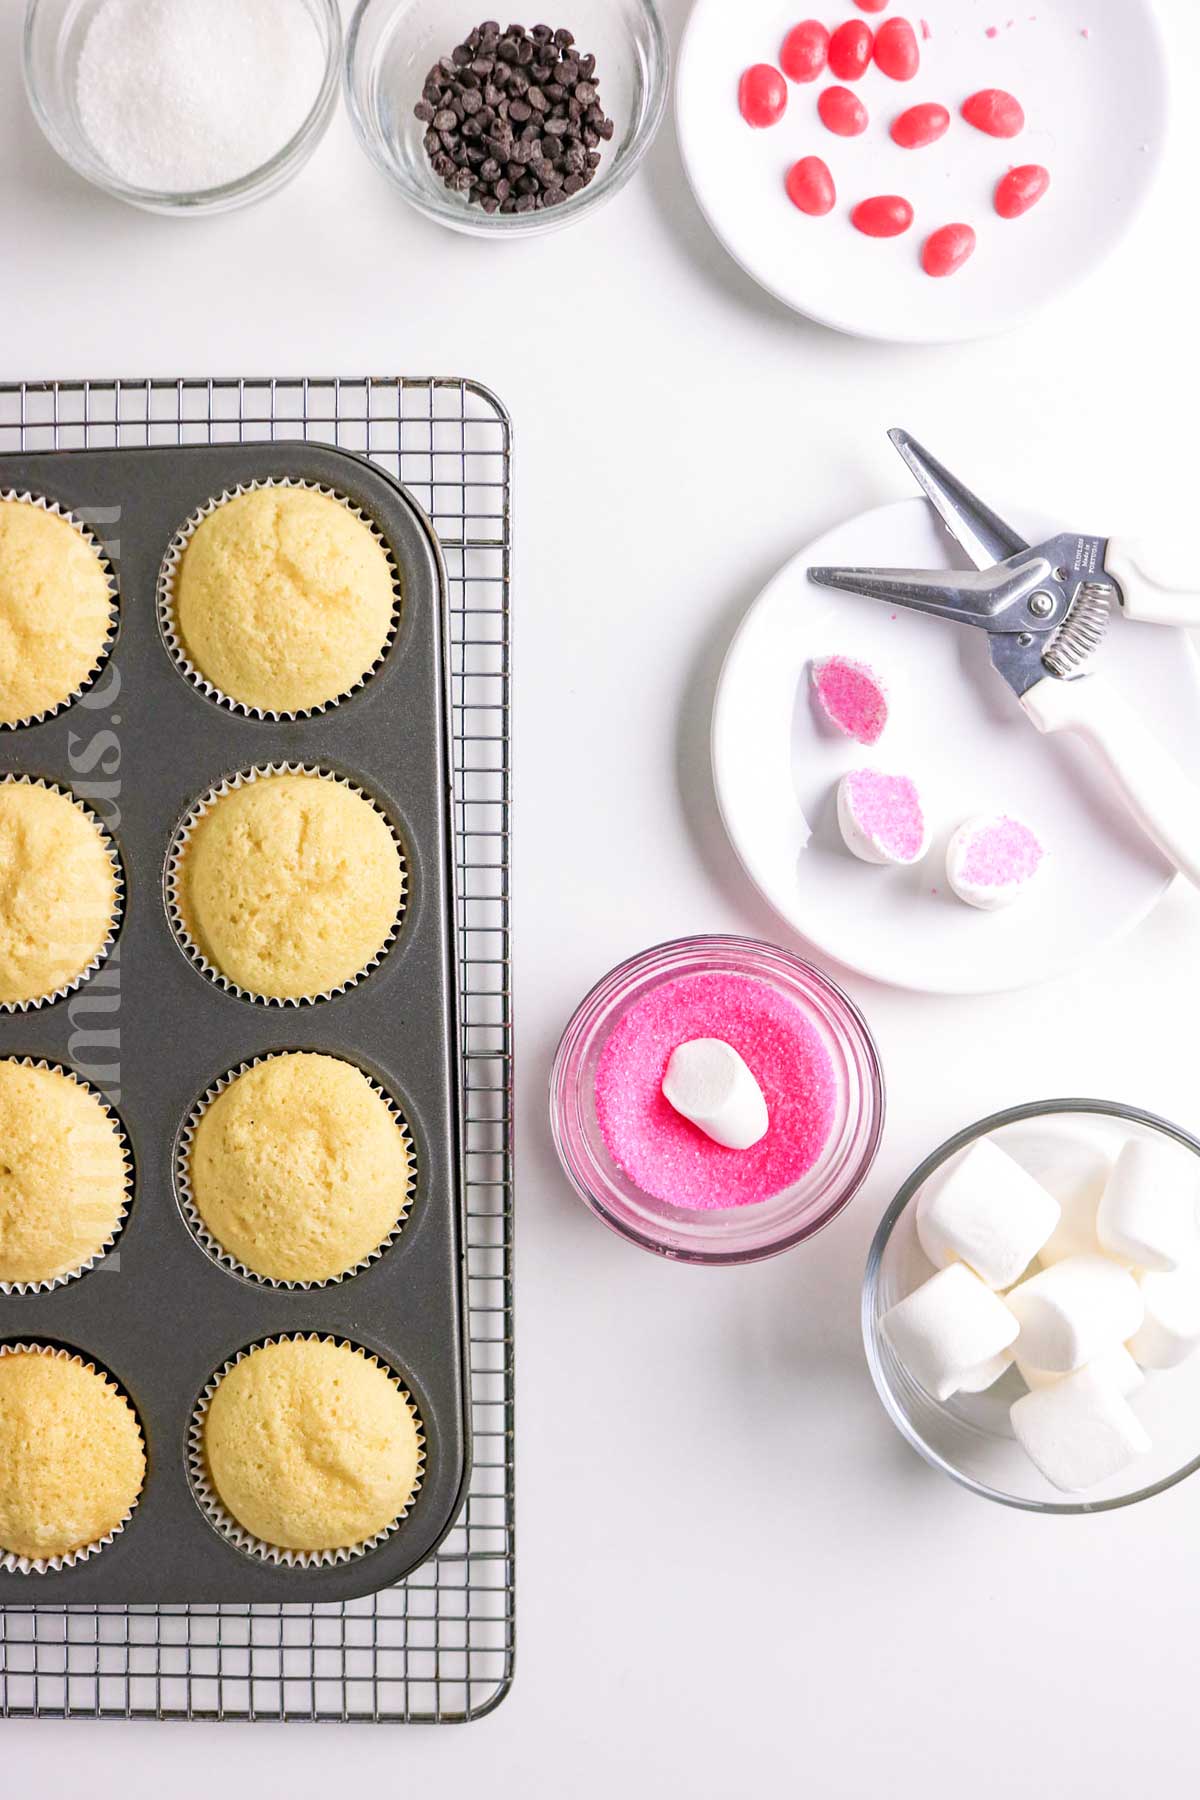
- Scoop the batter into your liners, filling each about two-thirds full. Pop them in the oven for 16–18 minutes, or until a toothpick inserted in the center comes out clean. Let the cupcakes cool completely before moving on to the fun part, decorating.
- For the frosting, beat the butter until it’s smooth and creamy. Gradually add the powdered sugar, then mix in the vanilla, a pinch of salt, and just enough milk to get a spreadable, luscious consistency.
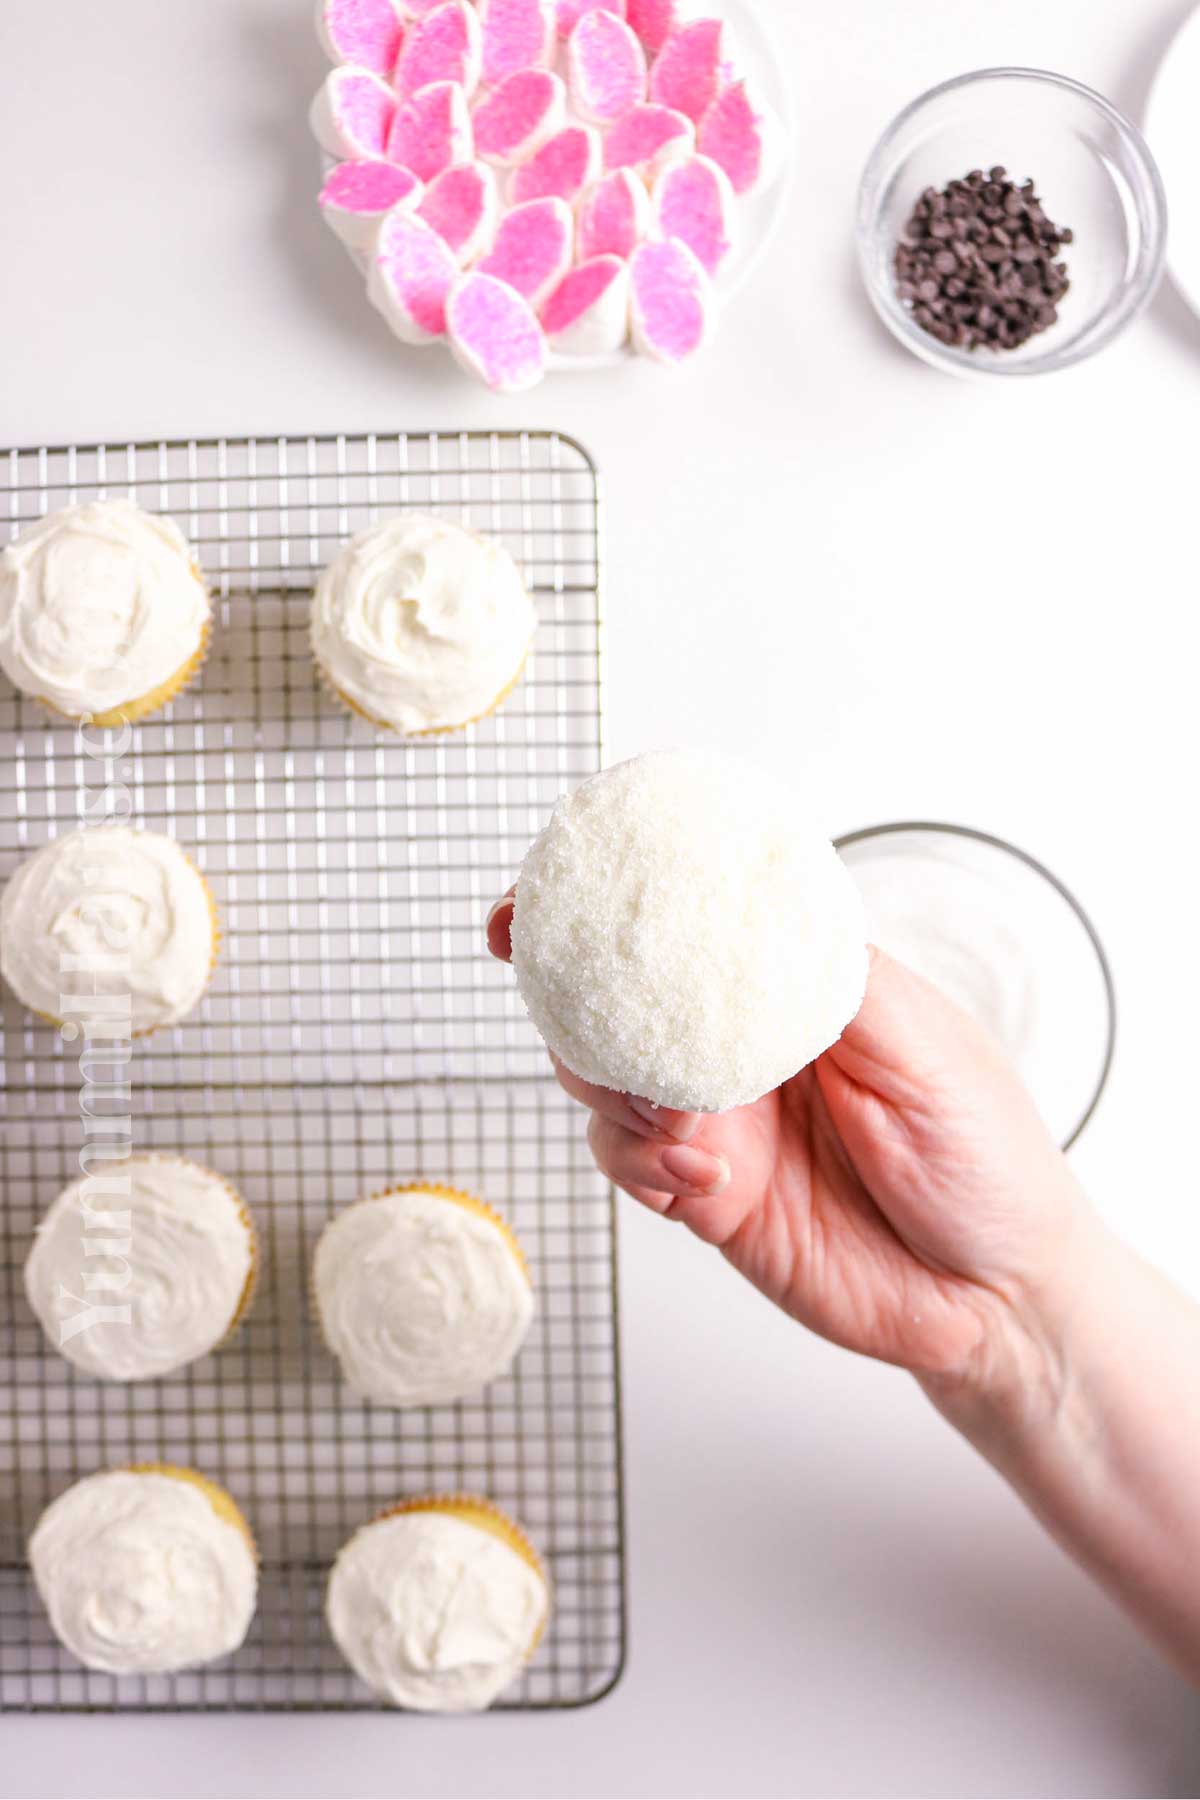
- Frost each cupcake generously using a small offset spatula or the back of a spoon. Then flip the cupcake upside down and roll it gently in clear sanding sugar, white jimmies, or coconut to give it that fluffy “fur” effect.
- To make bunny ears, cut each marshmallow diagonally into two ovals and press the sticky sides into pink sanding sugar. For the noses, carefully slice each jelly bean in half along the thickest part.
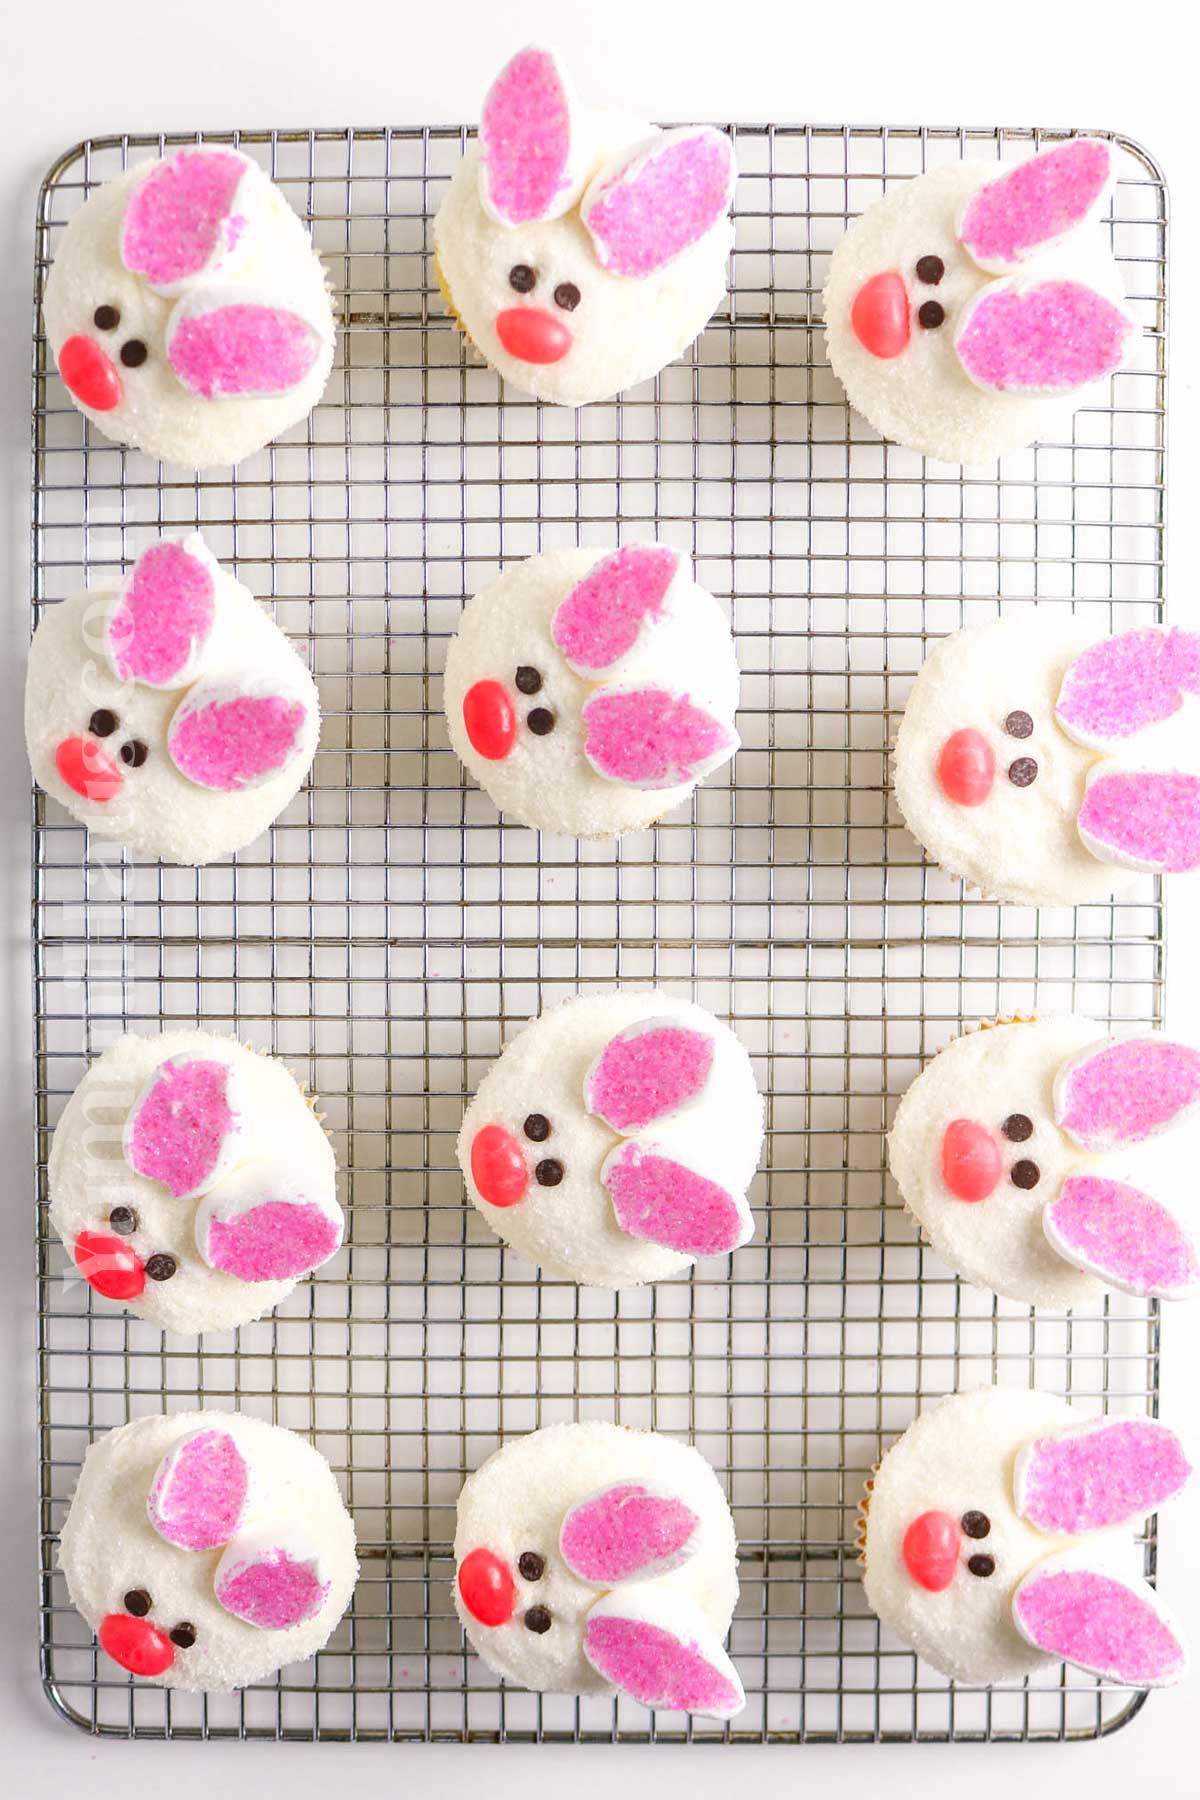
- Add a dab of frosting to the flat side of each marshmallow and stick them upright on top of your cupcakes for ears. Place two mini chocolate chips for the eyes and half a pink jelly bean for the nose, and voilà, your bunnies are ready!
- Serve them the same day for best results, or store loosely covered at room temperature. They’re adorable, fun, and guaranteed to bring smiles!
Variations & Substitutions
One of the things I love most about this recipe is how adaptable it is. Here are some ideas to make these bunny cupcakes your own:
Cupcake Base
Use your favorite chocolate cupcake recipe for a richer flavor, or stick with vanilla cupcakes if you prefer something lighter. You can even use a box mix if you’re short on time – no judgment here! Both work beautifully for easter recipes.
Frosting Options
White frosting is traditional and creates that fluffy bunny look, but you could also tint it pale pink or use chocolate frosting for chocolate bunnies. Cream cheese frosting adds a tangy twist that pairs wonderfully with carrot cake cupcakes if you want to get really creative. Store-bought frosting works great if you’re in a pinch.
Ears
The classic marshmallow ears are made by cutting large marshmallows diagonally, but you could also use pink candy melts to add color to the inside of the ears. Some people even use cookies or sugar wafers for a crunchier texture.
Decoration
Get creative with your easter candy! Use a jelly bean for the nose, add gummy carrots as a cute accent, or use a Reese’s cup as the base for bunny butt cupcakes (seriously, so adorable). The bunny tails can be made from frosting swirls, mini marshmallows, or even white chocolate.
Dietary Modifications
Need these to be gluten-free? Use your favorite gluten-free cupcake recipe. For dairy-free versions, swap in dairy-free frosting and use vegan marshmallows for the ears.
Storage
These cupcakes are best enjoyed within 2-3 days of decorating, but here’s how to keep them fresh:
Room Temperature
If you’ll be eating them within a day or two, you can keep them at room temperature in an airtight container. Just make sure they’re in a cool spot away from direct sunlight, especially if you’re using candy melts or chocolate decorations that might melt.
Refrigerator
For longer storage, refrigerate the cupcakes in an airtight container for up to 5 days. Let them sit at room temperature for about 30 minutes before serving so the frosting softens up nicely.
Freezing
You can freeze unfrosted cupcakes for up to 3 months. Wrap them individually in plastic wrap, then place in a freezer-safe bag. Thaw overnight in the refrigerator before decorating. I don’t recommend freezing already-decorated cupcakes because the marshmallow bunny ears can get soggy.
Make-Ahead Tips
Bake the cupcakes a day ahead and store them covered at room temperature. Make your frosting and keep it in the fridge, then bring it back to room temperature before decorating. This way, you can do the fun decorating part right before your event, when the cupcakes will look their freshest.
Expert Tips
After making these cute bunny cupcakes dozens of times, I’ve picked up a few tricks that make them turn out perfectly every time:
Let everything come to room temperature. This is crucial for both baking and frosting. Room temperature ingredients mix together more smoothly, creating a better texture in your cupcakes.
Don’t overfill your cupcake liners. Fill them about 2/3 full to get that perfect dome on top of your cupcake without overflow. That dome is important for creating a nice bunny face!
Use kitchen scissors for the marshmallow ears. Cut your large marshmallows diagonally for the perfect ear shape. Dip your scissors in powdered sugar first to prevent sticking.
Work in batches. Decorate a few cupcakes at a time rather than assembly-line style. This keeps the frosting from drying out before you can add the decorations.
Place the ears immediately. Insert those marshmallow ears right after frosting while the frosting is still soft. They’ll stick much better this way.
Get creative with positioning. Angle the ears slightly outward for a more realistic look. Place the jelly bean nose slightly off-center for extra cuteness.
Make it an activity. Set up a decorating station with all the supplies and let kids create their own bunny faces. Each one will be unique, and that’s part of the charm!
FAQ’s
Can I use store-bought cupcakes for this?
Absolutely! If you’re short on time, grab some cupcakes from your local bakery and just focus on the decorating. No one will know, and you’ll still have an adorable easter bunny cupcake cake setup.
How far in advance can I make these?
You can bake the cupcakes 1-2 days ahead, but I recommend decorating them the day of or the day before your event for the freshest look.
Where can I find supplies for decorating?
Most grocery stores carry everything you need around Easter time – large marshmallows, easter candy, jelly beans, and gummy carrots. Craft stores have candy melts and specialty decorating supplies. Note: Some links in this post are affiliate links, which means I may earn a small commission at no additional cost to you if you make a purchase.
Can I make bunny butt cupcakes instead?
Yes! For bunny butt cupcakes, pipe white frosting all over the top of your cupcake, add a fluffy frosting swirl or marshmallow for the tail, and use pink candy or frosting for the bunny tails and feet. They’re equally adorable and so much fun to make!
What’s the easiest way to make the bunny ears?
Cut large marshmallows in half diagonally. You can leave them white or dip the inside in pink candy melts for that inner-ear detail. Either way works great!
Do these work for other occasions besides Easter?
Definitely! These are perfect for baby showers, spring birthdays, or any time you want a cute easter dessert. I’ve even made them for a woodland-themed party.
Can I use chocolate frosting?
Sure! While white frosting gives that classic bunny look, chocolate frosting creates adorable chocolate bunnies. Just use white or pink decorations for contrast.
What if my marshmallows won’t stick to the cupcakes?
Make sure you’re inserting them while the frosting is still fresh and soft. If you’re having trouble, you can pipe a small dot of frosting on the bottom of each marshmallow ear before placing it.
Can I make a larger easter bunny cupcake cake?
Yes! Arrange your cupcakes in the shape of a bunny on a large platter, then decorate them as one big bunny face. It makes for an impressive centerpiece!
What are some other easter cupcake ideas?
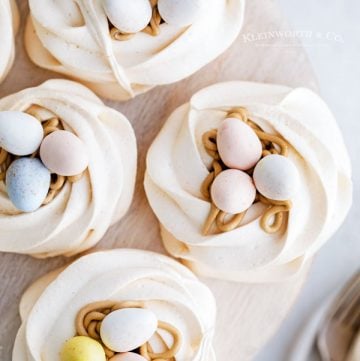
Beyond bunny cupcakes, you could make chick cupcakes using yellow frosting, nest cupcakes with chocolate eggs, or simple spring flower cupcakes. Check out my new recipes section for more easter recipes!
If you love this Easter recipe, you’re going to love these other cute Easter recipes, too. Please click each link below to find the easy, printable recipe!
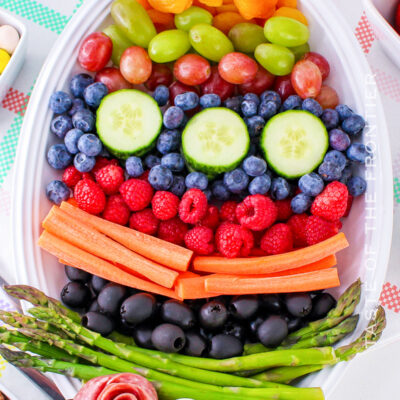
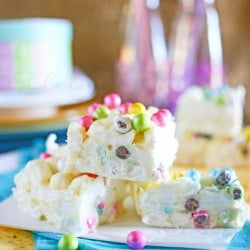
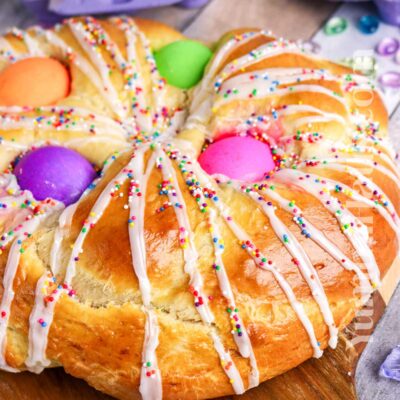
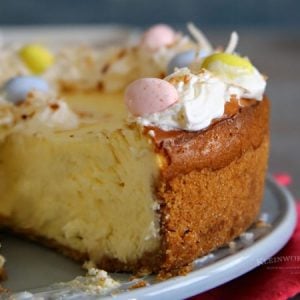
More Great Easter Recipes
CONNECT WITH YUMMI HAUS!
Be sure to follow me on my social media, so you never miss a post!


Bunny Rabbit Cupcakes
Ingredients
- 1½ cups all-purpose flour
- 1½ teaspoons baking powder
- ¼ teaspoon salt
- ¾ cup granulated sugar
- ½ cup butter unsalted, softened
- 2 large eggs
- 2 teaspoons vanilla extract
- ½ cup whole milk
Frosting
- ½ cup butter unsalted, softened
- 2 cups confectioner’s sugar
- 2 tablespoons milk 1-2 tbsp
- 1 teaspoon vanilla extract
- Pinch salt
Decoration
- 12 large marshmallows
- Clear sanding sugar white jimmies, or coconut
- Pink sanding sugar
- Mini chocolate chips for eyes
- Pink jelly beans for noses
Instructions
- Preheat the oven to 350°F.
- Line a 12-cup muffin pan with paper liners. Set aside.
- Whisk the flour, baking powder, and salt in a medium bowl. Set aside.
- Beat the sugar and butter together in a large mixing bowl until emulsified, and the mixture is light and fluffy, about 2–3 minutes.
- Add the eggs one at a time, mixing well after each addition. Add in the vanilla with the last egg.
- Alternate adding the dry ingredients and the milk, mixing just until combined
- Divide batter evenly among liners, filling each about two-thirds full.
- Bake for 16–18 minutes, or until a toothpick inserted in the center comes out clean.
- Cool completely to room temperature before decorating.
Frosting
- Beat butter until smooth and creamy.
- Gradually add confectioner’s sugar.
- Mix in the vanilla, salt, and enough milk to reach a smooth, spreadable consistency.
Decorate
- Spread a generous layer of frosting on the top of each cupcake, using a small offset spatula.
- Flip the cupcake upside-down and roll the frosting portion gently in the clear sanding sugar, white jimmies, or coconut to create the “fur”.
- Create the bunny ears by cutting each marshmallow diagonally to make two oval shapes.
- Press the sticky cut sides into pink sanding sugar.
- Use a sharp knife and carefully cut each jelly bean in half through the thickest part to create the noses.
- Add a small amount of frosting to the flat bottom of the marshmallow to help it stick to the sanding sugar. Place two marshmallow pieces upright on top of each cupcake for ears.
- Add two mini chocolate chips for eyes and half of a pink jelly bean for the nose.
- Serve the same day or store loosely covered at room temperature.
Nutrition
Nutritional information for the recipe is provided as a courtesy and is approximate. Please double-check with your own dietary calculator for the best accuracy. We at Yummi Haus cannot guarantee the accuracy of the nutritional information given for any recipe on this site.


Share Your Thoughts