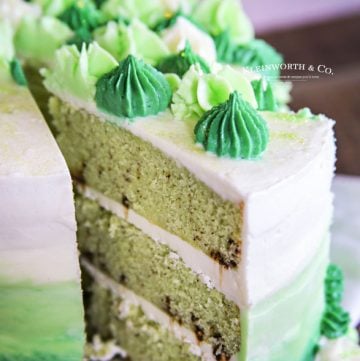
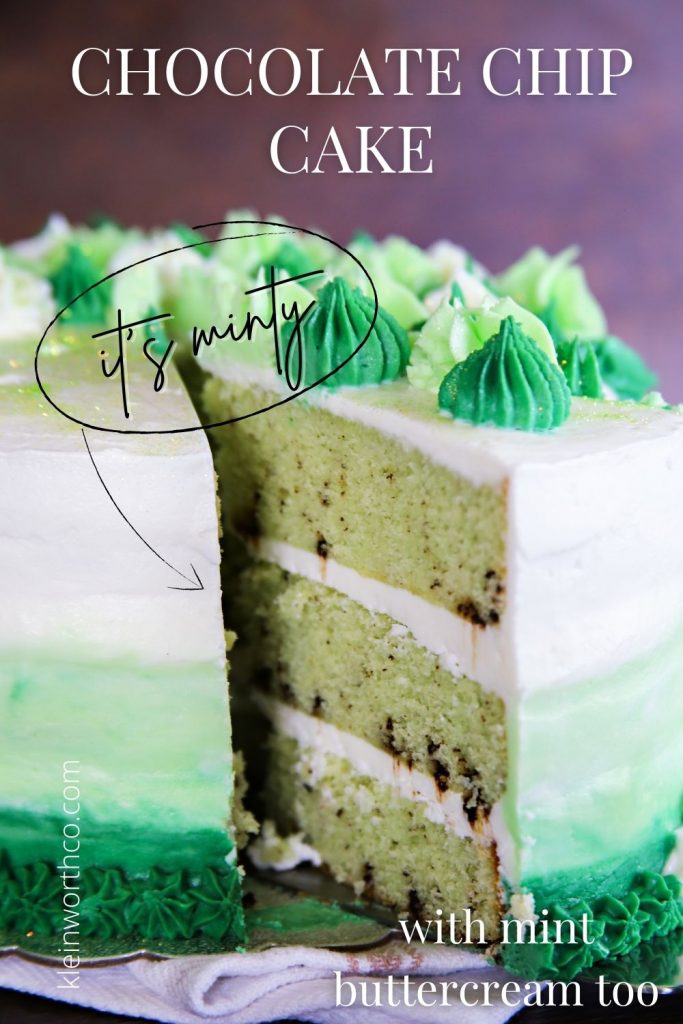
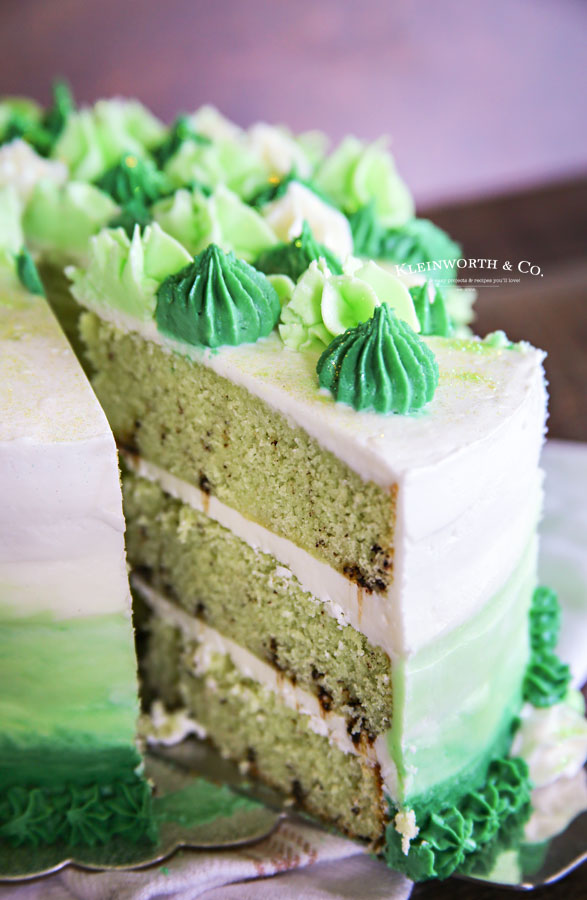
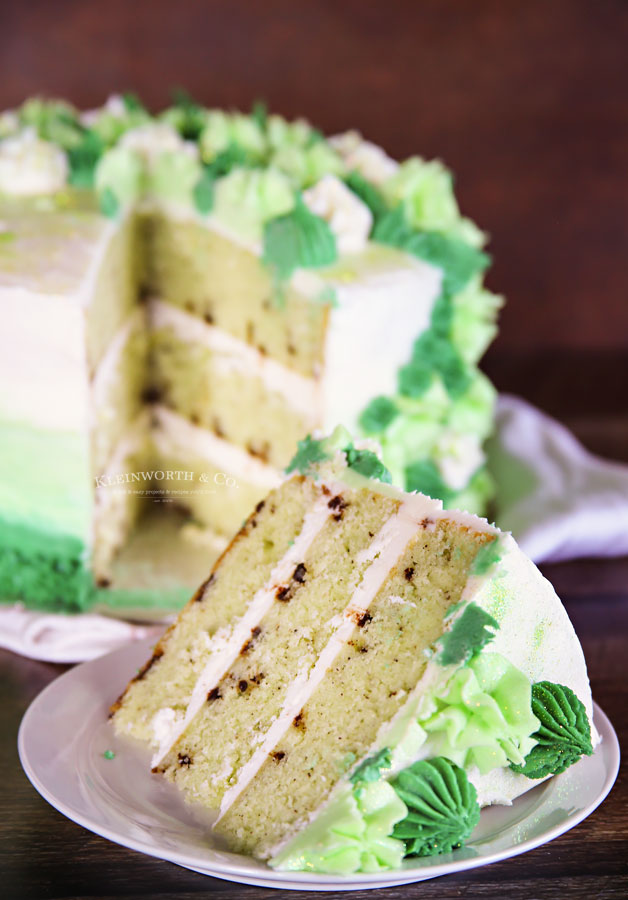
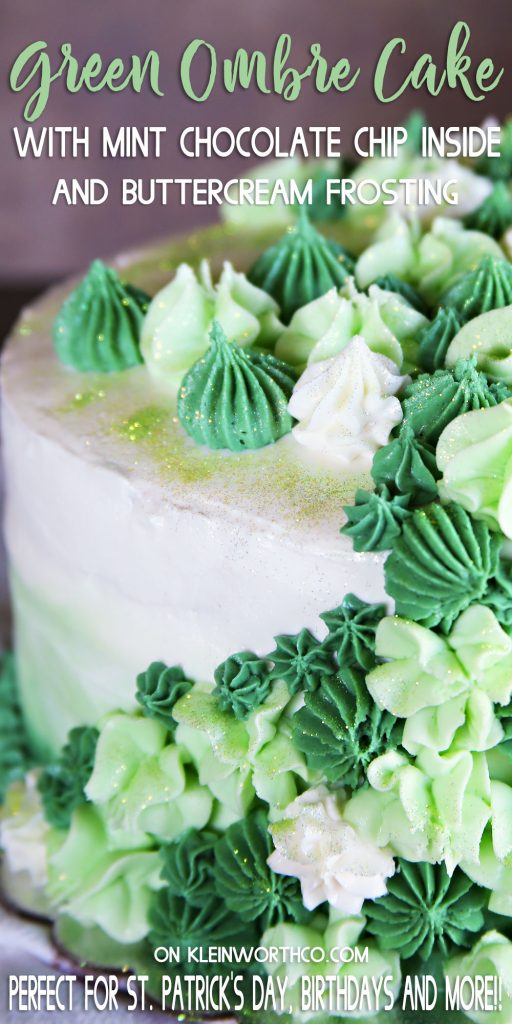
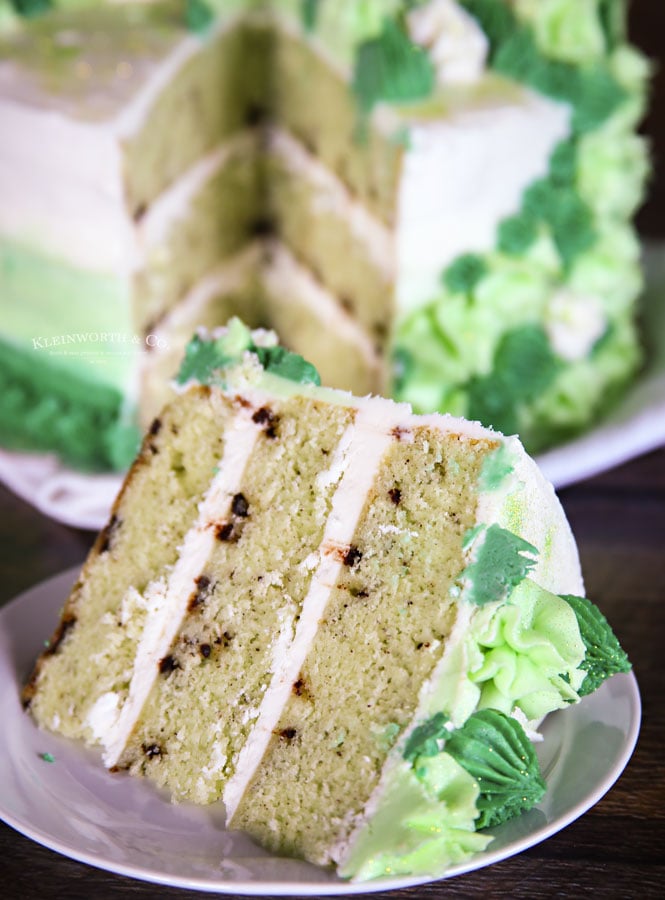
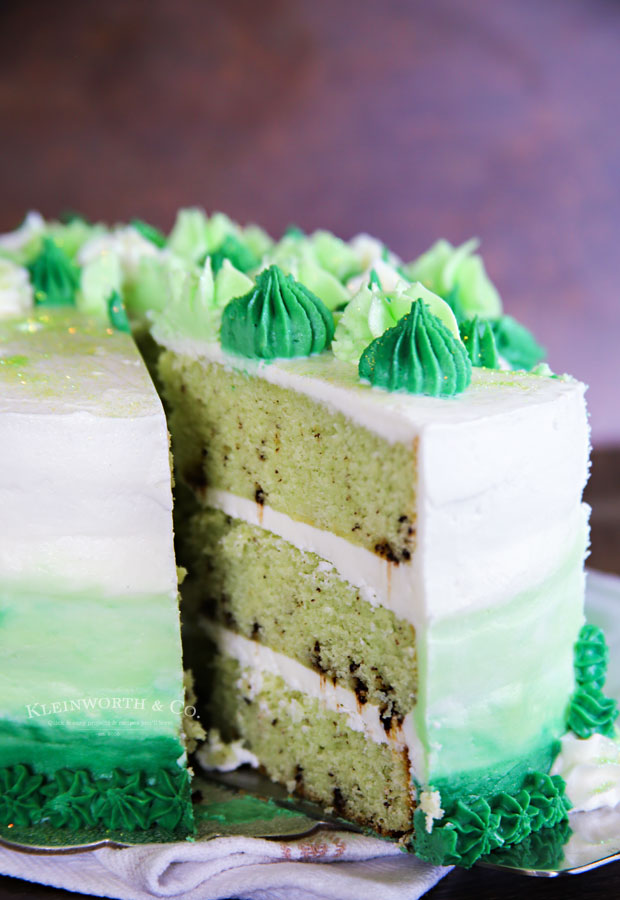
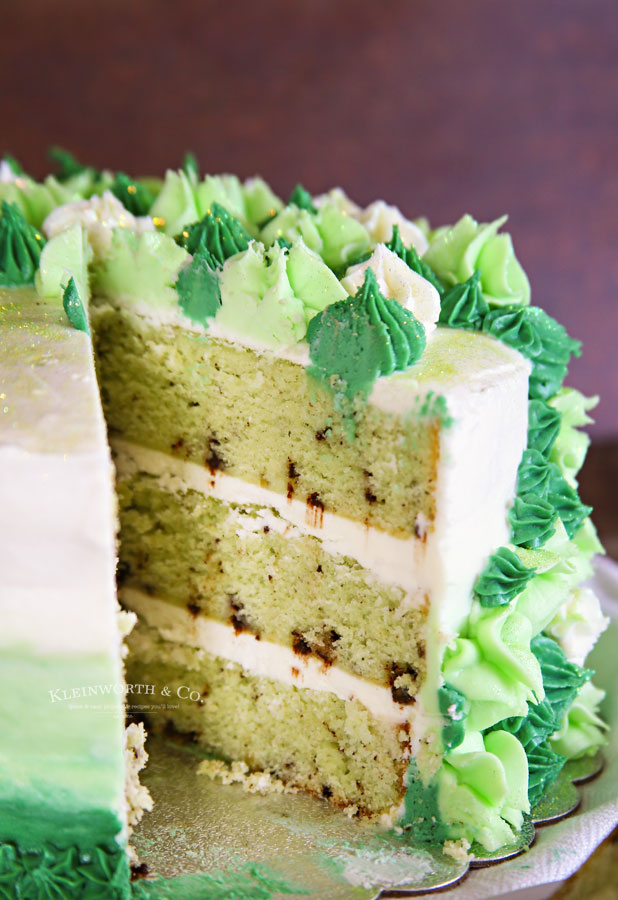
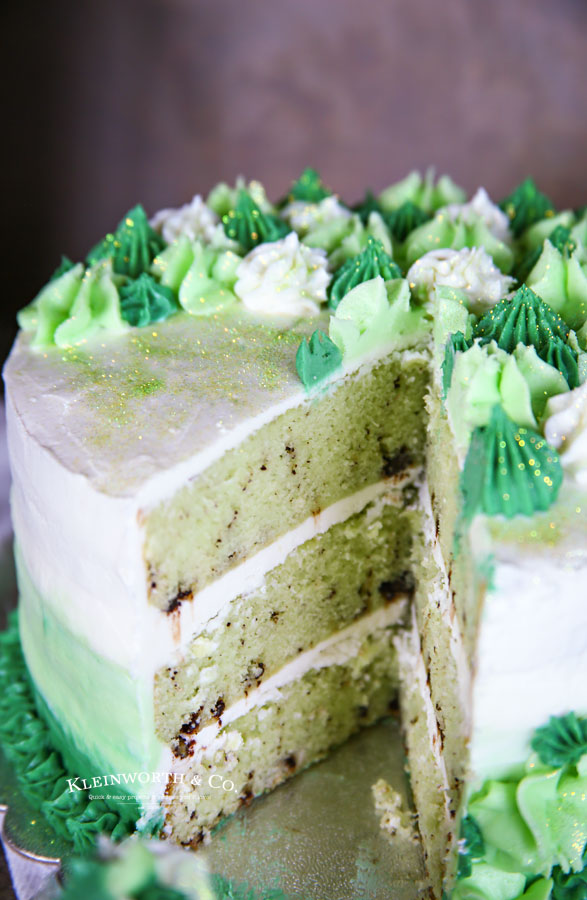
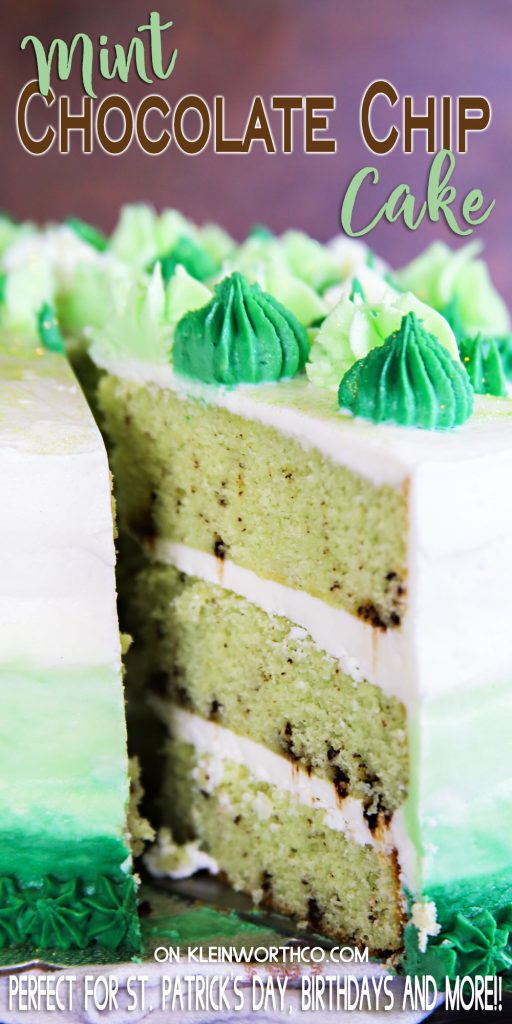
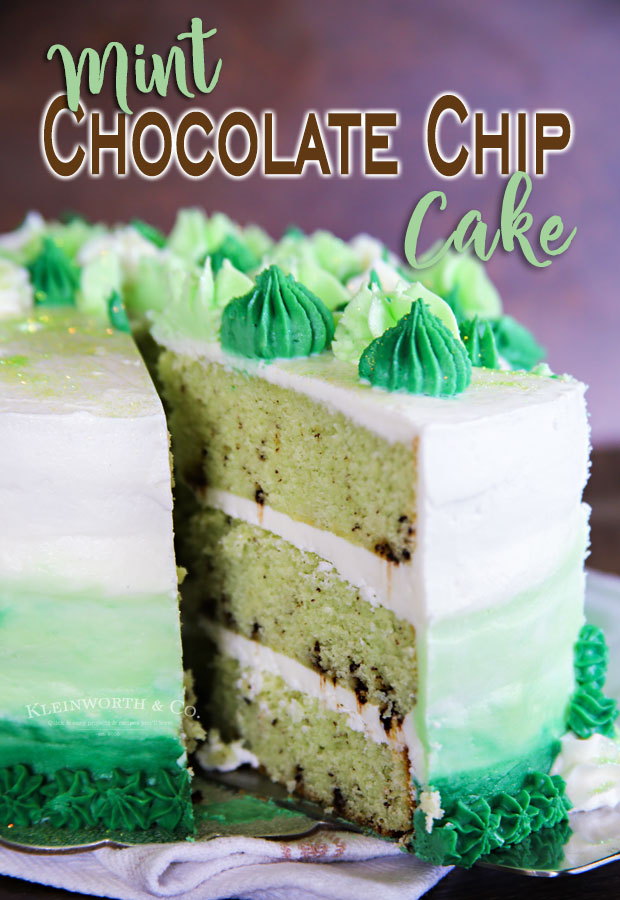
Mint Chocolate Chip Cake is 3 layers of deliciously moist mint cake that are speckled with crushed Andes mints throughout & frosted with a subtle mint buttercream icing in a green to white ombre design. Perfect for St. Patrick’s Day celebrations, birthdays & more!
Who loves mint and chocolate together? That combo certainly is fabulous if you ask me!
So each year my green-loving daughter challenges me to create a green-themed birthday cake for her. This last time she asked for the flavor of mint to be thrown into the mix and I was happy to oblige with this Mint Chocolate Chip Cake.
The last cake I made for her was this Marble Drip Cake because she asked for a “peacock theme”. That one was super fun and I loved the result.
But I have to say, I was thrilled to omit the fondant and get back to decorating with my favorite Bakery Buttercream Frosting as my base.
green cakes
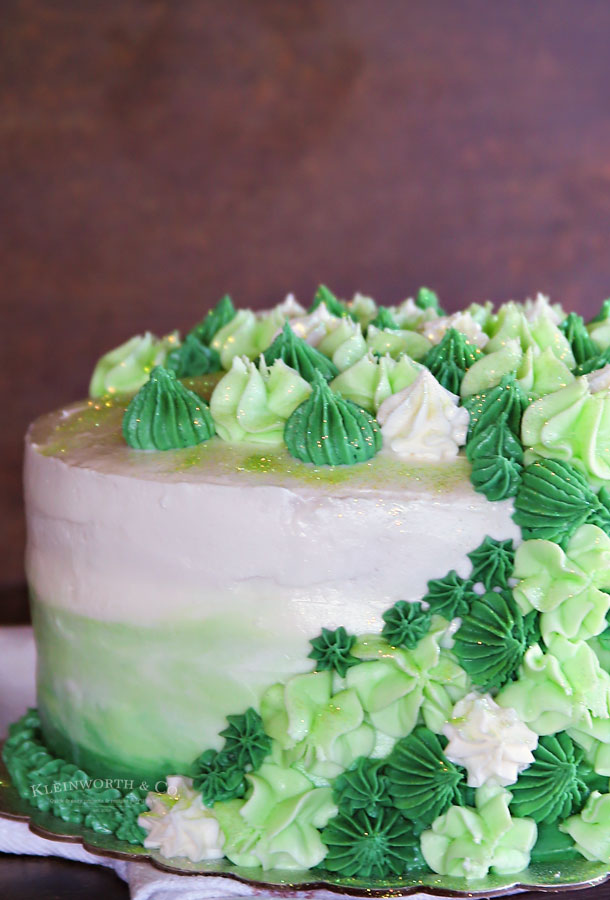
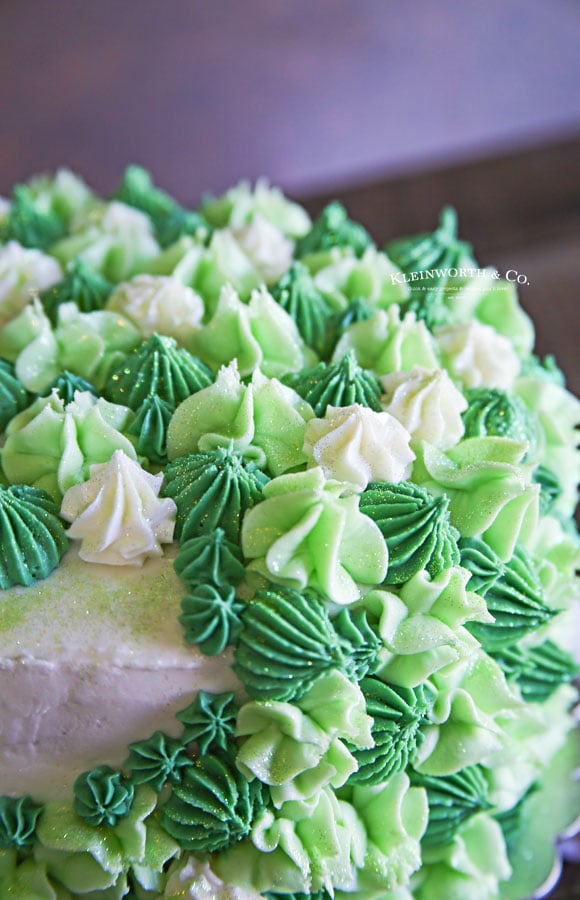
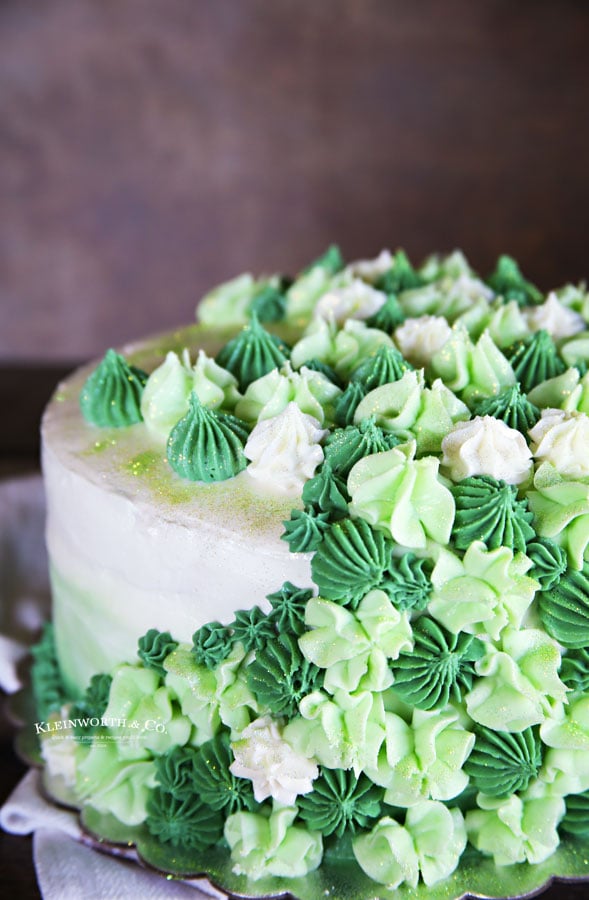
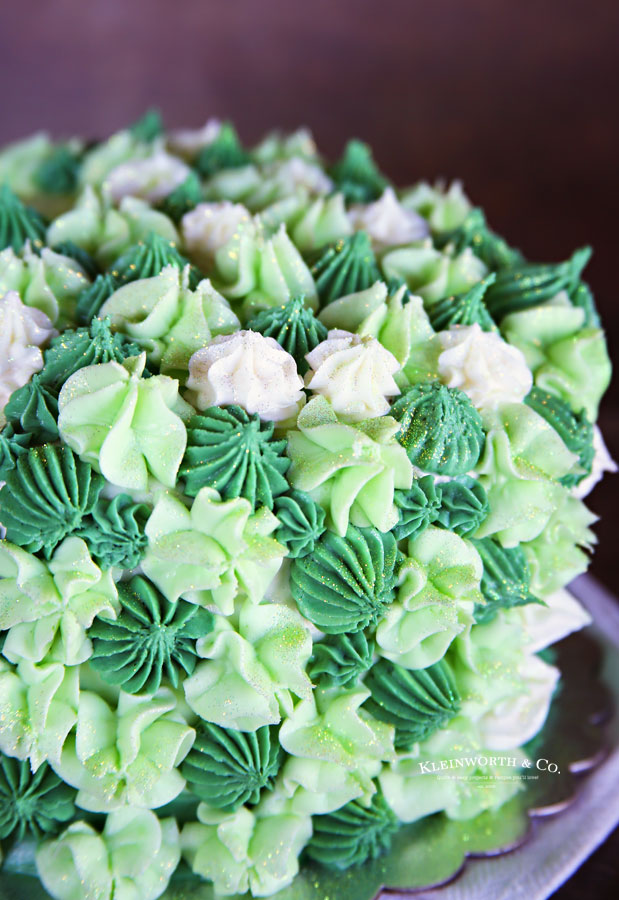
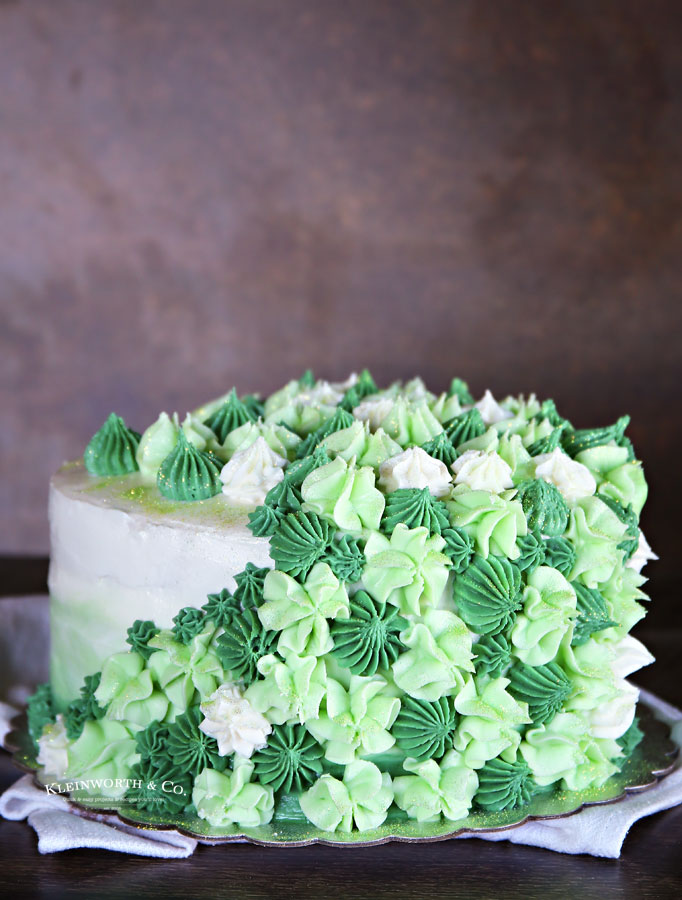
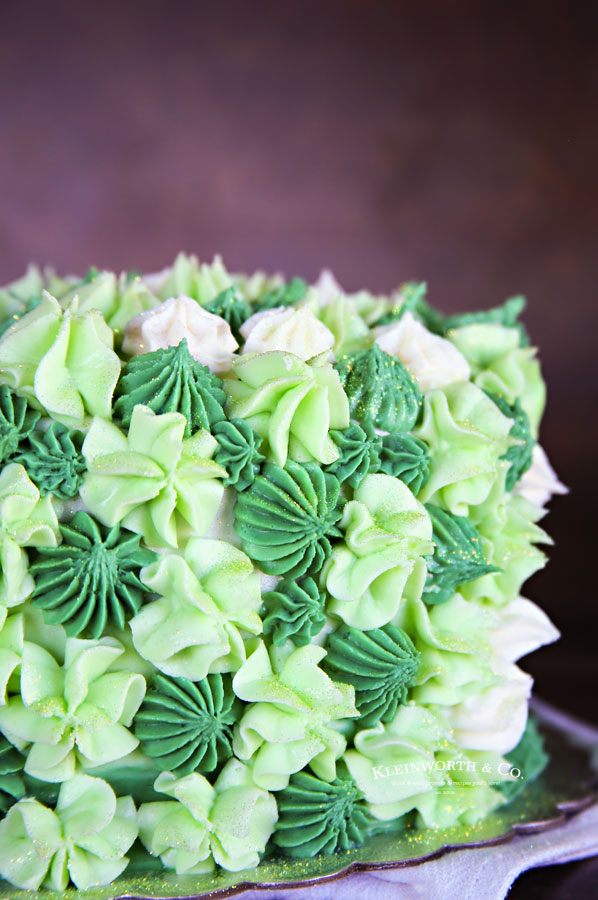
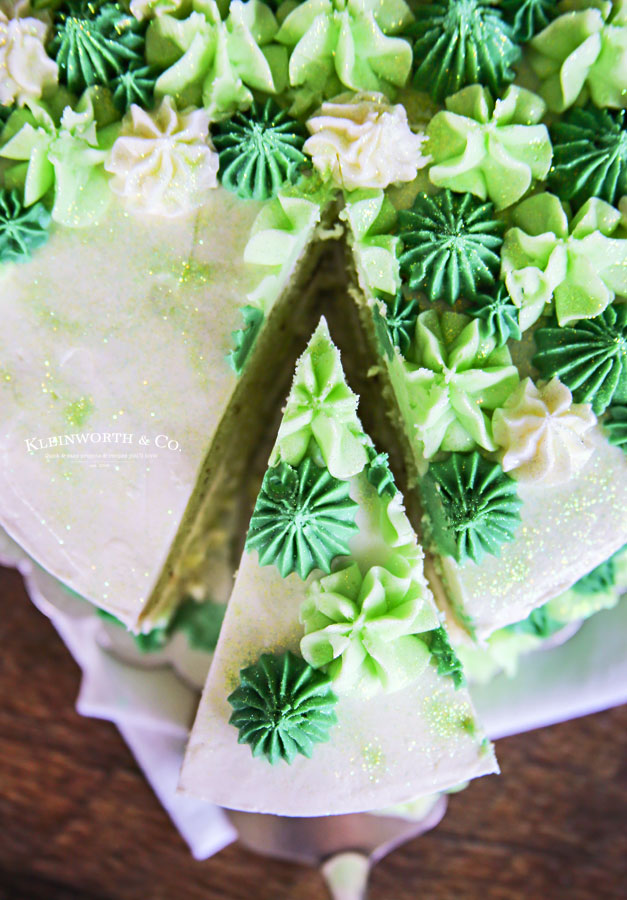
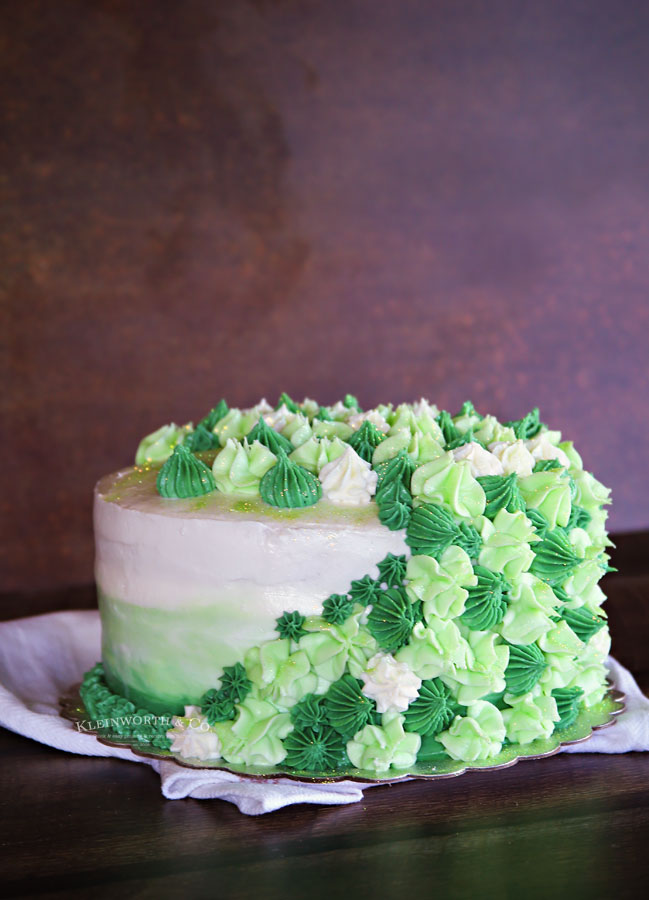
Not only did I add the green to white Ombre around the sides of the cake – but I added the varying sized stars in the three colors swooping up the sides.
She also really loves holographic ANYTHING – so I added some holographic disco dust for some sparkle.
chocolate mint cake recipe
Here are some commonly asked questions
Can I replace the oil with butter?
Yes, this cake can be made using 1/2 cup of melted butter in place of the vegetable oil. However, keep it mind that this will change the texture and overall end result of the cake. I prefer using the oil for this reason.
Can I use mint extract instead of mint chocolate chip flavor?
Yes – mint extract will work. I prefer the mint chocolate chip flavor because it does offer the added chocolate aspect that you wouldn’t get with regular mint extract since the base flavor of the cake isn’t chocolate.
Can I use a sugar substitute?
I have not personally tried it, so I can’t say how that would turn out. But if you would like to try it, I suggest a product that offers a 1:1 swap. I have heard that there are substitutes available now for confectioner’s sugar so please let me know how it turns out.
green cake
Can I substitute the sour cream?
I do not recommend omitting the sour cream as it keeps the cakes moist. However, you can use low fat or fat-free sour cream. You can also use non-fat plain Greek yogurt if you don’t have sour cream.
Can I use mini chocolate chips instead of Andes mints?
Yes – that will work. But I do recommend that you toss the mini-chocolate chips in a small bit of flour and then sift them out before adding them to the cake batter.
Since the mini chocolate chips are heavier than the slivers of Andes, they will be more likely to sink to the bottom of each cake layer as it bakes. The flour will help to keep them disbursed throughout the cake.
How do I properly measure the flour?
The official way is to spoon the flour into the measuring cup & level off. This makes sure the flour isn’t packed tightly into your measuring cup, adding more than you need, as that will make your baked goods too dry.
However – if you fluff your flour with a spoon, then gently scoop the flour into the measuring cup, taking care to not pack the flour – that should work for this recipe.
chocolate mint cake
HOW DO YOU MAKE Mint Chocolate Chip Cake?
- Preheat the oven to 350 degrees.
- Prepare 3 – 8″ round pans by either greasing and lining the bottom with parchment or coating the bottom and sides with bakers release.
- In a large mixing bowl, combine the sugar, oil, eggs, and mint chocolate chip flavor. Beat on medium for about 2 minutes. The mixture should be slightly lighter in color.
- Stir in the sour cream until incorporated.
- Combine the flour, baking powder, and salt in a small bowl.
- Add half of the dry mixture to the egg mixture along with half of the milk. Mix on low until the flour is mostly mixed in.
- Scrape down the sides of the bowl and then add the remaining dry ingredients, milk, and food color. Beat on low until all of the ingredients are well incorporated.
- Fold in the crushed Andes mints.
- Divide the batter evenly between the 3 prepared cake pans. It should be almost 2 cups of batter per pan.
- Bake for 25-30 minutes, or until the toothpick test comes out clean. You can also test by gently pressing the center of the cake – if it springs back – the cake is done. Be sure to rotate the cakes in the oven about halfway through the baking process.
- Once done, remove from the oven and allow to cool until the cakes reach room temperature.
- Remove the cakes from the pan and wrap each individually in plastic wrap and place them in the freezer. They should be frozen prior to assembling the cake.
mint cake
To make Mint Chocolate Chip Cake you will need…
- granulated sugar
- vegetable oil
- large eggs
- mint chocolate chip flavor *see link below
- sour cream
- all-purpose flour
- baking powder
- table salt
- milk
- green food color – I used mint green soft gel paste – see link below
- Andes mint chocolates
Can this frosting be made ahead of time?
You bet! Often when I am working on a cake, it happens in batches. I will bake the layers on one day and make the frosting while they are baking.
Then the layers go in the freezer and the frosting gets refrigerated for up to 1-3 days before I even get around to decorating the cake.
Can I use a gluten-free flour?
I’m not sure just yet. I have been meaning to give this a try but haven’t had a chance. If you do try this, I would recommend using a 1:1 flour like this one as I don’t believe it would require additional ingredients that are typically called for when trying to make baked recipes in a gluten-free version. Please come back & tell me how it turned out.
mint chocolate chip cake
HOW DO YOU MAKE Mint Buttercream Frosting?
- Place the butter in a large mixer bowl and beat on high speed for several minutes until light and fluffy.
- Sift in half of the confectioner’s sugar and beat again, starting slowly until incorporated and then increase to high until well-whipped.
- Add the remaining confectioner’s sugar along with the mint chocolate chip flavor, and the milk and mix slowly until just incorporated. Then increase the speed and beat well until whipped and creamy.
- Separate out about half of the frosting into a large bowl. This will be your white. Then divide the remaining frosting in half – setting aside one portion and leaving the remaining portion in the mixer bowl.
- Add food color and beat well – adding more as needed to achieve the desired color. I usually start with the lighter colors and then gradually move to the darker ones.
- Remove that shade of frosting and place it in another bowl.
- Add the remaining frosting you had set aside and repeat the tinting process until that portion has reached the desired color.
- Once you have the white and 2 shades of green, you are ready to assemble and decorate this cake.
- Spread or pipe onto your baked treats – cake, cupcakes, etc.
- Store in an airtight container in the refrigerator for up to 7 days or freeze for up to 3 months.
green birthday cake
To make Mint Buttercream Frosting you will need…
- butter – room temperature
- confectioner’s sugar
- mint chocolate chip flavor
- milk
- green food color
How much frosting does this make?
This is enough to fill, crumb coat, and frost & decorate a 3-layer, 8″ round cake. Increase the recipe by 1/2 if you like your frosting thicker than what you see here or wish to pipe on more decoration.
What is the best way to store leftover buttercream frosting?
Just keep it refrigerated in an airtight container for up to 7 days. As long as you don’t let it sit out at room temperature for too long, this should keep well when chilled.
You can also freeze it for up to 3 months. Just make sure to thaw in the refrigerator for 24 hours prior to using it again.
st patricks day cake
HOW DO YOU DECORATE A MINT CHOCOLATE CHIP CAKE?
- Place one of the frozen cake layers on a cake plate or cardboard round. You can add a small dollop of frosting underneath to keep it from shifting on the plate.
- Use a cake leveler or sharp knife to trim off the dome if your cake did not bake flat.
- Add some of the frosting in an even layer on top of that bottom round of cake.
- Repeat the leveling process with the second and third layers and stack one on top of the filling layer you just added, add another filling layer on that one before adding the final cake layer.
- Using an offset spatula, spread a thin coat (this is the crumb coat) of frosting around the whole cake, tops, and sides. You should be able to see through it. I like to freeze the cake at this time to set the frosting and make it easier to work with for the decorating.
- Once frozen, add another thicker layer of frosting to the top and sides of the cake. For the ombre effect, use the dark green at the bottom, light green in the middle, and white at the top, and then smooth them together using a rubber cake scraper.
- Transfer the remaining frosting to piping bags – each color in its own bag and decorate as desired. I use several open star tips for this one.
- Add green disco dust if desired.
- Keep refrigerated until ready to serve.
mint buttercream frosting
Can this be made with different size cake pans?
You bet – if you need to change the size of the cake you are making – please see the variations below. As with all cakes – bake until the toothpick test is clean as different ovens, climate, elevation, and other factors can change the baking time.
- TWO 9″ pans – These tend to dome and crust a bit more. Baking time will change to 30-35 minutes. This could be varied by the type of pans and true oven temp.
- TWO 8″ pans – divide the batter evenly – should be just about 2-1/2 cups of batter for each. Bake for 28-32 minutes.
- FOUR 6″ pans – divide evenly – should be about 1-1/3 cup of batter each. Bake for 24-30 minutes.
Can mint chocolate cake be frozen?
Yes, I do it often. Once baked – this cake can be frozen at all stages of the creation process. I like to remove the freshly baked and cooled cakes from the pan, wrap them tightly in plastic wrap and freeze them for later use.
(this is also handy when you want to work with cold cakes to keep the frosting from getting too soft.)
I also like to freeze the cake once I have assembled the layers and added the crumb coat. This helps the final frosting decorating go much smoother. This way you don’t have your frosting melting off the side of the cake because the cake or the frosting is too warm.
Often times I will get a cake to this stage days before the event I’m making for. Then just finish up the decorating the night before.
You can also gently wrap the completely decorated cake and freeze it until you need it. Remember that the frosting won’t be completely firm and can still be dented if something gets pushed up against it while in the freezer.
Just make sure to thaw it in the fridge the night before as it does taste best when not frozen. I also like to leave it at room temperature for 1-2 hours before serving so the frosting is more creamy than stiff.
st patrick’s day cake
Can this recipe be cut in half?
I have not had the best results when cutting this recipe in half when it comes to the cake. I recommend making the whole recipe and freezing the layers that you don’t need immediately.
However, the frosting can be cut in half easily as needed.
What is bakers release?
Bakers release is a combination of oil, flour, and shortening that makes releasing cakes and other baked goods almost effortless.
To make Bakers Release – it is as simple as 1,1 & 1.
- equal parts of all-purpose flour, shortening, and cooking oil – I like to do 1 cup of each.
Mix the ingredients together – whisking well. Store in an airtight container in the pantry or refrigerator. When ready to use, dip a pastry brush into the mixture and spread it over the cake pan.
chocolate chip cake
This recipe calls for a stand mixer. Can I also make this recipe by hand?
Yes. This recipe can be made by hand. However, keep in mind that this method will influence the overall time commitment. If you don’t have a stand mixer, I would recommend using a hand mixer if you can.
What is the best way to store leftover mint chocolate chip cake?
If most of the cake is still remaining after serving, I recommend wrapping it with plastic wrap, taking care to fully cover the cut area that is now exposed. Then add a layer of foil over the whole thing. Refrigerate.
If you only have a couple of slices left, place them in an airtight container, preferably in individual slices and refrigerate.
This cake will stay fresh for up to 5 days if kept wrapped and refrigerated. Let sit at room temperature for about 20 minutes prior to serving again.
mint chocolate cake recipe
Should I use salted or unsalted butter?
This is really a personal preference. If you are happy with just a little salt to cut the sweetness, then use salted butter.
I usually use whatever I have on hand & I really don’t pay too close attention to what butter I have. But I typically keep salted butter on hand & I love that little bit of extra salt with the sweet in this recipe.
These days with groceries being more difficult to find – I basically get whatever the store has available at the time and make it work.
How many can this serve?
Depending on the size of your slices, this cake will yield approximately 12-16 slices. That being said – in our house, it is “go BIG or go home”. So we usually split the cake between the 5 of us for 2 nights.
shamrock cake
How do I properly measure the confectioner’s sugar?
The official way is to spoon the sugar into the measuring cup & level off. This makes sure the sugar isn’t packed tightly into your measuring cup, adding more than you need, as that will make your recipe too dry.
Sometimes if you fluff the sugar with a spoon, then gently scoop it into the measuring cup, taking care to not pack it in – that can work. For THIS RECIPE fluffing and gently scooping will work fine.
Can the frosting recipe be doubled?
Yes – this recipe can be doubled well. I usually pull out the pro mixer when I need to make a large cake or want to decorate more as this makes just enough for what you see here.
Products I love when making mint chocolate chip cake…
This mint chocolate chip cake recipe is SUPER delicious – and if you’re like me, then you maybe already have some of these items on hand OR maybe you have never made a homemade cake before, & you might be a bit nervous – but you’re going to love it. I have made a list below of the things I absolutely can’t live without when it comes to making this cake recipe.
- granulated sugar
- vegetable oil
- all-purpose flour
- baking powder
- table salt
- Andes mint chocolates
- confectioner’s sugar
- mint chocolate chip flavor
- mint green food coloring
- mixer
- hand mixer
- mixing bowl
- piping bag
- piping tips
- offset spatula
- rubber scraper
- star tip
- holographic disco dust
- offset spatula
- silicone spatulas
- cake pans
- cake turntable
- decorative scrapers
- cardboard rounds
If you love this Mint Chocolate Chip Cake recipe, you’re going to love these other treats too. Please click each link below to find the easy, printable recipe!


If you love this recipe for Mint Chocolate Chip Cake as much as I do, please write a five-star review, and be sure to help me share on Facebook and Pinterest!
CONNECT WITH YUMMI HAUS!
Be sure to follow me on my social media, so you never miss a post!
Mint Chocolate Chip Cake
Ingredients
Cake
- 2 cups granulated sugar
- ½ cup vegetable oil
- 3 large eggs
- 1½ tsp mint chocolate chip flavor *see link in post)
- ½ cup sour cream
- 2½ cups all-purpose flour
- 3 tsp baking powder
- 1 tsp table salt
- 1¼ cups milk I used 2%
- 2 drops green food color I used mint green soft gel paste – see link in post
- 25 Andes mint chocolates – chopped
Frosting
- 1½ cups butter – room temperature
- 5-6 cups confectioner’s sugar
- 2 tsp mint chocolate chip flavor
- 3 tbsp milk
- green food color divided
Instructions
Cake
- Preheat the oven to 350 degrees.
- Prepare 3 – 8" round pans by either greasing and lining the bottom with parchment or coating the bottom and sides with bakers release.
- In a large mixing bowl, combine the sugar, oil, eggs, and mint chocolate chip flavor. Beat on medium for about 2 minutes. The mixture should be slightly lighter in color.
- Stir in the sour cream until incorporated.
- Combine the flour, baking powder, and salt in a small bowl.
- Add half of the dry mixture to the egg mixture along with half of the milk. Mix on low until the flour is mostly mixed in.
- Scrape down the sides of the bowl and then add the remaining dry ingredients, milk, and food color. Beat on low until all of the ingredients are well incorporated.
- Fold in the crushed Andes mints.
- Divide the batter evenly between the 3 prepared cake pans. It should be almost 2 cups of batter per pan.
- Bake for 25-30 minutes, or until the toothpick test comes out clean. You can also test by gently pressing the center of the cake – if it springs back – the cake is done. Be sure to rotate the cakes in the oven about halfway through the baking process.
- Once done, remove from the oven and allow to cool until the cakes reach room temperature.
- Remove the cakes from the pan and wrap each individually in plastic wrap and place them in the freezer. They should be frozen prior to assembling the cake.
Frosting
- Place the butter in a large mixer bowl and beat on high speed for several minutes until light and fluffy.
- Sift in half of the confectioner’s sugar and beat again, starting slowly until incorporated and then increase to high until well-whipped.
- Add the remaining confectioner’s sugar along with the mint chocolate chip flavor, and the milk and mix slowly until just incorporated. Then increase the speed and beat well until whipped and creamy.
- Separate out about half of the frosting into a large bowl. This will be your white. Then divide the remaining frosting in half – setting aside one portion and leaving the remaining portion in the mixer bowl.
- Add food color and beat well – adding more as needed to achieve the desired color. I usually start with the lighter colors and then gradually move to the darker ones.
- Remove that shade of frosting and place it in another bowl.
- Add the remaining frosting you had set aside and repeat the tinting process until that portion has reached the desired color.
- Once you have the white and 2 shades of green, you are ready to assemble and decorate this cake.
- Spread or pipe onto your baked treats – cake, cupcakes, etc.
- Store in an airtight container in the refrigerator for up to 7 days or freeze for up to 3 months.
Decorate
- Place one of the frozen cake layers on a cake plate or cardboard round. You can add a small dollop of frosting underneath to keep it from shifting on the plate.
- Use a cake leveler or sharp knife to trim off the dome if your cake did not bake flat.
- Add some of the frosting in an even layer on top of that bottom round of cake.
- Repeat the leveling process with the second and third layers and stack one on top of the filling layer you just added, add another filling layer on that one before adding the final cake layer.
- Using an offset spatula, spread a thin coat (this is the crumb coat) of frosting around the whole cake, tops, and sides. You should be able to see through it. I like to freeze the cake at this time to set the frosting and make it easier to work with for the decorating.
- Once frozen, add another thicker layer of frosting to the top and sides of the cake. For the ombre effect, use the dark green at the bottom, light green in the middle, and white at the top, and then smooth them together using a rubber cake scraper.
- Transfer the remaining frosting to piping bags – each color in its own bag and decorate as desired. I use several open star tips for this one.
- Add green disco dust if desired.
- Keep refrigerated until ready to serve.
Notes
*To make this ultra-creamy – beat each step for 5 full minutes before adding more ingredients. This isn’t necessary but enhances the texture. *This is enough to fill, crumb coat, and frost & decorate a 3-layer, 8″ round cake. Increase the recipe by 1/2 if you like your frosting thicker than what you see here or wish to pipe on more decoration. To make Bakers Release – it is as simple as 1,1 & 1.
1 cup all-purpose flour
1 cup shortening
1 cup cooking oil Mix the ingredients together – whisking well.
Store in an airtight container in the pantry or refrigerator.
When ready to use, dip a pastry brush into the mixture and spread it over the cake pan.
Nutritional information for the recipe is provided as a courtesy and is approximate. Please double-check with your own dietary calculator for the best accuracy. We at Yummi Haus cannot guarantee the accuracy of the nutritional information given for any recipe on this site.

