

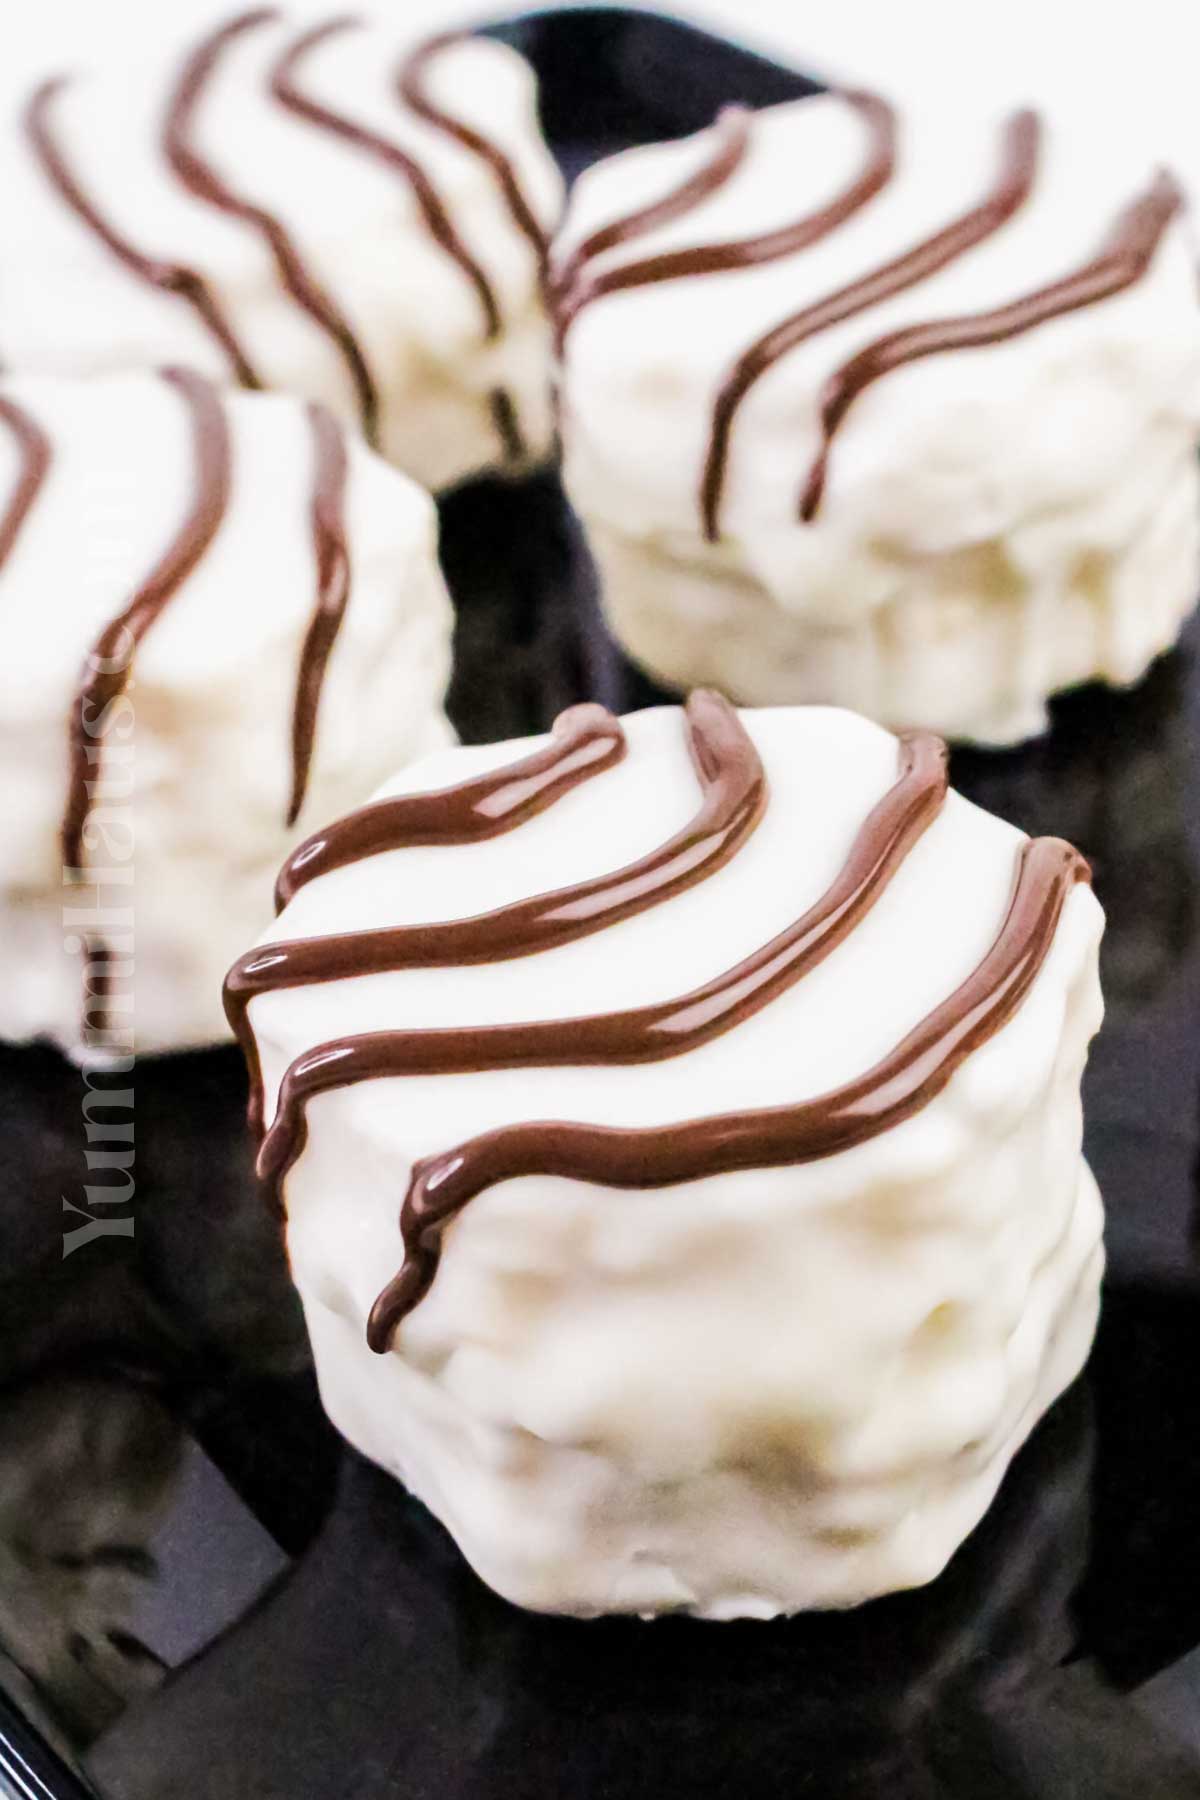
If you have a soft spot for fun and whimsical desserts, let me introduce you to zebra cakes—the charming treats that bring together the best of chocolate and vanilla in a delightful striped dance.
These cakes aren’t just a treat for the eyes—they capture the same soft, creamy, chocolatey magic we loved as kids, with every bite bringing back the joy of enjoying the original zebra cakes growing up.
Whether you’re baking for a casual afternoon snack or a special gathering, zebra cakes have a way of making moments feel a little sweeter and a lot more memorable.
And don’t worry if you’re new to baking striped treats like these—this recipe is straightforward enough to make with a smile and maybe a few playful smudges.
Gina’s Recipe Rundown:
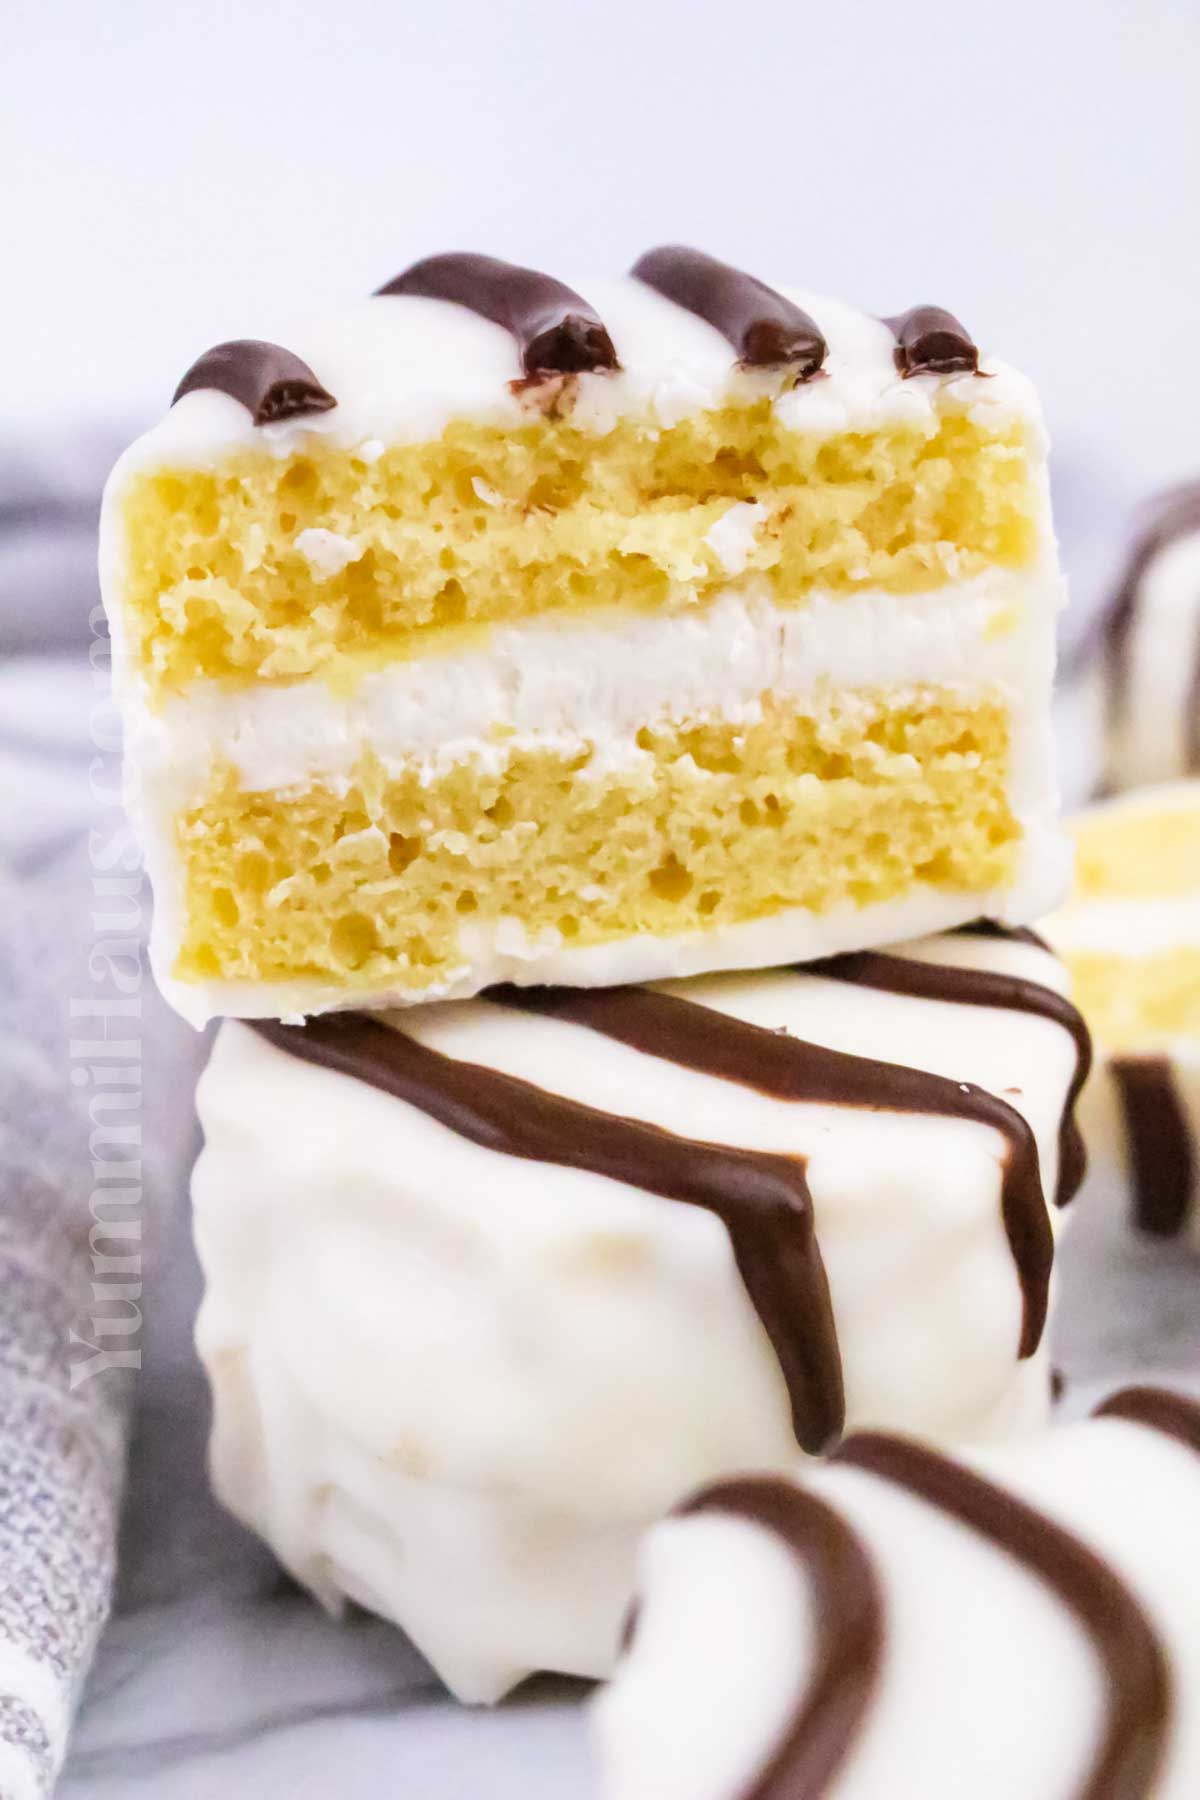
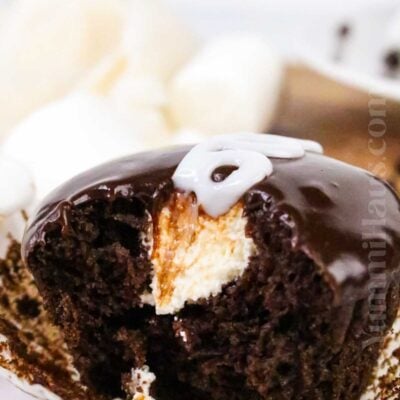
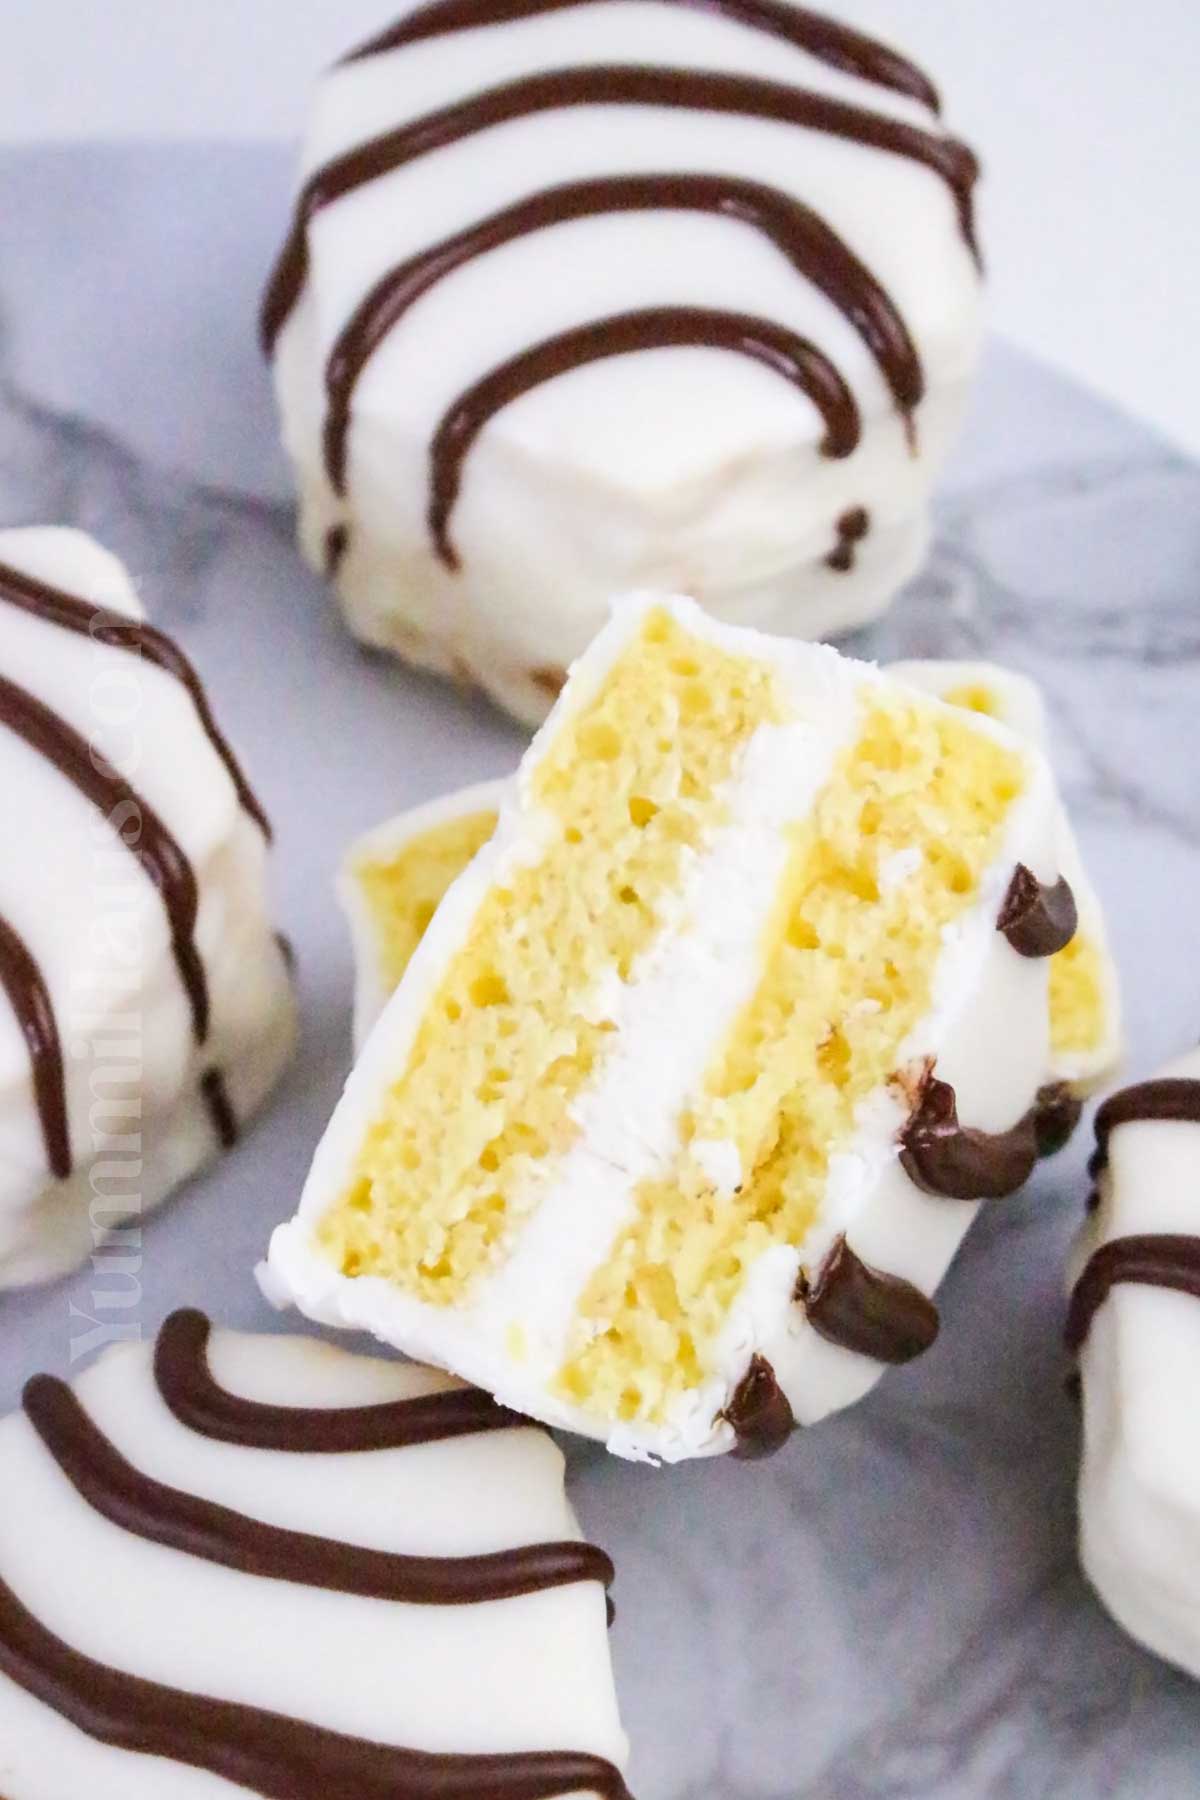
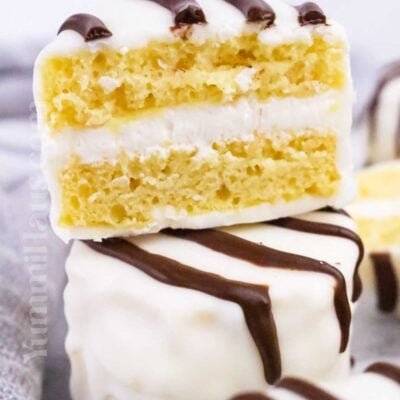
Texture: These have a soft, tender sponge cake that’s light but sturdy enough to hold the filling. The inside is layered with a creamy, fluffy vanilla cream (or marshmallow-style filling) that’s smooth and sweet without being too heavy. Once assembled, the whole cake is coated in a thin layer of firm chocolate shell, which gives a satisfying snap when you bite into it before yielding to the soft cake and creamy center.
Taste: The taste is sweet, nostalgic, and indulgent—just like the childhood favorite, but fresher.
Ease: Despite looking fancy, these homemade zebra cakes are surprisingly simple to make. The cake batter comes together quickly, the creamy filling is no-fuss, and the chocolate coating only takes a few minutes to dip. With just a little patience, you can create a bakery-worthy treat right in your own kitchen!
Why I love it: I love these homemade copycat zebra cakes because they bring back all the childhood nostalgia, but taste even better when made from scratch. The soft, fluffy cake paired with that creamy filling and chocolate shell feels like a treat straight from the bakery.
What Makes This Recipe Great
Delightful visual appeal.
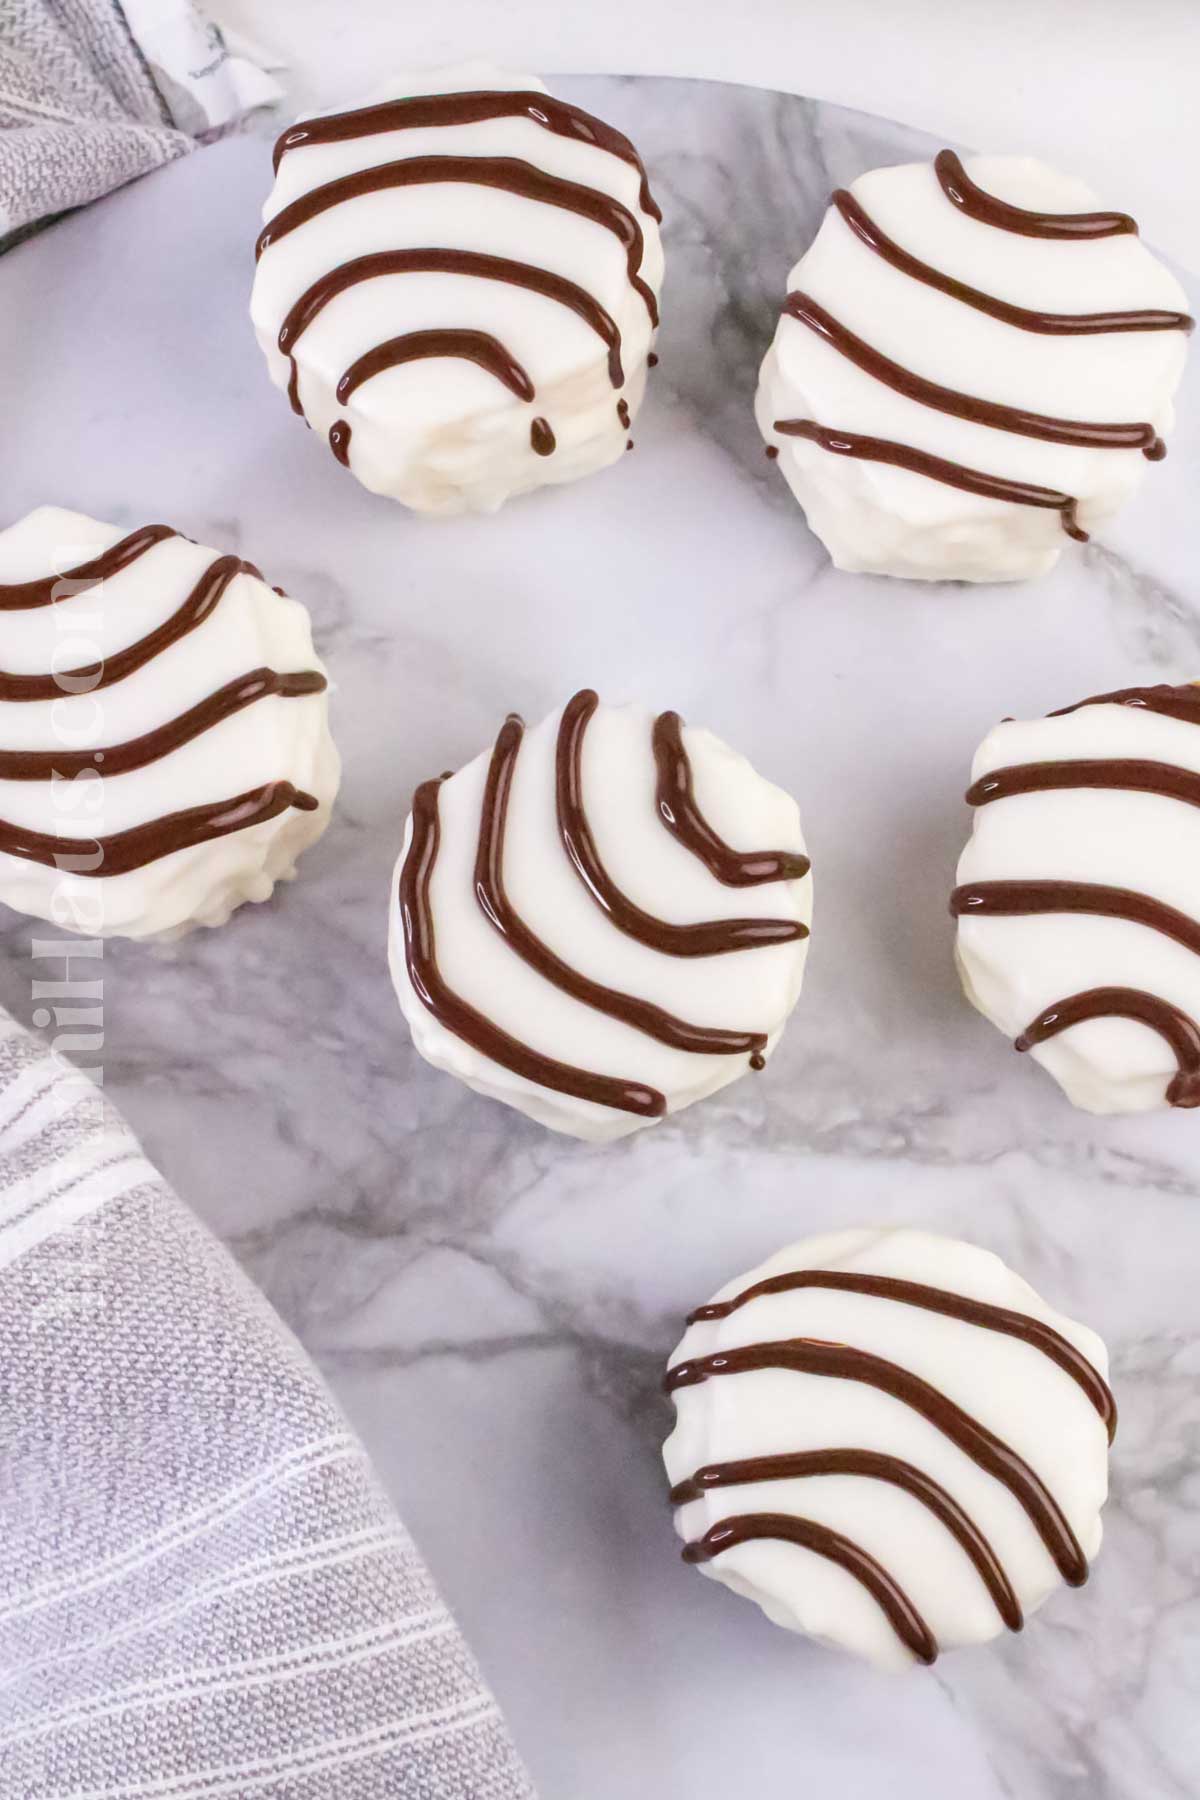
Zebra cakes immediately catch the eye with their beautiful black-and-white striped pattern inside, blending chocolate and vanilla batter in a way that feels playful and inviting. This striking look adds an extra layer of fun to your baking, perfect for impressing guests or just brightening your day.
Simple to prepare but impressive in result.
Even if you don’t consider yourself an expert baker, the step-by-step layering makes this cake recipe easy to follow, yet it delivers a result that looks like it belongs in a bakery window. The technique is forgiving enough so you can experiment without fear, turning your kitchen into a mini workshop of delicious creativity.
Perfect balance of flavors and textures.
The soft, moist vanilla batter contrasts beautifully with the rich, chocolatey stripes, creating a harmonious marriage of flavors that keeps each bite interesting. Plus, the cake’s tender crumb offers a comforting mouthfeel, making it a delightful treat for all ages.
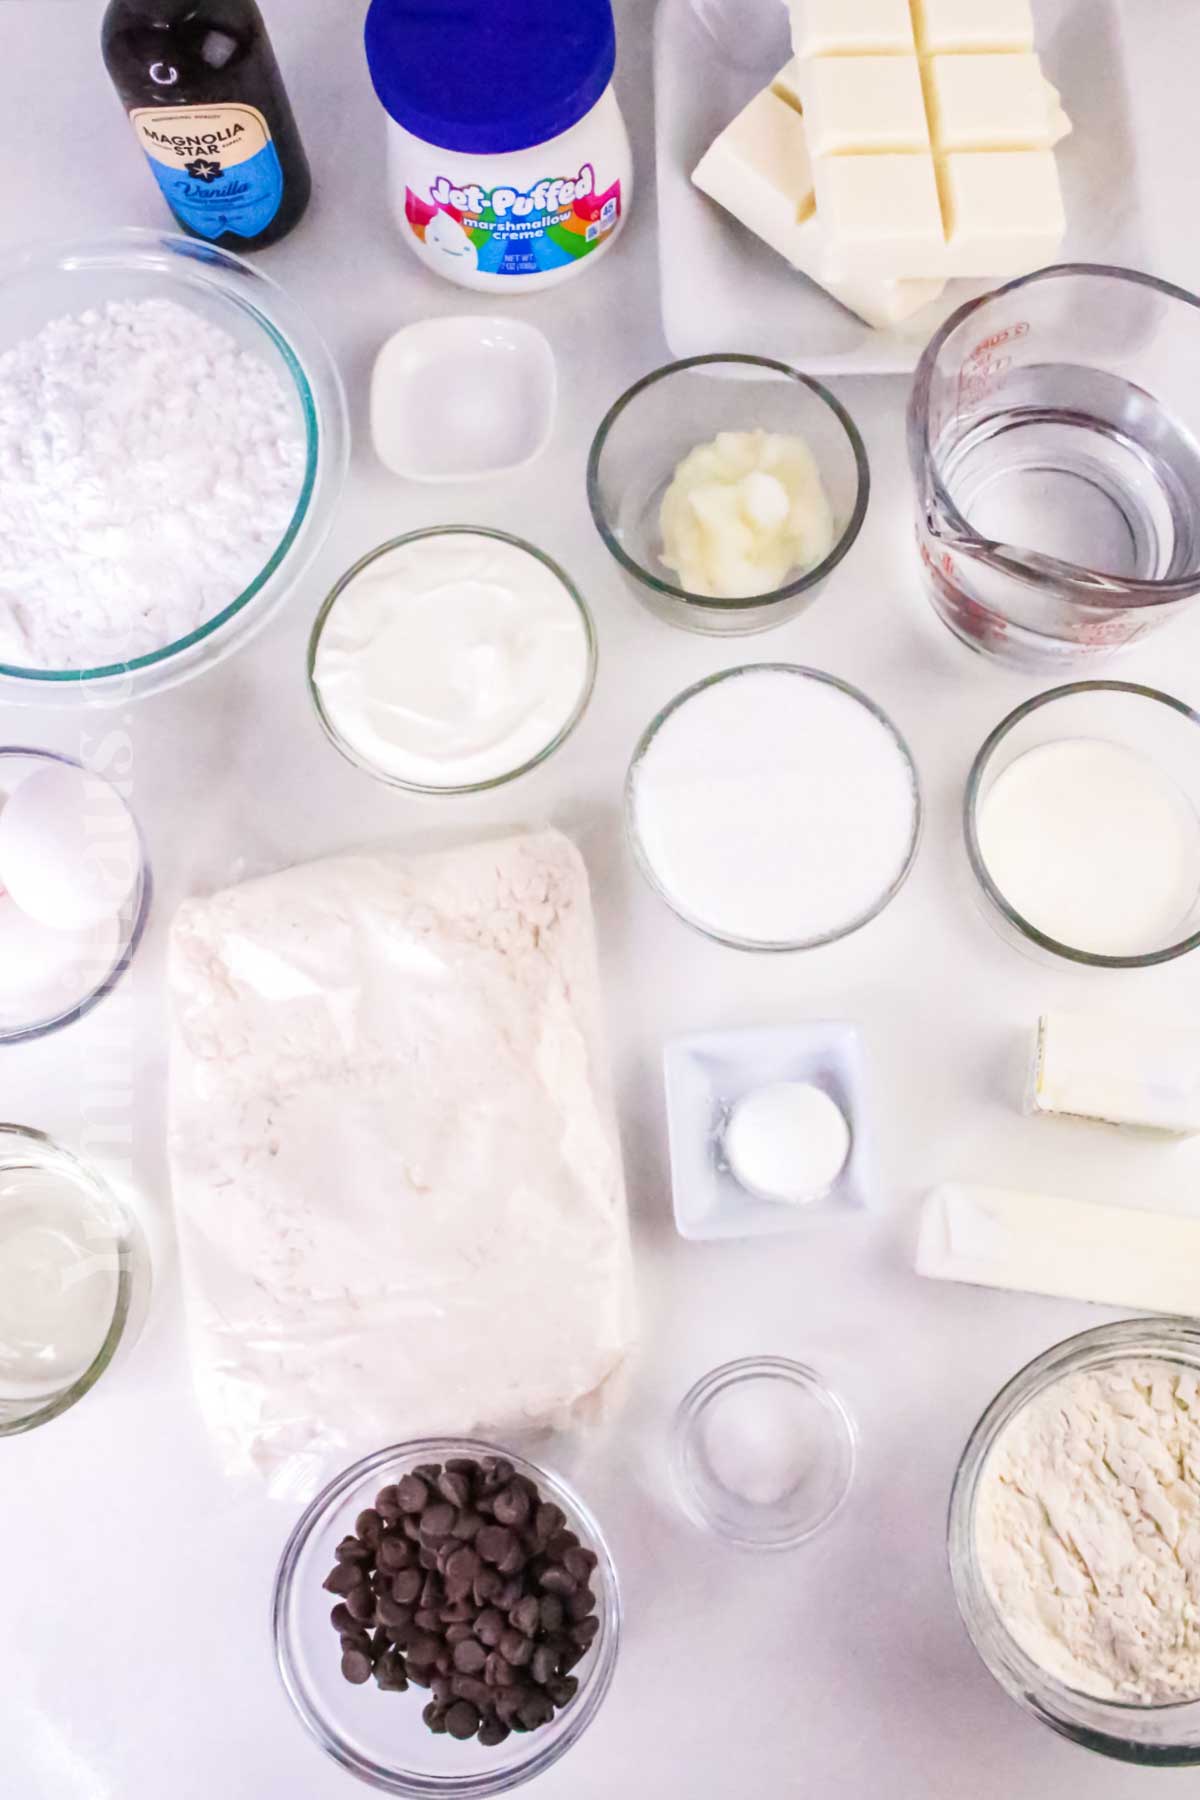
Ingredients and Substitutions
- vanilla cake mix
- cornstarch
- granulated sugar
- water
- eggs
- vanilla extract
- vegetable oil
- sour cream
- all-purpose flour
- table salt
- marshmallow fluff
- butter
- confectioner’s sugar
- vanilla extract
- heavy cream
- almond bark or vanilla candy coating
- coconut oil
- milk chocolate chips
Equipment
- Half Sheet Pans – 2 (18×13-inch)
- Mixing Bowls
- Electric Mixer or Whisk
- Measuring Cups and Spoons
- Spatula
- Cooling Rack
How to Make Zebra Cakes
Cakes
- Preheat the oven to 350°F. Grease and line two half-sheet pans (18×13 inches) with parchment paper.
- In a large mixing bowl, combine the cake mix, cornstarch, sugar, water, eggs, vanilla, and oil. Beat for about 1 minute until smooth.
- Add the flour, salt, and sour cream. Mix on medium speed for 2–3 minutes until fully combined and lump-free.
- Divide the batter evenly between the prepared pans and smooth the tops.
- Bake for 15–18 minutes, or until a toothpick inserted in the center comes out clean.
- Let the cakes cool at room temperature for 30 minutes, then chill in the refrigerator for 30–60 minutes to firm up.
Filling
- In a mixing bowl, beat the marshmallow fluff and softened butter on medium-high speed until fluffy, about 1 minute.
- Add the confectioner’s sugar, vanilla, salt, and 2 tablespoons of heavy cream. Beat until smooth. Add more cream gradually if needed until the filling is spreadable but still thick.
Assemble & Decorate
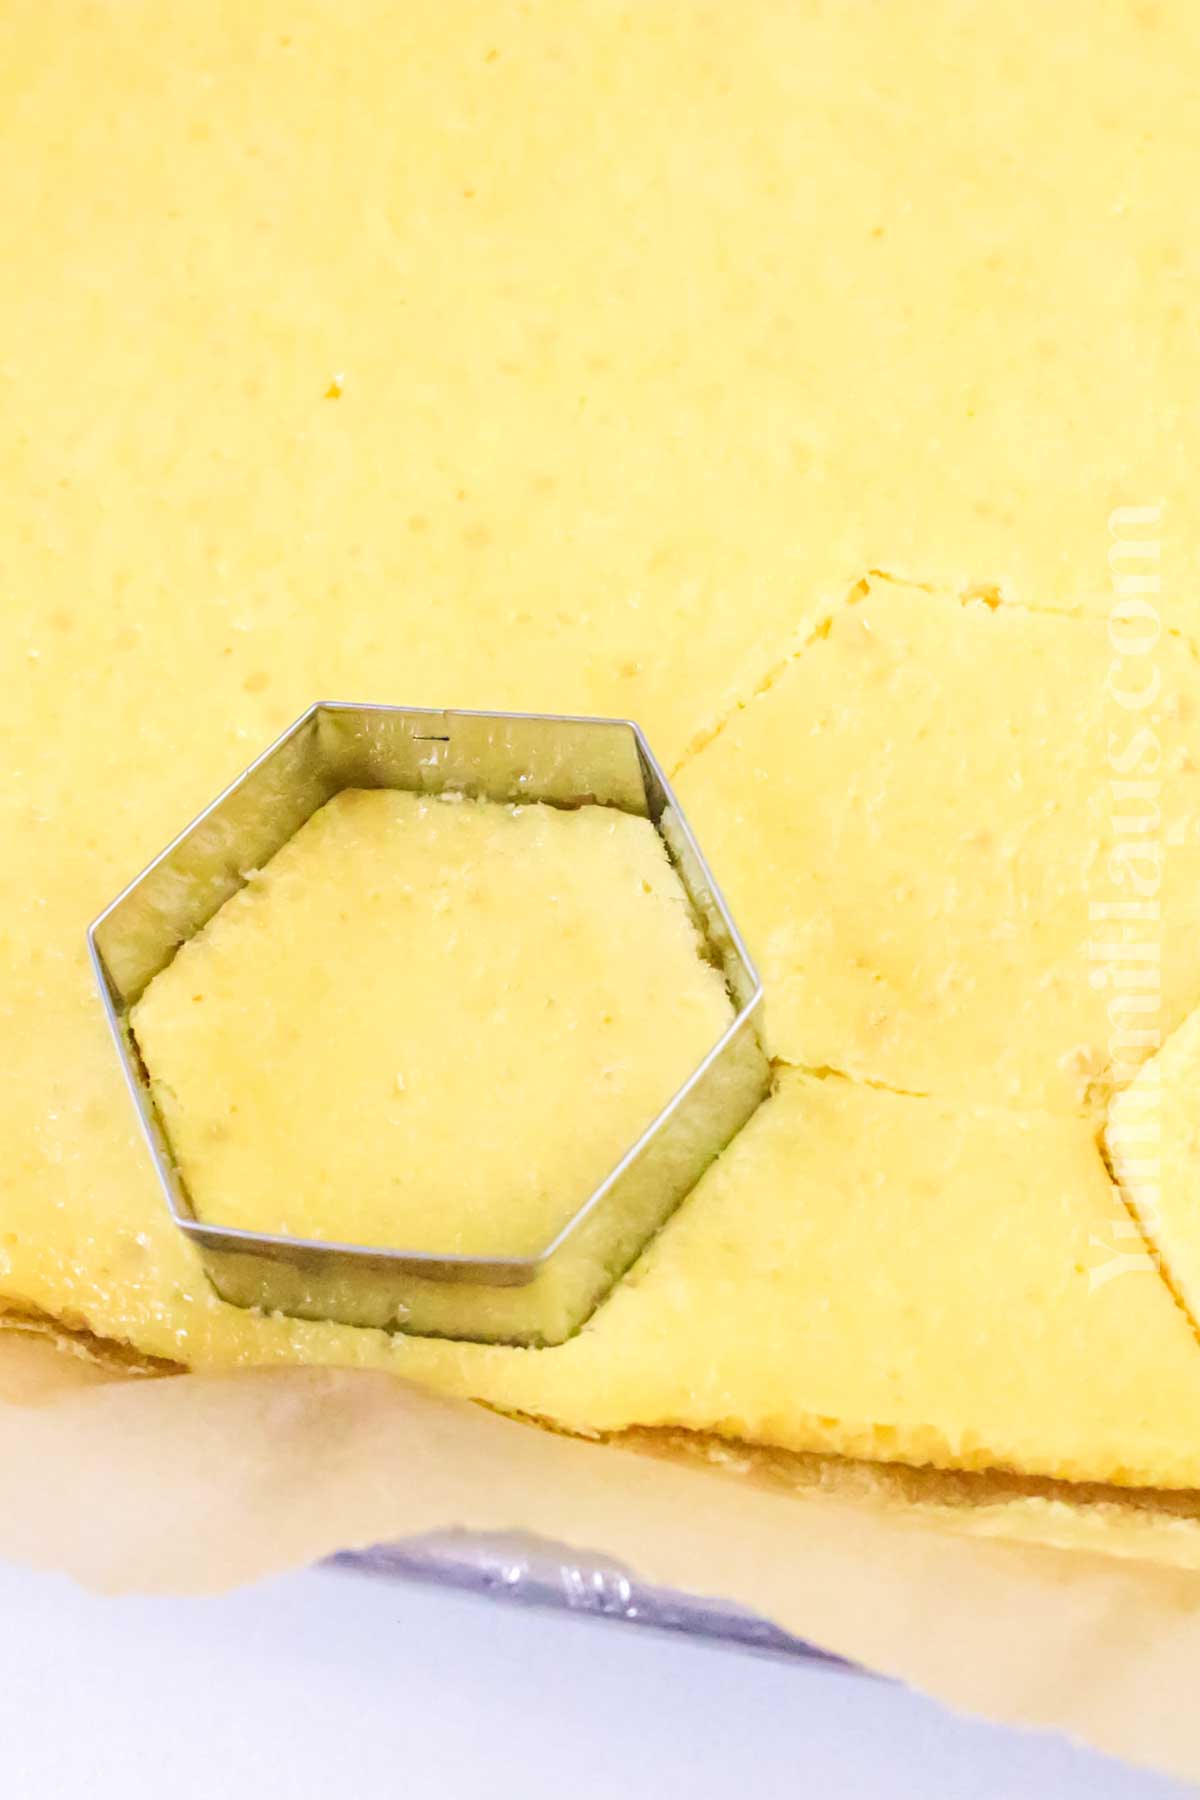
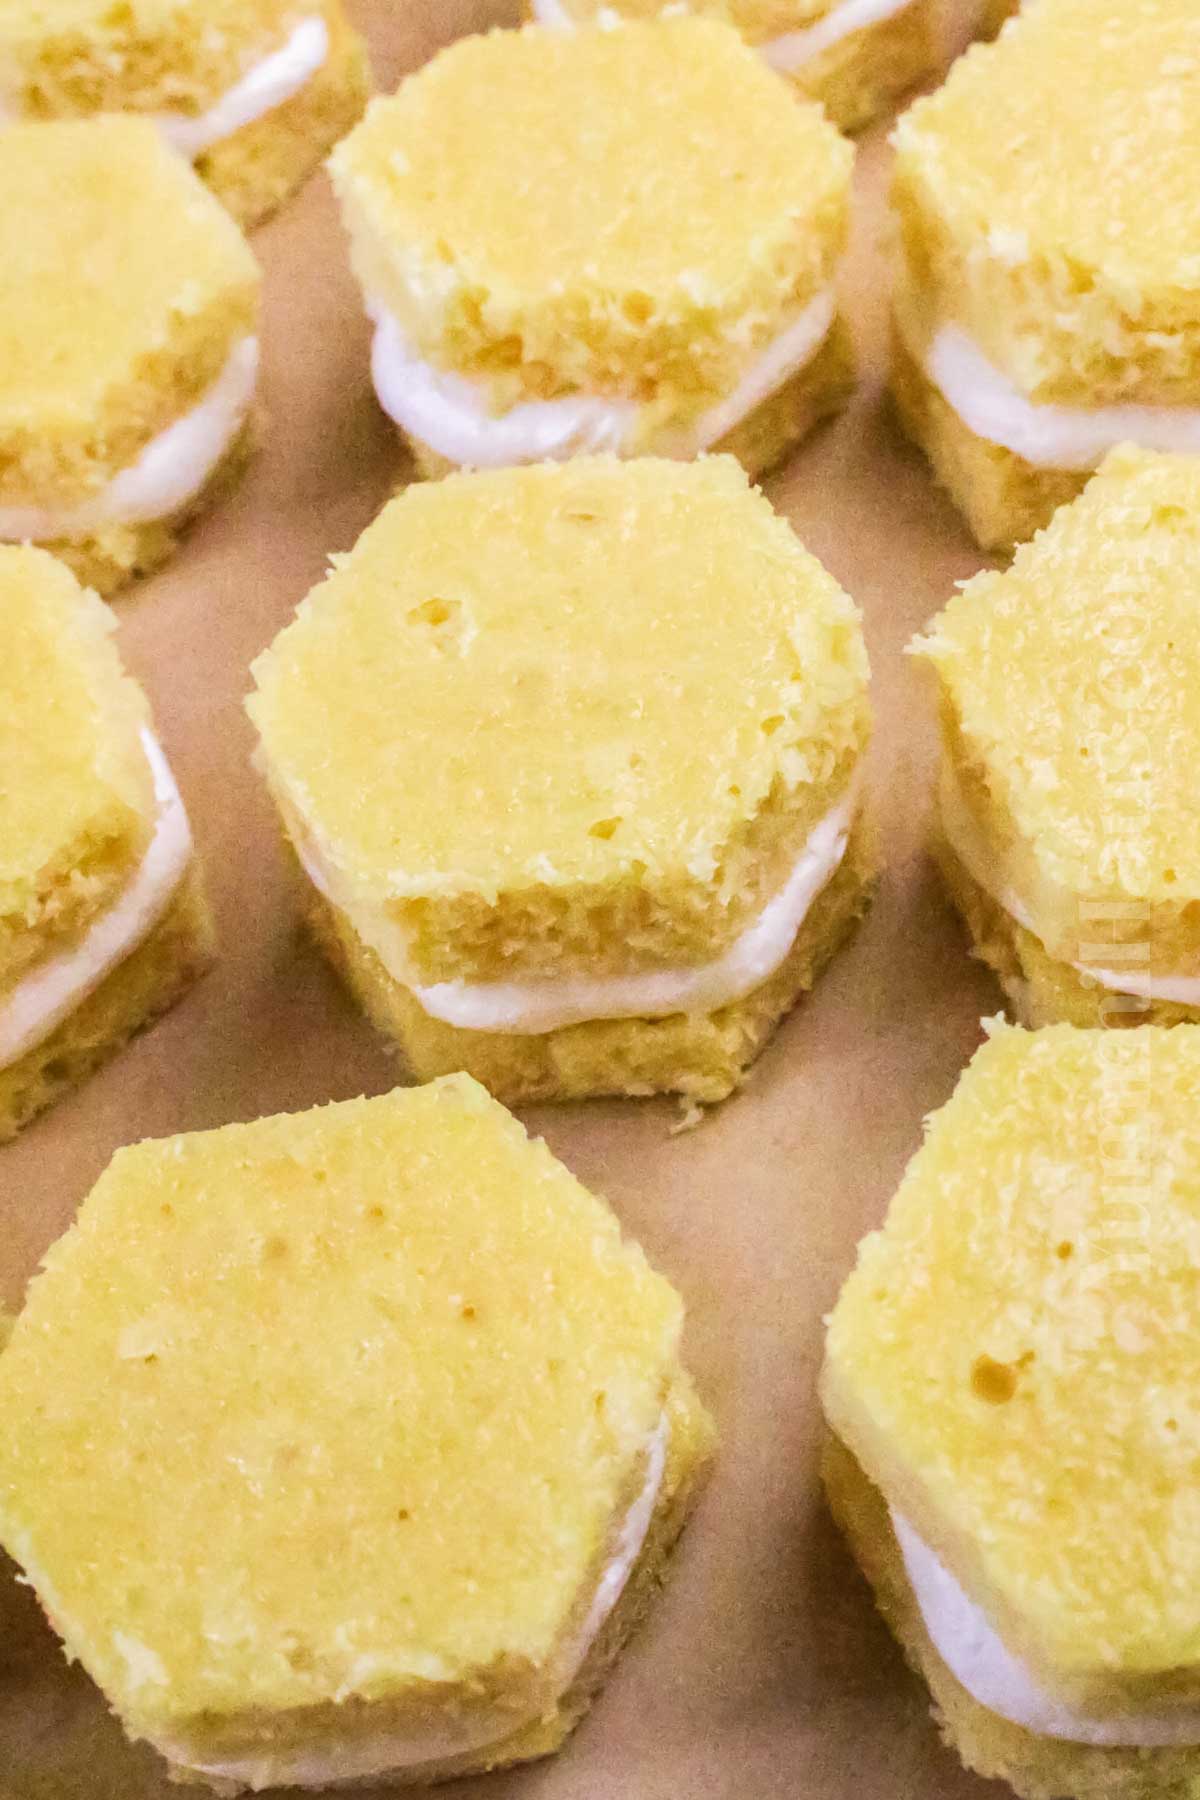
- Once chilled, use a 2-inch hexagon cookie cutter to cut 36 shapes from the cake layers. Lightly spritz the cutter with nonstick spray between cuts to prevent sticking.
- Pipe the filling onto half of the cake pieces, then top each with another piece to create a sandwich.
- Place the sandwiches on a parchment-lined tray and freeze for at least 1 hour (or up to a day) to make coating easier.
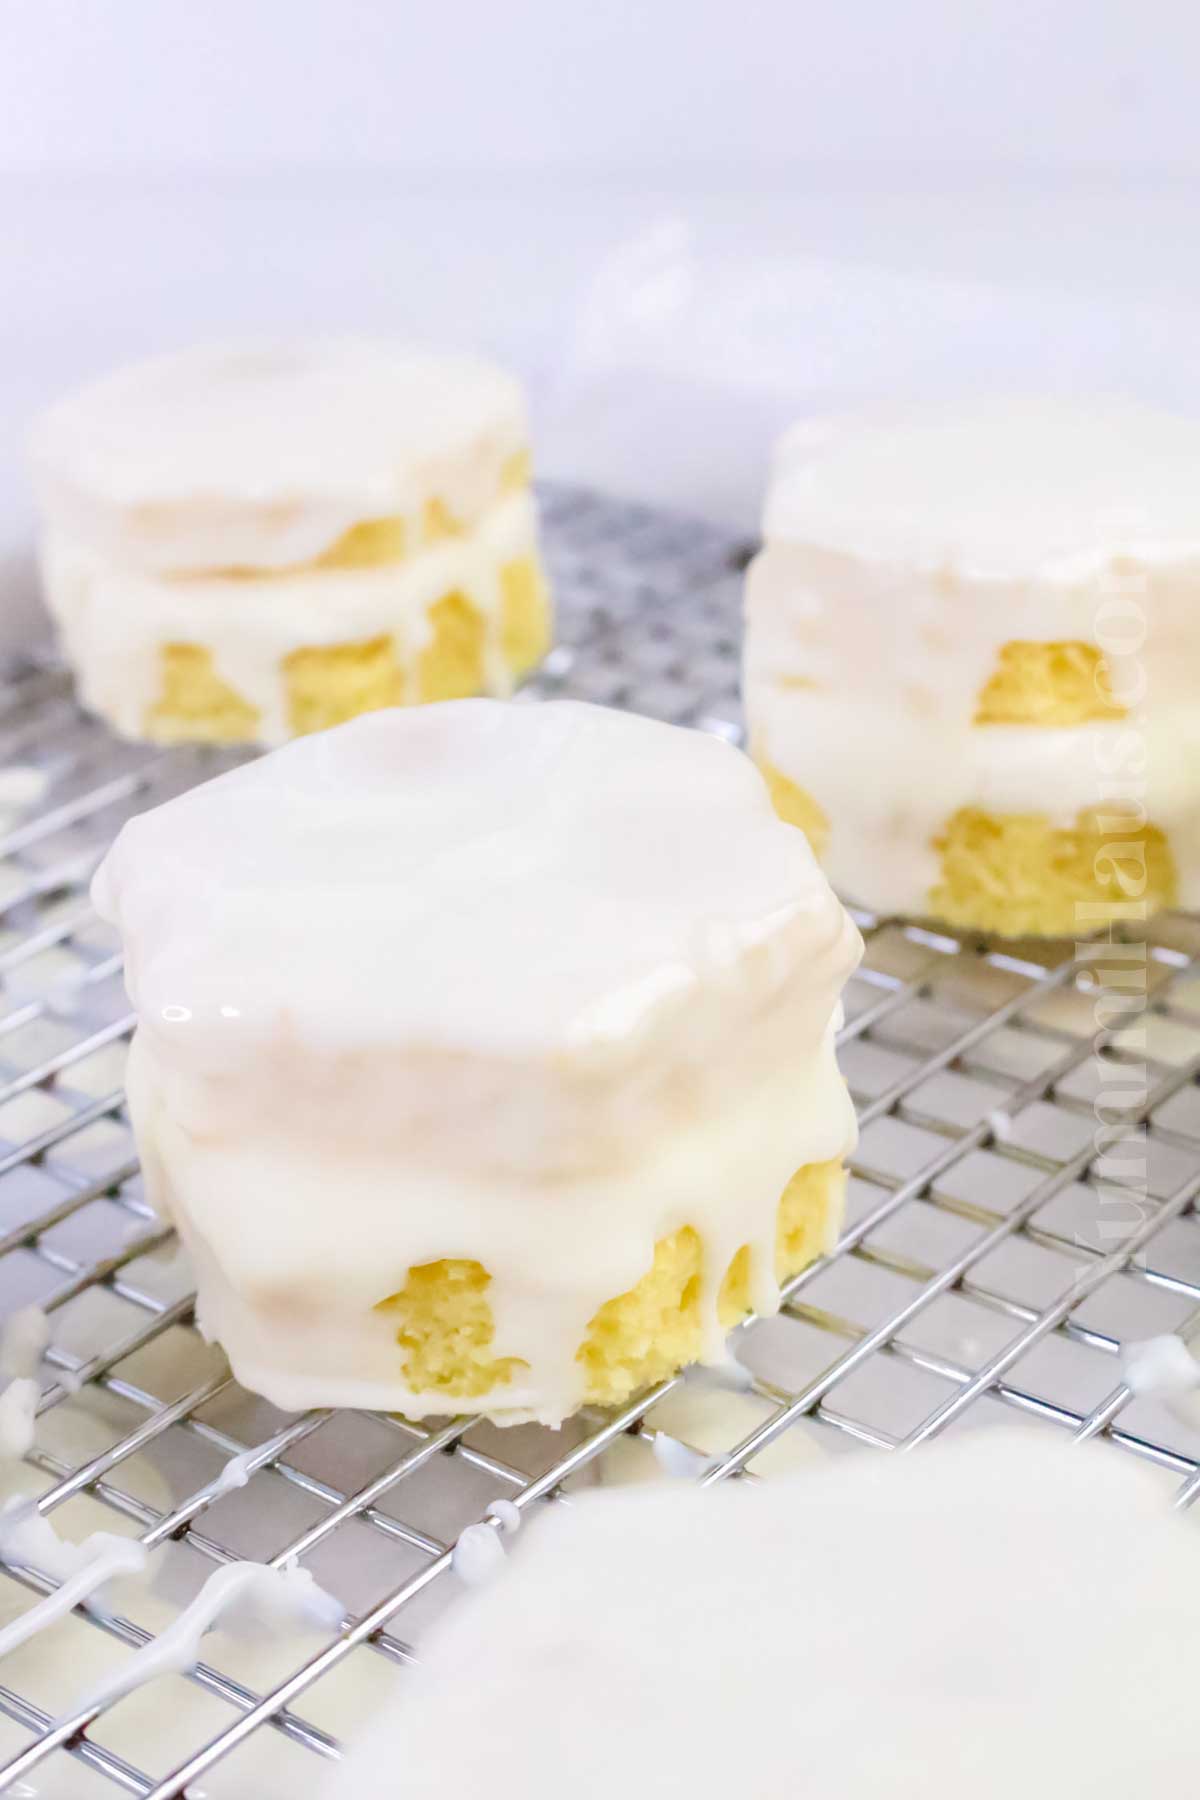
- Melt the almond bark in a heat-safe bowl in 30-second microwave intervals, stirring in between, until smooth. Stir in the coconut oil until glossy.
- Spoon the melted almond bark over each frozen cake sandwich, coating the top and sides. Let set, then flip and coat the other side. Place the coated cakes on a parchment-covered tray and let the chocolate set for 10 minutes.
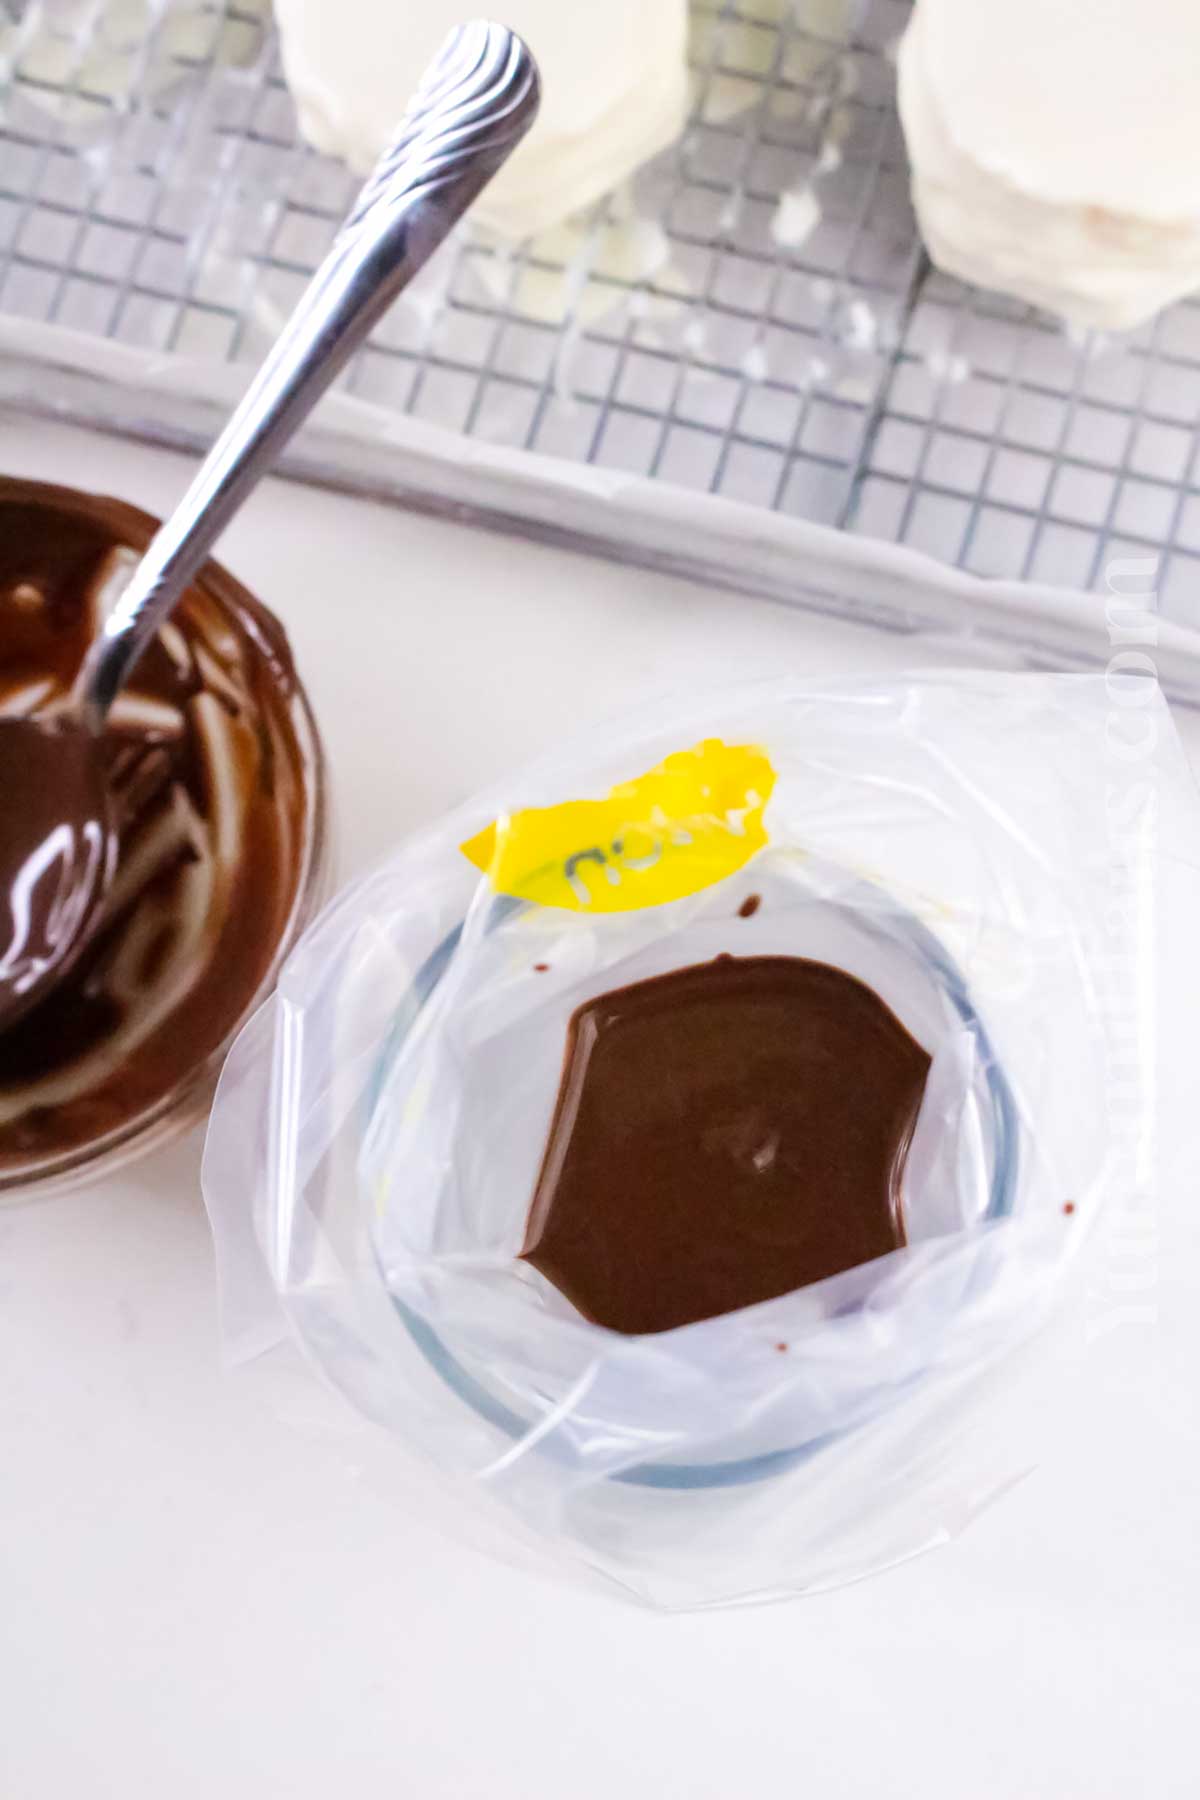
- Melt the milk chocolate wafers separately and transfer to a piping bag with a small round tip. Drizzle over the coated cakes in curved stripes to create the classic zebra pattern.
Pro Chef Tips
- Use room temperature ingredients
Bringing butter, eggs, and any dairy to room temperature before mixing ensures smoother batter and better incorporation, which helps with an even rise and tender crumb. It’s a simple step that can make a noticeable difference in your cake’s texture. - Don’t overmix the batter
Overmixing can develop gluten and make your cake dense or tough, so mix just until ingredients are combined. A few small lumps are okay and won’t harm your cake’s texture. - Use an oven thermometer
Oven temperatures can vary, so an oven thermometer helps ensure your baking environment stays steady at the recommended temperature. This prevents under or overbaking, letting you achieve that perfect moist cake. - Let the cake cool before cutting the shapes
Patience here pays off because cutting into a hot cake can cause it to crumble or lose its shape. Let it cool in the pan for about 10 minutes, then transfer to a wire rack until fully cooled for cleaner, more attractive slices. - Change it up – try using a biscuit cutter for a different shape when making these copycat Little Debbie Snack Cakes. You can also decorate the top of the cake with any excess chocolate in any design you desire.
- Grease the baking sheet well when making these vanilla cakes.
- I like to use varying colors of candy melts for the chocolate drizzle on the tops of the cakes to customize these little cakes for parties and celebrations. They are perfect when served alongside some ice cream.
Recipe Variations
Chocolate Orange Zebra Cake: Add a teaspoon of orange zest into the batter for a fresh, citrusy twist that complements the chocolate beautifully.
Coffee-Infused Zebra Cake: Try making this with chocolate cake mix and then mix a tablespoon of strong brewed coffee or espresso powder into the chocolate batter for a subtle mocha flavor sophistication.
Gluten-Free Version: Swap the standard cake mix for a gluten-free flour blend, and add an extra egg to help with binding and texture.
Mini Zebra Cakes: Use a muffin tin to create tiny individual zebra cakes, perfect for portion control and delightful presentation at parties.
Flavor Boosters
- Add a pinch of cinnamon or espresso powder to a chocolate batter (if using) for a subtle warming note that intensifies the cocoa flavor.
- Swirl in a handful of mini chocolate chips into the batter before layering to introduce a delightful melt-in-your-mouth surprise.
- Top the cooled cake with a dusting of confectioner’s sugar or a drizzle of white chocolate for an inviting presentation and an extra touch of sweetness.
- Incorporate finely chopped nuts like pecans or walnuts into the vanilla batter to add delightful texture contrasts.
- Add a splash of almond extract alongside vanilla for a nuanced, aromatic flavor dimension that elevates the cake.
Troubleshooting this Recipe
Cake Layers Blend Together
To keep the distinct zebra stripes, add the stripes gently and carefully after the white chocolate has cooled. If layers merge, try to chill the cakes longer before decorating next time.
Cake is Dry
Avoid overbaking by starting to check doneness a few minutes before the timer’s up, and keep oven temperature consistent. Adding a bit more butter or a dollop of sour cream to the batter can also increase moisture.
Stripes Not Visible Enough
This can happen if the chocolate isn’t firm before decorating. Use a good-quality chocolate for deep color.
Cake Sinks in the Middle
Make sure baking powder is fresh and measure accurately. Don’t open the oven door too early or frequently, as temperature changes can cause sinking.
Crumbs are Too Dense
Overmixing creates gluten, resulting in a dense crumb. Mix until ingredients just combine for a light, tender texture.
Freezing & Storing Leftovers
Freezing: Wrap cakes individually in plastic wrap and place them in an airtight container or freezer bag; the zebra cakes can be frozen for up to 2 months. To enjoy later, thaw at room temperature or gently warm in the microwave for a soft, fresh-from-the-oven feeling.
Storing: Keep leftover cake in an airtight container at room temperature for up to 2 days or refrigerate for up to 5 days. Refrigeration can dry the cake, so try to bring it to room temperature before serving for the best texture.
FAQs
Can I make zebra cakes vegan?
Yes, by substituting eggs with flaxseed or chia seeds and using plant-based butter and milk, you can create a vegan version that’s still moist and flavorful.
What’s the best pan size to use for zebra cakes?
A half-sheet cake pan works well to showcase the zebra pattern without making the cake too thin or too thick.
Can I use dark chocolate instead of white chocolate?
You can melt dark chocolate for a richer chocolate flavor, but you may need to adjust the recipe as it melts differently.
How do I keep the stripes evenly spaced?
Work slowly when piping the stripes on the cake. Also, make sure that the white chocolate is cooled and firm before adding the milk chocolate so that the two don’t blur together.
Is zebra cake good for freezing whole or just sliced?
It’s better to freeze sliced and wrapped pieces to make portioning easy and keep the cake fresh without thawing the entire cake.
If you love this fun copycat recipe, you’re going to love these other nostalgic favorites, too. Please click each link below to find the easy, printable recipe!
More Great Childhood Favorites
Samoa Cookies – Copycat Girl Scout Recipe
Mrs. Fields Chocolate Chip Cookies – Copycat Recipe
CONNECT WITH YUMMI HAUS!
Be sure to follow me on my social media, so you never miss a post!
Homemade Zebra Cakes
Ingredients
Cake
- 15.25 ounces vanilla cake mix 1 box
- 1 tbsp cornstarch
- 1 cup granulated sugar
- 1 ⅓ cups water
- 3 large eggs room temperature
- 1 tbsp vanilla extract
- 2 tbsp vegetable oil
- 1 cup sour cream
- 1 cup all-purpose flour
- ½ tsp table salt
Filling
- 7 ounces marshmallow fluff 1 jar
- ¾ cup butter salted – room temperature
- 2 cups confectioner's sugar
- 1 ½ tsp vanilla extract
- ¼ tsp salt
- 3 tbsp heavy cream room temperature (2-4 tbsp)
Coating
- 36 ounces almond bark about 1.5 packages almond bark (24 ounce packages) or vanilla candy coating
- 3 tbsp coconut oil
- ⅓ cup milk chocolate chips
Instructions
Cakes
- Preheat the oven to 350°F.
- Prepare two half-sheet pans (18×13 inches) by greasing and lining them with parchment paper.
- Combine the cake mix, corn starch, sugar, water, eggs, vanilla, and oil in a large mixing bowl. Beat for about 1 minute, or until smooth.
- Add the flour, salt, and sour cream. Continue mixing on medium speed for another 2–3 minutes until fully blended and no lumps remain.
- Divide the batter evenly between the prepared pans and smooth out the tops.
- Bake for 15–18 minutes or until a toothpick inserted in the center comes out clean.
- Let the cakes cool at room temperature for about 30 minutes, then chill them in the refrigerator for 30–60 minutes to firm up.
Filling
- Beat the marshmallow fluff and softened butter in a mixing bowl on medium-high speed until well combined and fluffy, about 1 minute.
- Add the confectioner's sugar, vanilla, salt, and 2 tablespoons of heavy cream. Beat until smooth. If needed, add more cream gradually until the mixture is spreadable but still thick.
Assemble/Decorate
- Once the cakes are chilled, use a 2-inch hexagon cookie cutter to cut 36 shapes from the cake layers. To prevent sticking, spritz the cutter with nonstick cooking spray between cuts.
- Pipe the filling on half of the cake pieces and top each with another to form a sandwich.
- Place the assembled cakes on a parchment-lined tray and freeze them for at least 1 hour or up to a full day. The colder they are, the easier they’ll be to coat.
- Melt the almond bark in a heat-safe bowl in 30-second intervals in the microwave, stirring in between, until smooth. Stir in the coconut oil until the mixture is glossy and fluid.
- While warm, spoon the melted almond bark over each frozen cake sandwich and allow it to set before flipping the cake and spooning more almond bark over the back side so that it is fully coated. Place the coated cakes on a parchment-covered rack or tray. Let the chocolate set for 10 minutes.
- Melt the milk chocolate wafers separately and transfer the melted chocolate to a piping bag with a small round tip.
- Finish by drizzling the melted milk chocolate on top in curved stripes to create the classic zebra pattern.
Nutrition
Nutritional information for the recipe is provided as a courtesy and is approximate. Please double-check with your own dietary calculator for the best accuracy. We at Yummi Haus cannot guarantee the accuracy of the nutritional information given for any recipe on this site.


Share Your Thoughts