

Hey there, holiday bakers! Let me tell you about one of my absolute favorite treats to make this season – Christmas cake pops! These little festive bites are basically happiness on a stick, and they’re way easier to make than they look. Trust me, once you master these, you’ll be the star of every holiday party.
Christmas cake pops are perfect because they’re portable, adorable, and you can decorate them about a million different ways. Plus, there’s something so satisfying about turning leftover cake into something magical. Whether you’re making these for a cookie exchange, a holiday potluck, or just because you want to feel festive, these little guys are going to be your new go-to.
Gina’s Recipe Rundown:
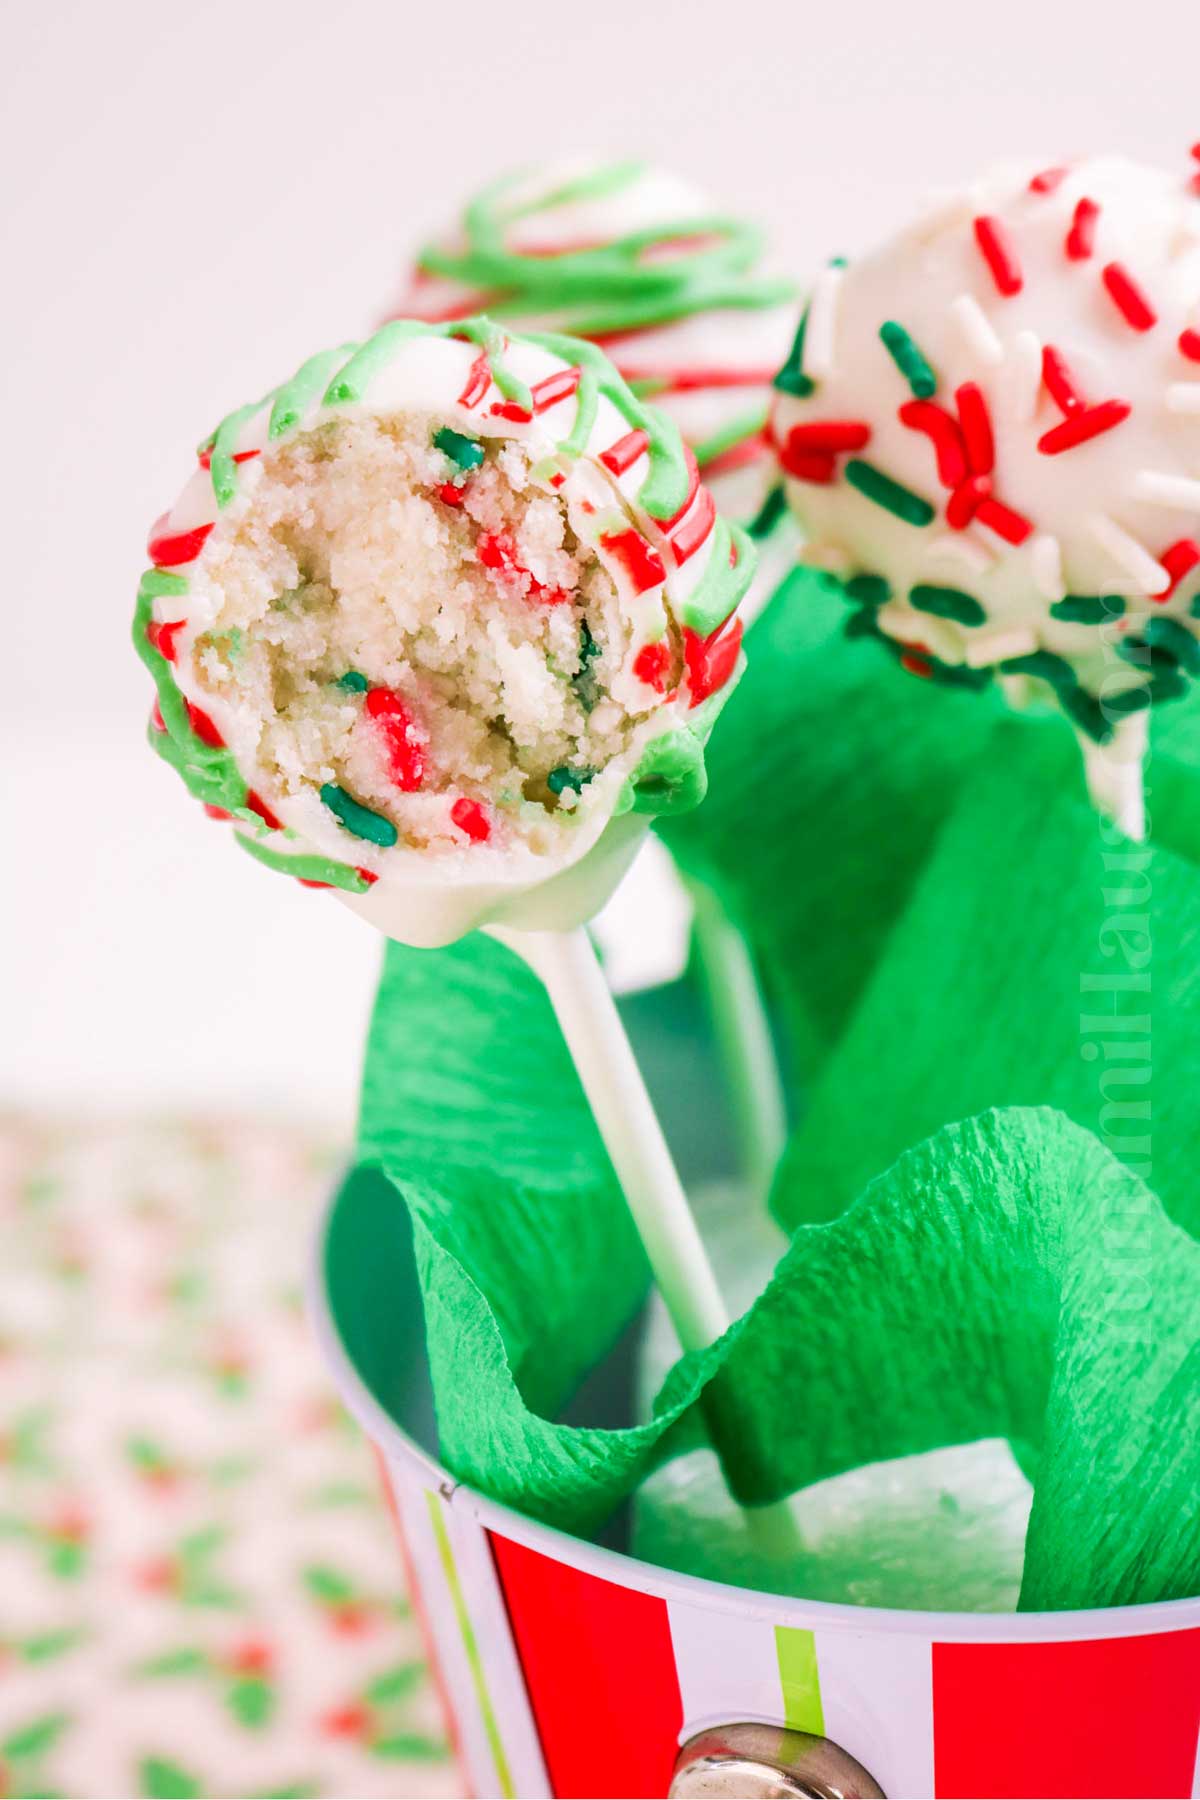
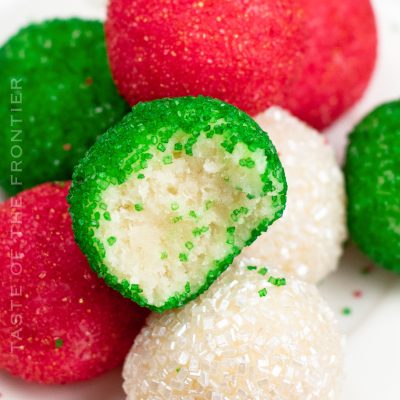
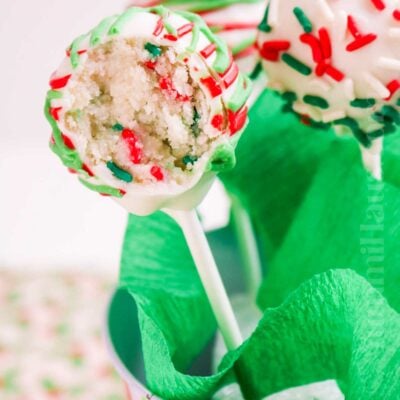
Texture: Soft, moist, and perfectly bite-sized on the inside, with a smooth, slightly firm candy coating on the outside.
Taste: Soft, moist cake blends perfectly with rich, creamy frosting, all coated in sweet, festive candy melts.
Ease: Use leftover cake crumbs and mix with frosting, roll into balls, dip in melted candy or chocolate, and decorate.
Why I love it: Because they turn leftover cake into a festive, bite-sized treat that’s fun to make and even more fun to eat! They’re colorful, customizable, and perfect for gifting, party trays, or just a little holiday indulgence. Plus, they bring a little joy to every holiday table with minimal effort.
Why You’ll Love This Recipe
First off, these cake pops are incredibly versatile. You can use any flavor cake you want – chocolate, vanilla, red velvet, gingerbread – the world is your oyster. Second, they’re make-ahead friendly, which is basically the holy grail during the busy holiday season. And third, decorating them is genuinely fun. I’m talking glitter, sprinkles, mini candy canes – go wild!
The best part? Kids absolutely love helping with these. Sure, things might get a little messy, but that’s half the fun. Plus, it keeps them entertained while you’re checking other things off your holiday to-do list.

Ingredient Notes
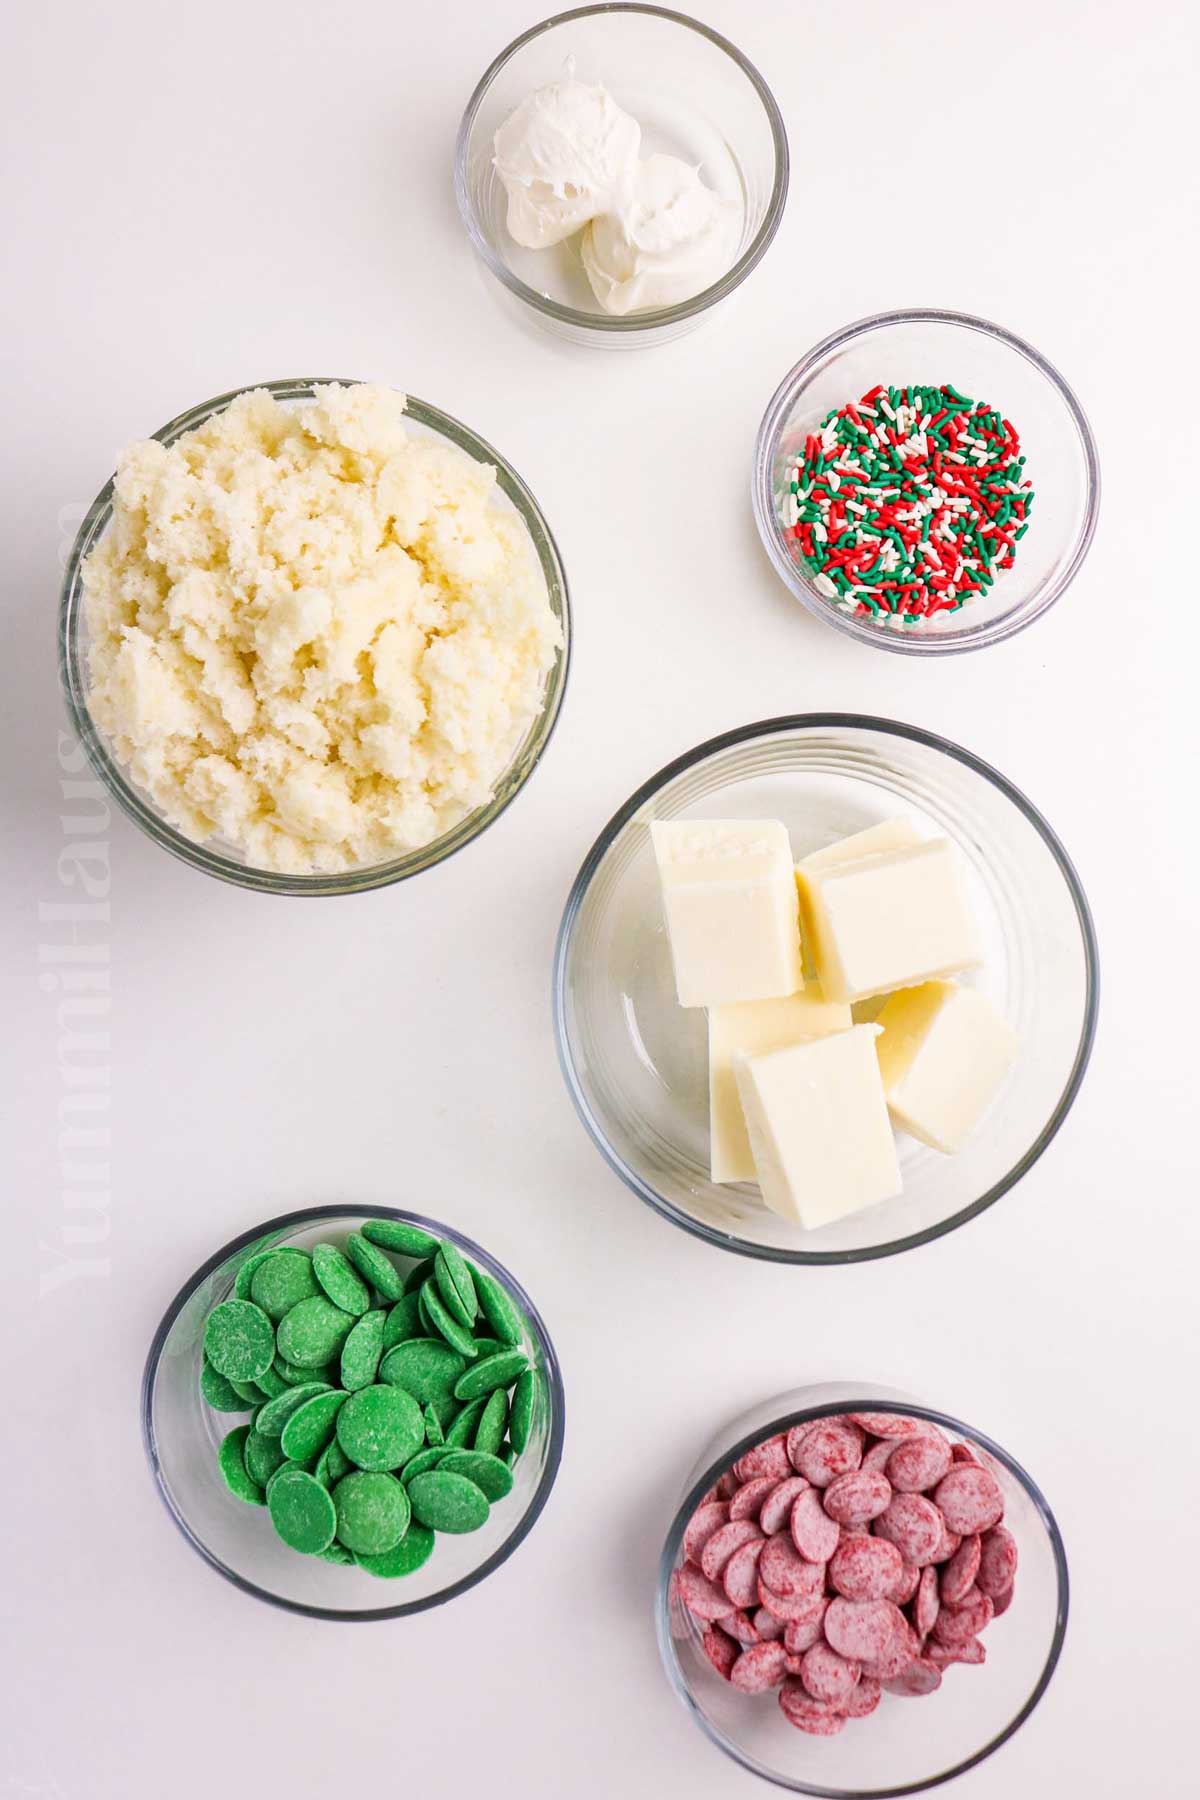
- Leftover cake scraps: Any flavor works—crumbled finely for easy mixing.
- Frosting: Buttercream or cream cheese works perfectly to bind the crumbs.
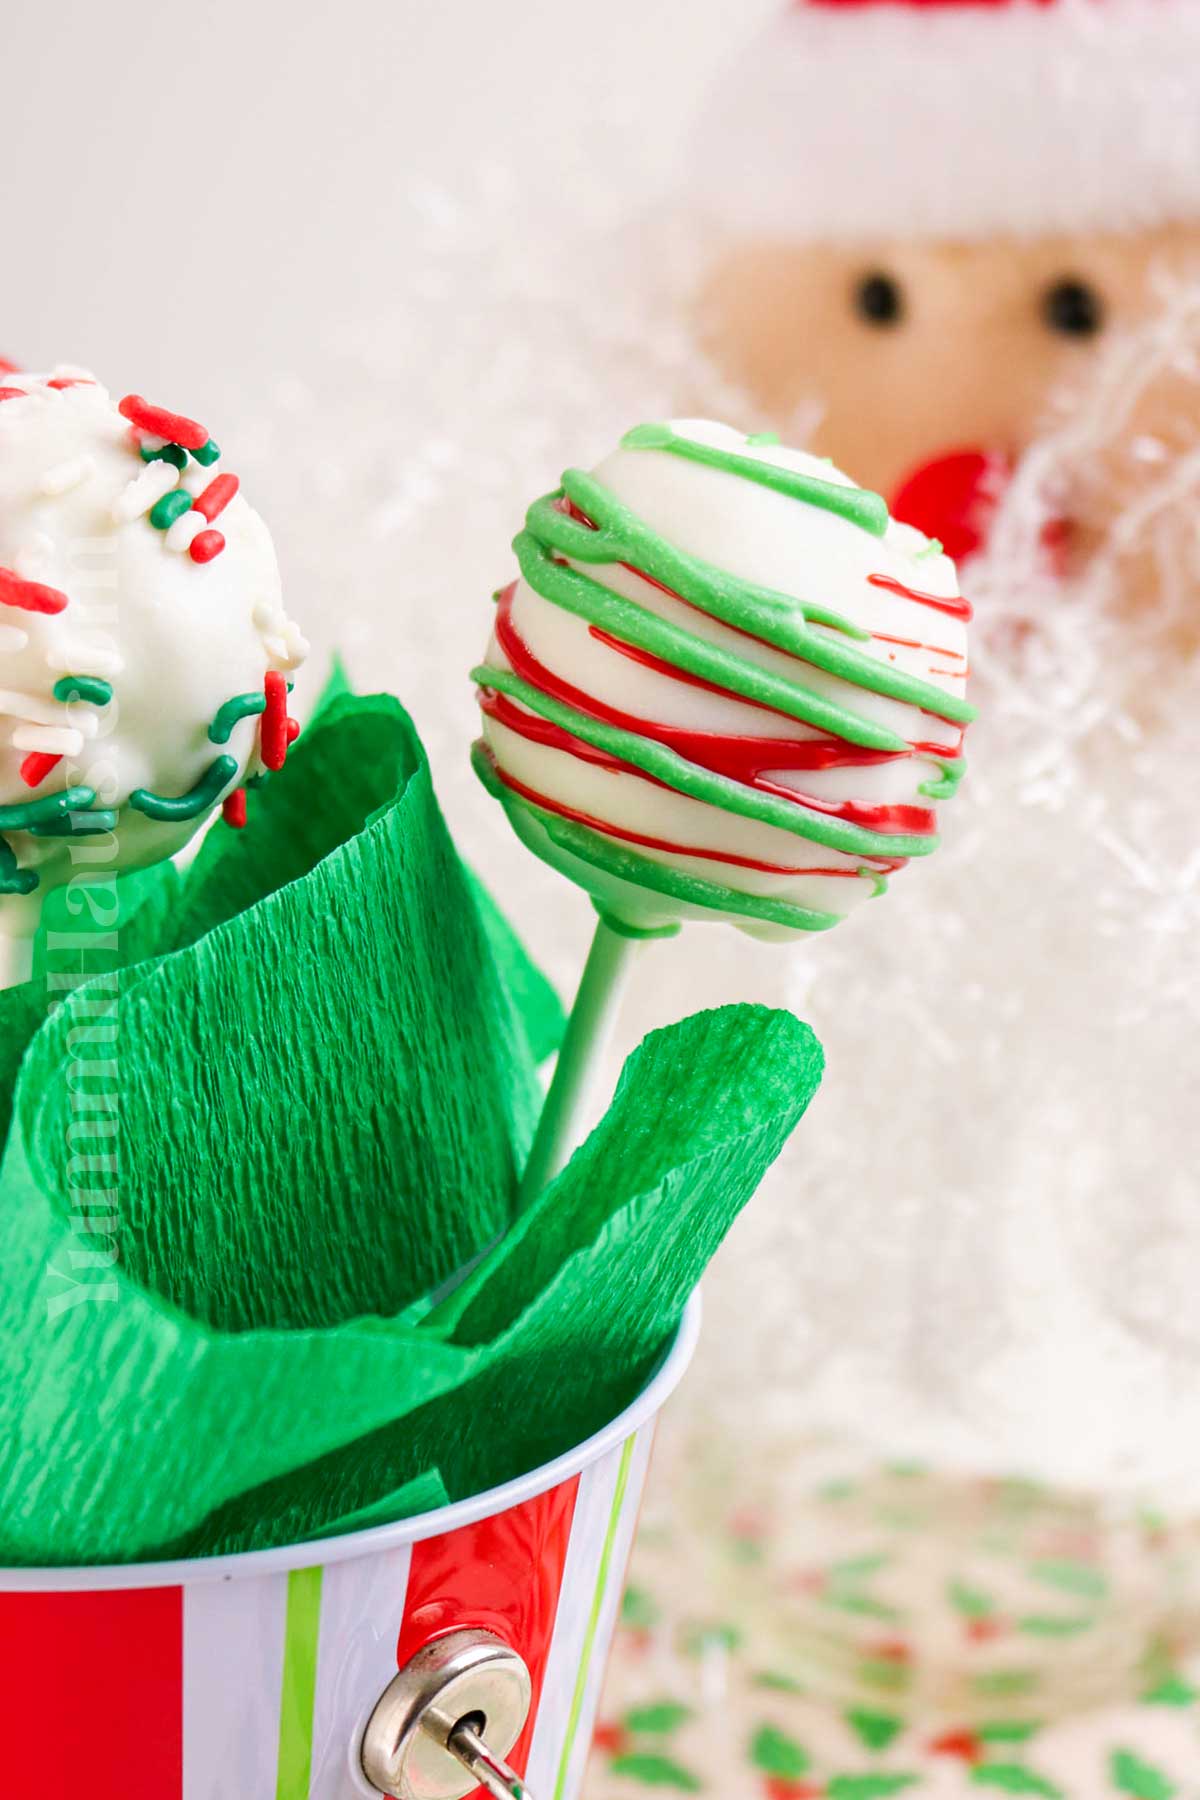
- Candy melts or chocolate: Use red, green, or white for festive dipping.
- Decorations: Holiday sprinkles, crushed peppermint, edible glitter, coconut flakes, red m&m candies, or a drizzle of chocolate to make them extra festive.
Kitchen Equipment
- Mixing bowls– large bowl, medium bowl, and small bowls
- Hand mixer or stand mixer with the paddle attachment if desired
- Spatula or spoon (you can also use a wooden spoon or a cookie scoop)
- Food processor or fork (for crumbling cake)
- Large baking sheets
- Parchment paper (greaseproof paper) or silicone mat
- Cake pop sticks or lollipop sticks, or wooden skewers
- Microwave-safe bowl or double boiler (for melting candy/chocolate)
- Pop Holder
- Cooling rack (optional, for setting dipped cake pops)
How to Make Christmas Cake Pops
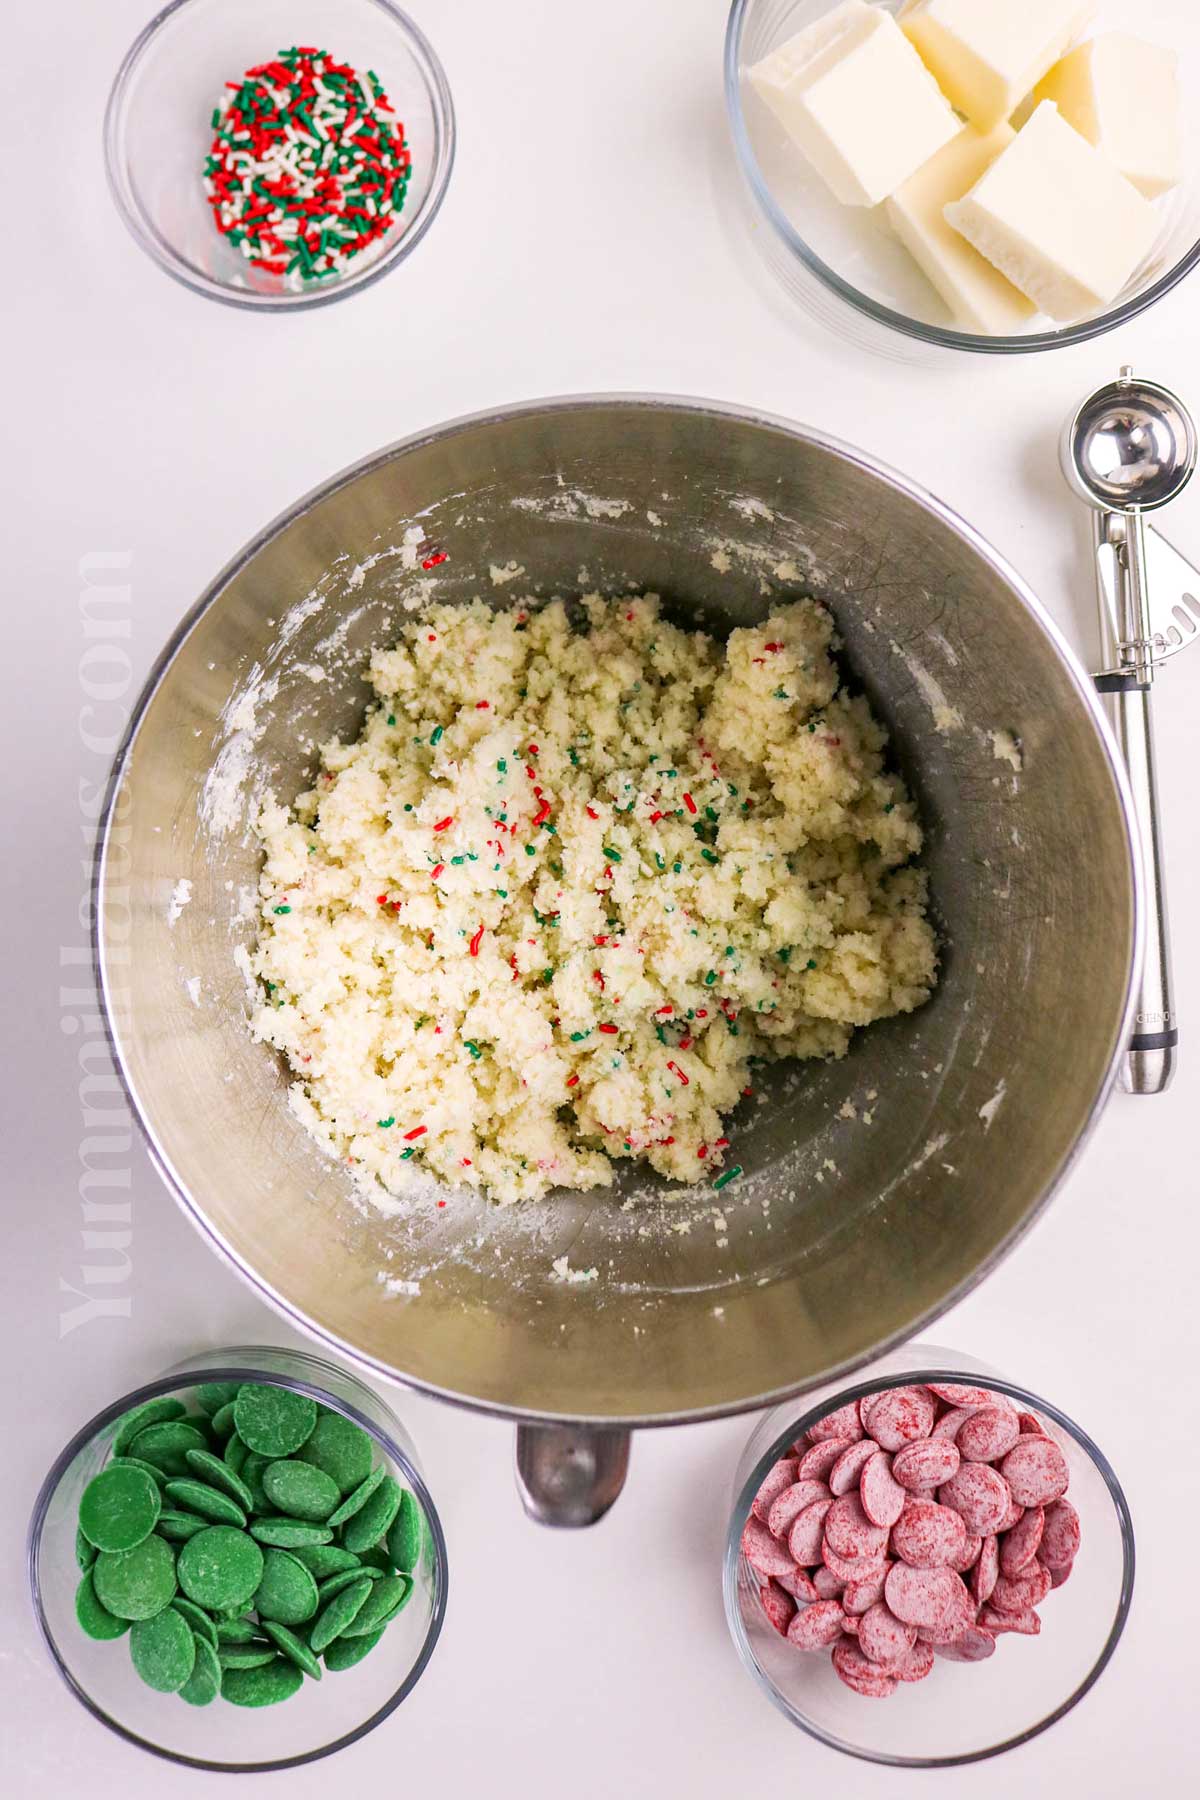
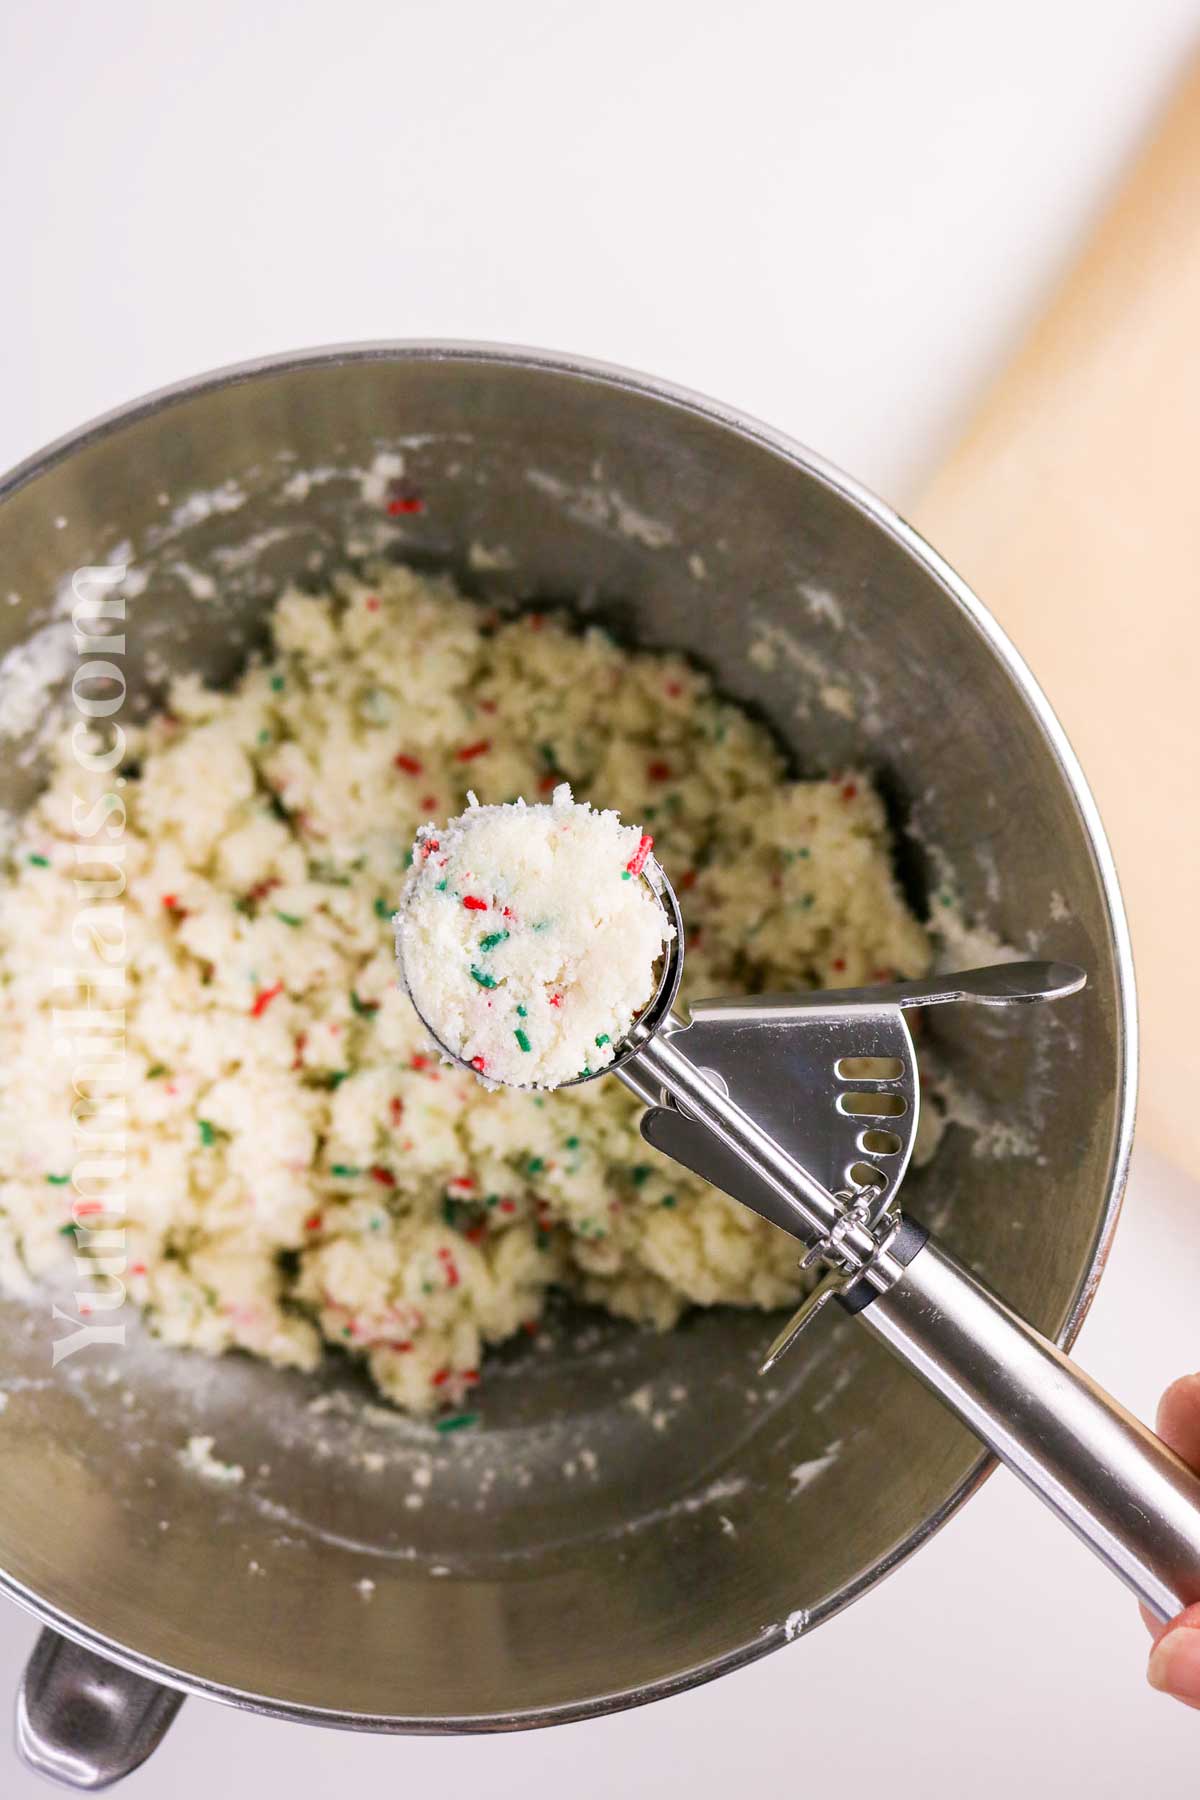
- In a large mixing bowl, combine the cake crumbs and frosting until the mixture feels like cookie dough and sticks together when pressed.
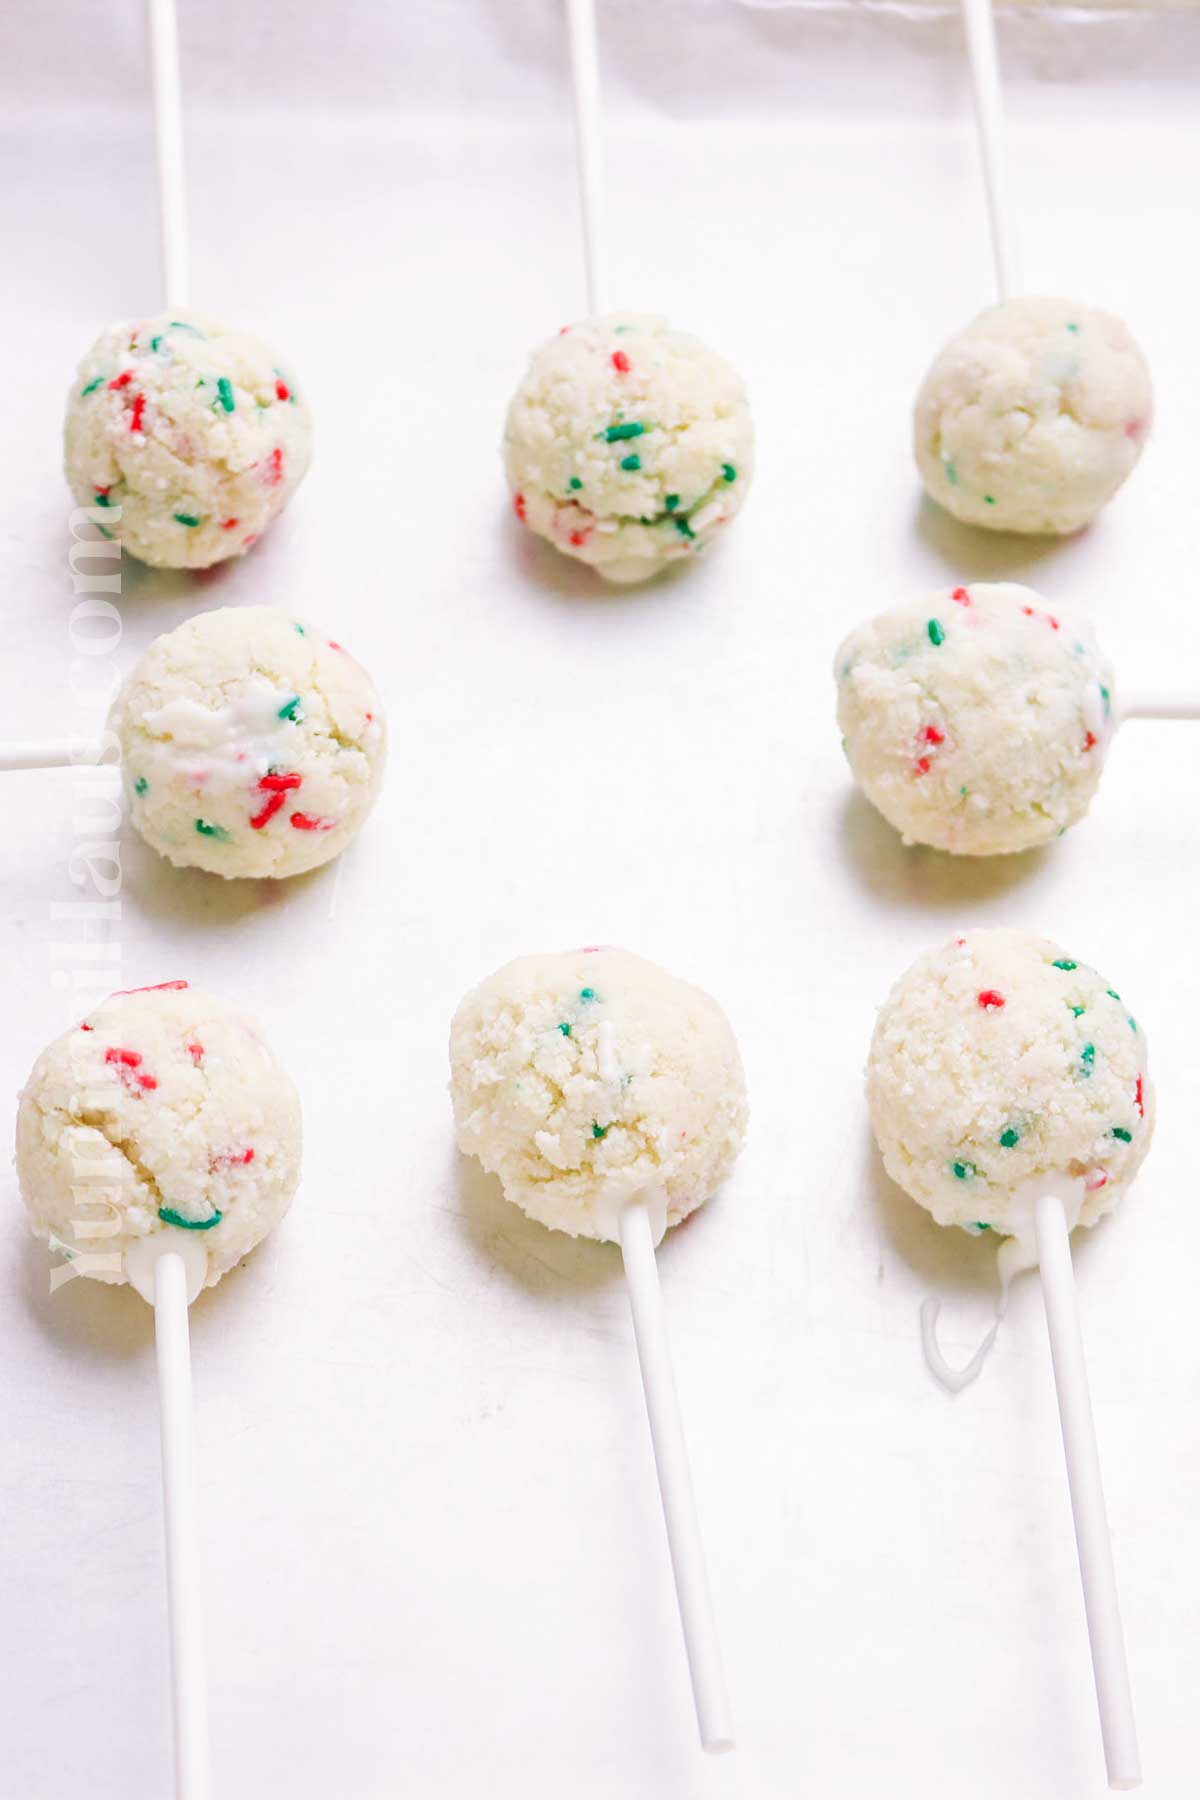
- Roll the mixture into 1-inch balls and set them on a parchment-lined baking sheet.
- Pop them in the fridge for about an hour—or 20 minutes in the freezer—until they’re nice and firm.
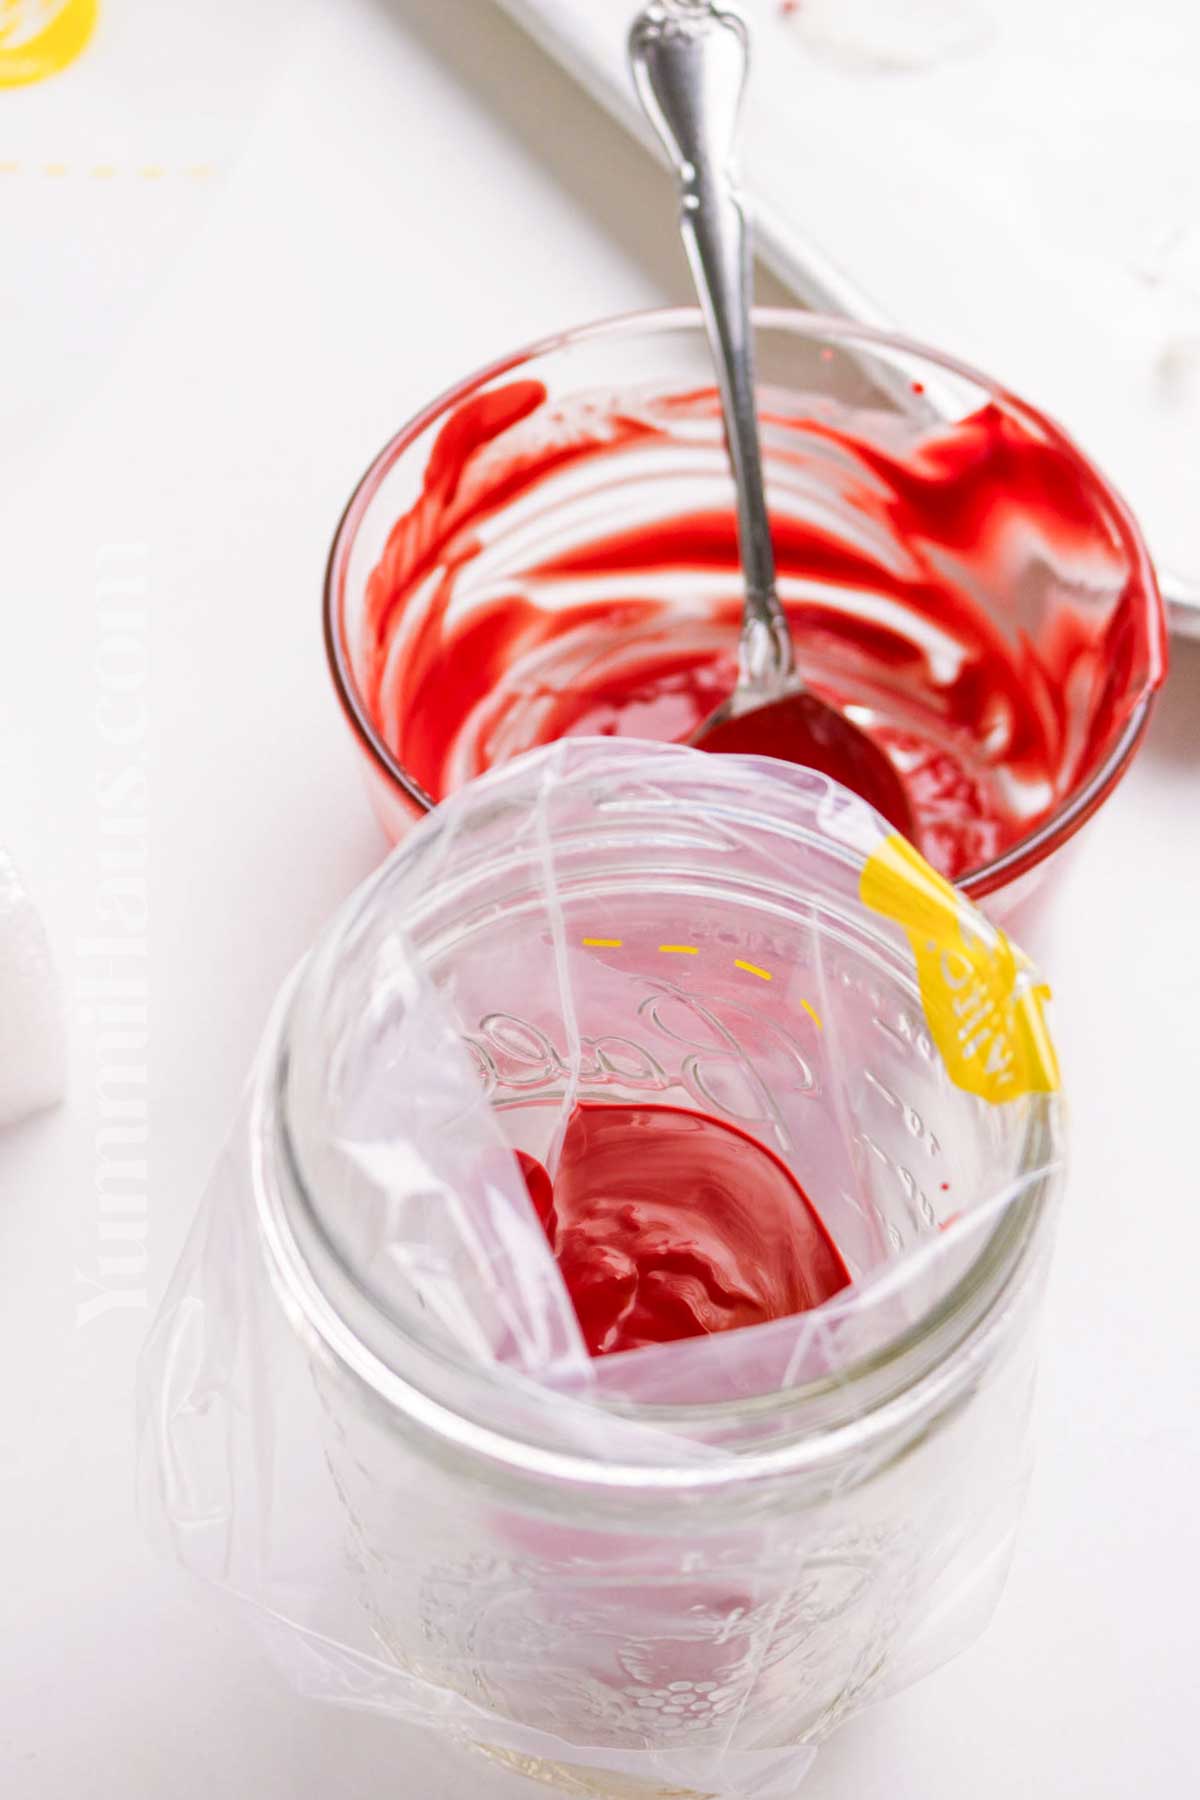
- Meanwhile, melt your candy melts or chocolate according to the package directions.
- Dip the tip of each lollipop stick into the melted chocolate, then insert it halfway into a cake ball—this helps the stick stay put.
- Next, dip each cake pop into the melted chocolate, gently tapping off any excess.
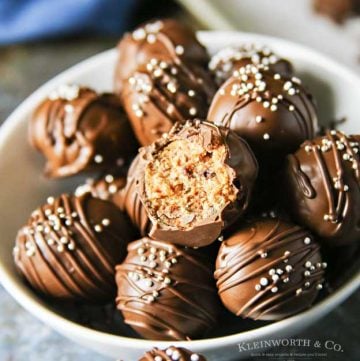
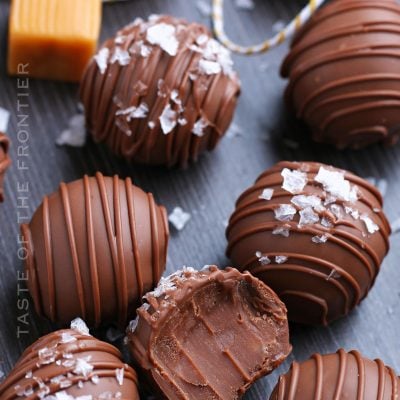
- Decorate right away with sprinkles, crushed peppermint, or a drizzle of a contrasting candy melt.
- Finally, place the pops upright in a holder and let them set completely.
Variations & Substitutions
Once you’ve mastered the basic technique, the flavor world is your oyster! Here are some delicious variations:
Gingerbread Cake Pops: Use gingerbread cake and cream cheese frosting, then dip in white chocolate and sprinkle with cinnamon sugar.
Peppermint Chocolate: Chocolate cake with chocolate frosting, dipped in white chocolate, and topped with crushed candy canes. Add a few drops of peppermint extract to the cake mixture for extra zing!
Eggnog Cake Pops: Vanilla cake with a splash of rum extract and nutmeg, paired with cream cheese frosting. Dip in white chocolate and dust with nutmeg.
Hot Chocolate Pops: Chocolate cake with chocolate frosting, dipped in milk chocolate, and topped with mini marshmallows and a drizzle of chocolate.
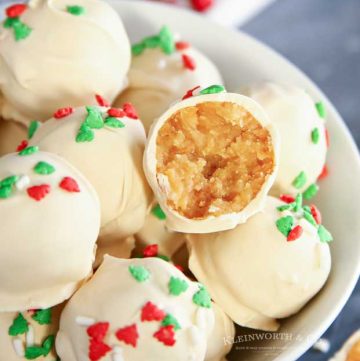
Sugar Cookie Pops: Use a vanilla or sugar cookie cake, dip in white chocolate, and decorate like sugar cookies with icing and festive sprinkles.
Serving Suggestions
These cake pops are pretty versatile when it comes to presentation. Here are some fun ways to serve them:
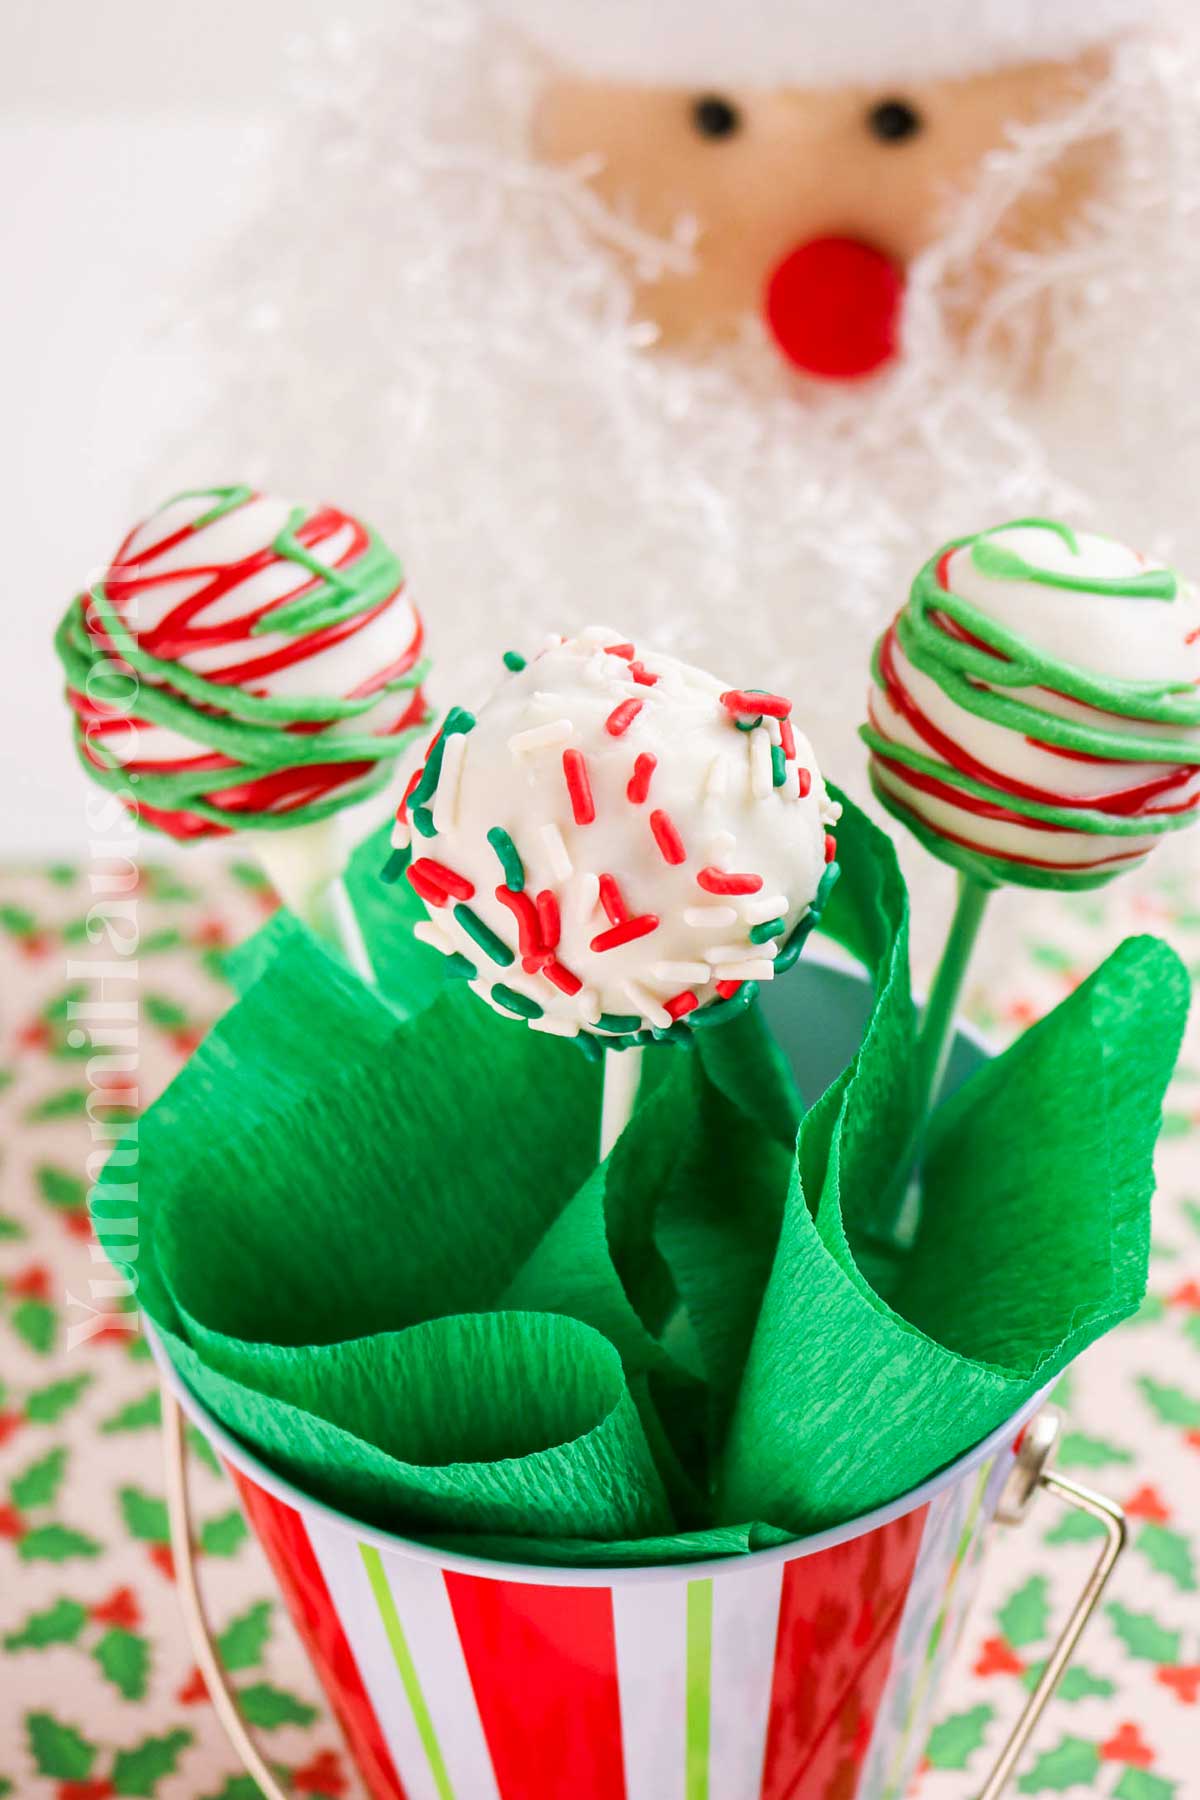
Cake Pop Bouquet: Arrange them in a decorative pot filled with Styrofoam, like a festive bouquet. Tie ribbons around the sticks for extra flair.
Individual Gifts: Wrap each pop in a cellophane bag tied with a ribbon – perfect for teacher gifts, neighbor treats, or party favors.
Dessert Table Display: Stand them up in a tiered cake pop stand for a stunning dessert table centerpiece.
Hot Cocoa Bar: Set up a hot chocolate station and let guests stir their cocoa with a cake pop!
Christmas Tree Display: Arrange them in a cone shape to look like a Christmas tree, using different colored pops as “ornaments.”
Decorating Ideas for Christmas Cake Pops
Let’s talk about making these pops look absolutely stunning. Here are some of my favorite Christmas themes:
Snowman Pops: Dip in white coating, use mini chocolate chips for eyes and buttons, and an orange sprinkle or small piece of orange fondant for the nose. You can even tie a little ribbon around the stick for a scarf!
Santa Pops: Red coating on top half, white coating on bottom, with a little black “belt” made from black candy coating or a strip of black fondant. Add a tiny gold buckle with a yellow sprinkle.
Ornament Pops: Use metallic red, green, gold, or silver coating, and add a little “cap” at the top with a different colored coating to make it look like a Christmas ornament hanging on a stick.
Candy Cane Pops: White coating with red candy melt drizzle in a swirl pattern, or cover entirely in crushed peppermint candies.
Reindeer Pops: Chocolate coating, pretzel pieces for antlers, a red M&M for the nose, and candy eyes.
Christmas Tree Pops: Green coating with colorful sprinkles as “ornaments” and a yellow star sprinkle on top.
Storage
The beauty of these cake pops is that you can totally make them ahead of time, which is a lifesaver during the holidays!
At Room Temperature: Once fully set, cake pops will keep at room temperature for up to 2 days. Just keep them in an airtight container.
In the Refrigerator: Store in an airtight container for up to 1 week. Let them come to room temperature before serving for the best texture.
In the Freezer: These freeze beautifully! Place finished cake pops in a freezer-safe container with layers separated by parchment paper. They’ll keep for up to 3 months. Thaw in the fridge overnight before serving.
Make-Ahead Strategy: I like to bake the cake a day or two ahead, then make the balls and freeze them undecorated. The day before I need them, I dip and decorate. This spreads out the work and keeps things stress-free!
Expert Tips
Let me share some wisdom I’ve gained through trial and error (mostly error, if I’m being honest):
Don’t skip the chilling step. I know you’re excited, but warm cake balls will fall apart when you dip them. Patience, my friend!
Consistency is key. Make sure all your cake balls are roughly the same size so they cook and set evenly, and look professional.
Tap, don’t bang. When removing excess coating, gently tap your wrist. Banging the stick on the bowl is a recipe for disaster (literally – your pop will end up in the bowl).
Thin your coating if needed. If your candy melts are too thick, they’ll be hard to work with and create a coating that’s too heavy. A little vegetable oil or shortening works wonders.
Work in batches. Don’t try to dip all 24 at once. The coating will start to harden, and you’ll be racing against time. Do 4-6 at a time and reheat your coating as needed.
Room temperature is your friend. Take your cake balls out of the fridge about 5 minutes before dipping. If they’re too cold, the temperature difference can cause the coating to crack.

FAQ’s
Can I use homemade cake instead of box mix?
Absolutely! Any cake works beautifully. Homemade cakes sometimes have a slightly different texture, so you might need to adjust the amount of frosting slightly.
What’s the difference between candy melts and chocolate?
Candy melts are easier to work with – they melt smoothly and set up quickly without tempering. Regular chocolate requires tempering to set properly and can be trickier for beginners.
Do I have to use frosting, or can I use something else?
Frosting is the traditional binder, but you could use cream cheese, Nutella, or even condensed milk. Just make sure whatever you use helps the cake hold together.
How do I transport cake pops?
Styrofoam blocks work great! You can also lay them flat in a single layer in a shallow container, or use a special cake pop carrier.
Can I make these without sticks?
Sure! They become cake balls instead of pops. Just roll, chill, dip, and decorate. They’re equally delicious!
My candy melts are clumping – what went wrong?
Water is the enemy of candy melts! Even a tiny bit can cause seizing. Make sure your bowls and utensils are completely dry. This can also happen if the chocolate gets overheated, which is really common with white chocolate. Go low and slow, stirring often, when melting white chocolate.
Troubleshooting Common Issues
Even experienced bakers run into hiccups. Here’s how to fix the most common problems:
Cake pops falling off sticks: Your cake mixture might be too heavy, or you didn’t let the “glue” (candy coating on the stick) set before dipping. Make sure you’re using that glue trick and letting it dry for a minute!
Coating is too thick: Add a teaspoon of vegetable oil or shortening and stir well. This will make it much more dippable.
Cracks in the coating: This usually happens when the temperature difference between the cold cake ball and warm coating is too extreme. Let your cake balls sit at room temperature for a few minutes before dipping.
Coating won’t stick: Your cake mixture might be too oily. Next time, use a little less frosting in the mixture.
Cake pops are too soft: You probably added too much frosting. The mixture should hold together but still be fairly firm. Don’t worry though – pop them back in the fridge to firm up!
DON’T MISS THESE HOLIDAY E-BOOKS!
If you love this Christmas recipe, you’re going to love these other no-bake recipes, too. Please click each link below to find the easy, printable recipe!

More Great Christmas Recipes
CONNECT WITH YUMMI HAUS!
Be sure to follow me on my social media, so you never miss a post!

Christmas Cake Pops
Ingredients
- 2 cups cake scraps leftover in any flavor, crumbled finely
- ¼ cup frosting buttercream or cream cheese
- 6 oz candy melts red, green, or white – or white chocolate
- Holiday sprinkles crushed peppermint, or a drizzle for decorating
Instructions
- Mix the cake crumbs with frosting in a large mixing bowl until the texture is similar to cookie dough and holds together when pressed.
- Roll into 1-inch balls and place on a parchment-lined baking sheet.
- Refrigerate for 1 hour (or 20 minutes in the freezer) until firm.
- Melt the candy melts or chocolate according to package instructions.
- Dip the tip of each lollipop stick into the melted chocolate coating, and then insert the stick halfway into a cake ball (this helps secure it).
- Dip each pop into the melted chocolate, gently tapping off excess.
- Decorate immediately with sprinkles, crushed peppermint, or a drizzle of contrasting candy melt.
- Prop the cake pops upright into the pop holder to set, leaving until completely firm.
Notes
Frosting: Buttercream or cream cheese works perfectly to bind the crumbs.
Candy melts or chocolate: Use red, green, or white for festive dipping.
Decorations: Holiday sprinkles, crushed peppermint, or a drizzle of chocolate to make them extra festive.
Equipment
- 12 lollipop sticks
- Pop holder – or a styrofoam block or a piece of foam board – to hold pops upright
Nutrition
Nutritional information for the recipe is provided as a courtesy and is approximate. Please double-check with your own dietary calculator for the best accuracy. We at Yummi Haus cannot guarantee the accuracy of the nutritional information given for any recipe on this site.


Share Your Thoughts