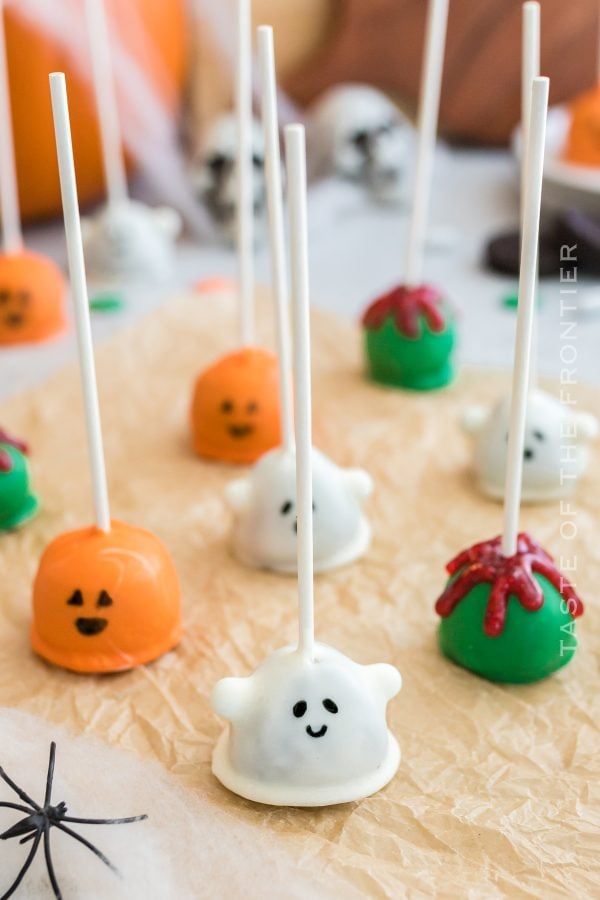
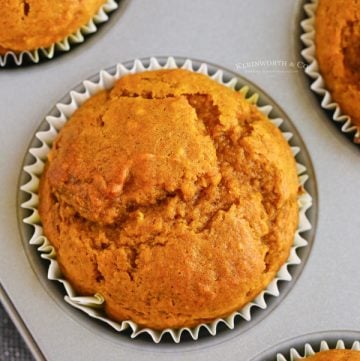
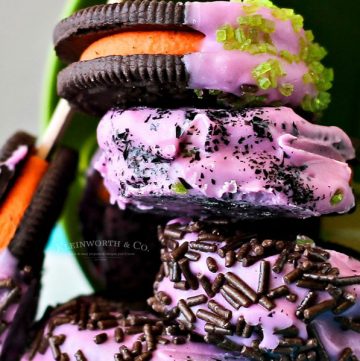
Sweet or savory pretzel bites with an iconic golden chewy crust and soft homemade pretzel dough, just like Auntie Anne serves them.
No trip to the mall is complete without some fresh Auntie Anne’s Pretzel Bites.
View post
Deliciously Easy Recipes
Sweet or savory pretzel bites with an iconic golden chewy crust and soft homemade pretzel dough, just like Auntie Anne serves them.
No trip to the mall is complete without some fresh Auntie Anne’s Pretzel Bites.
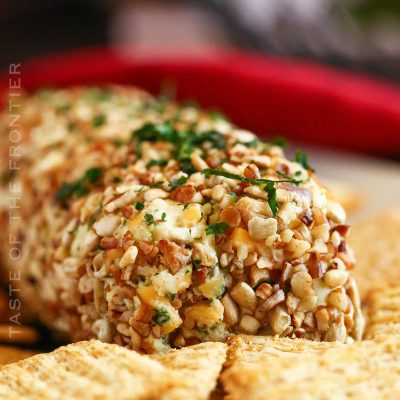
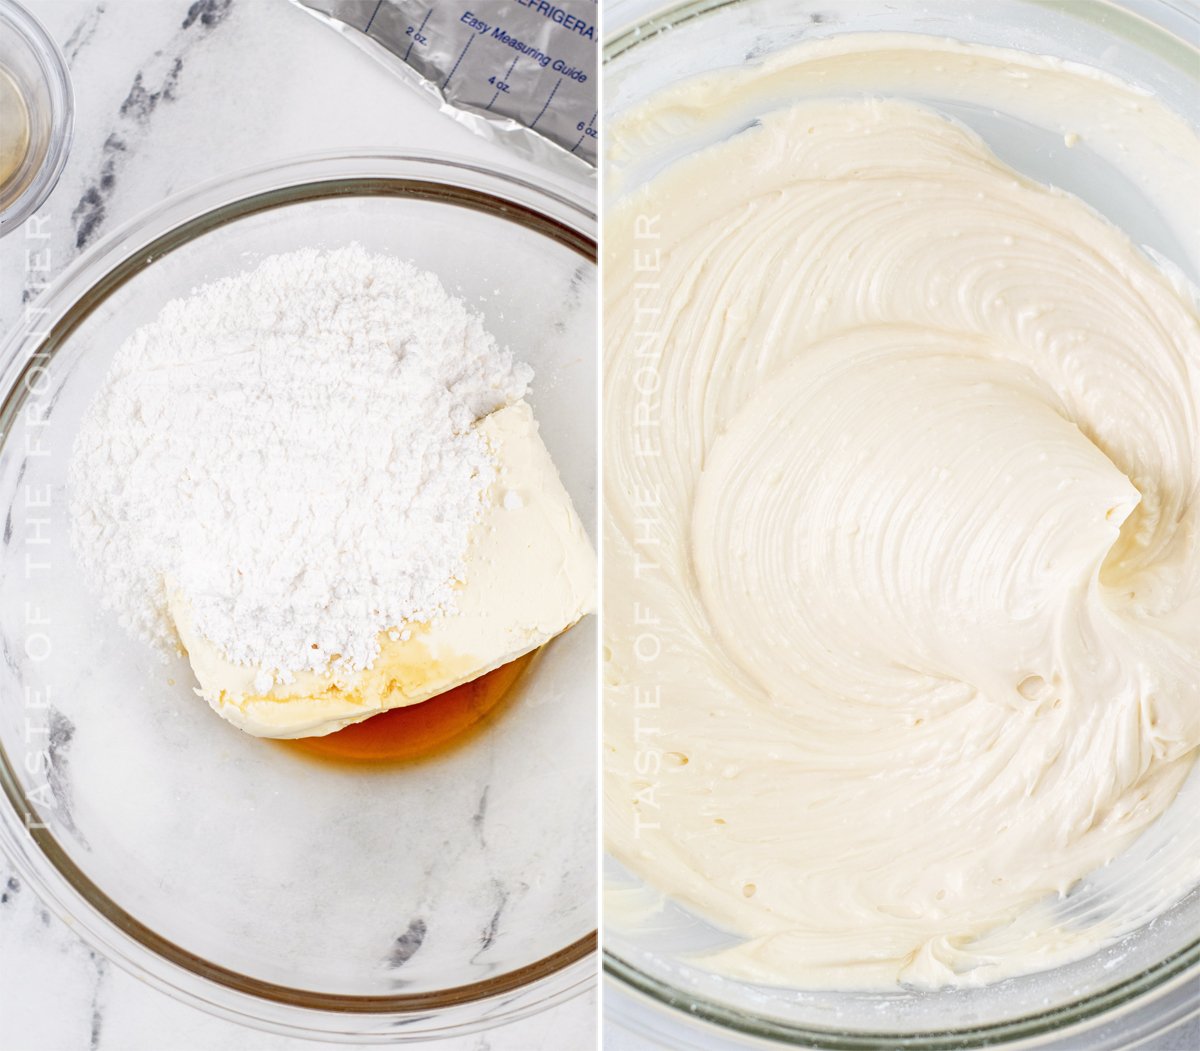
View postSmoked Cream Cheese is perfectly seasoned, and smoked over low heat with a touch of applewood. It’s the perfect addition to any hors d’oeuvre tray, or it can be used as a dip for chips or fresh vegetables.
I don’t know about you, but when summer and fall come around – I’m all about the snacks and appetizers. You just can’t beat the ease of having snacks that you can graze on instead of sitting down for a large meal.
In this house – we are ALL ABOUT the snacks and when we can make the snacks on the Traeger – we are ALL IN. So that’s where this AMAZINGLY creamy, melty deliciousness comes in with this cream cheese recipe made on the smoker.
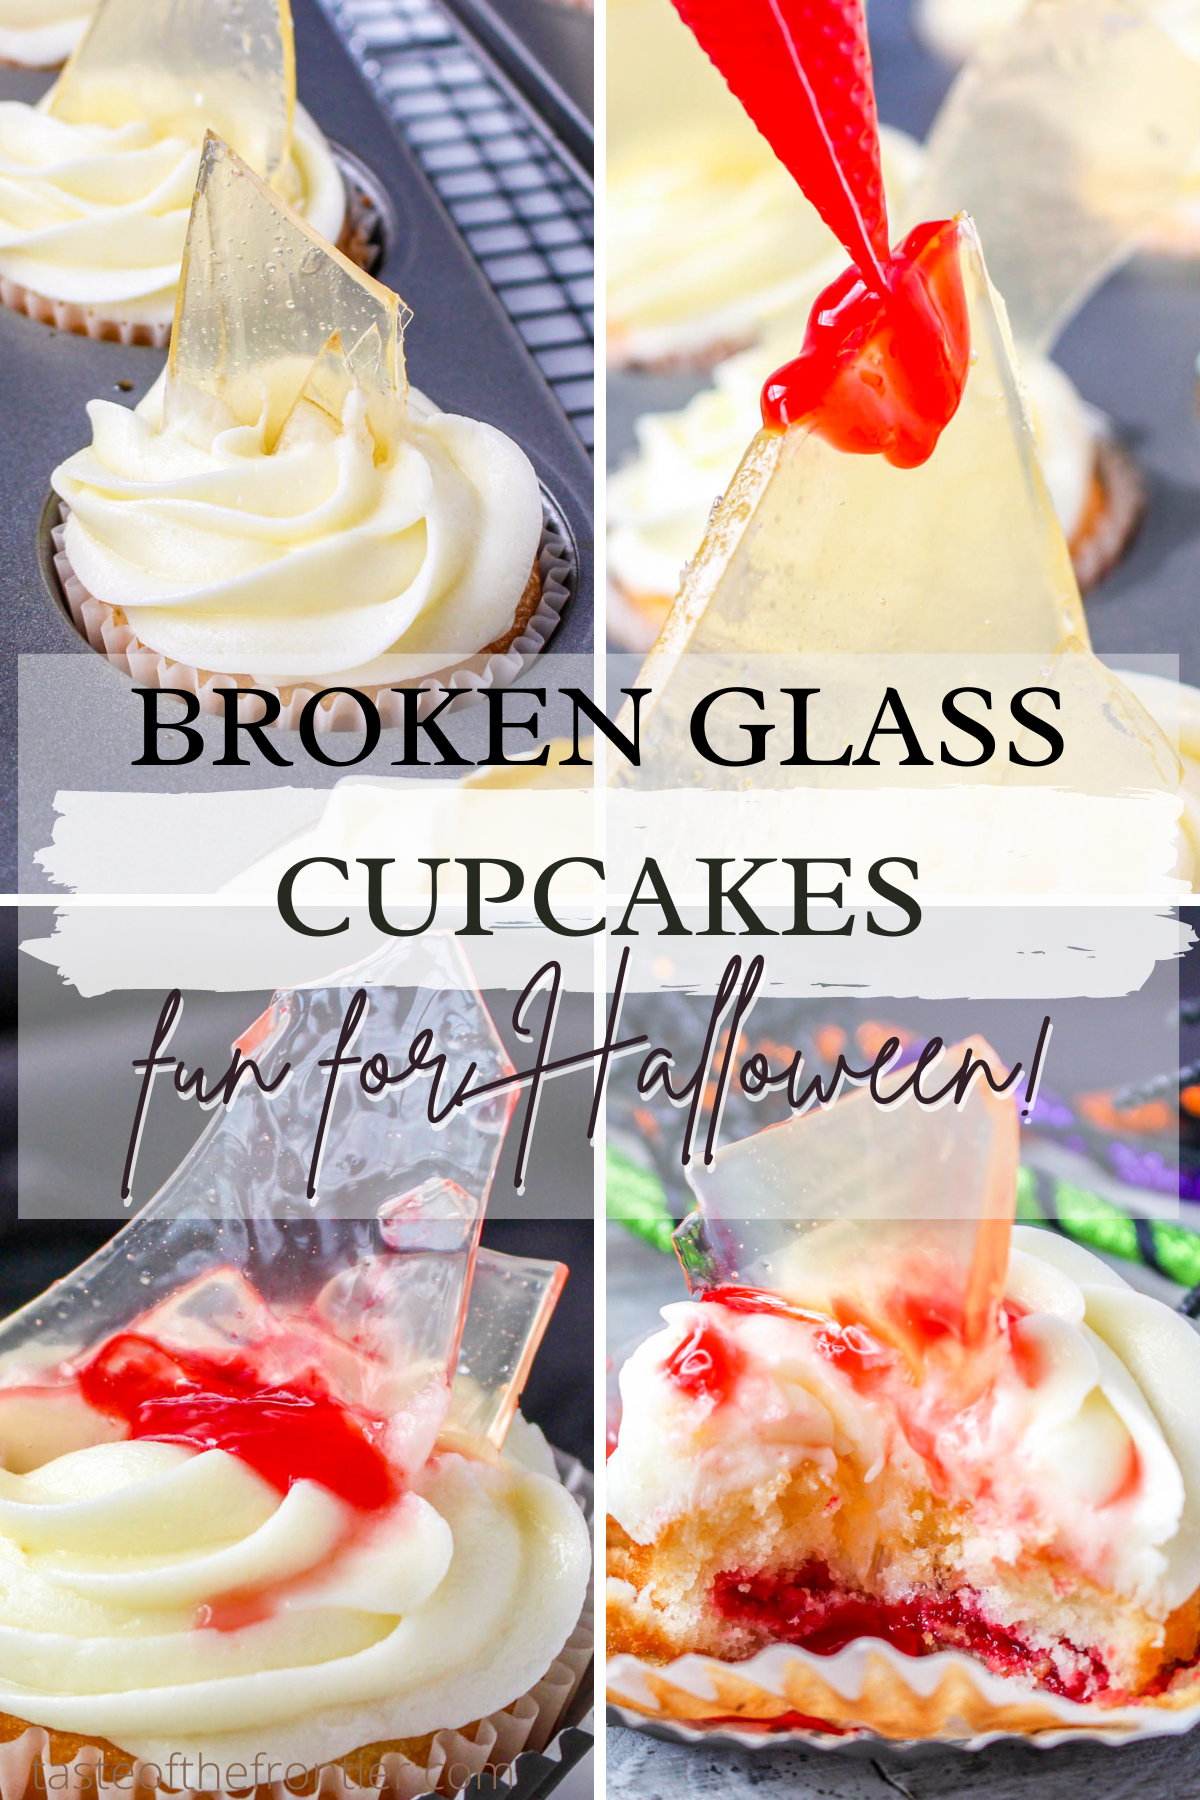
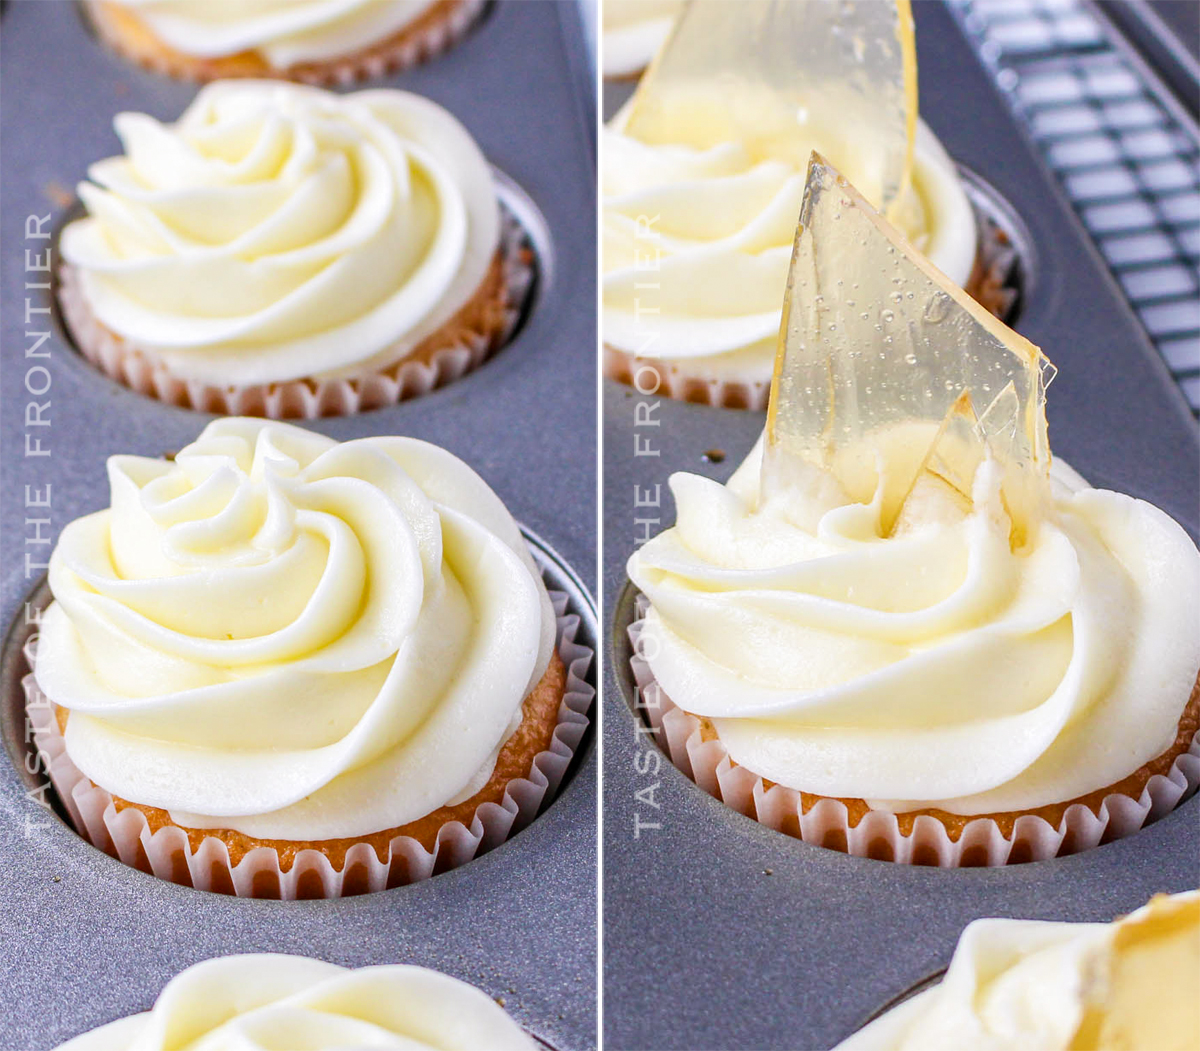
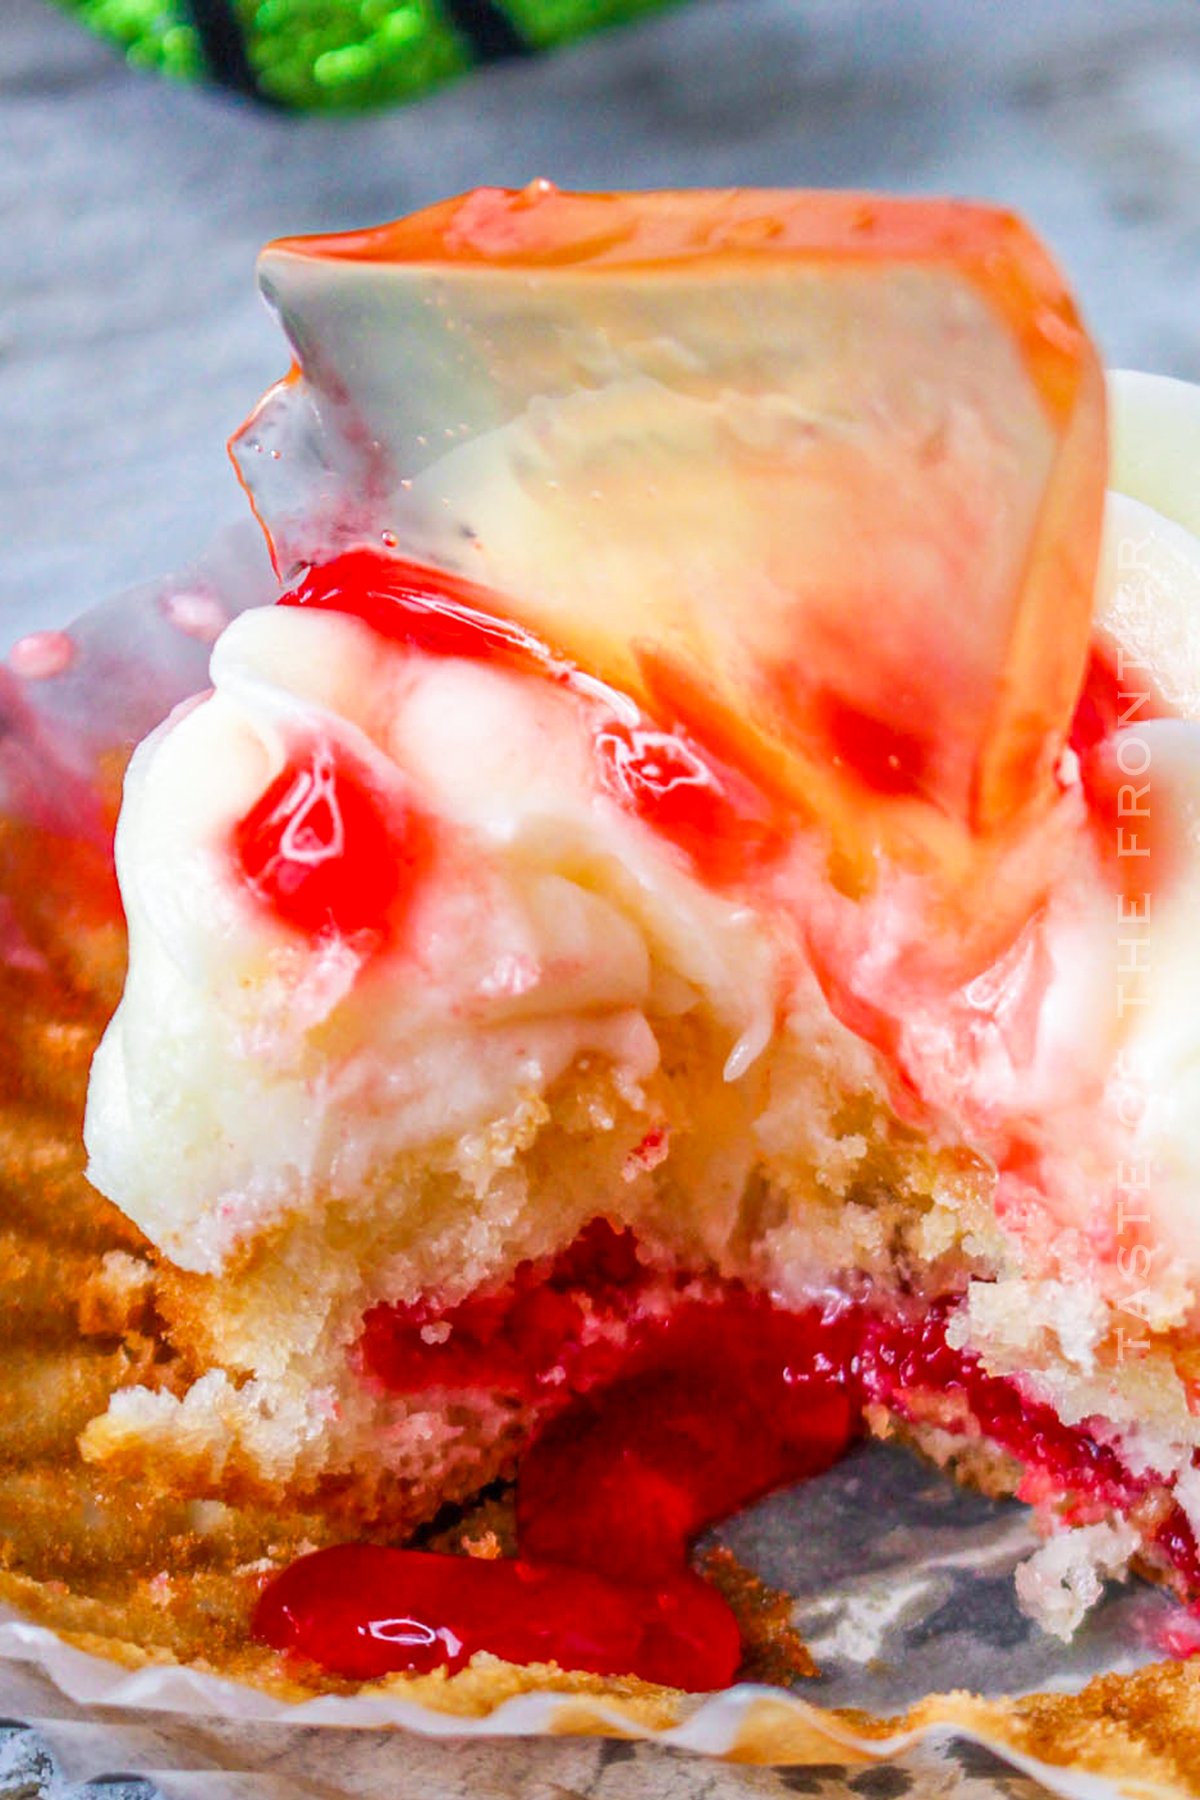
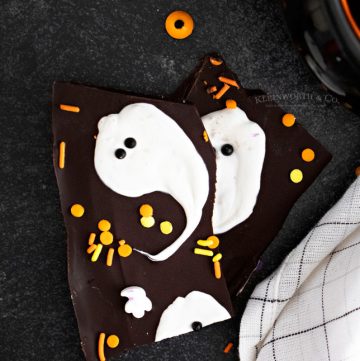
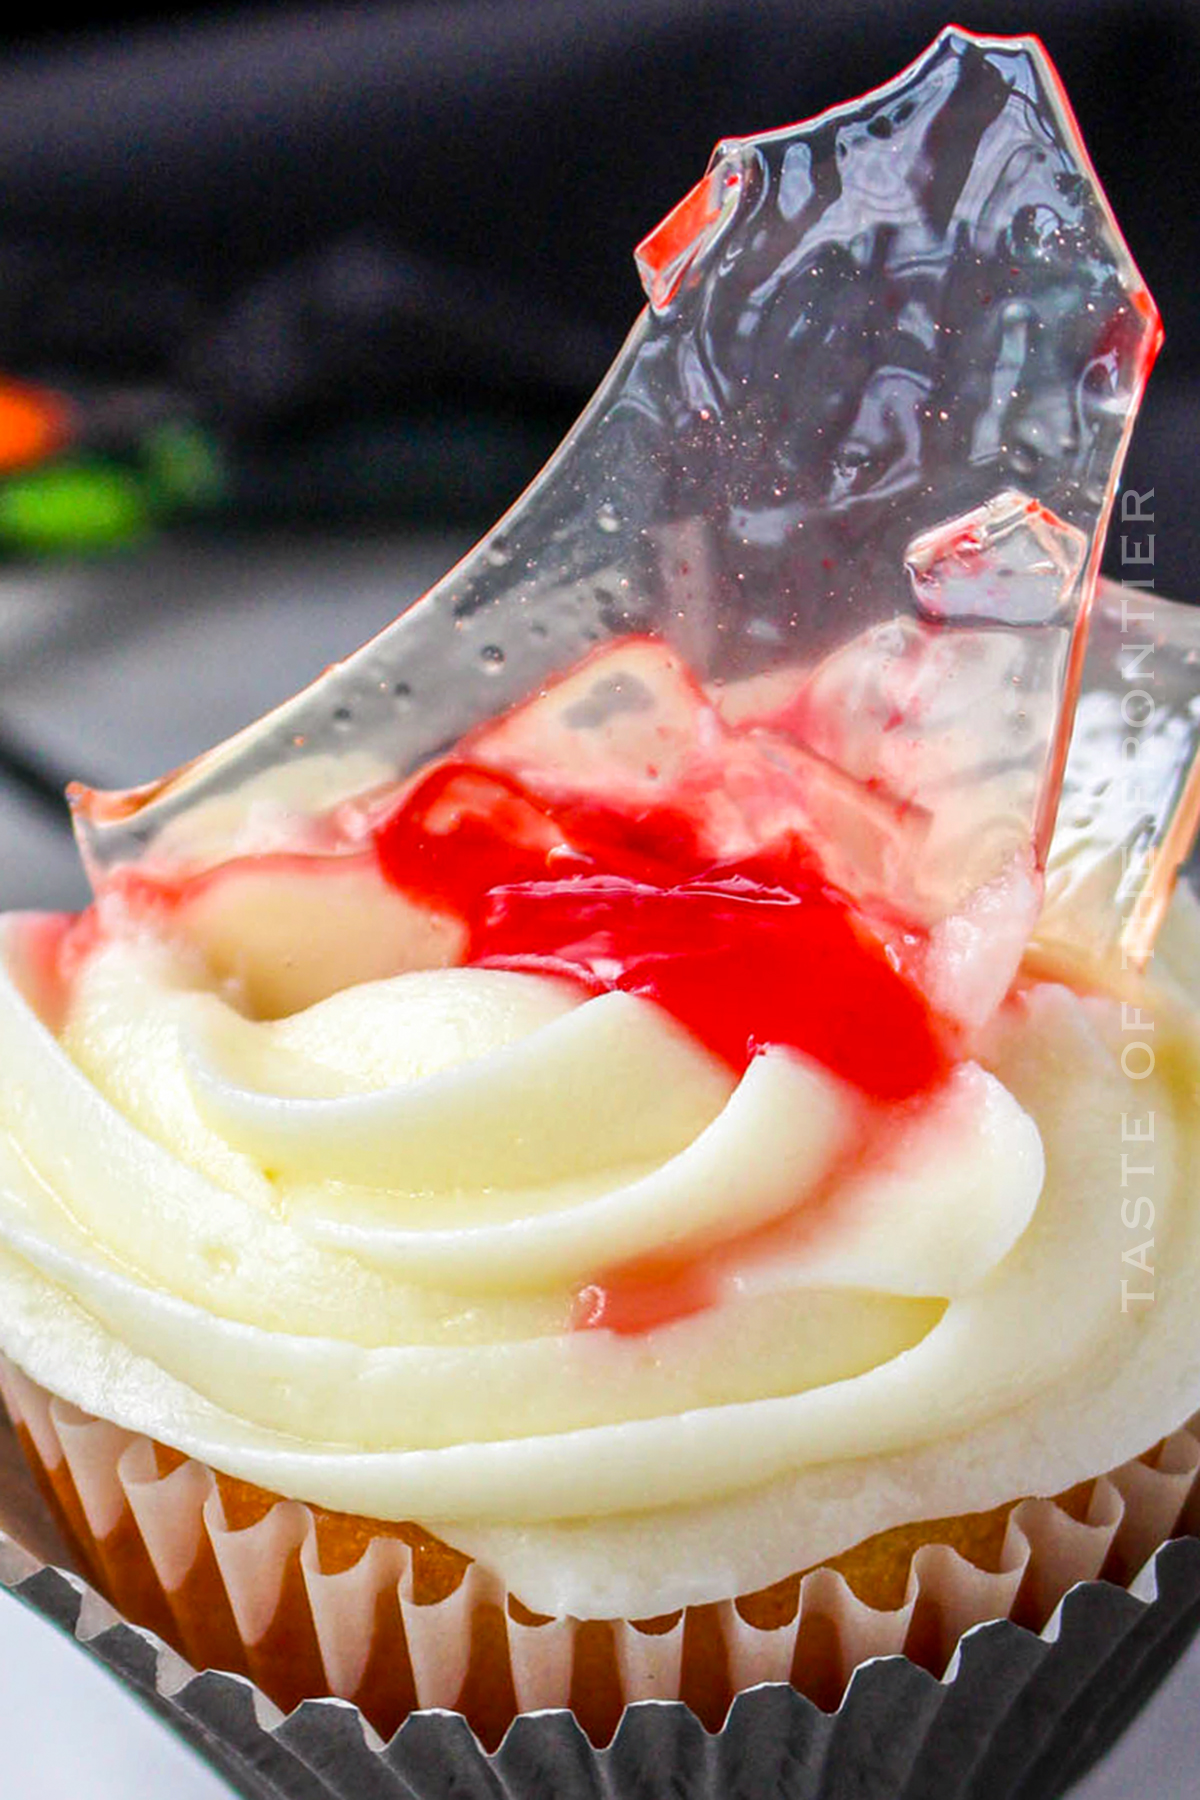
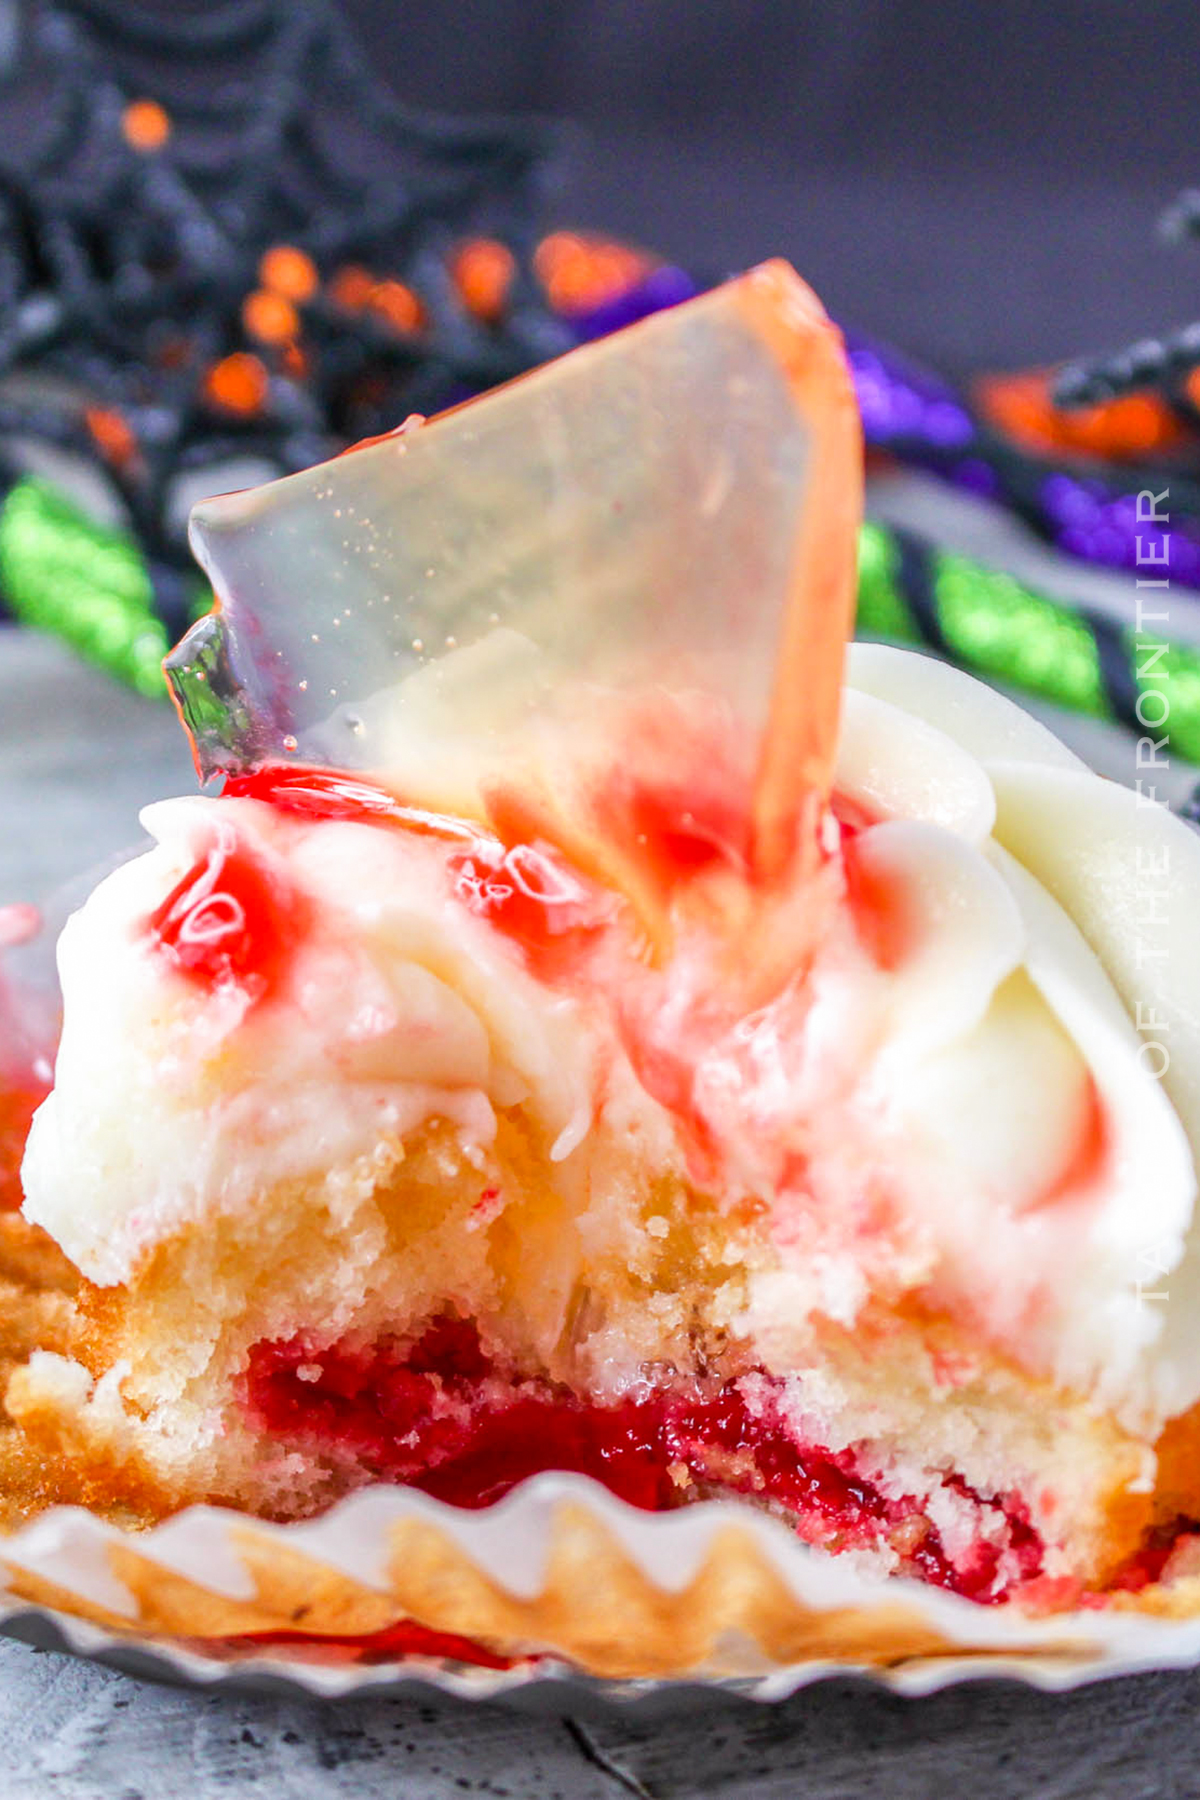
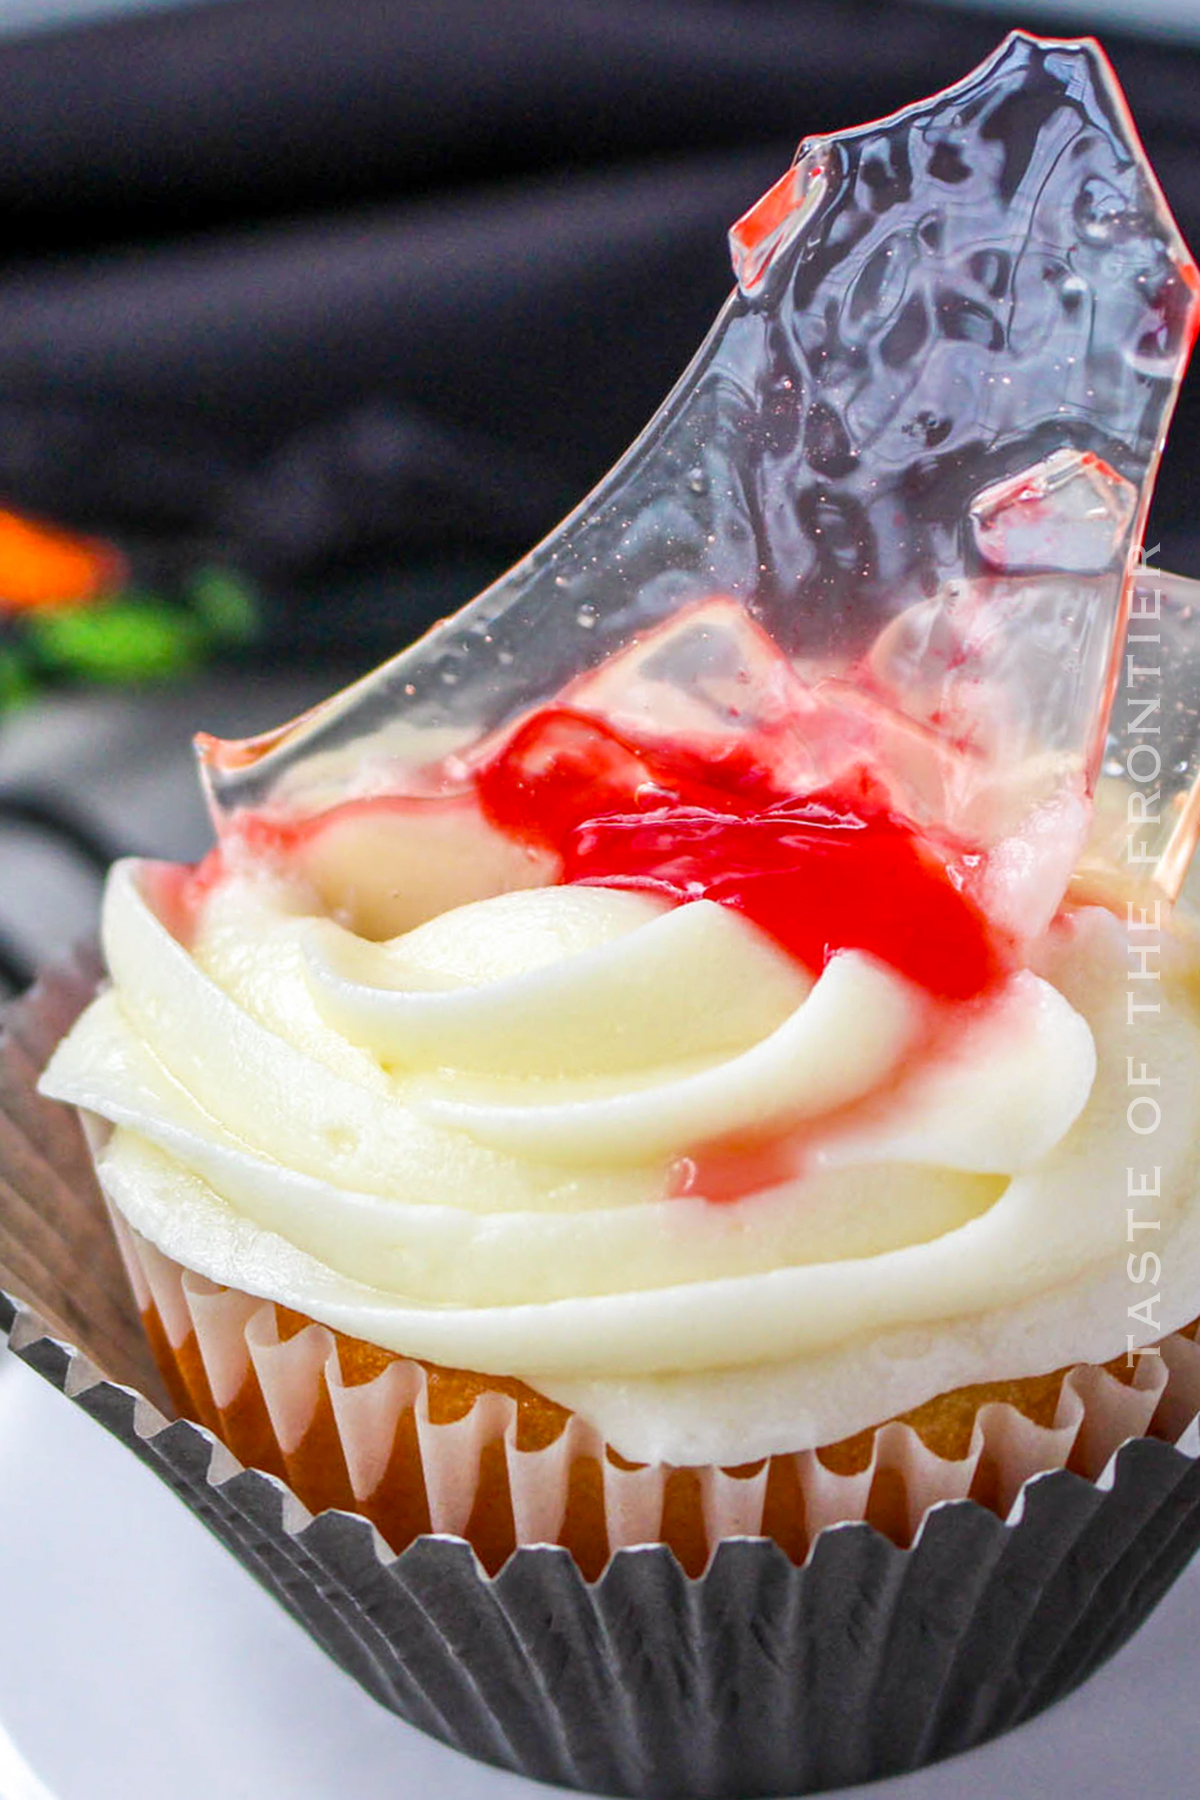
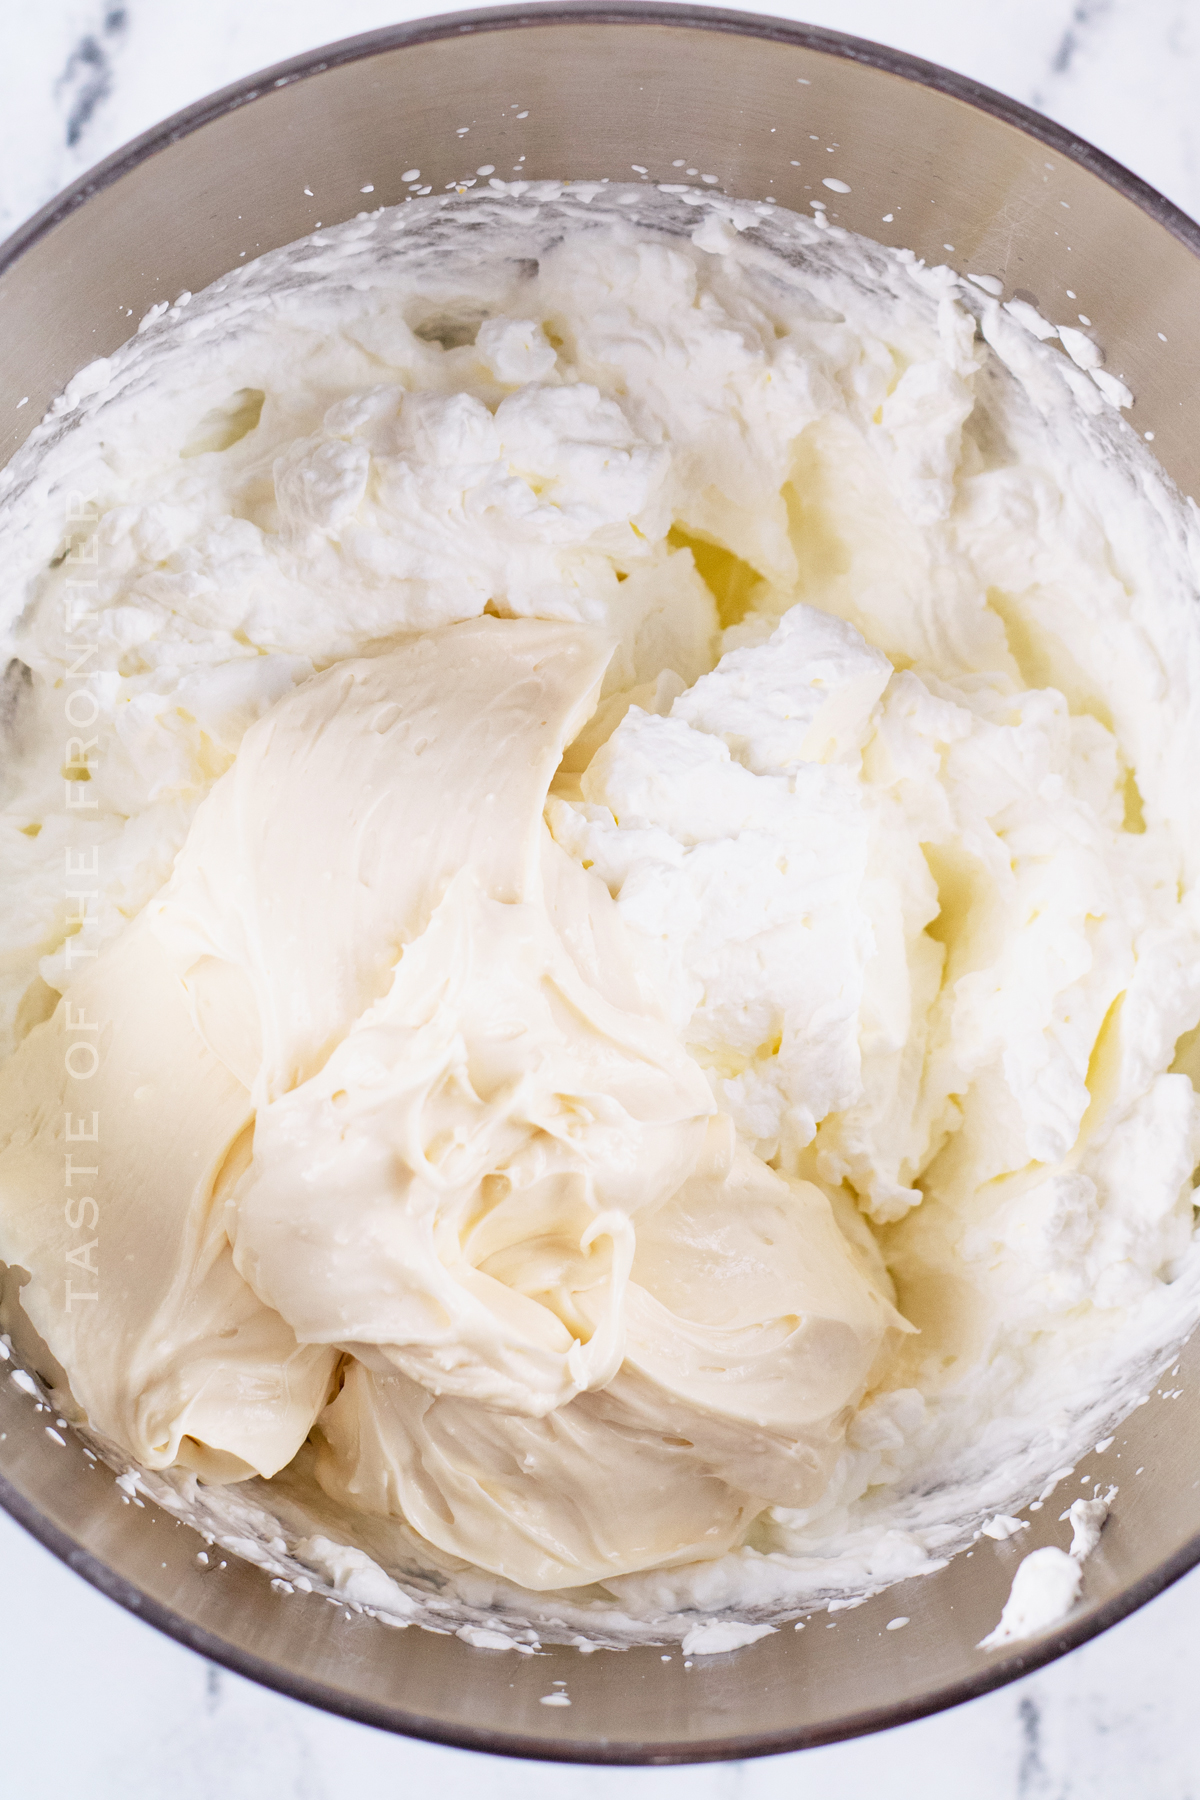
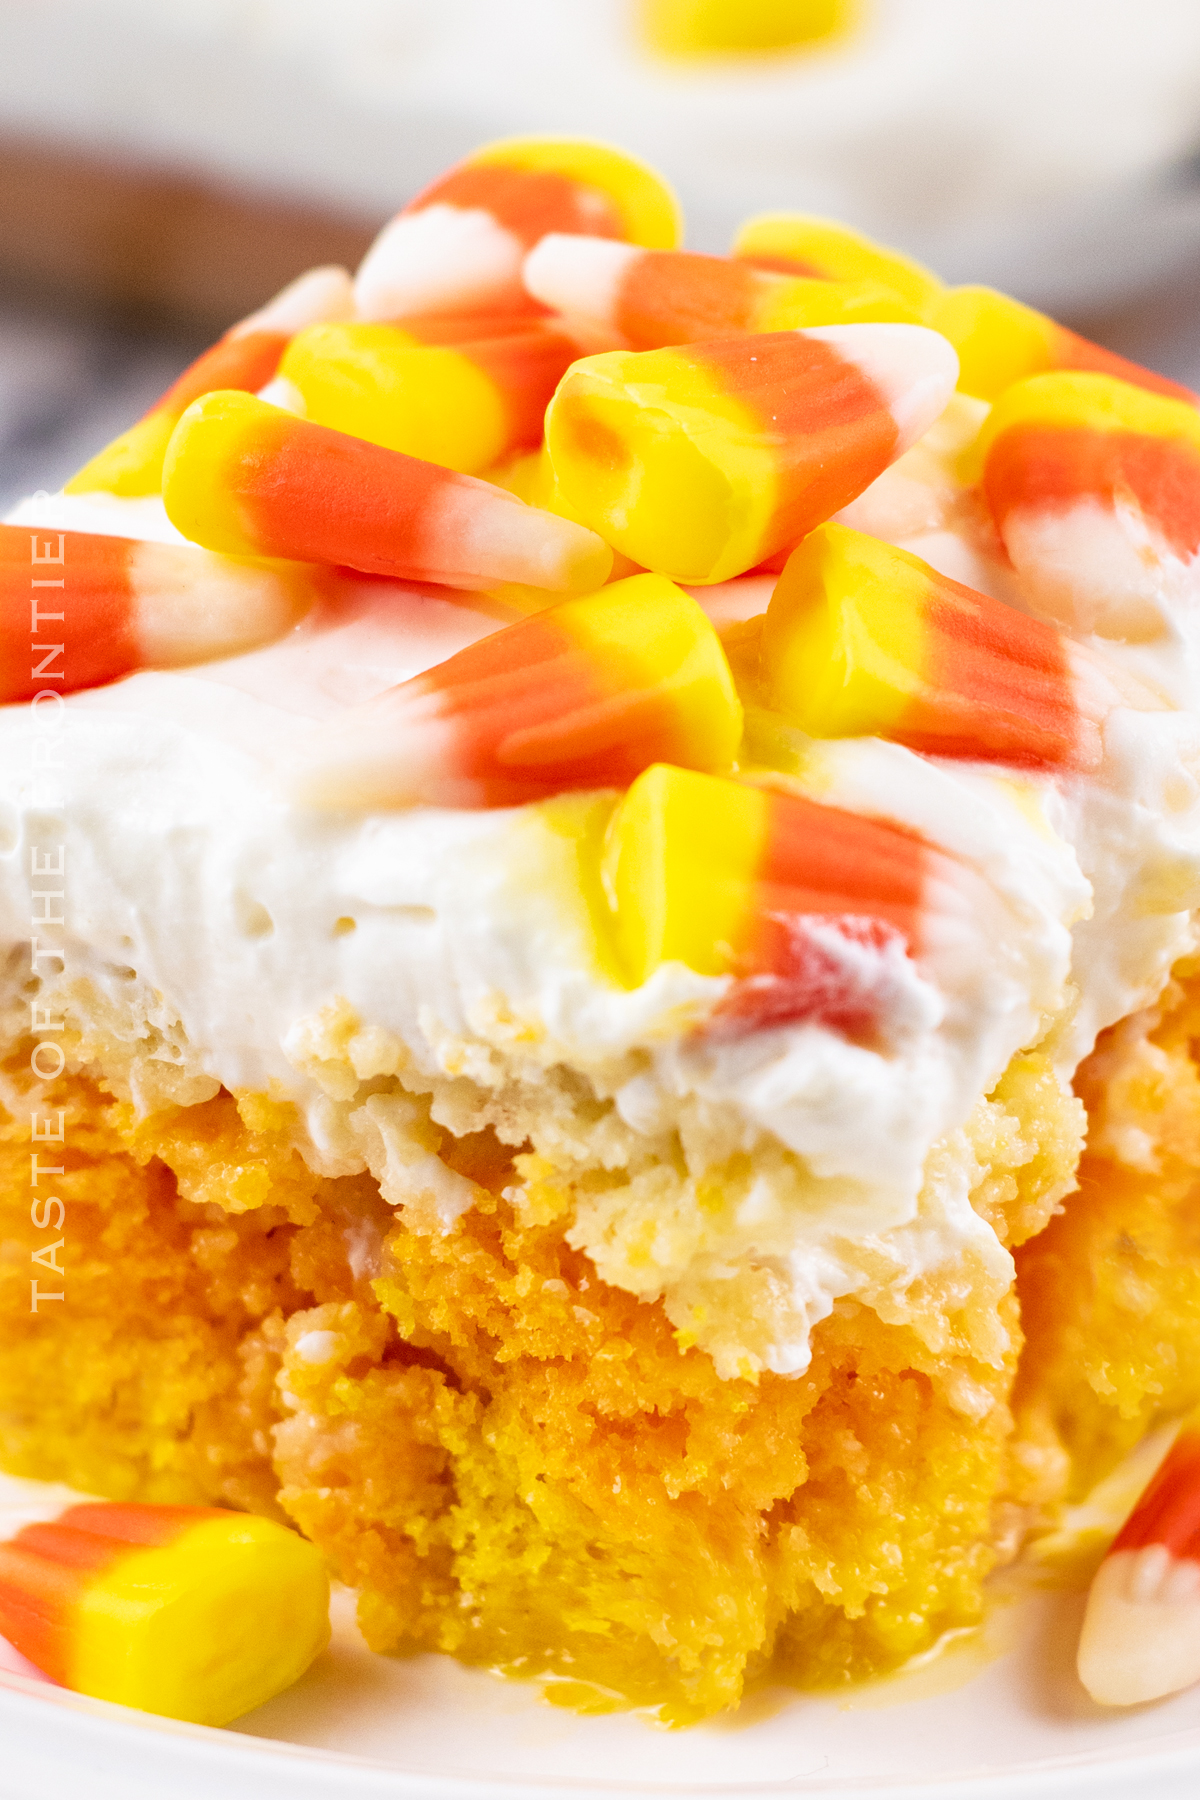
View postIf you’re looking for a fun (and stunning) dessert to serve at your Halloween party, look no further than Broken Glass Cupcakes! These cupcakes are made with a simple cupcake recipe and topped with candy that looks like broken shards of glass. Don’t forget the candy blood to make them extra spooky.
These Broken Glass Cupcakes are a super fun treat to serve at your next Halloween Party. We start with a simple doctored cake mix recipe and then create “broken glass” with homemade hard candy.
Then we add a little red gel to finish them off – because broken glass isn’t complete without the “blood” that comes with it. These are sure to be a hit at your Halloween celebrations this year!
I don’t know about you – but when it comes to Halloween, once the kids got to a certain age they would always prefer to stay home and pass out candy instead of going out into the neighborhood.
But I wanted them to have something fun to enjoy, just the same. So I would always whip up some sort of cute treat for them to snack on while they greeted all the little kids.
These broken glass cupcakes are super spooky and absolutely perfect for a Halloween celebration.

The most important thing is to keep them in an airtight container. I like to keep them refrigerated since the frosting does have milk and butter in it.
Now- I must say, they do keep better when they have only been partially decorated. So typically I will bake the cupcakes and add the frosting. Those go in the fridge.
Then I keep the glass candy in an airtight container in the pantry. The gel stays fine at room temperature until the container is opened. So since I do open that to make the cupcakes, I’ll pop that in the fridge after taking what I need for them.
When it comes time to serve – I just add the candy on top, then the blood, and they are ready. Super easy to prep ahead.
Yes, I do it often. Once baked – these cupcakes can be frozen at most stages of the creation process. I like to remove the freshly baked and cooled cupcakes from the pan, wrap them tightly in plastic wrap and freeze them for later use. (this is also handy when you want to work with cold cakes to keep the frosting from getting too soft.)
You can also place the frosting decorated cupcakes in an airtight container where the frosting won’t get crushed, and freeze them until you need them. Add the candy glass and the gel blood at the time of serving – not before freezing.
Just make sure to thaw the cupcakes in the fridge the night before as they do taste best when not frozen. I also like to leave them at room temperature for 1-2 hours before serving so the frosting is more creamy than stiff.
Room temperature ingredients help to ensure that everything blends together perfectly. You don’t want any pockets of unblended butter. You want everything evenly disbursed for the perfect texture.
When your dairy products are at room temperature, they can create an emulsion. It’s essential to have an emulsion because air gets trapped, so the baked goods expand and get fluffy as it bakes.
These broken glass cupcakes are fun, strawberry-filled cupcakes that are topped with buttercream frosting, candy made to look like broken glass, and then topped with strawberry gel to look like blood. They are a super cute treat for any Halloween celebration!
The key to moist, fluffy cupcakes is to create air bubbles in the batter that expand during baking. You’ll wind up with dense, heavy cupcakes if you overmix your batter. Always use a low speed when mixing and stop just before all of the components are combined.

You will need to take your butter out of the fridge about an hour before you would like to make the recipe for the butter to soften but not get too soft.
There are a couple of ways to do this. The first being that you can take the butter (& any other ingredients that need to be at room temperature) out, leave it on the counter for about 30 minutes while you prep for baking.
I usually start with all my chilled ingredients and pull everything I need out onto the counter before getting started – so I know for sure I have everything before I’m mid-way through I realize I’m out of something.
But sometimes it’s winter and that isn’t enough time to get the ingredients warmed up – OR – I’m just not that organized to plan ahead. It happens. So I have another couple of tricks.
I place the butter in the microwave – wrapped in the paper. (don’t do this if it is wrapped in foil) Then I microwave for 2 seconds – flip – go another 2 seconds – flip again – and continue for 2 seconds on each side.
This is usually enough to get it perfect – sometimes stopping before if it feels soft enough. Take care when doing this method – overly softened butter from the microwave WILL ALTER the end result of the recipe. Don’t over-do it.
My third method is to place the wrapped butter sticks in a zip-top bag and place it in a bowl of warm water. I do this with the eggs too. If the water isn’t too hot it can be THE PERFECT way to get “room-temperature” ingredients.
Buttercream frosting can be stored in an airtight container in the fridge for up to 2 weeks. Simply let it come to room temperature before using it.

Yes, you can freeze buttercream frosting. Simply place it in an airtight container and store it in the freezer for up to 3 months. Thaw it overnight in the fridge before using it.

DON’T MISS THESE HOLIDAY E-BOOKS!

This broken glass cupcake recipe is SUPER EASY and delicious – and if you’re like me this time of year, then you maybe already have some of these items on hand OR maybe you have never made fun treats like this before, & you might be a bit nervous – but you’re going to love it. I have made a list below of the things I absolutely can’t live without when it comes to making this spooky recipe. (you can also SHOP MY FAVORITES in my store)
If you love this easy broken glass cupcakes recipe, you’re going to love these other Halloween treats too. Please click each link below to find the easy, printable recipe!


If you love this recipe for Broken Glass Cupcakes as much as I do, please write a five-star review, and be sure to help me share on Facebook and Pinterest!
CONNECT WITH YUMMI HAUS!
Be sure to follow me on my social media, so you never miss a post!
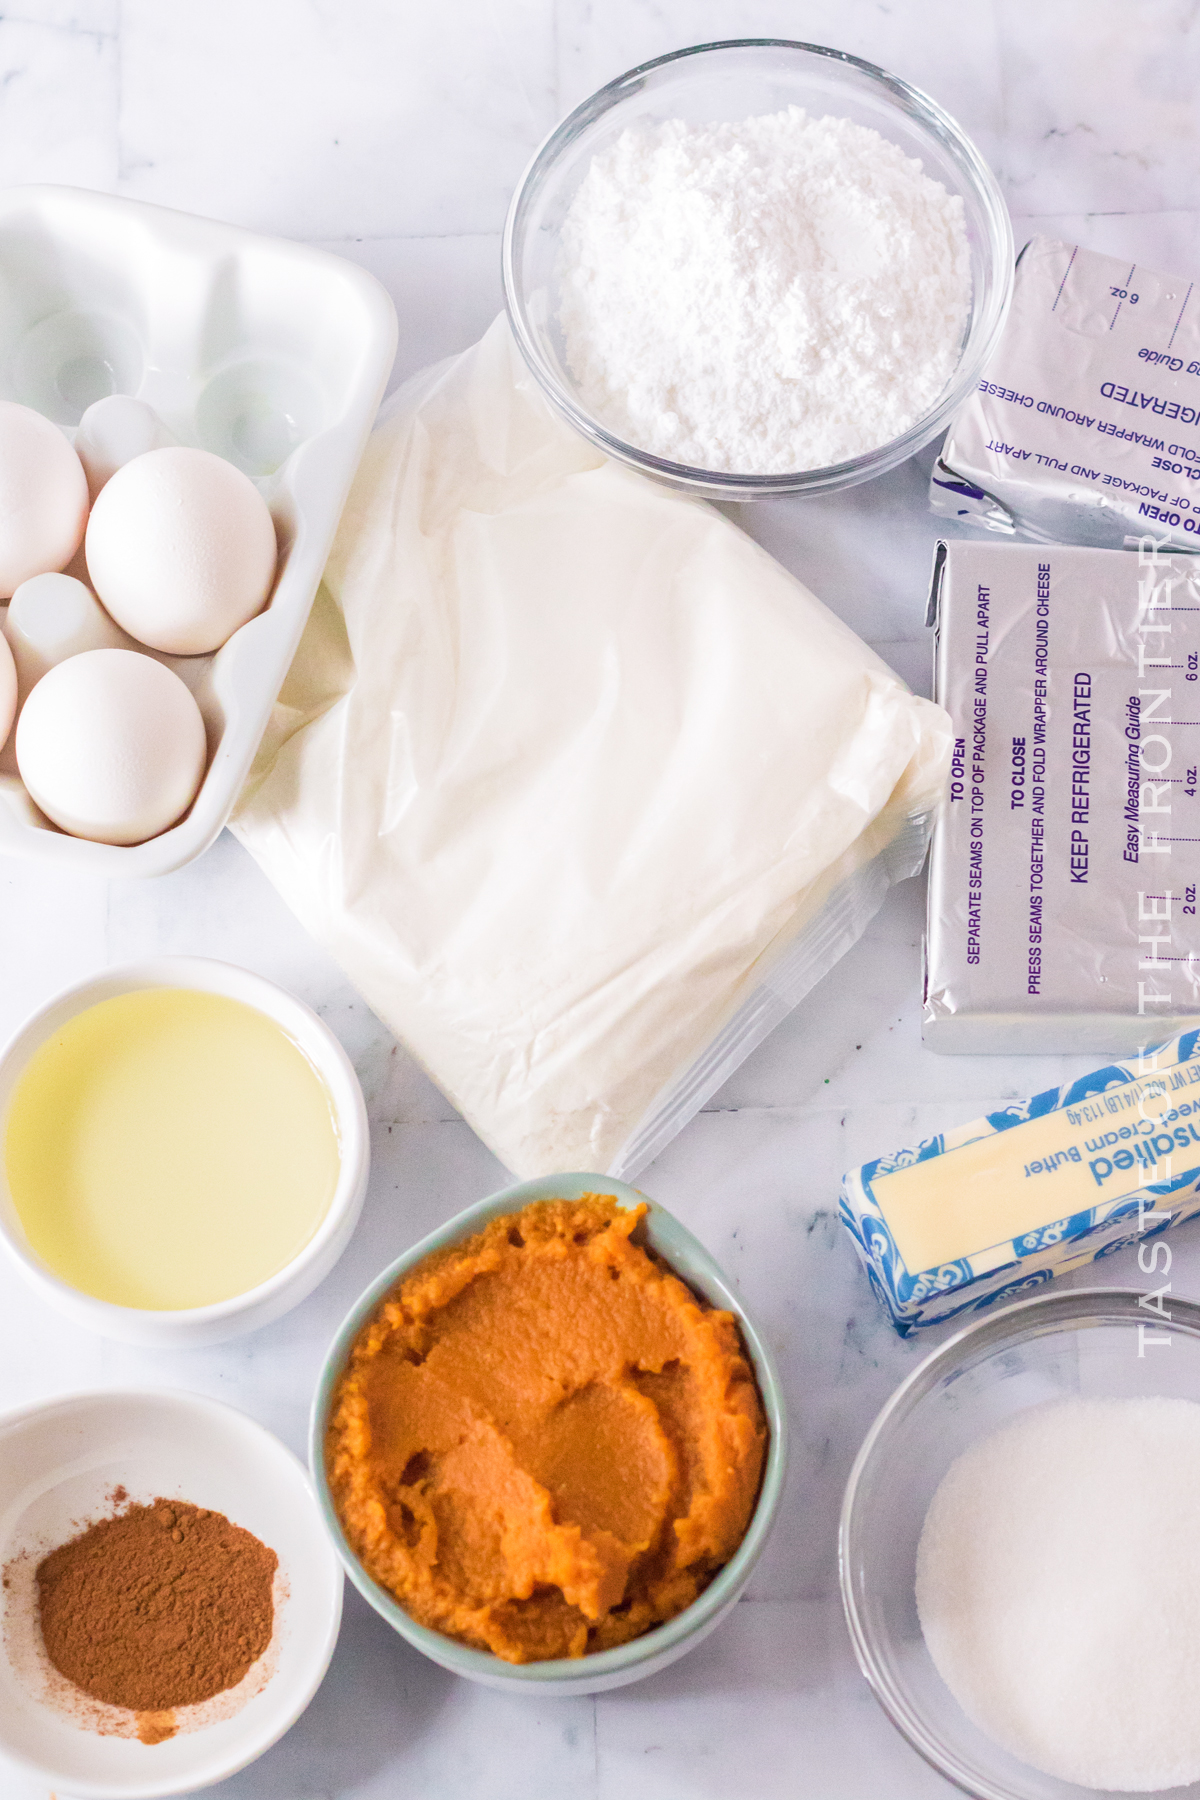
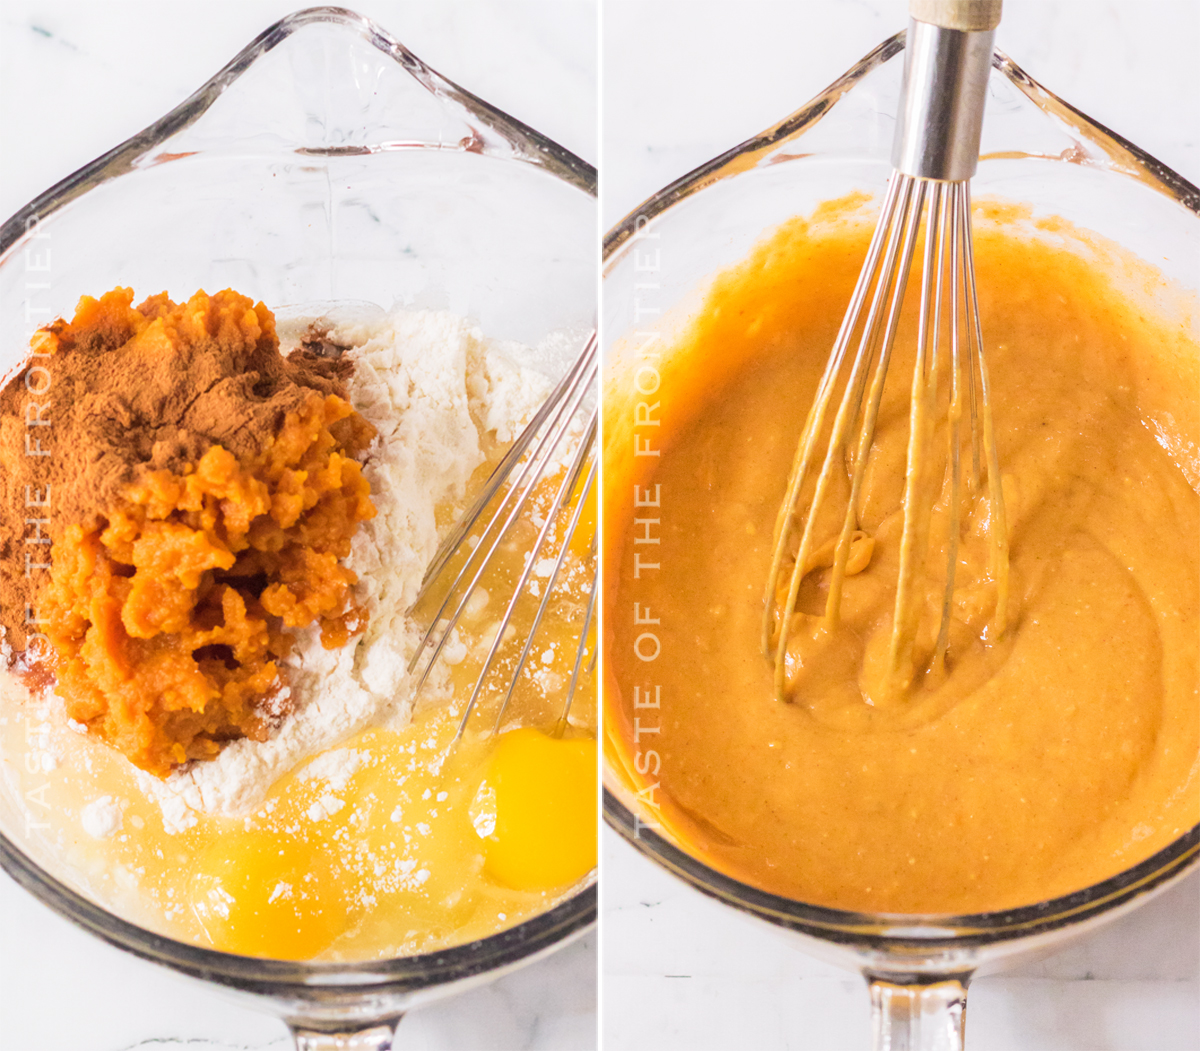
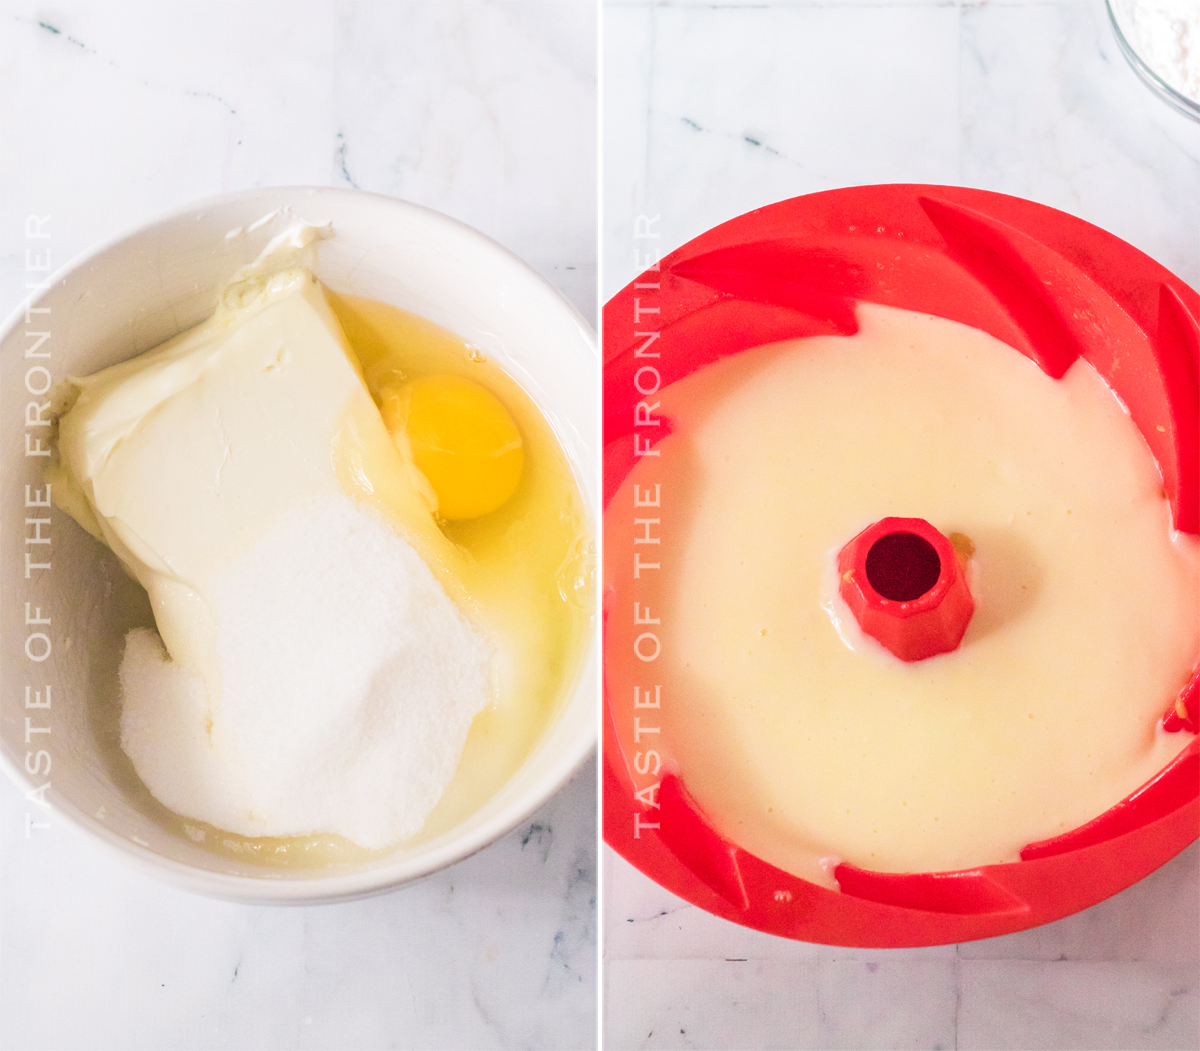
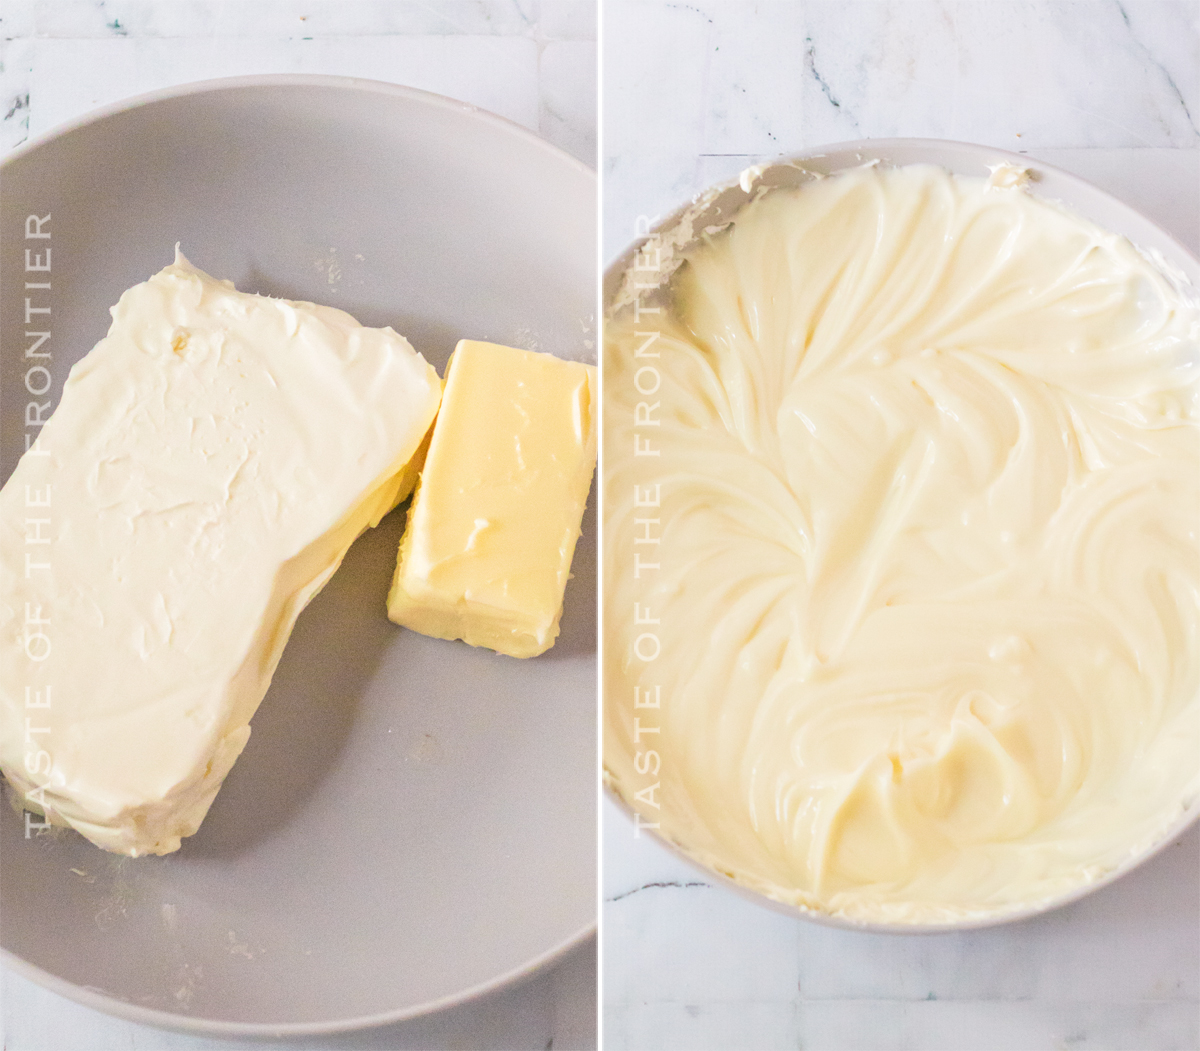
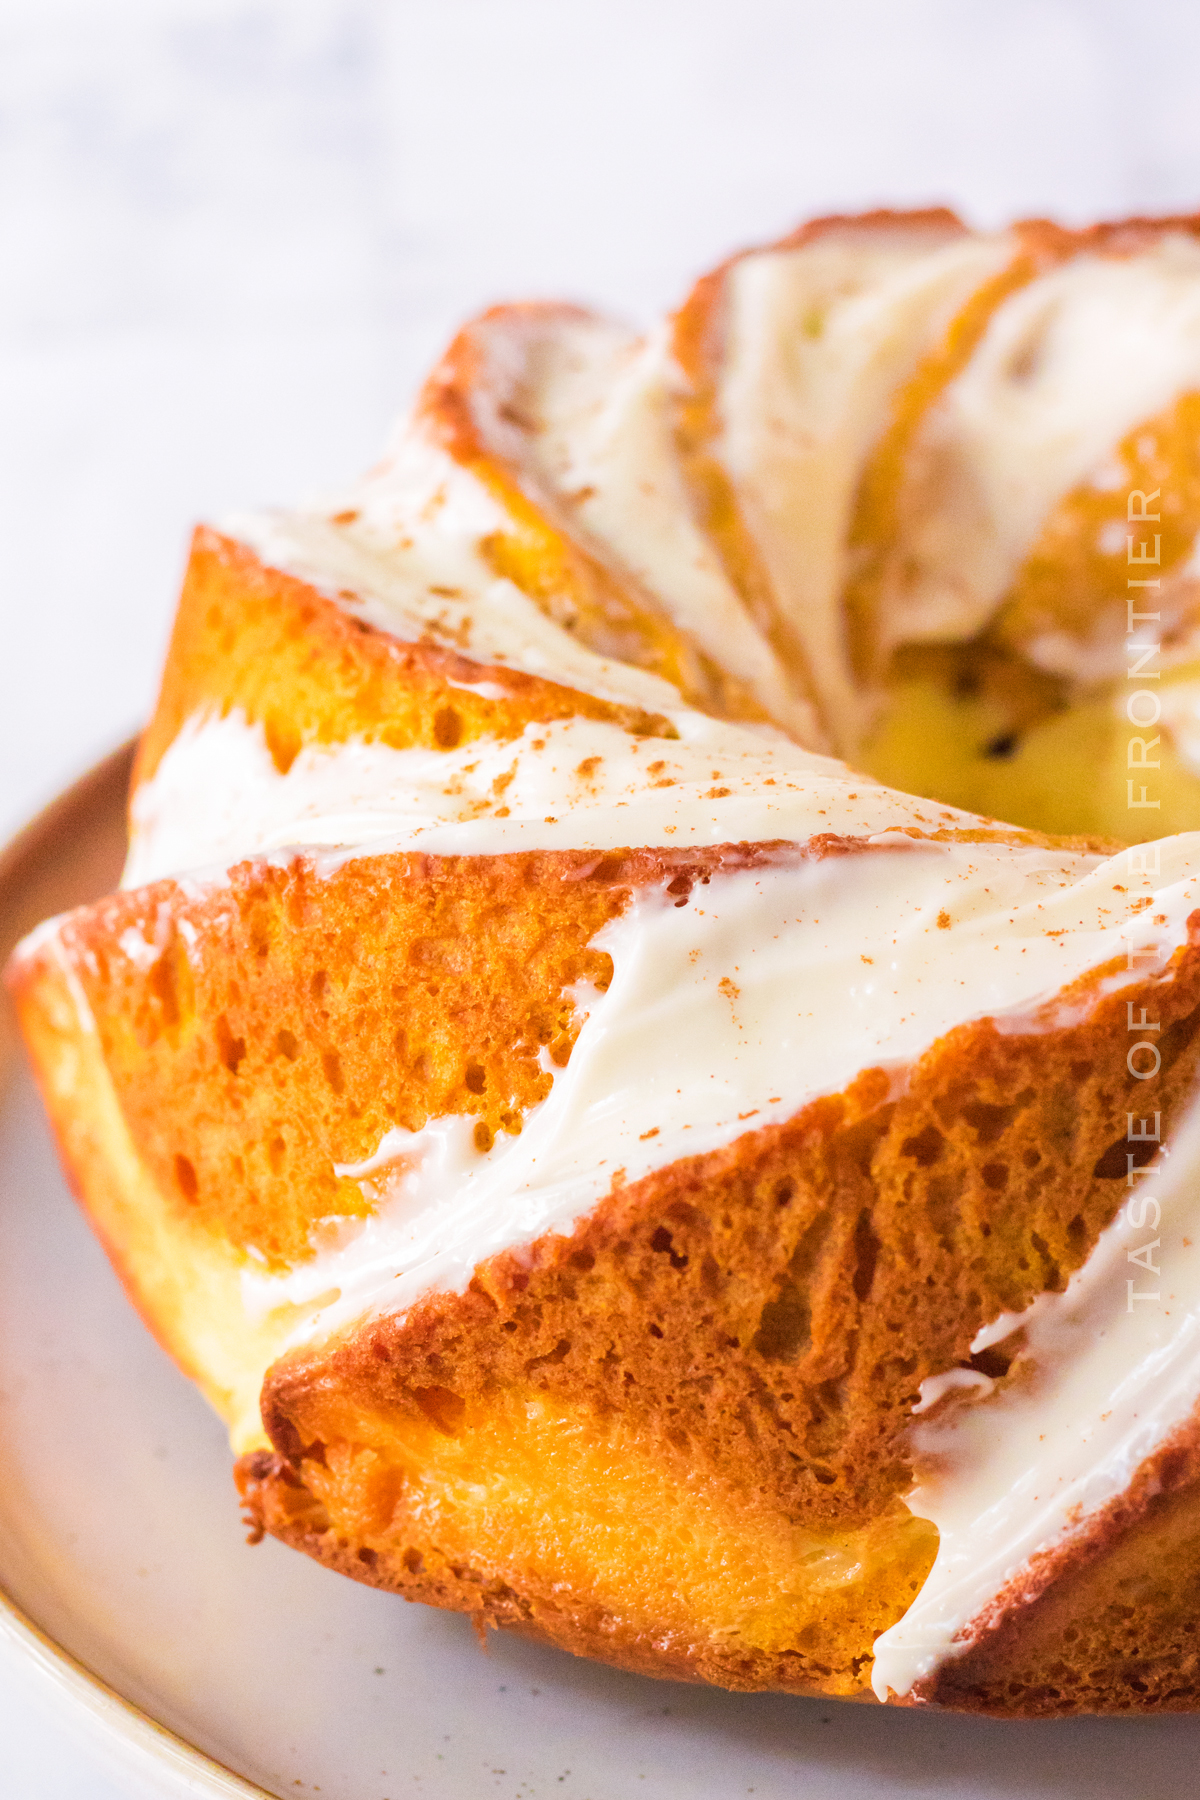
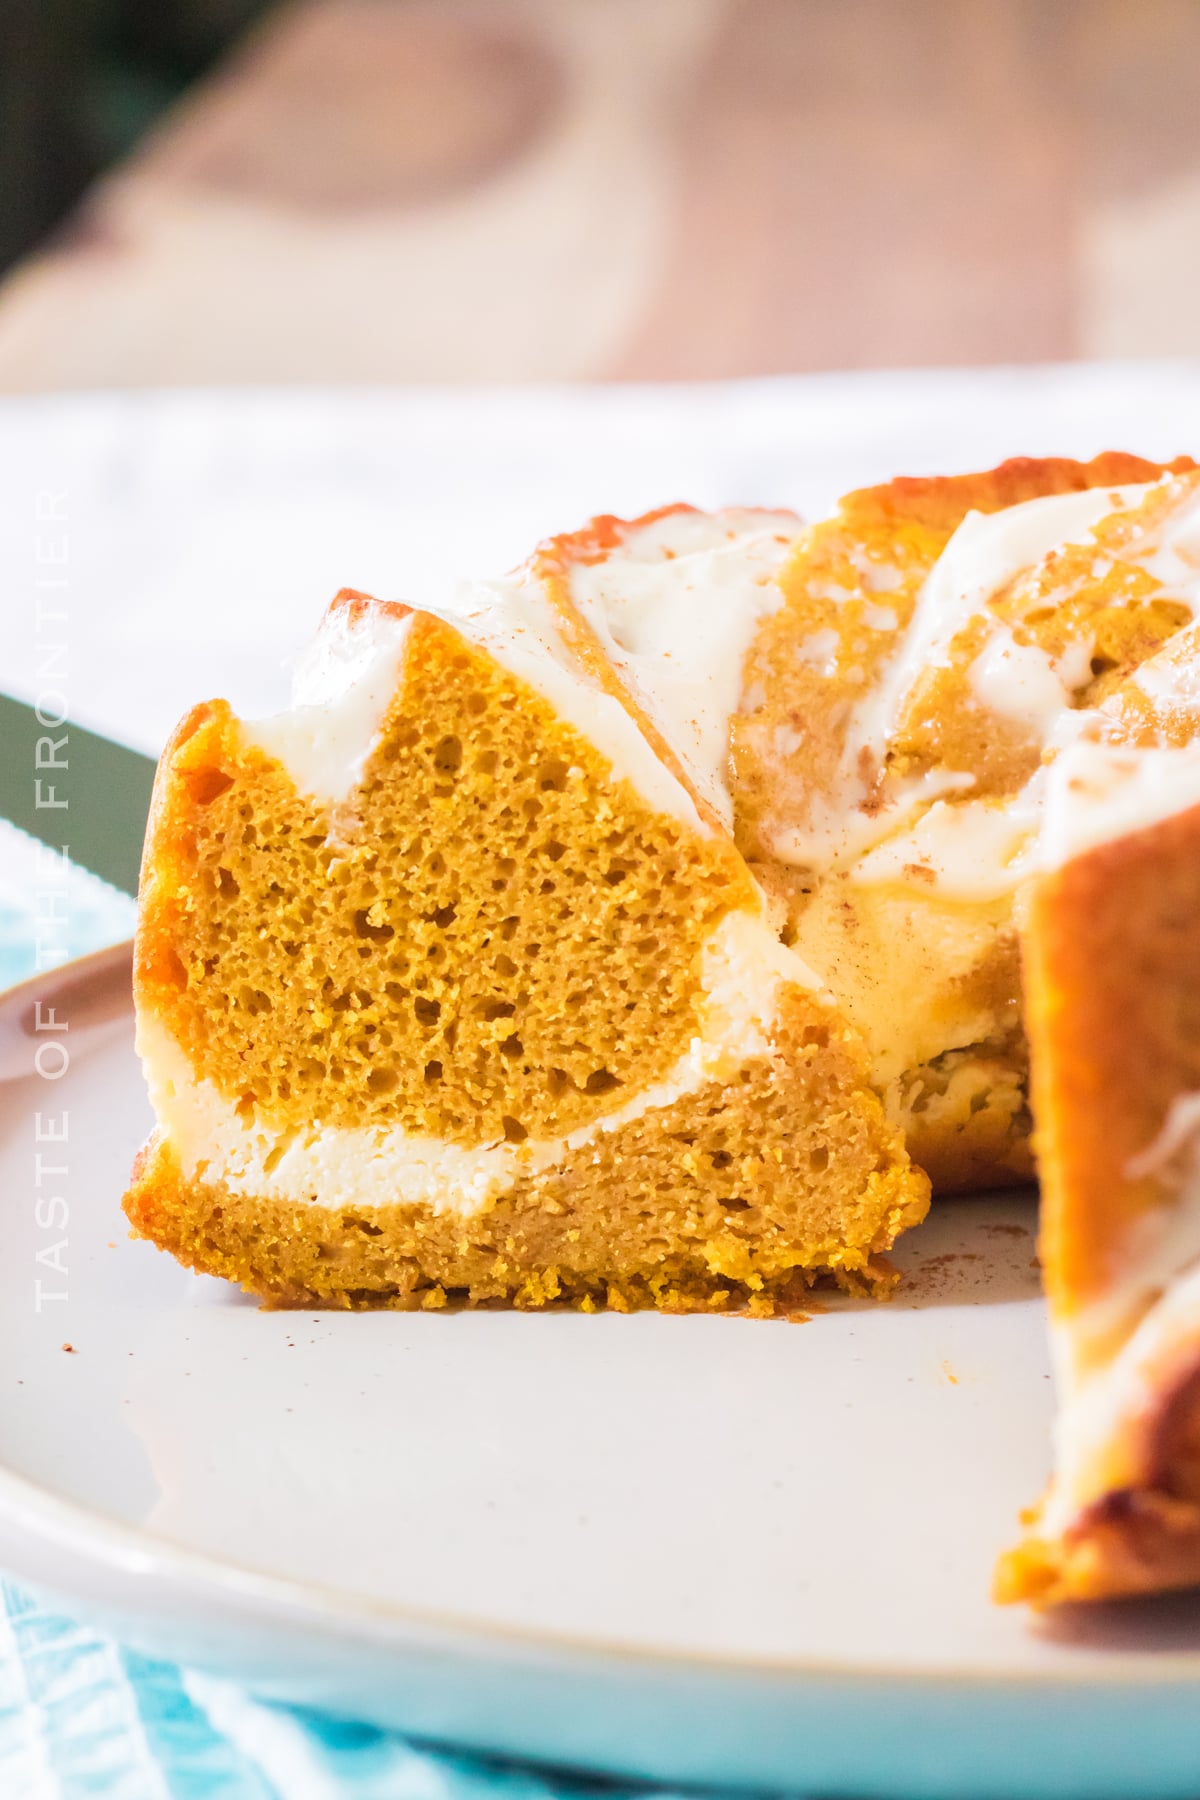
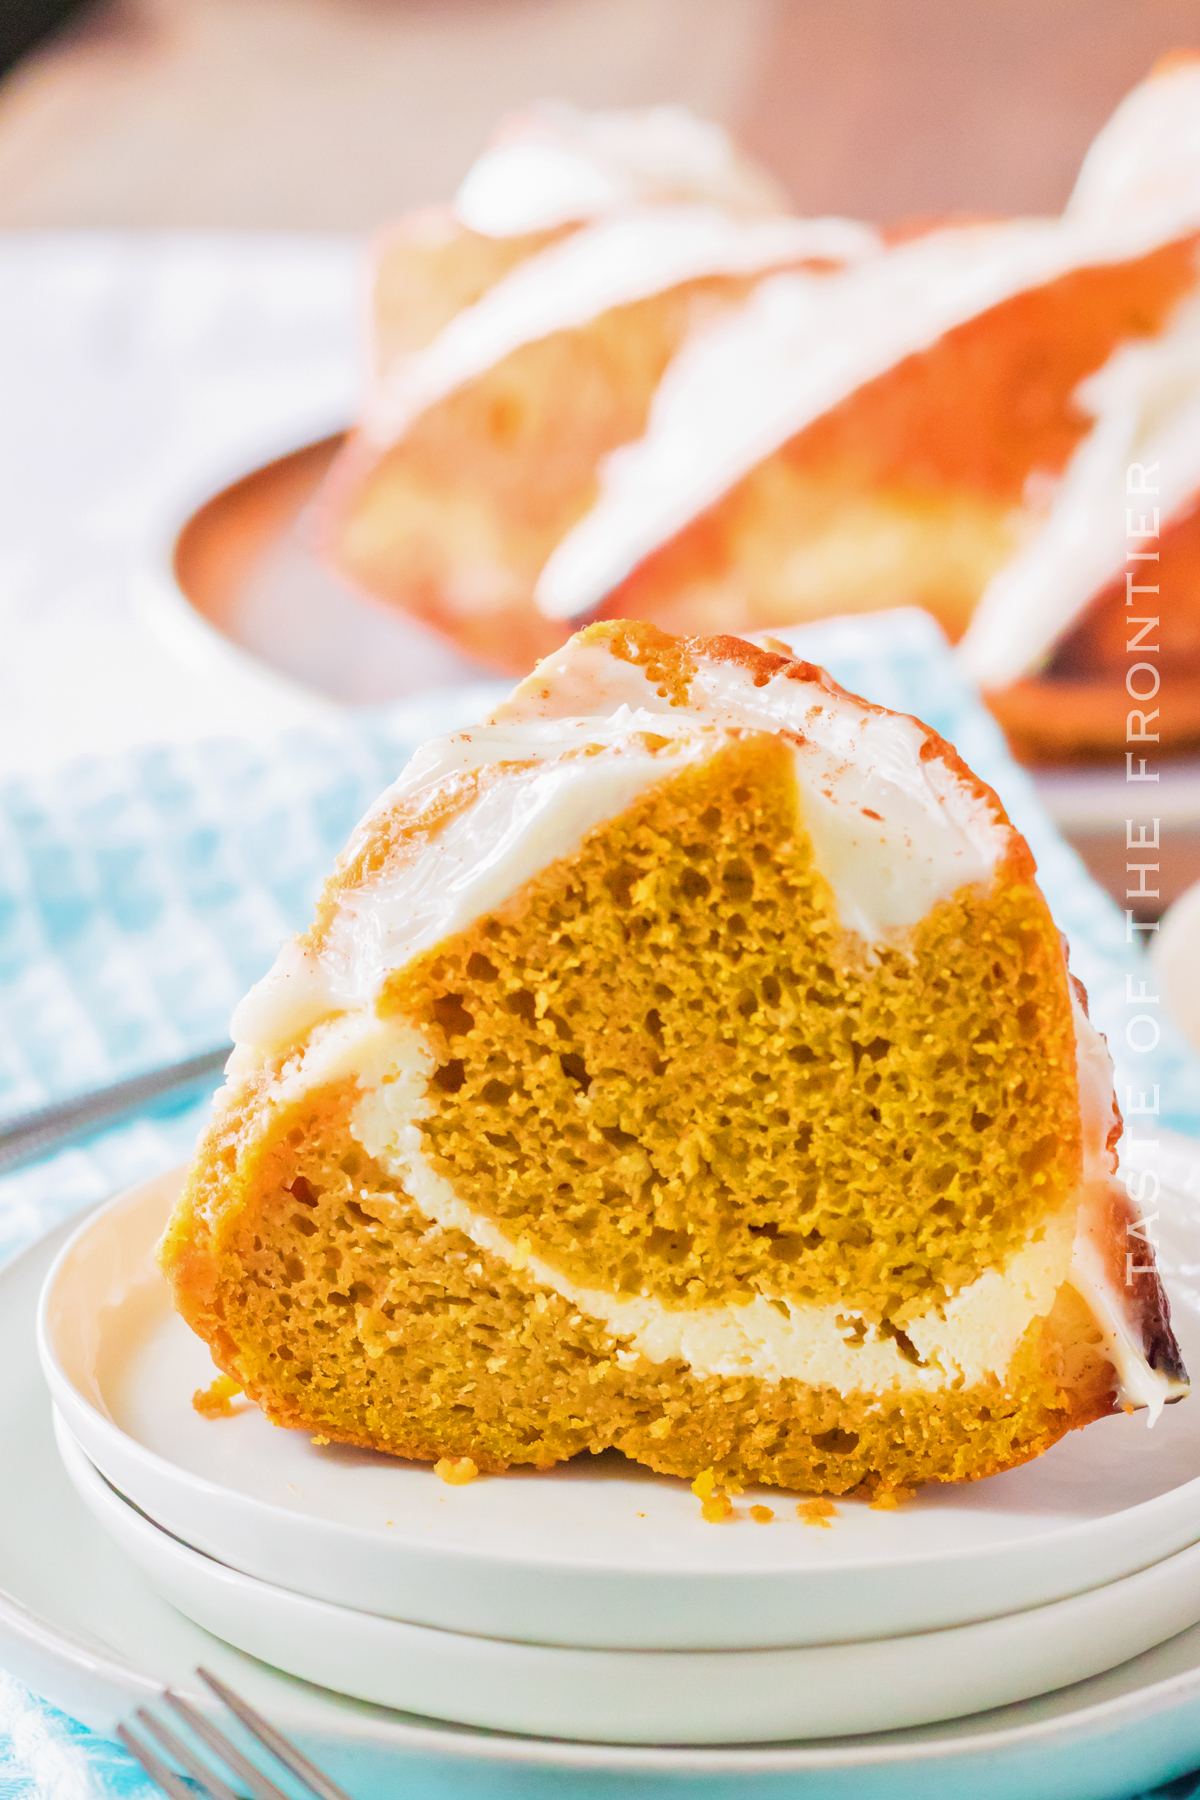
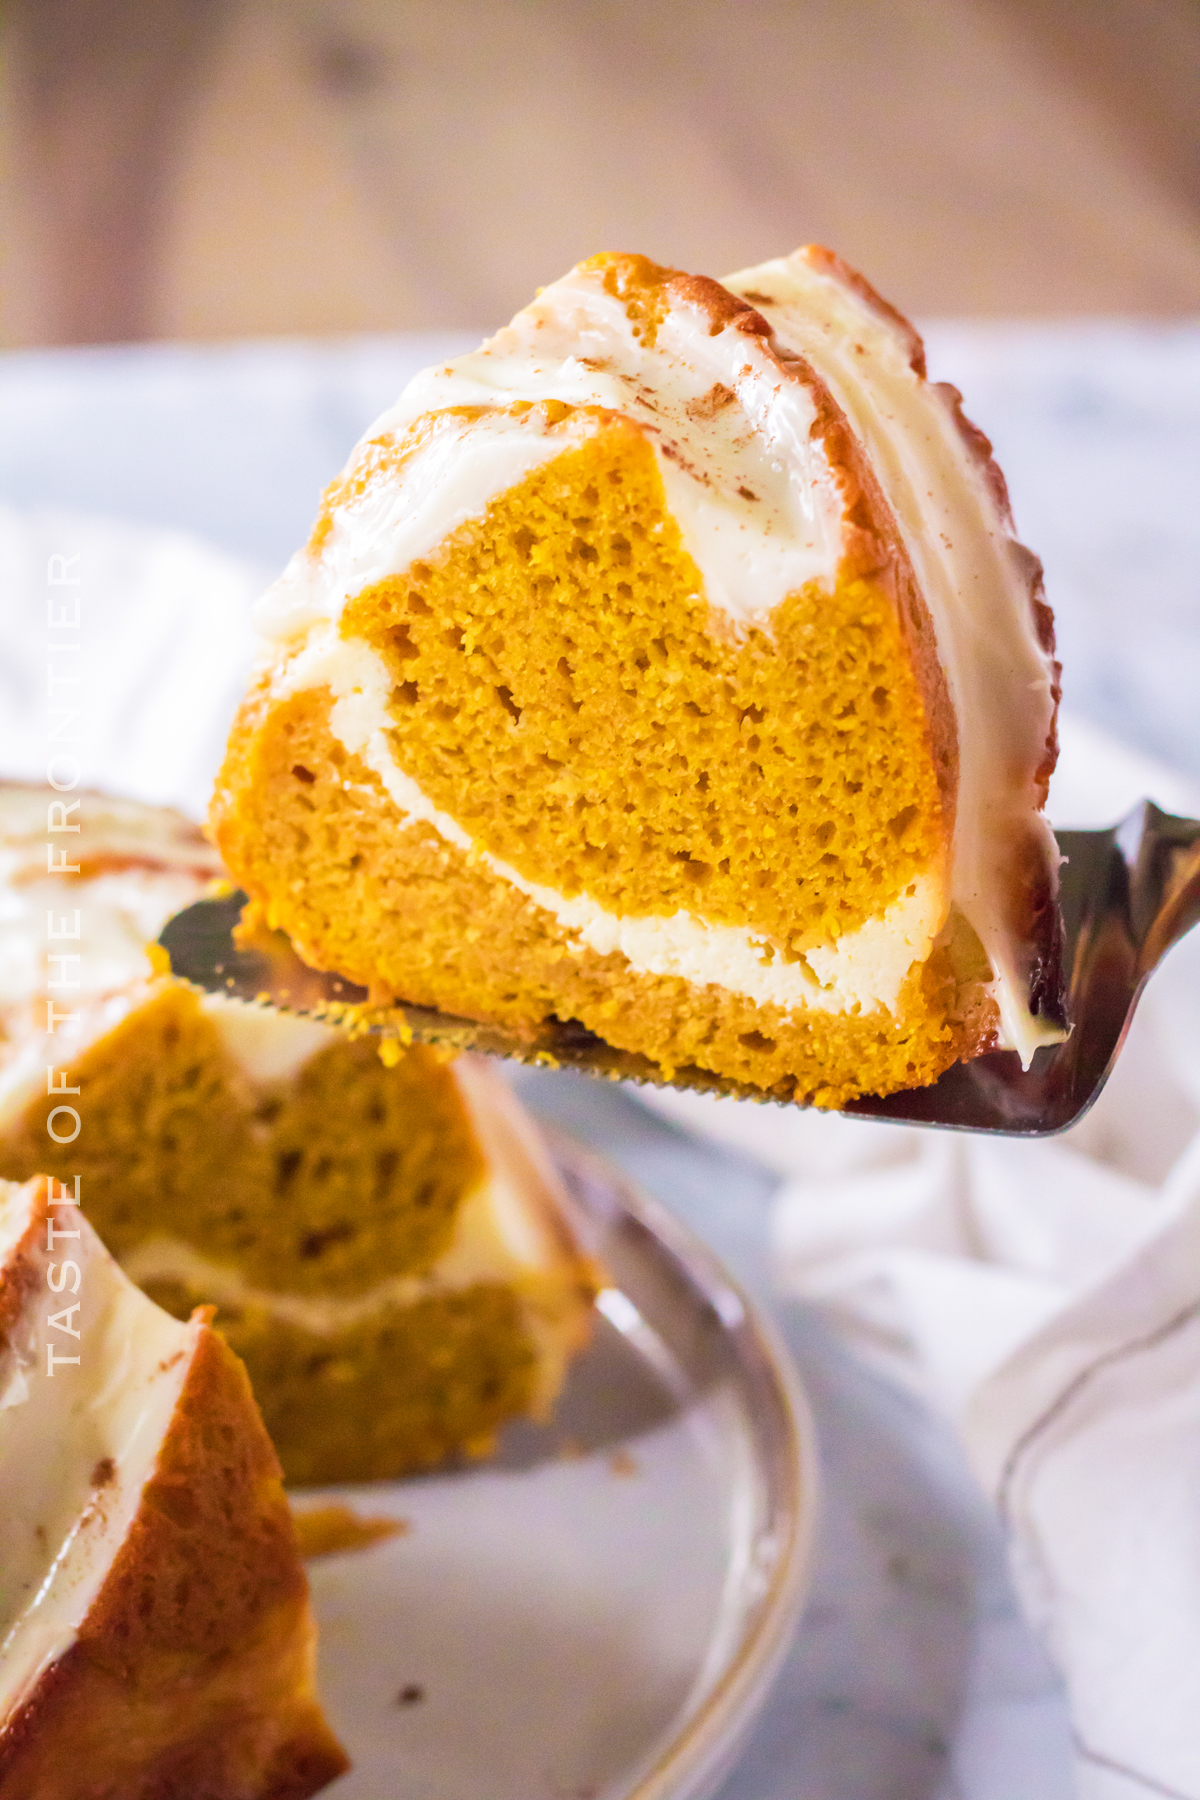
Pumpkin Bundt Cake is the perfect fall dessert. This recipe is easy to follow and yields a delicious cake that everyone will love. Serve this cake at your next gathering and watch it disappear!
Autumn is in the air, which can only mean one thing: pumpkin season is here! This delicious pumpkin bundt cake is perfect for any autumn celebration.
Not only is it easy to make, but it tastes amazing too. So why not give it a try? You won’t be disappointed.
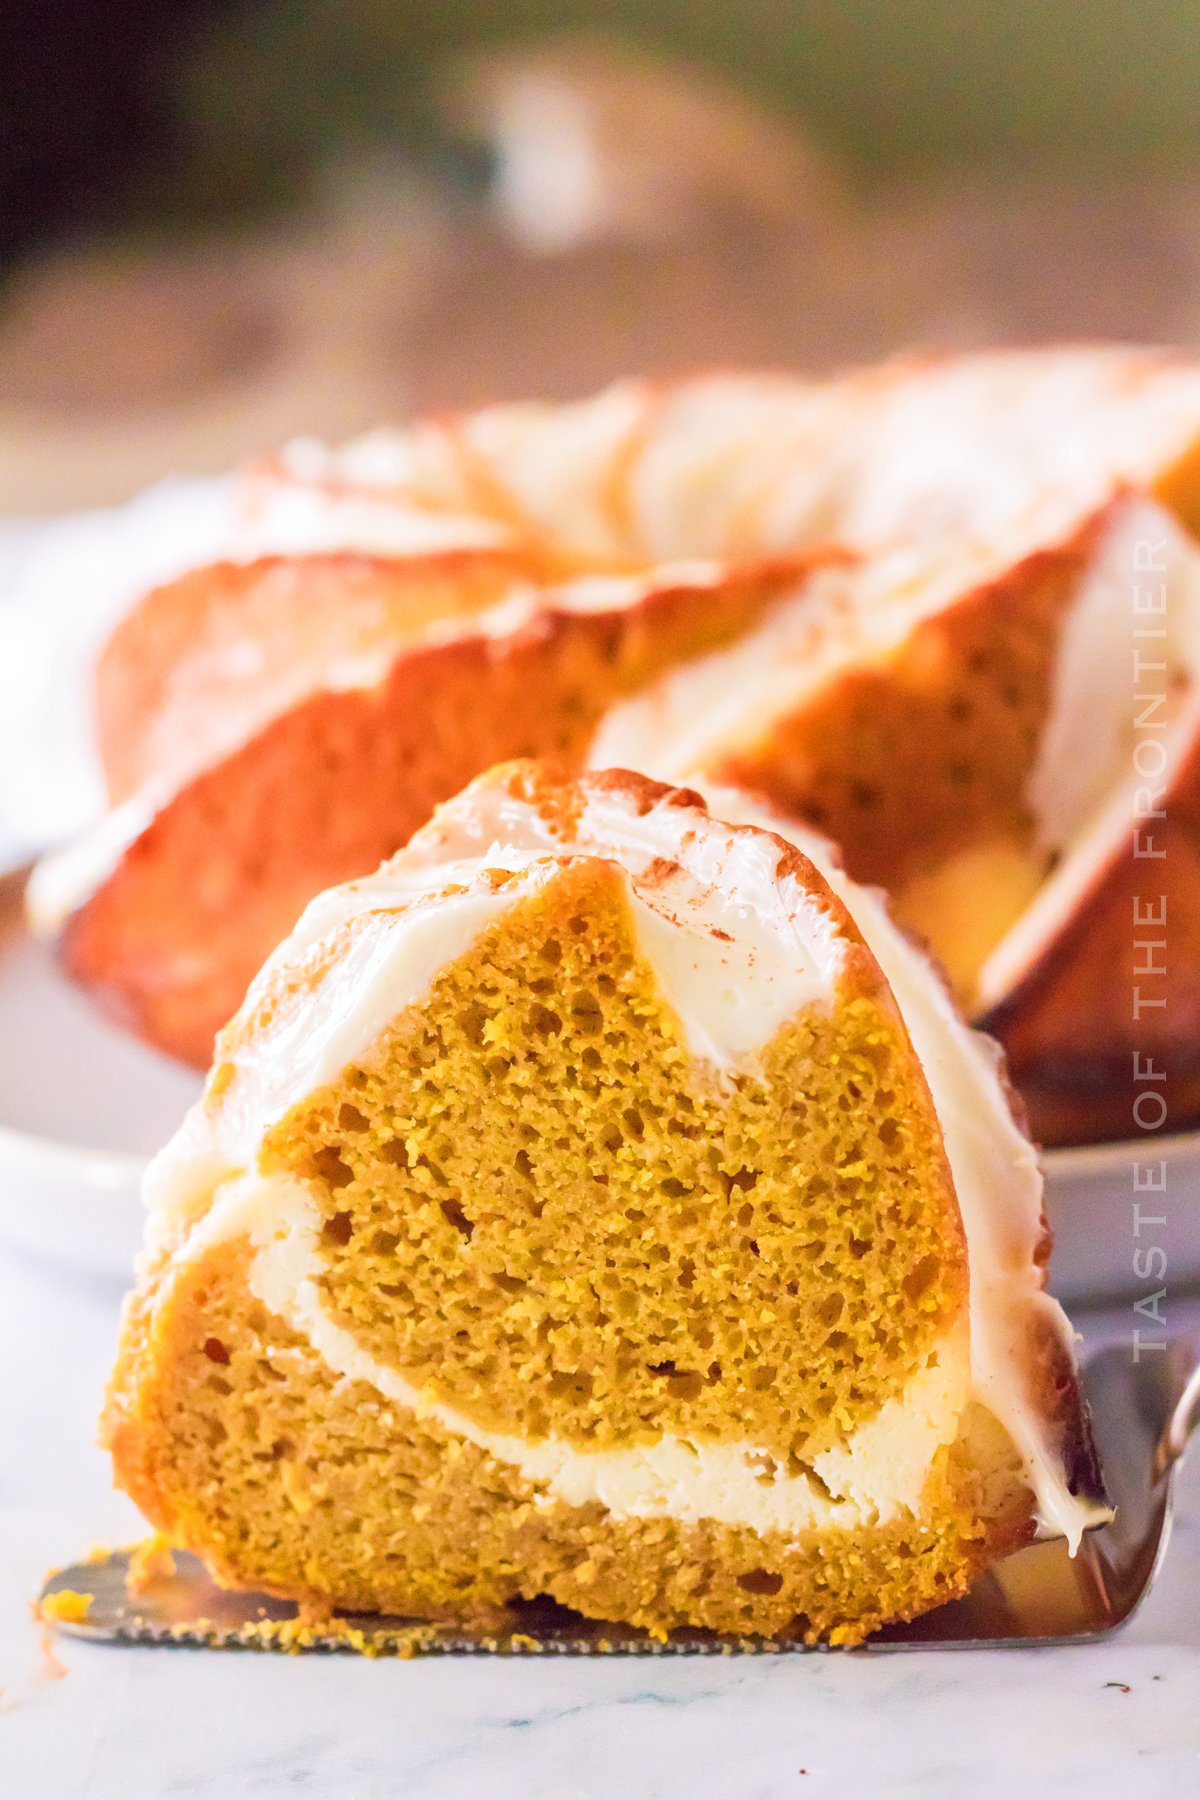
Is there anything better than a delicious and moist pumpkin bundt cake? This easy recipe is perfect for a fall get-together, or just because you’re in the mood for something special.
The best part is that it only takes a few simple ingredients, so you can have it ready in no time!
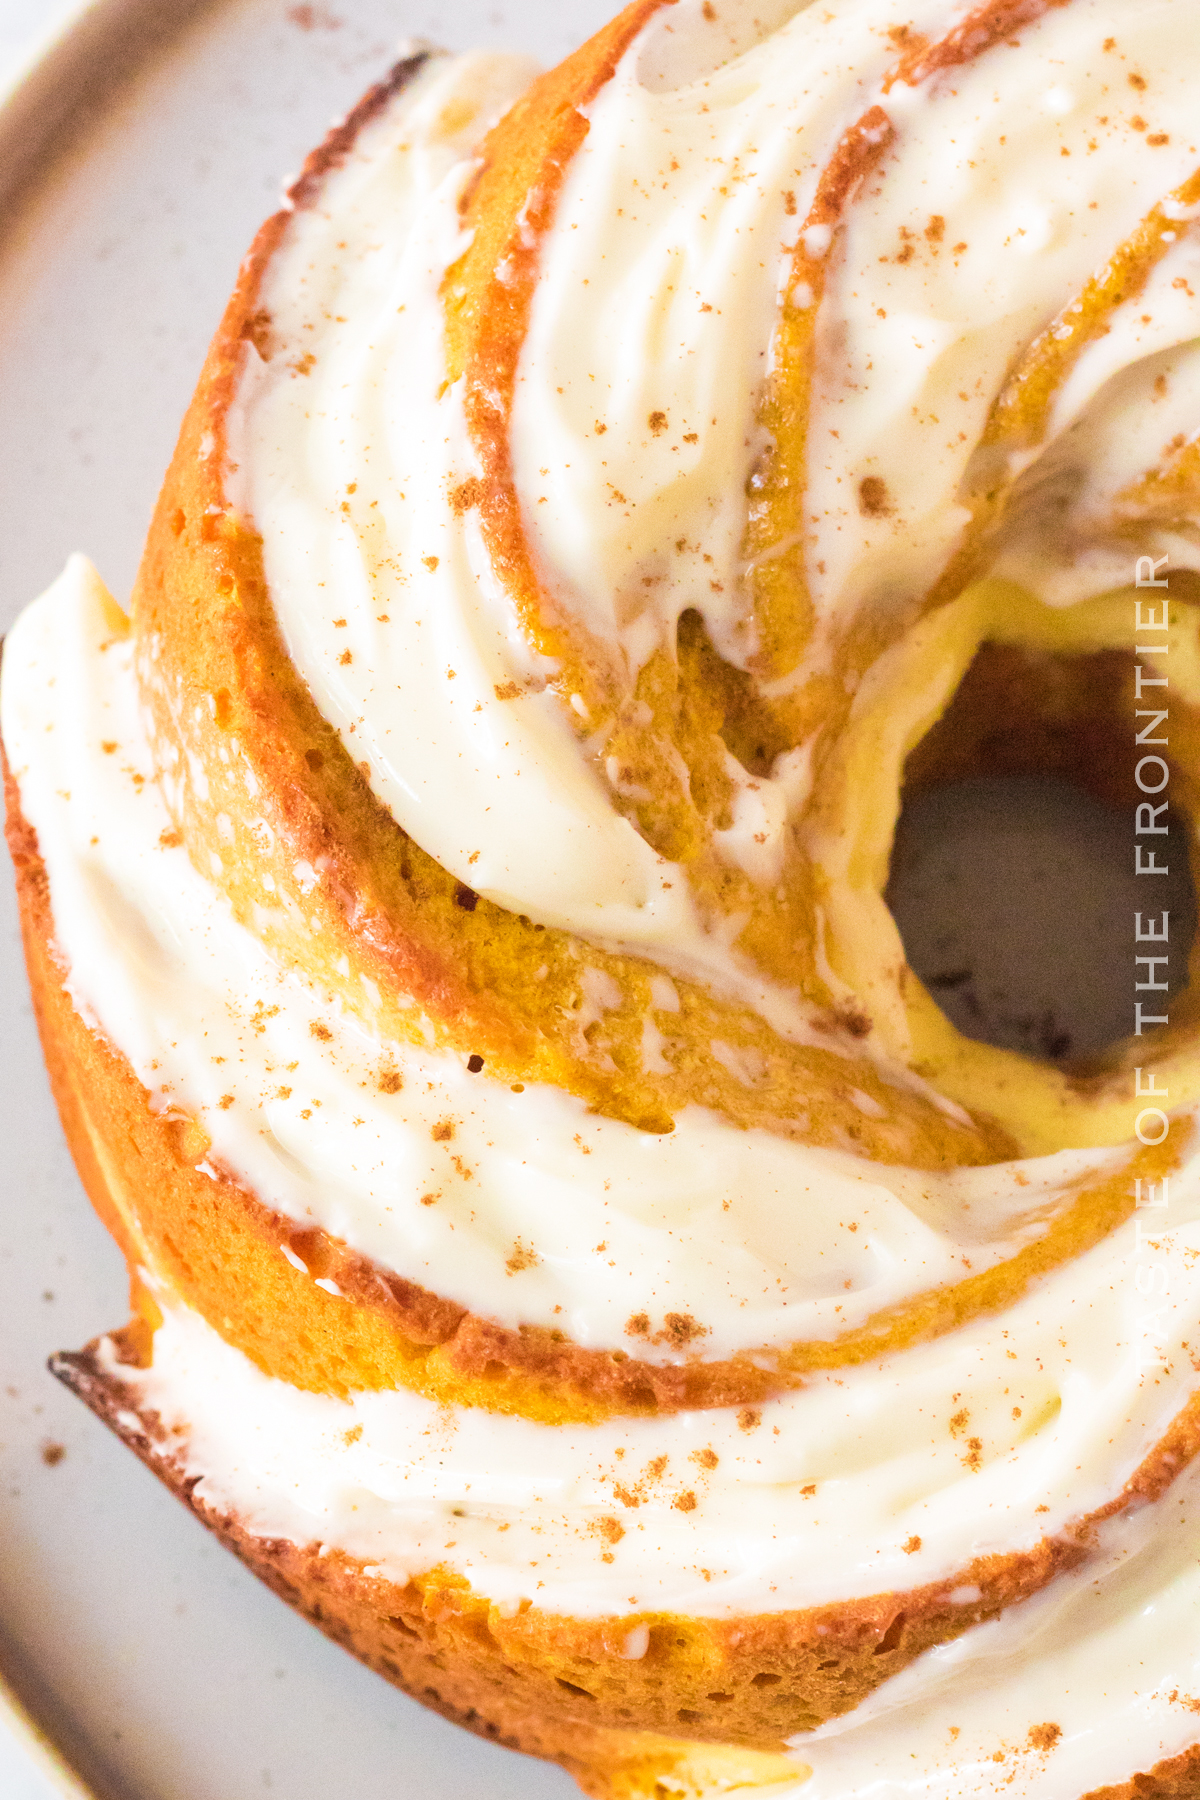
A bundt cake is a type of cake that is typically round, has a hole in the center, and is covered in sugar or frosting. Bundt cakes are often made from flour, butter, eggs, baking powder, salt, and milk.
They are usually baked at lower temperatures for longer periods of time to produce an extremely moist and fluffy texture. This Pumpkin Bundt Cake is a popular type of dessert, and this recipe will help you make the best one possible.
You can store your pumpkin bundt cake in the fridge or freezer. If you want to keep it refrigerated, place it in a sealed, airtight container and store it in the fridge for up to 5 days.
I don’t recommend keeping it at room temperature because of the dairy in the cheesecake layer and the frosting.
If you want to freeze it, place it in a sealed, airtight container and freeze for up to 2 months.
The pumpkin bundt cake will last for up to 5 days if kept properly refrigerated.
You could, although it’ll be a little more watery. I have not made it using fresh pumpkin so I can’t tell you exactly how much to use, but I would definitely make sure the cooked pumpkin has completely cooled before you start using it.
Pumpkin bundt cake is a popular dessert that can be topped with many different things. Here are some of the most popular pumpkin Bundt cake toppings.
Some of the most popular pumpkin bundt cake toppings include whipped cream, ice cream, caramel, nuts, and chocolate chips.
This recipe is easy to follow, and it will result in a delicious Bundt cake that everyone will love. The spices add flavor without being overpowering, so you can focus on the other ingredients and let this cake do the work for you. Plus, it’s perfect for parties or dinners – just make sure you have plenty of forks!
Yes, this pumpkin cake can be made in advance and stored in the fridge. You’ll need to let it cool completely before serving.
Pumpkin Pie Mix is a mixture of pumpkin puree, sweetener and spices combined that is used to make pumpkin pie. Pumpkin Puree is a pureed form of pumpkin and can be used in recipes that call for canned pumpkin. It does not contain any other ingredients, it is just pureed pumpkin.
The recipe calls for pumpkin puree because it does not contain all the additional ingredients in the pie filling. Pumpkin pie filling can also be used in this recipe, however, most people think that it makes the dessert too sweet. I prefer to stick to puree.
You can use a different flavor cake mix for this recipe. We have made this using white cake mix, vanilla cake mix, and even spice cake mix instead of yellow cake mix and they all turn out beautifully. You can also add additional fall spices to the batter with the pumpkin.
I understand that you might not keep pumpkin pie spice on hand – or maybe you used so much last season that you may have run out. No problem – just blend the following ingredients together and you will have your own homemade pumpkin pie spice.
Pumpkin Bundt Cake is the perfect way to celebrate autumn. It’s easy to make and packed with flavor, so you’ll love how it turns out every time.
This cake is also a great option if you’re looking for something special that can stand up to all of the other flavors that will be in season during this time of year.
Whether you’re serving it at your own Thanksgiving dinner or just want an amazing dessert to share with friends, this recipe is sure to please everyone in your family and congregation!
DON’T MISS THESE HOLIDAY E-BOOKS!
This pumpkin cake recipe is SUPER EASY and delicious – and if you’re like me this time of year, then you maybe already have some of these items on hand OR maybe you have never made a bundt cake before, & you might be a bit nervous – but you’re going to love it. I have made a list below of the things I absolutely can’t live without when it comes to making this cake recipe. (you can also SHOP MY FAVORITES in my store)
If you love this easy pumpkin cake recipe, you’re going to love these other pumpkin recipes too. Please click each link below to find the easy, printable recipe!


If you love this recipe for Pumpkin Bundt Cake as much as I do, please write a five-star review, and be sure to help me share on Facebook and Pinterest!
CONNECT WITH YUMMI HAUS!
Be sure to follow me on my social media, so you never miss a post!
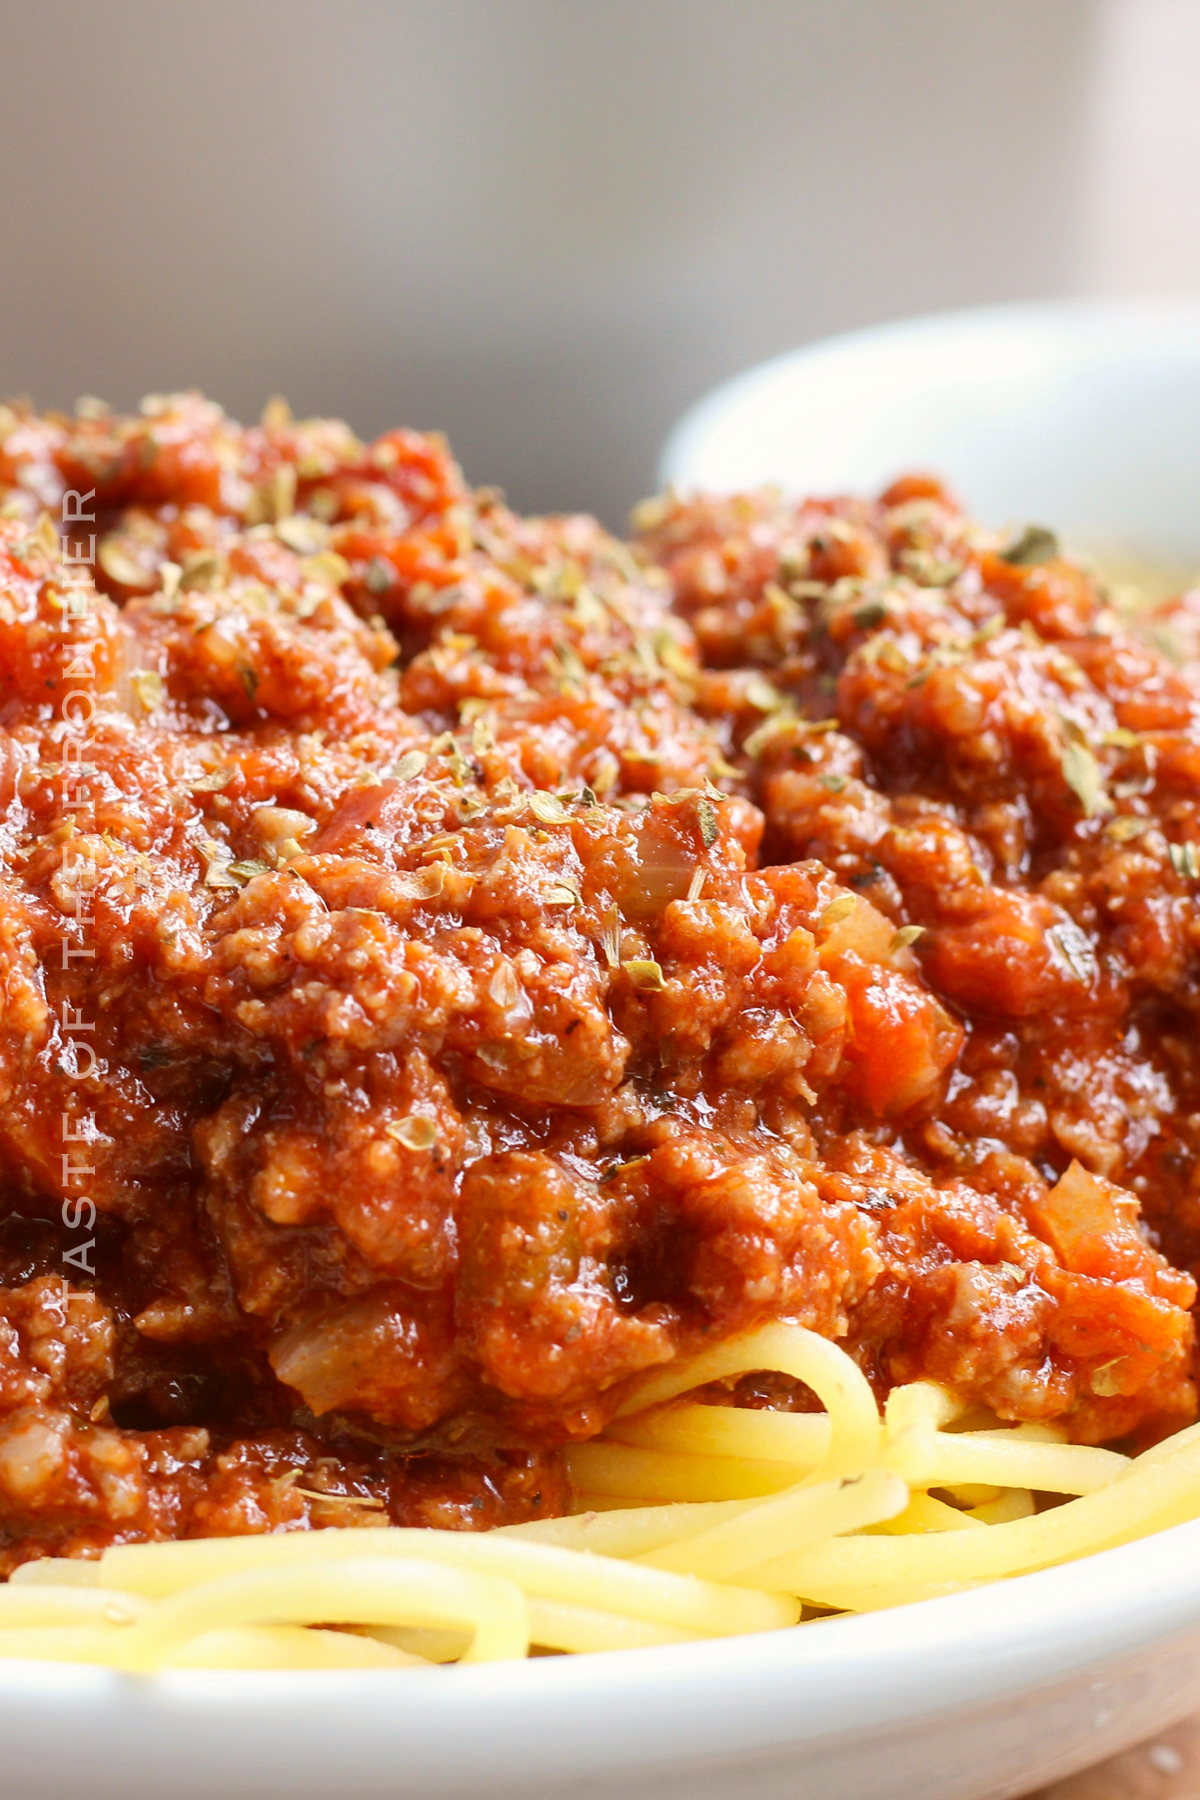
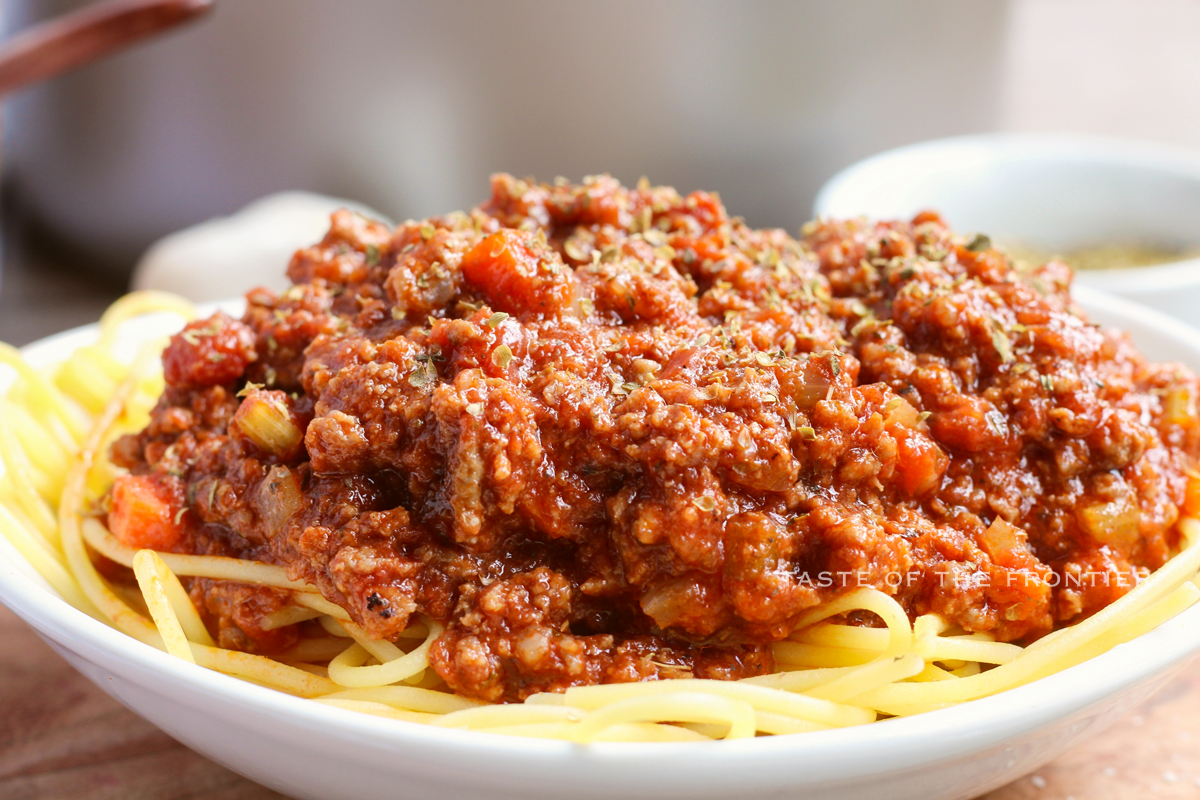
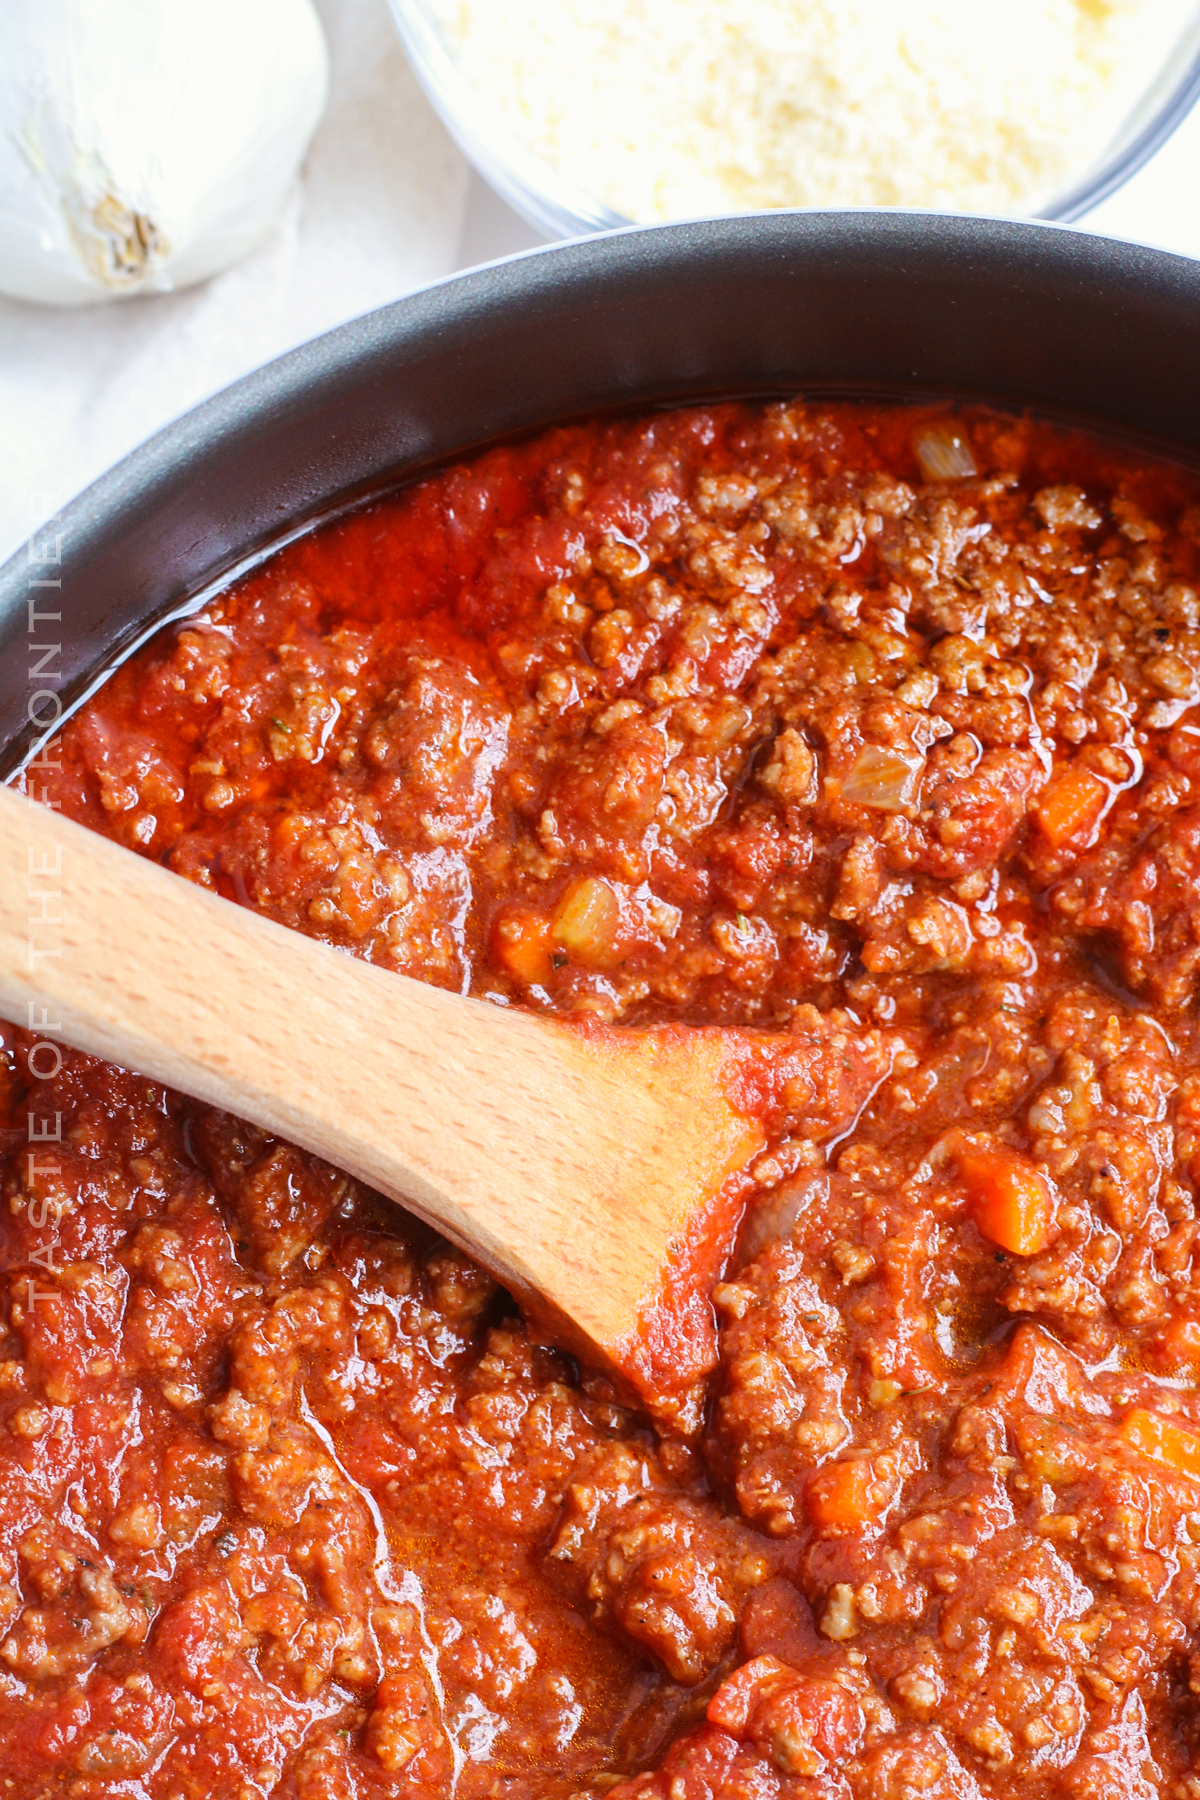
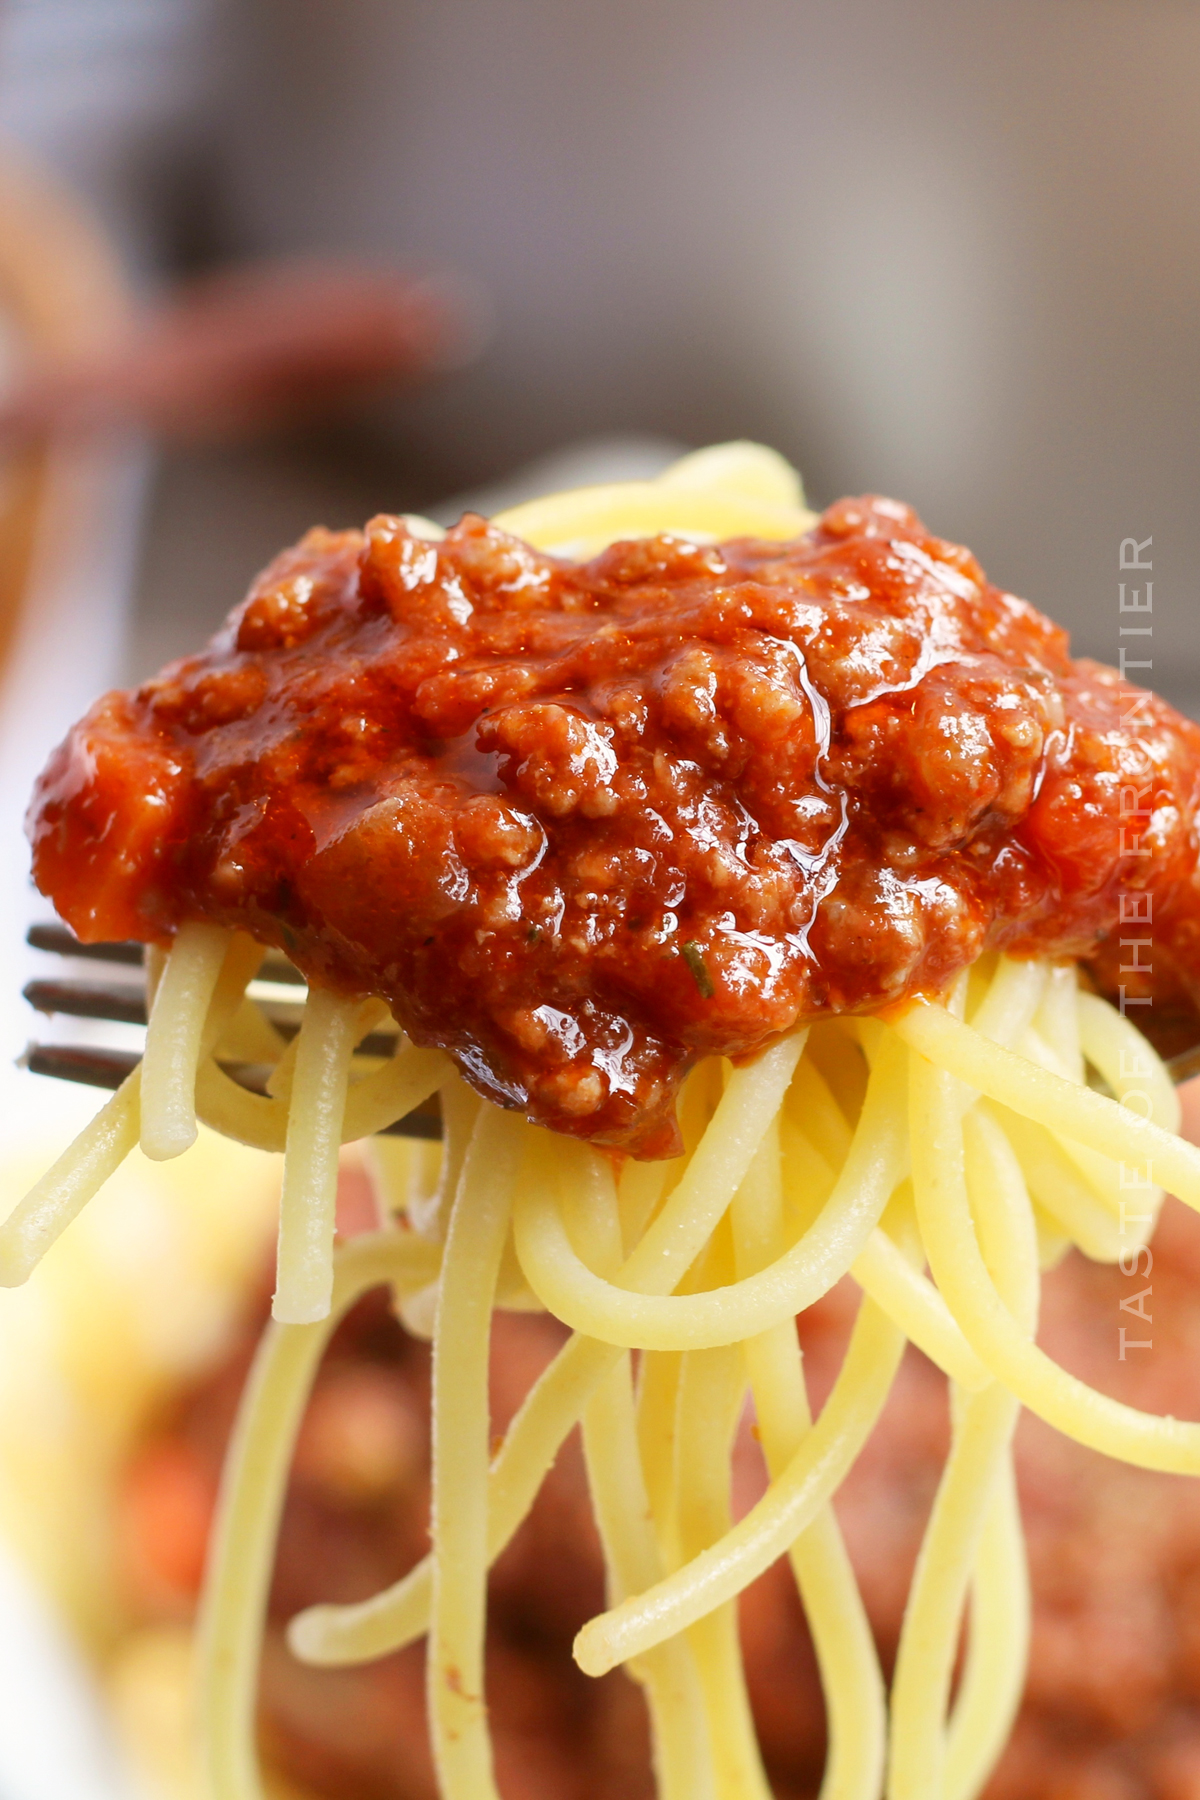
This Easy Bolognese Recipe is easy to make and so delicious. You’ll love the rich, beefy flavor of this classic sauce. Plus, it’s all cooked in one pot, so it’s super easy to clean up. Who doesn’t love that? Serve this sauce over your favorite pasta for a hearty meal that everyone will love.
One-pot meals are the best. Everything all cooked in one pot? Yes, please! This One-Pot Bolognese is sure to be a hit with your family. It’s easy to make and it’s oh so delicious. You’re going to love it!
This really is the perfect sauce for all your pasta dishes. No need to buy the pre-made stuff anymore.
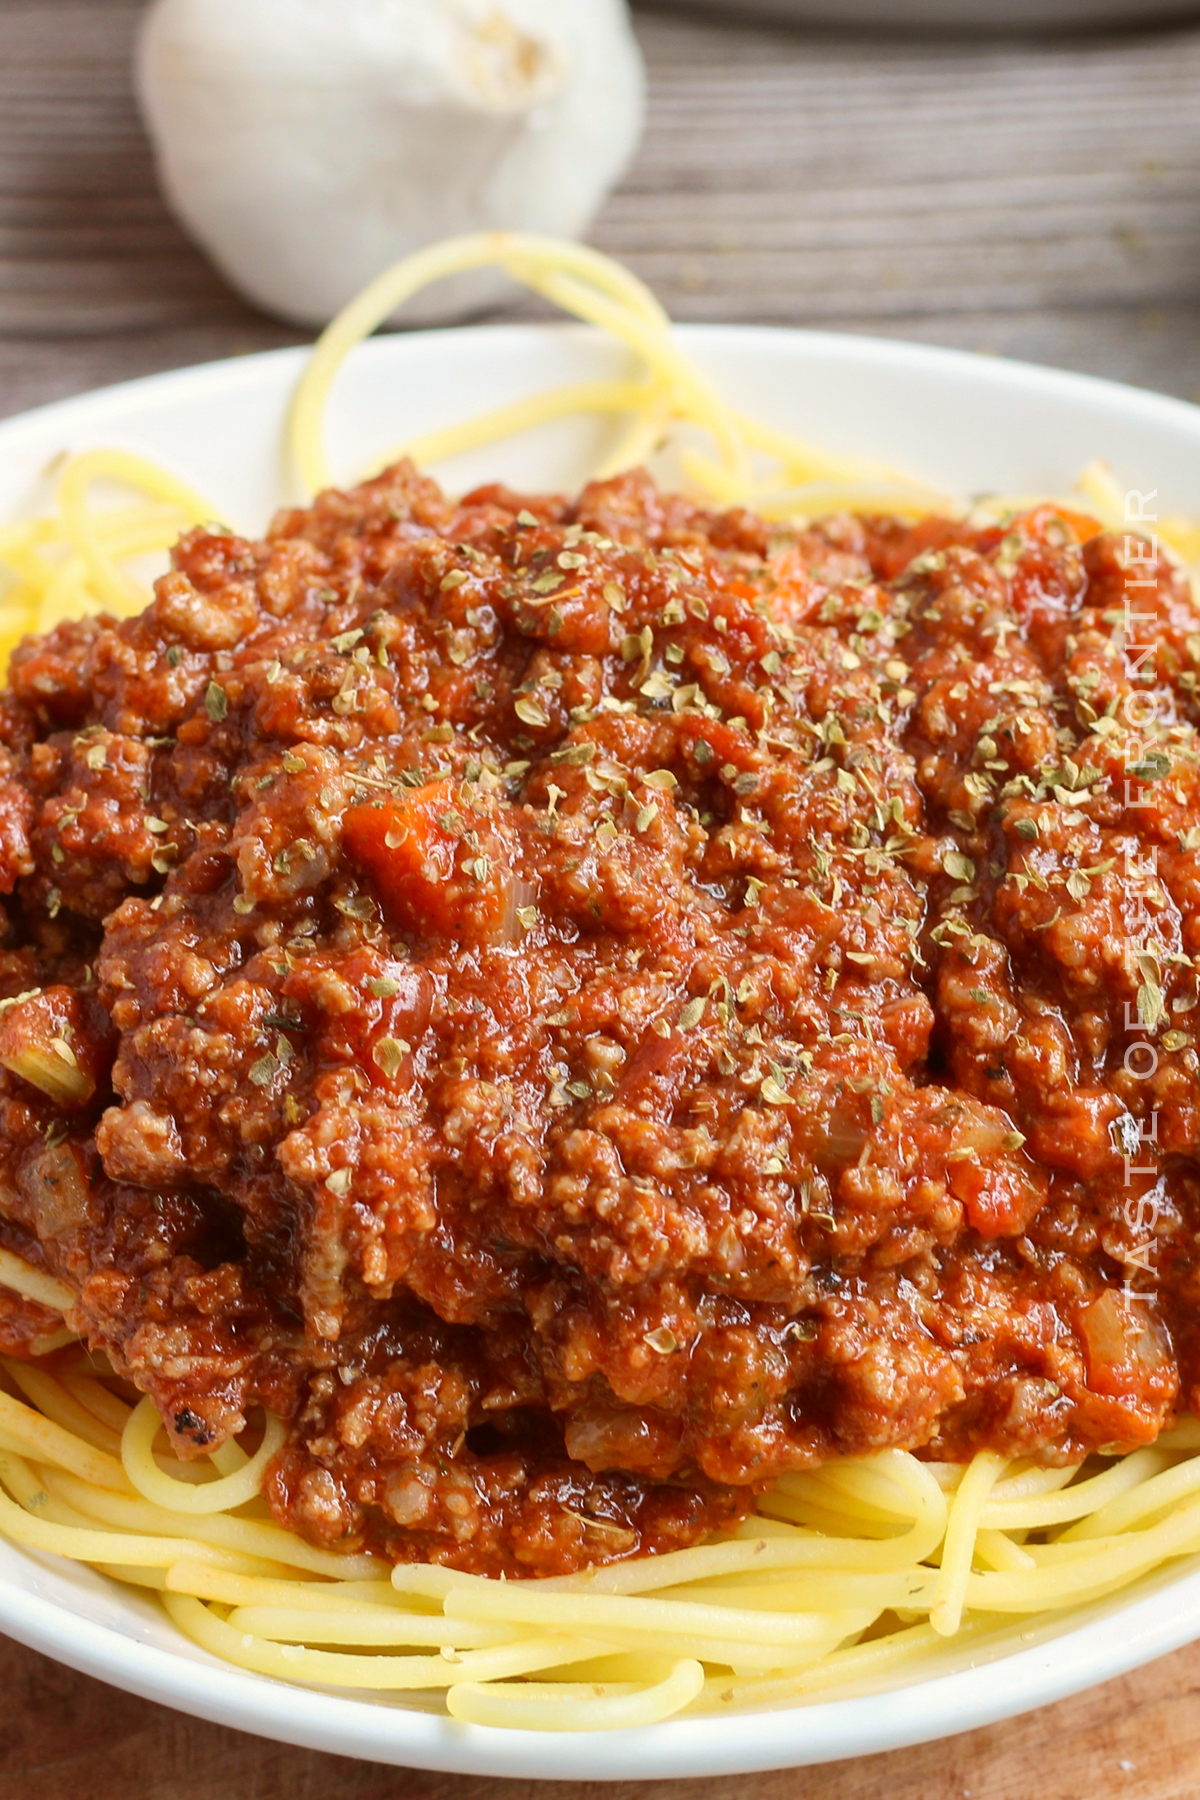
Warm, comforting, and hearty, this one-pot Bolognese is perfect for a cozy winter dinner. Or, really any time of year. It’s easy to make, and so incredibly tasty. I love that it’s made in one pot and you can truly taste the LOVE simmered right in.
It pairs perfectly with pasta and is great when used in a chicken parmesan recipe. I can’t get enough of this sauce!
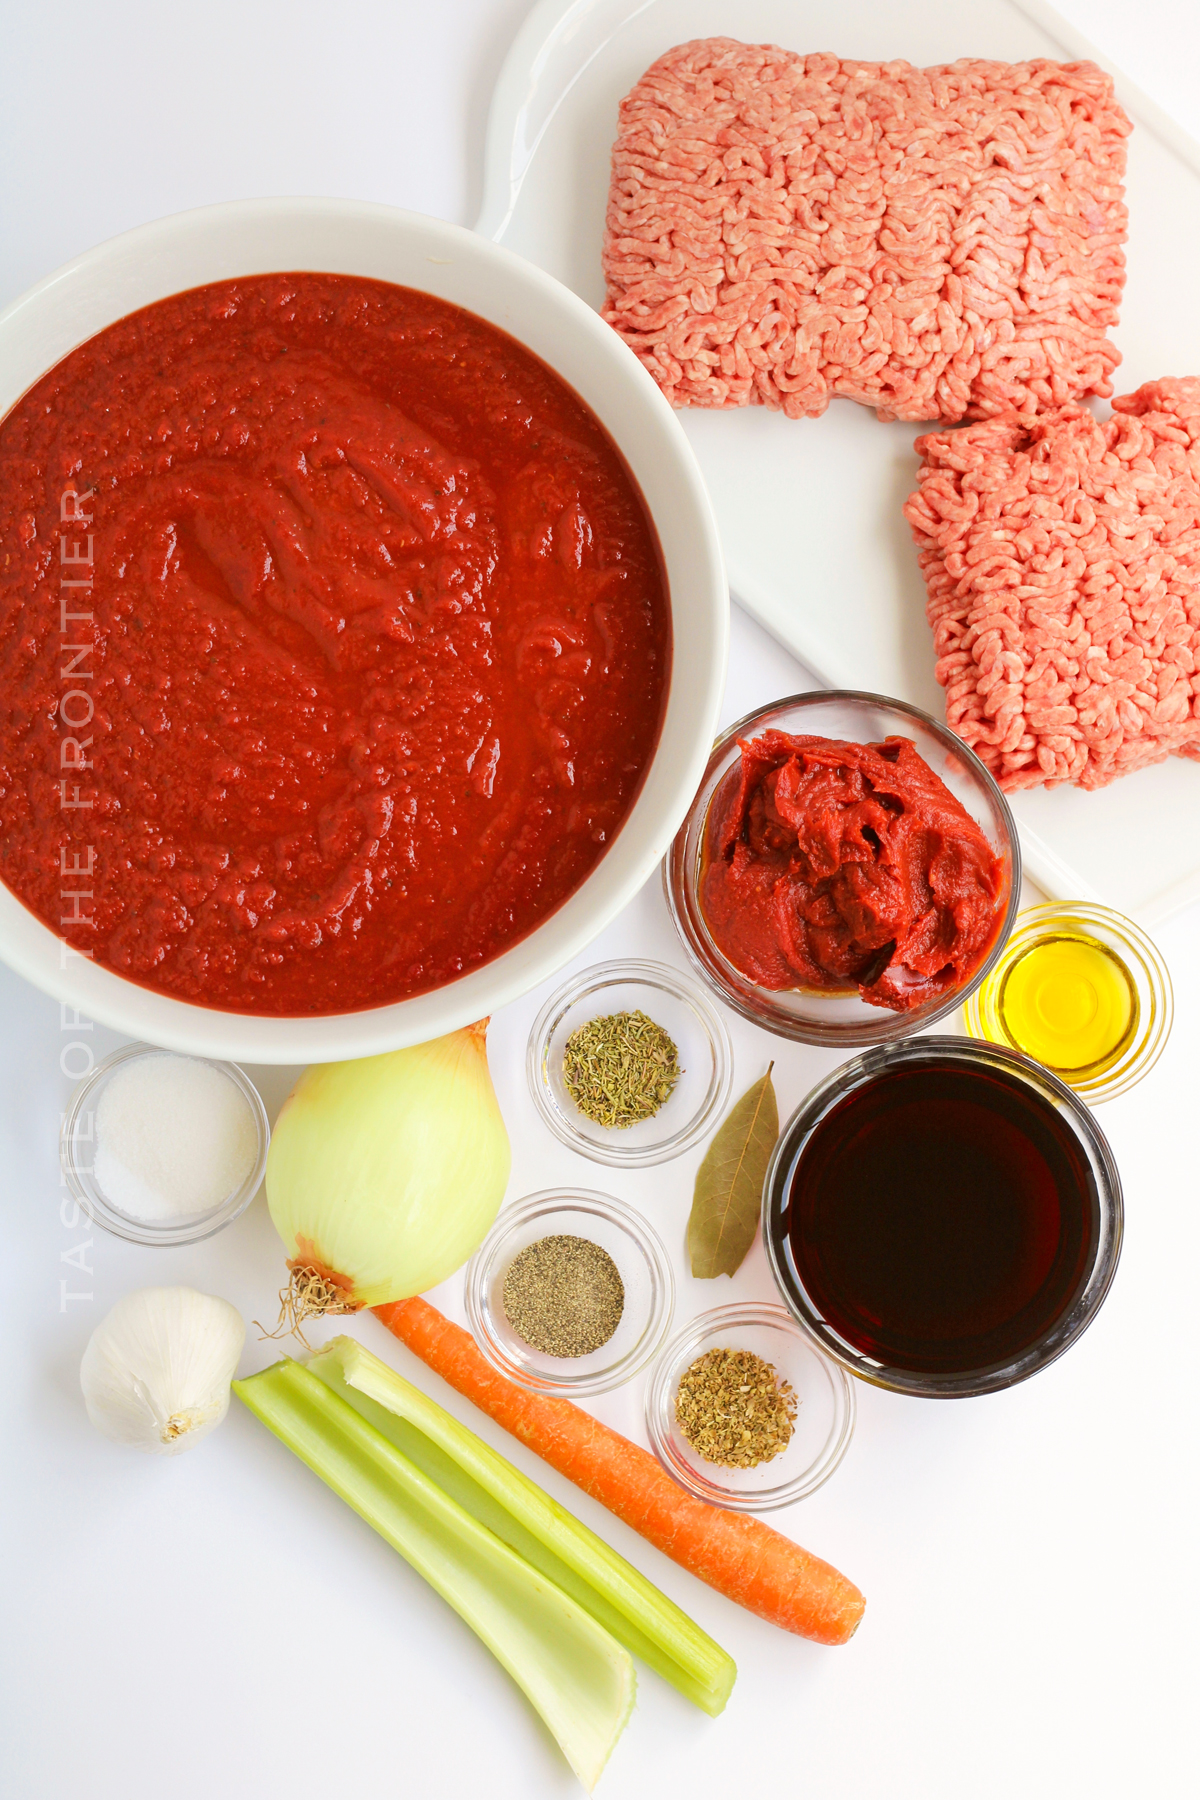
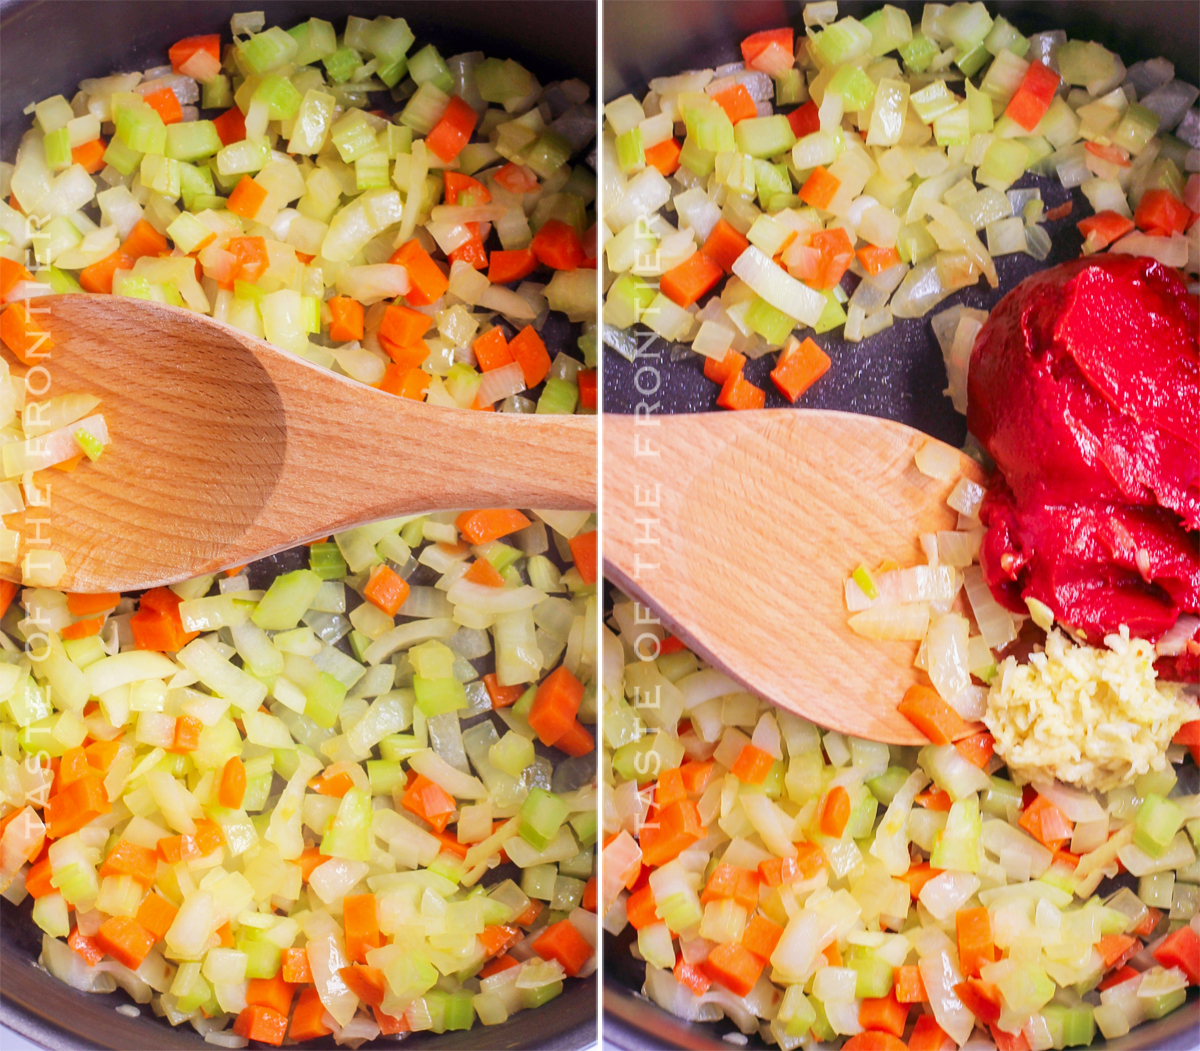
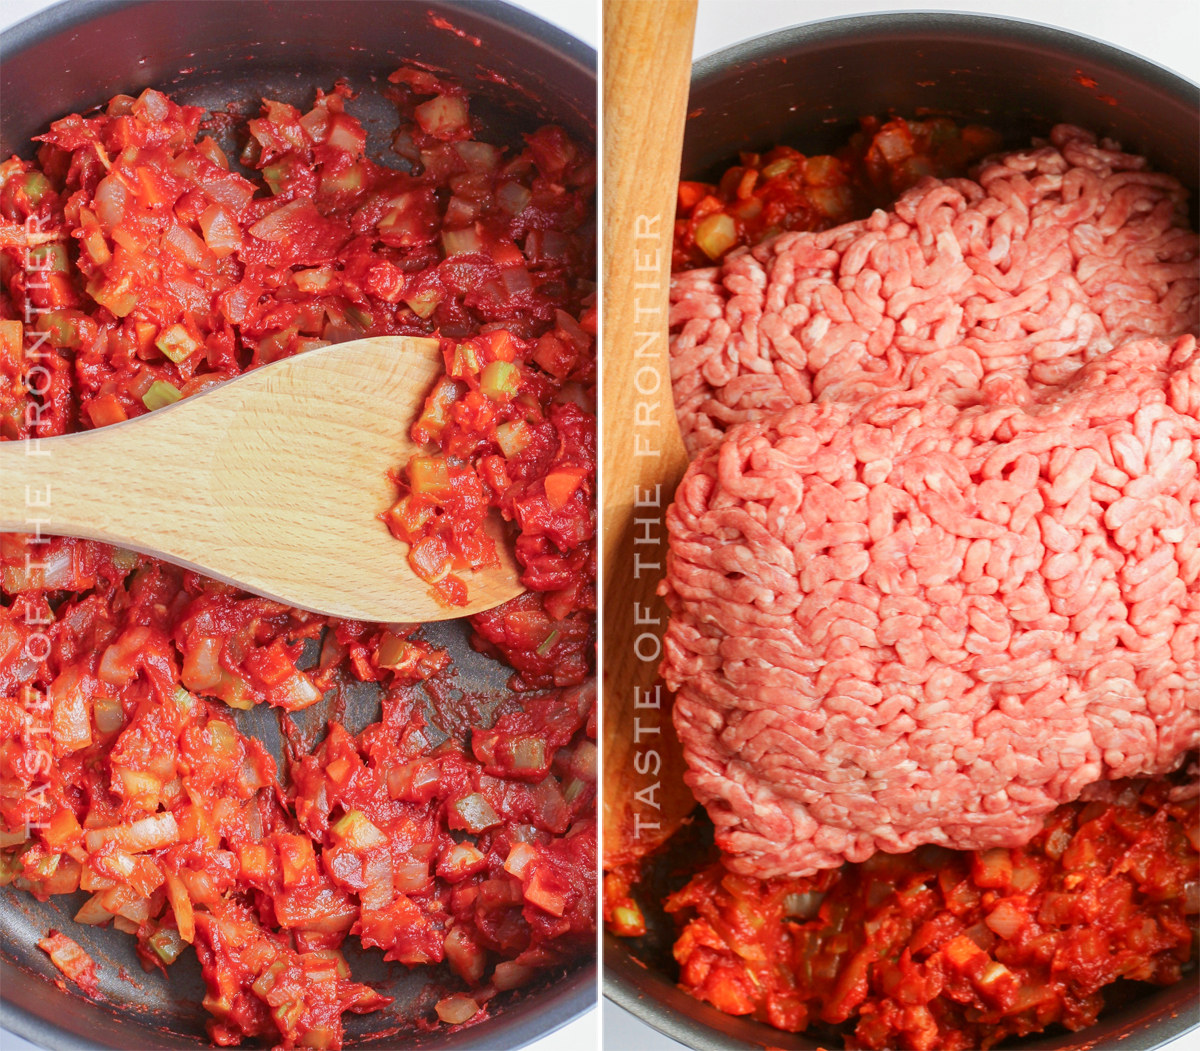
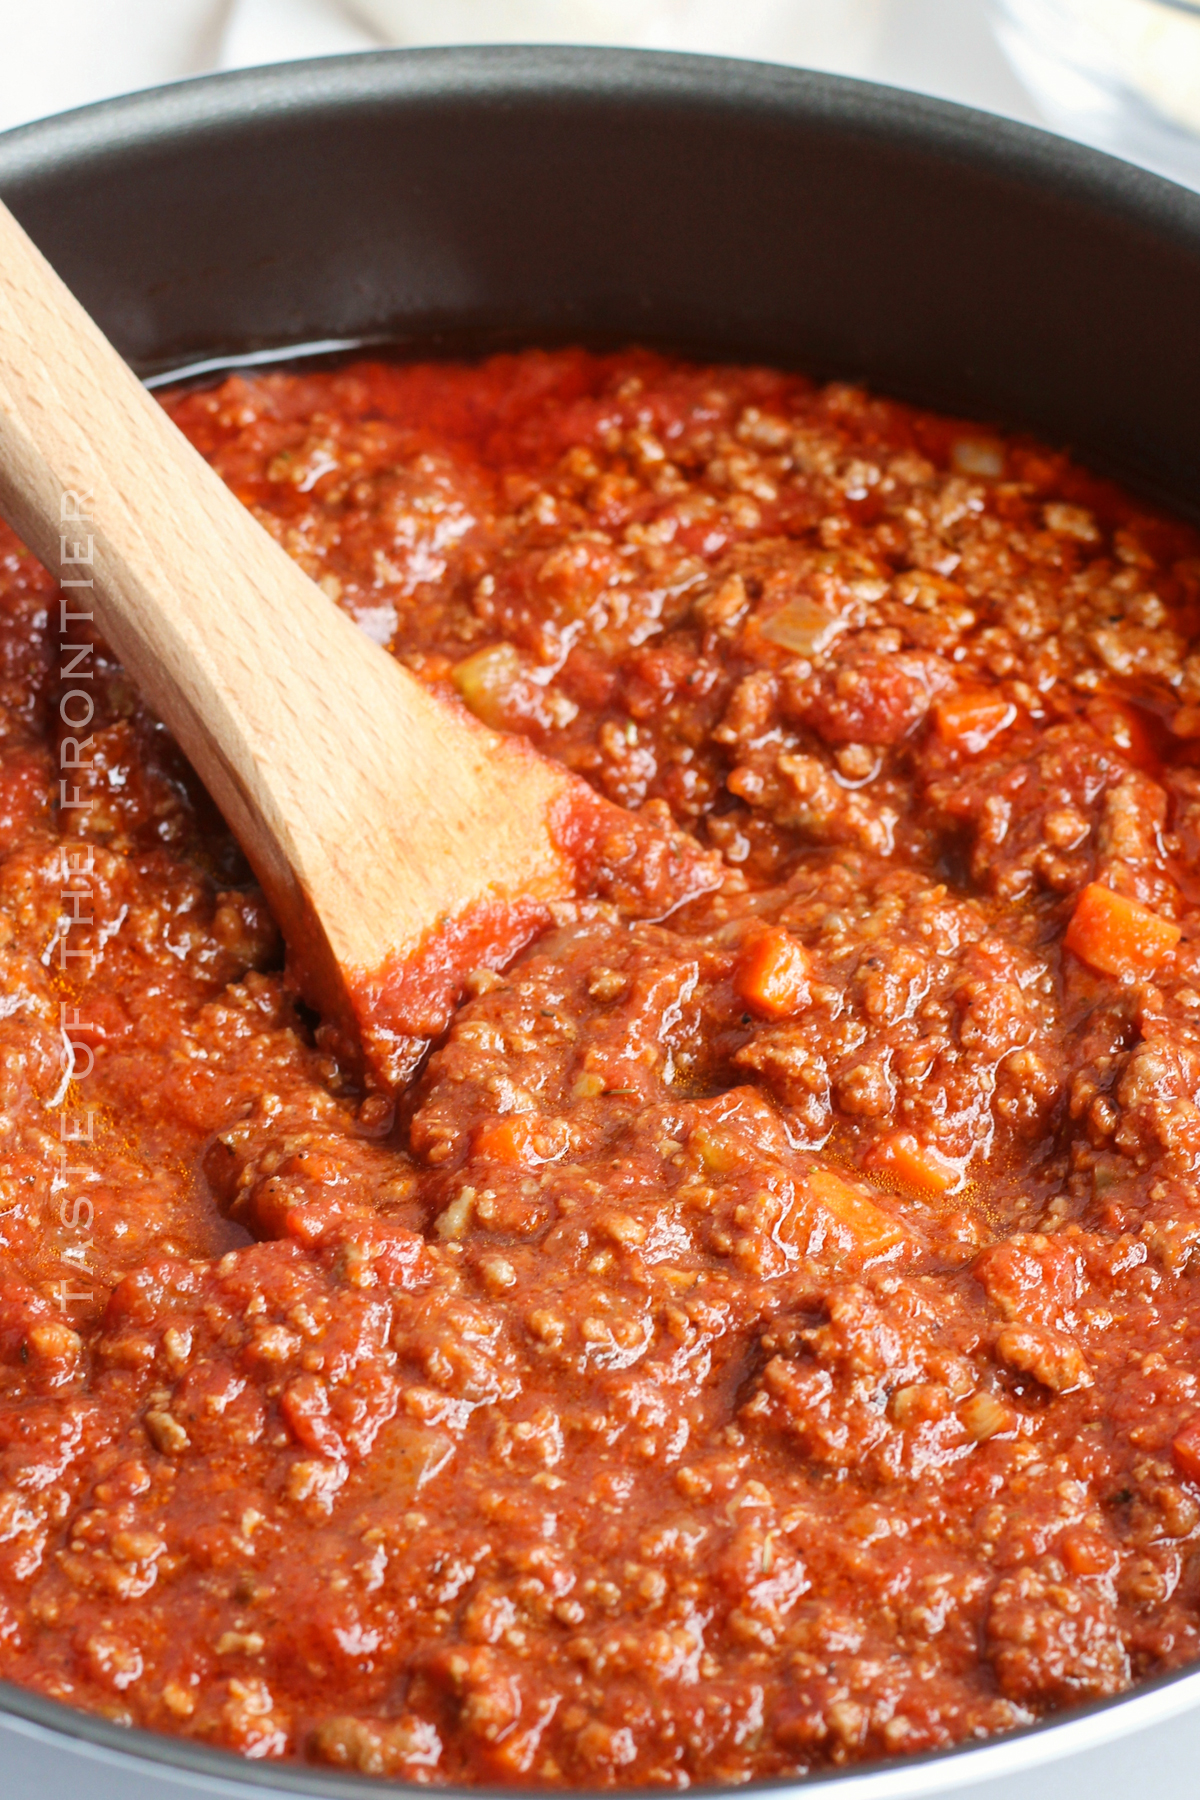
Bolognese is a popular recipe for Italian meat sauce basically. The dish is made with onions, garlic, tomatoes, celery, carrots, beef stock, wine, black pepper flakes (or crushed red pepper), and ground meat. The ingredients are simmered together until the meat is cooked through.
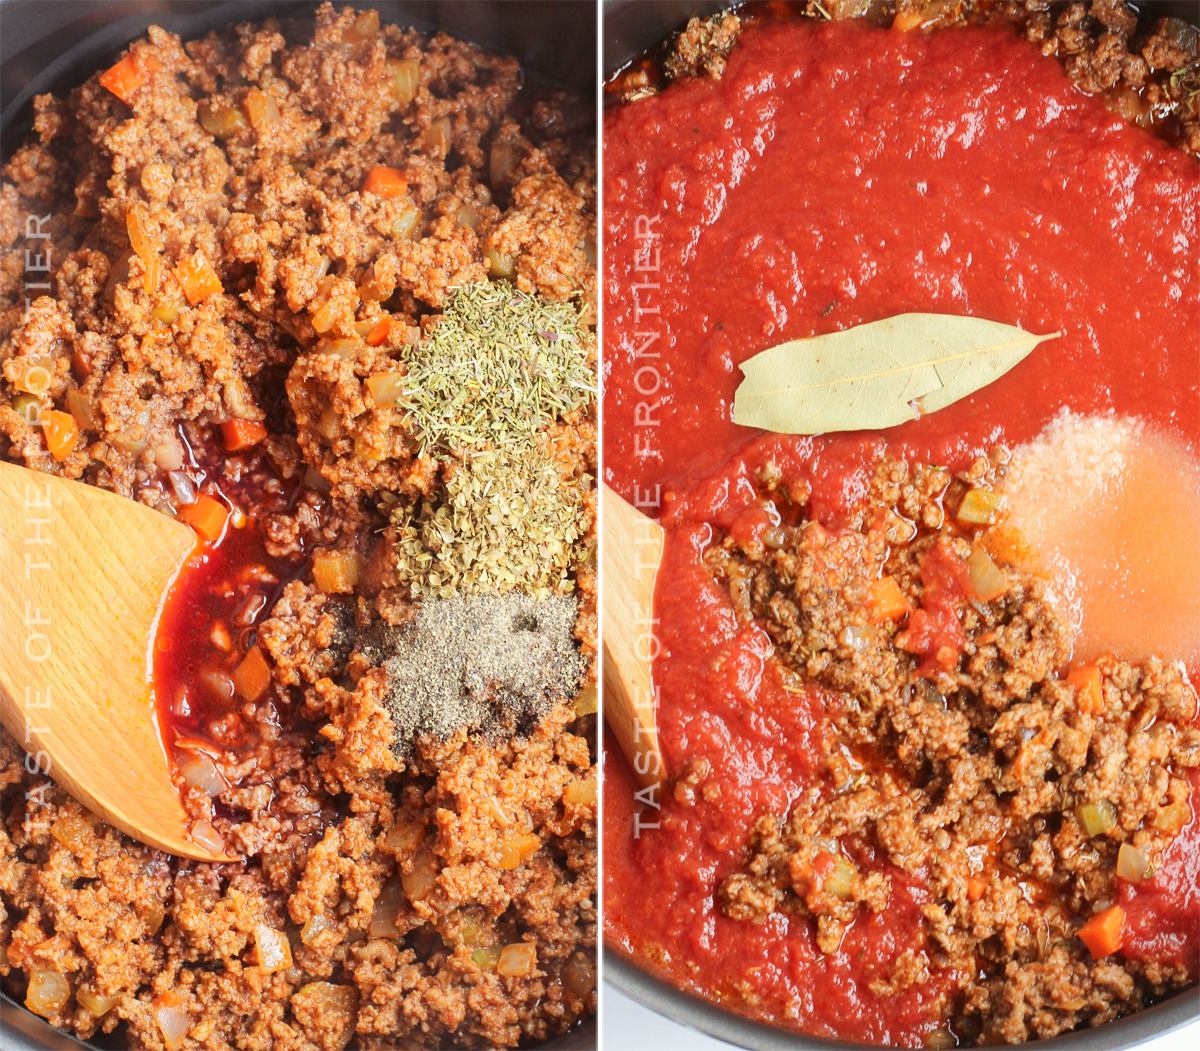
The key to a great Bolognese is using high-quality ingredients that have been cooked slowly and carefully. You also need to season it to taste, which allows you to customize the flavor profile depending on your preferences.
Some other tips for making the perfect Bolognese include adding reducing or eliminating garlic if you’re sensitive to its odor or flavor, and simmering until thickened before serving. Whichever adaptation you choose, be sure not to overcook it or it will turn into a watery sauce instead of a savory one.
You can store leftover Bolognese in the fridge for up to four days. You can also freeze it for up to two months.
Yes – this recipe freezes well. Just make sure to place it in a freezer-safe container, label it with the date and store it for up to 2 months. When you are ready to serve it again, you can thaw it in the refrigerator overnight.
This recipe requires that you cook the sauce until it reaches a deep red color and has a subtle tang to it. This means that the sauce has cooked all the way through and is ready to serve.
You can serve Bolognese with a variety of dishes. Some popular choices include pasta, rice, potatoes, and even pizza.
Different people have different preferences for the type of sauce they prefer in their bolognese dish.
Some people prefer a more traditional bolognese with beef stock and onions; others may enjoy a lighter version with less meat and more vegetables. There are also variations that use different types of pasta such as spaghetti or tagliatelle.
The history of Bolognese can be traced back to the 16th century in the Emilia-Romagna region of Italy. At this time, there were two main styles of cooking – Northern Italian cuisine which was heavy on meat sauces, and Southern Italian cuisine which focused on vegetables and fish.
Bolognese evolved out of an improvisational dish known as bollito misto (mixed boiled beef). This dish contained various types of meat that had been boiled in water with some aromatics such as onion, garlic, carrots, celery seed etc. until they became soft. The mixture would then be served over pasta or rice.
Over time the recipe changed slightly to include ground beef instead of mincemeat and tomato paste replaced some of the watery ingredients. As this dish became popular throughout Italy it eventually acquired its own name – bollito misto or simply a bolognese sauce.
In modern times Bolognese can be made with a variety of meats, vegetables, and spices to create a sauce that is unique to each region.
Spaghetti is a popular choice for dinner when it comes to bolognese because it absorbs the flavors of the sauce very well. Macaroni and cheese is another great option because it has a creamy texture that pairs perfectly with the beefy flavor of the sauce.
Angel hair pasta also tastes great with bolognese because its thin strands soak up all the delicious flavors in the dish.
Our easy Bolognese recipe works because it is made with simple ingredients and has a long (but not too long) cooking time. This combination results in a delicious and luxurious dish that will please even the most discerning of eaters.
The slower cooking process allows the flavors to meld together, while the beef helps to create a thick sauce. And since this recipe calls for only basic ingredient staples, you can easily make it any time you have some extra time on your hands.
So why not give our easy Bolognese recipe a try? You won’t be disappointed!

This pasta sauce recipe is SUPER EASY and delicious – and if you’re like me, then you maybe already have some of these items on hand OR maybe you have never made homemade meat sauce before, & you might be a bit nervous – but you’re going to love it. I have made a list below of the things I absolutely can’t live without when it comes to making this dinner recipe. (you can also SHOP MY FAVORITES in my store)
If you love this easy one-pot bolognese recipe, you’re going to love these other Italian-inspired recipes too. Please click each link below to find the easy, printable recipe!


If you love this recipe for Homemade Bolognese as much as I do, please write a five-star review, and be sure to help me share on Facebook and Pinterest!
CONNECT WITH YUMMI HAUS!
Be sure to follow me on my social media, so you never miss a post!
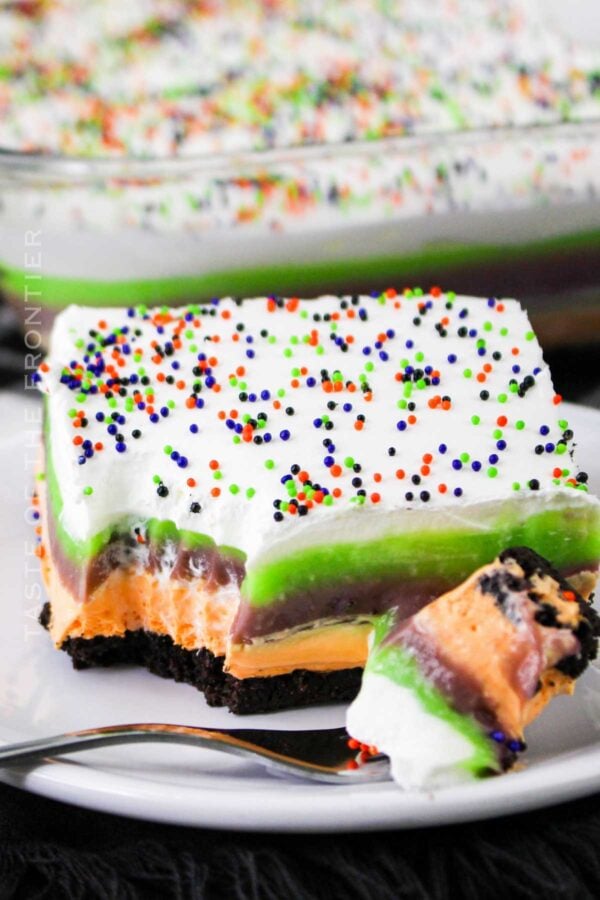
This colorful Halloween Lush is a visually striking dessert with layers of orange, purple, and green, perfect for adding a festive touch to your spooky celebrations.
It’s a fun and easy no-bake dessert that combines creamy cheesecake layer and fruity layers over a homemade cookie crust for a tasty treat everyone will enjoy.
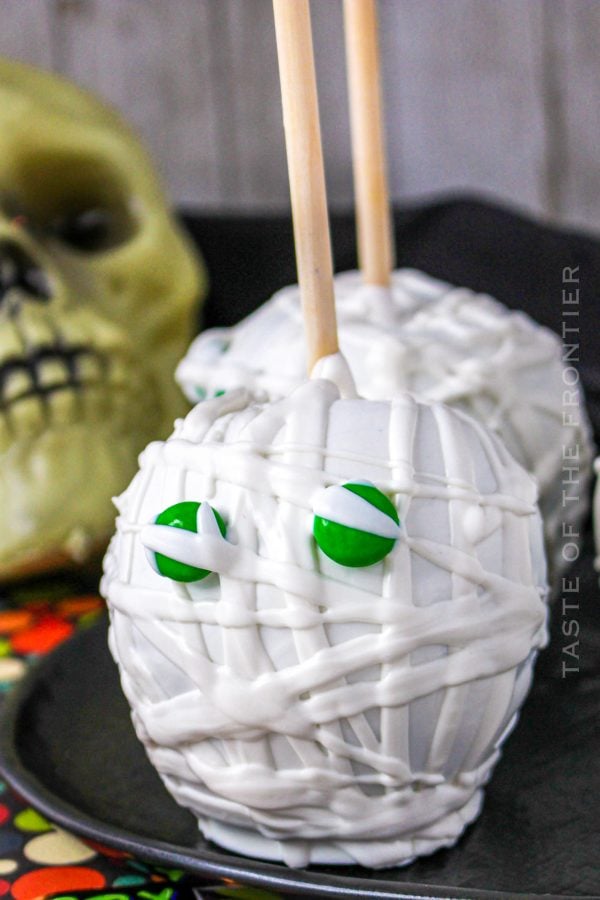
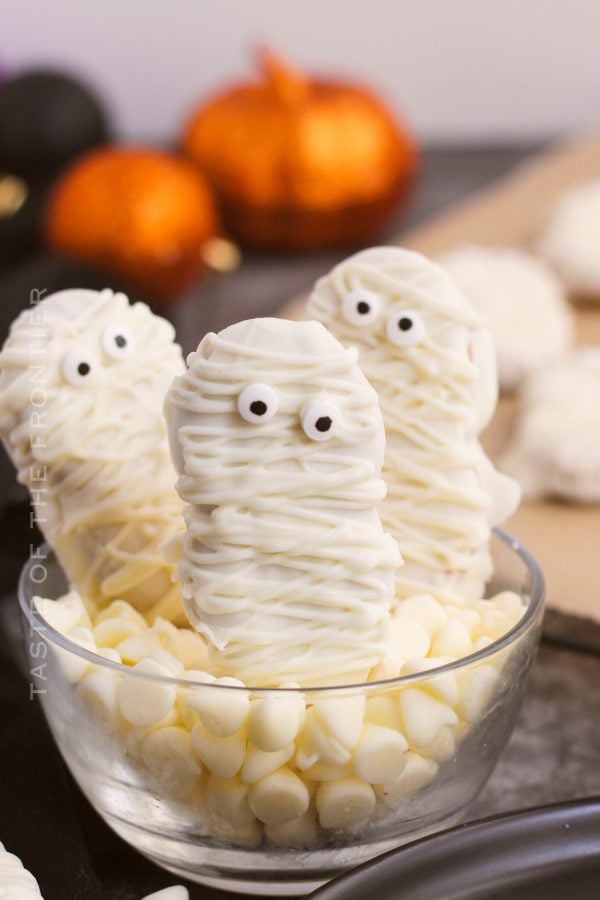
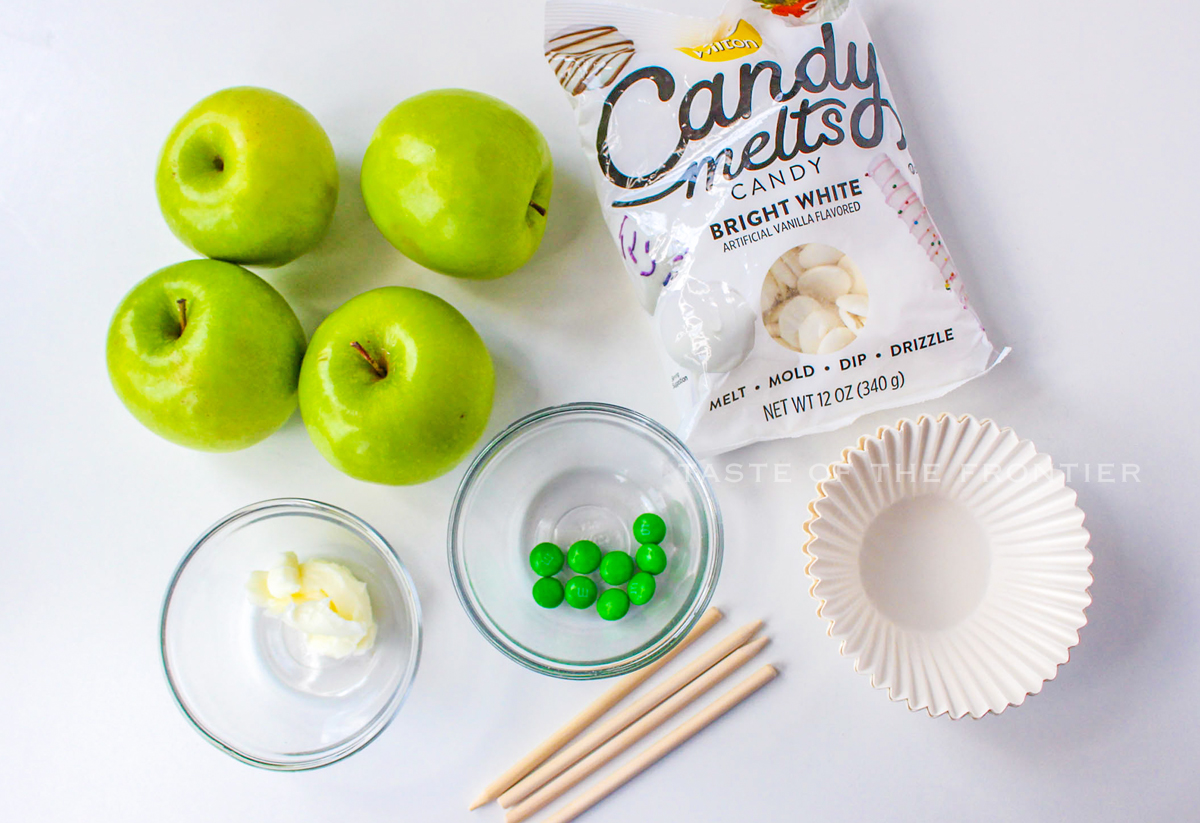
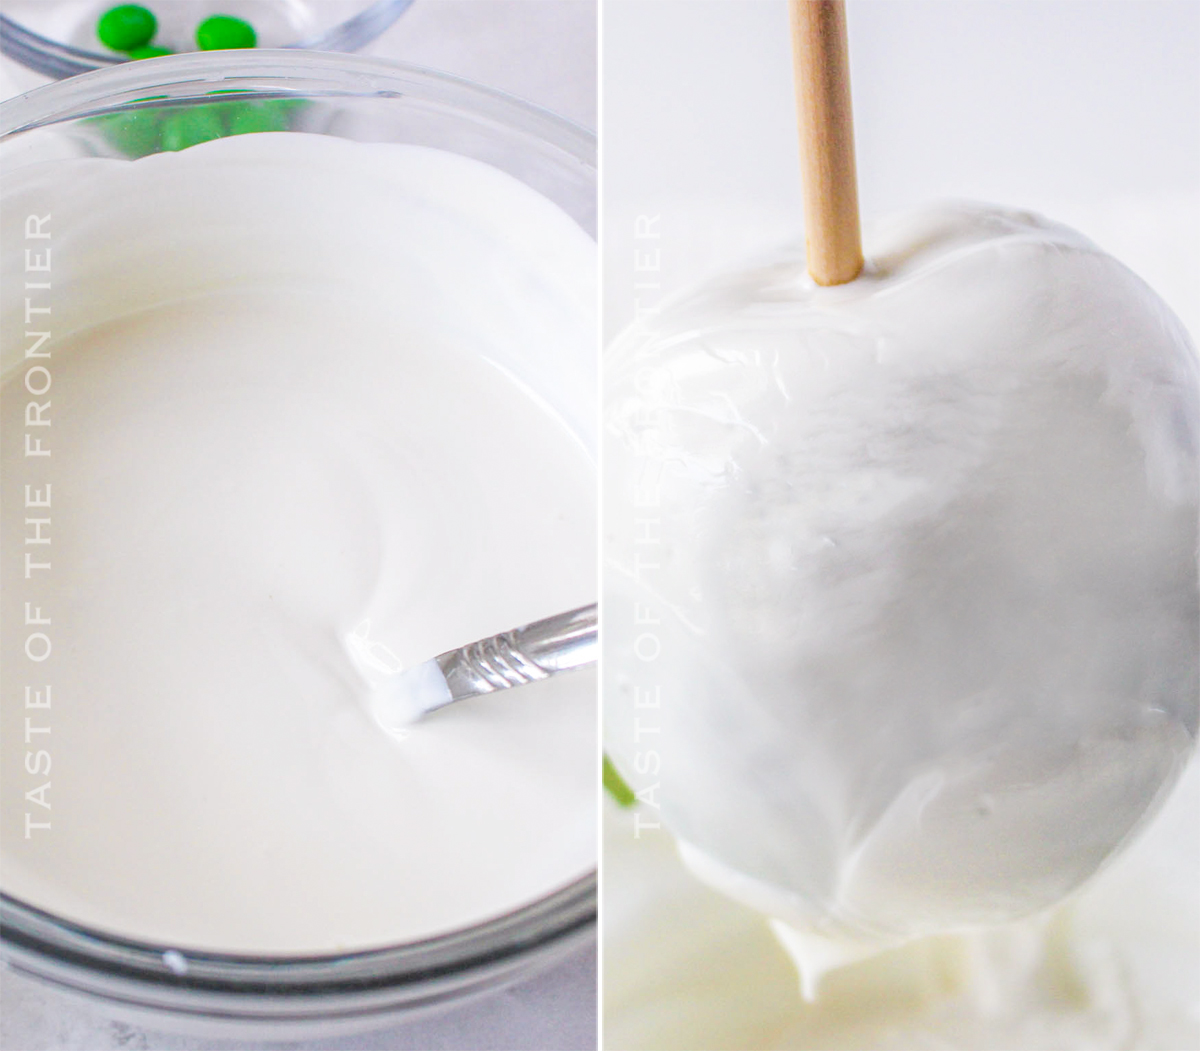
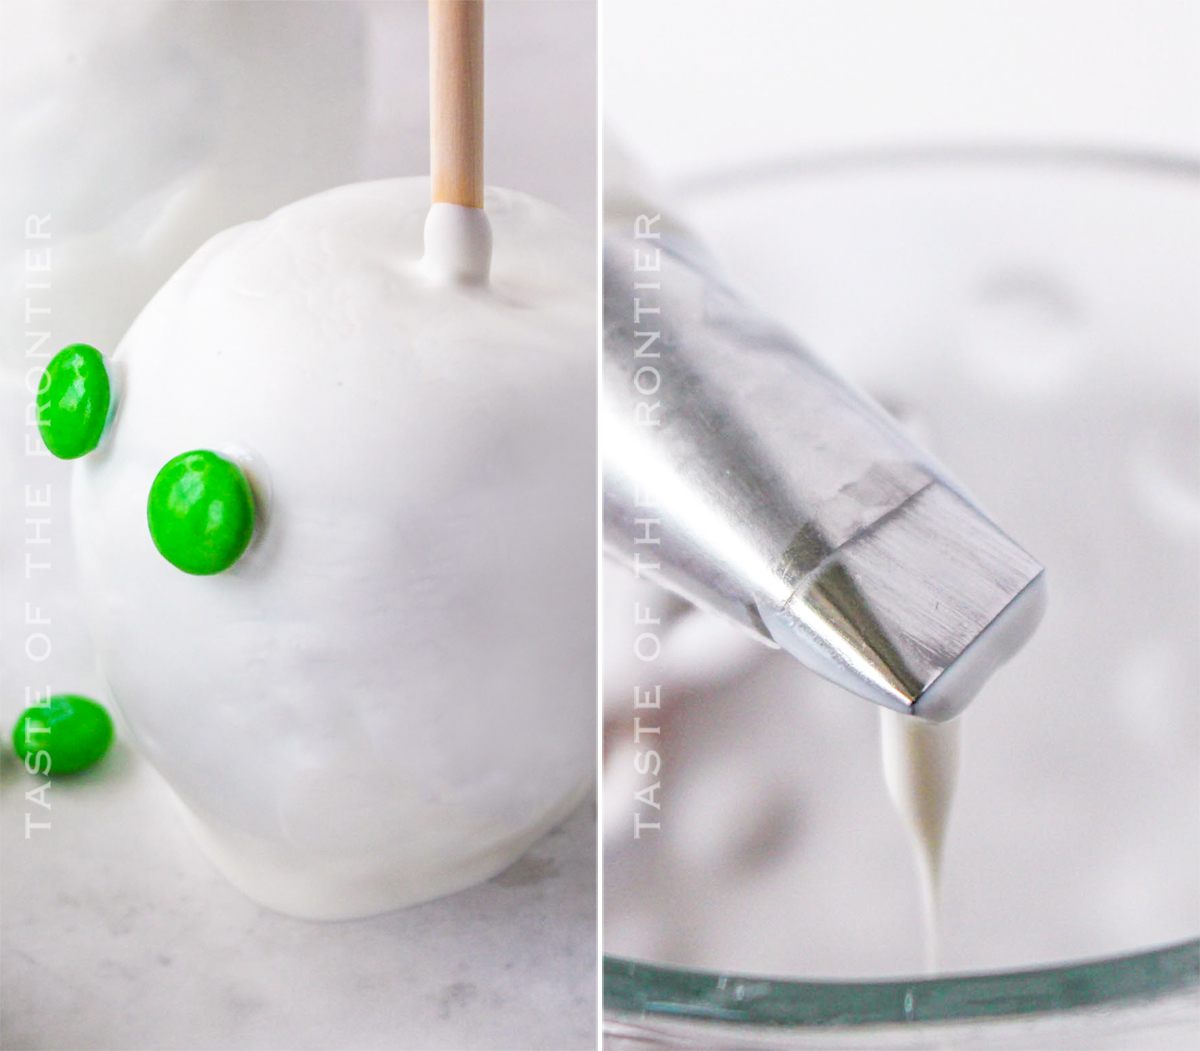
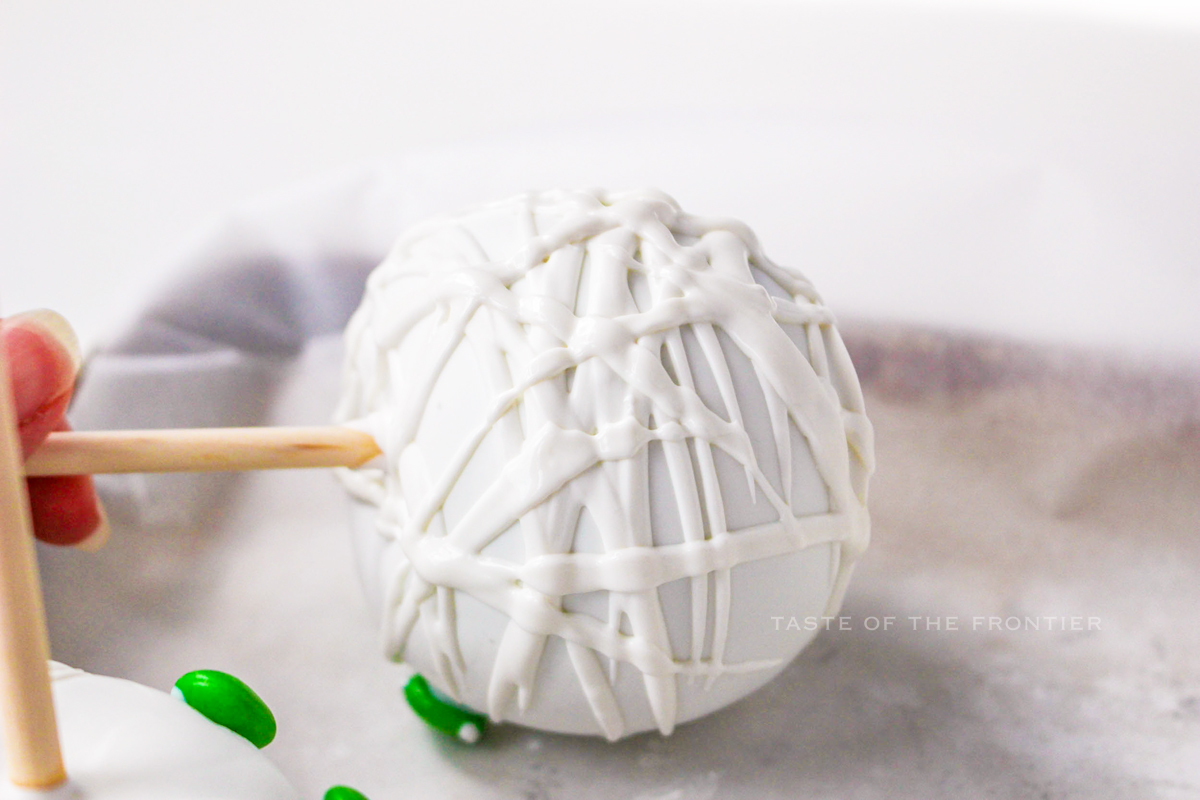
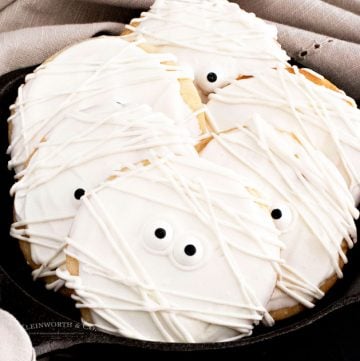
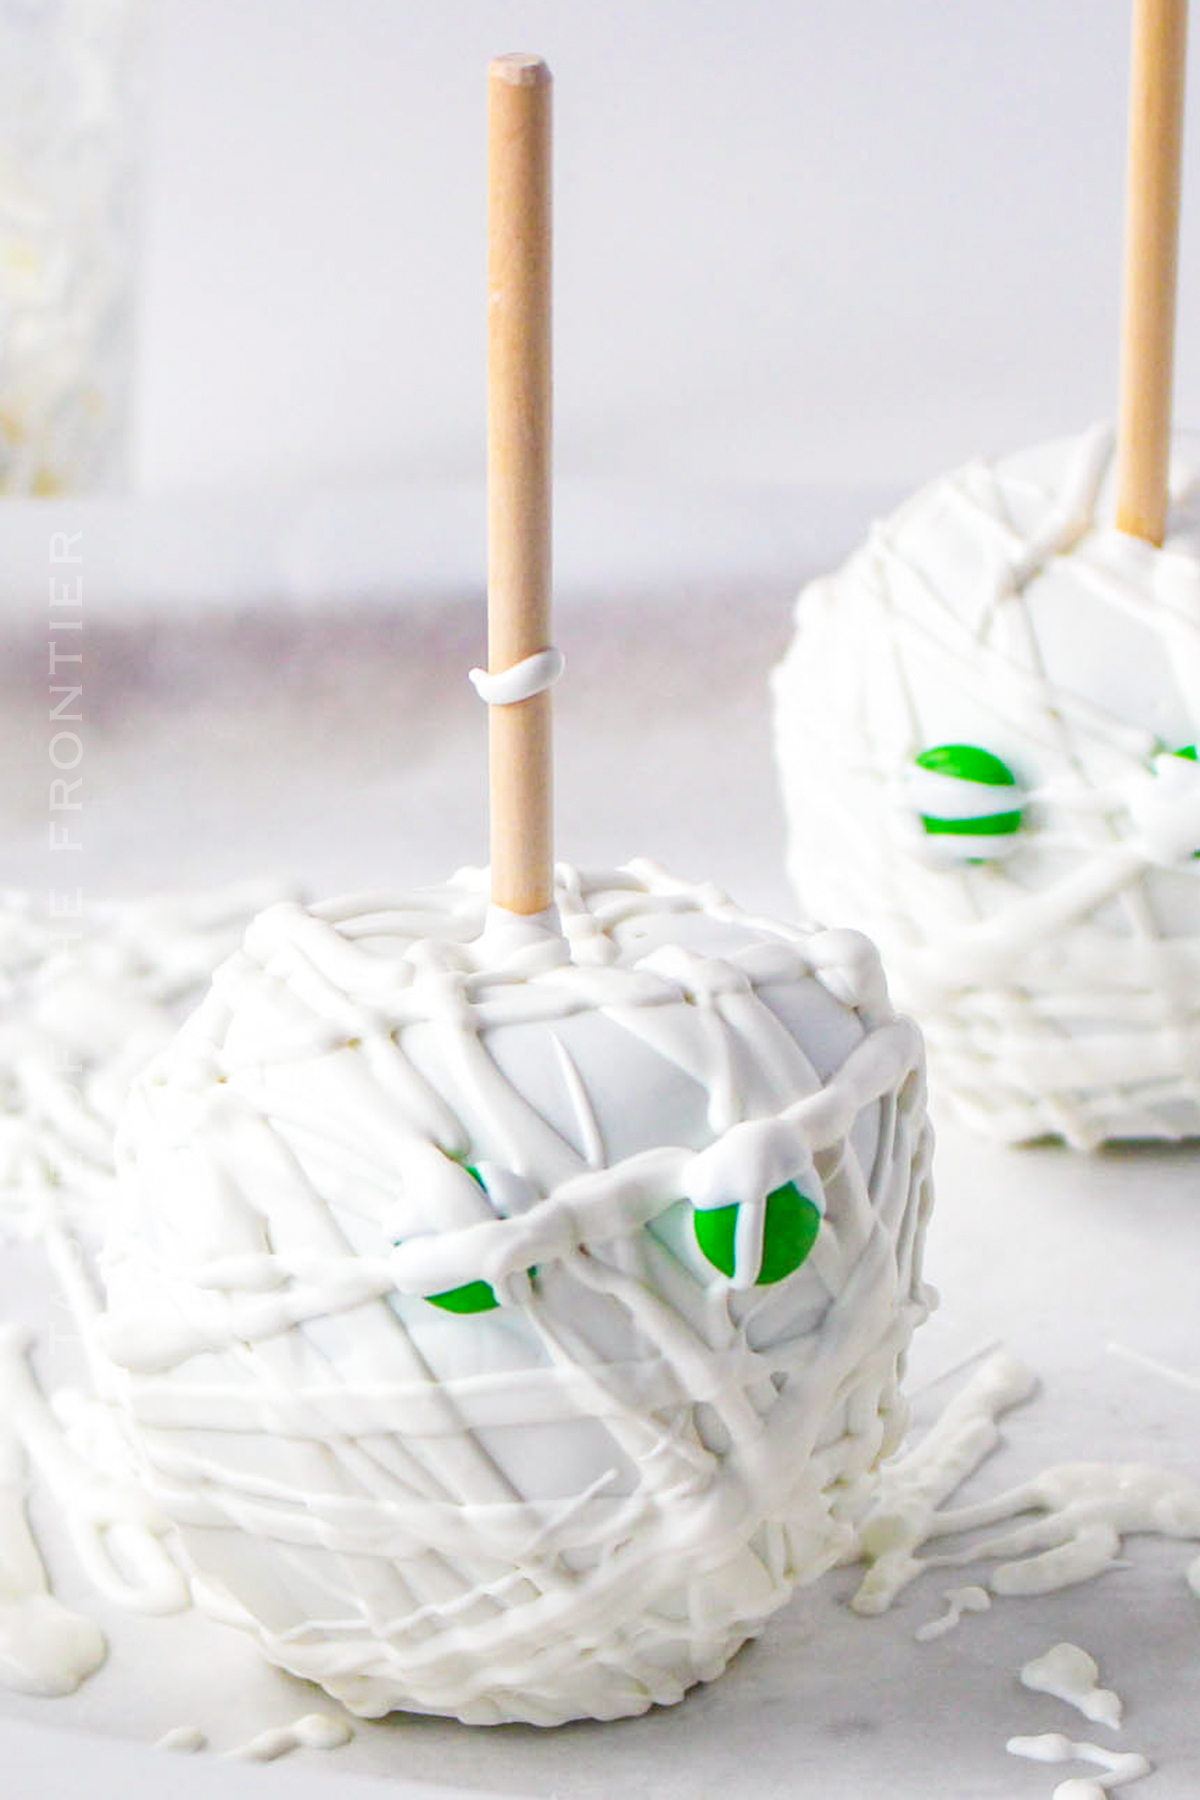
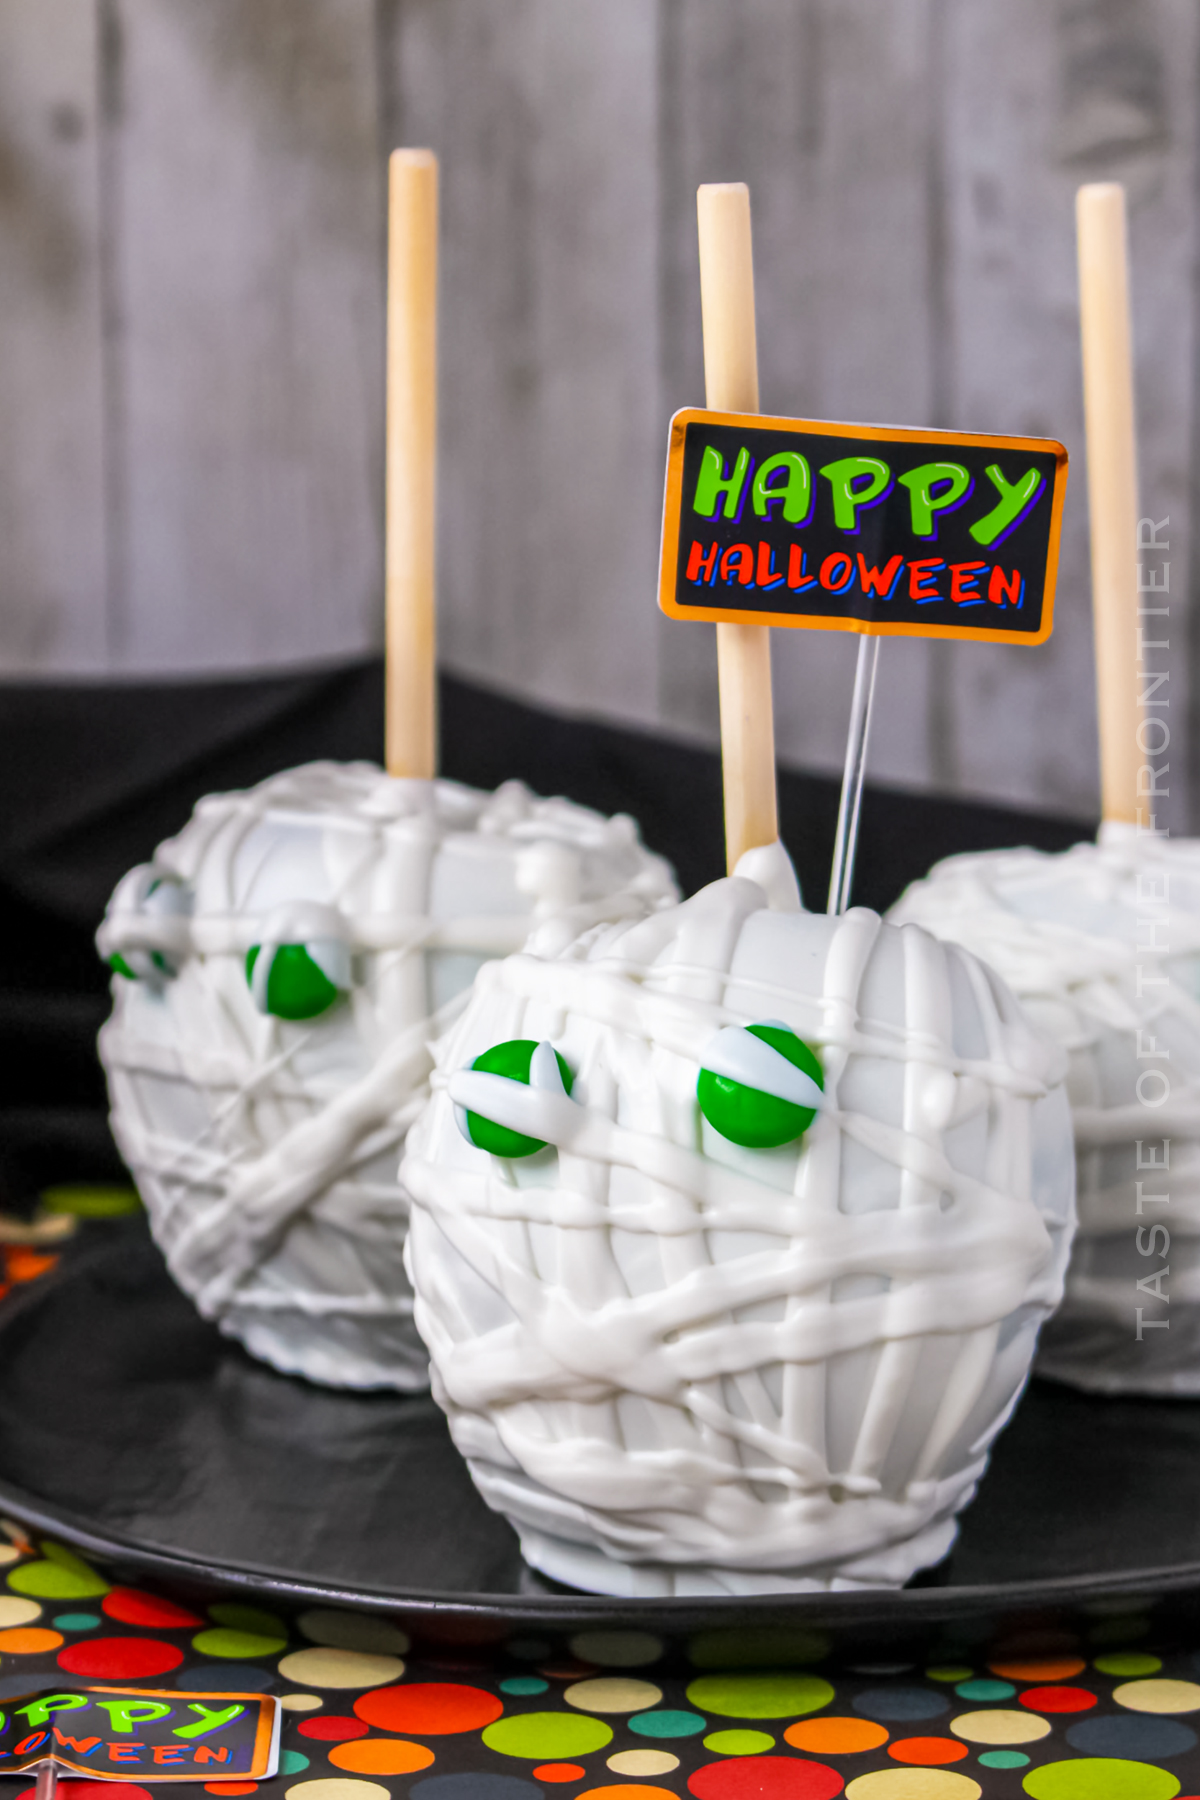
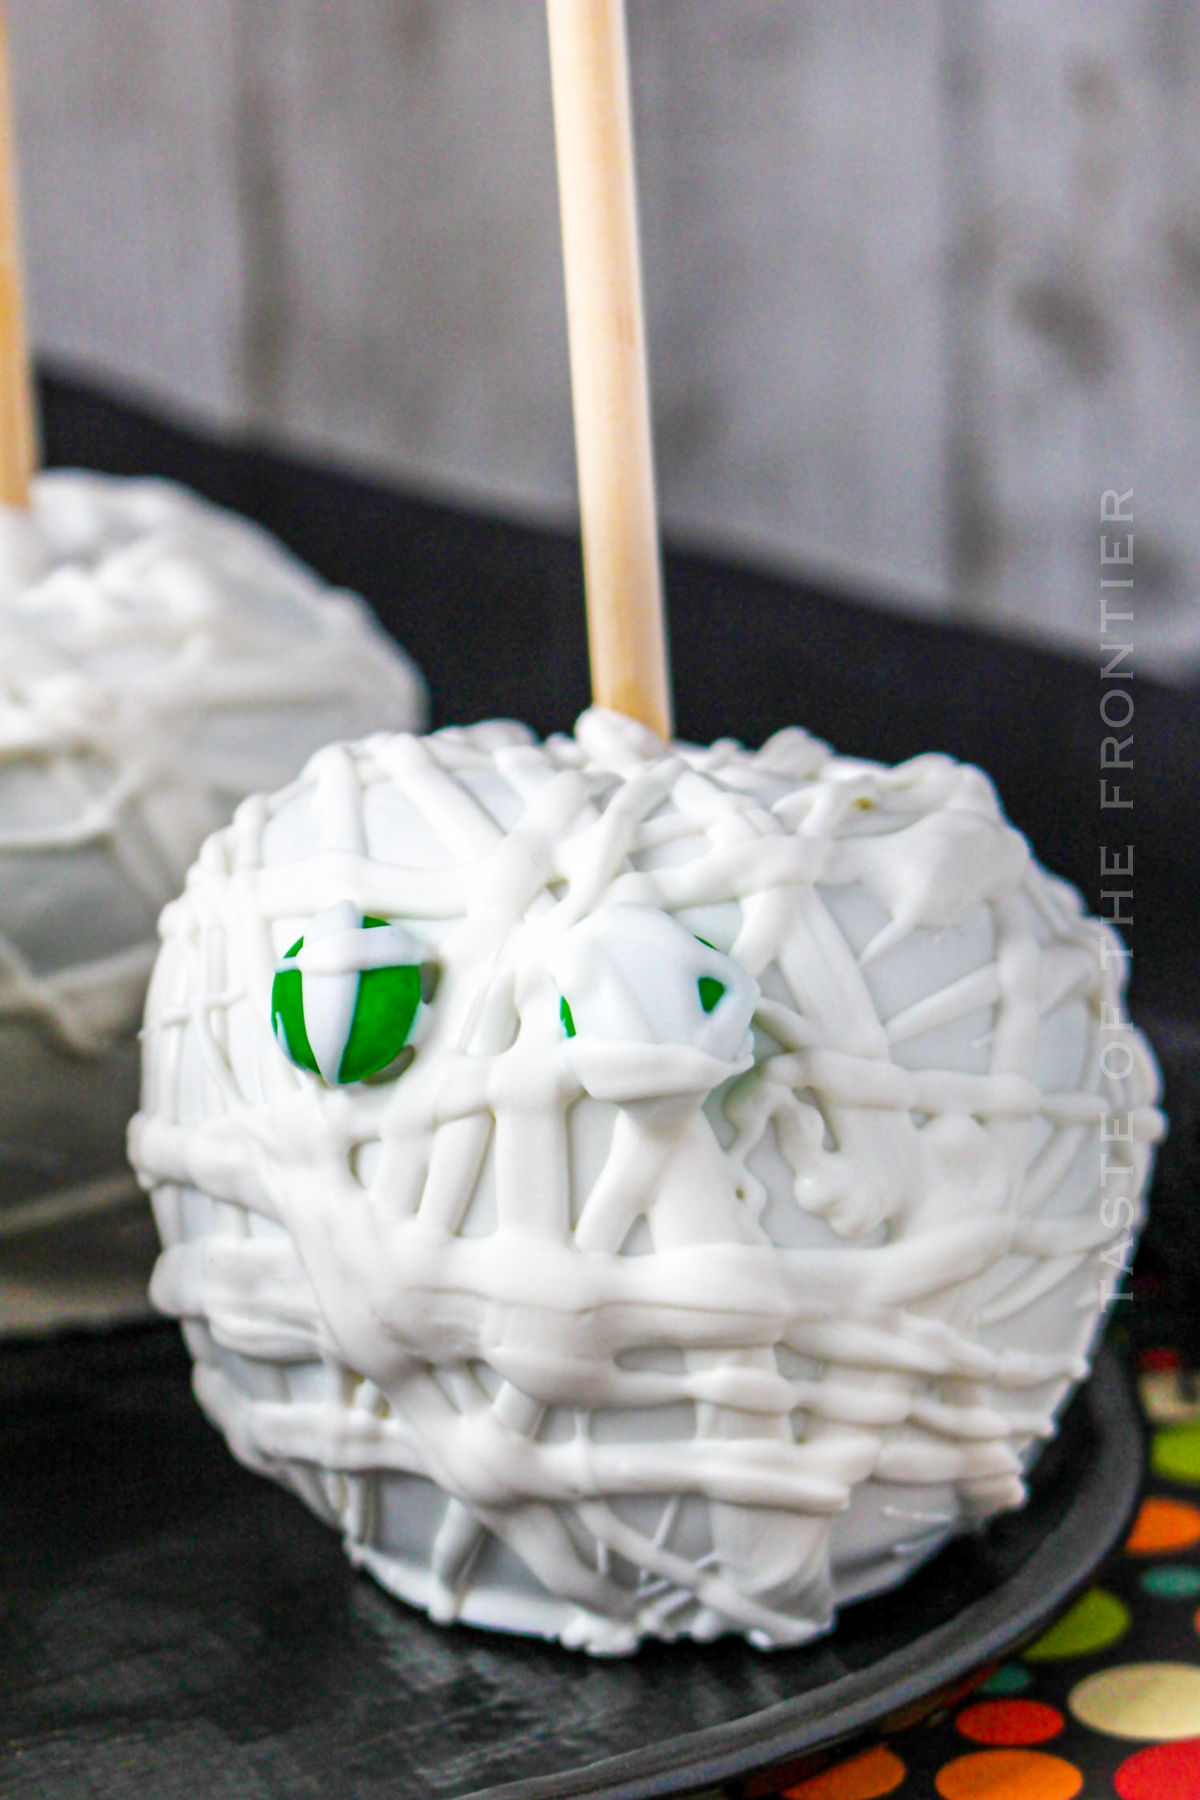
View postAre you looking for a fun and easy Halloween recipe that your kids will love? Well, look no further than mummy candy apples! This is a simple recipe that the whole family can enjoy. Plus, it’s perfect for getting in the Halloween spirit.
These mummy candy apples are the perfect Halloween treat! They’re easy to make and require just a few ingredients. Plus, they’re coated in white chocolate, making them absolutely irresistible.
If you love fun and easy treats for Halloween – these white chocolate-coated apples are the perfect fall treat.

Have you ever seen those mummy apples at the grocery store? They’re so cute, and I always thought it would be fun to make my own. Well, today I’m going to show you how you can make them yourself!
It’s surprisingly easy, and the end result is so adorable. Plus, these would make a great Halloween treat for kids. They are so much cuter than traditional cinnamon candy apples or traditional caramel apples.
Check out how easy it is to make these cun mummy apples yourself.
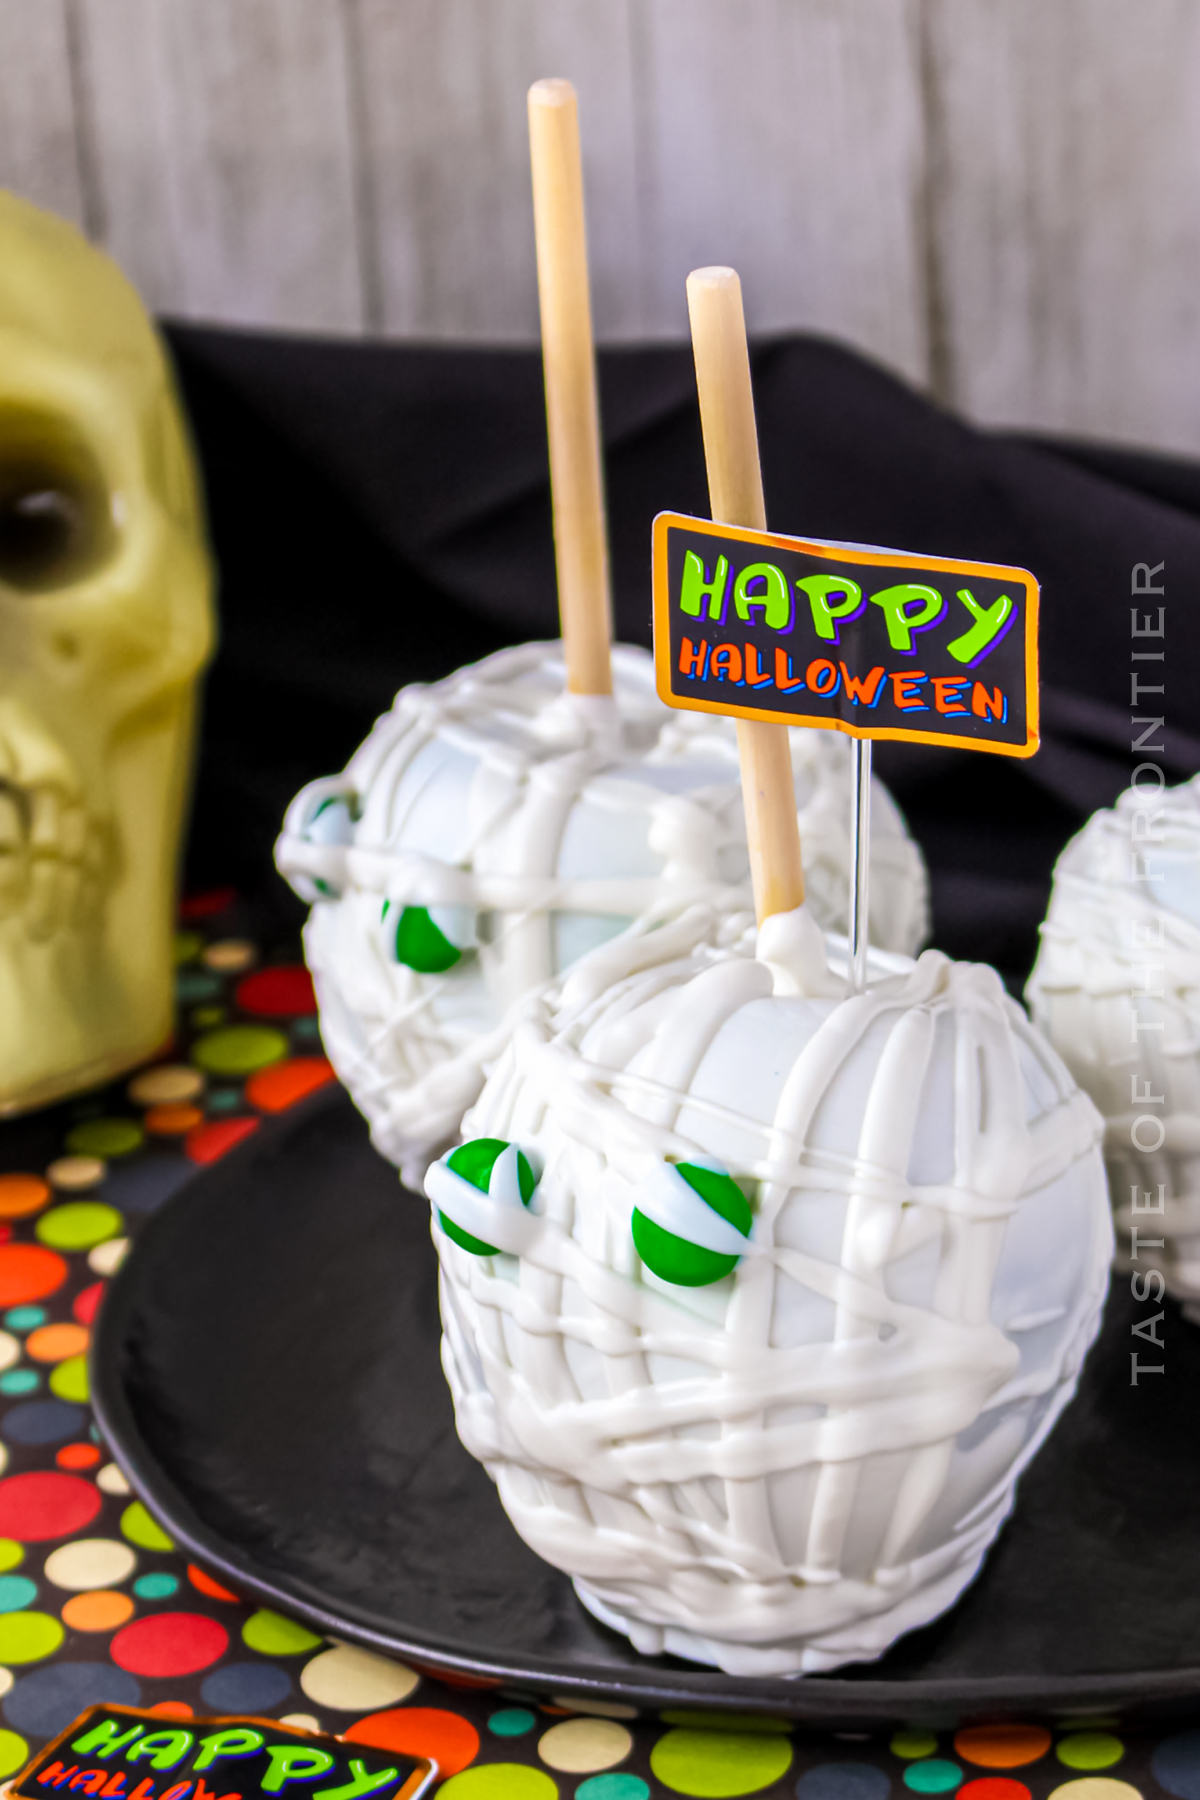
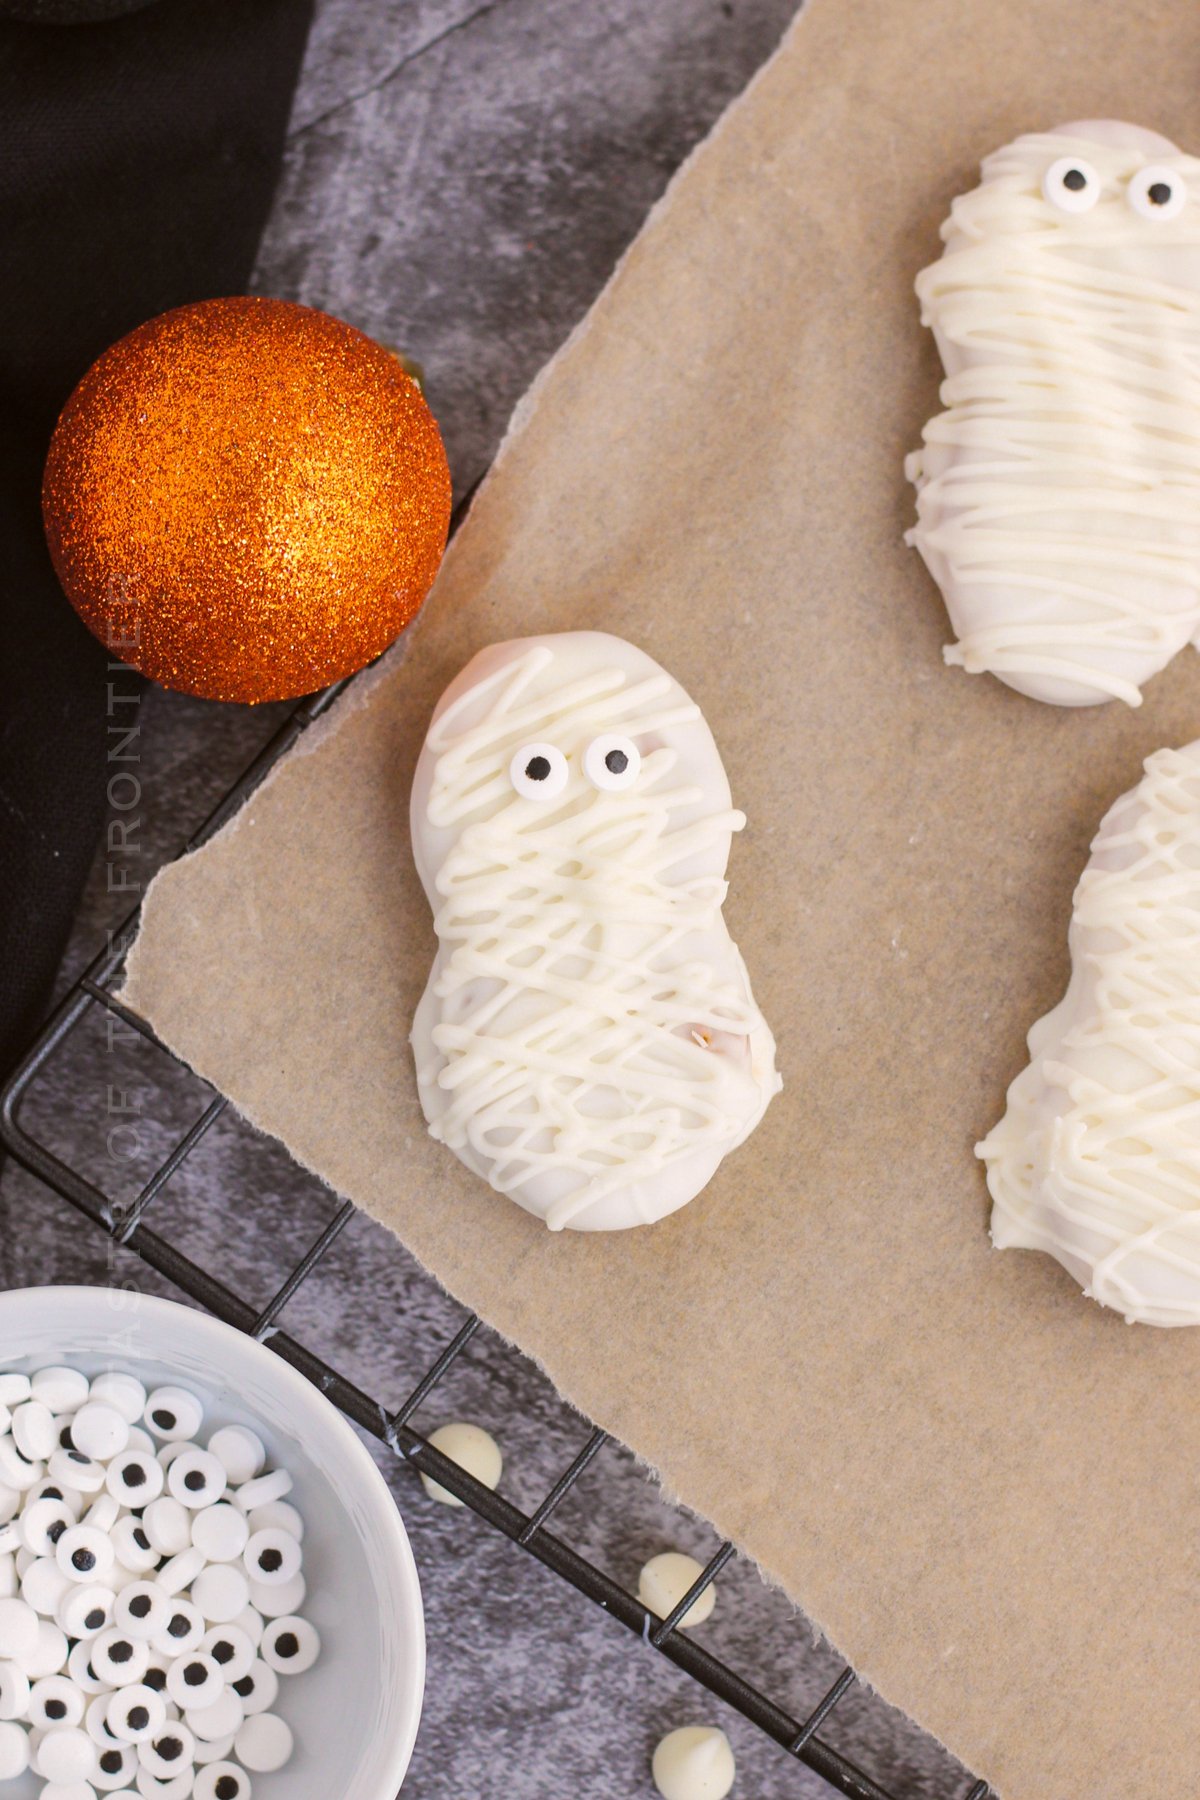
Mummy candy apples are an easy Halloween recipe that you can make at home. They’re made from apples that have been coated in chocolate, and they’re then covered in drizzles of additional chocolate and candy eyes. They make a great treat for kids or adults who love scary foods for Halloween!
Some variations of mummy candy apples include ghost candy apples, black widow candy apples, and Frankenstein candy apples.
Ghost candy apples are made by coating regular apple slices in a dark chocolate shell and then sprinkling white sugar on top.
Black widow candy apples are made by coating regular apple slices in a black chocolate shell and then sprinkling red sugar on top.
Frankenstein Candy Apples are made by taking two normal apple slices, cutting one into the shape of a heart, and then dipping it into melted chocolate.
Mummy candy apples will last for up to 3 days if kept in an airtight container. I don’t recommend placing them in the fridge. Not only will the candy eyes start to bleed in the moist air, but the chocolate coating tends to crack in the refrigerator.
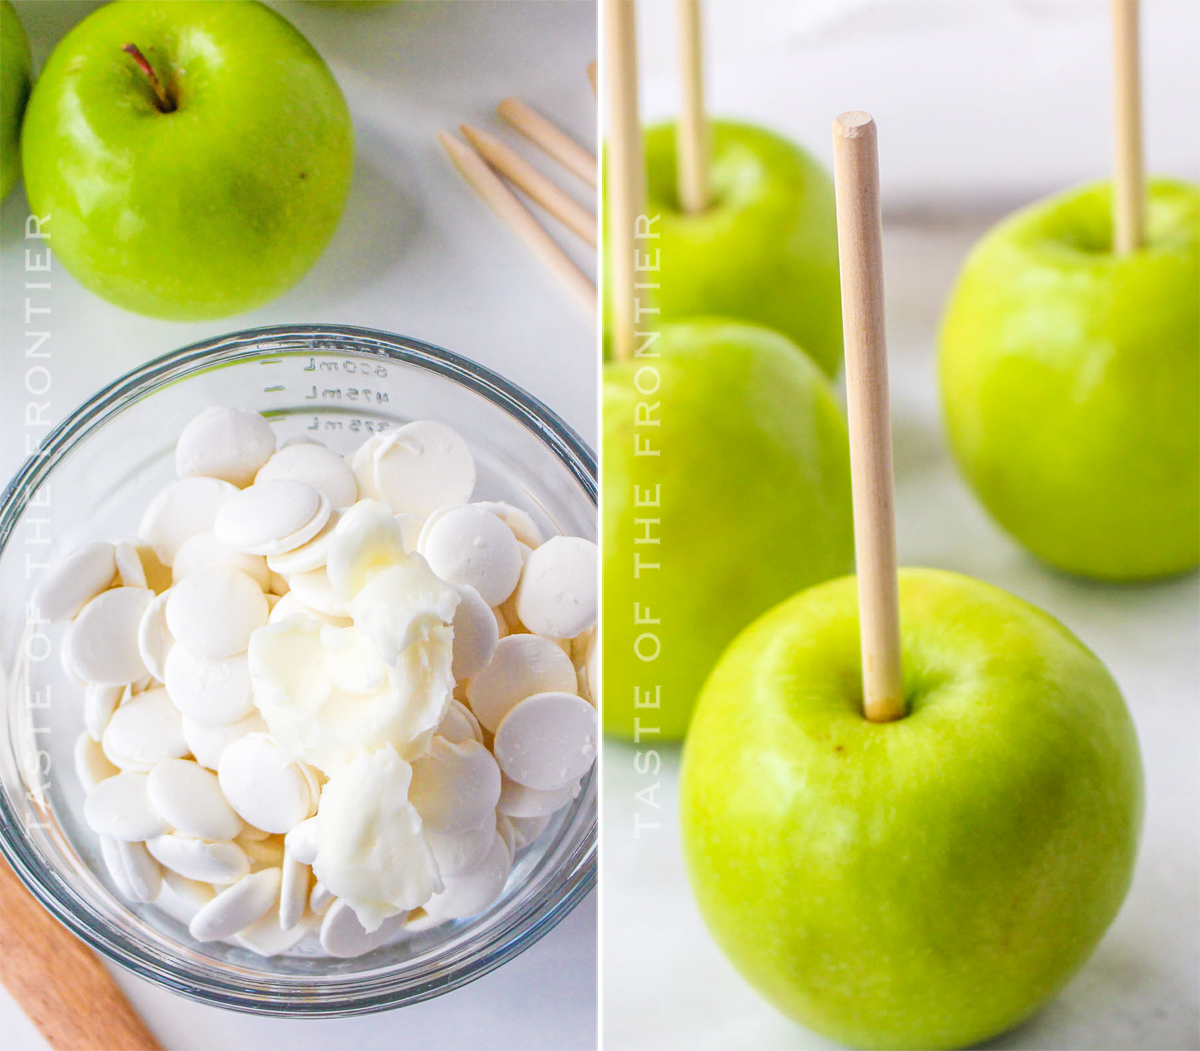
The best apple to use for candy apples is the Granny Smith apple. Granny Smith apples are a great option for candy apples because they’re tart and sweet, which makes them perfect for Halloween. They also have hard skin, so they stay fresh longer than other types of apples.
I find that the best way is to wrap them individually with plastic wrap or place them in a paper bag and fold the bag closed. I don’t recommend refrigeration unless the apples have been cut open.
This cute Halloween recipe is SUPER EASY and delicious – and if you’re like me this time of year, then you maybe already have some of these items on hand OR maybe you have never made candy-coated apples before, & you might be a bit nervous – but you’re going to love it. I have made a list below of the things I absolutely can’t live without when it comes to making this treat recipe. (you can also SHOP MY FAVORITES in my store)
If you love this easy Halloween treat recipe, you’re going to love these other Halloween treats too. Please click each link below to find the easy, printable recipe!
If you love this recipe for Homemade Chocolate Covered Candy Apples as much as I do, please write a five-star review, and be sure to help me share on Facebook and Pinterest!
CONNECT WITH YUMMI HAUS!
Be sure to follow me on my social media, so you never miss a post!
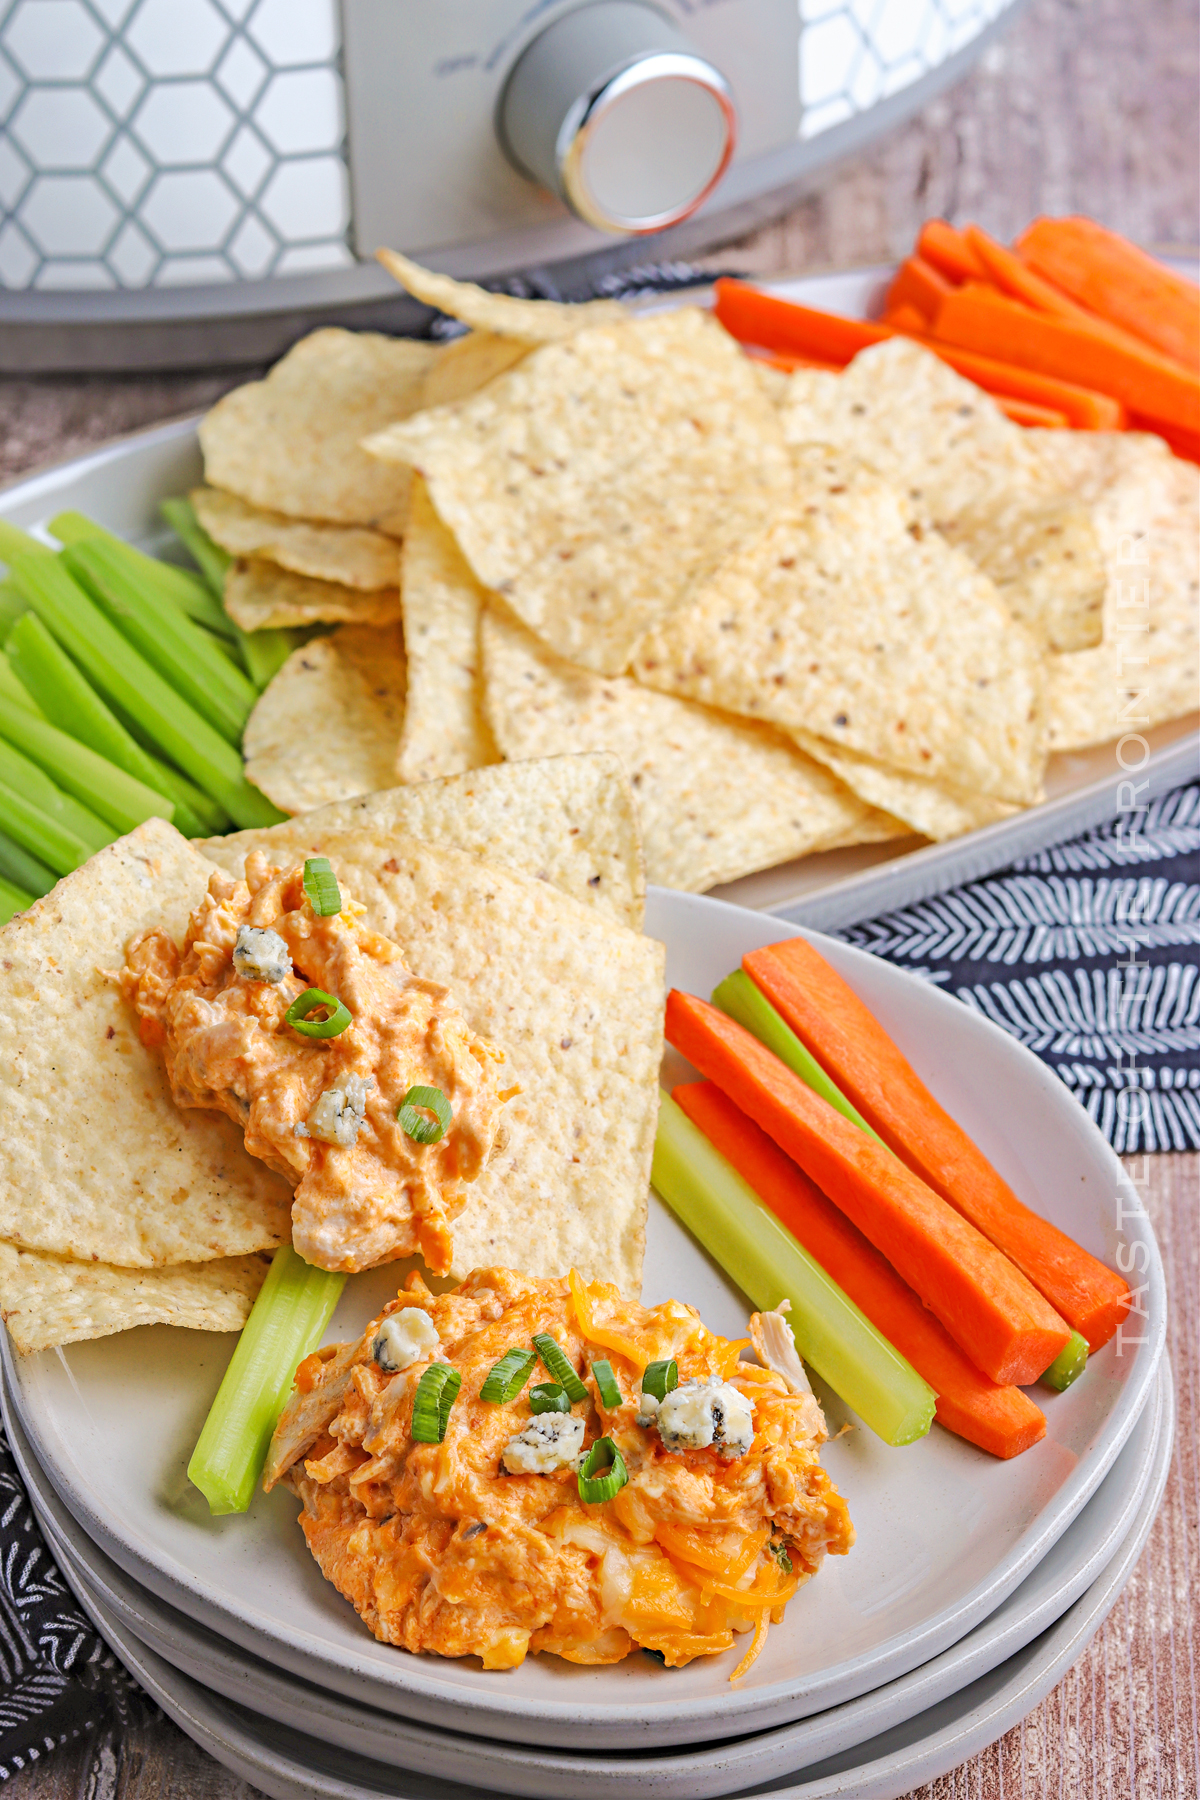
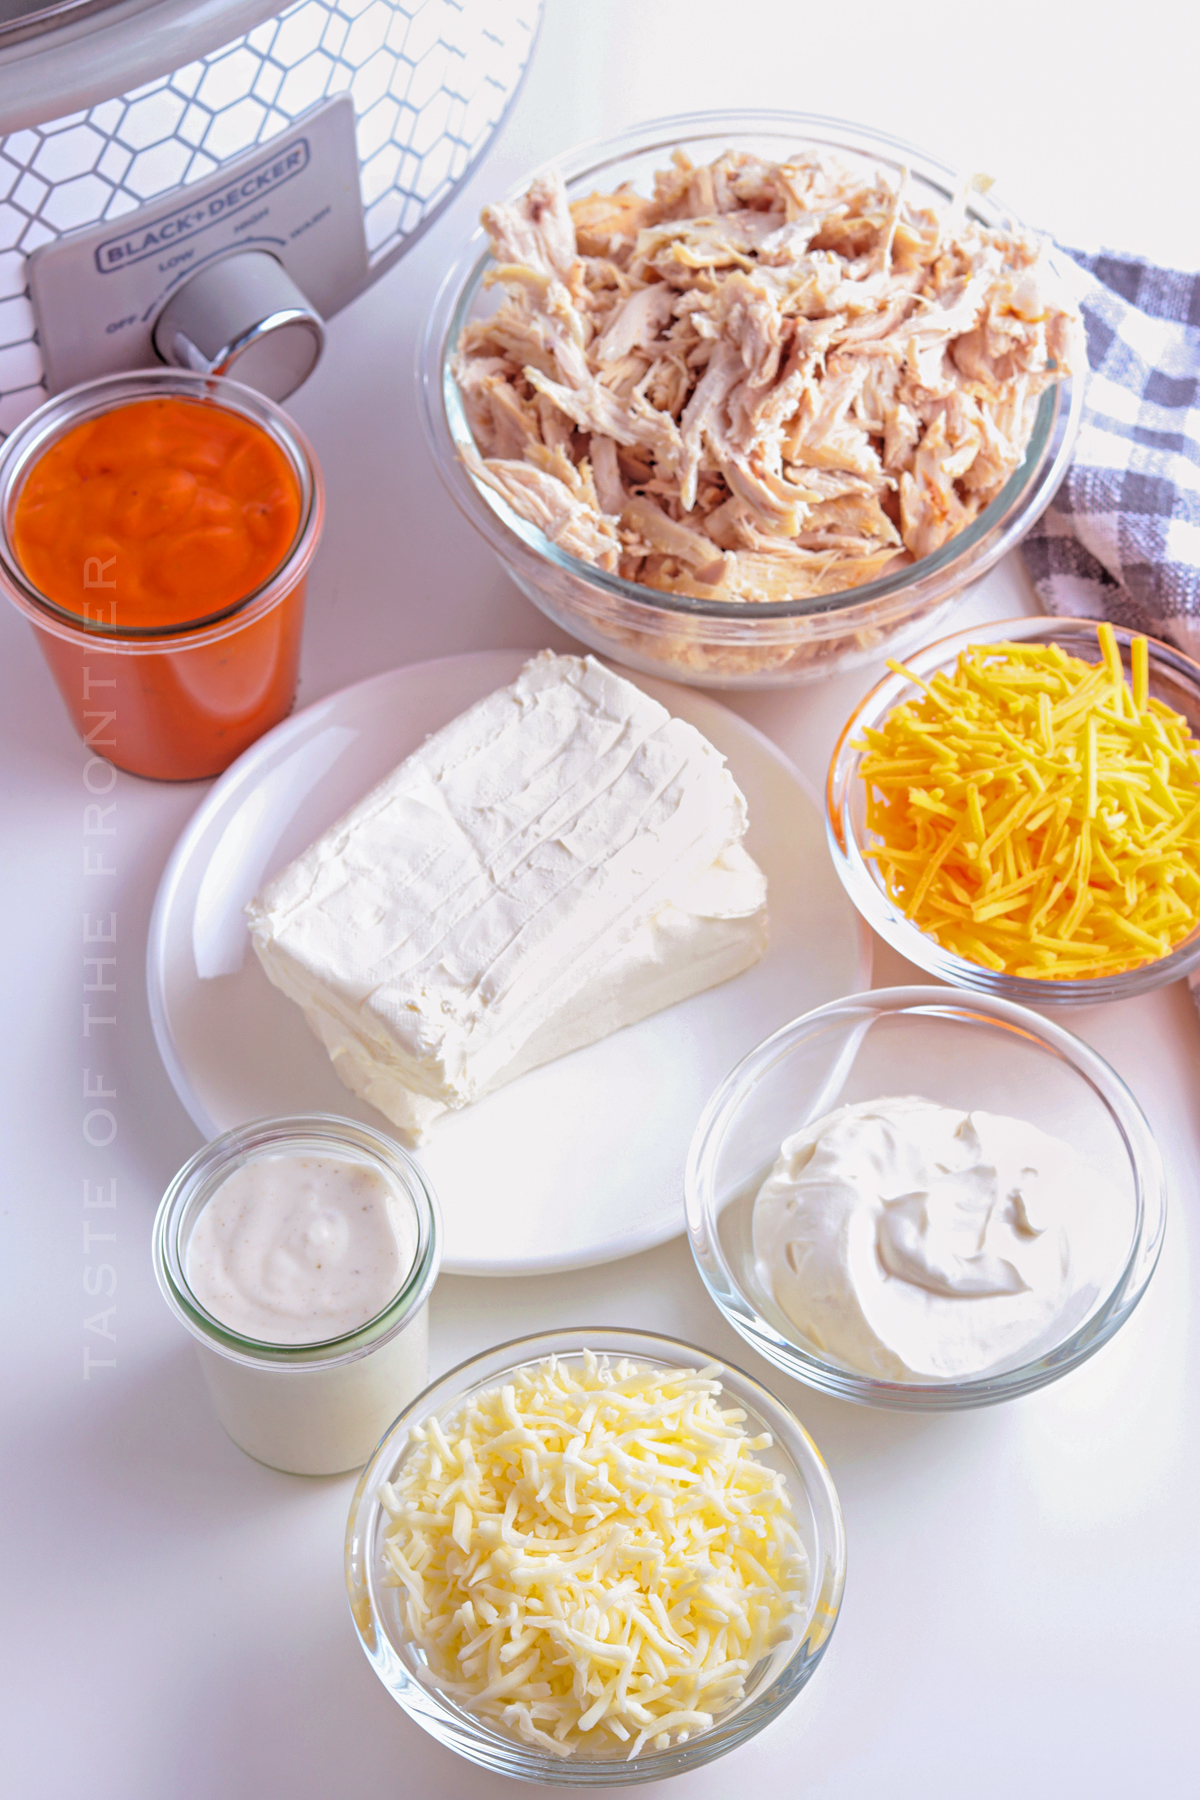
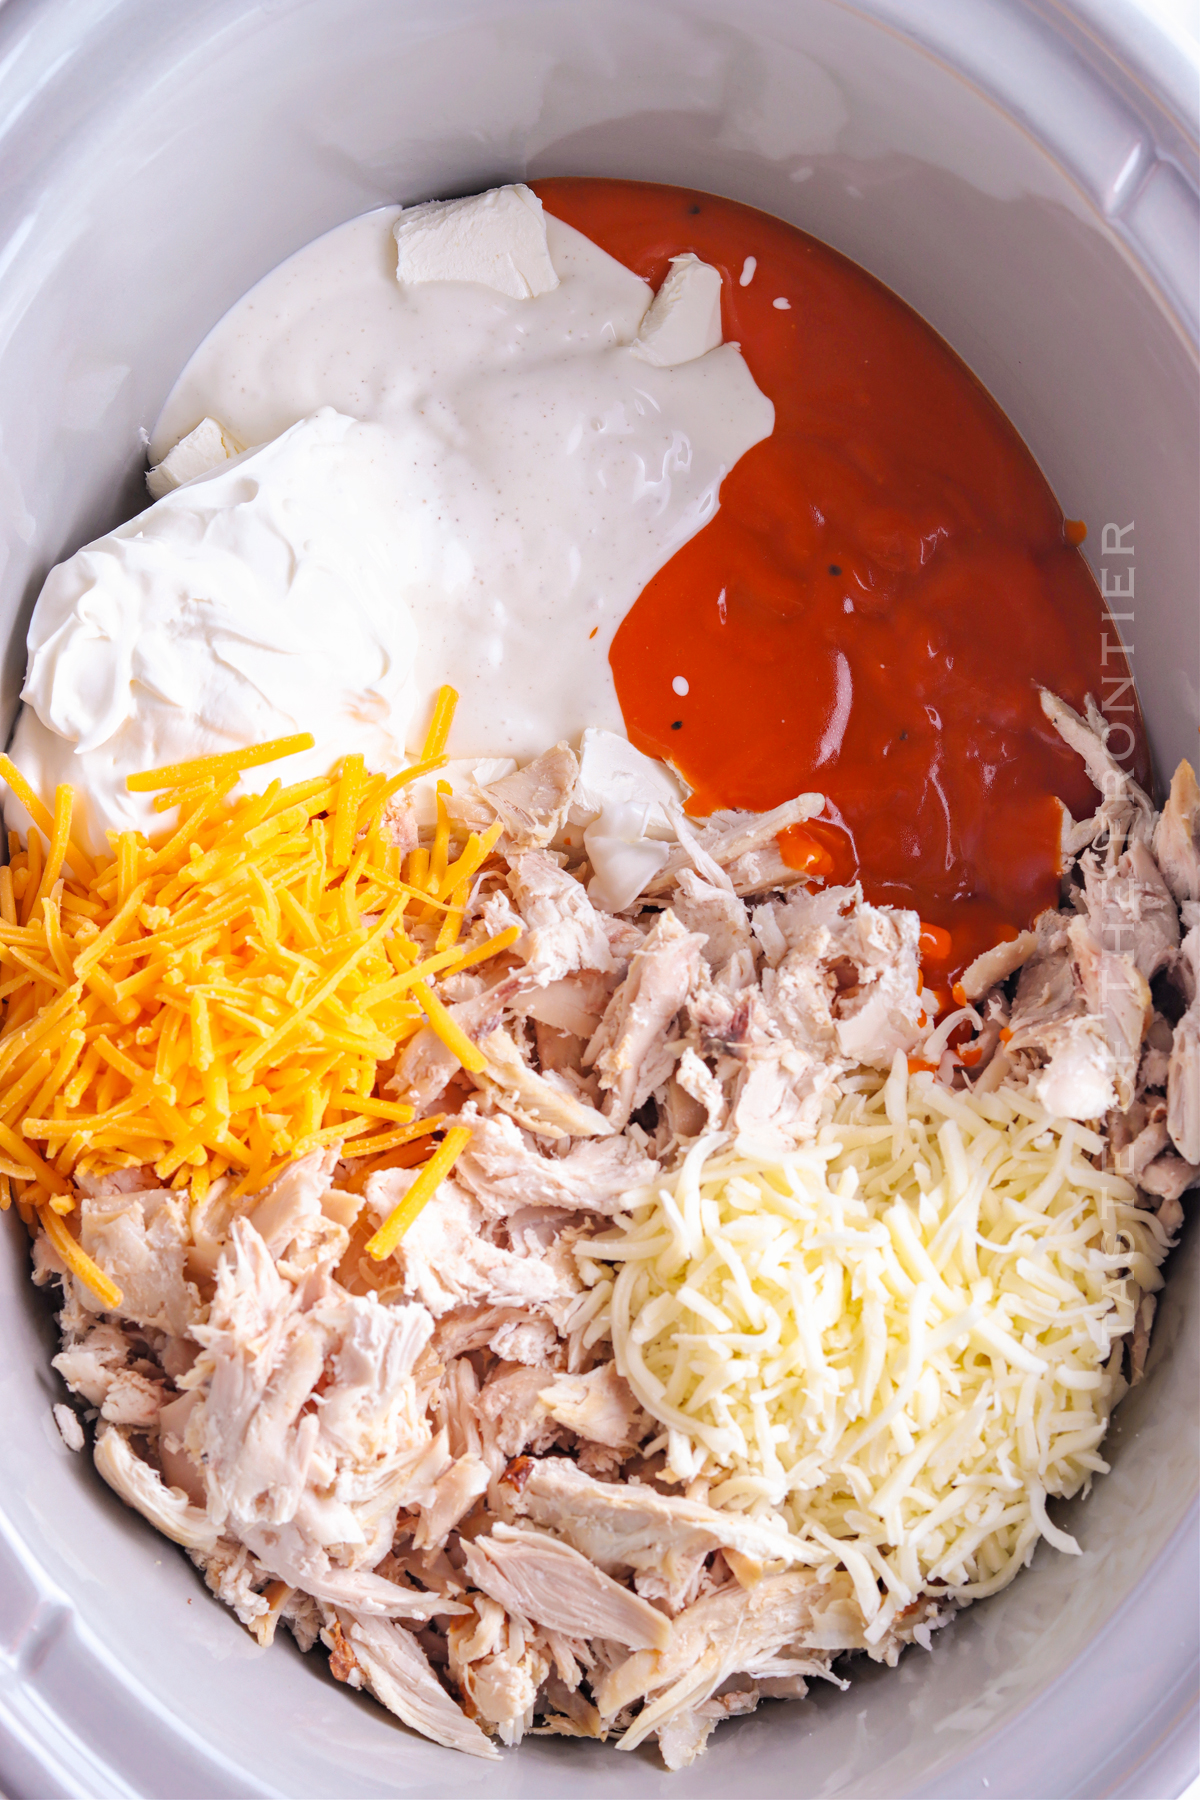
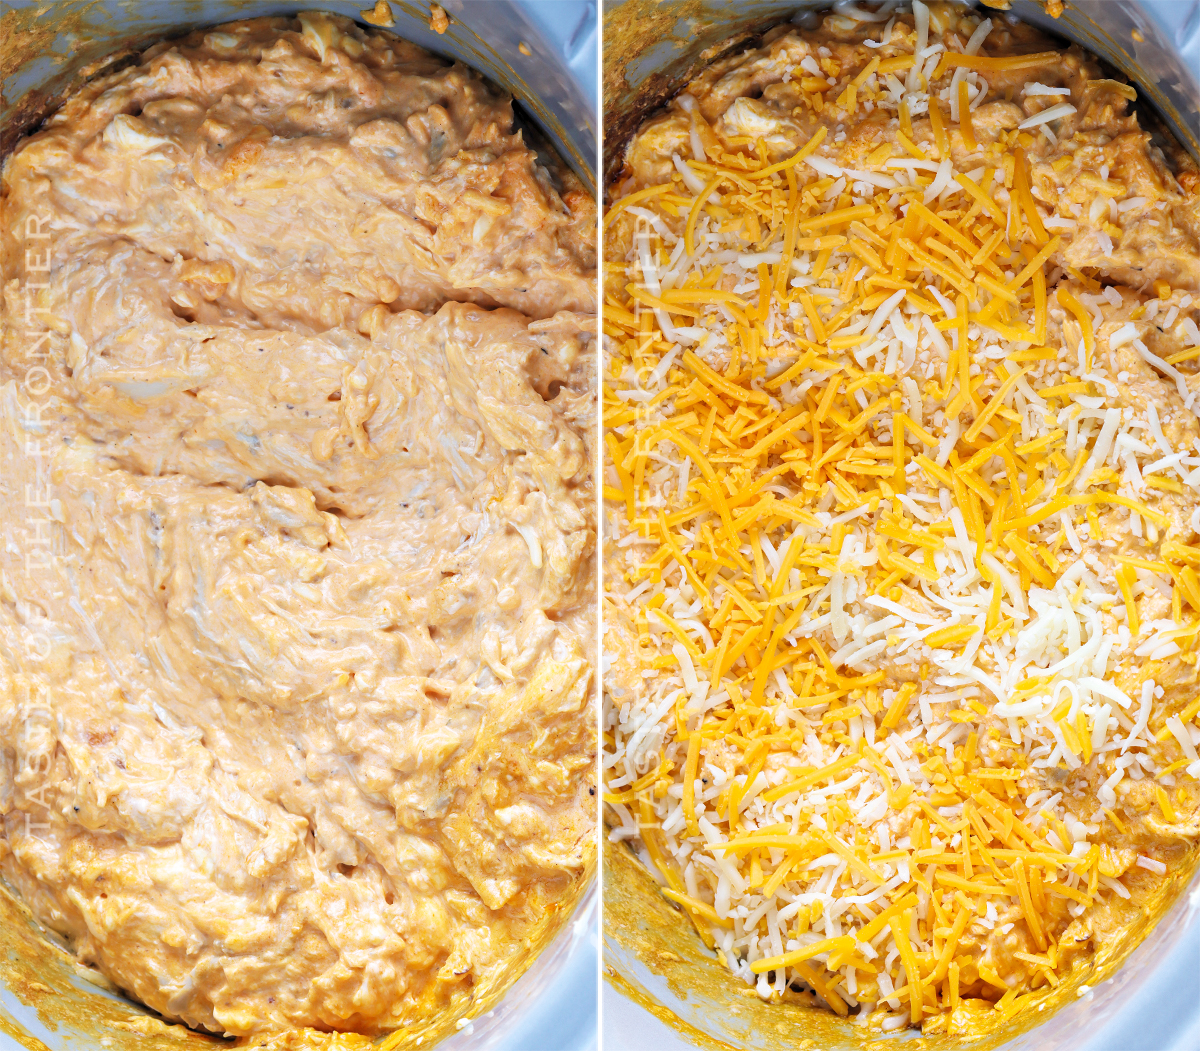
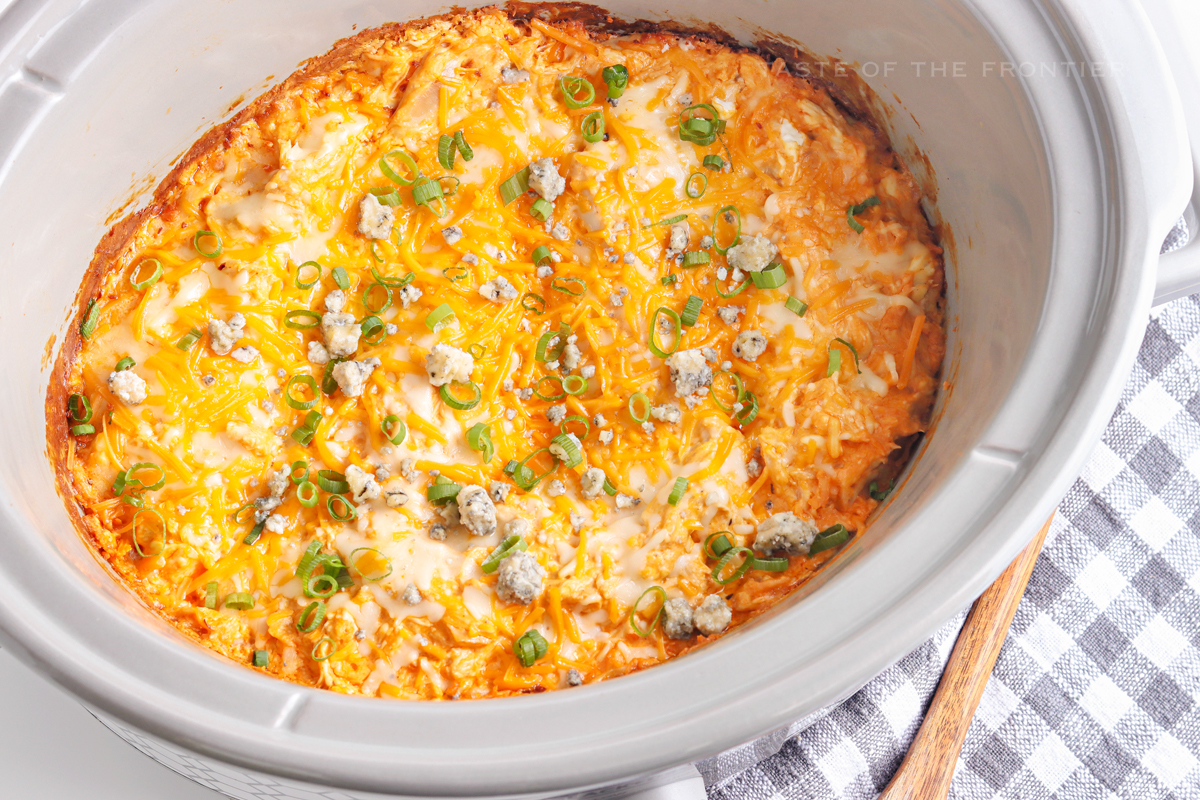
Looking for an easy game day appetizer? Slow Cooker Buffalo Chicken Dip is always a hit! With just a few simple ingredients, you can have this creamy and cheesy dip ready to go.
It’s simple to make and always a hit with guests. Plus, it’s perfect for game day or any other gathering. It is always the first thing to run out at every party because it is SO GOOD!
Serve it with tortilla chips or celery sticks for a delicious snack everyone will love. Leave the oven off and let your slow cooker do all the work!

If you’re like me, you love buffalo chicken dip. It’s creamy, cheesy, and spicy – perfect for game day or any party. But it can be a pain to make.
That’s why I’m excited to share this slow cooker buffalo chicken dip recipe with you. It’s easy to make, and it tastes just as good as the classic version. So get ready to enjoy some of the best buffalo chicken dips ever!
Buffalo chicken dip is a creamy, spicy dip made with buffalo chicken and cream cheese. It’s perfect for parties or game day gatherings because it’s easy to make and can be served hot or cold. This recipe is a classic party dish that everyone will love.
This Crockpot Buffalo Chicken Dip recipe is a delicious and easy way to enjoy a classic dip. It’s perfect for parties or get-togethers, and it can be made in just minutes using ingredients you likely already have on hand.
This slow cooker buffalo chicken dip is a delicious and easy recipe that you can make without any fuss. You’ll need some basic ingredients, and the process is simple enough that you can easily follow along.
The end result will be an amazing dish that your guests will love. Plus, it’s perfect for entertaining because it can be made in advance and served at any time of the night or day.
So don’t wait any longer – get started on this delicious slow cooker buffalo chicken dip recipe today!
Some serving suggestions for the Slow Cooker Buffalo Chicken Dip include dipping chips, celery sticks, carrots, and pita bread.
Buffalo chicken dip can be stored in the fridge for up to four days. You can also store it in the freezer for up to two months.
That depends on what you personally define as healthy. If you are watching fat and calories – the cheese in this recipe probably isn’t the right thing for you.
However, if you are on a low-carb, or keto diet – this recipe is perfect for you. Just be sure to watch the sugar content in the ranch dressing and buffalo sauce you choose.
Yes, you can freeze Crock Pot Buffalo Chicken Dip. This will allow you to have the dip at your convenience and without having to wait for it to cook.
Freezing will also preserve the flavor and texture of the dip. Just make sure that you wrap it well in plastic wrap or freezer bags so it doesn’t become misshapen.
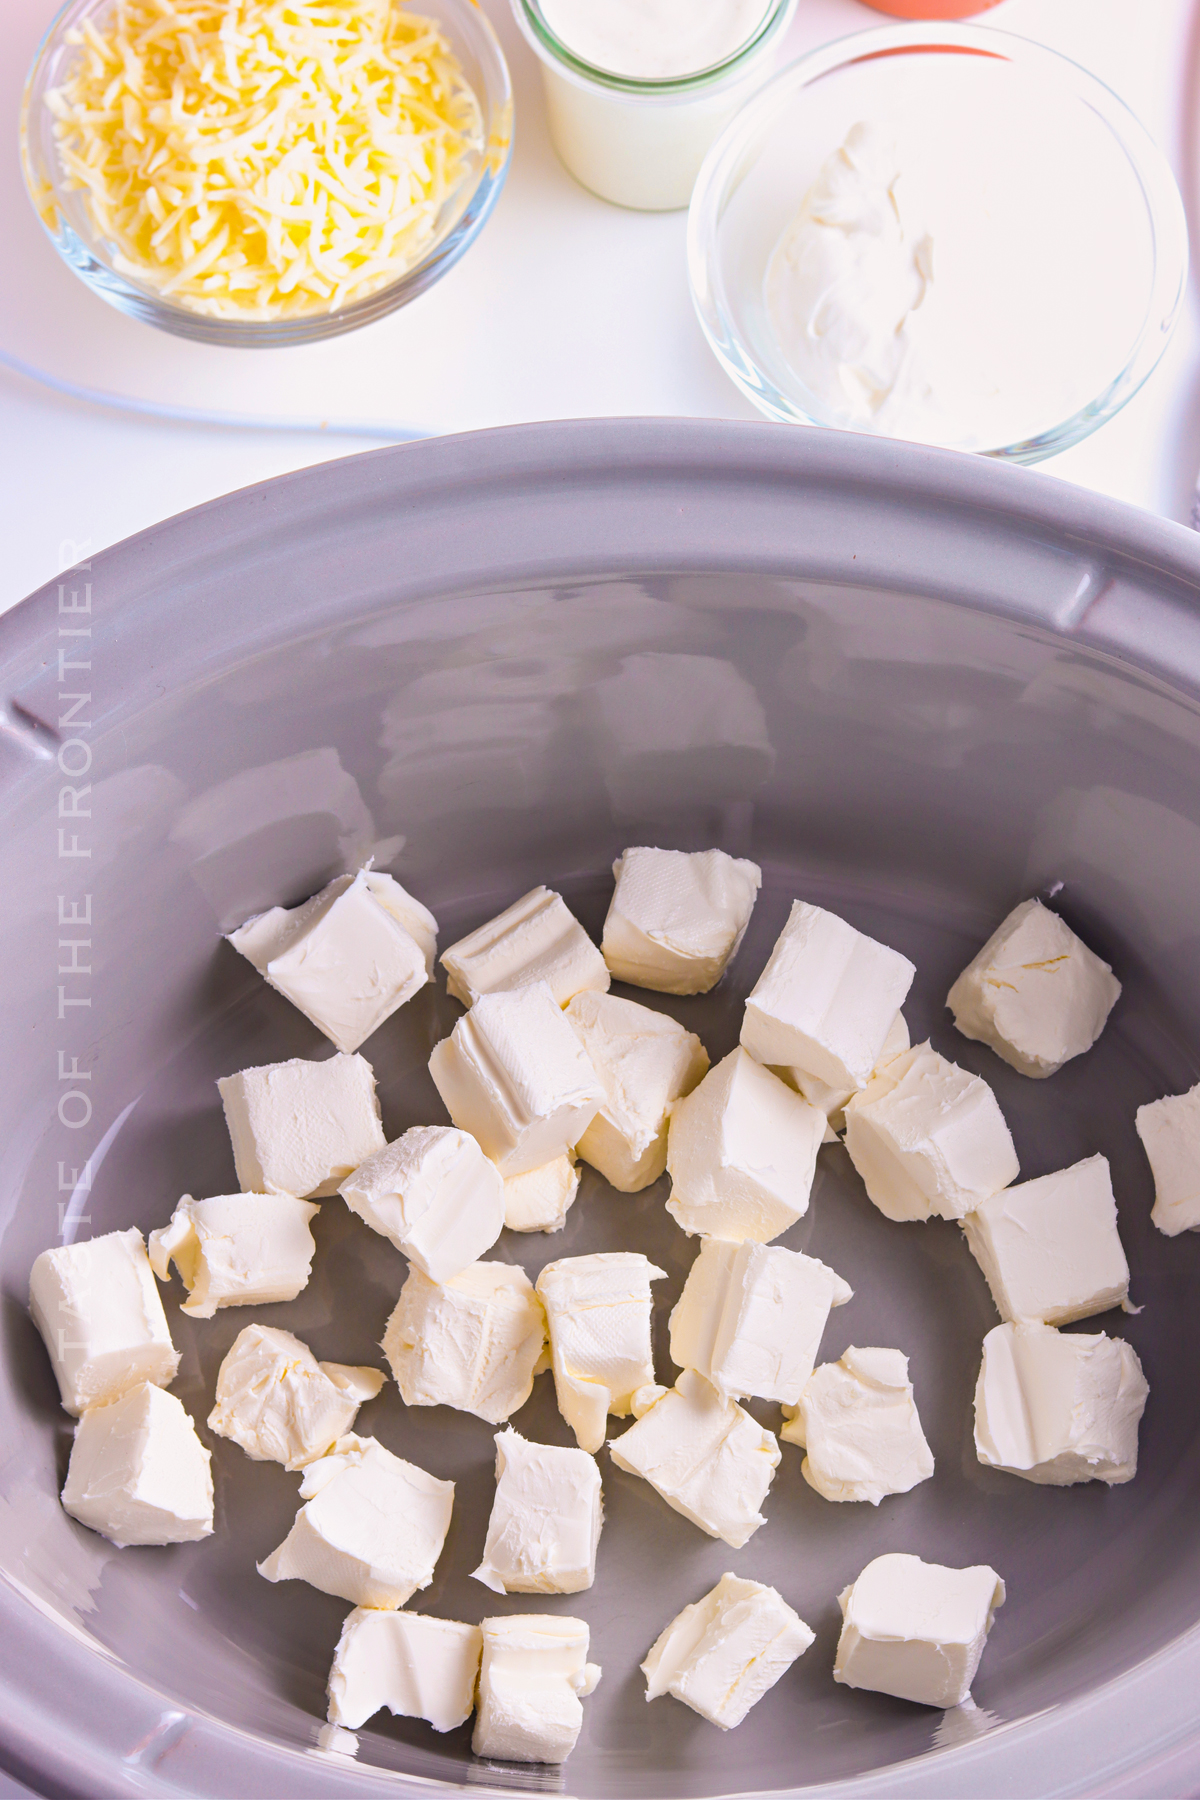
Crockpot buffalo chicken dip is a popular variation of the dish that can be made in a slow cooker or an oven. This recipe calls for boneless, skinless chicken breasts to be cooked with cream cheese, and Buffalo sauce, (garlic powder, onion powder, salt, and pepper can be added) until cooked through.
Other variations of buffalo chicken dip include using different types of meat (chicken thighs instead of breasts), adding vegetables (broccoli florets or carrots), making it vegan by replacing ingredients with your favorite vegan alternatives, adding more spices (cayenne pepper or chili powder) or using different types of dips (sour cream ranch dressing or blue cheese dressing).
When buffalo chicken dip is done, it will be hot and bubbly. This means that the ingredients have cooked all the way through and are ready to serve. The sauce should be thick and creamy. The cheese should be melted and the chicken mixed throughout.
Yes – making this recipe in the Instant Pot is a great idea when you are tight on time. Check out our recipe for Instant Pot Buffalo Chicken Dip here.
Crockpot Chicken Parmesan Soup
You can also make Slow Cooker Buffalo Chicken Dip in the oven by following the same steps as the crockpot recipe. Combine the mixture in an oven-safe dish and bake at 350 degrees Fahrenheit for 15-20 minutes, or until heated through. Remove from the oven, stir. Then add the other cheese, and bake until that is melted and bubbling before serving.
This Slow Cooker Buffalo Chicken Dip is a delicious and easy Crockpot Recipe that will be loved by everyone in your family! It’s made with buffalo chicken, cream cheese, and sour cream, and it’s simple to make so you can enjoy a delicious appetizer or main course any time of the day.
How to shred the chicken is a question that often comes up when making Buffalo chicken dip. The easiest way is to pull it with your hands or use 2 forks to gently pull the chicken apart.
I recommend using cooled rotisserie chicken to make the process even easier.
To reheat the hot dip, microwave it or heat it in a saucepan on the stove. Microwaving works best if you want it warm quickly while heating it in a saucepan on the stove is better if you want it piping hot.
Slow Cooker Buffalo Chicken Dip is a delicious and easy crockpot recipe that is perfect for game day or any party. This dip is made with chicken, cream cheese, ranch dressing, and hot sauce. It is perfect for dipping celery, carrots, chips, or anything else you want to enjoy!
This appetizer recipe is SUPER EASY and delicious – and if you’re like me, then you maybe already have some of these items on hand OR maybe you have never made a snack like this in your slow cooker before, & you might be a bit nervous – but you’re going to love it. I have made a list below of the things I absolutely can’t live without when it comes to making this chicken dip recipe. (you can also SHOP MY FAVORITES in my store)
If you love this easy buffalo chicken dip recipe, you’re going to love these other snack recipes too. Please click each link below to find the easy, printable recipe!


The Best Loaded Baked Potato Dip

If you love this recipe for Crock Por Buffalo Chicken Dip as much as I do, please write a five-star review, and be sure to help me share on Facebook and Pinterest!

CONNECT WITH YUMMI HAUS!
Be sure to follow me on my social media, so you never miss a post!

Are you looking for an easy dessert that will impress your friends and family? Look no further than Pumpkin Dump Cake! This simple recipe is perfect for fall, and it only takes a few minutes to put together.
Pumpkin dump cake is the easiest fall dessert to make. It only requires a few ingredients and less than 20 minutes of prep time.
Plus, it’s delicious and there’s hardly any cleanup required once it’s done. So what are you waiting for?! If you’re looking for a quick and easy recipe that will satisfy your sweet tooth, this is it!
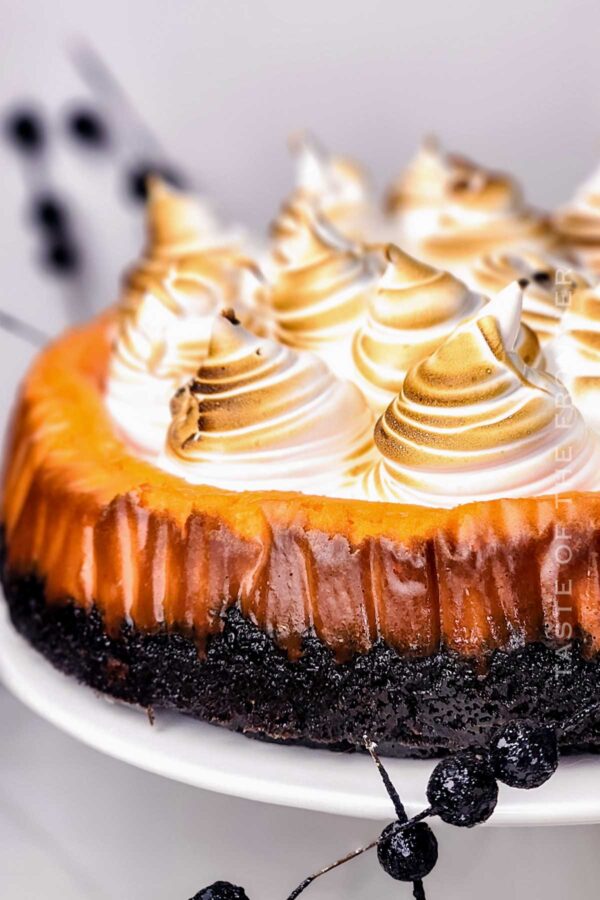
View postIndulge in a hauntingly delicious Halloween Cheesecake! This creamy, festive dessert is a wickedly sweet treat for any Halloween party!
Classic creamy dessert with a Halloween twist. Chocolate Oreo crust, rich vanilla-flavored cheesecake tinted orange, and torched meringue mountains that look like cute ghosts as a topping.
People all over the world love cheesecake for how creamy and delicate this sweet treat is. And if your kids’ and family’s favorite holiday is Halloween, you have to create a fun Halloween dessert!
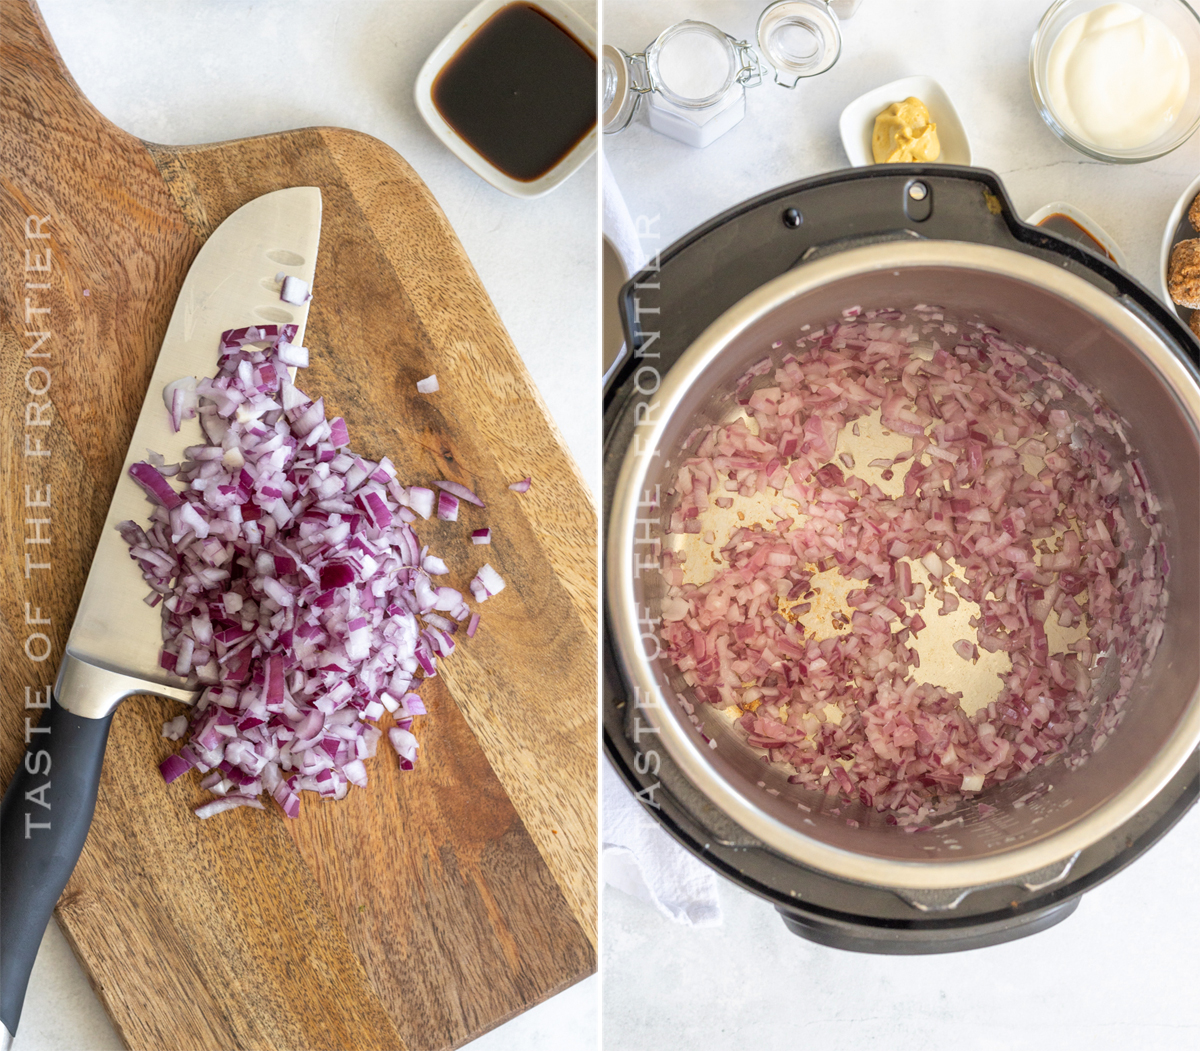
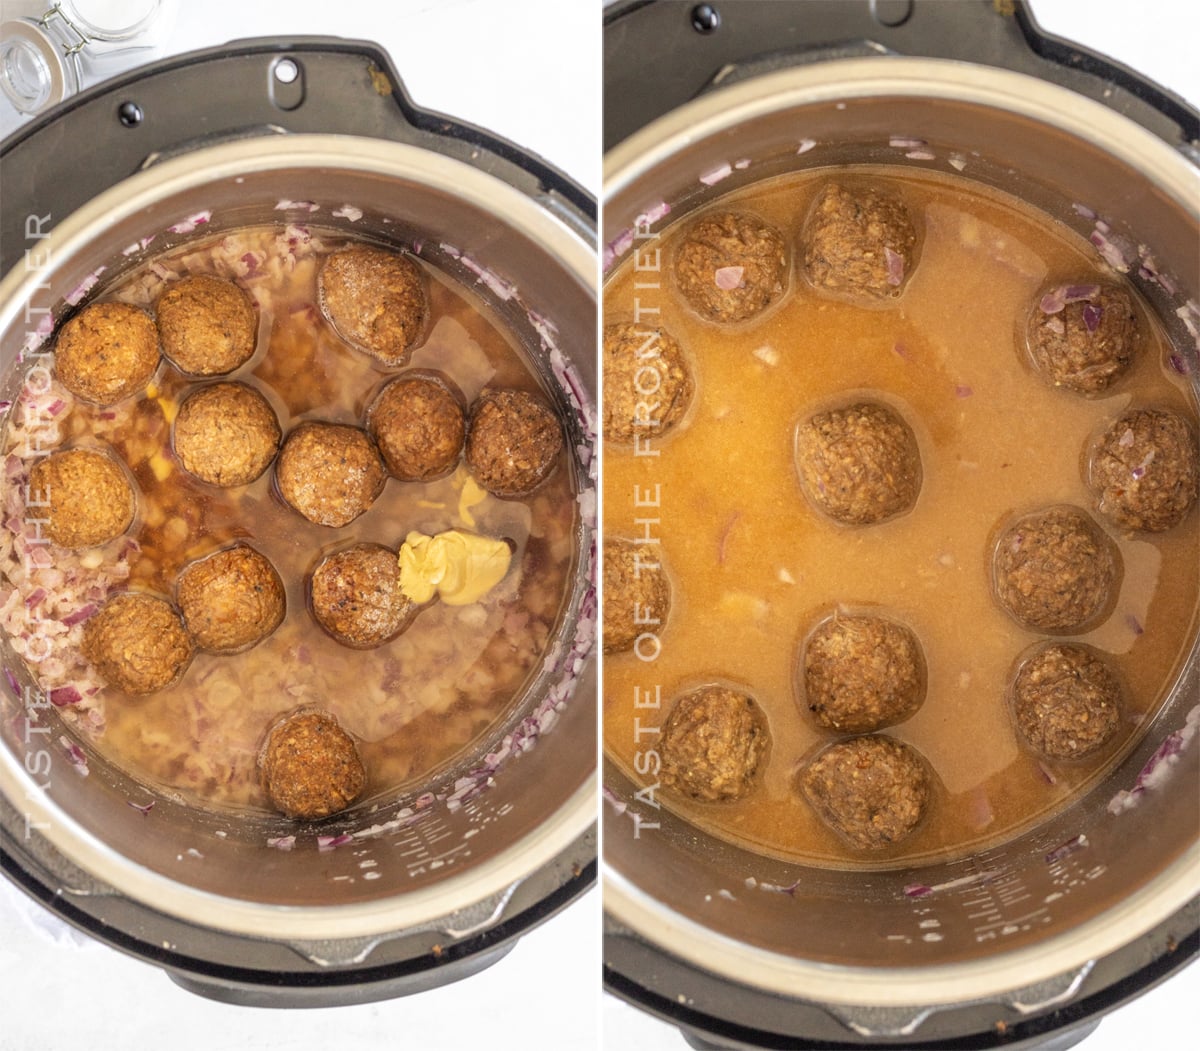
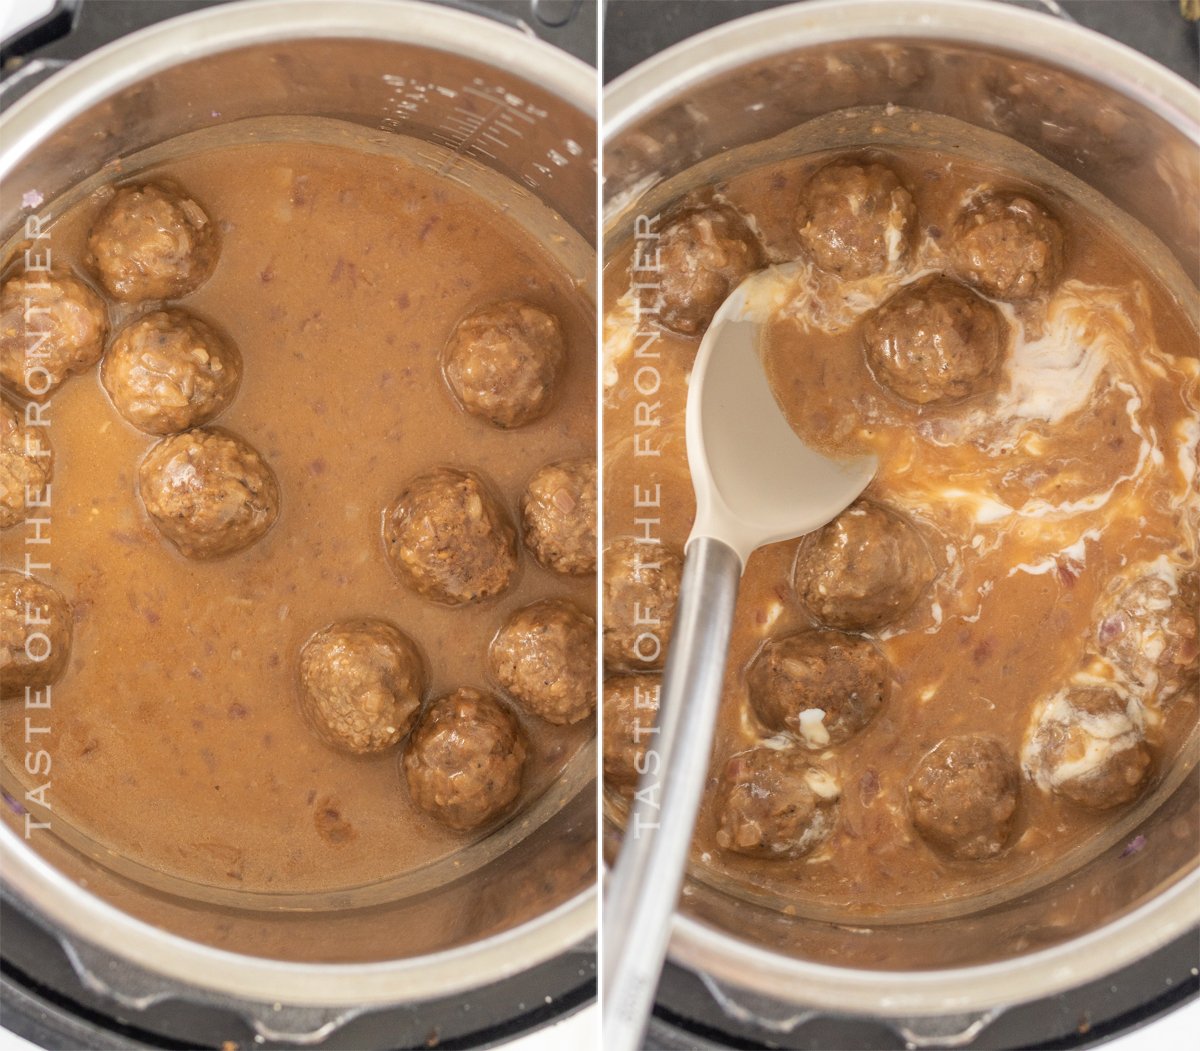
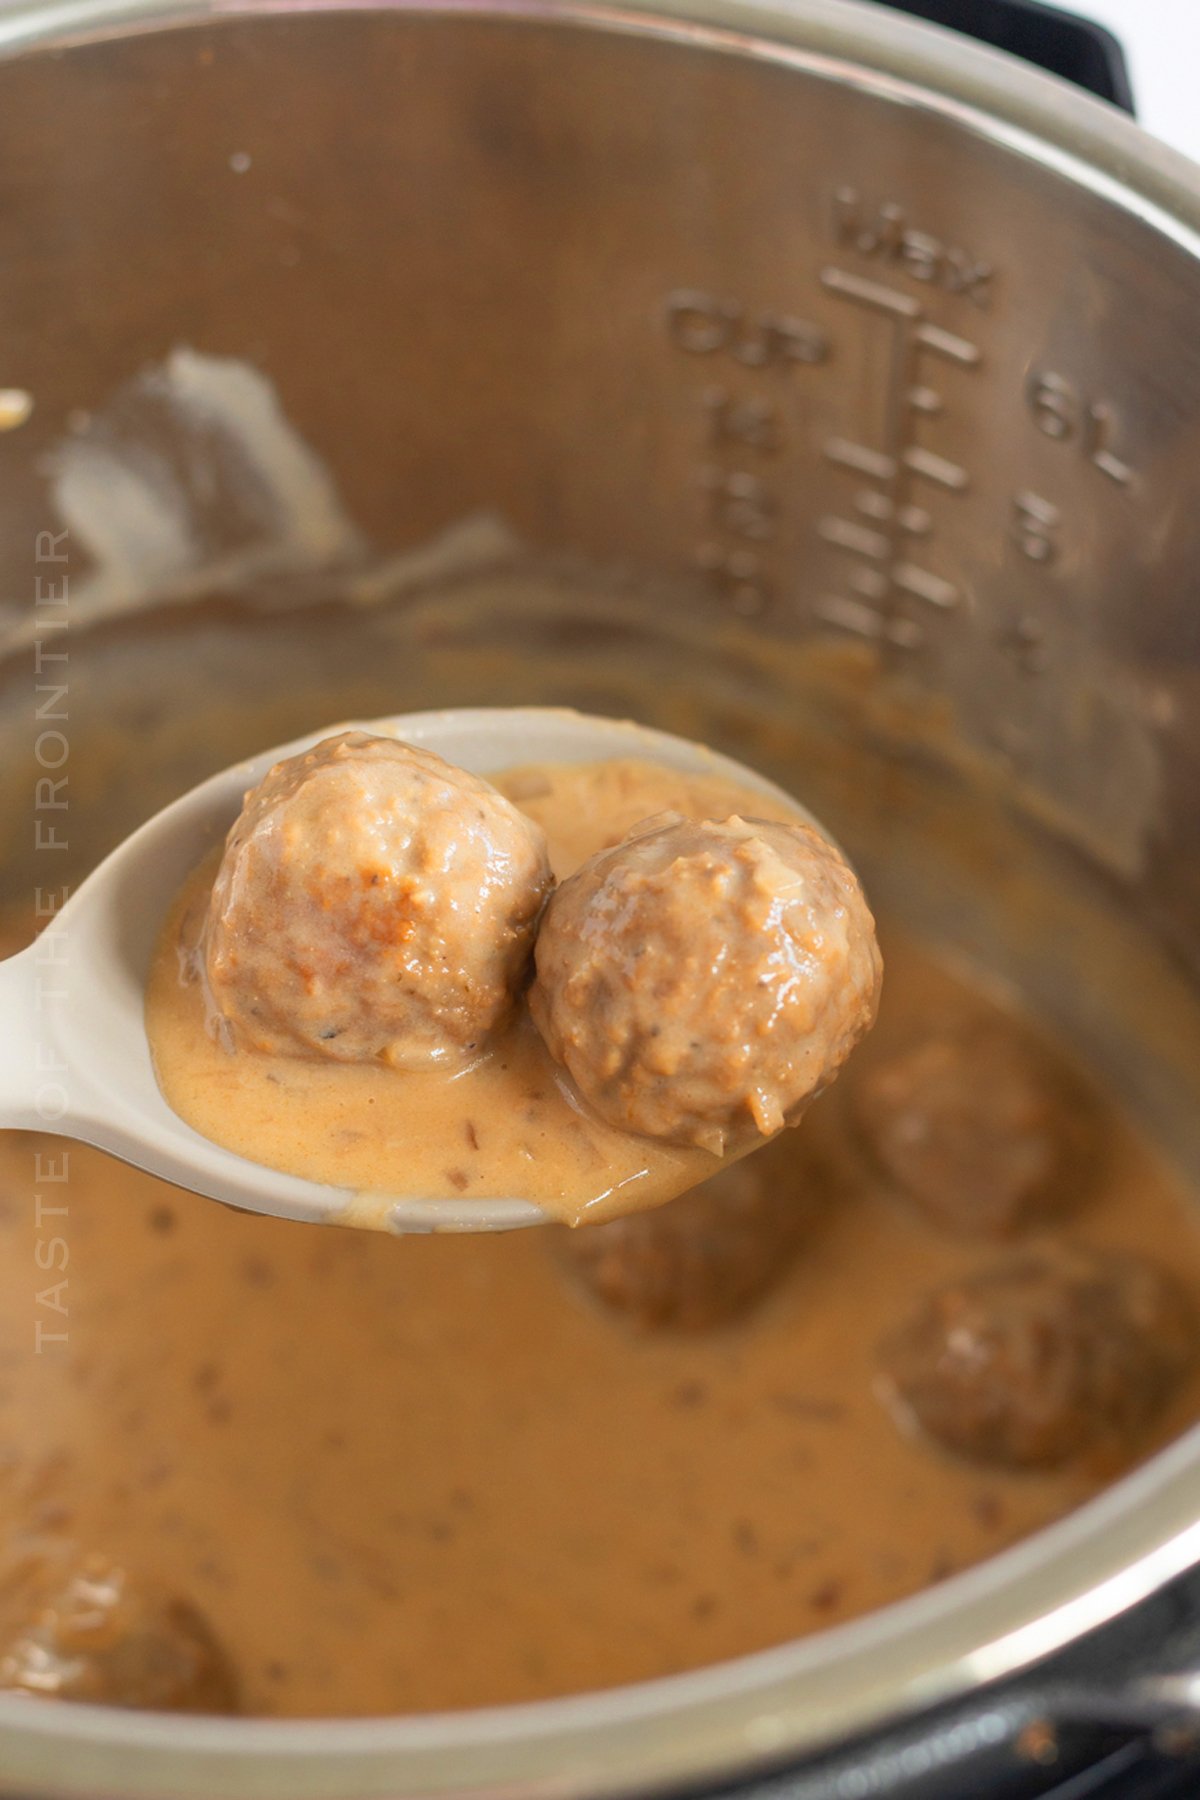
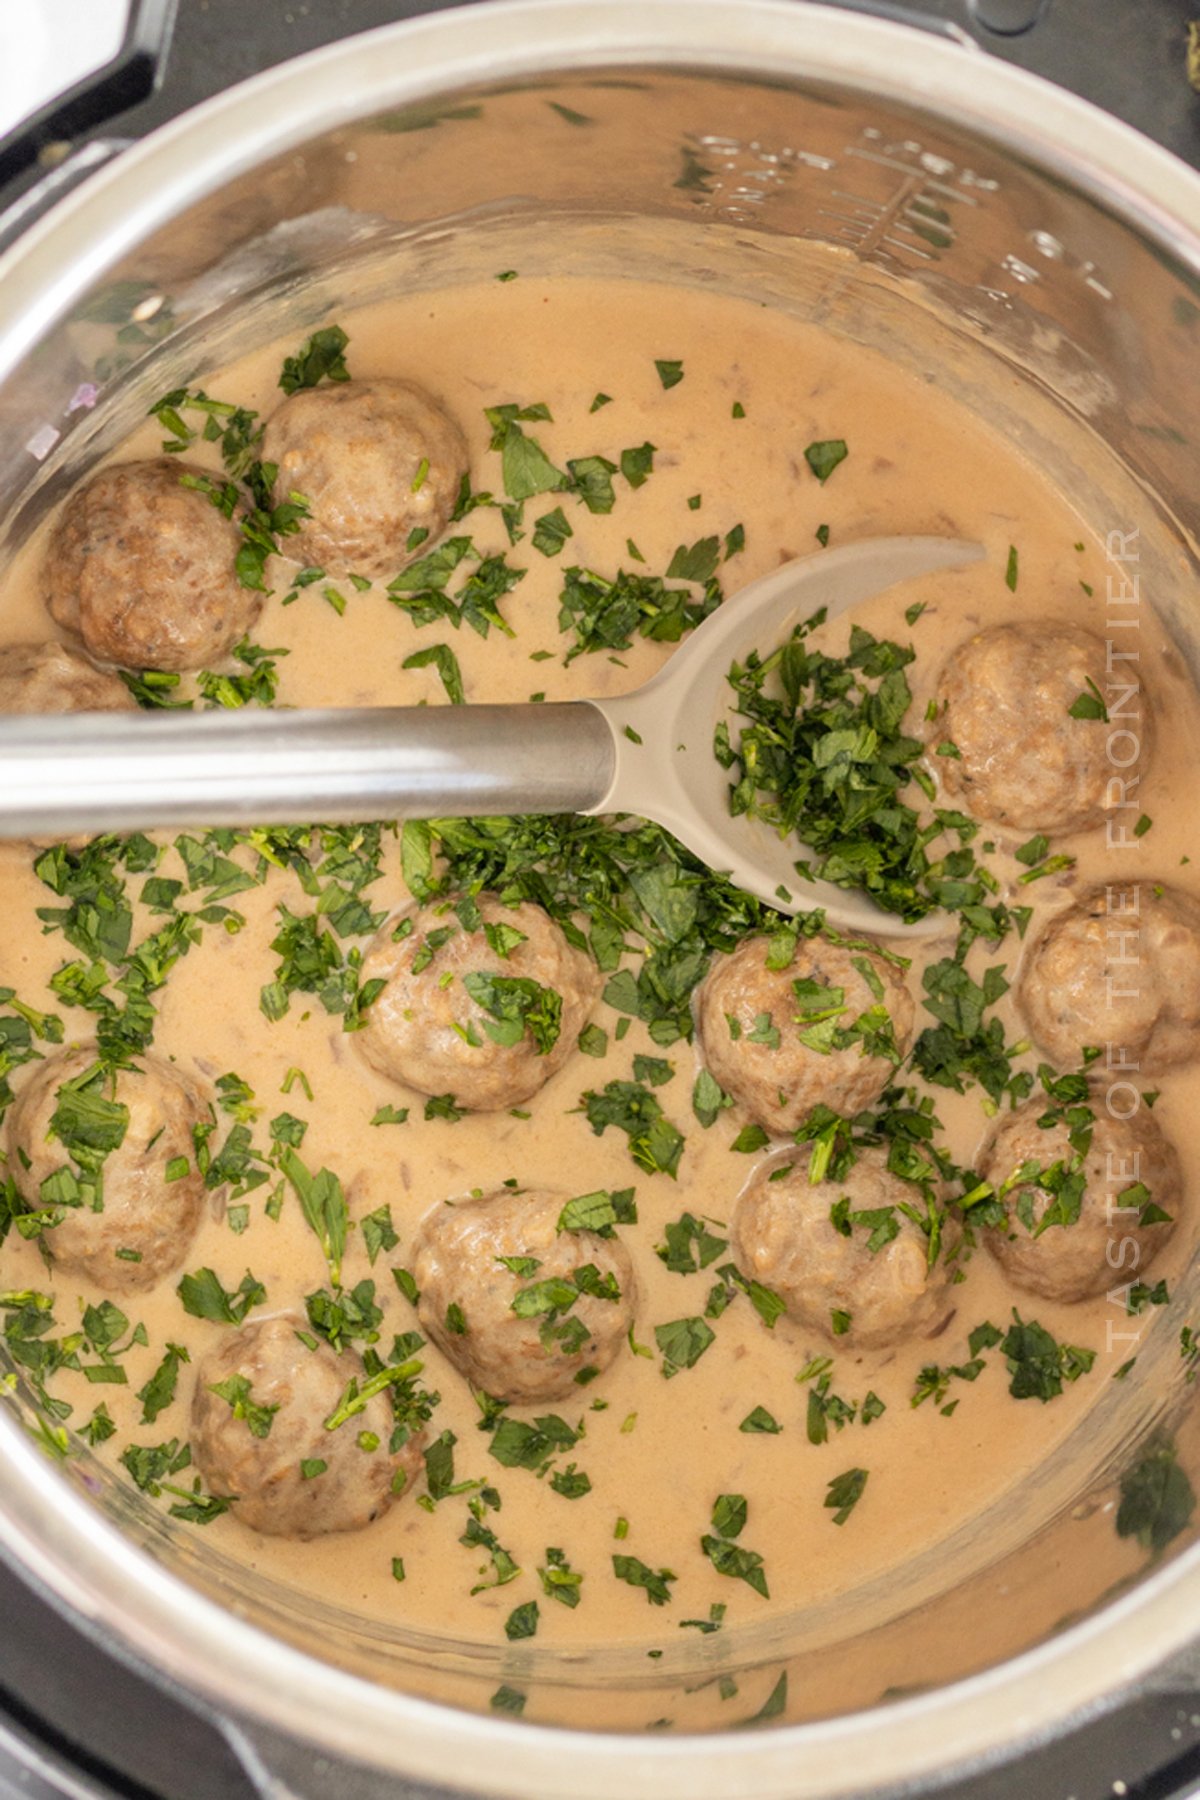
View postIf you’re looking for an easy and delicious dinner idea, you’ve gotta try these Instant Pot Swedish Meatballs! They’re made with just a handful of ingredients and come together in no time at all. Plus, they’re soooo good! You’ll love them!
Meatballs are a classic Swedish dish that can be made with ground beef, pork, or lamb and even vegan. They’re usually served in a gravy or sauce and can be eaten as an appetizer or main course.
Making meatballs can be a bit time-consuming, but with an Instant Pot, they can be ready in no time! These Instant Pot Swedish meatballs are just as delicious as the traditional version.

If you’re like me, you love Swedish meatballs. They’re so delicious and comforting! But they can be a bit overwhelming to make the traditional way.
That’s why I’m excited to share this Instant Pot Swedish Meatballs recipe with you. It’s quick and easy, and the results are just as good as if you made them the old-fashioned way! So give it a try and let me know what you think. 🙂

Swedish meatballs are a type of food that is made from meatballs cooked in a creamy, beef-based sauce. They are typically served on a bed of rice or with egg noodles.
Yes, you can use homemade meatballs. I have this recipe here for homemade meatballs. You will need to cook them completely before adding them to this recipe.
If you want to do that in the Instant Pot, cook them on the saute setting and deglaze the pot insert before proceeding to the next steps.
Yes, absolutely, that will work just fine. Just be sure to cook them thoroughly BEFORE starting this recipe. This recipe is intended for FULLY COOKED meatballs prior to adding any seasonings and sauce.
You can literally use whatever type of meatballs you prefer. We have tried them with beef, pork, turkey, sausage, and chicken. If you want to make this vegan – choose the vegan variety.
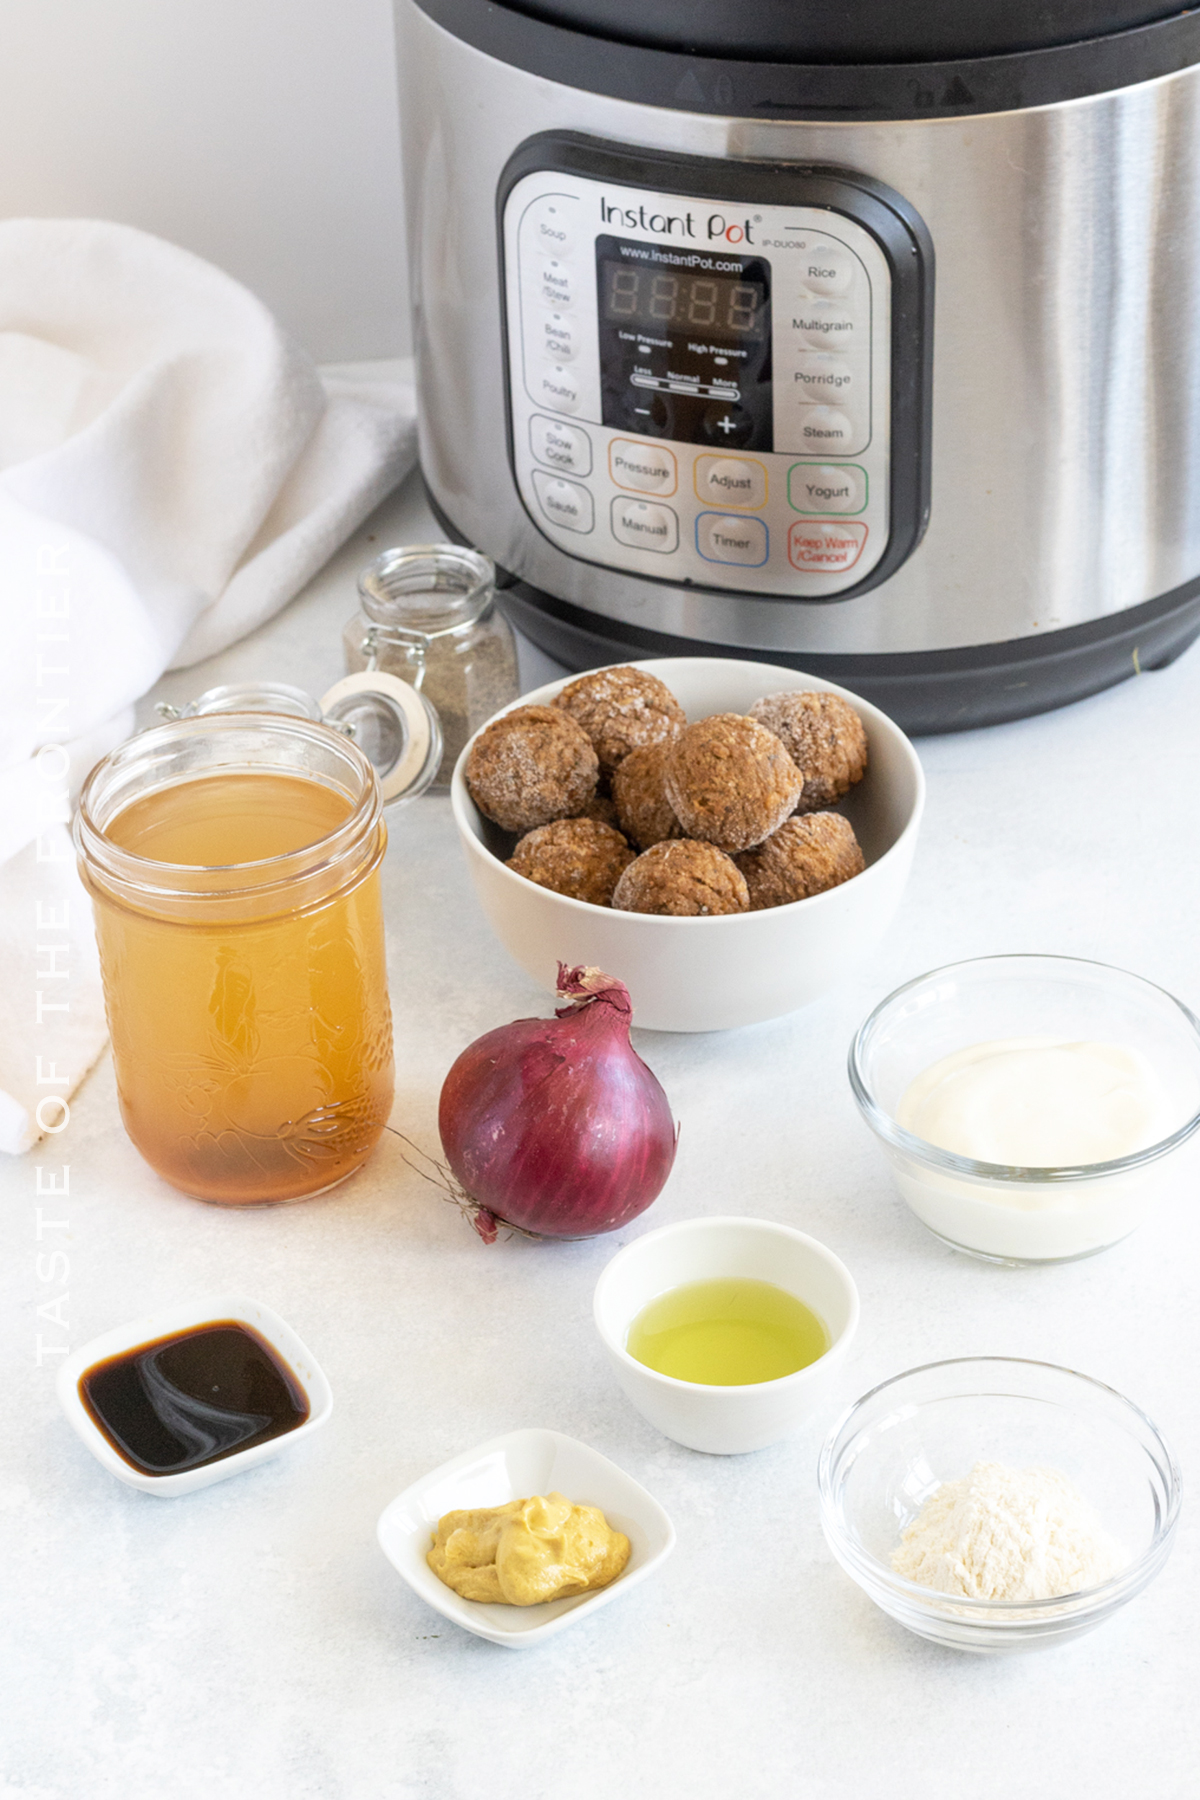
An Instant Pot is a popular electric pressure cooker that can be used to make many different dishes. It’s easy to use, and it has a variety of features that make cooking easier. Some of the features include automatic settings, programmable functions, and quick-release valves.
So – this is only an issue if you are using homemade or uncooked meatballs. If that is the case, the meatballs should be cooked through when they no longer have pink in the center and are firm to the touch.
This means that they have fully cooked and you can remove them from the Instant Pot without the risk of them being too soft or falling apart.
However, for this recipe, we are using frozen meatballs that are already pre-cooked. Therefore, you just need to make sure that they are hot and completely heated for the recipe to be done.
This recipe can be served in different ways, such as on a bed of rice or with a side salad. Also, people like to sever them on a bed of cooked egg noodles.
You can also serve them as an appetizer or main course. The serving suggestions are just guidelines; you can adjust the amount to fit your own preferences.
You can make the best Instant Pot Swedish Meatballs recipe ahead of time and store them in the refrigerator for later. This will allow you to easily prepare them when you’re ready to eat.
When you are ready to reheat, simply place the recipe in a large pot on the stove and heat over medium-low. The meatballs are easy to make and perfect for a quick meal or snack.
Place the leftovers in an airtight container and keep them in the refrigerator until ready to serve again.
This recipe for Swedish Meatballs can be made in a Ninja Foodie the same way you will make them in the Instant Pot. Just follow the same instructions you see here. The recipe will work with any electric pressure cooker.
1. Look for meatballs that are well-seasoned and cooked through.
2. Look for top quality with natural ingredients and fewer fillers.
4. Store your frozen balls in a freezer bag or container so they stay fresh.
Swedish meatballs are a classic dish in Sweden, and they’re usually made with ground beef or pork. They’re typically very moist and tender, thanks to the use of bread crumbs as a binder. Swedish meatballs are also well-seasoned, which gives them a complex flavor profile that’s perfect for an Instant Pot recipe.
You can make Swedish meatball recipes using either ground beef or pork – either option will result in delicious results. And since these balls are so versatile, you can easily customize them by adding your favorite spices or herbs to the mix.
If you’re looking for an easy Instant Pot recipe that delivers big flavor profiles and is sure to please everyone in your household, look no further than Swedish meatball recipes!
No, you don’t have to cook the meatballs before putting them in an Instant Pot. You can simply mix everything together and let them cook in the Instant Pot.
Only cook the meatballs before putting them in the Instant Pot if you are not using pre-cooked, frozen meatballs.
It takes about 20 minutes to cook frozen meatballs in a pressure cooker.
The pressure cooker cooks the meatballs quickly and evenly, resulting in tender, delicious meatballs that are perfect for a quick meal. Simply add the frozen meatballs to the pressure cooker, set the timer, and let them cook until they’re ready to eat.
To make homemade meatballs from scratch, you’ll need ground beef, bread crumbs, onion, garlic, salt, and pepper.
Refrigerated meatballs will last for about four days. Make sure they don’t sit out at room temperature for more than 1 hour prior to refrigeration.
Yes, you can freeze these Swedish meatballs. Simply place them in a freezer-safe container and they will be good for up to 2 months.
No, you don’t have to saute the Instant Pot Swedish meatballs. You can simply place them in the Instant Pot with the other ingredients and press “cook”.
Teriyaki Chicken in the Instant Pot
I am currently using an 8-quart pot, but this recipe can be made in the 6-quart pot too. If you have one of the smaller versions (3-quart mini), I recommend cutting this recipe in half.
If you love this easy Swedish Meatball recipe, you’re going to love these other easy dinners too. Please click each link below to find the easy, printable recipe!


20-Minute Pepper Jelly Meatballs
Slow Cooker Blueberry Honey Garlic Meatballs
Slow Cooker Sweet and Sour Meatballs
Italian Wedding Soup with Pork Meatballs
Instant Pot Spaghetti and Meatballs
Oven-Baked Meatball Sandwiches

If you love this recipe for Homemade Swedish Meatballs as much as I do, please write a five-star review, and be sure to help me share on Facebook and Pinterest!

CONNECT WITH YUMMI HAUS!
Be sure to follow me on my social media, so you never miss a post!

Looking for fun and easy Halloween treats to make with your kids? Check out this recipe for spooky Halloween Cookie Dough!
The best part is that you can eat it right out of the bowl – no baking required! So get creative and have some fun with your Halloween goodies this year.
The best part is that you can make this ahead of time, and serve it up in individual portions for guests and it takes all the fuss out of party planning and prep. Plus – everyone LOVES snacking on cookie dough.
View postLooking for fun and easy Halloween treats to make with your kids? These Halloween Oreo Balls are perfect! They’re simple to make and delicious too. Plus, they’re perfect for any Halloween party. Give them a try this year!
Halloween is right around the corner, so that means it’s time to start planning your party menu! These spooky Oreo balls will be a hit with all of your guests. They’re easy to make and they taste delicious.
So get started on your Halloween party planning now and add these oreo balls to the list. You know you need to add these Halloween Oreo Ball Truffles to that list.
They are sure to add a little fright to any party! Made with chocolate and Oreos, they’re also perfect for trick or treating.
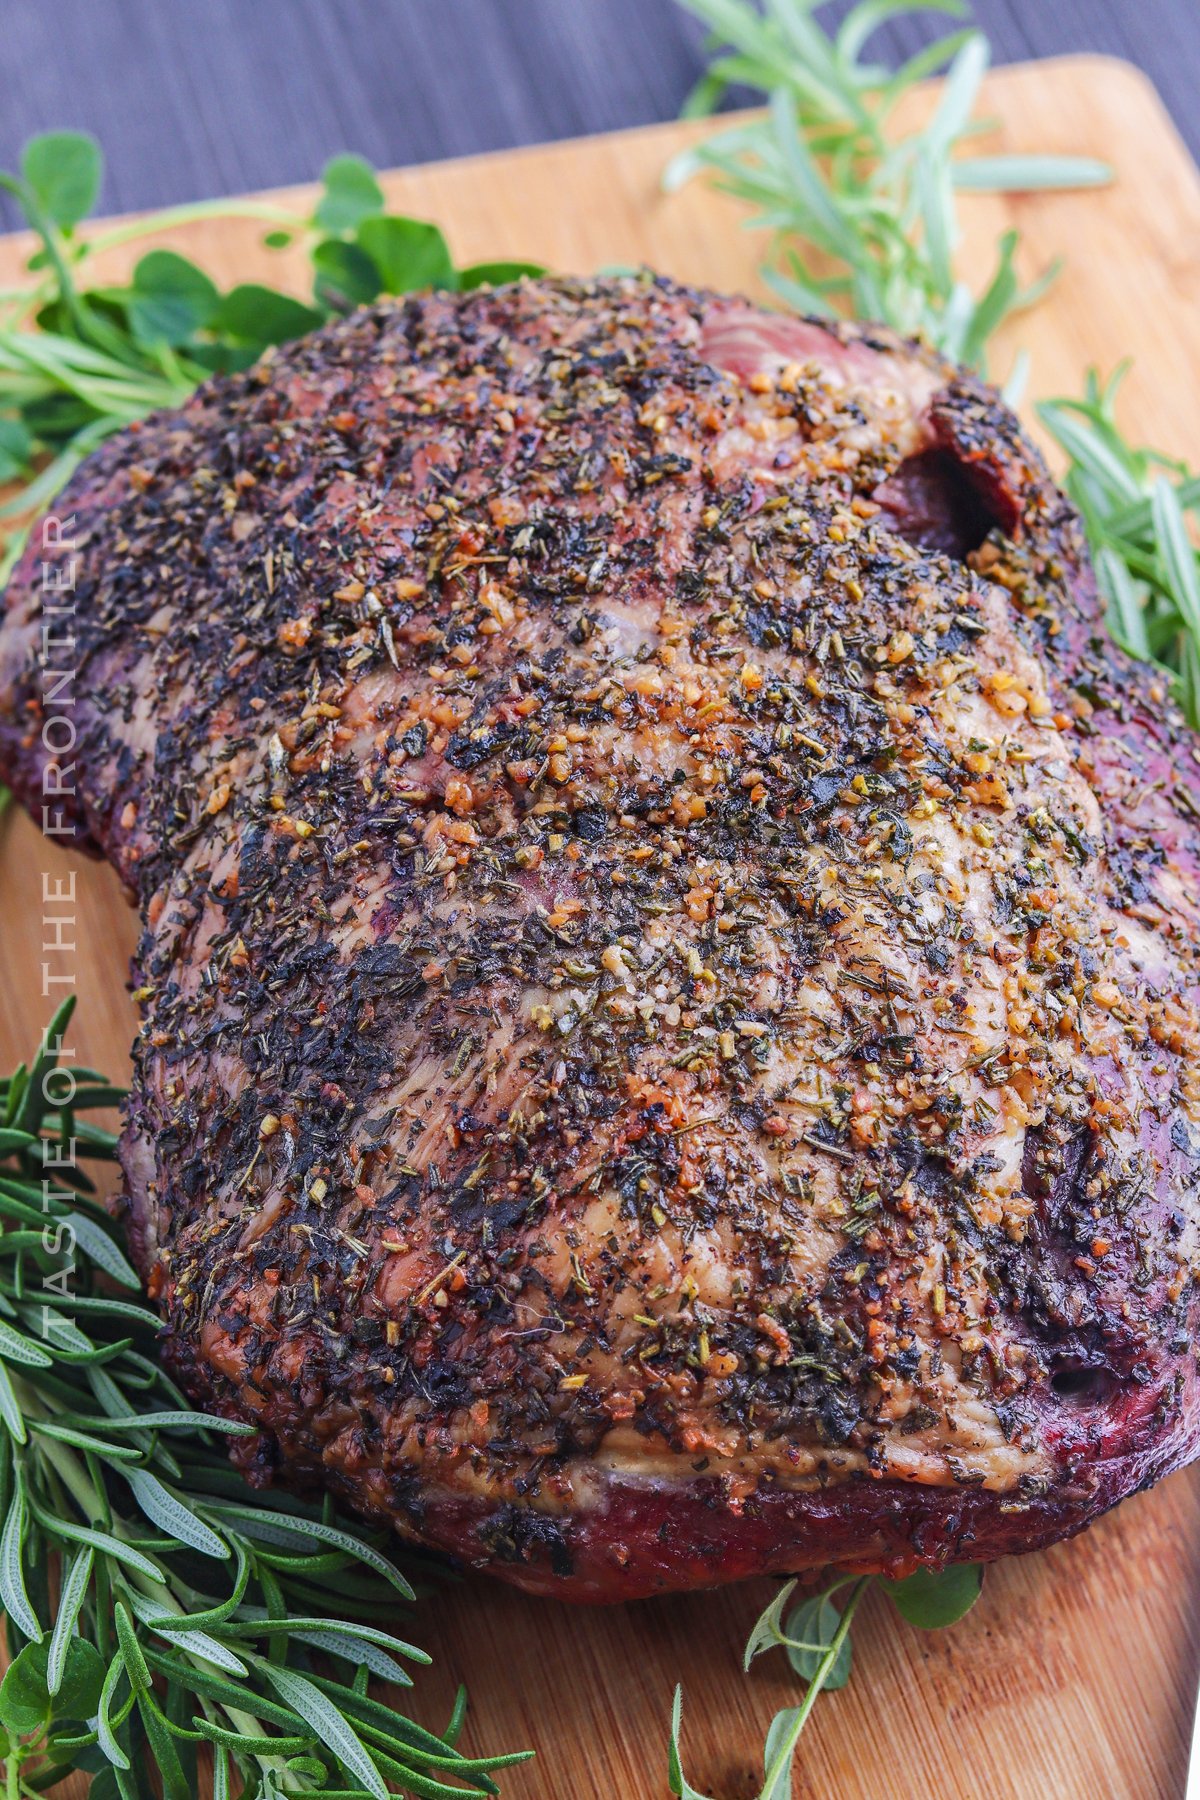
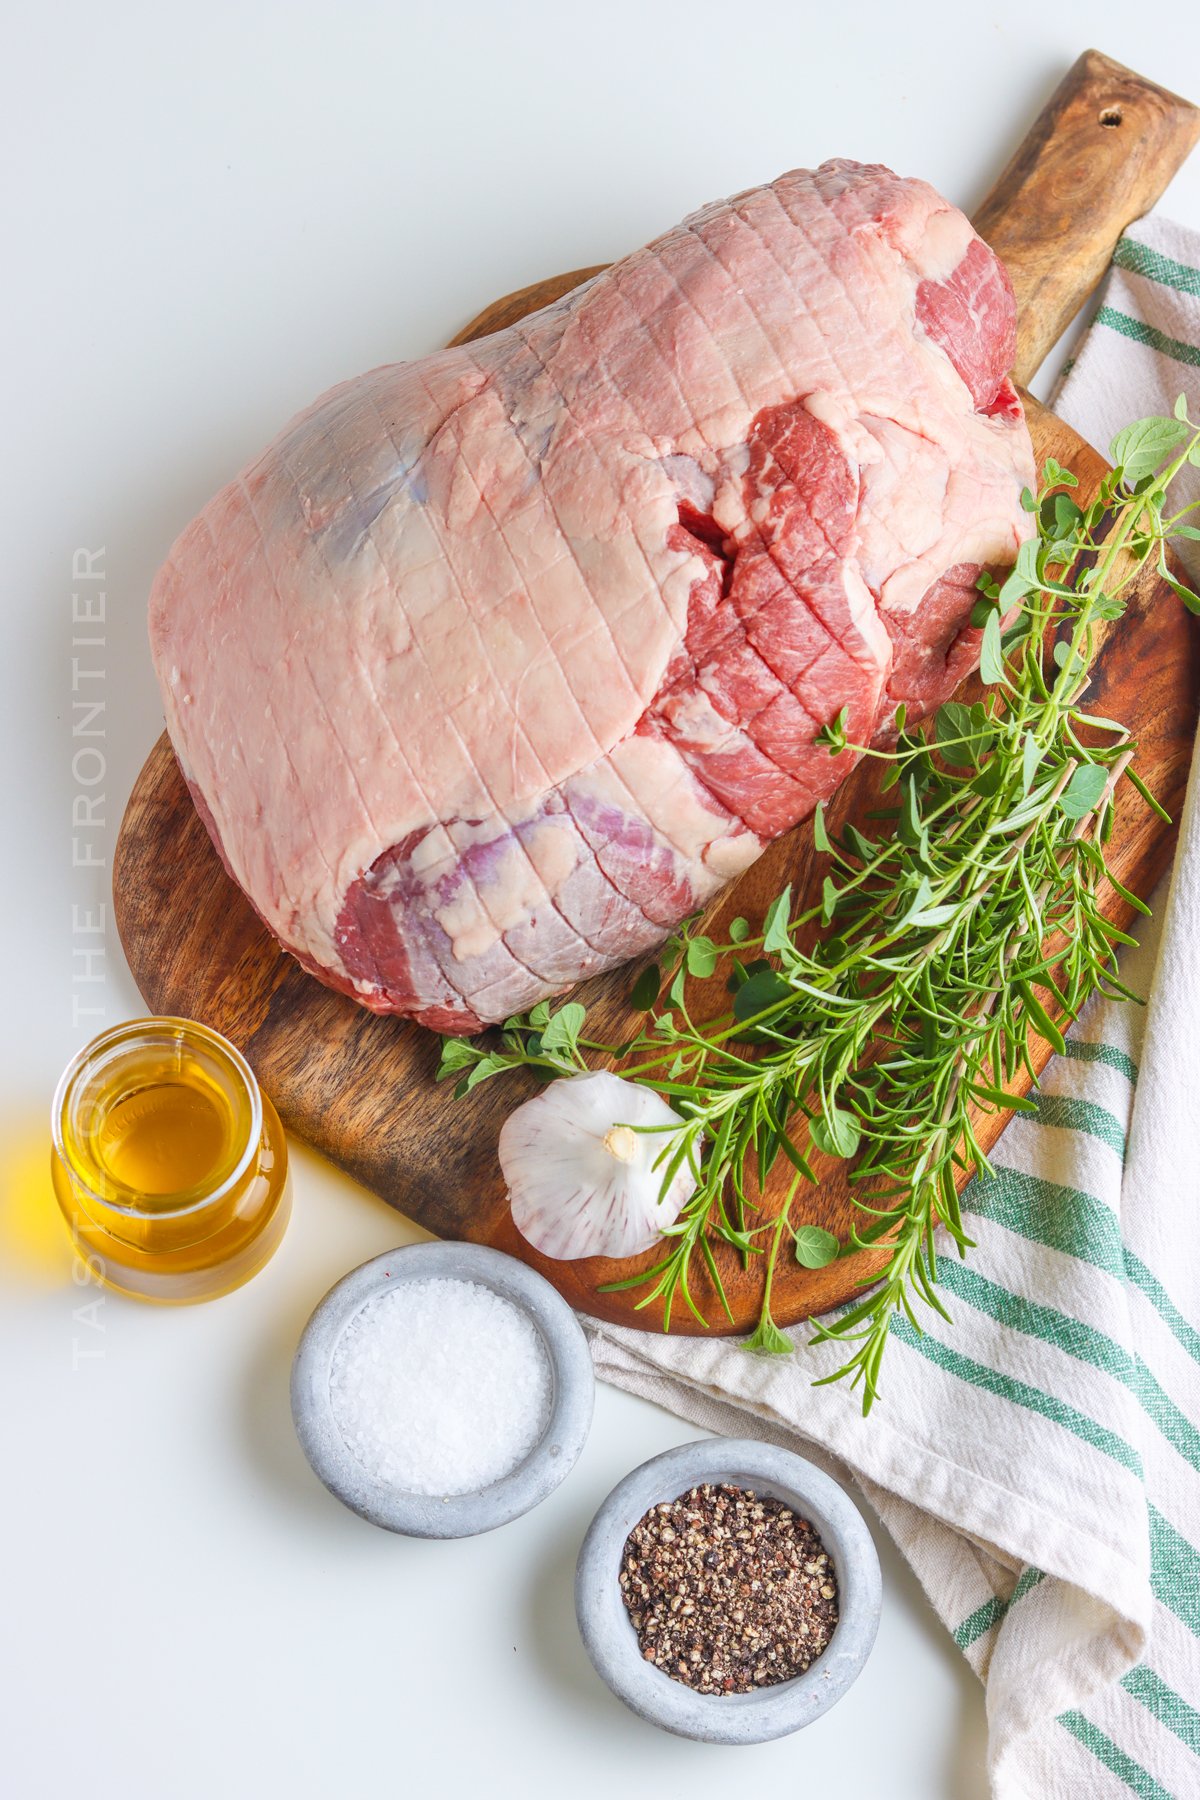
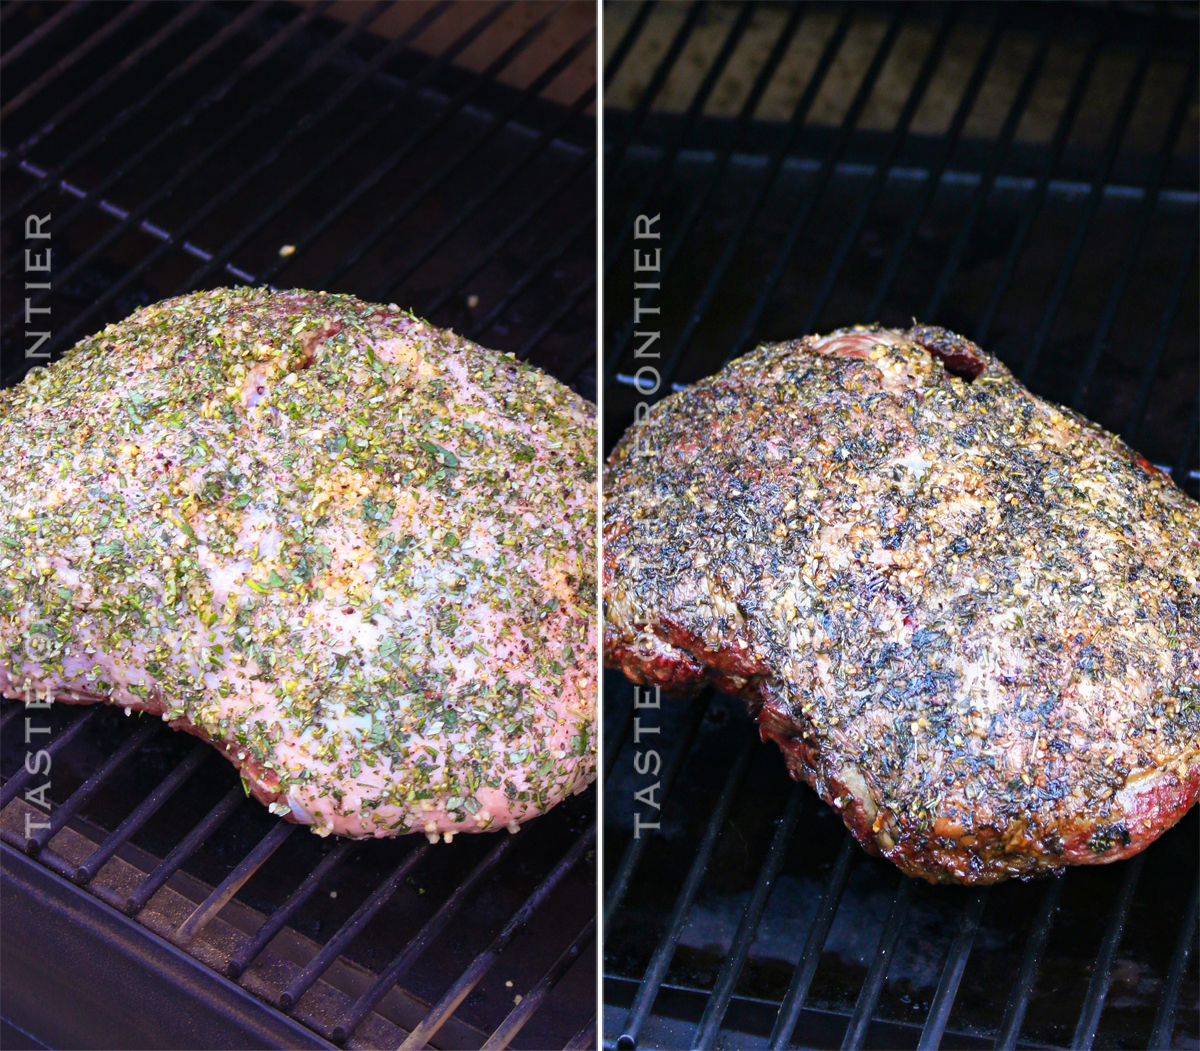
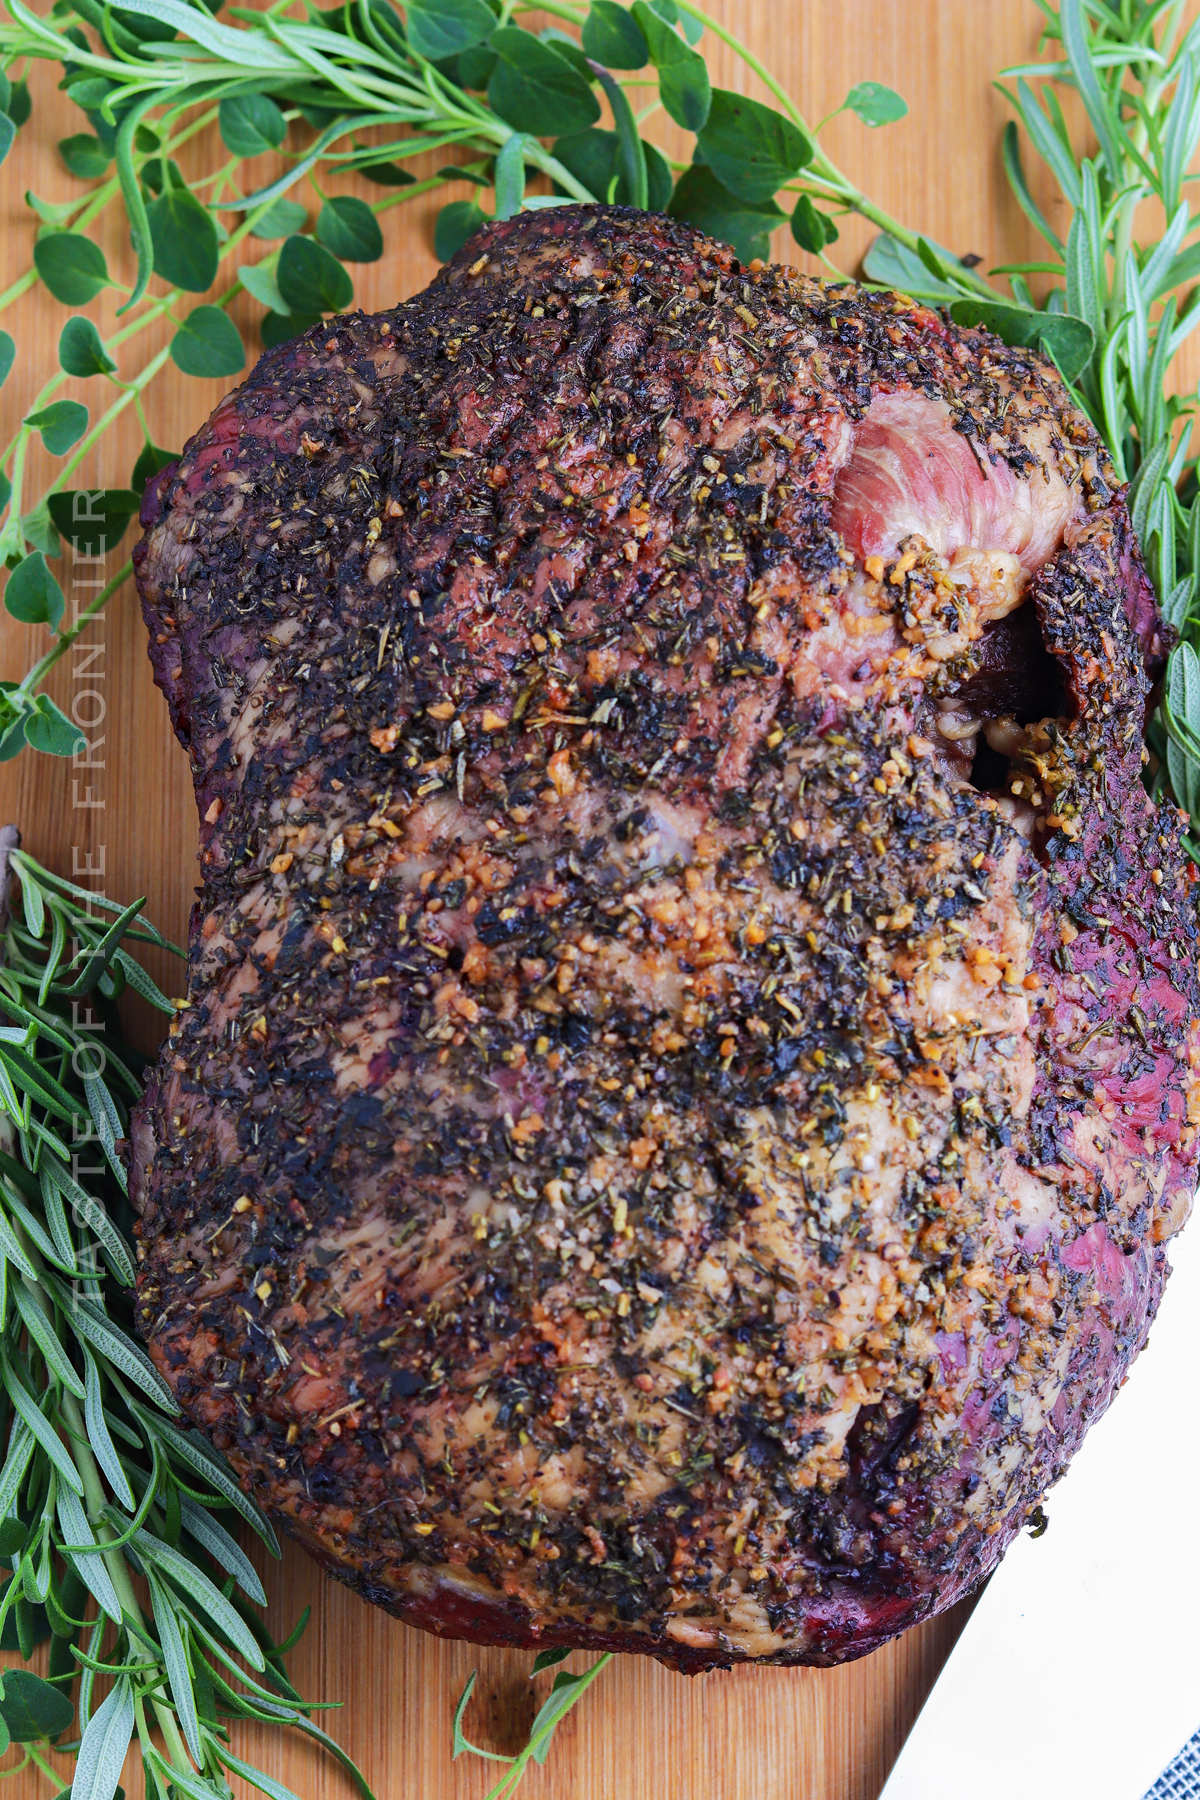
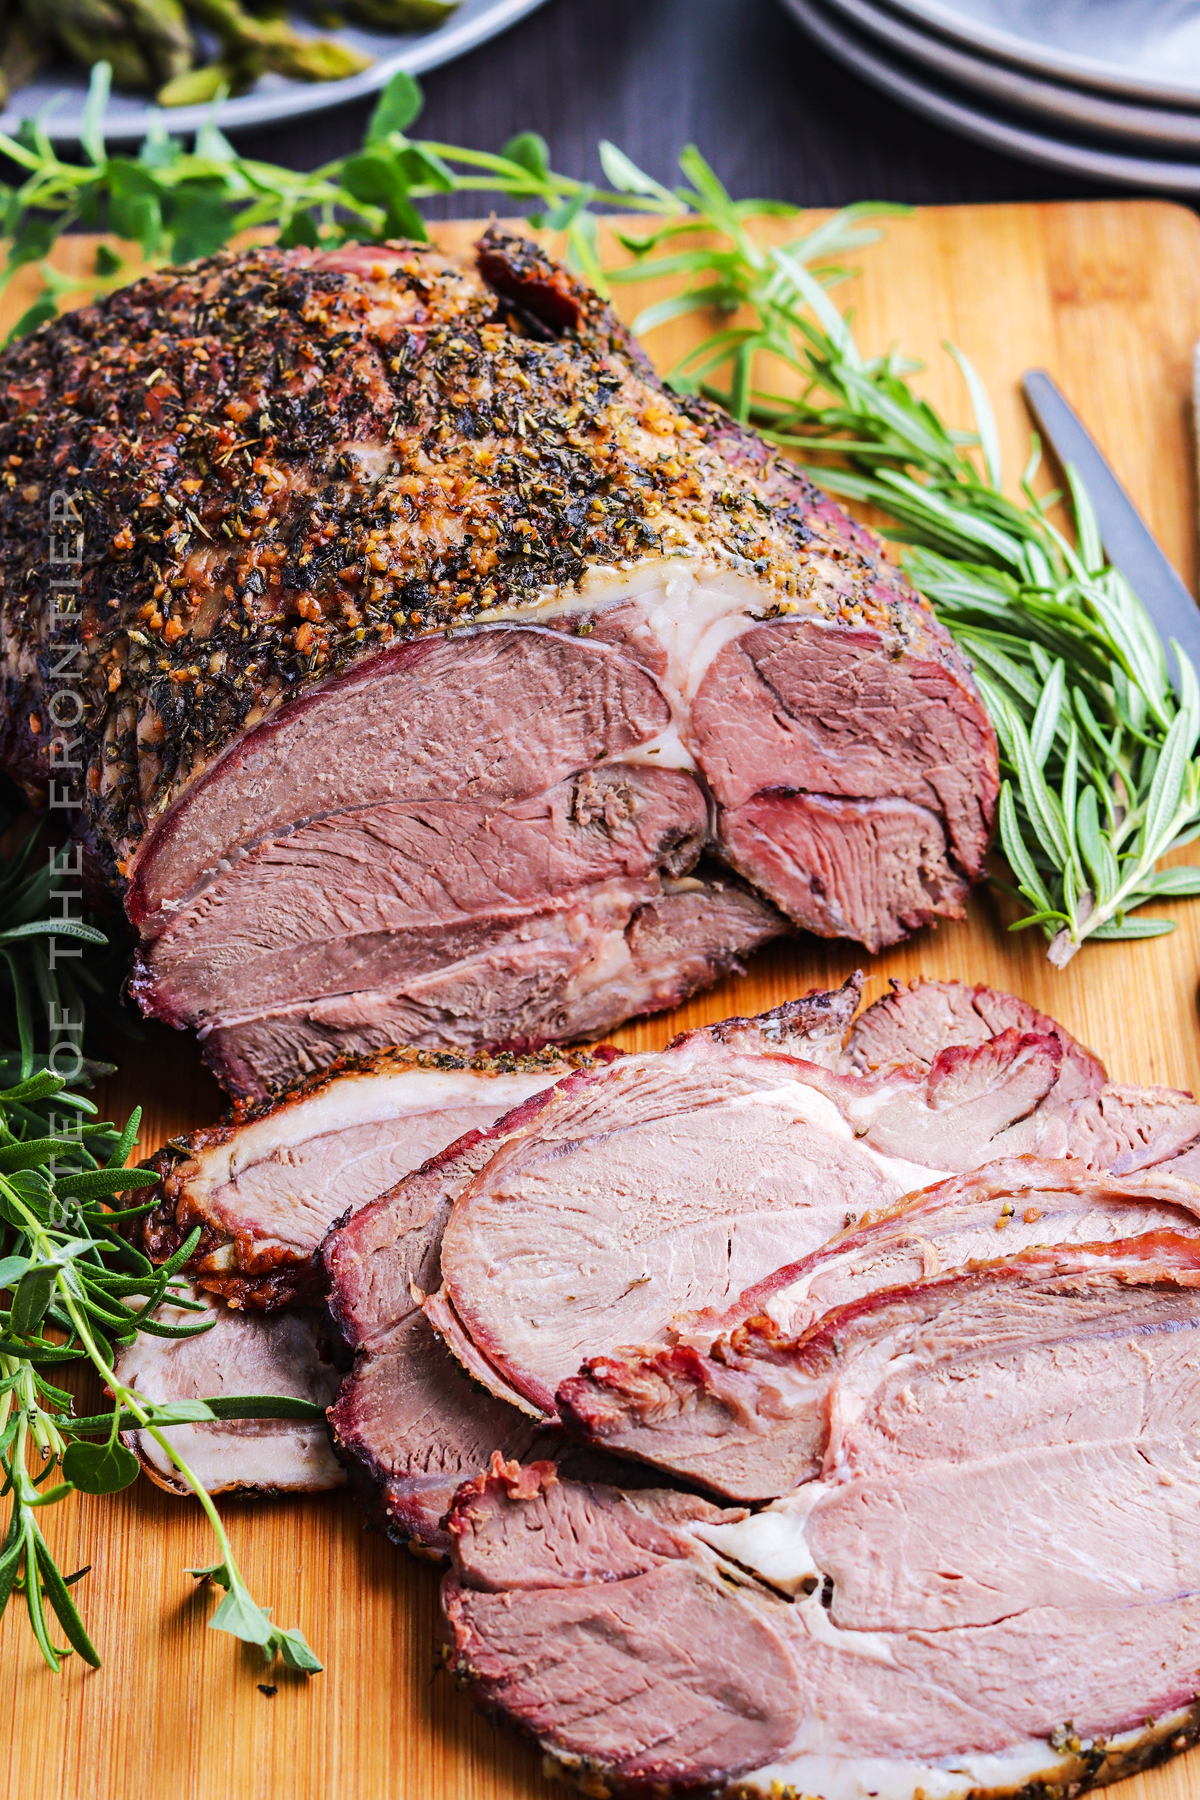
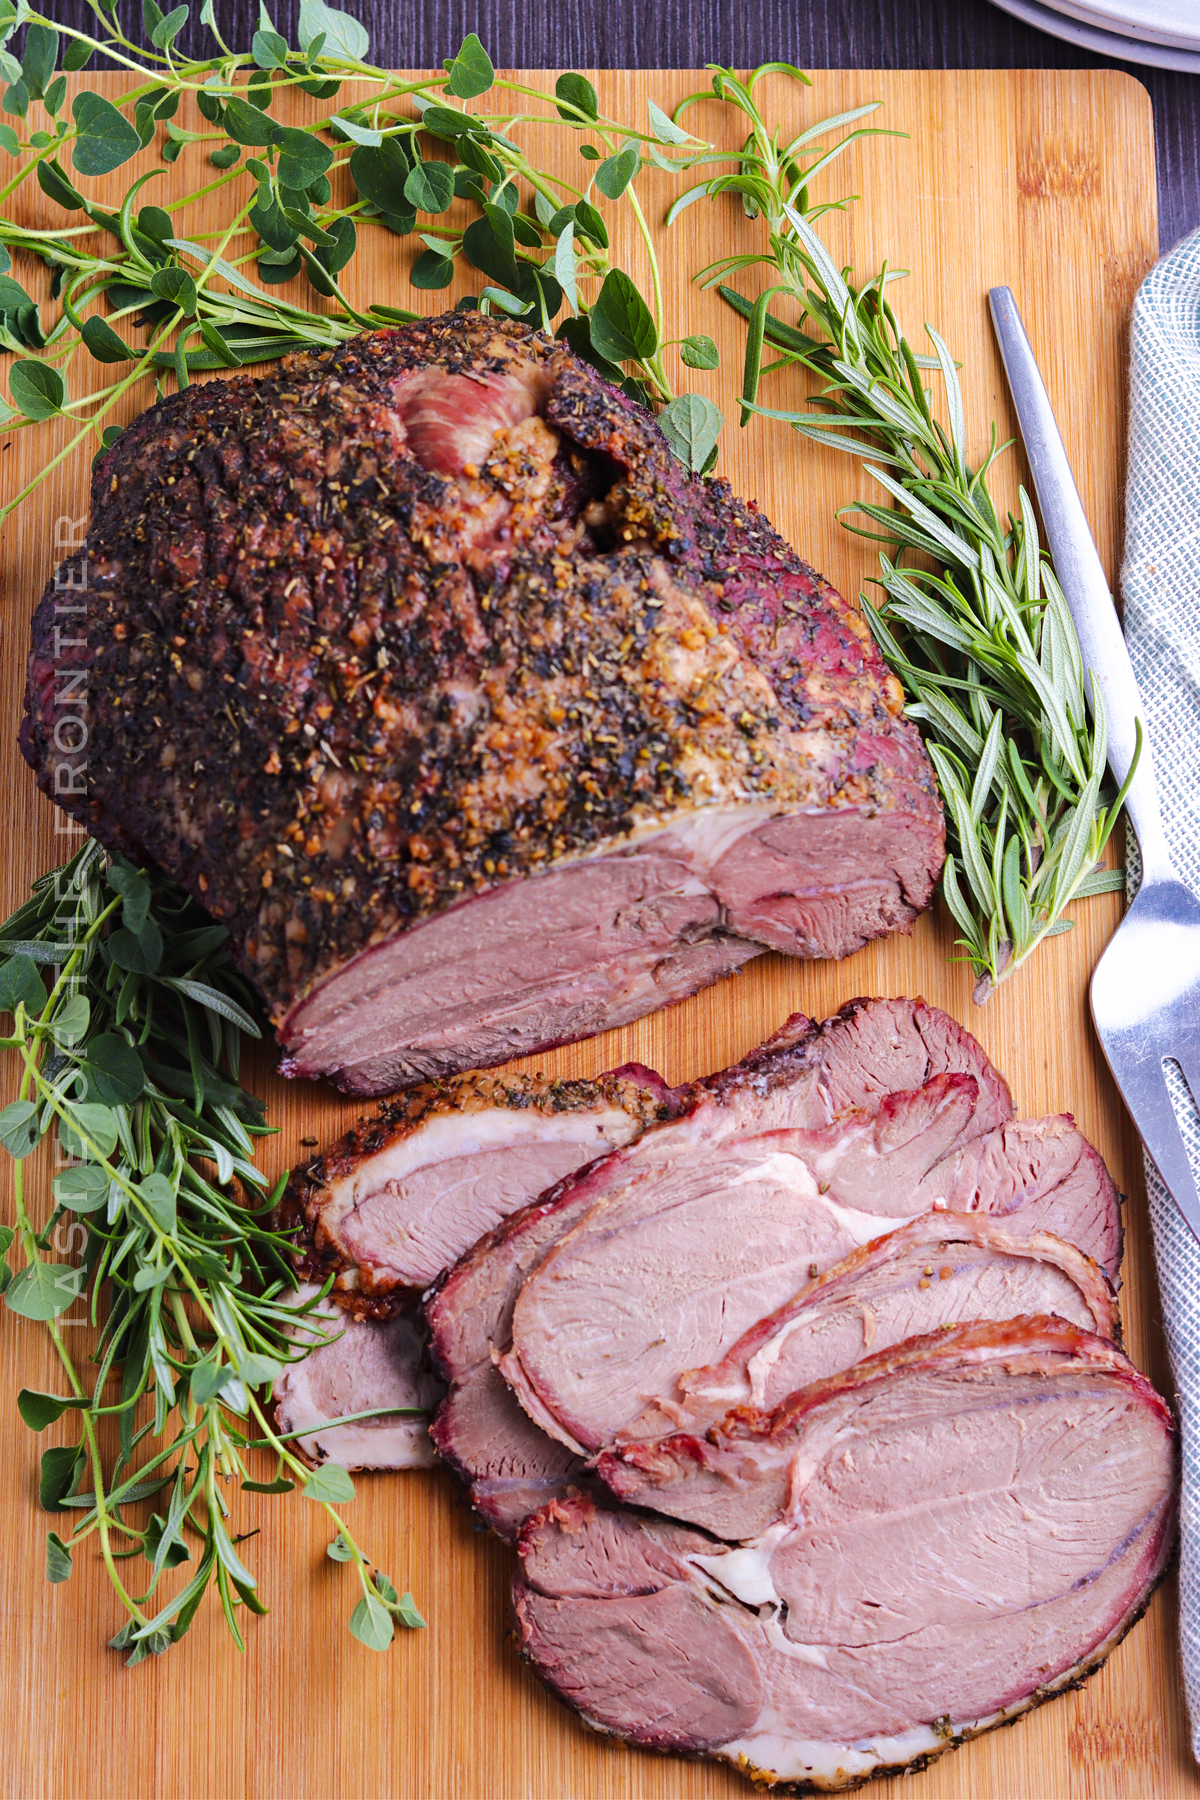
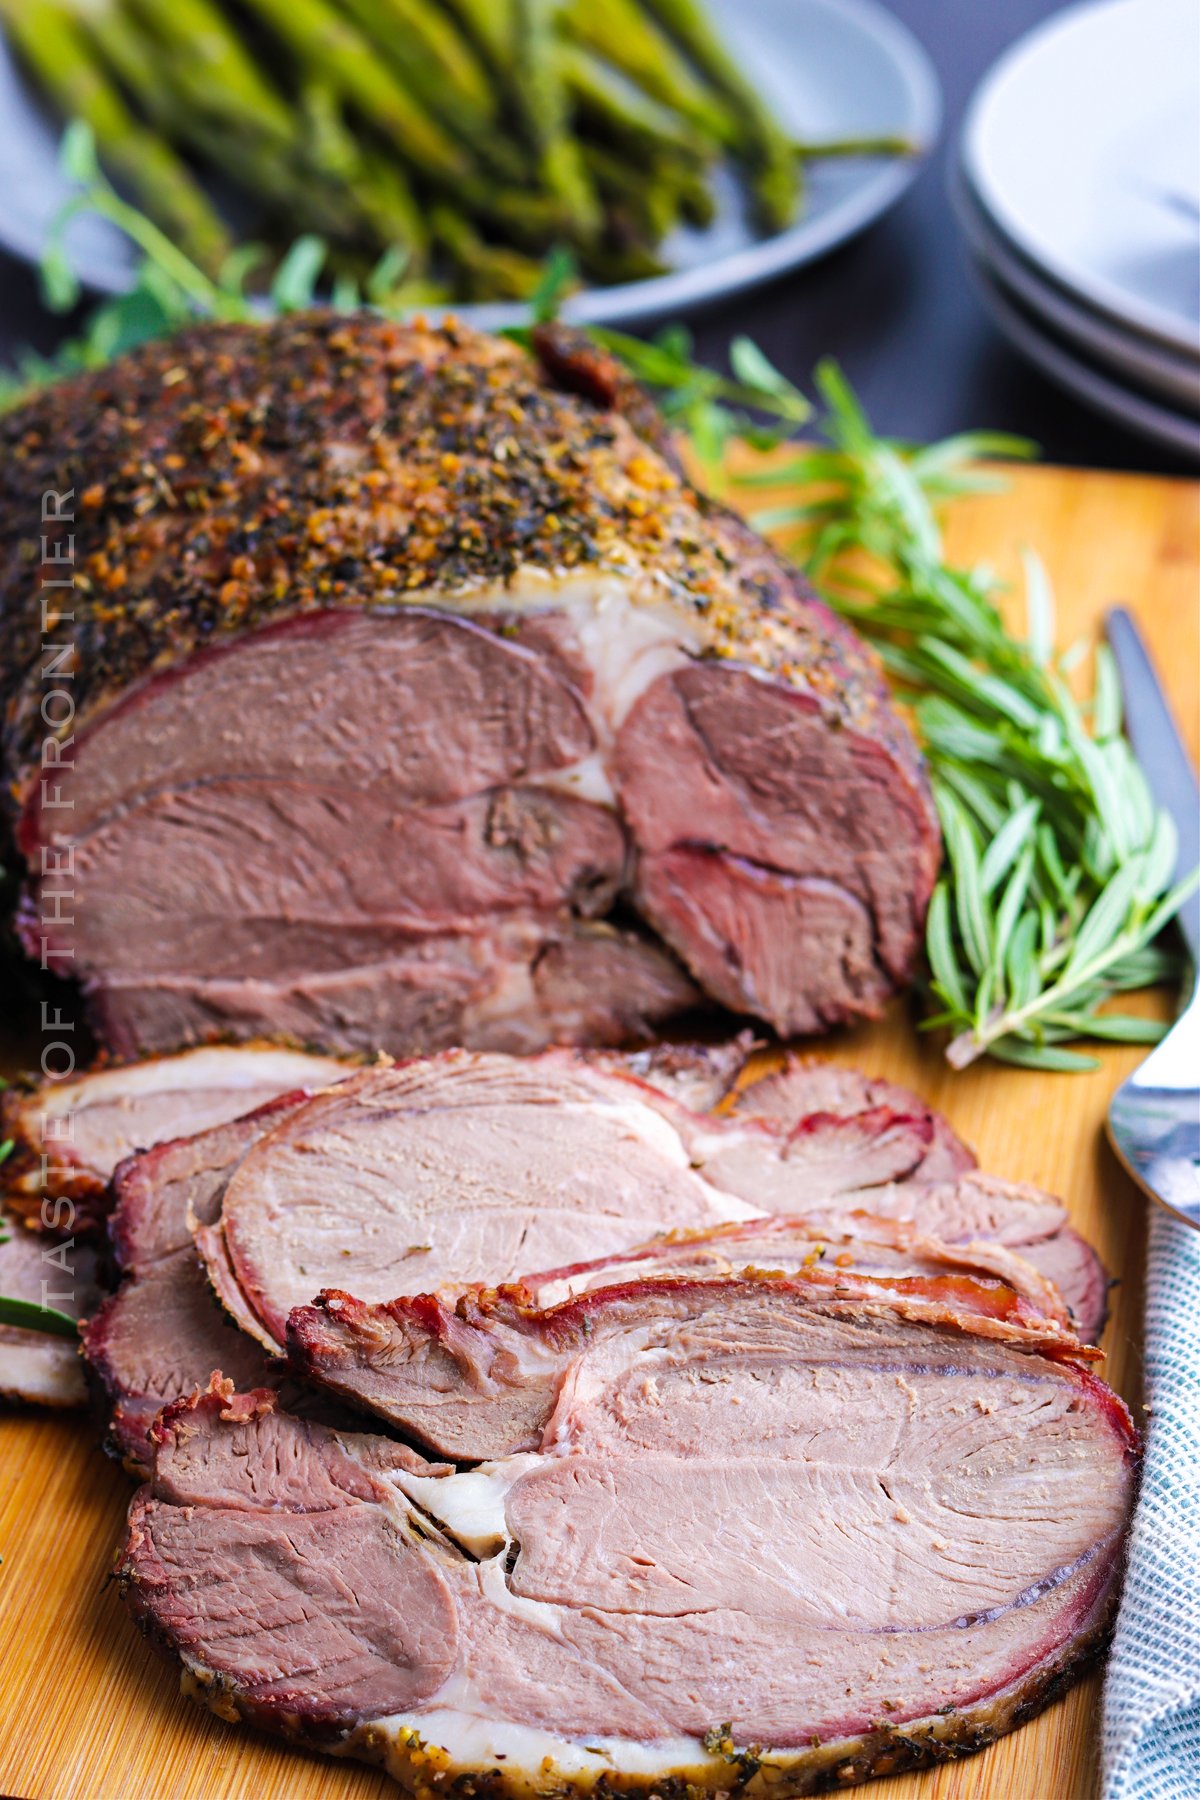
If you’re looking for an impressive dish to serve your guests, look no further than Smoked Boneless Leg of Lamb. This succulent and flavourful meat is perfect for special occasions, and it’s surprisingly easy to prepare at home.
All you need is a smoker, some basic ingredients, and a little bit of patience. This is one of the easiest things to make using the smoker. It takes very little time and the results are incredible!
So why not give smoked boneless leg of lamb a try? You won’t be disappointed. I guarantee your guests will love it!

Is there anything more luxurious than a smoked leg of lamb? This recipe is perfect for a special occasion – the smoky, herby flavor is absolutely delicious.
Best of all, it’s really easy to make – you just need a smoker or pellet grill. So why not treat yourself and your family to this amazing dish? Bon appetit!
A boneless leg of lamb is a type of meat that has been cut from the lower part of the lamb’s thigh. The lower part of a lamb’s thigh is where most muscle and fat are located. This makes it an ideal choice for smoking because it will be less fatty and more tender than other parts, such as the shoulder or rack.
Smoking a boneless leg of lamb can have a number of benefits, including adding flavor to the meat and making it more tender. Smoking also helps preserve the meat by removing water content and preventing spoilage.
After serving, place any leftover lamb in a shallow airtight container. Be sure to label with the date before refrigerating. This ham should keep for up to 5 days if not left out for too long. As with most things, it is important to get food into the refrigerator within 1 hour after serving to prevent bacteria growth.
Yes, you can freeze a boneless leg of lamb. Wrap the lamb tightly in plastic wrap or foil, then place it in a freezer-safe bag. Label the bag with the date and contents, then freeze for up to three months. When you’re ready to use the lamb, thaw it in the refrigerator overnight before cooking.
There are different types of smokers that can be used for smoking a boneless leg of lamb. The most common type of smoker is the Traeger or pellet grill, and this is a great option if you have access to one.
You can also use a charcoal grill if you want to cook your lamb this way. If you don’t have access to any type of smoker, you can cook your lamb in the oven.
I personally prefer using applewood or pecan for meats like this lamb. However – you can use whatever flavor you like depending on the overall flavor you are looking for.
You could always fill the hopper with a sweet pellet for the early smoke and then use something like hickory or mesquite for the finishing smoke.
Yes, you can make this with a bone-in leg of lamb. However, the cooking time will need to be adjusted accordingly. For a boneless leg of lamb, cook for 1 1/2 – 2 hours. For a bone-in leg of lamb, cook for 2 – 3 hours.
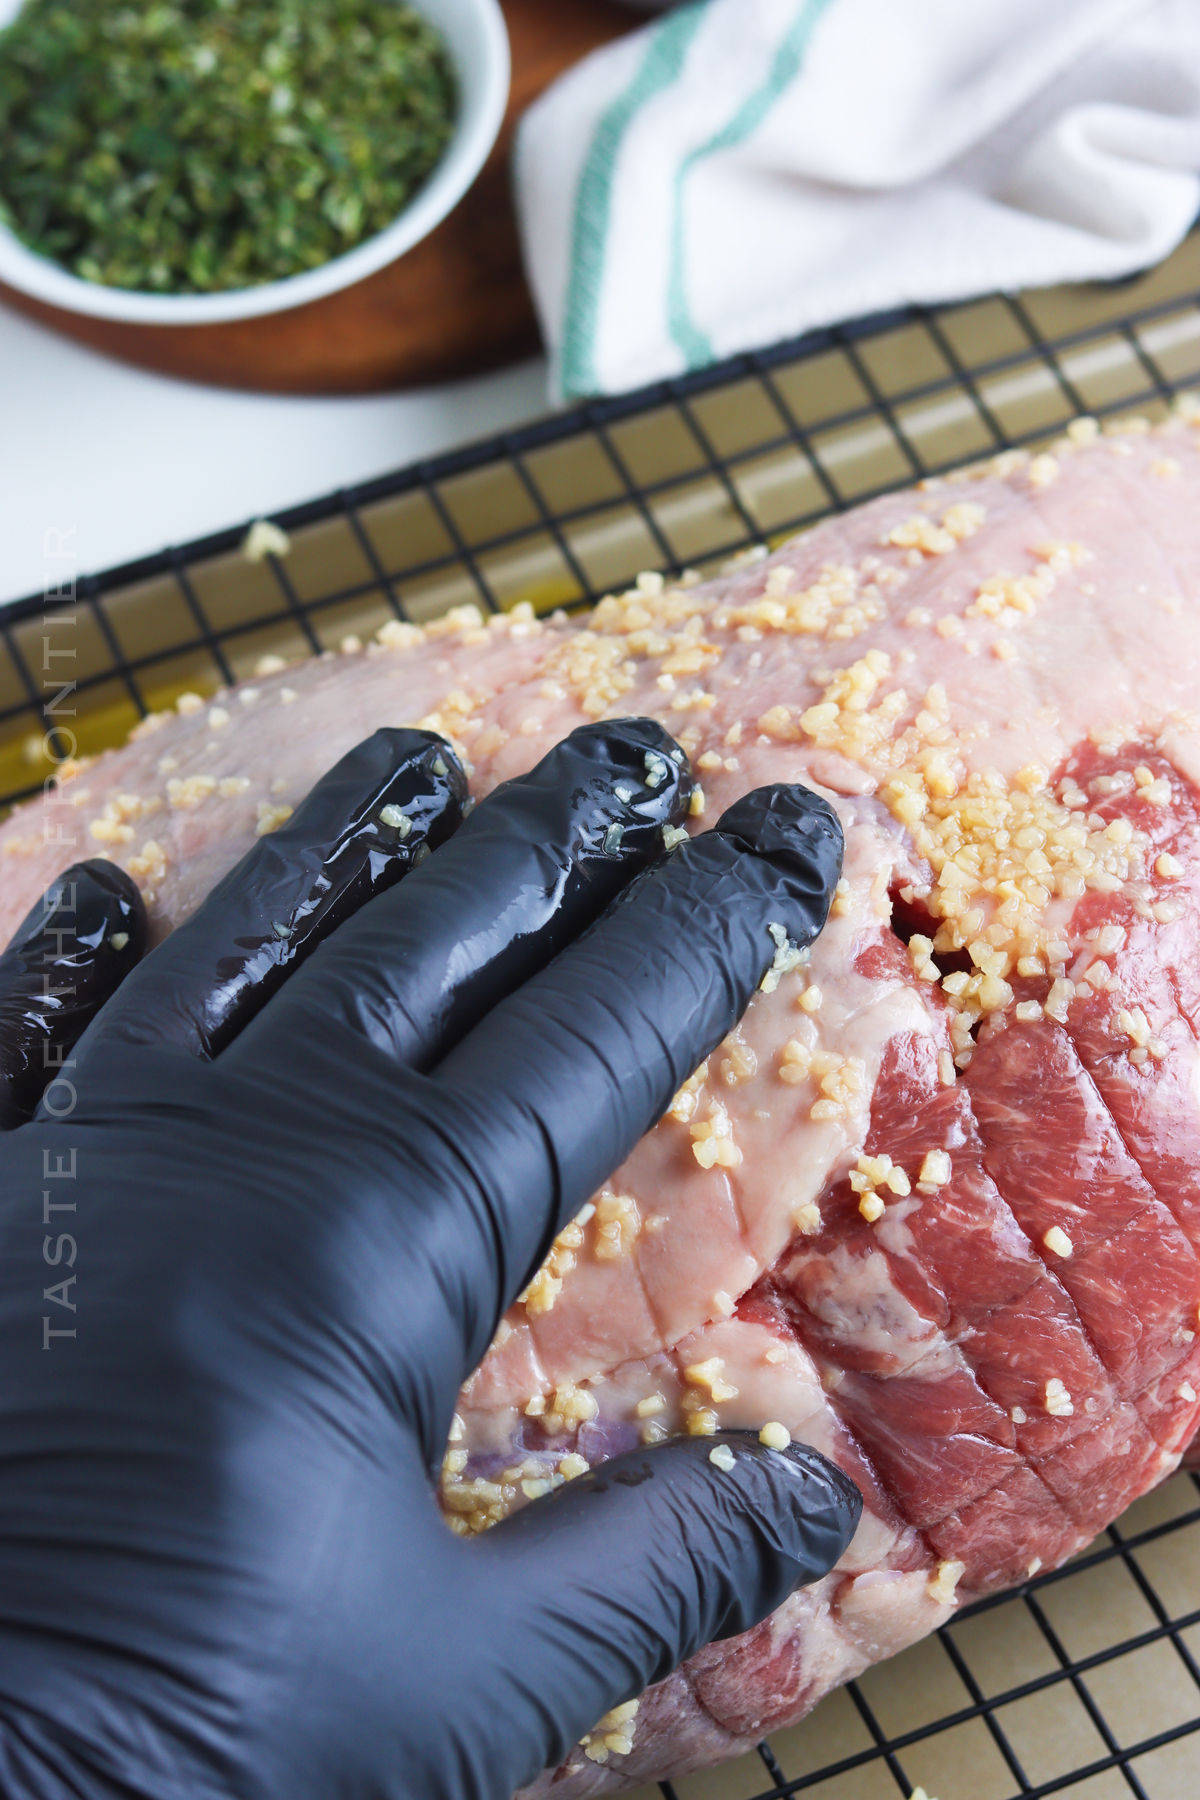
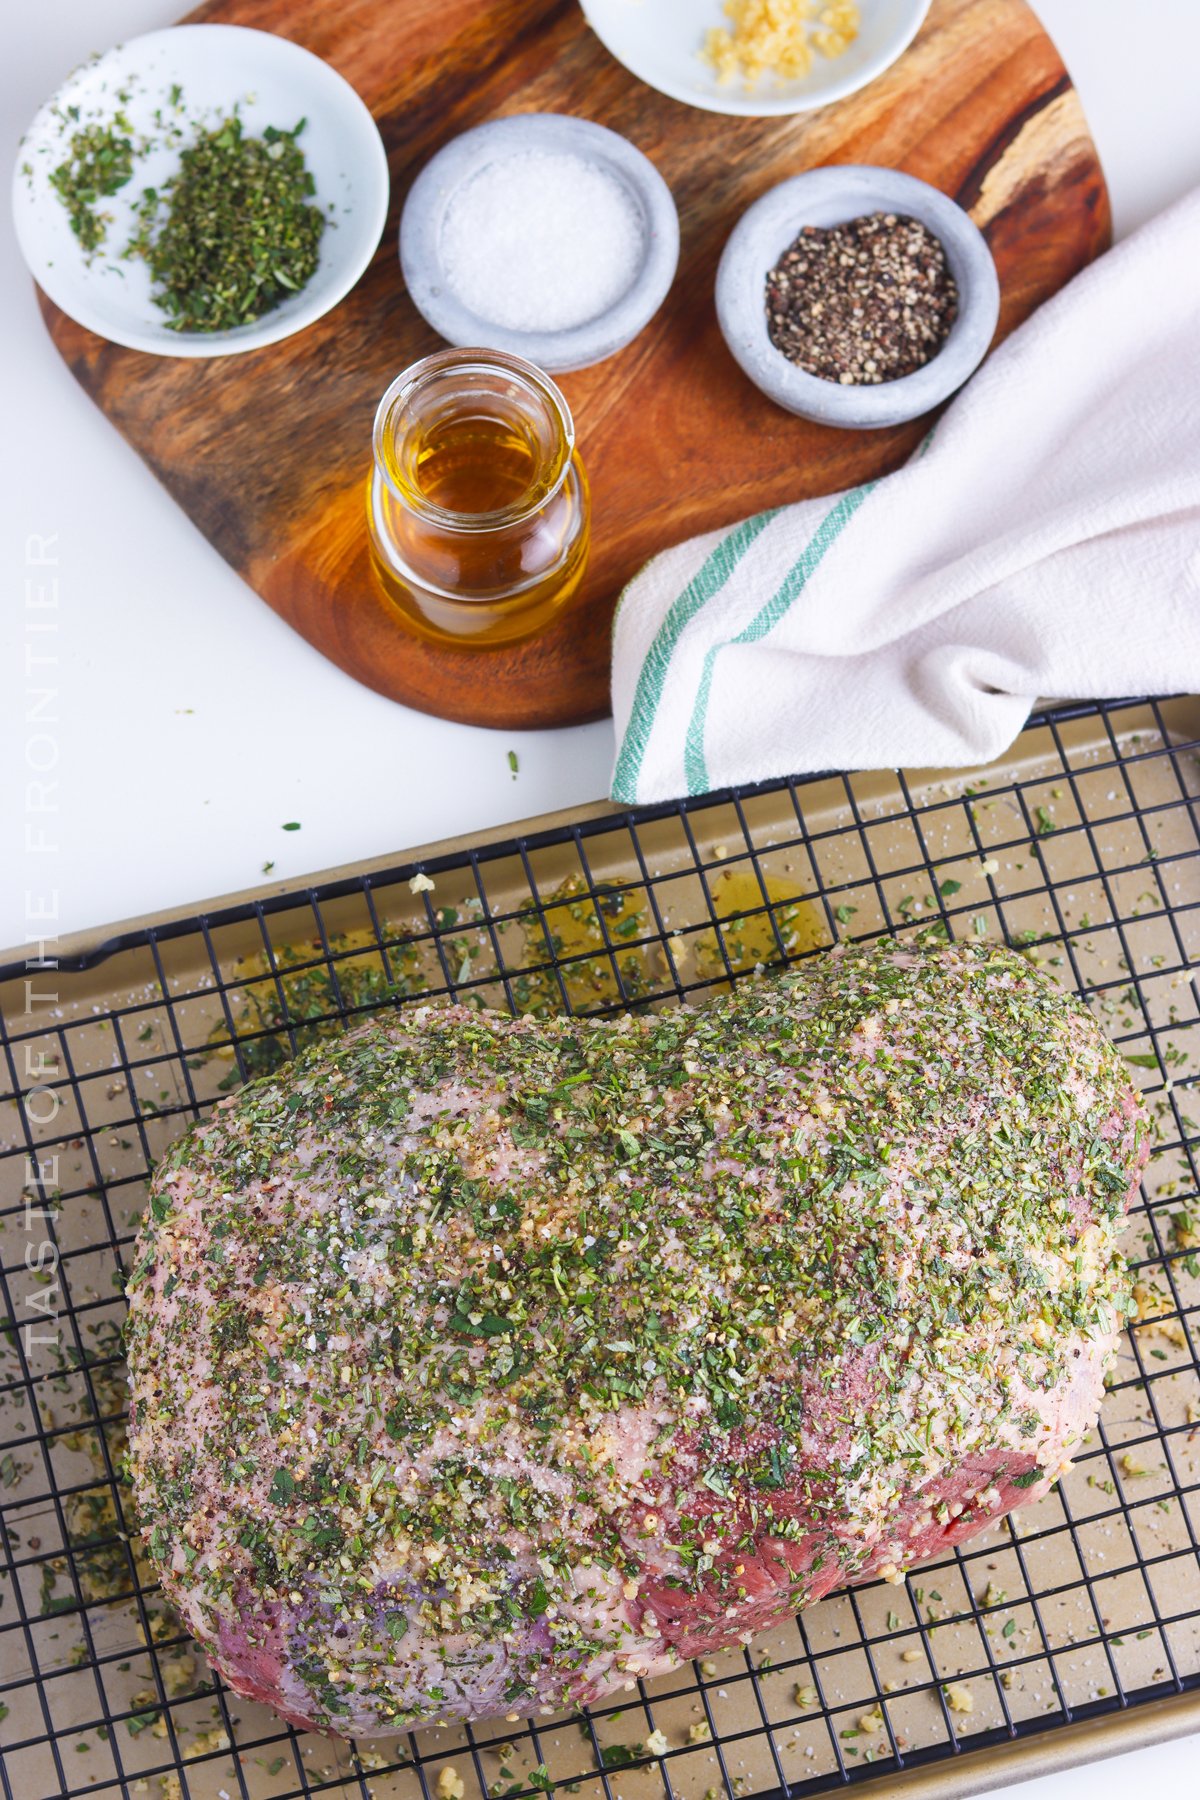
Smoking a boneless leg of lamb is an easy way to add some delicious flavor to your meal. Many different seasonings can be added to accentuate the taste, and each one will bring its own unique twist.
Some popular choices include rosemary, thyme, and pepper; all of which work well together in enhancing the Lamb’s natural flavors. Experiment with various combinations until you find what you like best!
Boneless Traeger smoked lamb leg is great because it’s easy to smoke. It doesn’t require any fancy preparations or cooking times, so you can cook it quickly and easily on your smoker.
Smoking is a great way to cook food, and boneless Traeger smoked lamb leg is perfect for smokers because it’s easy to smoke. You simply put the lamb leg in the smoker, set the temperature, and let it cook. There are no complicated preparations or cooking times required; just wait until the meat is cooked through.
I would say that most standing Traeger models can handle roasting a ham this size. We have the Pro 34 in blue & we take out the swinging rack from the lid when we make large things like this ham. I don’t think we could make this recipe on our portable Ranger model that we use for camping because the lid doesn’t give it enough space.
This recipe is so versatile you can serve it with just about anything. But here are some of our favorites.
Preheat the oven to 325°F. Place lamb in roasting pan. Rub garlic all over the surface of the lamb. Pour wine and water into the pan. Sprinkle rosemary, thyme, salt, and pepper over lamb.
Roast lamb for 1-1/2 to 2 hours or until internal temperature reaches 145°F. Remove lamb from the oven and let rest for 10 minutes before carving.
Some common side dishes that go well with smoked lamb are mashed potatoes, green beans, roasted vegetables, and couscous. For a more traditional meal, you can also serve the lamb with mint jelly or gravy.
I think you could reasonably fit 2 of these on any Traeger model. So doubling would be just fine – even on the camping model.
Lamb should be cooked to an internal temperature of 145 degrees Fahrenheit. Use a meat thermometer to check the temperature of the lamb before serving.
A general rule of thumb is to allow 1/2 pound of smoked lamb per person. However, this will vary depending on how the lamb is being served and what else is on the menu.
The best way to reheat a smoked lamb is in a 325-degree Fahrenheit oven. Place the lamb on a rack over a baking sheet and roast until the internal temperature reaches 145 degrees Fahrenheit. Let the meat rest for 5-10 minutes before slicing and serving.
Lamb is considered red meat because it comes from a mammal. The color of the meat can vary depending on the animal’s diet, but it is typically a darker shade of red than other meats like chicken or pork.
Lamb meat can have a gamey flavor, but this is typically more pronounced in older animals. The flavor can also be affected by the animal’s diet. Grass-fed lamb may have a milder flavor than lamb that has been fed grain.
DON’T MISS THESE HOLIDAY E-BOOKS!
This smoked lamb recipe is SUPER EASY and delicious – and if you’re like me, then you maybe already have some of these items on hand OR maybe you have never cooked on your smoker before, & you might be a bit nervous – but you’re going to love it. I have made a list below of the things I absolutely can’t live without when it comes to making this dinner recipe. (you can also SHOP MY FAVORITES in my store)
If you love this easy Traeger Boneless Leg of Lamb recipe, you’re going to love these other smoked main dish recipes too. Please click each link below to find the easy, printable recipe!


If you love this recipe for Smoked Boneless Leg of Lamb as much as I do, please write a five-star review, and be sure to help me share on Facebook and Pinterest!
CONNECT WITH YUMMI HAUS!
Be sure to follow me on my social media, so you never miss a post!
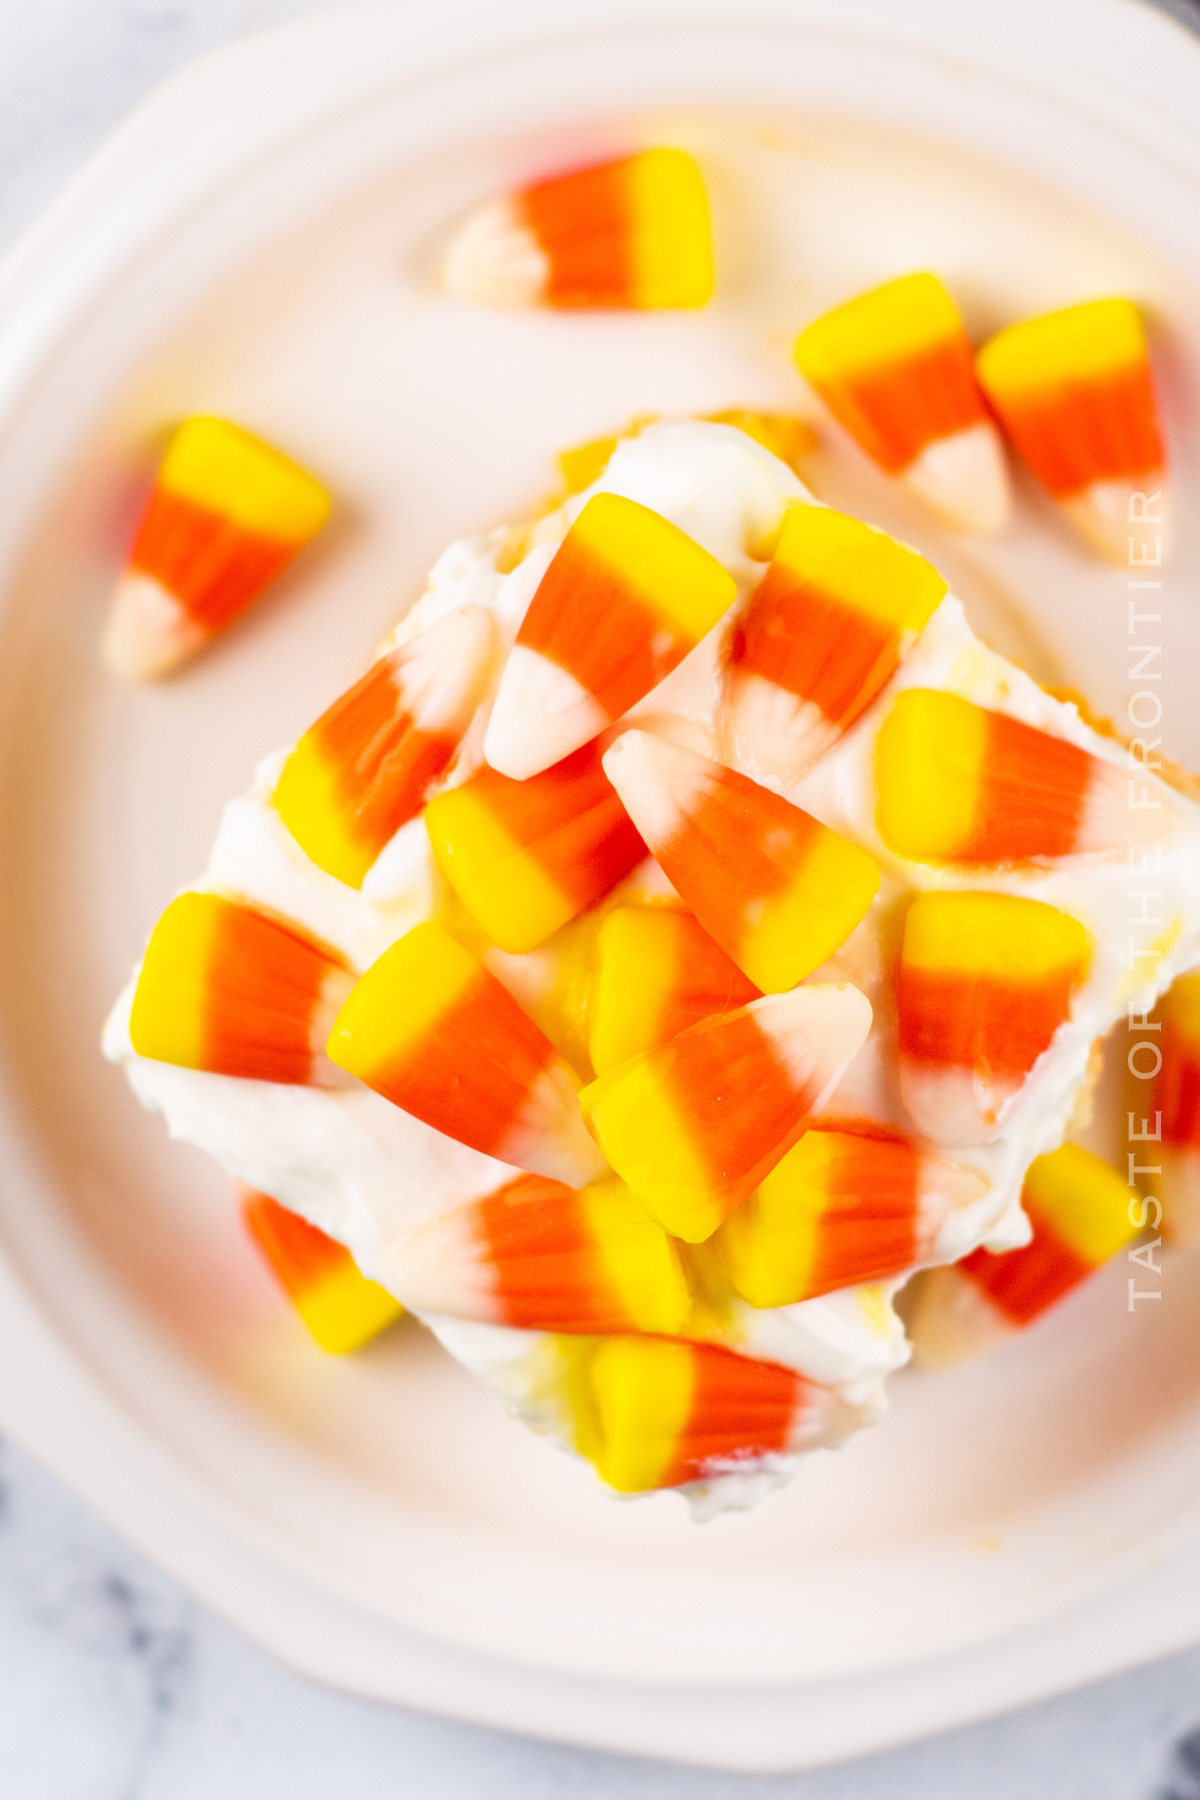
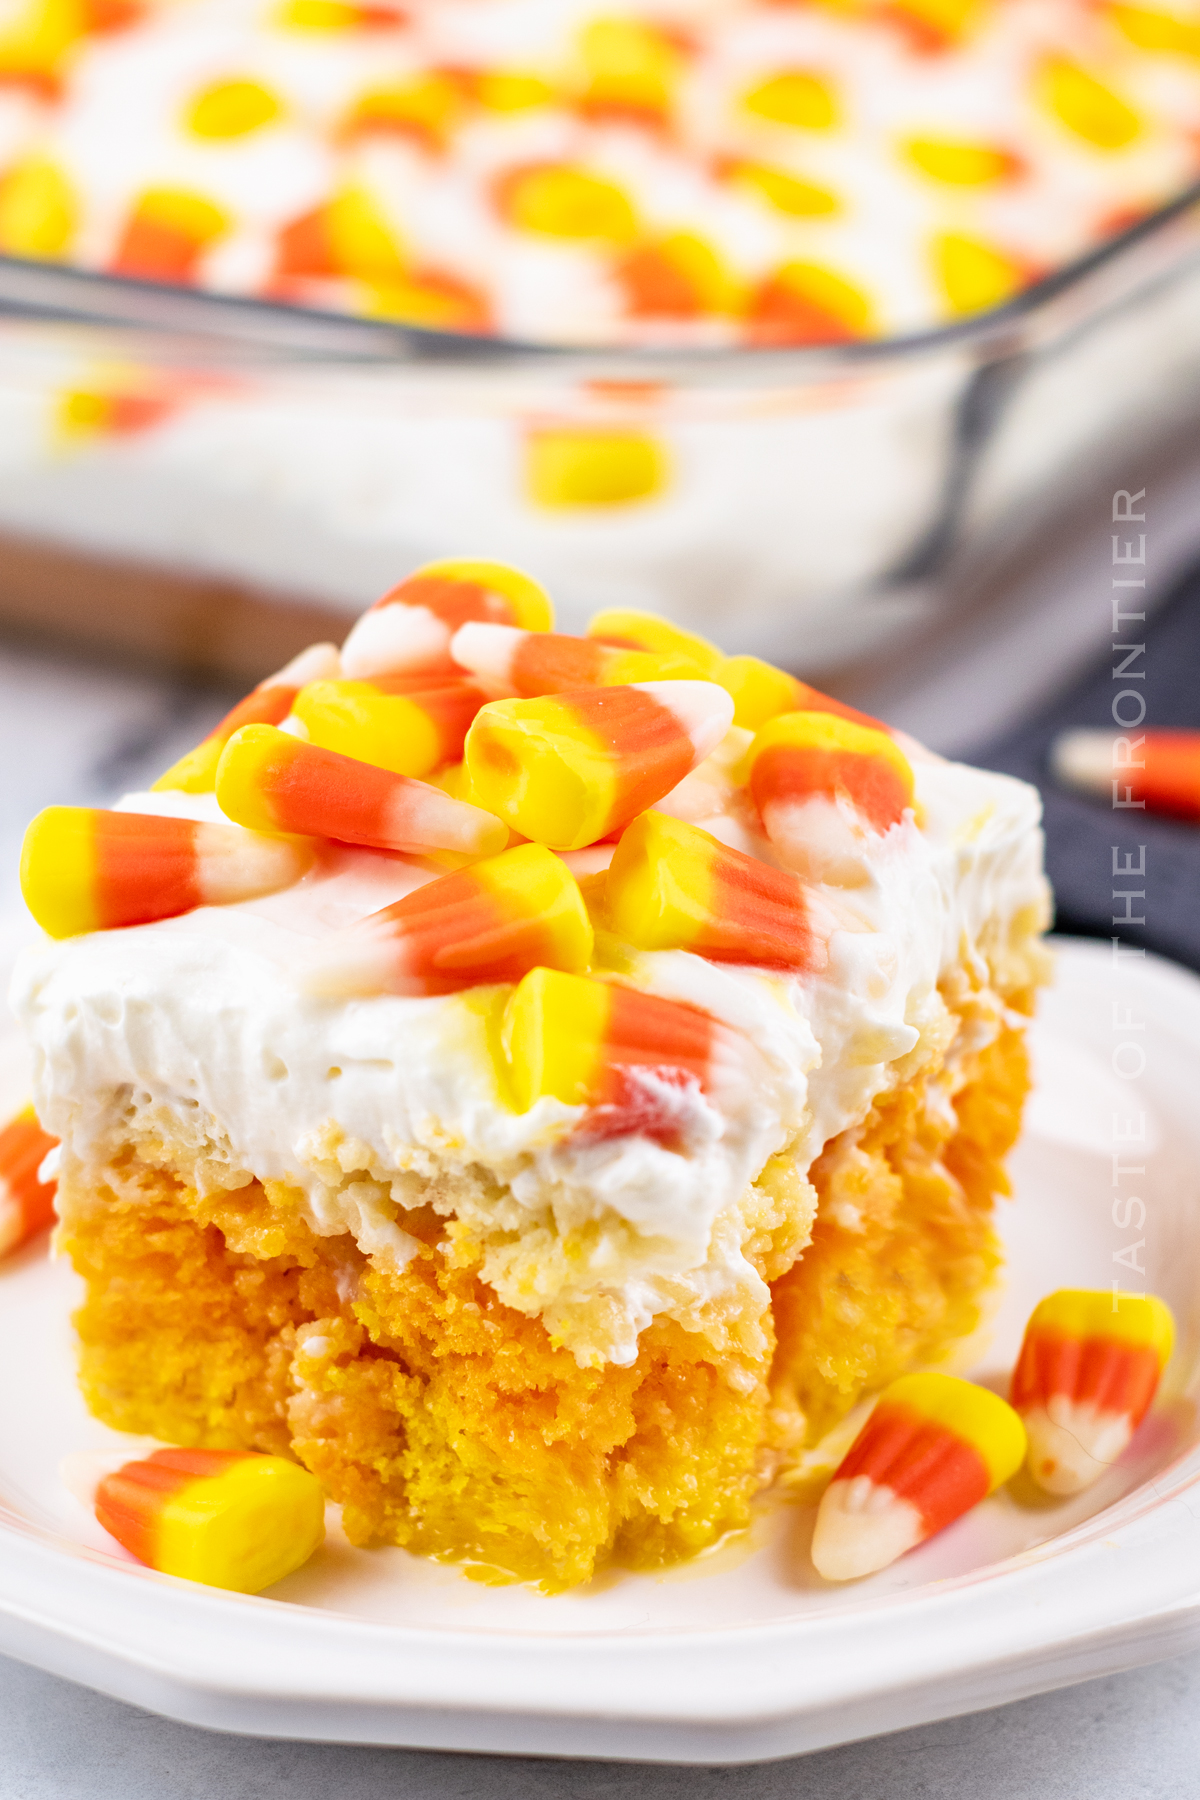
Looking for an easy and festive fall dessert? Look no further than this Candy Corn Poke Cake Recipe! It’s cute, sweet, and easy to make. Even novice cooks will have no trouble whipping it up. Serve it at your next party and watch it disappear in no time!
Do you love fun and festive desserts to celebrate Halloween? Look no further than this candy corn poke cake! This easy cake is made with yellow cake mix and a cream cheese frosting.
The colors of candy corn come together to create a delicious autumn treat. Topped with candy corn for a sweet and colorful dessert. Enjoy!
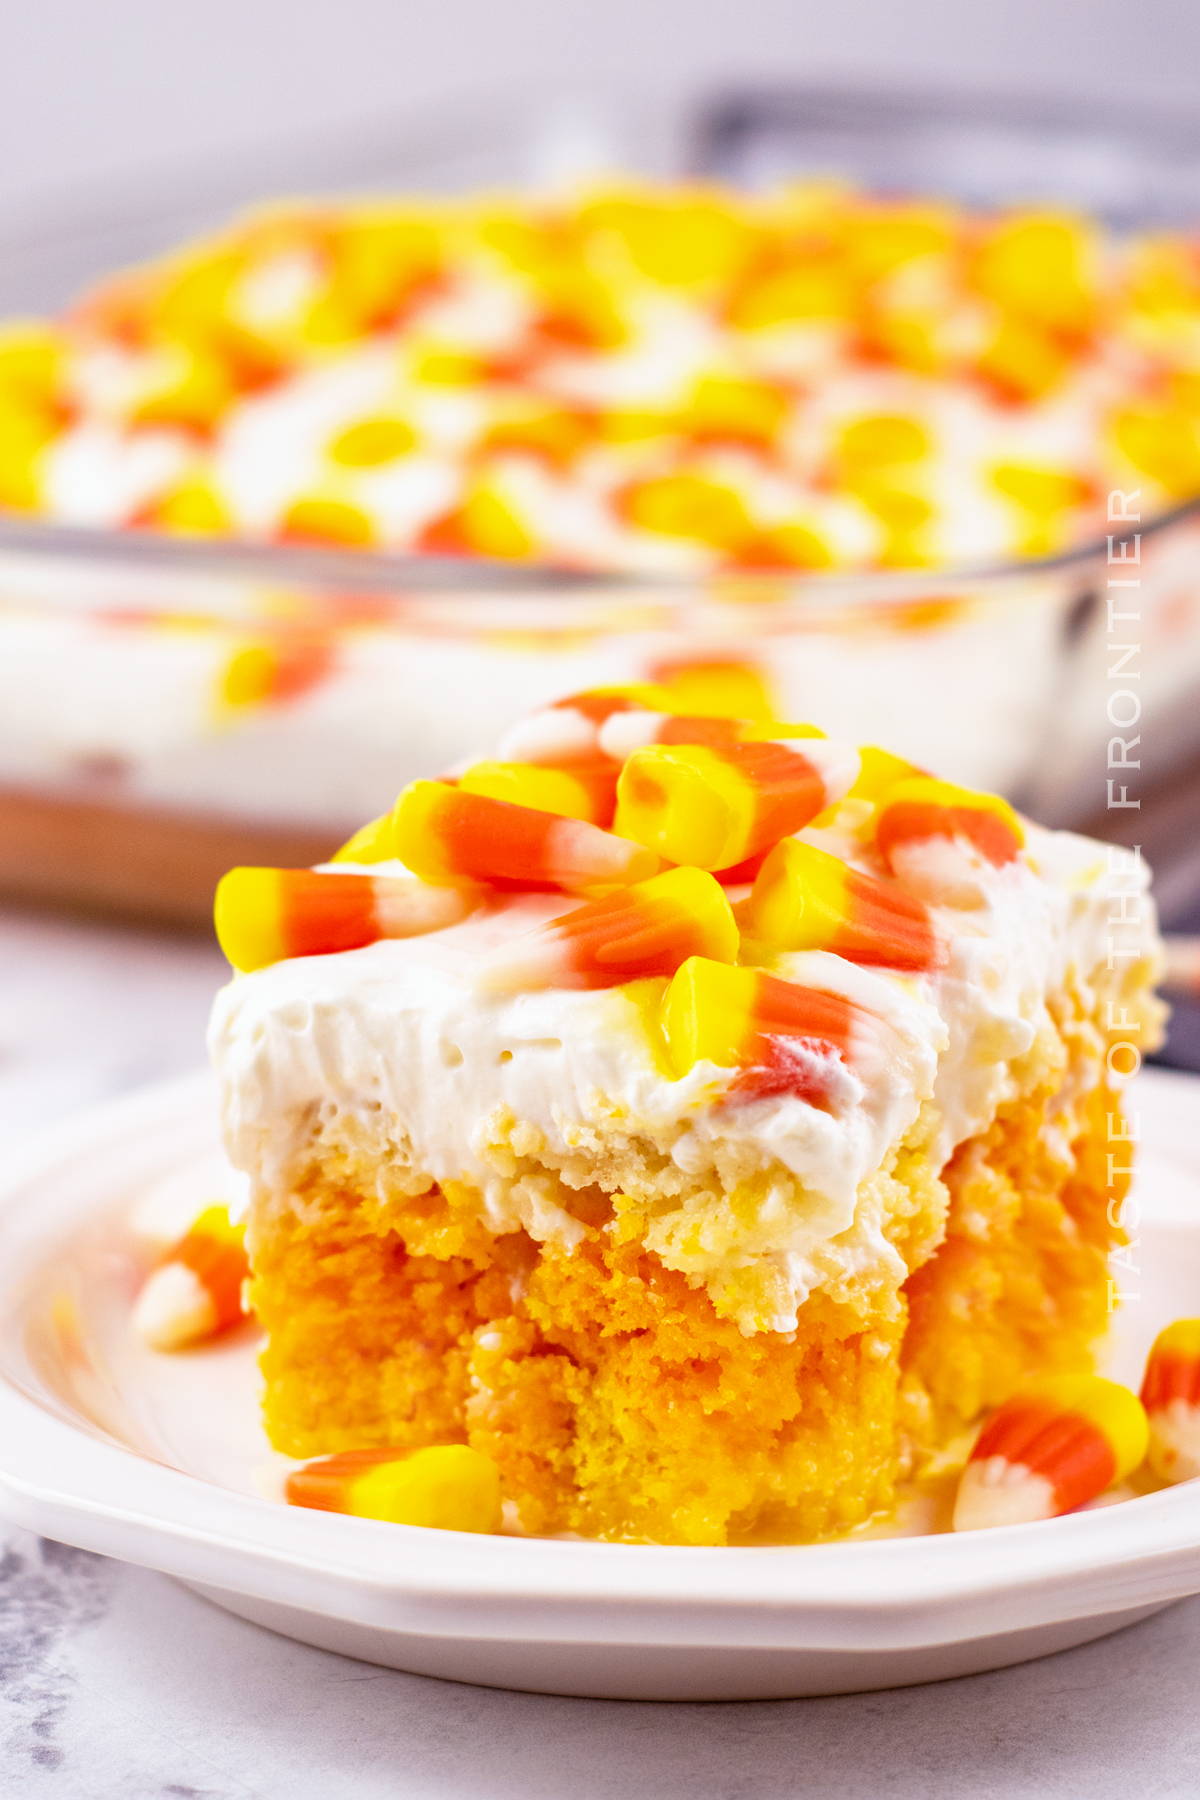
Candy corn is a ubiquitous symbol of the Halloween season, but how often do you see it show up in dessert form? This poke cake is a fun and easy way to get your candy corn fix, and it’s perfect for parties or potlucks.
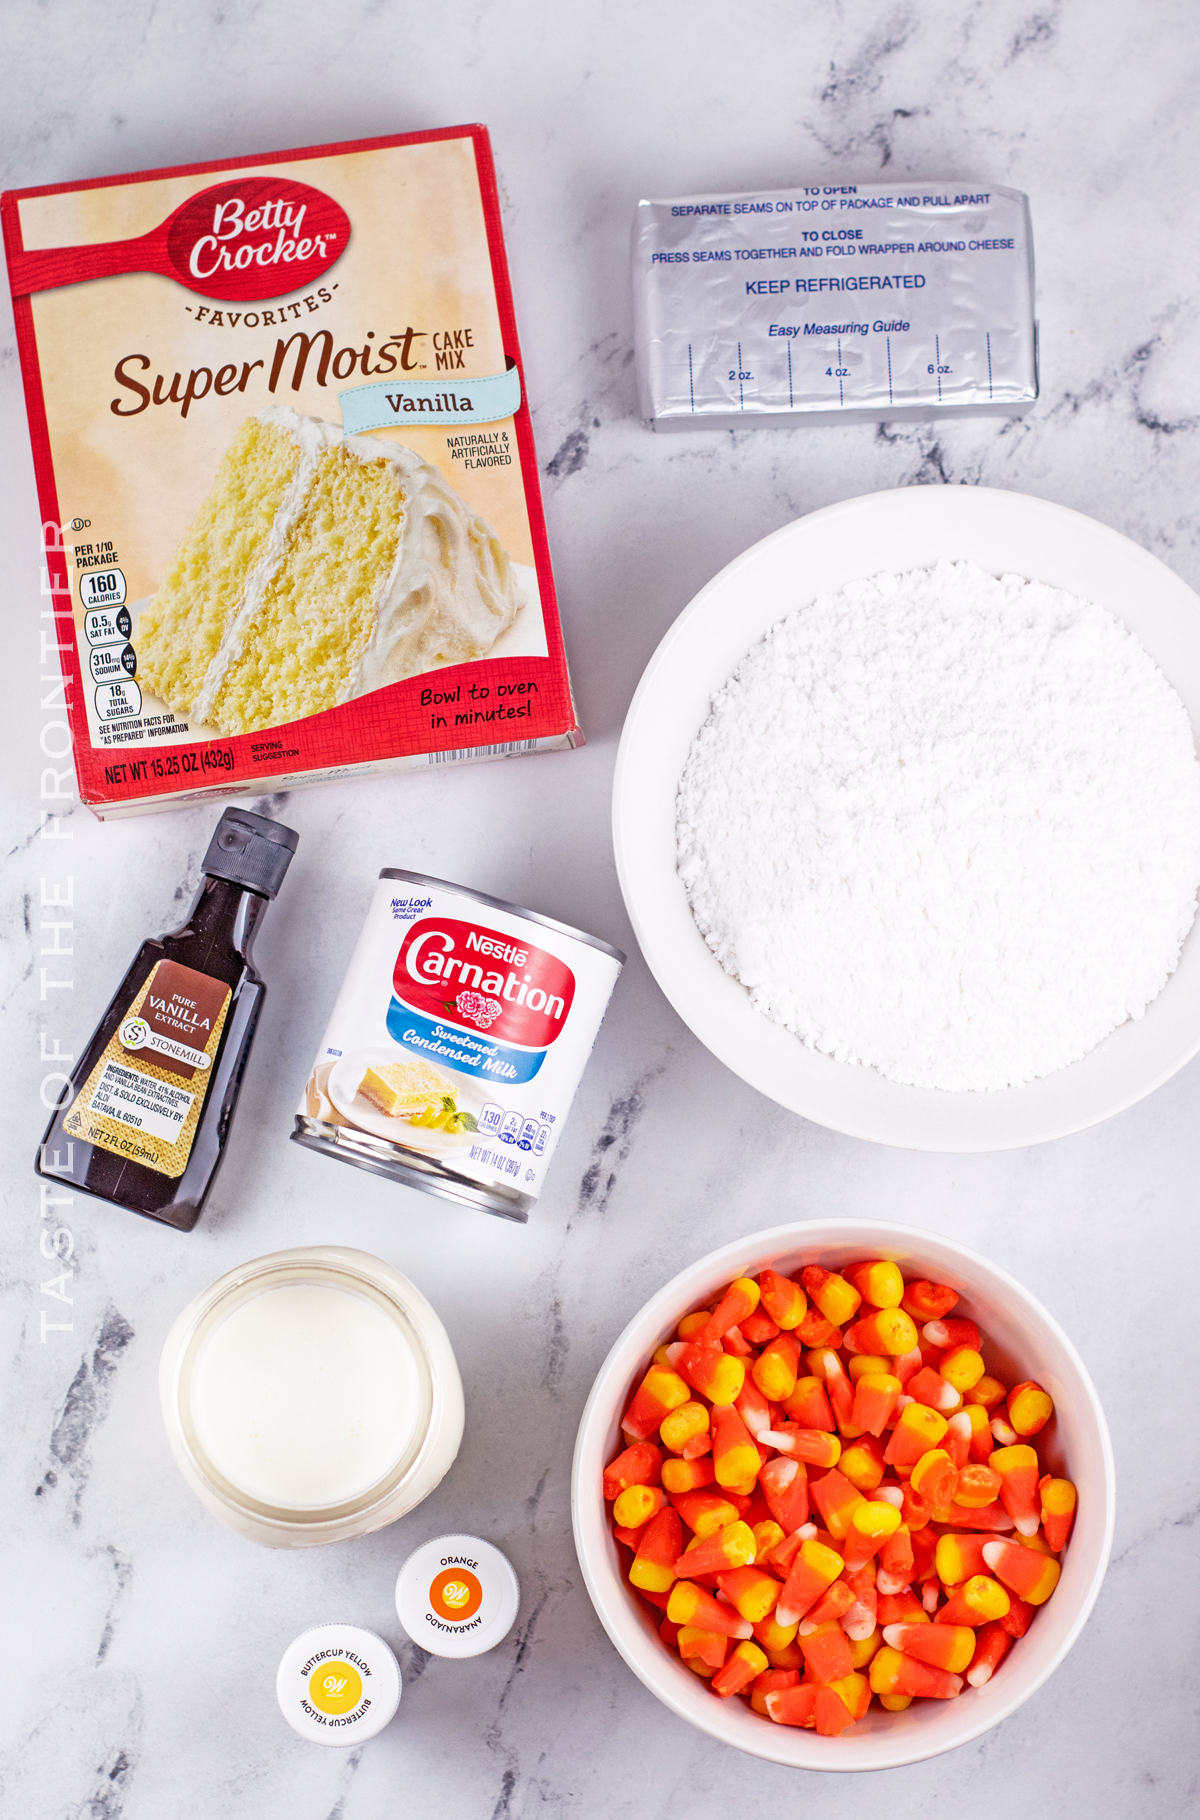
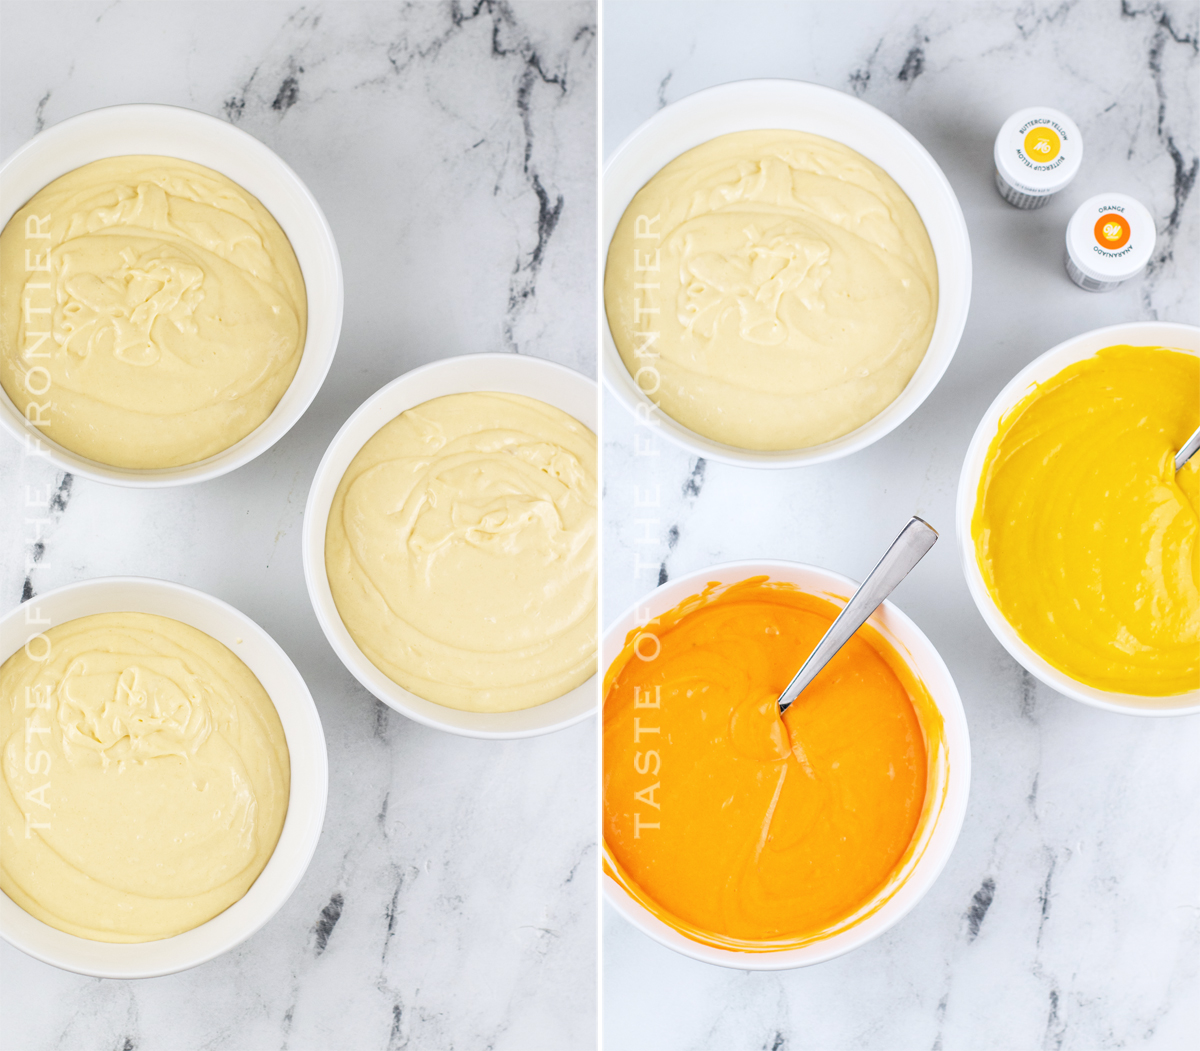
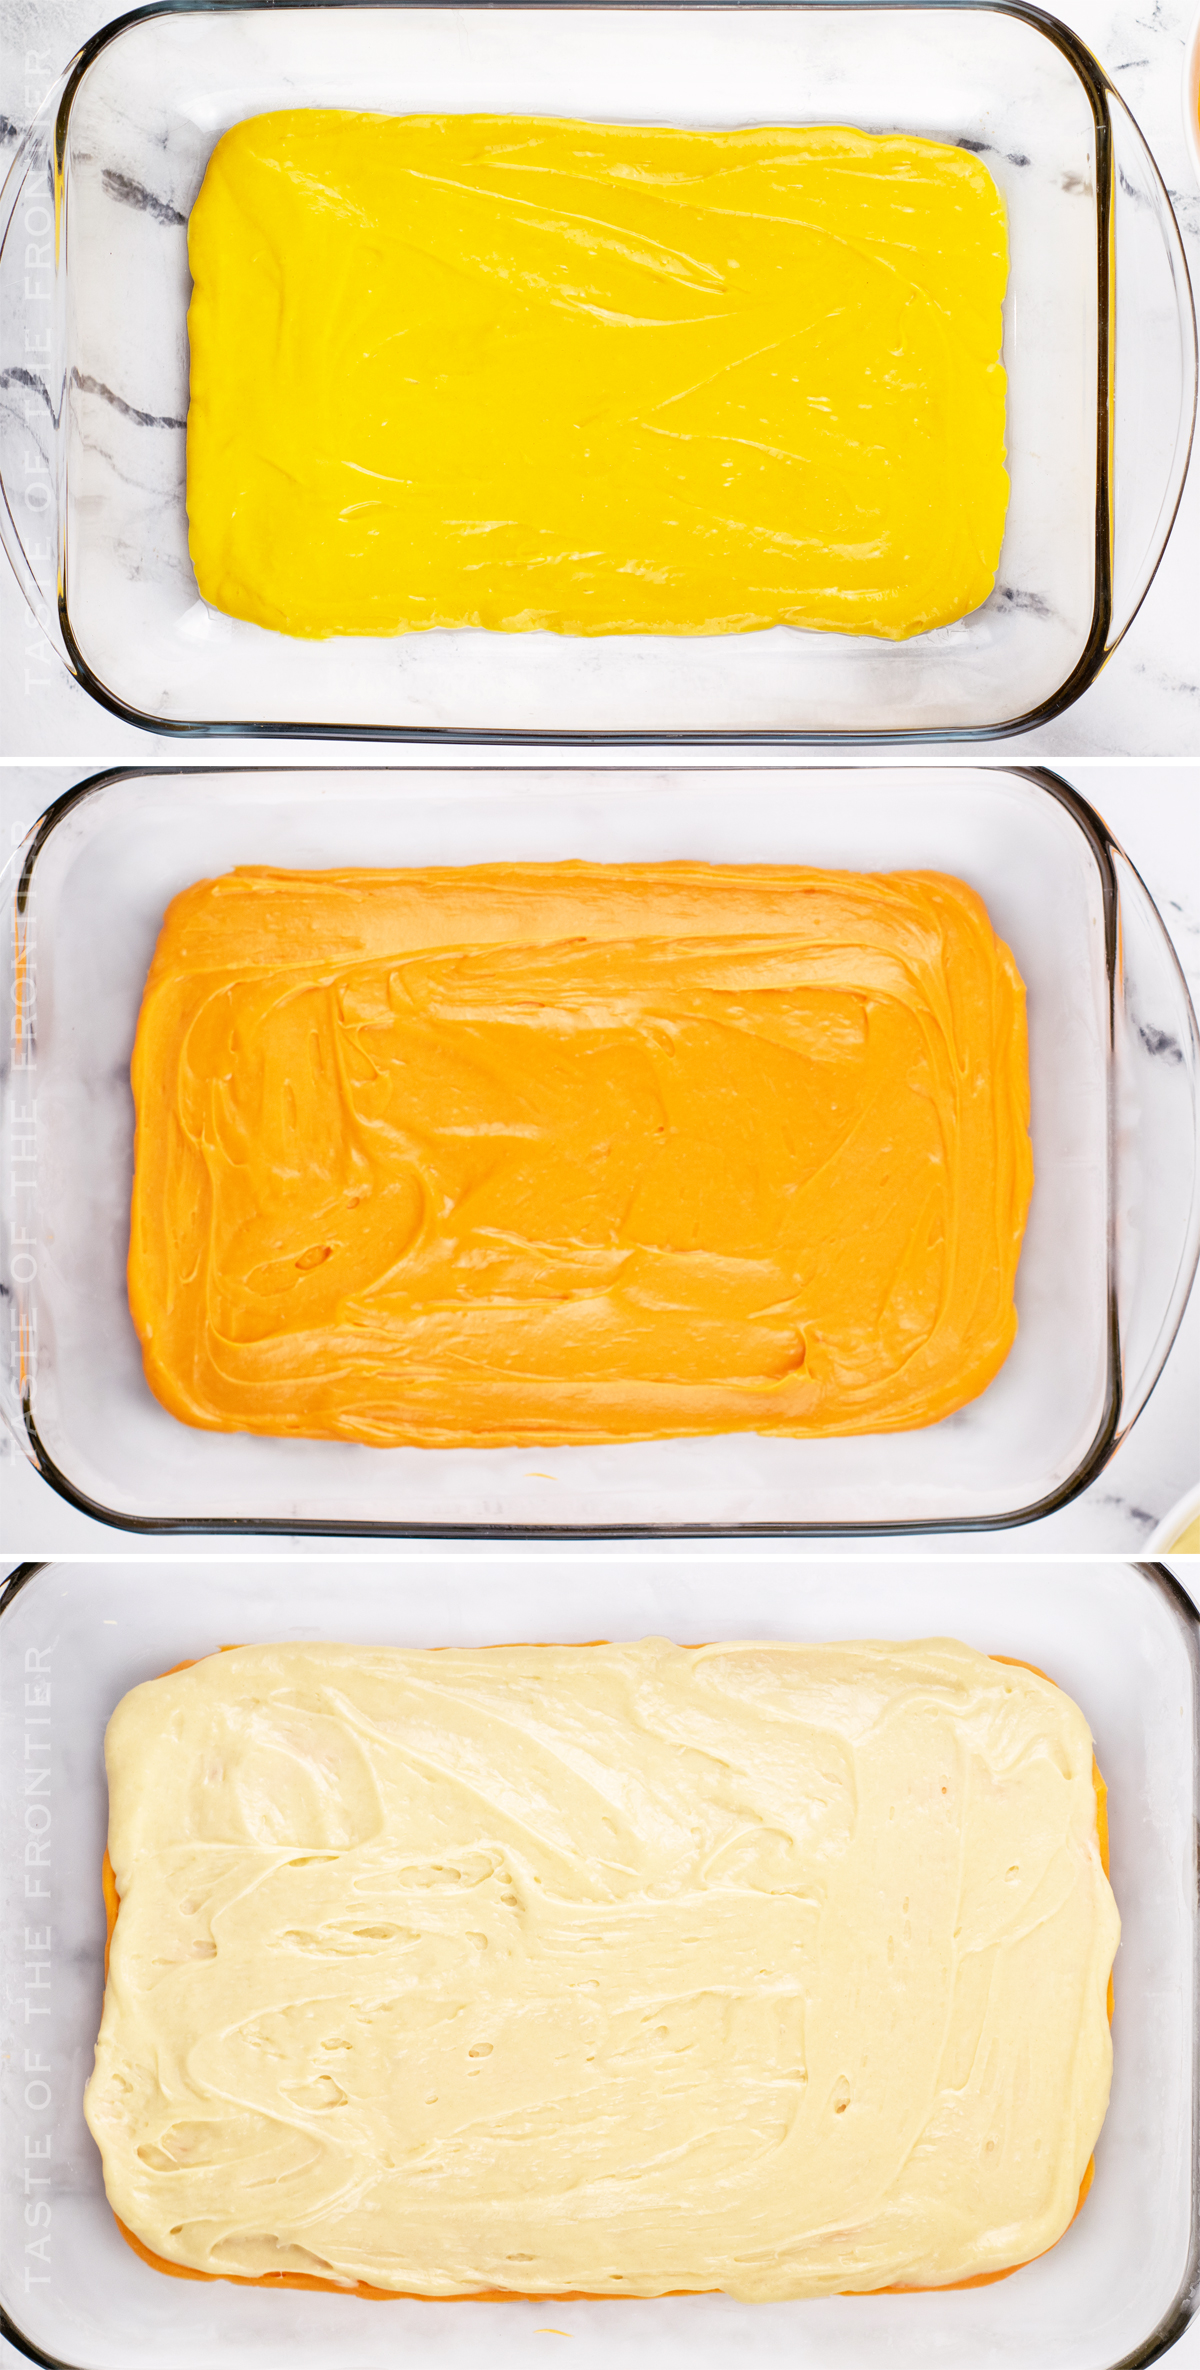
The recipe is simple: just combine a box of yellow cake mix with some orange and yellow food coloring, then top with whipped cream/cream cheese frosting and more candy corn. So good, no one will be able to resist! It is perfect for all those serious candy corn lovers out there.
Candy corn is a popular Halloween candy that is made from sugar, corn syrup, and wax. The candy is shaped like a kernel of corn and has a white end and a yellow end. Candy corn is often used in Halloween decorations and as a treat for Trick-or-Treaters.
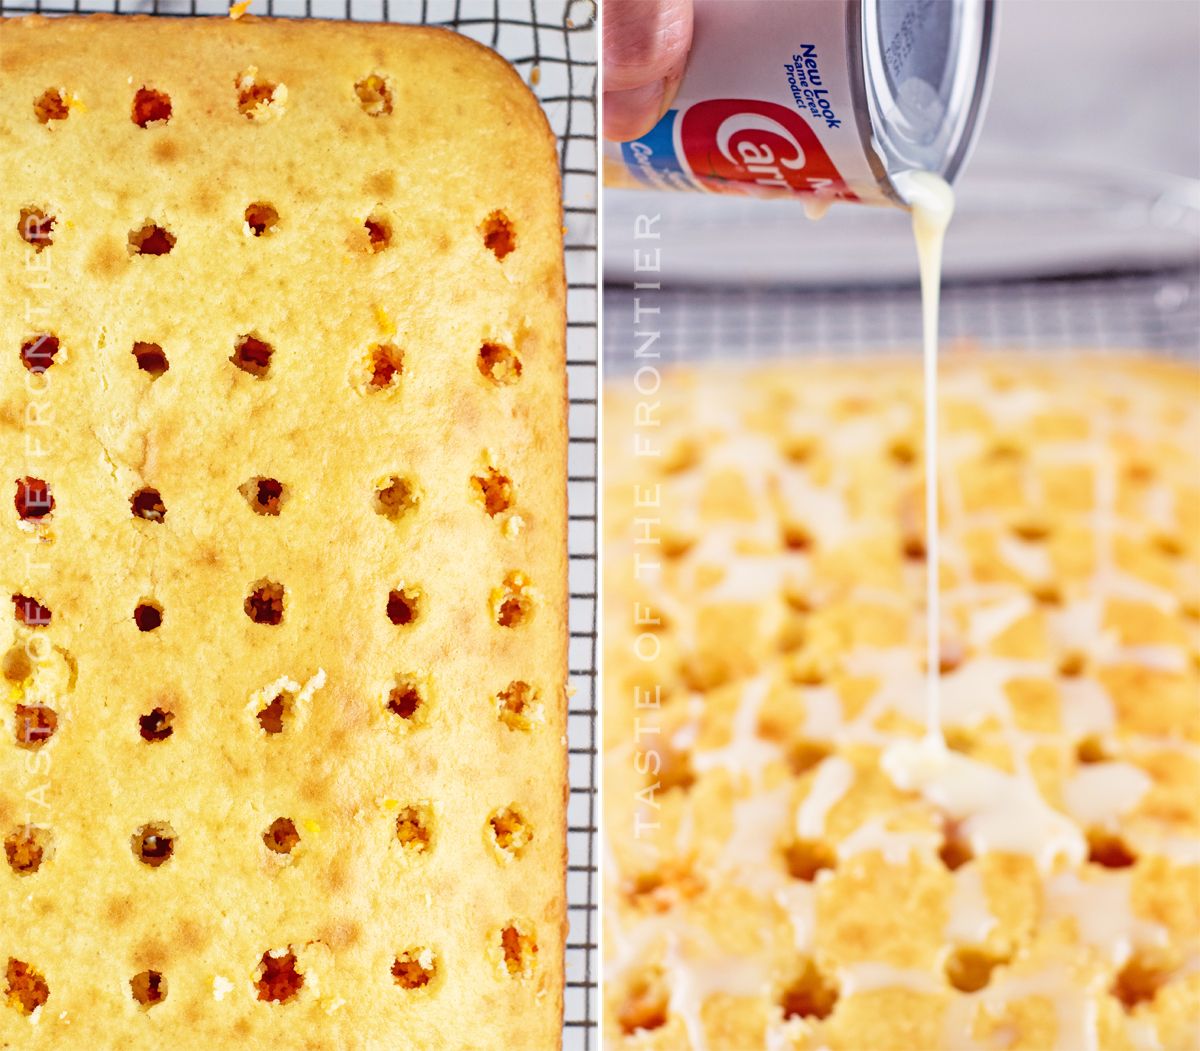
A poke cake is a cake that has holes poked in it after it is baked. These holes are then filled with a filling, such as pudding or fruit. Poke cakes are often decorated with icing or frosting.
Leftover poke cake can be stored in an airtight container in the fridge for up to 4 days.
This will depend on the size of holes you want in the cake – those will be your pockets of flavor. So you can either use a chopstick for smaller holes or go with the handle of a wooden spoon (most common) for larger ones.
I find that the chopstick works better when making jello since the liquid is thinner. The larger wooden spoon handle works best for pudding because it has a thicker consistency.
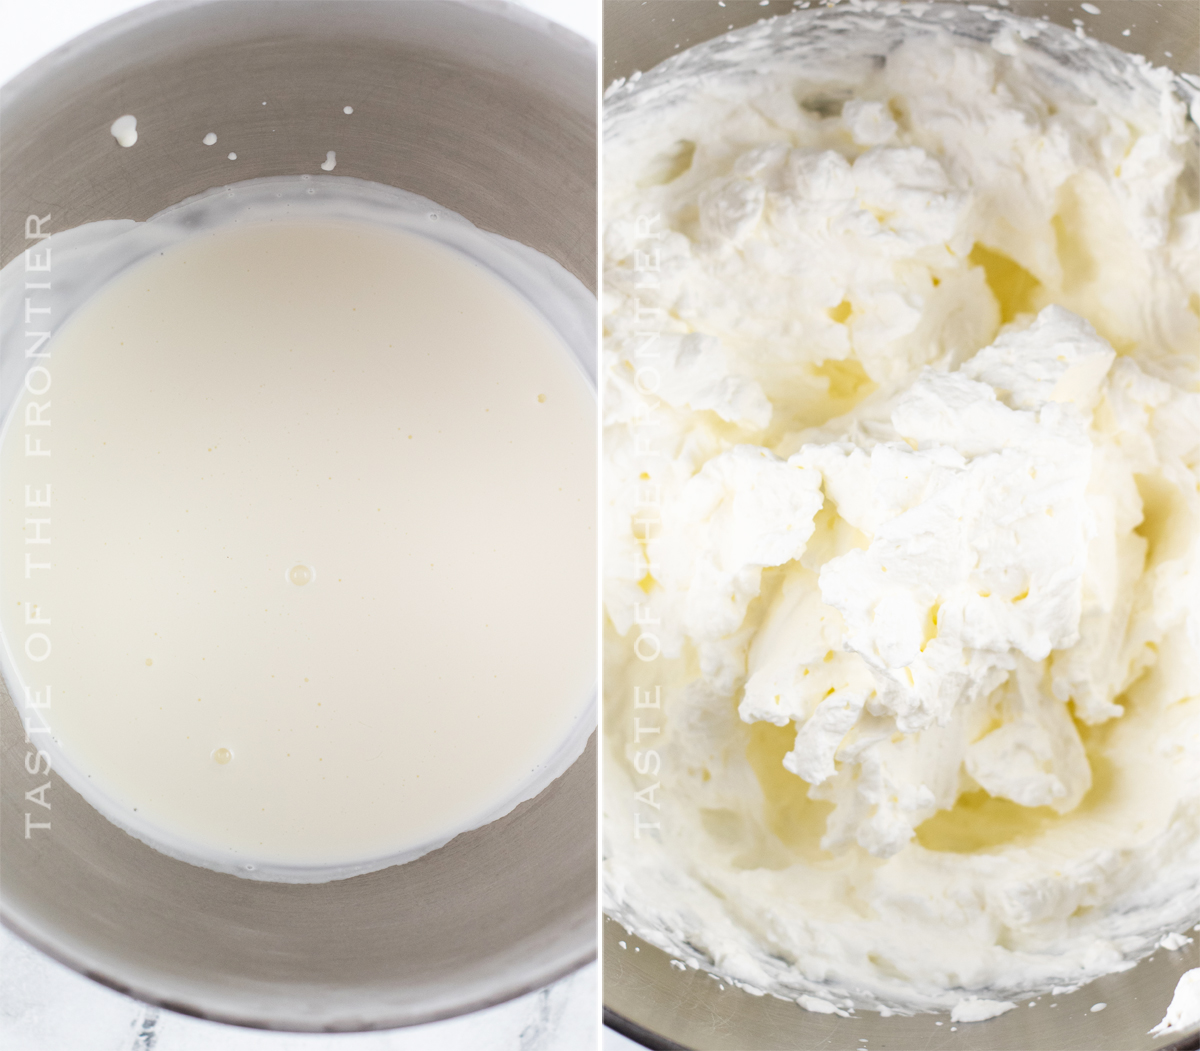
Yes – this poke cake can be made with instant pudding instead of the sweetened condensed milk mixture. In fact, it is quite common to do so. Using the pudding makes it ultra-creamy. For this cake – try a white chocolate pudding flavor.
Just use a 4-serving-sized box of instant pudding mix and 2 cups of cold milk. Whisk those together until smooth and pour it over the top of the cake just like you would the sweetened condensed milk. Then refrigerate for several hours before adding the frosting. This will help firm up the pudding before continuing.
Yes, you can make a poke cake the day before. Just make sure to cover it tightly and keep it in the dish you baked it in until you are ready to serve.
Yes – of course. Just like any other cake, you can freeze this poke cake. Just make sure to wrap the cake tightly with plastic wrap or place it in an airtight container before freezing. Use it within 3 months.
I do recommend adding the candy on top when serving as it will taste best if it wasn’t frozen first.
DON’T MISS THESE HOLIDAY E-BOOKS!
This Fall Poke Cake recipe is SUPER EASY and delicious – and if you’re like me, then you maybe already have some of these items on hand OR maybe you have never made a poke cake before, & you might be a bit nervous – but you’re going to love this. I have made a list below of the things I absolutely can’t live without when it comes to making this delicious dessert recipe. (you can also SHOP MY FAVORITES in my store)
If you love this easy candy corn poke cake recipe, you’re going to love these other fall holiday treats too. Please click each link below to find the easy, printable recipe!


If you love this recipe for Candy Corn Poke Cake as much as I do, please write a five-star review, and be sure to help me share on Facebook and Pinterest!
CONNECT WITH YUMMI HAUS!
Be sure to follow me on my social media, so you never miss a post!
This Biscuit Breakfast Casserole is filled with fluffy biscuits, savory sausage, eggs, and melted cheese, perfect for an easy morning meal.
Get ready to enjoy the deliciousness of Biscuit Breakfast Casserole! This hearty and comforting dish is perfect for feeding a crowd or enjoying a lazy weekend morning. That’s our favorite time to make it at my house.
There’s something satisfying about having a good, hearty breakfast on the weekend. No rushing off to work or school. Just enjoying a meal.
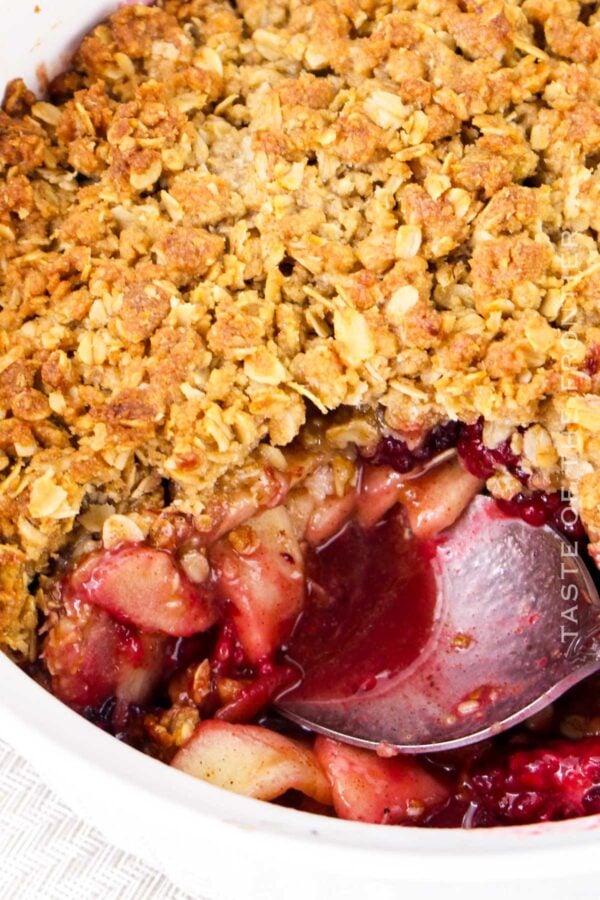
View postWarm and comforting, this Apple Blackberry Crumble combines tart apples and juicy blackberries with a buttery crumble topping.
Apple Blackberry Crumble is a dessert that always gets rave reviews. It’s the perfect combination of sweet, tender apples and tart, juicy blackberries, topped with a golden brown, crunchy oat crumble.
Grab a scoop of ice cream and get ready for amazing flavor. Imagine digging into this delicious dessert with a scoop of vanilla ice cream melting on top. It’s the ultimate comfort food, perfect for any time of year.
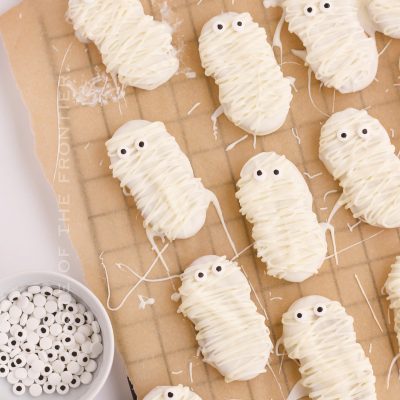
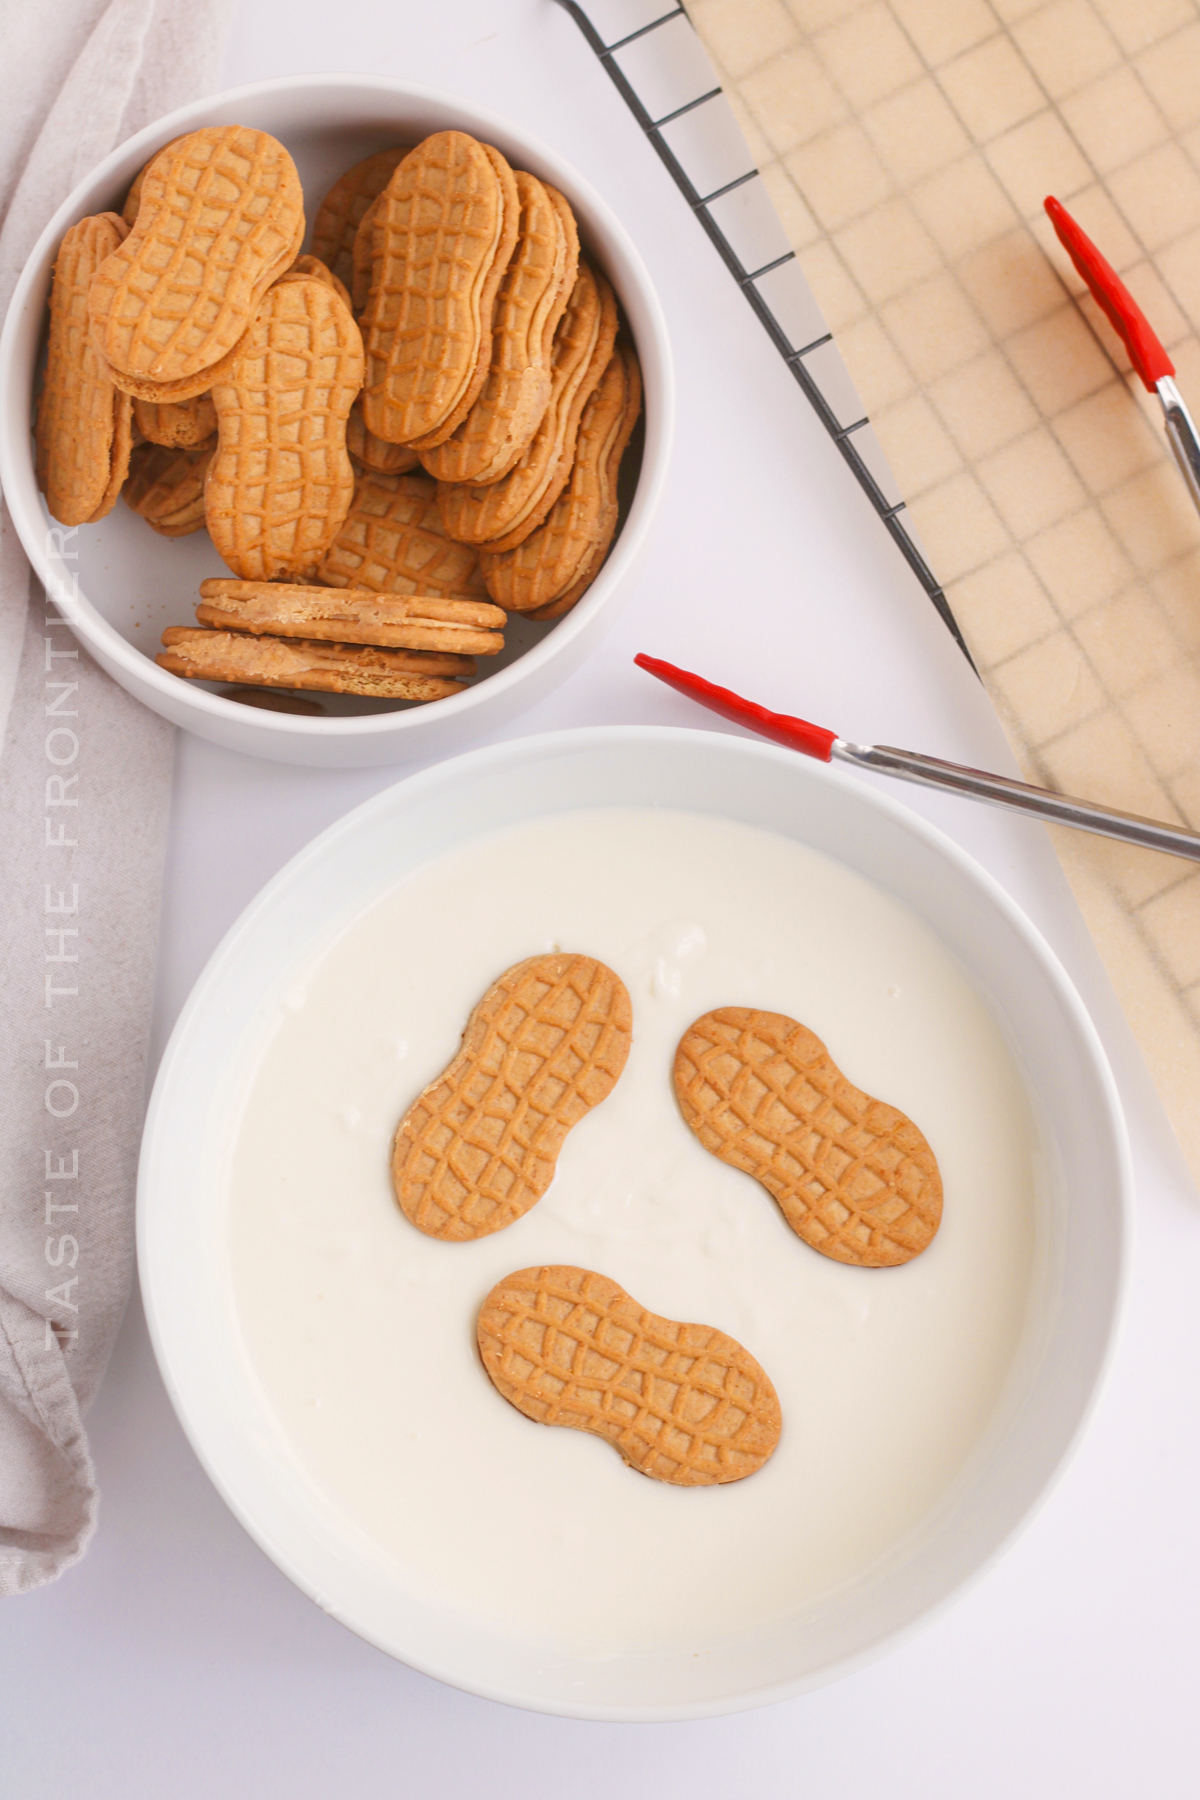
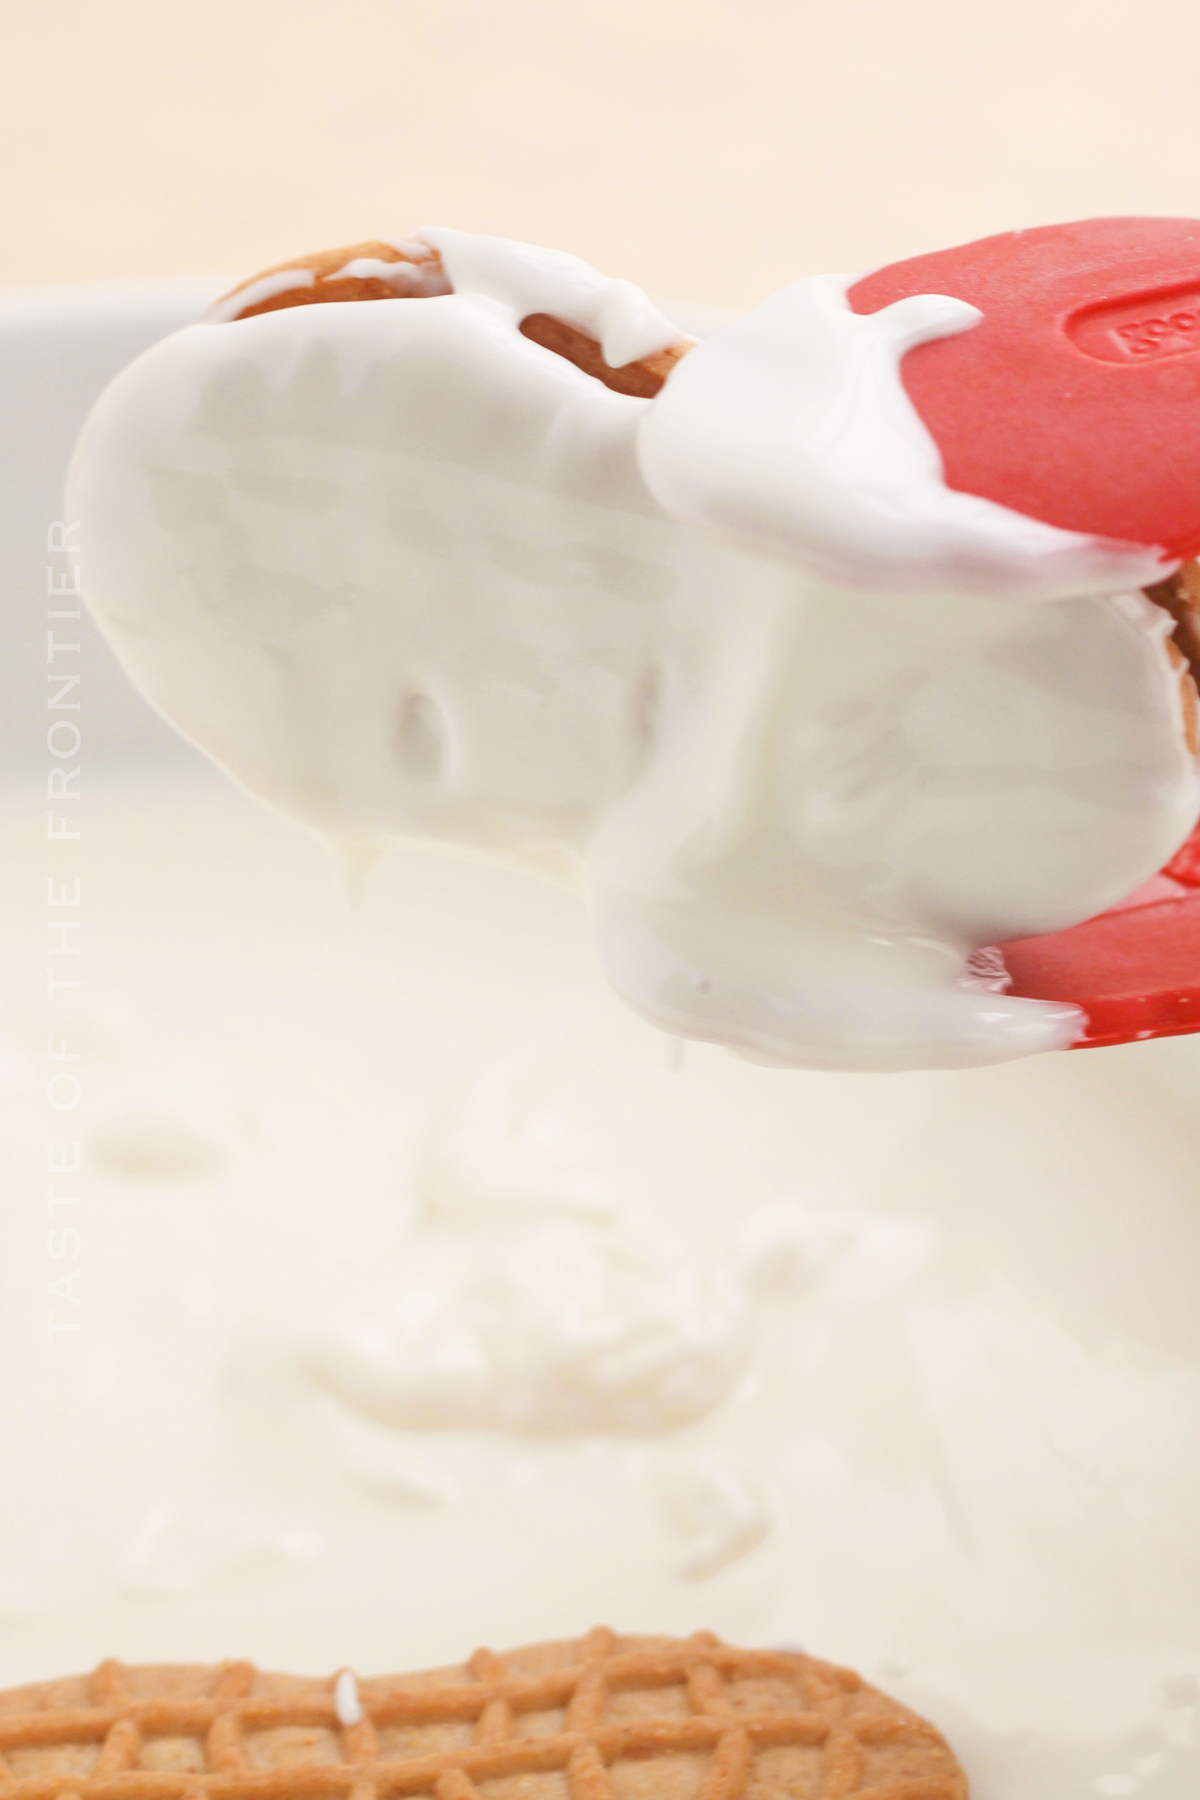
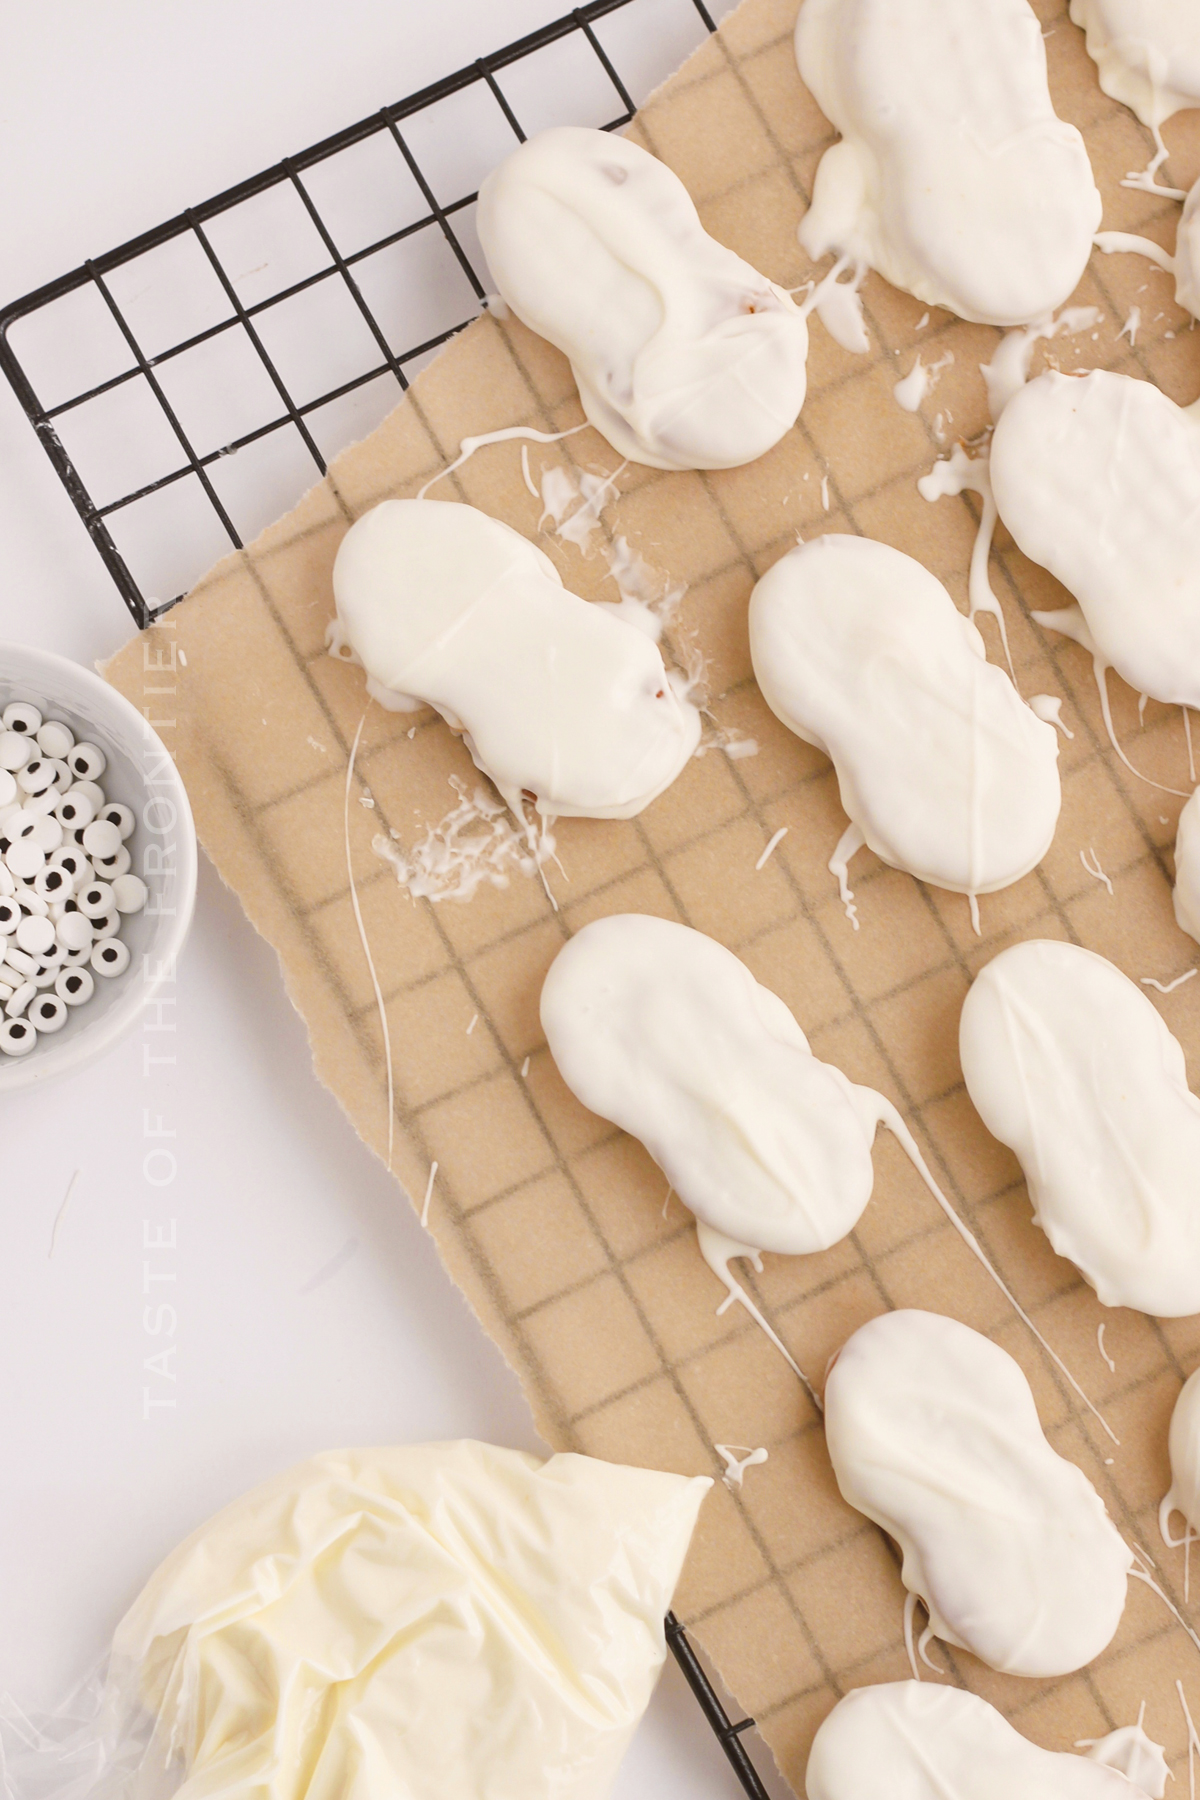
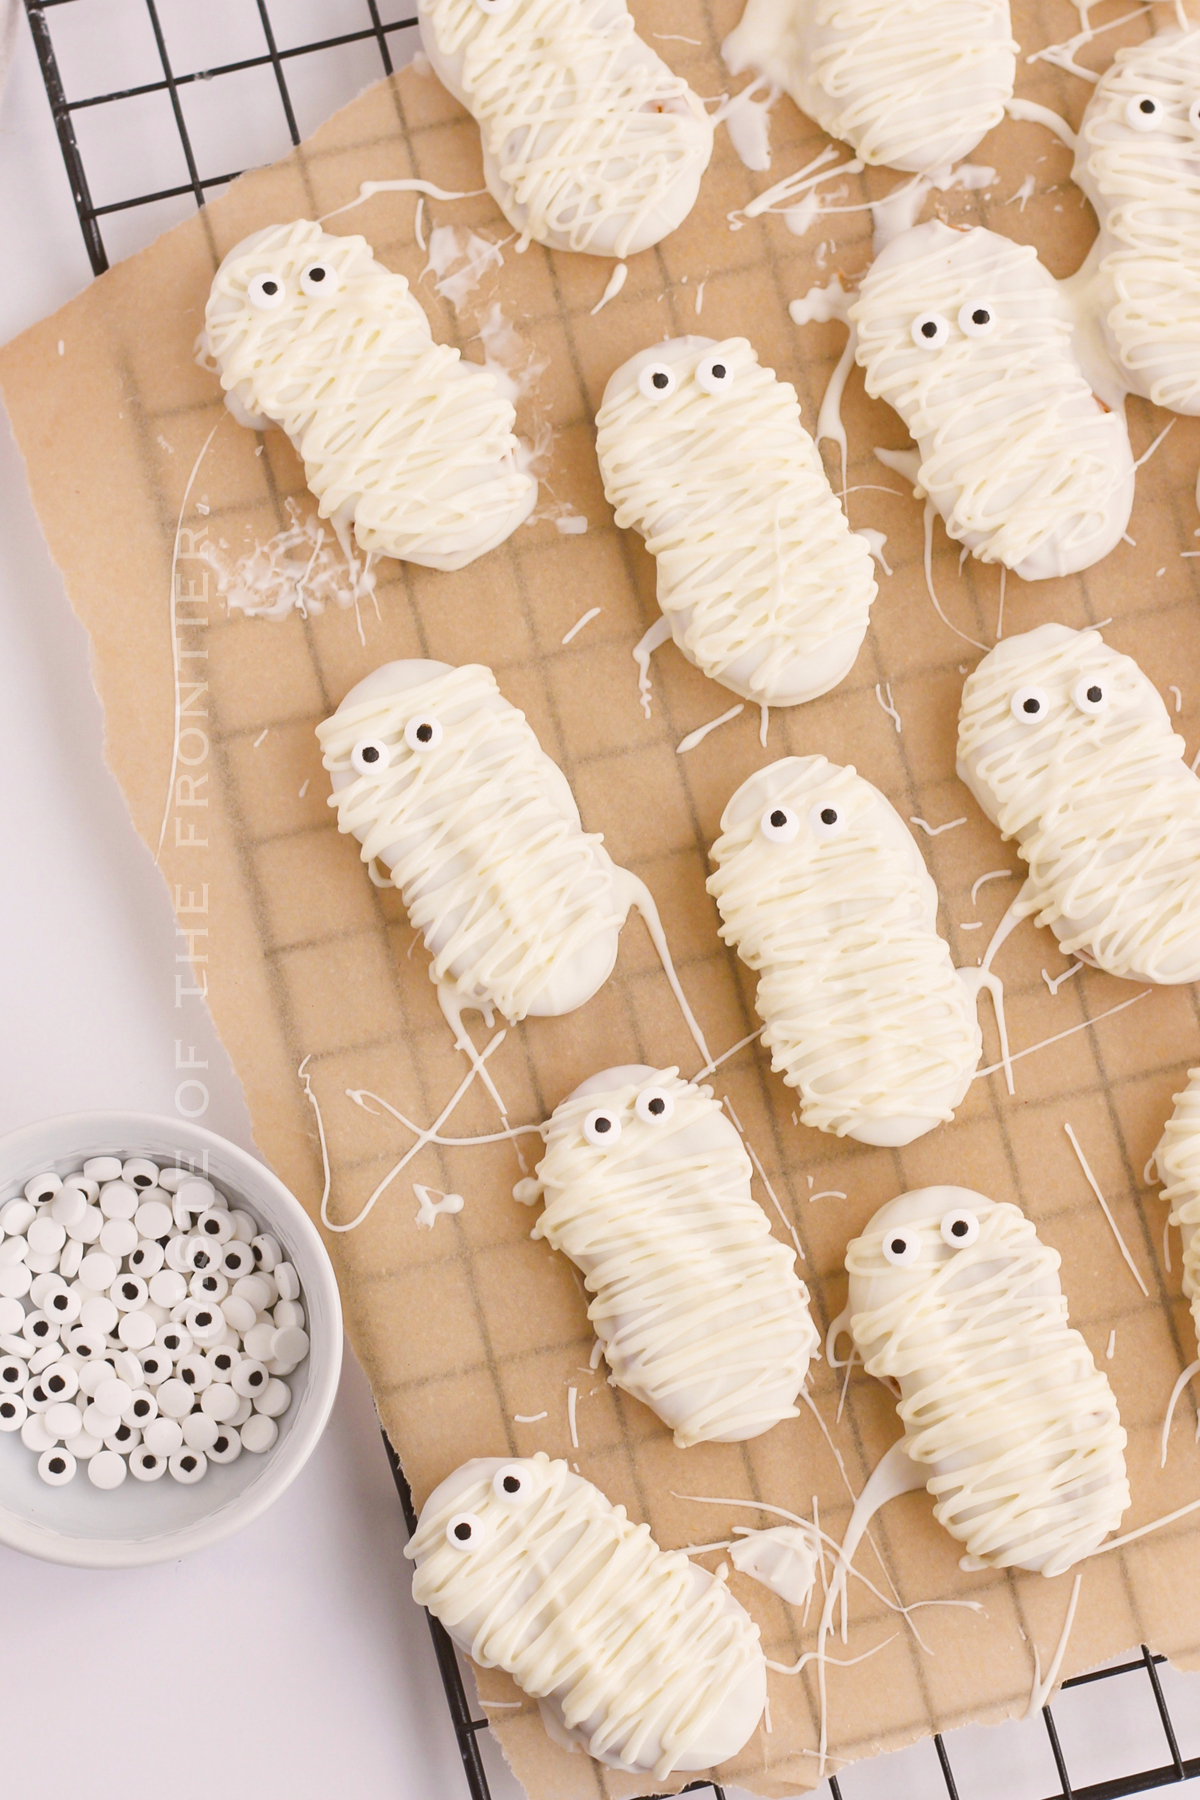
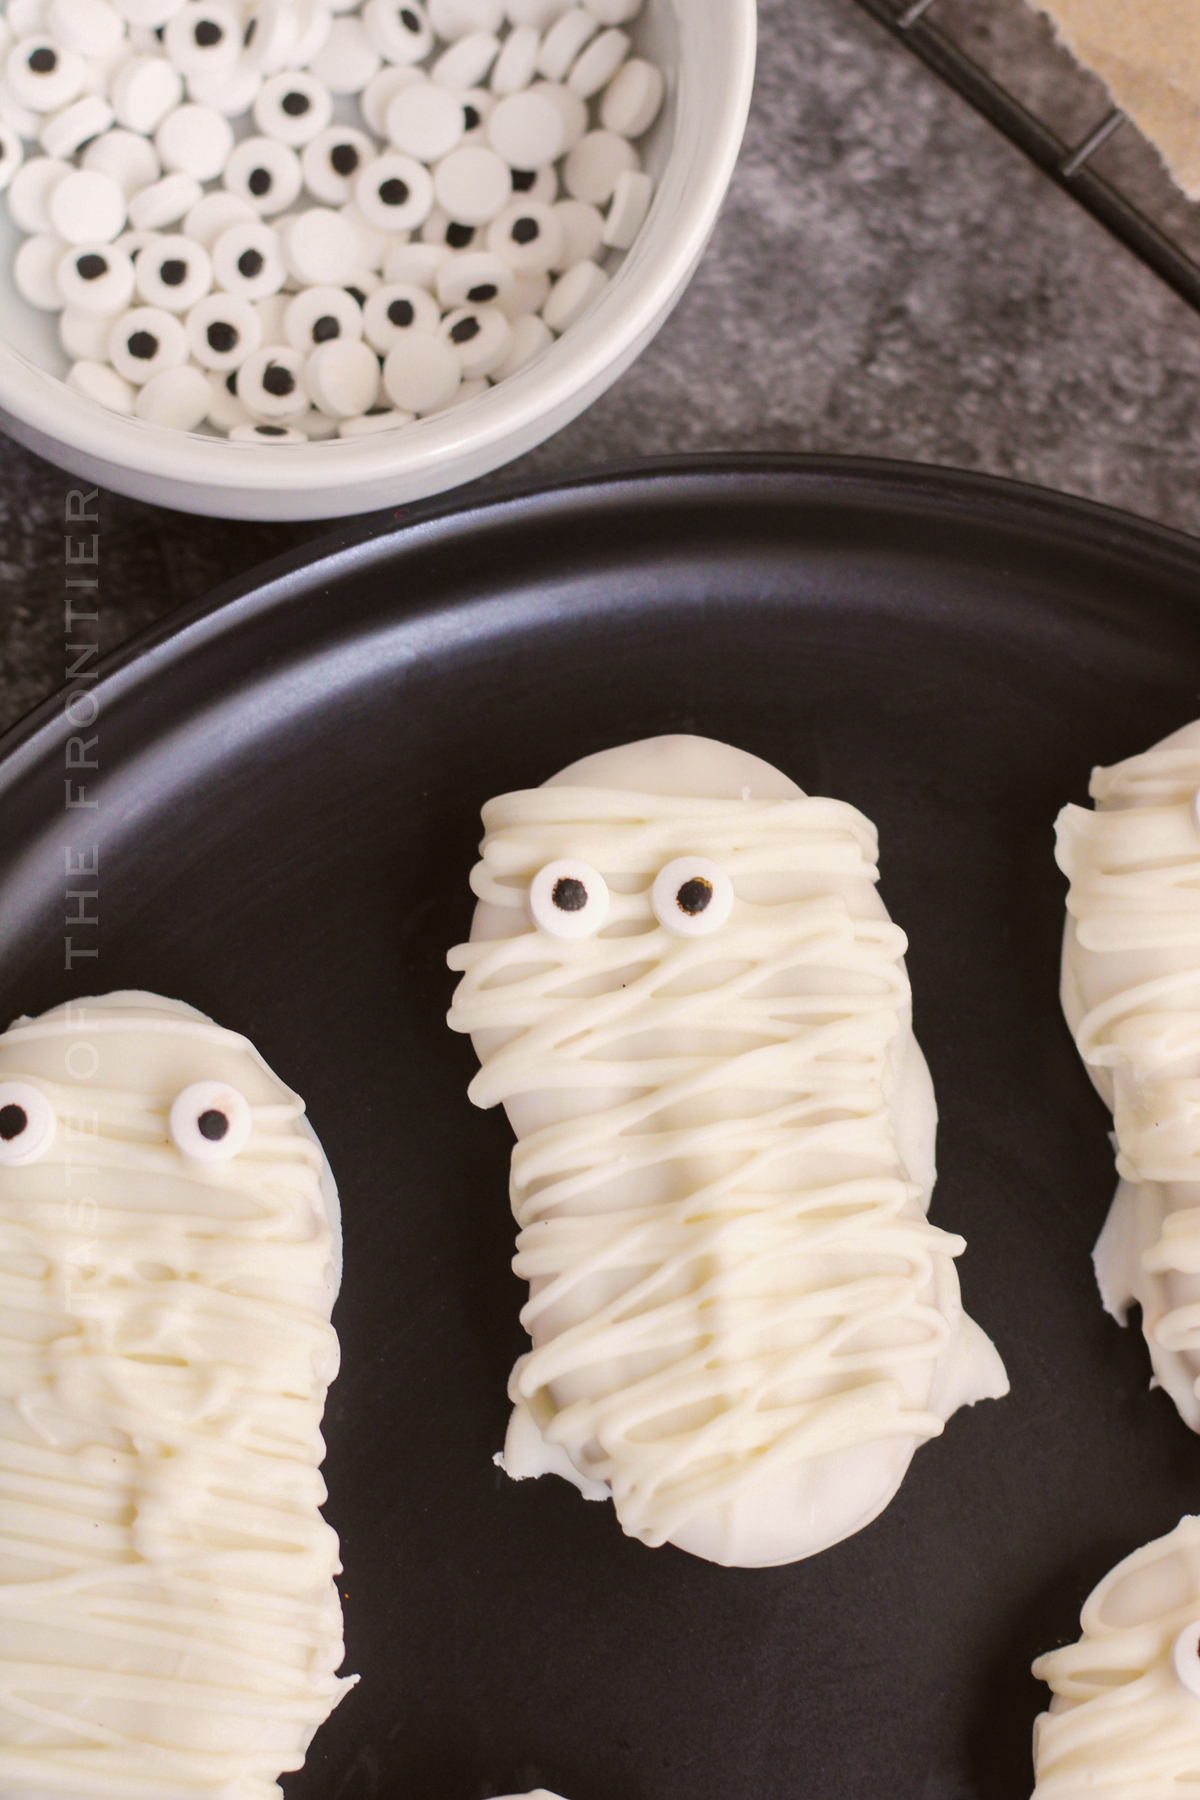
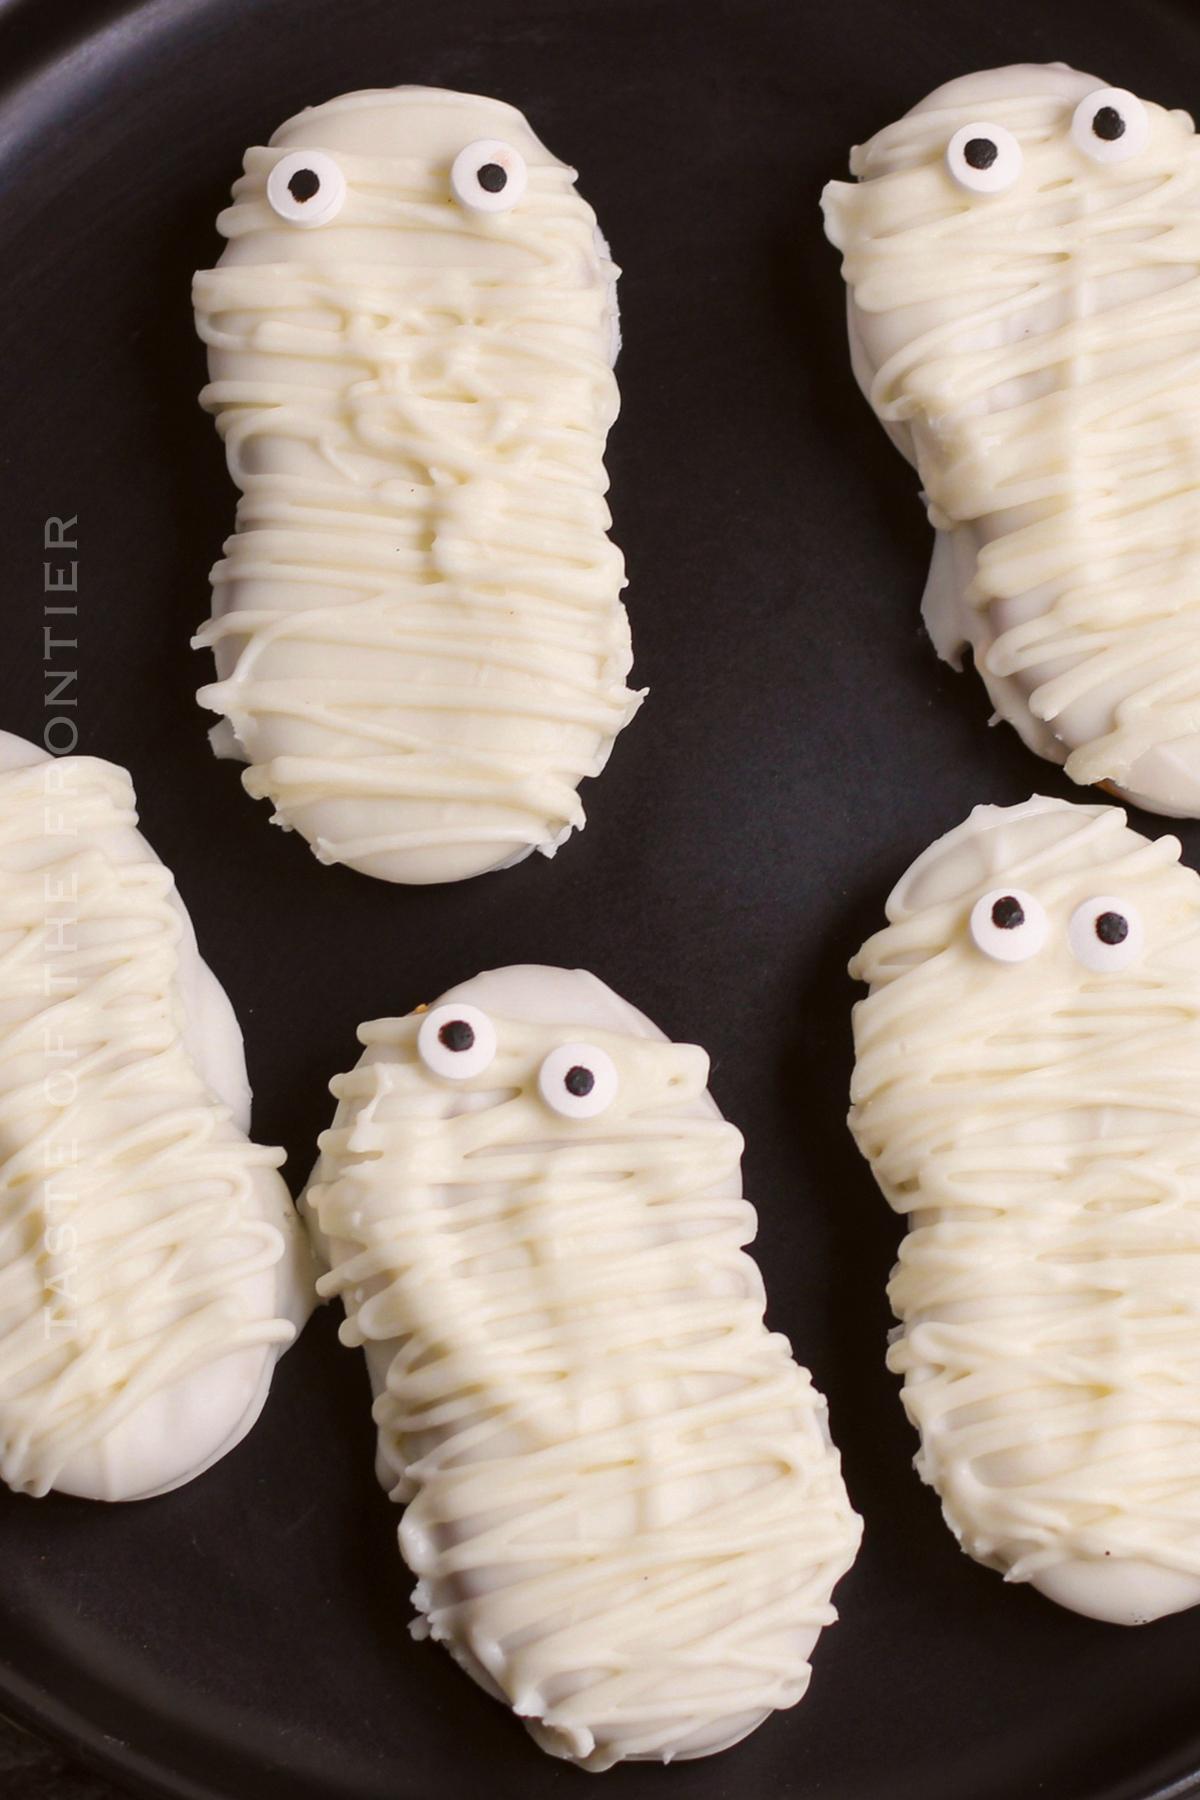
View postLooking for a fun, spooky treat to make with your kids this Halloween? Try these Mummy Cookies!
Kids love cookies, and what could be more fun than making cookies that look like mummies? These cookies are easy to make and sure to be a hit with your little ones.
Plus, they’re super fun to make and would be a great activity for a Halloween Party. Give them a try today!

If you’re looking for a spooky treat to make this Halloween, why not try making these mummy cookies? You won’t believe how simple they are to make and will be sure to impress your friends and family.
Plus, they’re tasty too! You can’t go wrong with Nutter Butter Cookies coated in white chocolate! SO GOOD and super cute too!
So go ahead and give them a try – your taste buds won’t regret it!
Store the cookies in an airtight container at room temperature for up to a week. I don’t recommend refrigerating them as the eyes don’t do well in the damp environment of the refrigerator. They tend to bleed and weap a bit.
Yes, you can freeze these cookies. Place them in a freezer-safe bag or container and they will keep for up to 3 months. Let them thaw at room temperature before eating.
BUT – as I mentioned above – the eyes don’t do well in a damp environment. SOOOOO – I recommend storing them without the eyes and adding them right before serving.
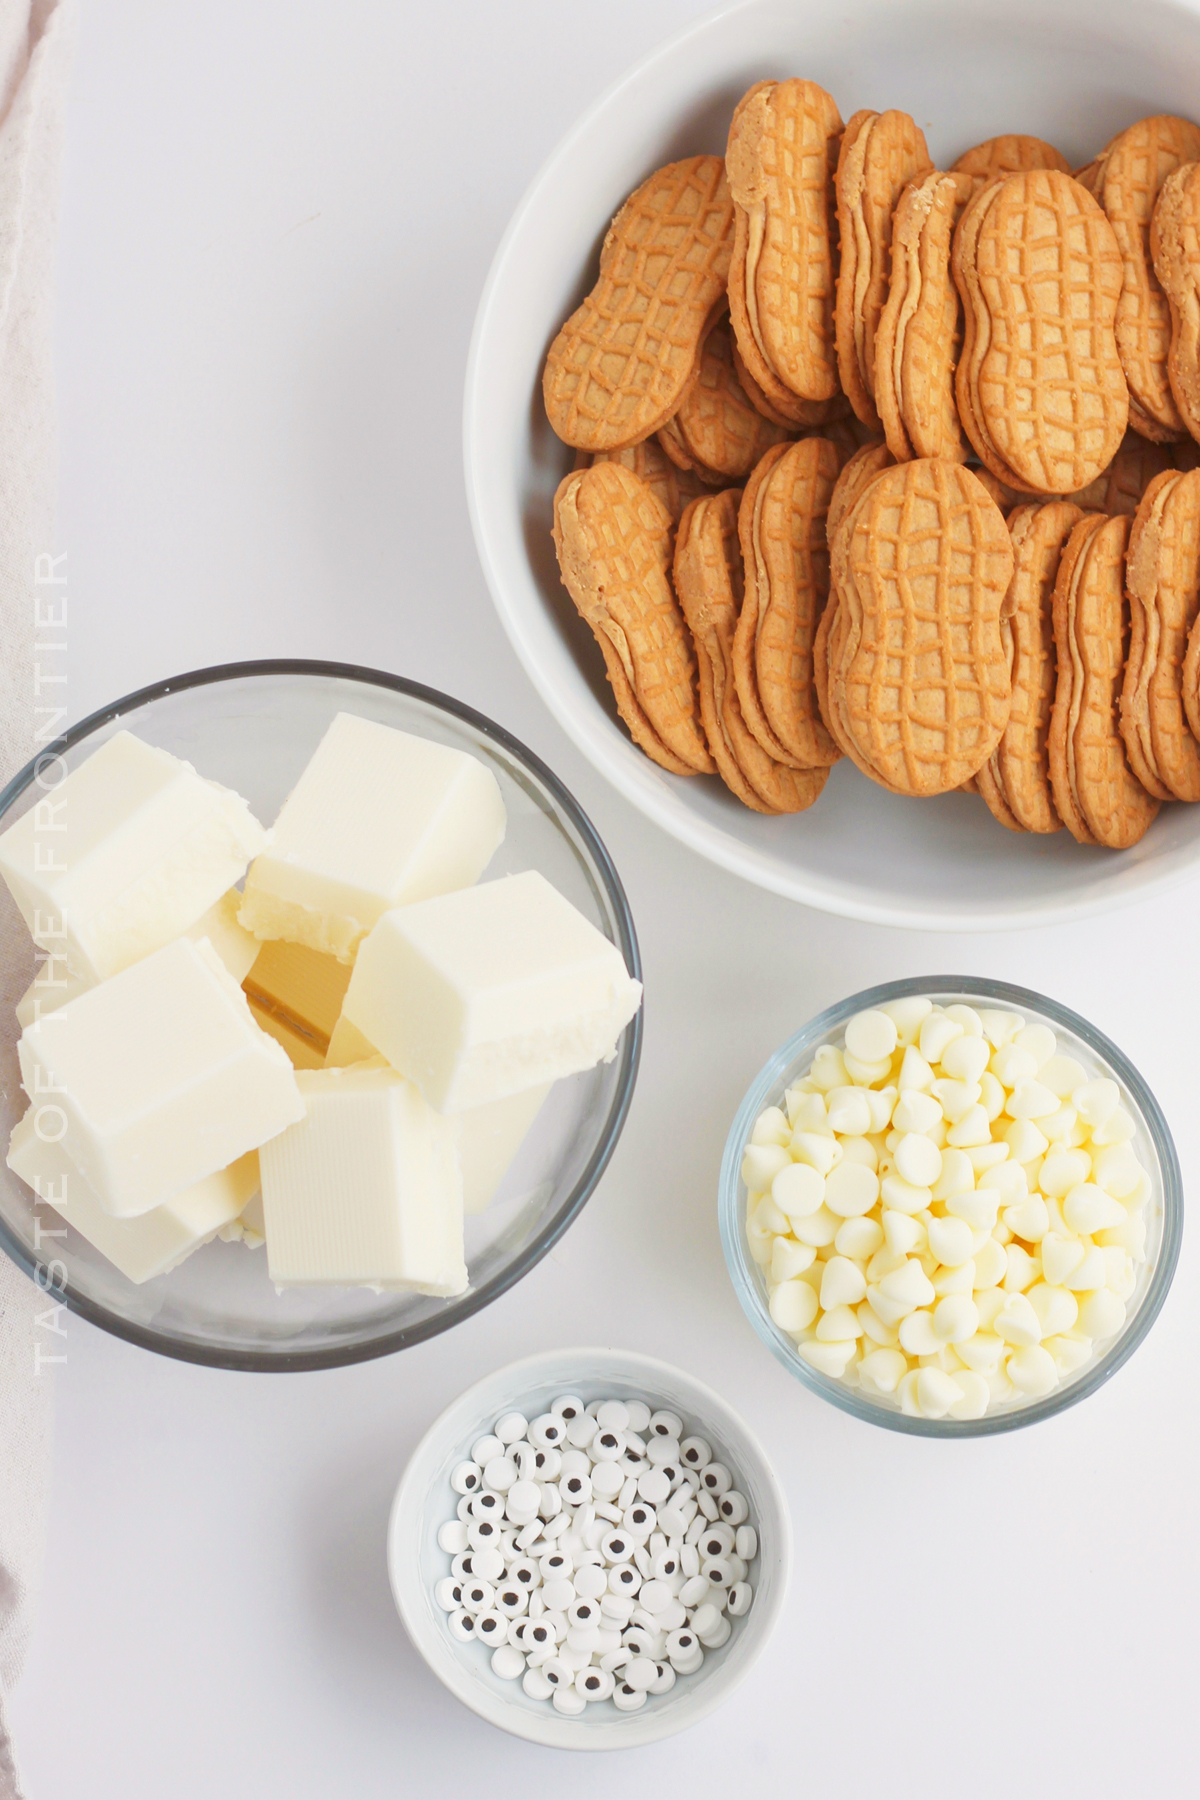
While you can use chocolate chips to make these, I have found that it often requires a bit of coconut oil or shortening to get the chocolate to melt to the right consistency.
I like to use candy melts because the chocolate is made with just the right formula so that it performs exactly as needed.
The candy melts come in a multitude of colors, varieties, and flavors so the sky is the limit on what you can do with them when it comes to making chocolate-coated goodies.
We made this recipe using almond bark and then used white chocolate chips to make the mummy part. You can sub candy melts for the almond bark and the white chocolate chips if you want to make this recipe even easier.
We used the almond bark because it comes in large quantities, making it easy to melt a lot of it at one time.
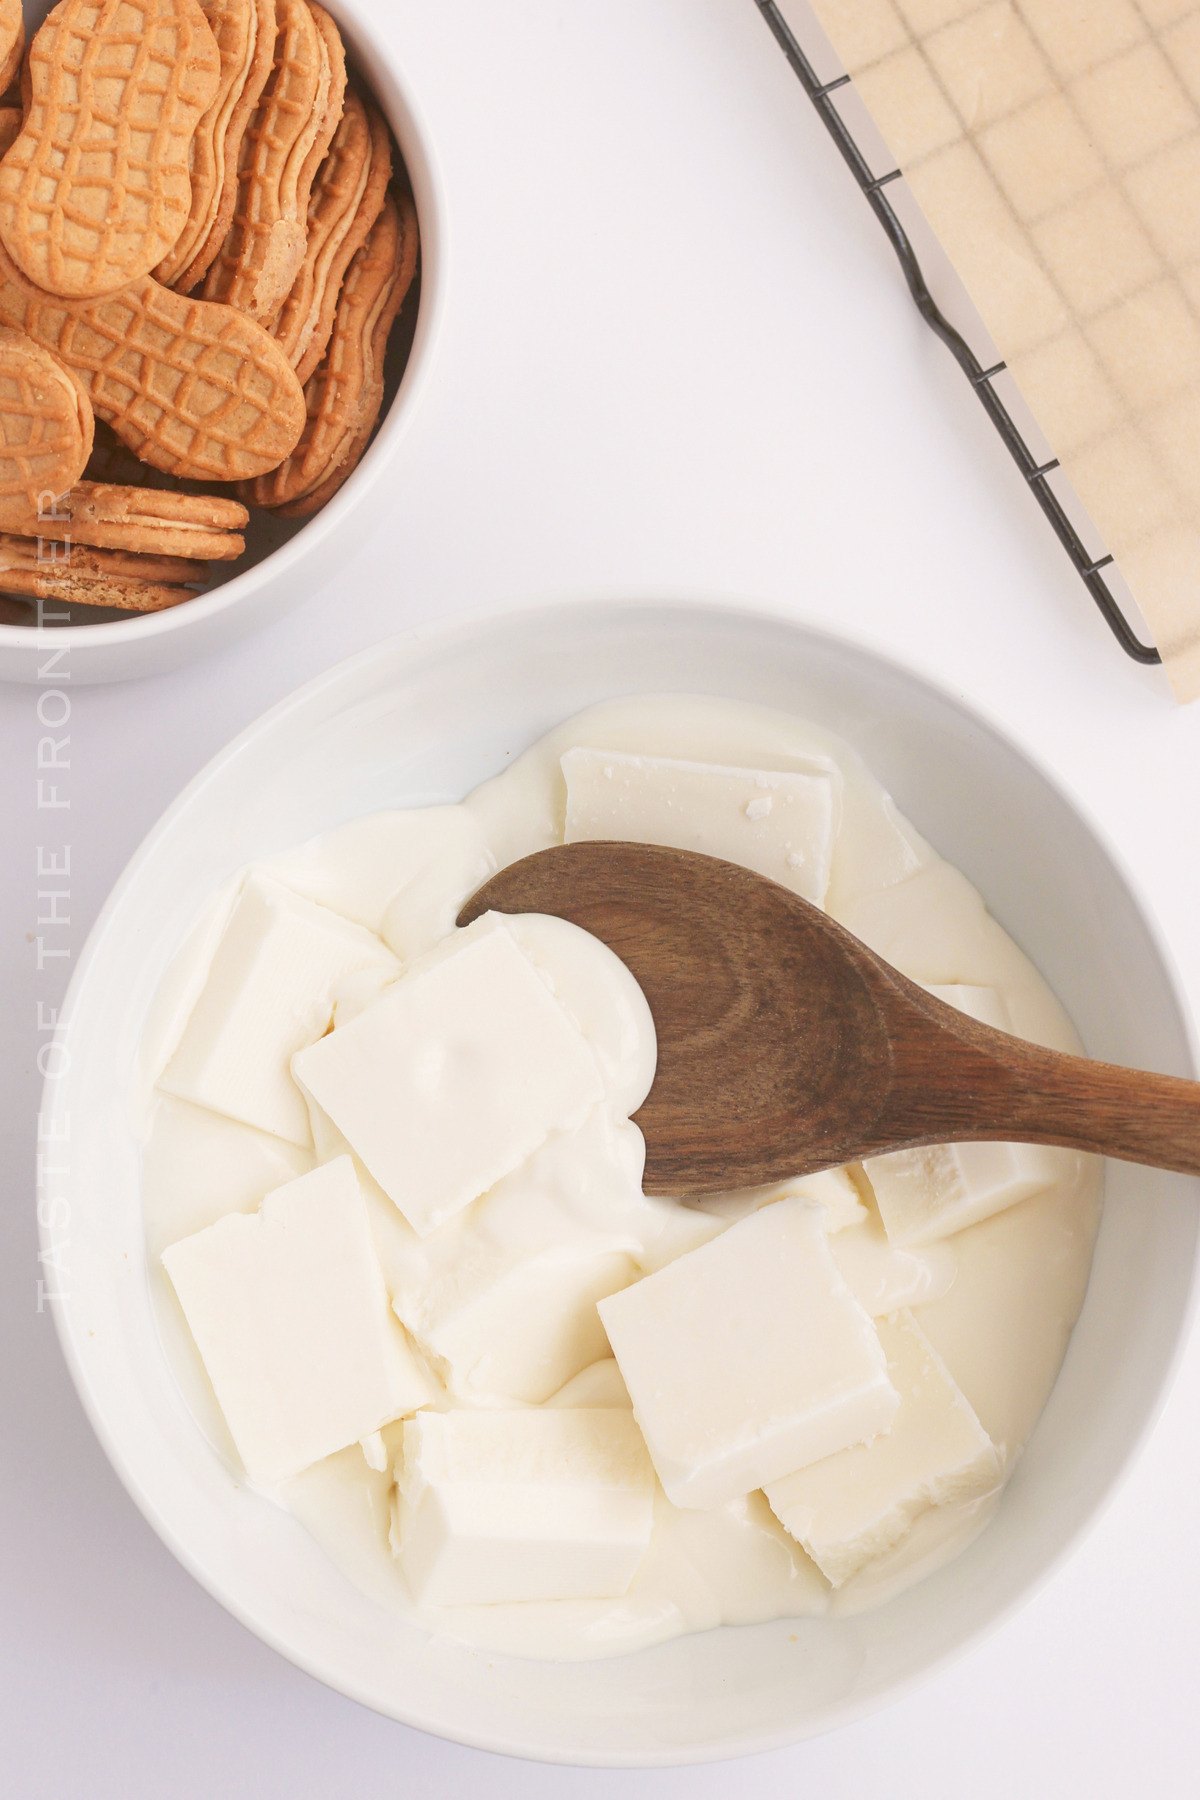
When your chocolate wafers become chunky rather than creamy, it is said that the chocolate is seized. This is typically due to overheating or contact with water or steam.
In the first case, the chocolate is just burning from excess heat, but in the second case, there is a negative reaction between the chocolate (which is waxy and has many oils that are hydrophobic, or “water-fearing”) and the water, causing the components of the chocolate to separate.
Be sure to refer to the package directions when melting chocolate to prevent this from happening.
I haven’t tried using sugar-free chocolate. But I think that will work just fine. That being said – you would need to also find some carb-friendly cookies in a similar shape to make these low-carb altogether.
If cake pops, chocolate truffles, or other chocolate-dipped treats intimidate you, don’t fret! These chocolate-covered Nutter Butter cookies are SO much quicker and easier and you can customize them a million ways.
These little cookies decorated like mummies take very little time to make start to finish and are perfect for packaging up in Halloween treat bags for the little ones!
Yes, this is a great activity to do with kids. They will have fun helping to decorate the cookies, dipping, adding the drizzle, and the eyes. Just be sure an adult handles melting the chocolate as the bowl can get quite hot.
DON’T MISS THESE HOLIDAY E-BOOKS!
This cute Halloween recipe is SUPER EASY and delicious – and if you’re like me this time of year, then you maybe already have some of these items on hand OR maybe you have never made cookies like this before, & you might be a bit nervous – but you’re going to love it. I have made a list below of the things I absolutely can’t live without when it comes to making this treat recipe. (you can also SHOP MY FAVORITES in my store)
If you love this easy Mummy Cookie recipe, you’re going to love these other Halloween treats too. Please click each link below to find the easy, printable recipe!
If you love this recipe for Mummy Cookies as much as I do, please write a five-star review, and be sure to help me share on Facebook and Pinterest!

CONNECT WITH YUMMI HAUS!
Be sure to follow me on my social media, so you never miss a post!
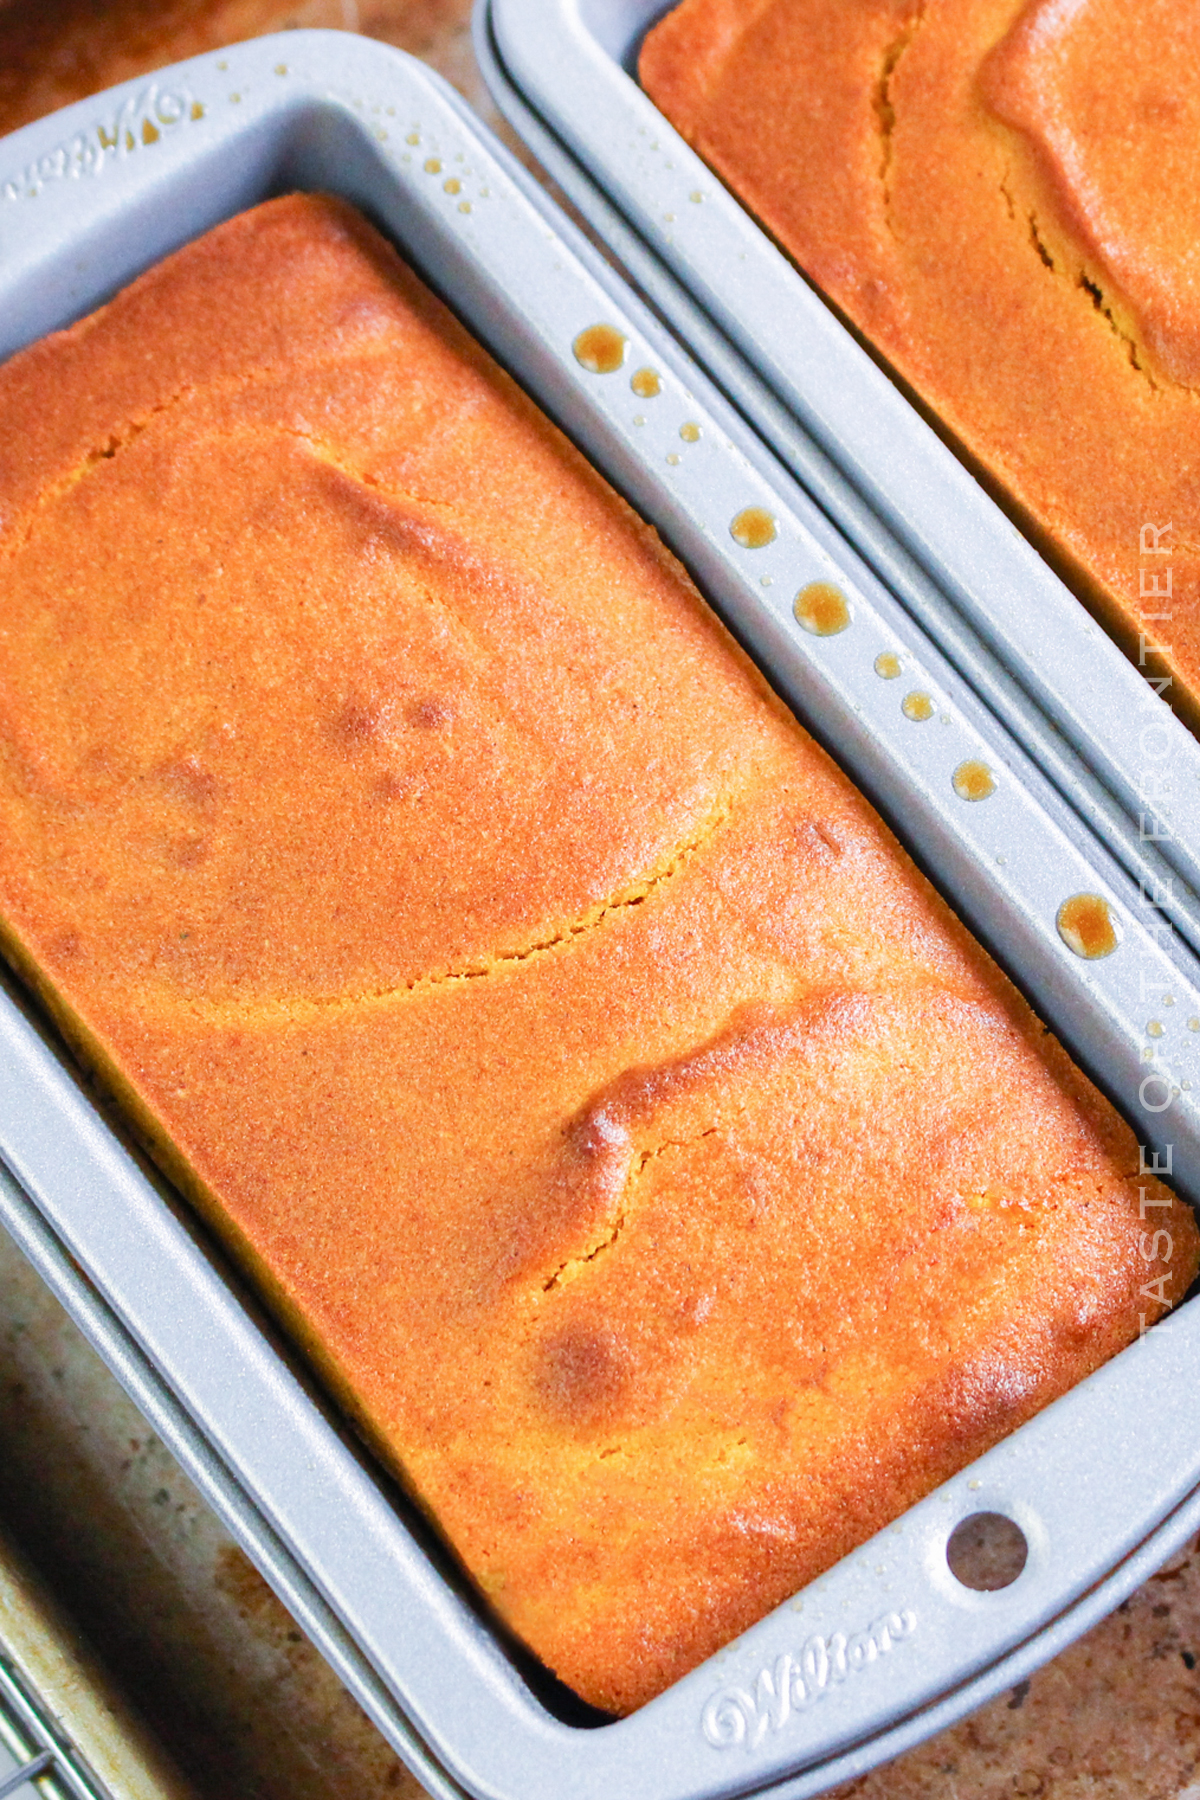
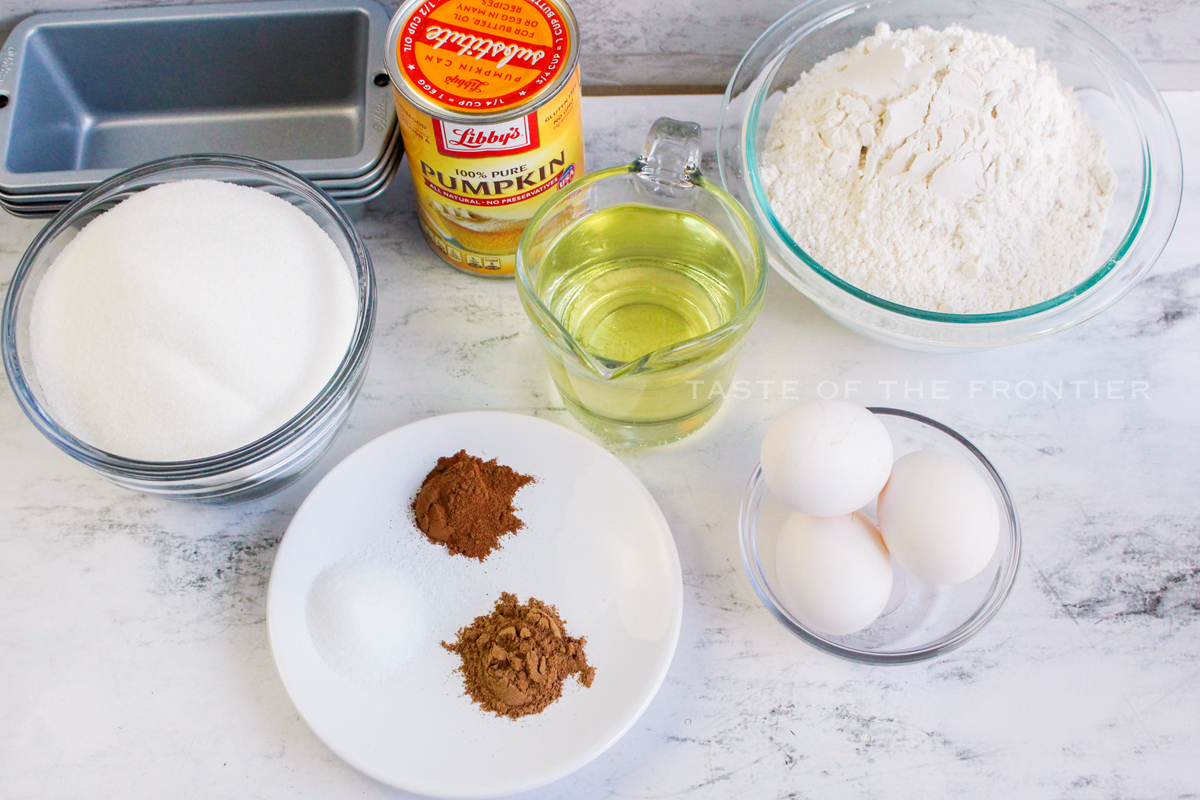
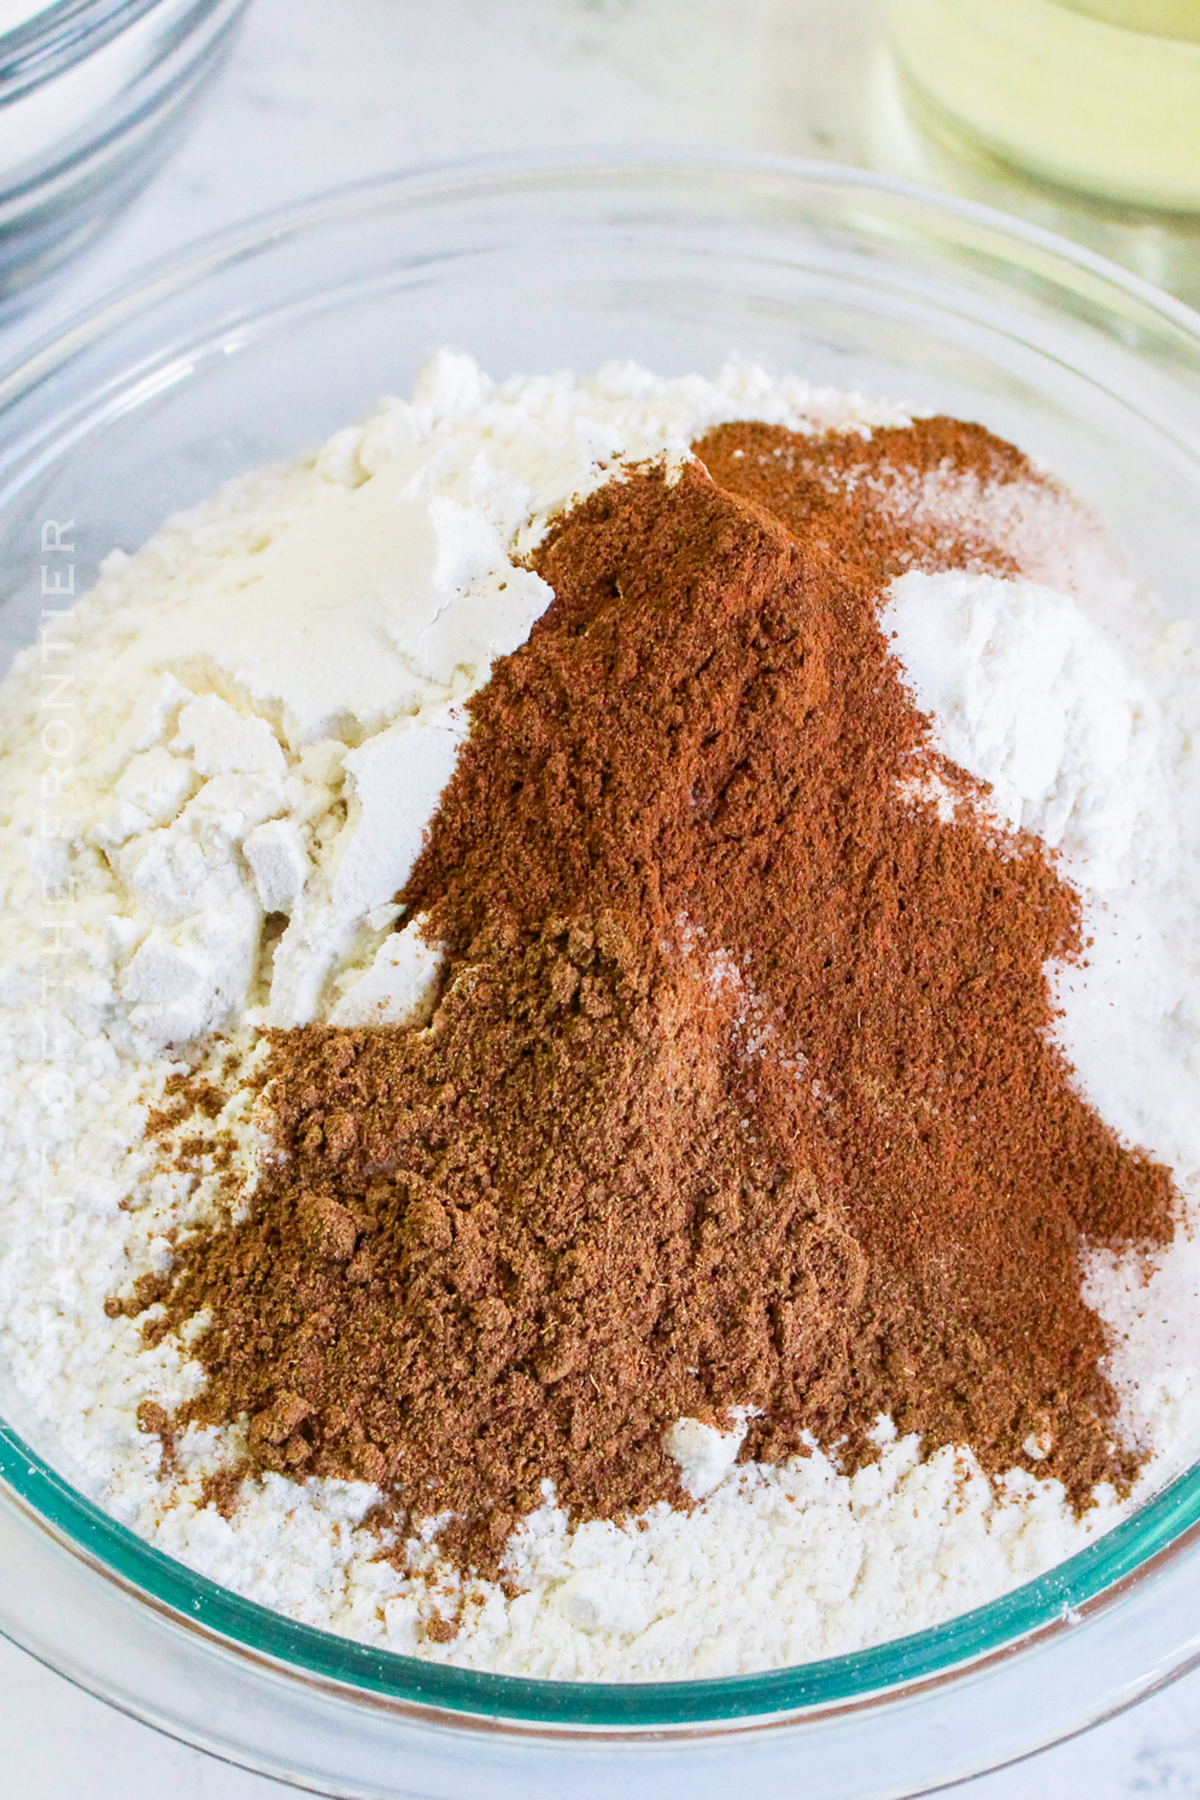
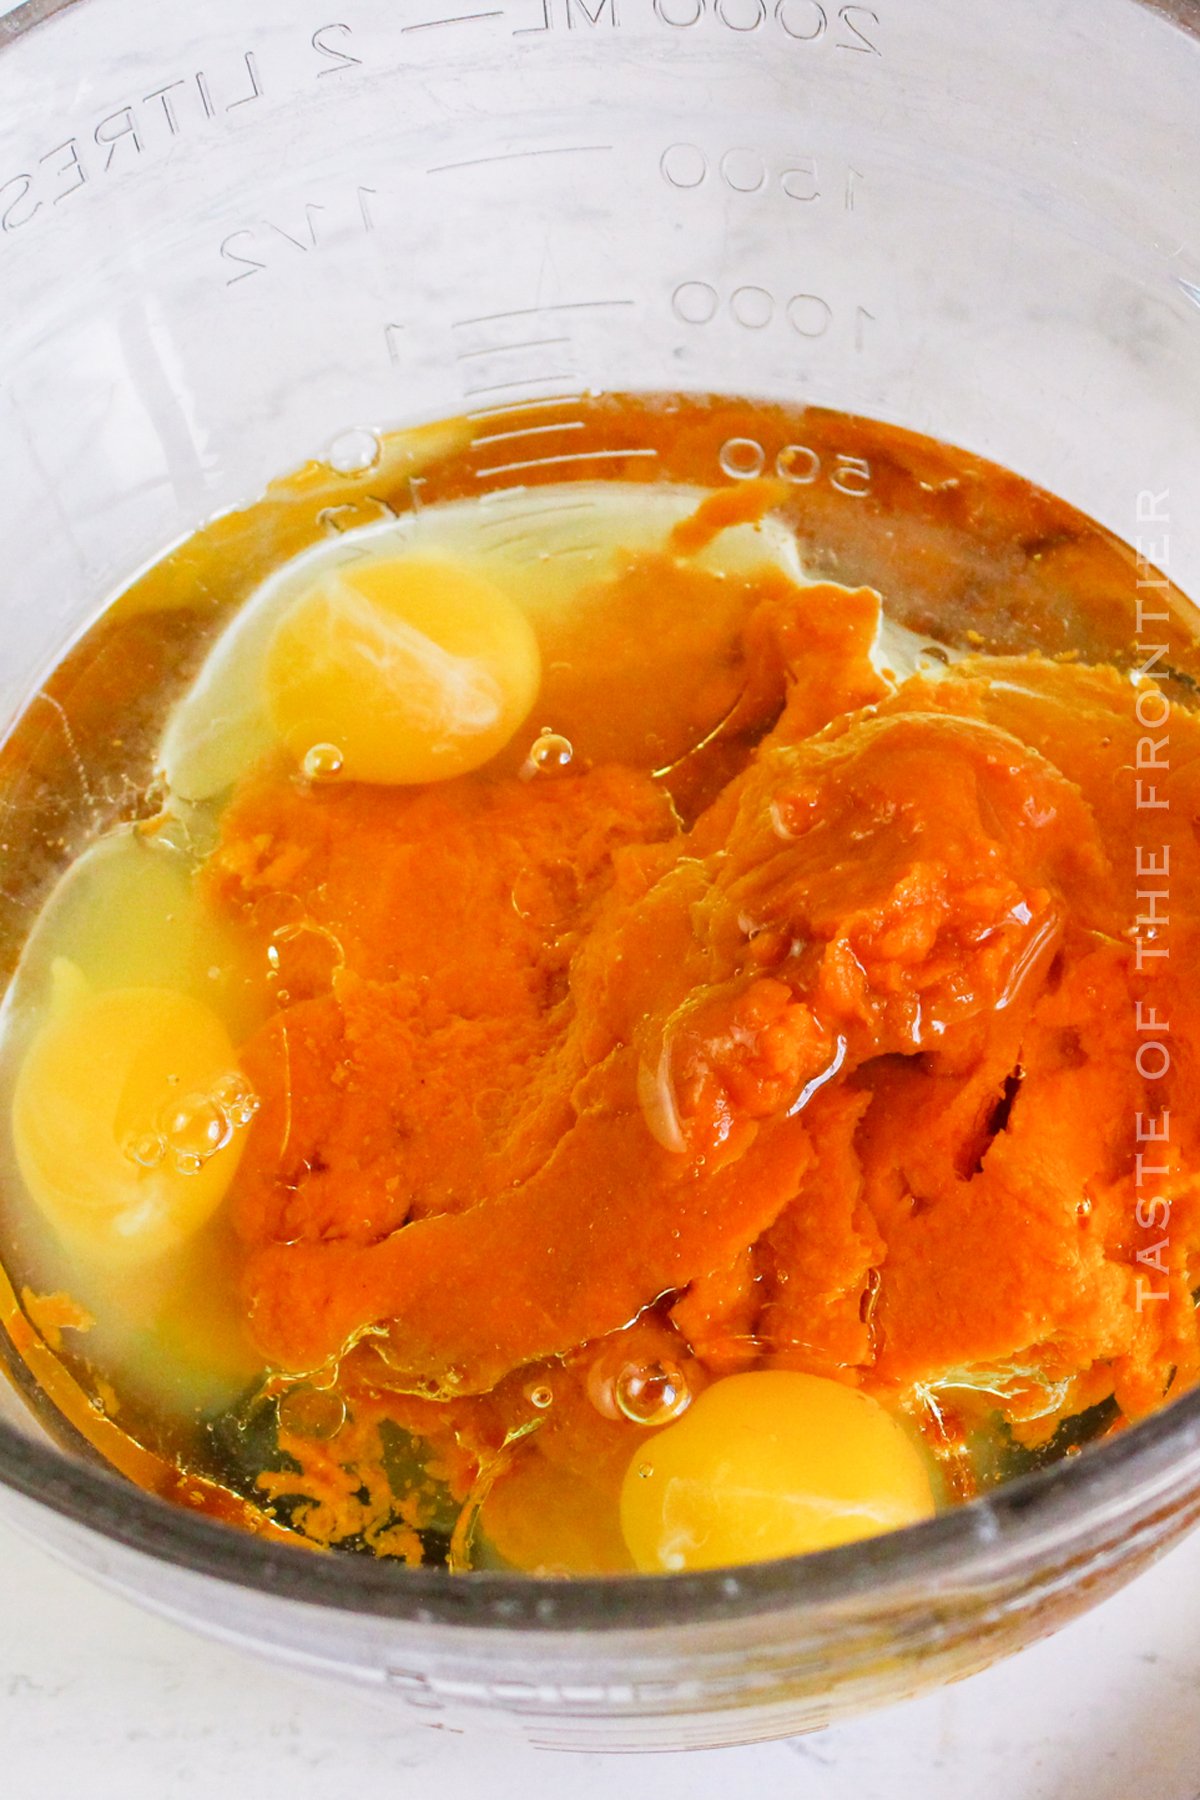
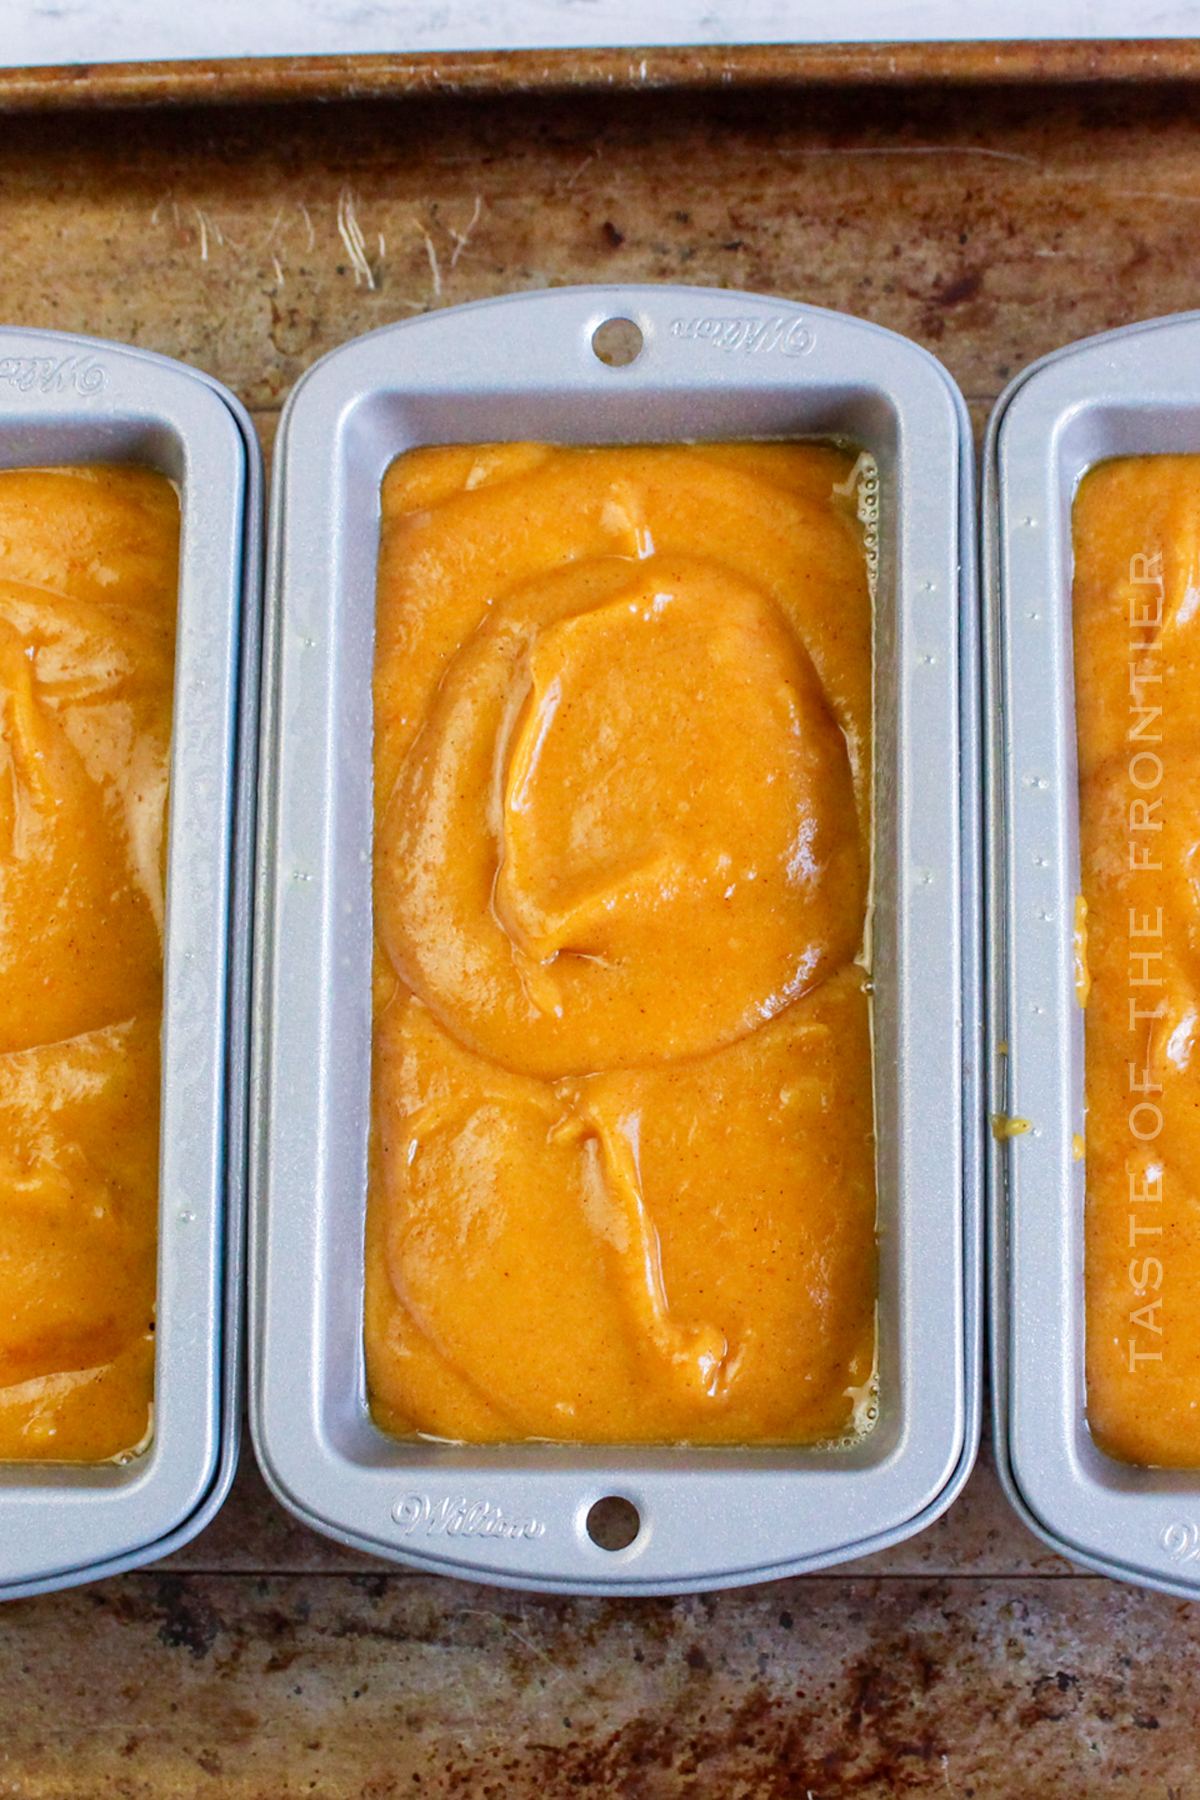
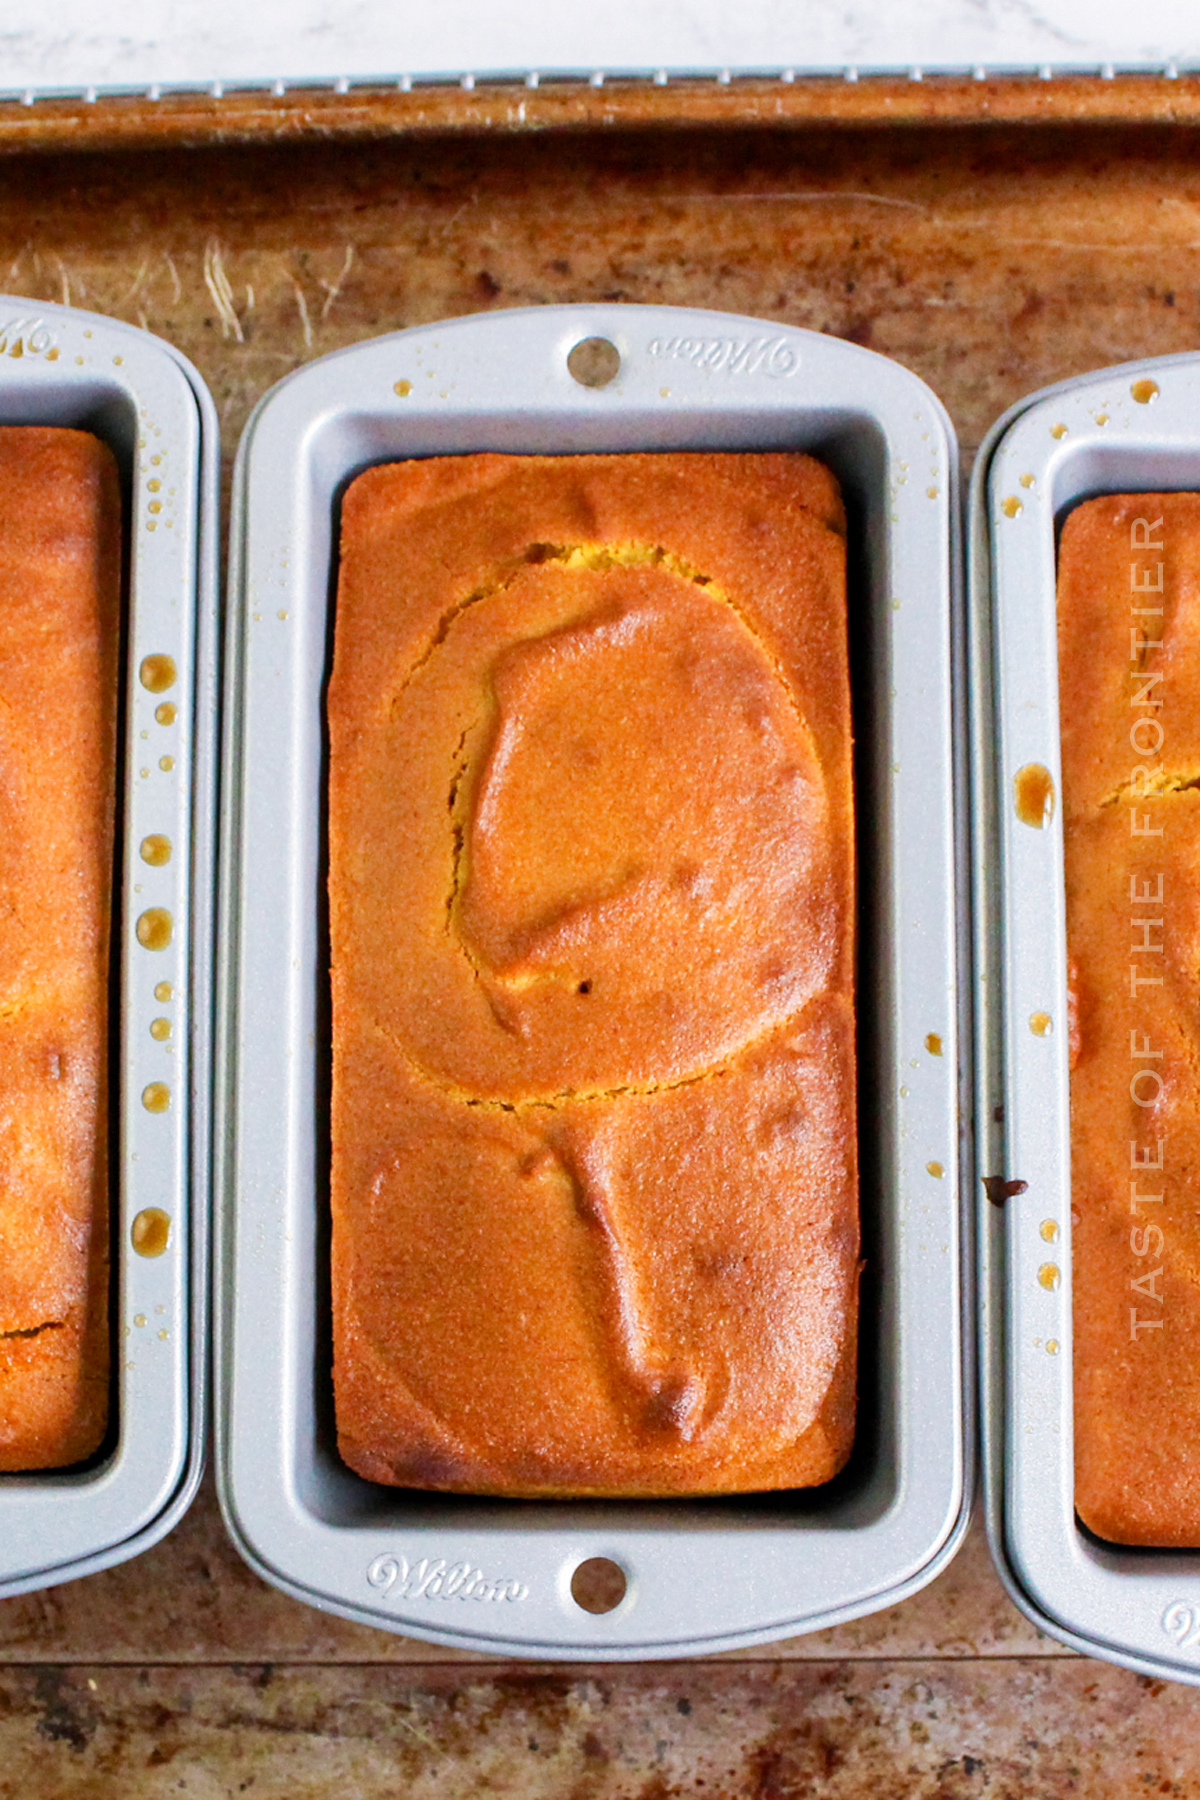
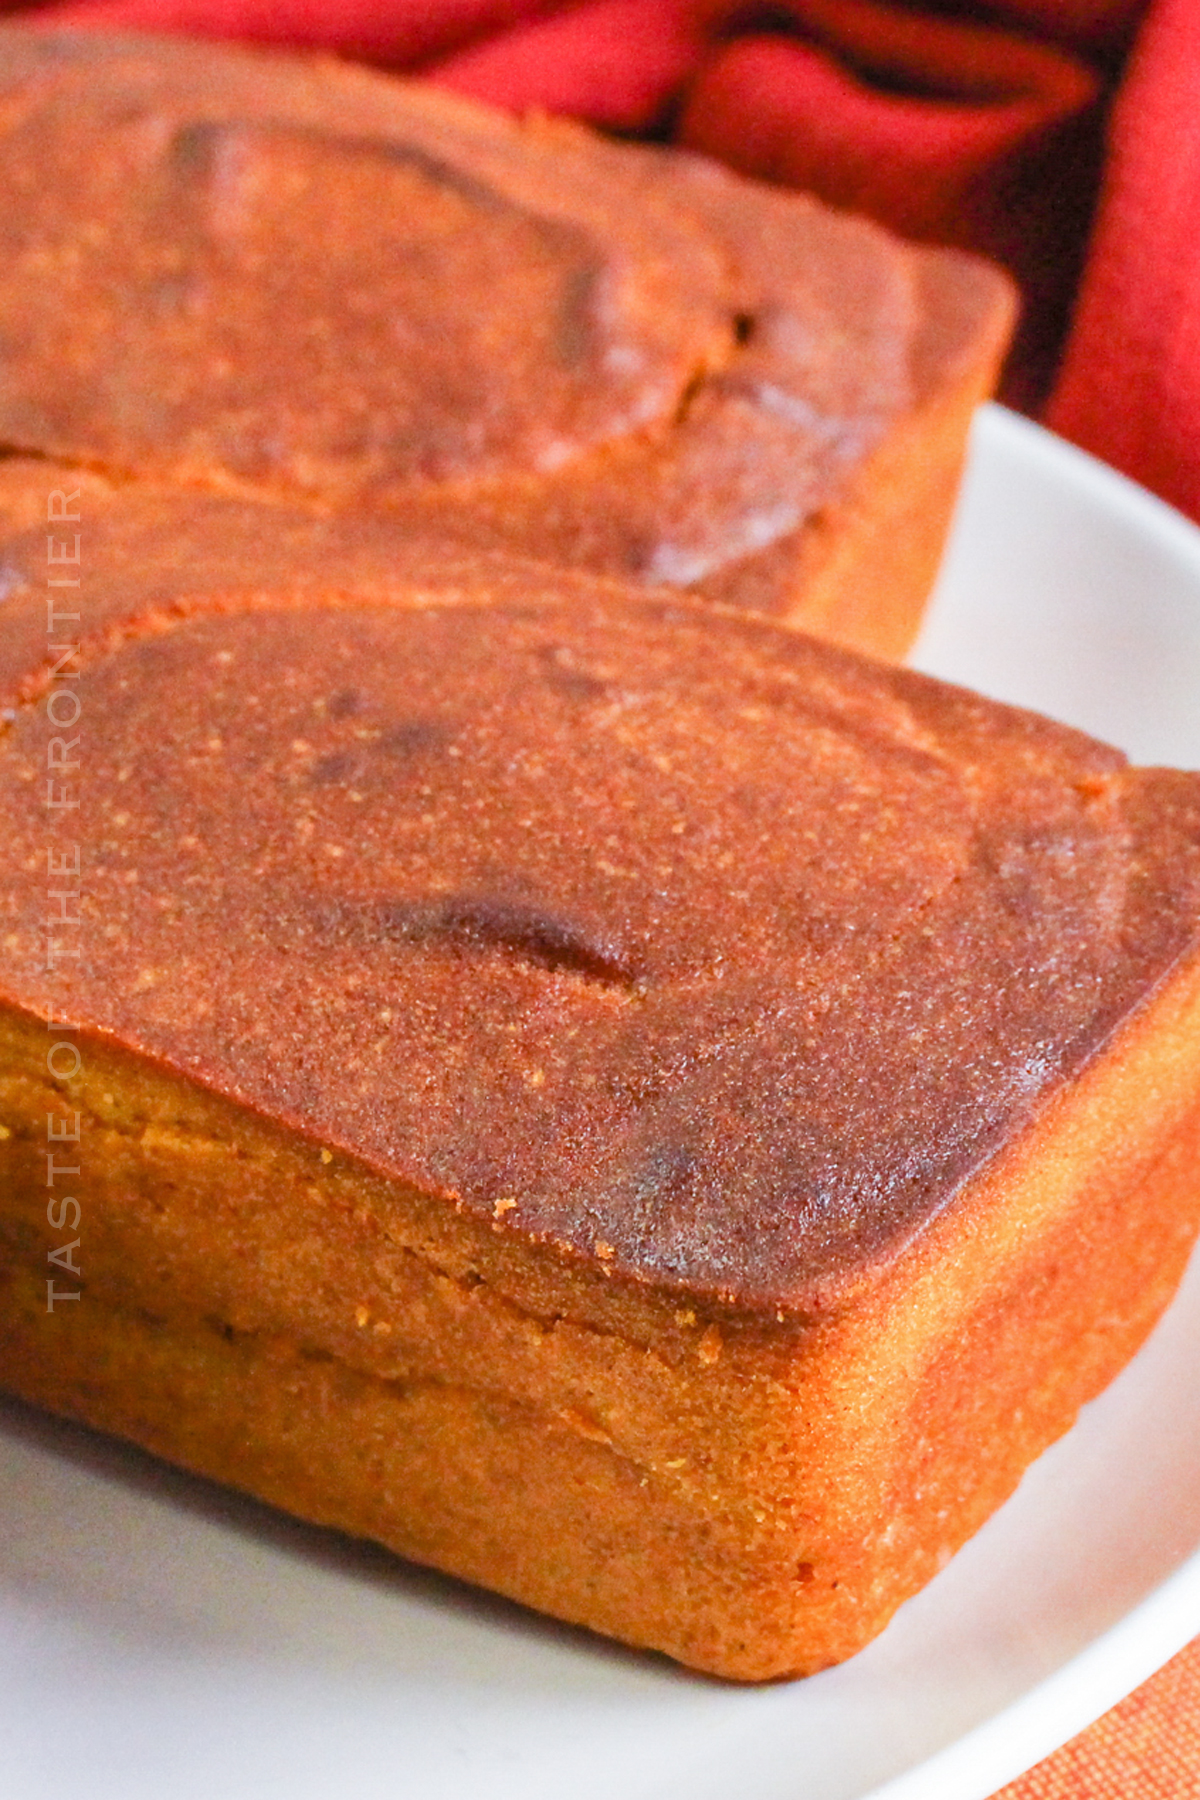
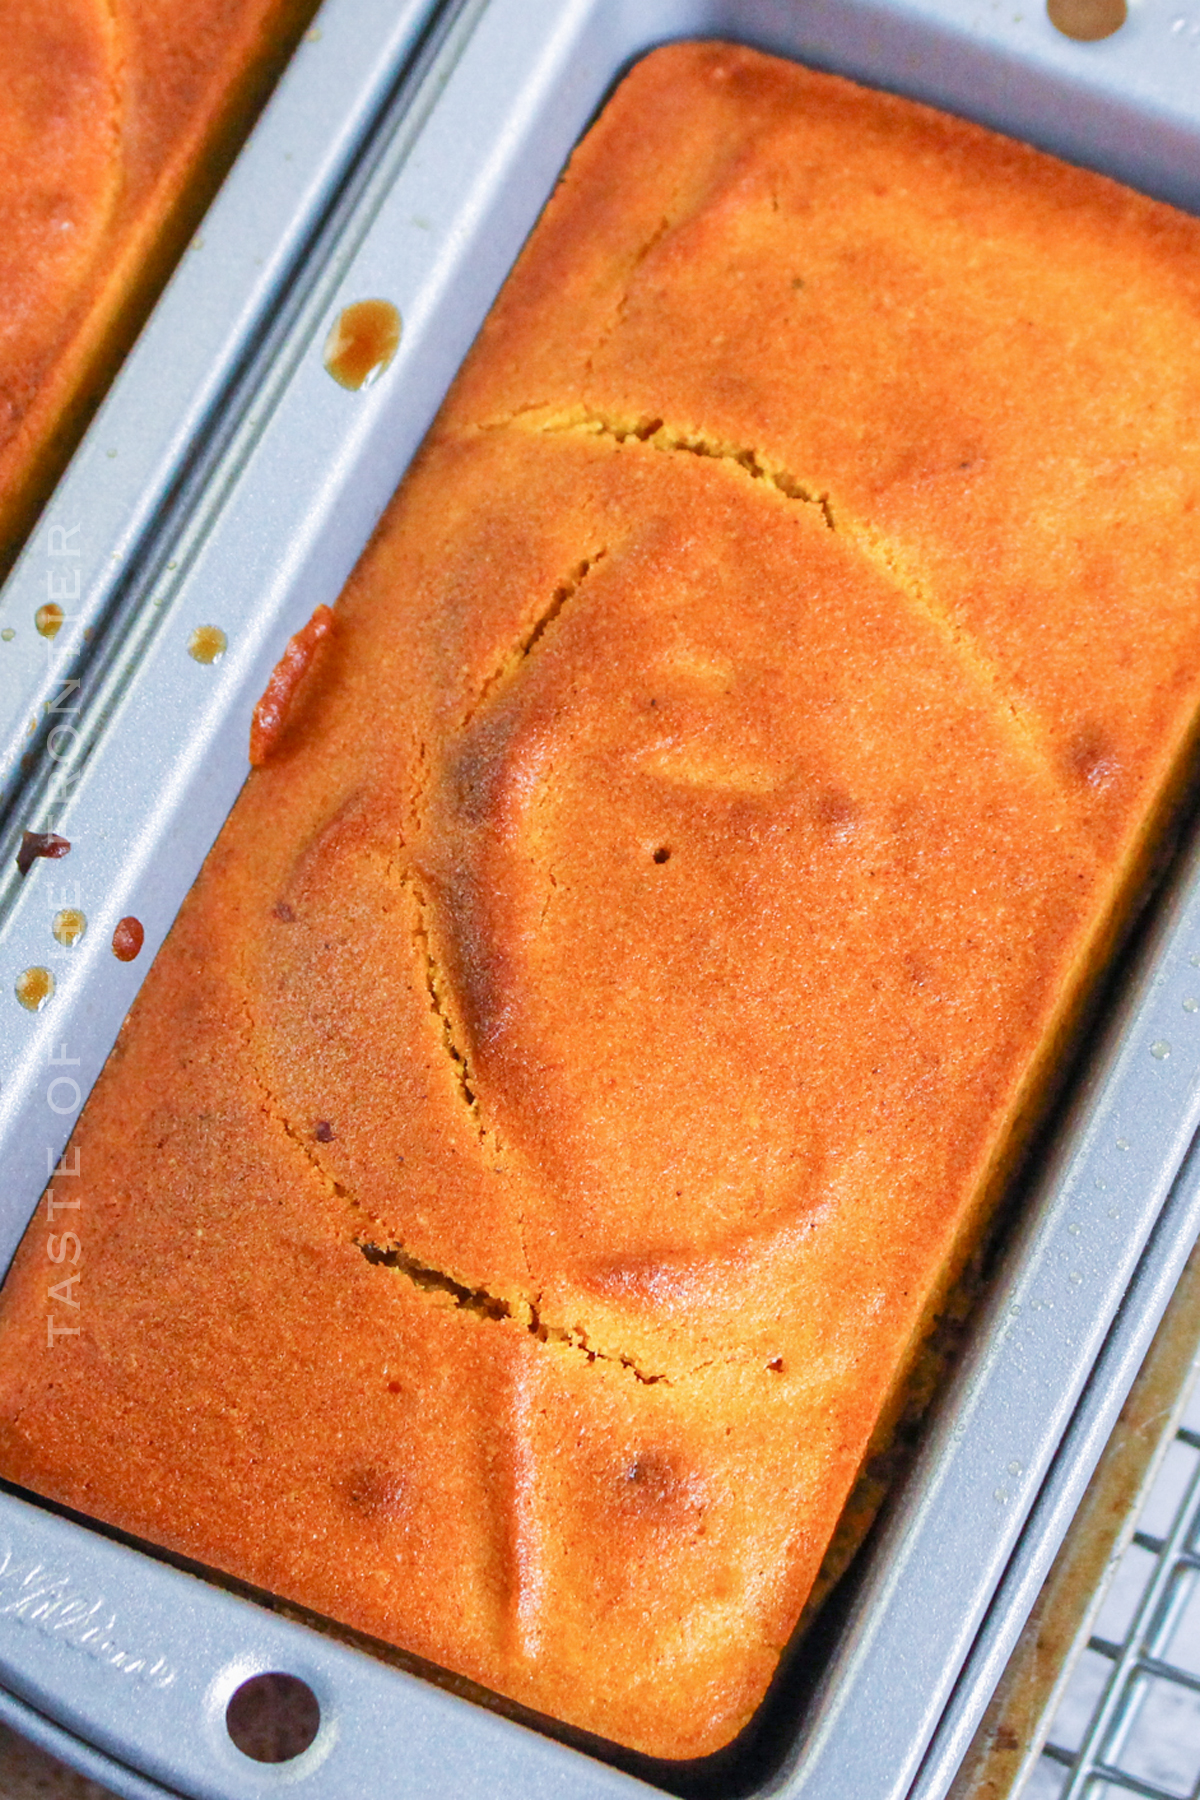
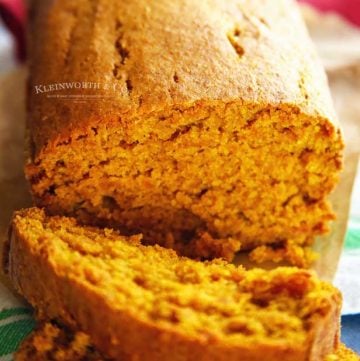
Yes, you read that right. Air Fryer Pumpkin Bread. Believe it or not, this delicious autumn treat can be made in your air fryer with little to no mess.
Plus, it cooks up quickly so you can enjoy a warm slice of pumpkin bread any time you want. Follow this easy recipe to make your very own air fryer pumpkin bread today.
These loaves make great gifts for neighbors and coworkers. They won’t believe you made them in your air fryer!
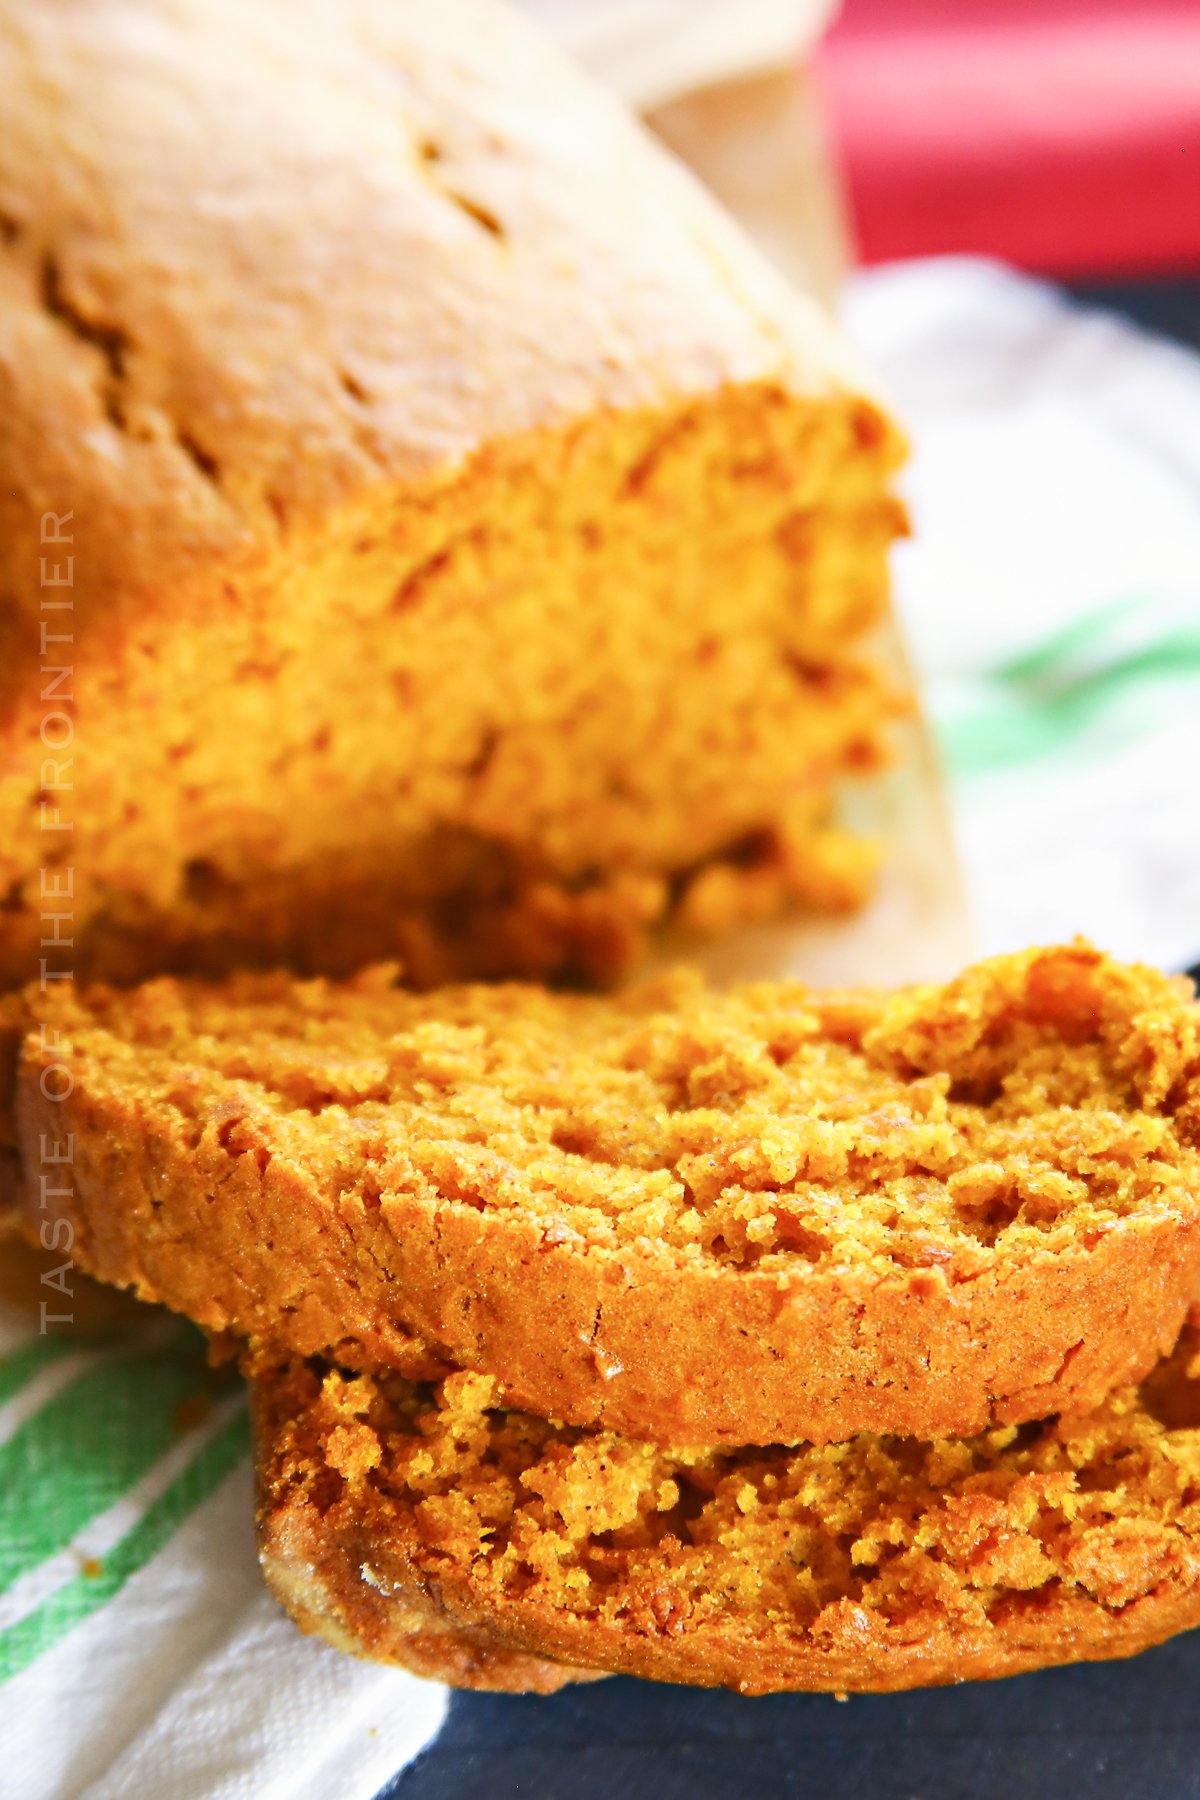
If you’re looking for a fun and easy way to add some fall flavor to your kitchen, you’ll love this air fryer pumpkin bread recipe.
With just a few simple ingredients, you can have a delicious piece of pumpkin bread that’s crispy on the outside and moist and fluffy on the inside. Plus, it only takes less than an hour to cook! So why not give it a try?
Wrap the bread in plastic wrap or cover the loaf pan with foil and keep it at room temperature for up to 3 days. You can also refrigerate if you prefer.
Yes, I do it often. If you plan on making ahead and saving – just wait for the loves to cool to room temperature. Then remove them from the loaf pans, wrap each of them tightly in plastic wrap and then place them in zip-top bags. Freeze for up to 4 months.
While air fryers are relatively new to the market, the technology isn’t really a new concept. They basically work like tiny convection ovens that you can use on your countertop.
Similar to a convection oven, it circulates the hot air within the cooking area using a high-powered fan. This helps evenly distribute the heat around the food which not only creates more evenly cooked food but also reduced cooking times.
By circulating the hot air, which contains the fine oil droplets from adding a light mist layer before cooking, and allows you to remove the need for submerging our foods in heavy oils to create the deliciously crunchy foods we all love.
This is really important when making pumpkin recipes. Pay close attention to the recipe & see if it calls for one or the other.
This recipe calls for pumpkin puree, which is just pumpkin that is cooked & pureed. Pumpkin pie filling is the puree mixed with sweeteners & spices – which isn’t what is usually called for when it comes to most recipes that use pumpkin.
They are not usually interchangeable because it will change the flavor & possibly the consistency of the recipe you are making.
Every air fryer is a bit different and they all cook at different rates – so in general, all cooking times are approximate based on the pan and temperature.
You can always cook the recipe longer if needed and reduce the heat a bit. If needed, you can tent the top if it is browning too much.
All of my recipes were created with an air fryer that had only a temperature & timer setting – since not all air fryers have all the additional settings.
You can use the bake setting when making recipes that you would traditionally bake – but if possible, please just set the temperature & time for this recipe.
I understand that you might not keep pumpkin pie spice on hand – or maybe you used so much last season that you may have run out. No problem – just blend the following ingredients together and you will have your own homemade pumpkin pie spice.
We love pumpkin recipes in this house – so we definitely have a lot of recommendations on what to make using pumpkin. Here is a small list of our favorites.
I have not tested this recipe in the oven. If you would like to make traditional, EASY pumpkin bread in your oven – try this super simple pumpkin bread recipe here.
Sticking can often happen when using an air fryer. I understand that most would think to add non-stick spray to the basket to prevent this. I strongly encourage you to not do that.
Non-stick spray leaves a coating that won’t come off, even when washed. Over time – this will build up and cause smoking when you use our air fryer.
I also do not recommend putting down a sheet of foil. The idea behind air frying is to allow the air to circulate around the food.
This is why the basket or tray has holes in it. If you put foil down – this prevents the air from reaching all of the areas it needs to in order for it to cook properly.
Instead – I recommend spraying the basket with olive oil using this spray bottle. You can line the air fryer with perforated parchment paper.
Or you can use one of these really great silicone liners that still allow for airflow but are reusable and easily cleanable.
Pumpkin bread will last in the freezer for up to 3 months. Be sure to wrap it tightly in foil or plastic wrap to prevent it from drying out. When you’re ready to enjoy it, simply thaw the bread at room temperature or pop it in the microwave for a quick defrost.
Bakers release is a combination of oil, flour, and shortening that makes releasing cakes and other baked goods almost effortless.
To make Bakers Release – it is as simple as 1,1 & 1.
Mix the ingredients together – whisking well. Store in an airtight container in the pantry or refrigerator. When ready to use, dip a pastry brush into the mixture and spread it over the cake pan.
Pumpkin bread is best kept moist by storing it in an airtight container. You can also wrap the bread in foil or plastic wrap to help keep the moisture in.
Be sure to only slice what you plan on eating immediately. Just like a standard loaf of bread – it can dry out quickly once sliced. You can always reserve the heel of these just as you would regular bread to help keep the inner slices moist for longer.
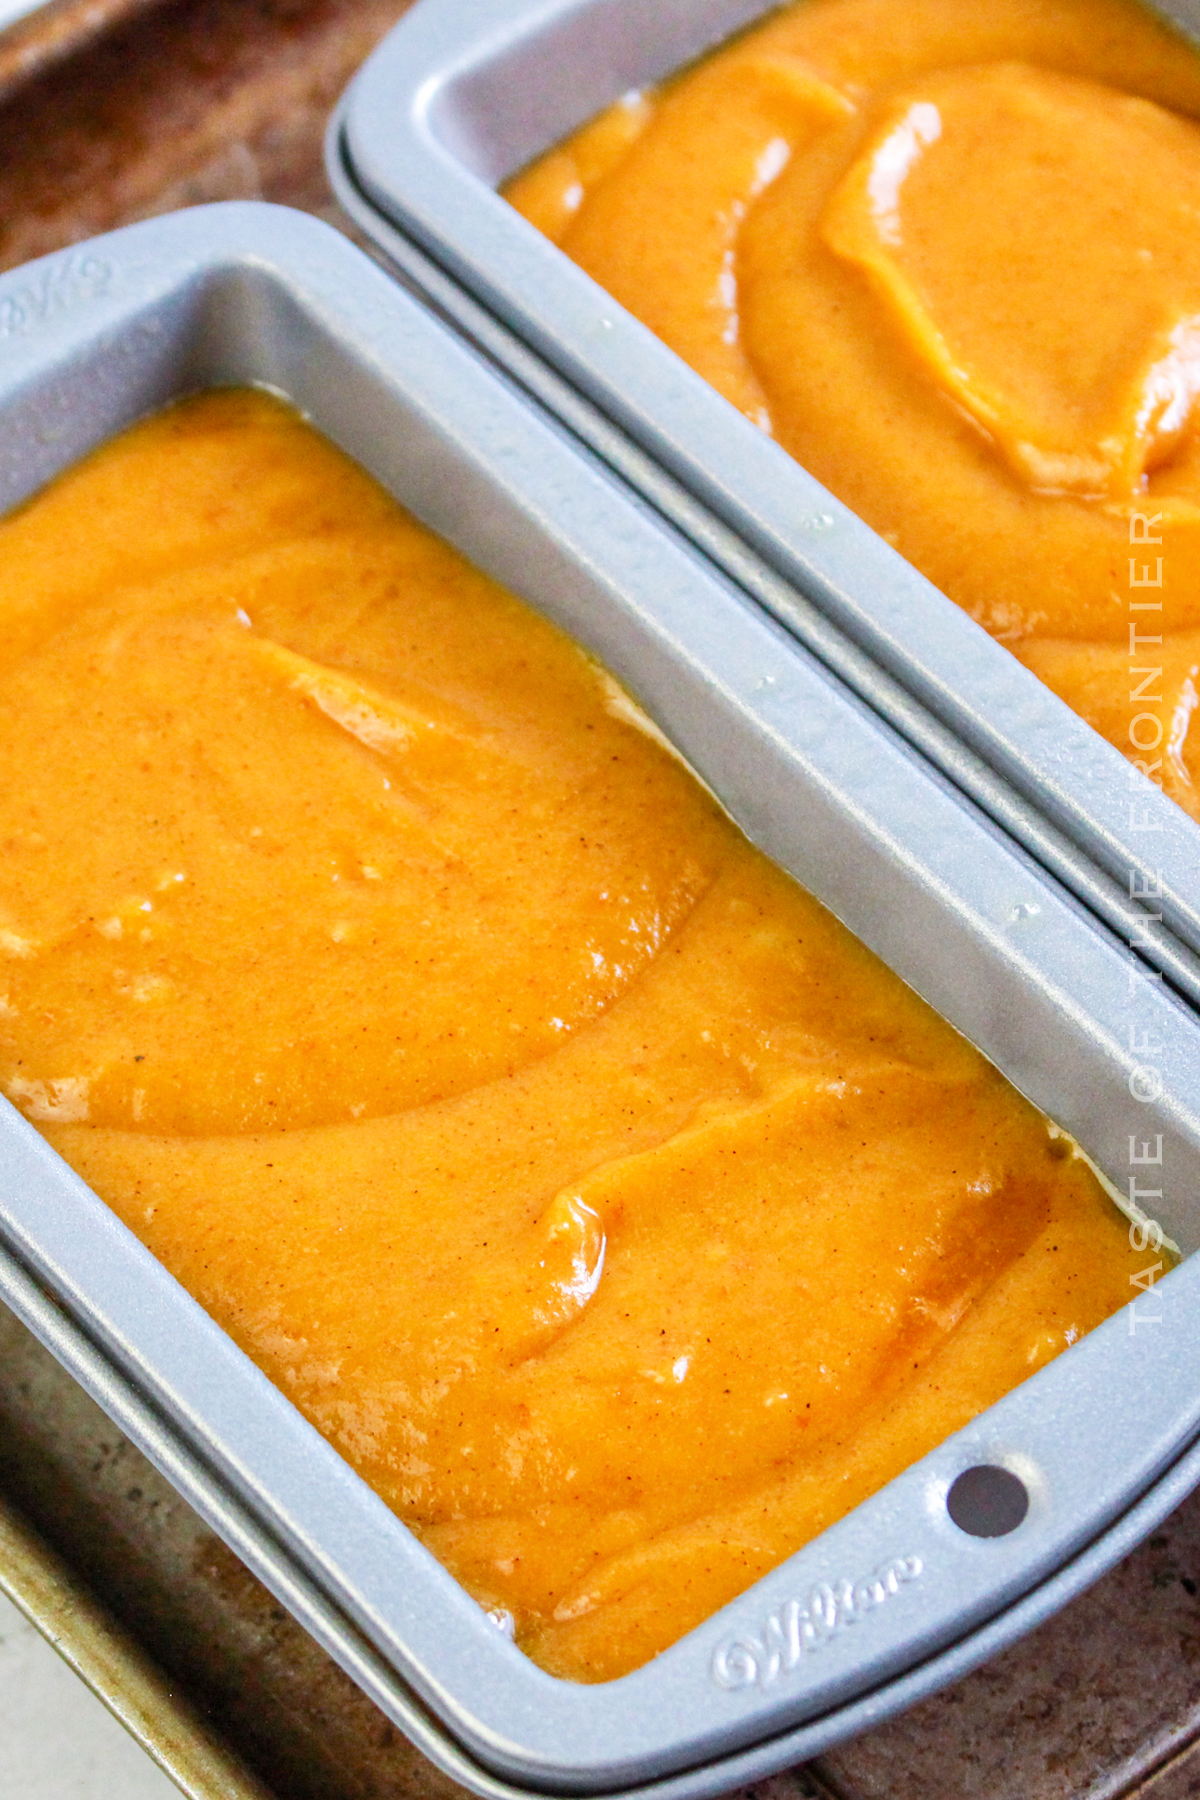
The dome of the bread is what makes it beautiful. Often times this can happen if the loaf pans aren’t filled high enough. Sometimes this can also happen if the sides are greased too much, giving little for the batter to hold onto as it is rising during the baking process.
Another thing that could be happening is that your leavening agent – in this case, the baking soda could be old. You want to make sure that it isn’t more than a few months old or it could hinder the rise when making bread.
If you have checked all of these things and your loaves are still flattening, it could be an elevation issue. To help combat this, try adding another half to 1 whole additional teaspoon of baking soda or even a teaspoon of baking powder to help that bread rise.
We actually have 3 air fryers. I have a smaller one from Phillips that we started with. I have since given that to my son since he’s only cooking for 1.
But the more I used the air fryer I realized I really wanted a digital screen. It wasn’t any more expensive, in fact- our XL air fryer from GoWISE was less expensive than the Phillips and I love its ease & extra functions.
Plus it comes with a lot of the extra accessories I like to use when cooking with my fryer.
But I when I started working on my second air fryer book, I wanted to change things up. I picked up this LARGE air fryer that has been wonderful. It has Touch Screen Presets plus it is XL Family Size, which is great!
DON’T MISS THESE HOLIDAY E-BOOKS!
This pumpkin bread recipe is SUPER EASY and delicious – and if you’re like me this time of year, then you maybe already have some of these items on hand OR maybe you have never made bread in your air fryer before, & you might be a bit nervous – but you’re going to love it. I have made a list below of the things I absolutely can’t live without when it comes to making this pumpkin bread recipe. (you can also SHOP MY FAVORITES in my store)
If you love this recipe – You might also love my air frying cookbook too!
The Essential Air Fryer Cookbook for Two also makes everything fast and easy. Most recipes take 30 minutes or less and they’re designed with simple prep and minimal clean-up in mind. Nutritional information, serving size descriptions, and recipes for vegetarians, vegans, and gluten-free are also included. There’s so much to savor.
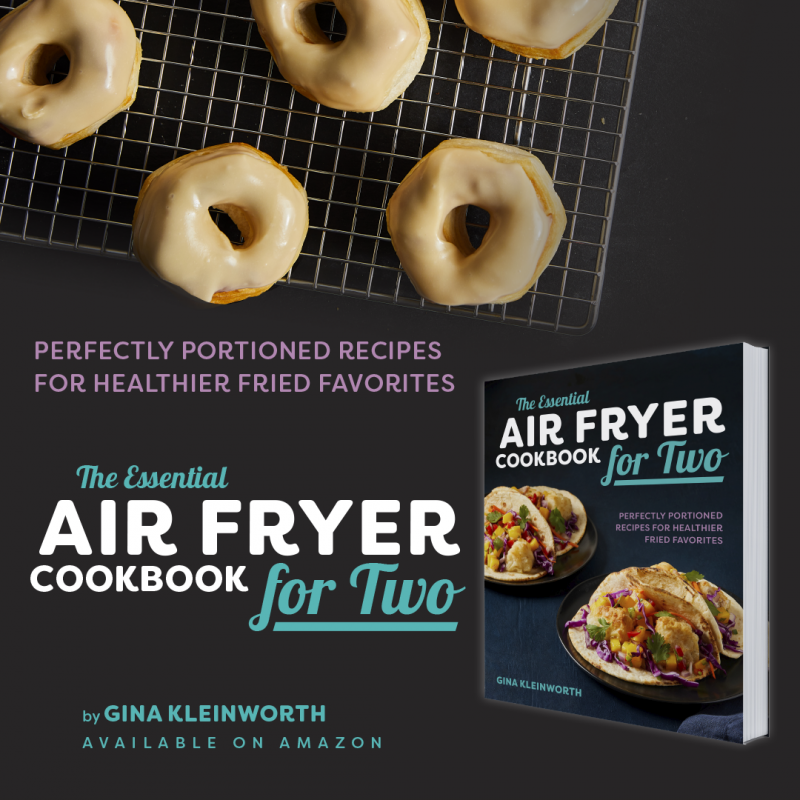
The Essential Air Fryer Cookbook for Two
Perfectly Portioned Recipes for Healthier Fried Favorites
If you love this easy Air Fryer Pumpkin Bread recipe, you’re going to love these other pumpkin recipes too. Please click each link below to find the easy, printable recipe!
If you love this recipe for Pumpkin Bread made in the Air Fryer as much as I do, please write a five-star review, and be sure to help me share on Facebook and Pinterest!
CONNECT WITH YUMMI HAUS!
Be sure to follow me on my social media, so you never miss a post!
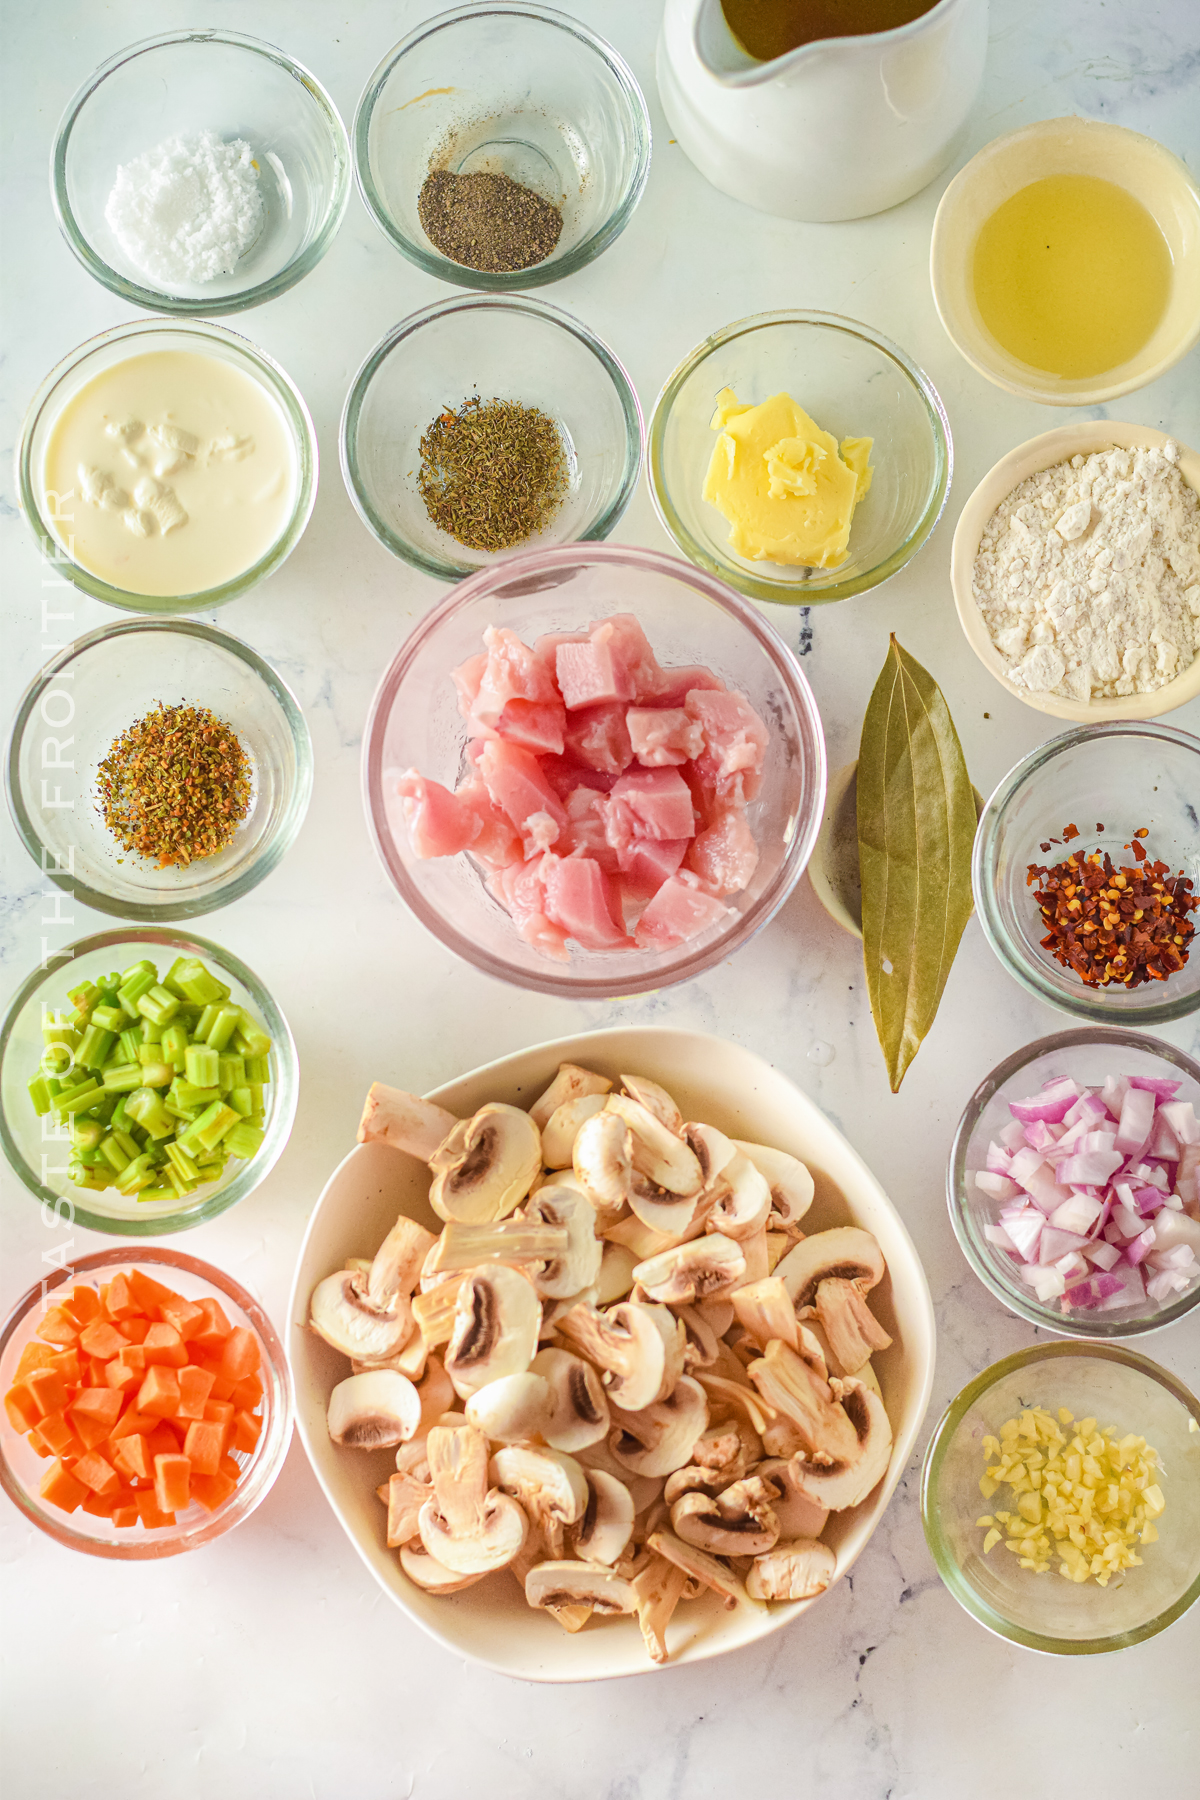
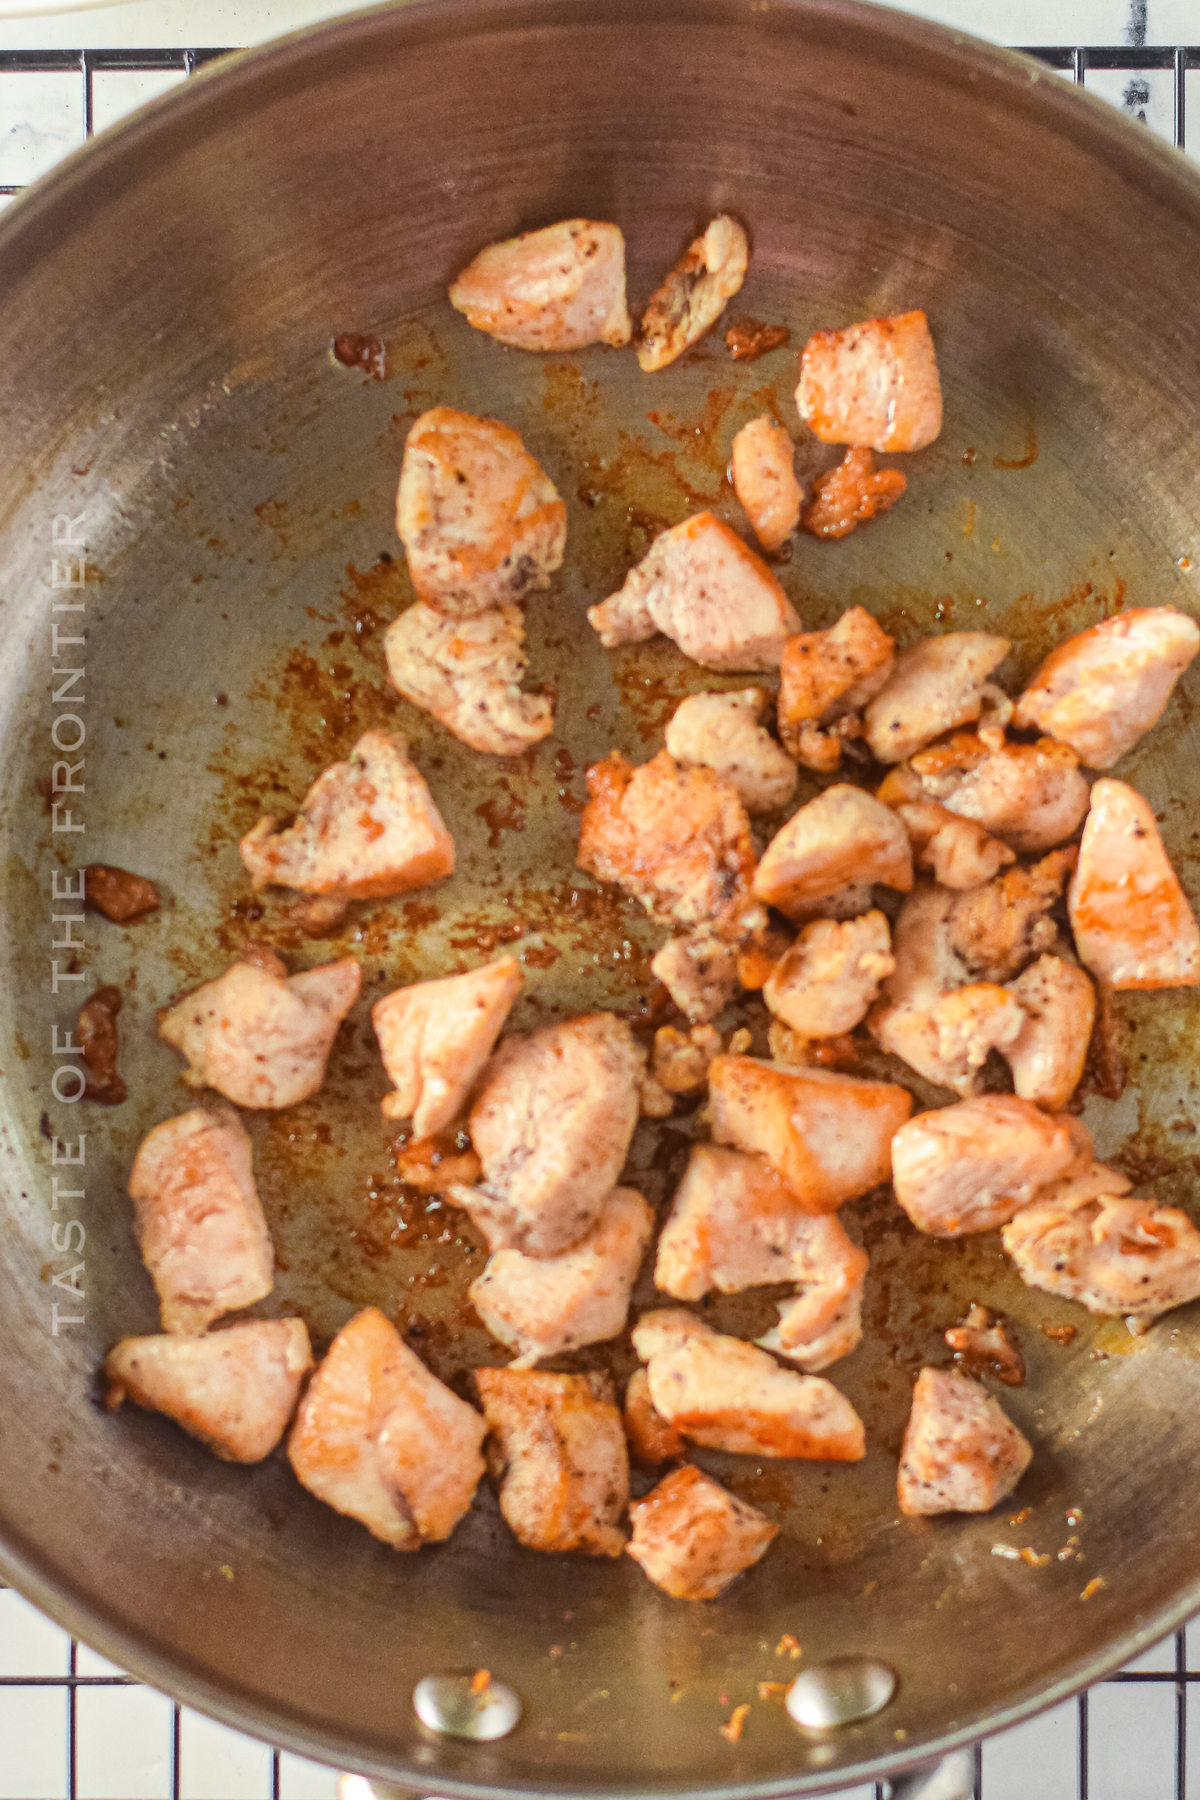
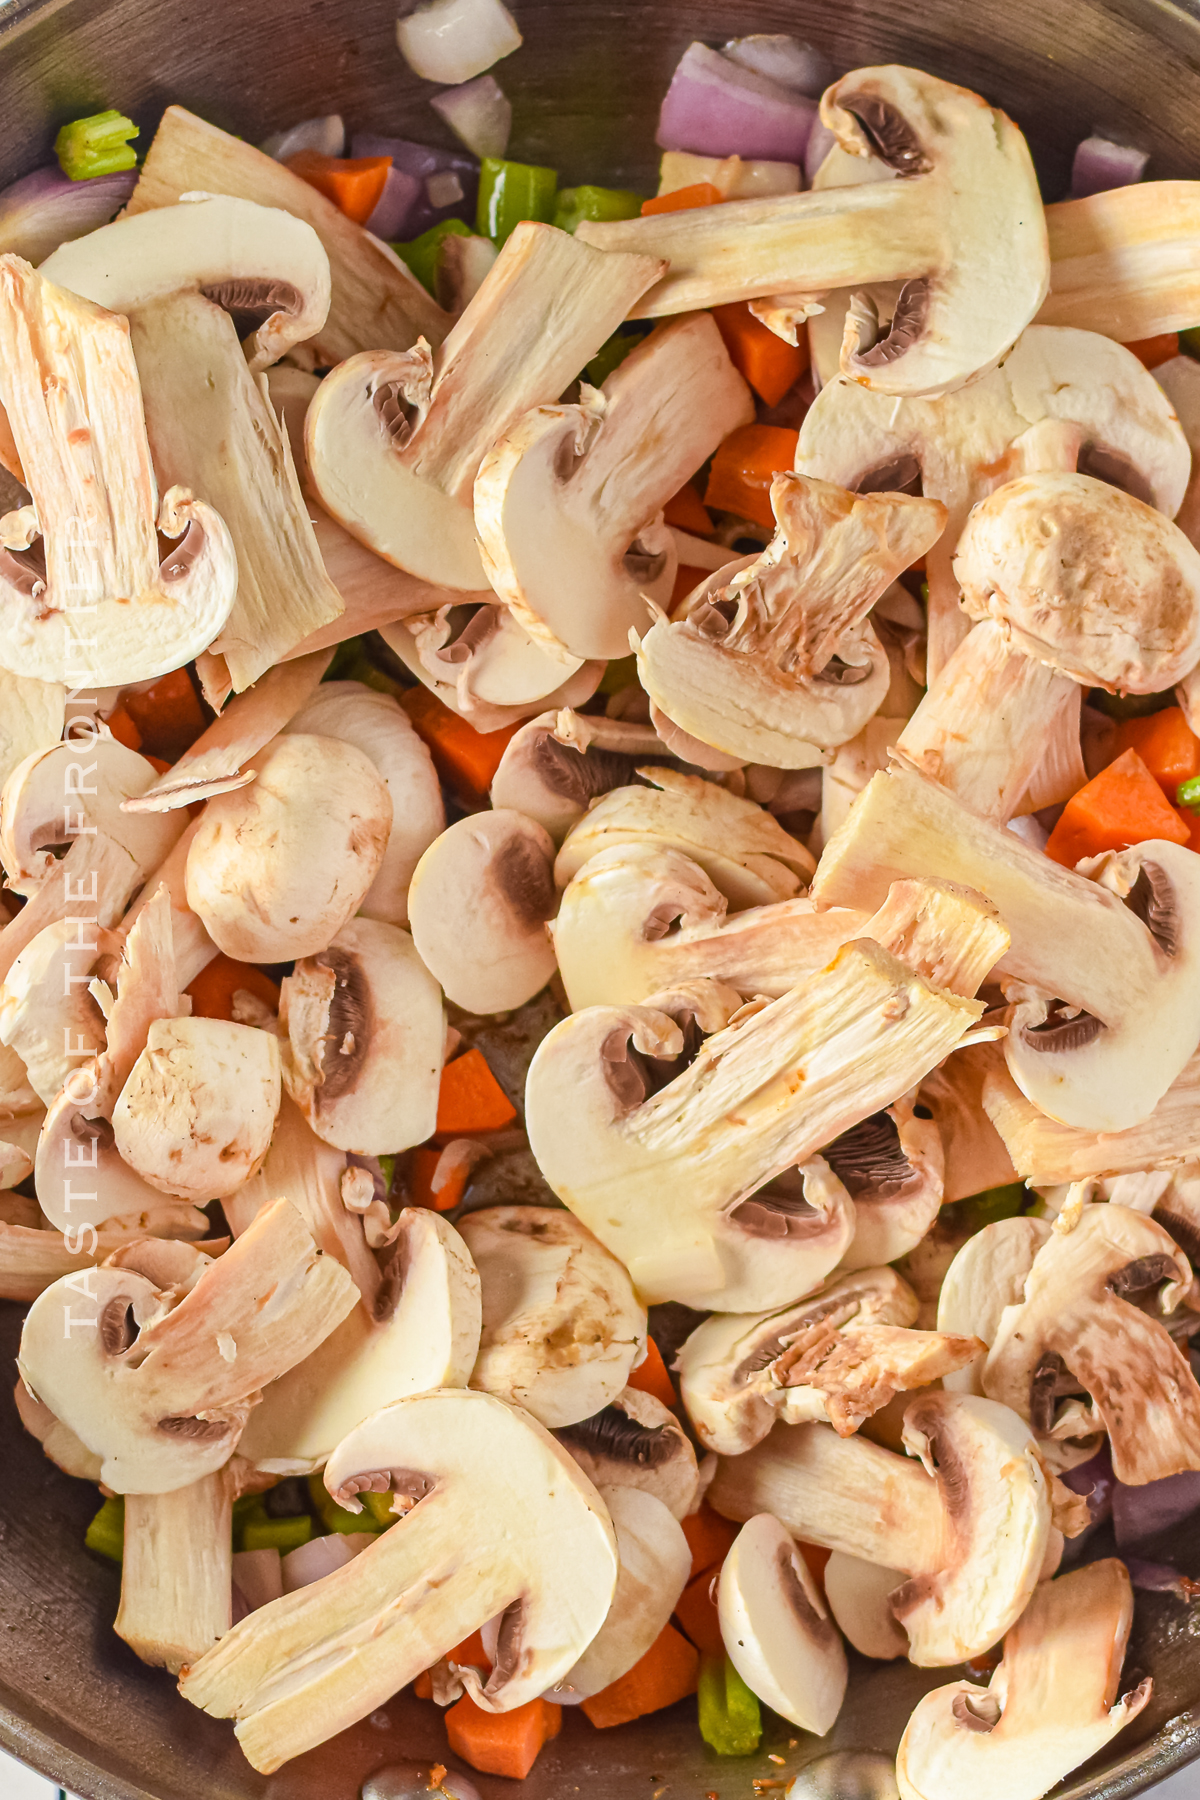
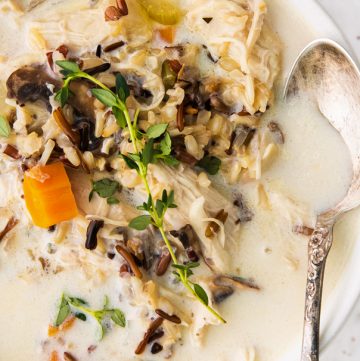
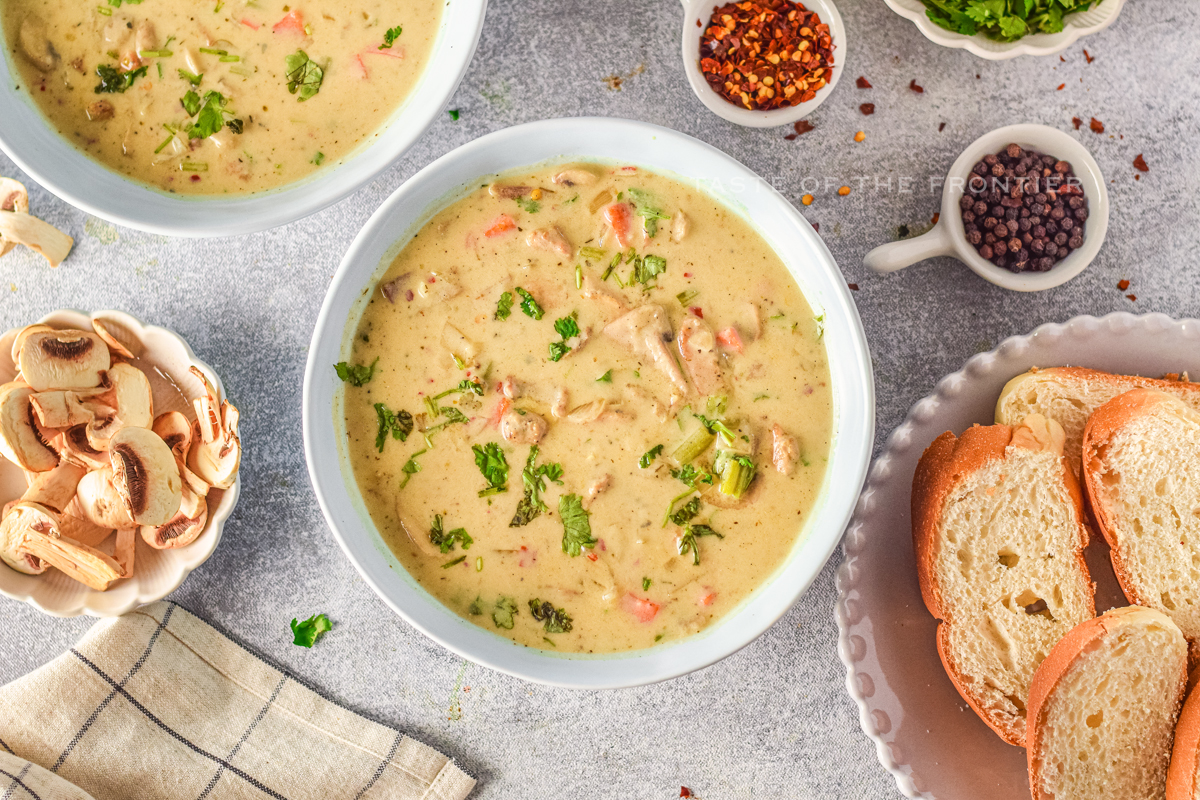
Here’s an easy soup recipe that will WOW your taste buds! This Chicken and Mushroom Soup is perfect for busy weeknights because it is ready in just 25 minutes. Super tasty, comforting, and hearty.
It’s super simple to make and can be modified to your liking. So go ahead and give it a try!
You won’t believe just how quick and easy it is to make a homemade, creamy chicken soup in such a short amount of time. Plus it is really tasty, you’ll want to make this one for guests.

Aren’t soups the best? Especially on a cold day or even a warm one. This chicken and mushroom soup is super easy to make and it’s really delicious. You’ll love it!
This is one of my “go-to” dinners when the day is too much to make anything complicated. I love how quickly it comes together and how having the leftovers simplifies the rest of the week too.

If you have any leftover Chicken and Mushroom Soup, it is important to store it properly in order to maintain its quality and flavor. Leftovers can be stored in the fridge for up to four days or in the freezer for up to six months.
When storing leftover soup in the fridge, be sure to place it in an airtight container. This will help to keep the soup fresh and prevent it from absorbing any odors from other food in the fridge. If you are freezing the soup, be sure to first place it in a freezer-safe container before transferring it to the freezer.
When reheating Chicken and Mushroom Soup, be sure to do so slowly and gently. Reheating too quickly can cause the soup to become watery and lose flavor. If reheating in the microwave, be sure to stop and stir the soup occasionally to help evenly distribute the heat.
Yes – of course! If you want to speed the process along, you can use leftover rotisserie chicken or canned chicken if that is what you have.
I also recommend dicing up pork or adding ground sausage to this soup. So good!
Yes – you can mix a variety of vegetables as needed. So you can use any canned, frozen, or fresh – whatever you have will work.
You bet that will work just fine. Just know that it will make the soup thicker AND increase the calories when making that swap.
There are many different things that you can serve with Chicken and Mushroom Soup. Some good options include:
In theory, yes, this recipe would double well. If you have a very large stockpot, you can double this recipe on the stovetop.
Yes – you can make this vegetarian. Just eliminate the chicken and use veggie broth – super easy!
You can do this by following the recipe here – only you will add the cooked ingredients to the slow cooker instead of to the pot on the stove.
Place the lid on the crockpot, turn it to high for 2 hours or low for 3-4 hours, and cook until the veggies are soft. If you want to add the chicken to the slow cooker when it is raw, instead of sauteeing it first – you will need to cook on high for 4 hours or on low for 6-7.
A: Yes, you can add additional vegetables to the soup if desired. Adding more mushrooms or chicken would be a good option too.
Just know that by swapping out the half and half with one of these options will make the soup thinner. You might need to add more flour or even a cornstarch slurry to help thicken it to your liking.

This creamy chicken soup with mushrooms recipe is SUPER EASY and delicious – and if you’re like me, then you maybe already have some of these items on hand OR maybe you have never made homemade soup before, & you might be a bit nervous – but you’re going to love it. I have made a list below of the things I absolutely can’t live without when it comes to making this simple comfort food recipe. (you can also SHOP MY FAVORITES in my store)

If you love this easy Chicken and Mushroom Soup recipe, you’re going to love these other soup recipes too. Please click each link below to find the easy, printable recipe!


Instant Pot Butternut Squash Soup

If you love this recipe for Chicken and Mushroom Soup as much as I do, please write a five-star review, and be sure to help me share on Facebook and Pinterest!
CONNECT WITH YUMMI HAUS!
Be sure to follow me on my social media, so you never miss a post!

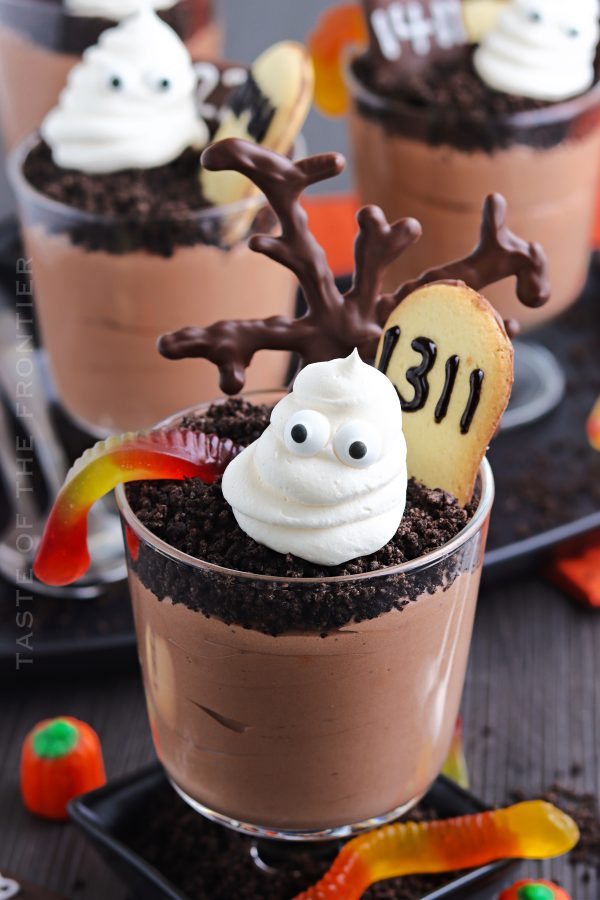
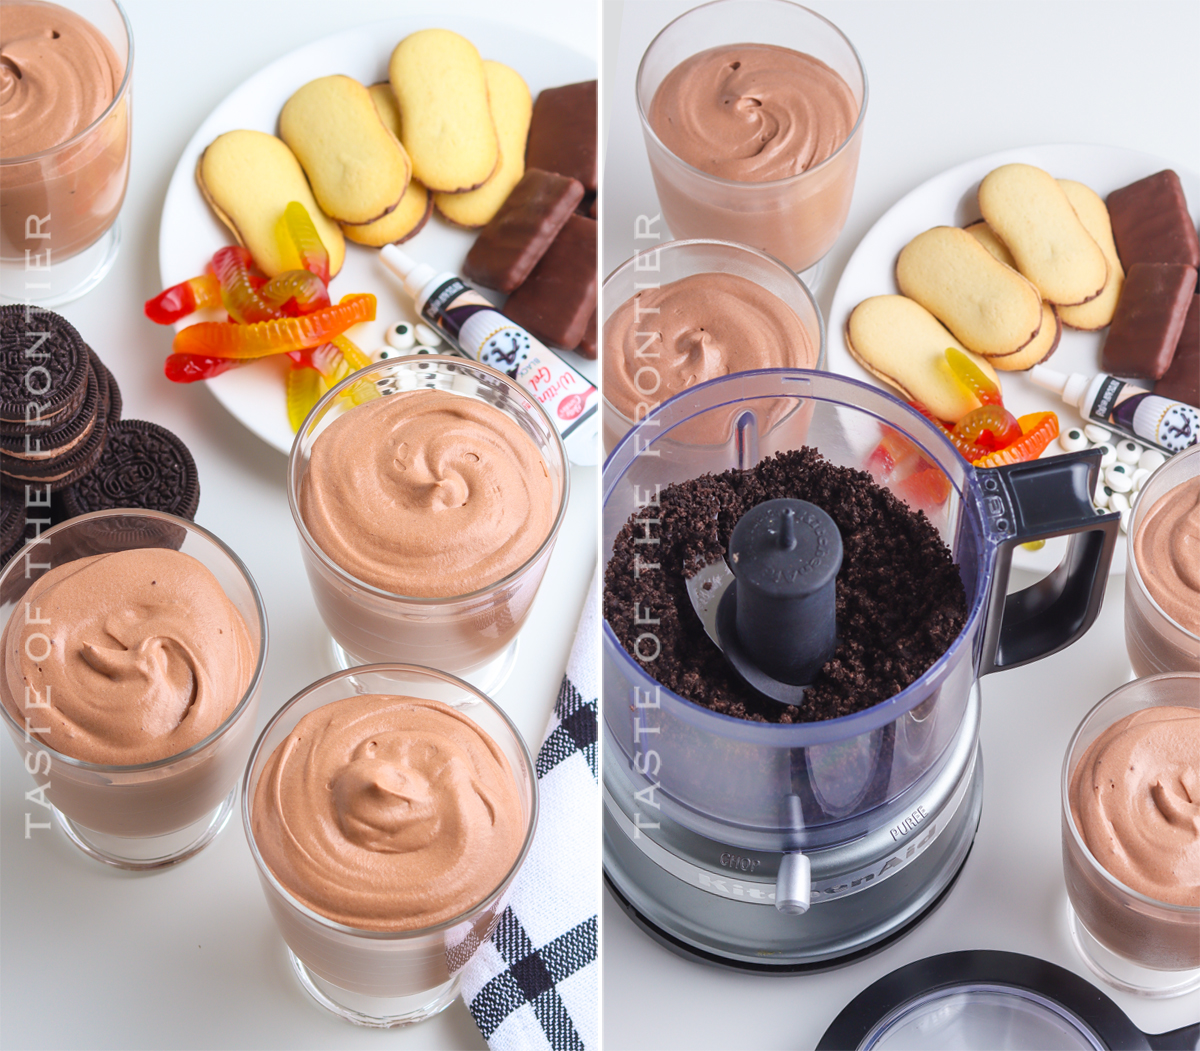
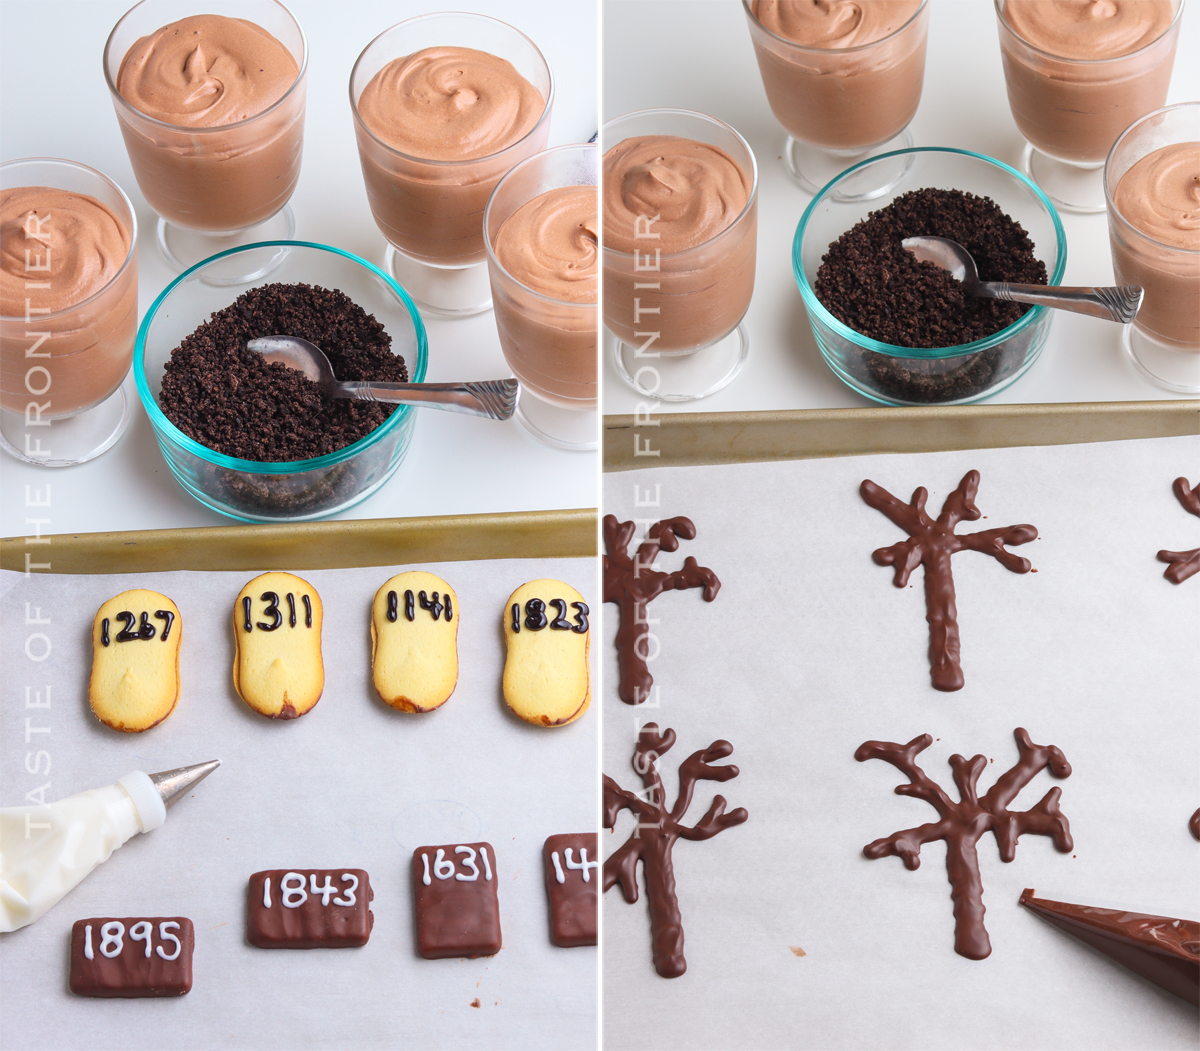
This one’s for the kids! Ghosts in the Graveyard Dessert is a creamy chocolate pudding topped with crushed Oreos, spooky trees, worms, and ghosts.
As the sun began to set, I could feel a chill in the air. It was the perfect time for some spooky Halloween fun. So, I decided to make my favorite Graveyard Dessert.
This dish is always a hit with kids and adults alike. It’s easy to make and tastes delicious! Best of all, it’s creepy enough to thrill everyone at your next Halloween party! Ready to learn how to make it? Keep reading!

Halloween is just around the corner, and that means it’s time to start thinking about spooky treats! This Ghost in the Graveyard Dessert is perfect for parties or get-togethers.
It’s easy to make and sure to impress your friends. Plus, it’s a great way to use up leftover Halloween candy. So gather your ingredients and get ready to create some deliciousness!
**If you love these, you’ll want to check out our adorable Halloween Oreo Balls too!
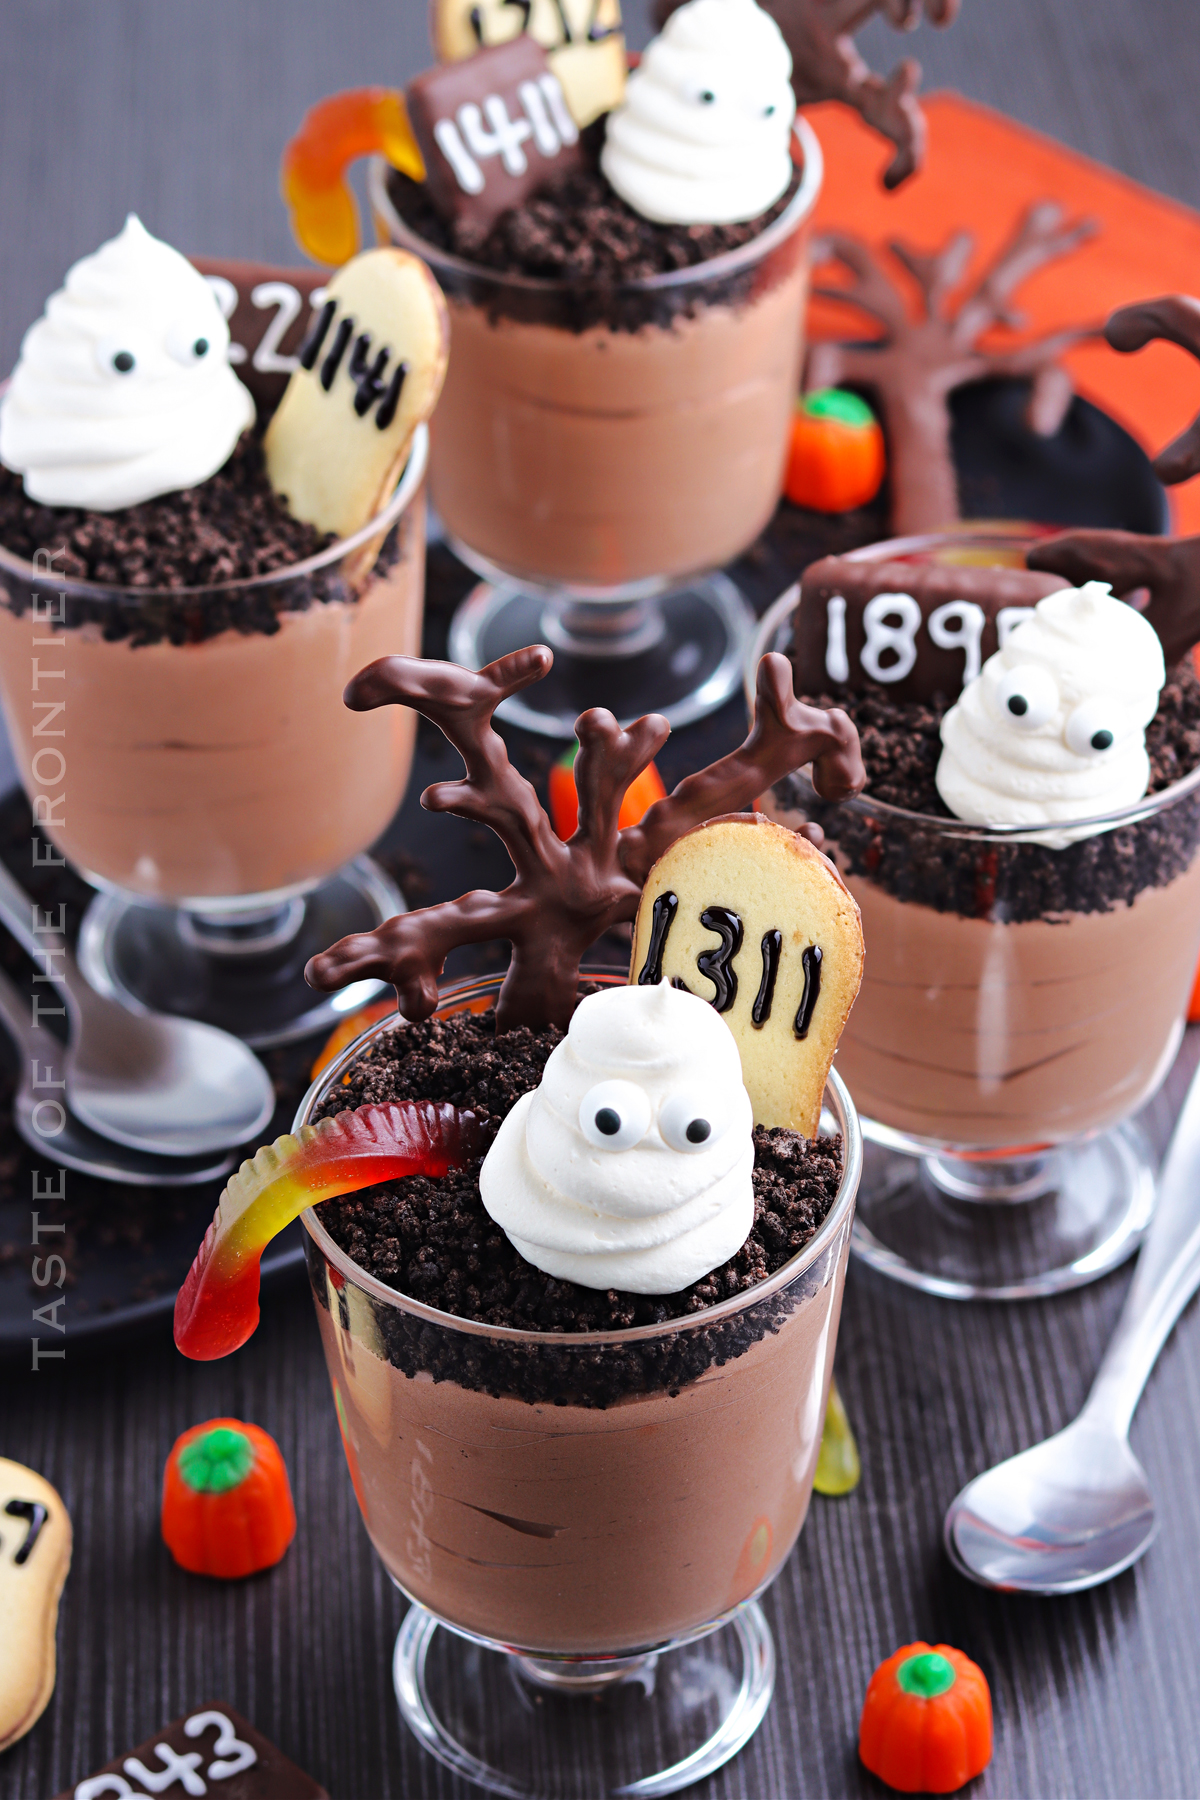
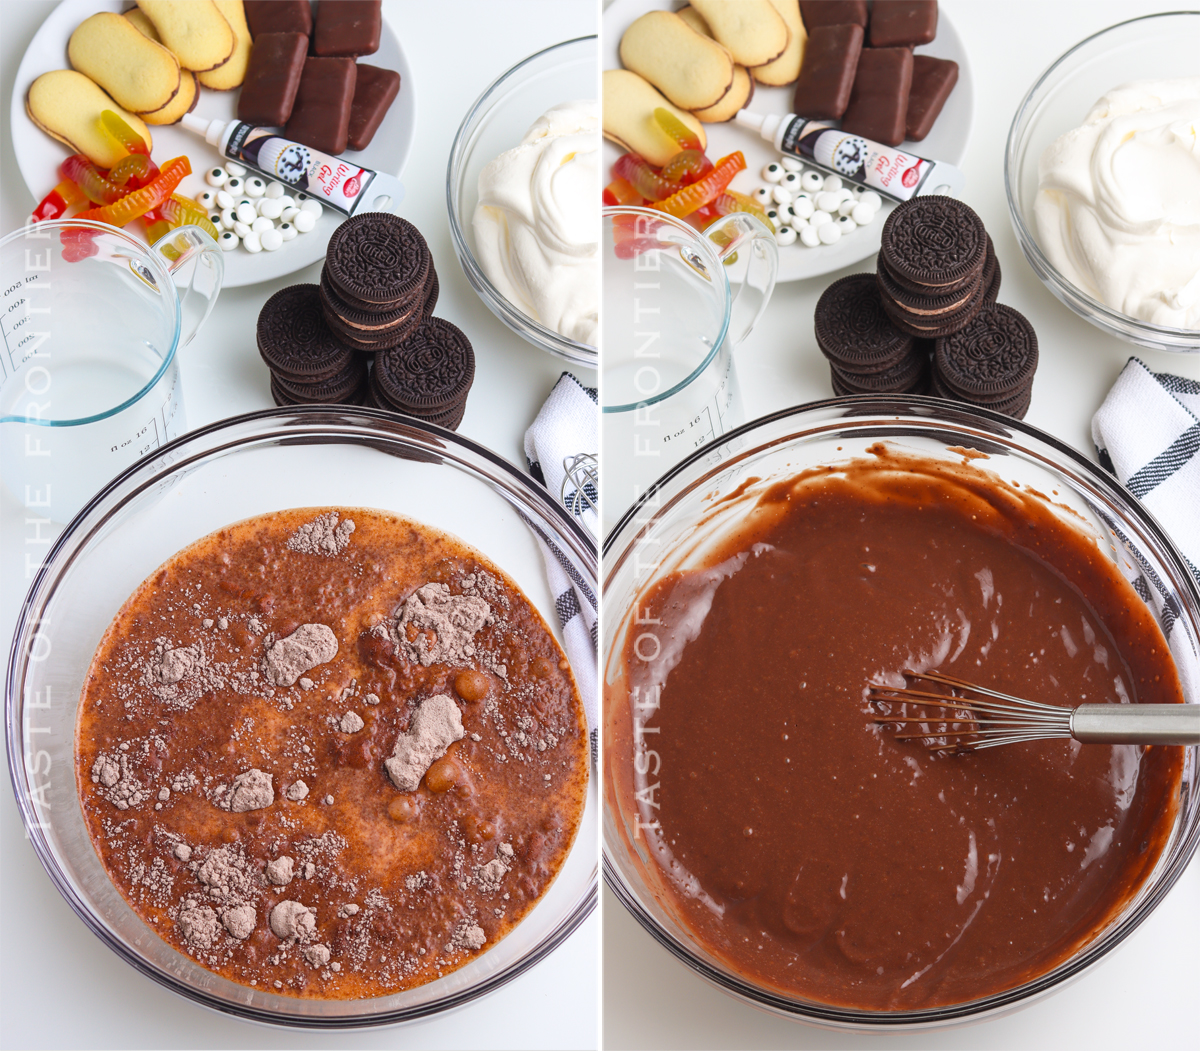
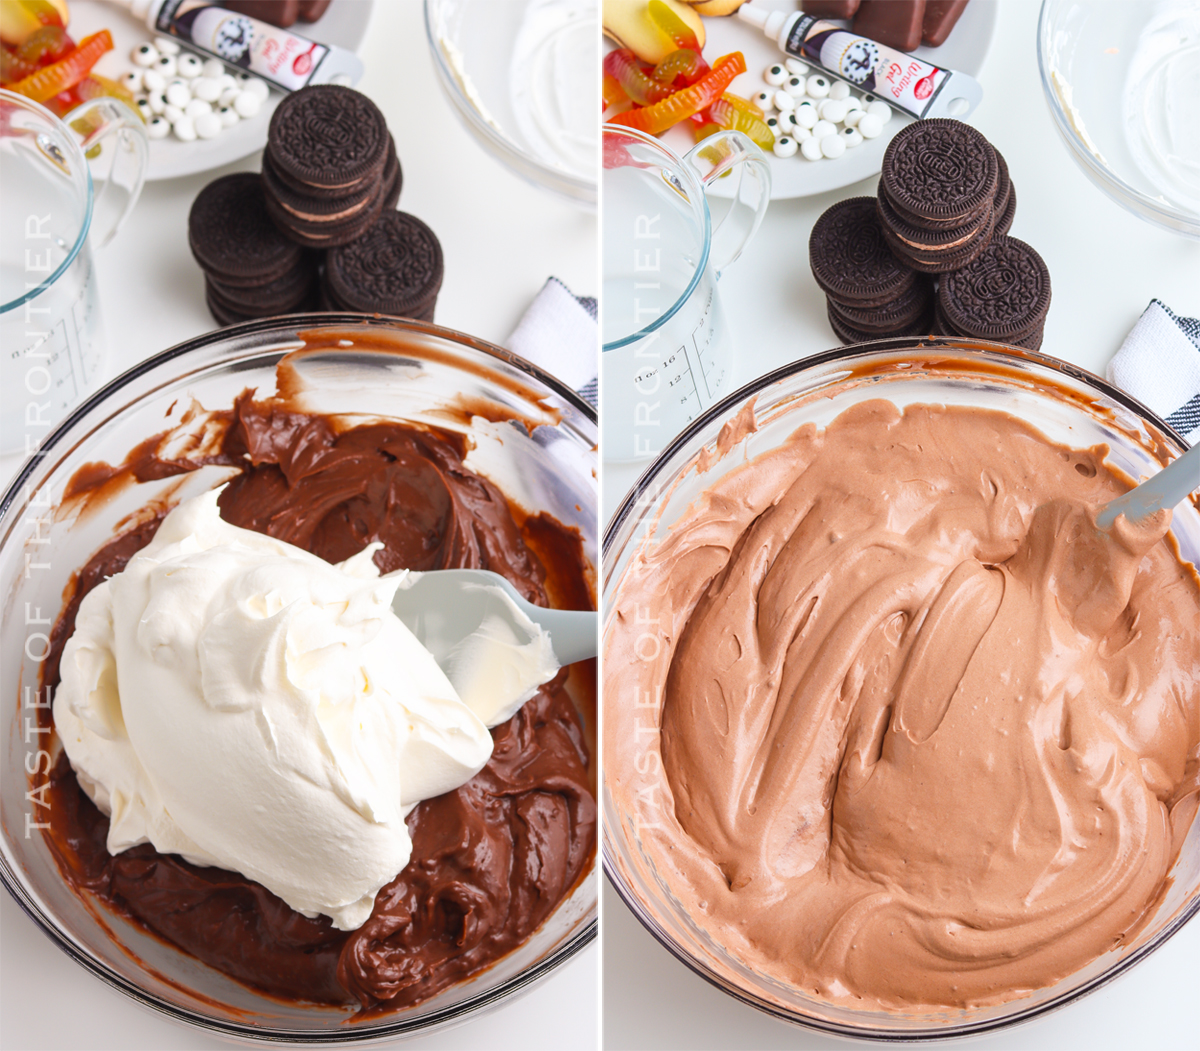
This spooky and delicious dessert is perfect for any Halloween party! It’s made with a chocolate pudding base and topped with a layer of Oreo crumbs. Finally, it’s topped with tombstone cookies, gummy worms, and ghosts made from whipped topping!
To store your leftover Ghosts in the Graveyard Dessert, simply place them in an airtight container and refrigerate them for up to 3 days. When you’re ready to enjoy them again, simply remove them from the fridge and enjoy!
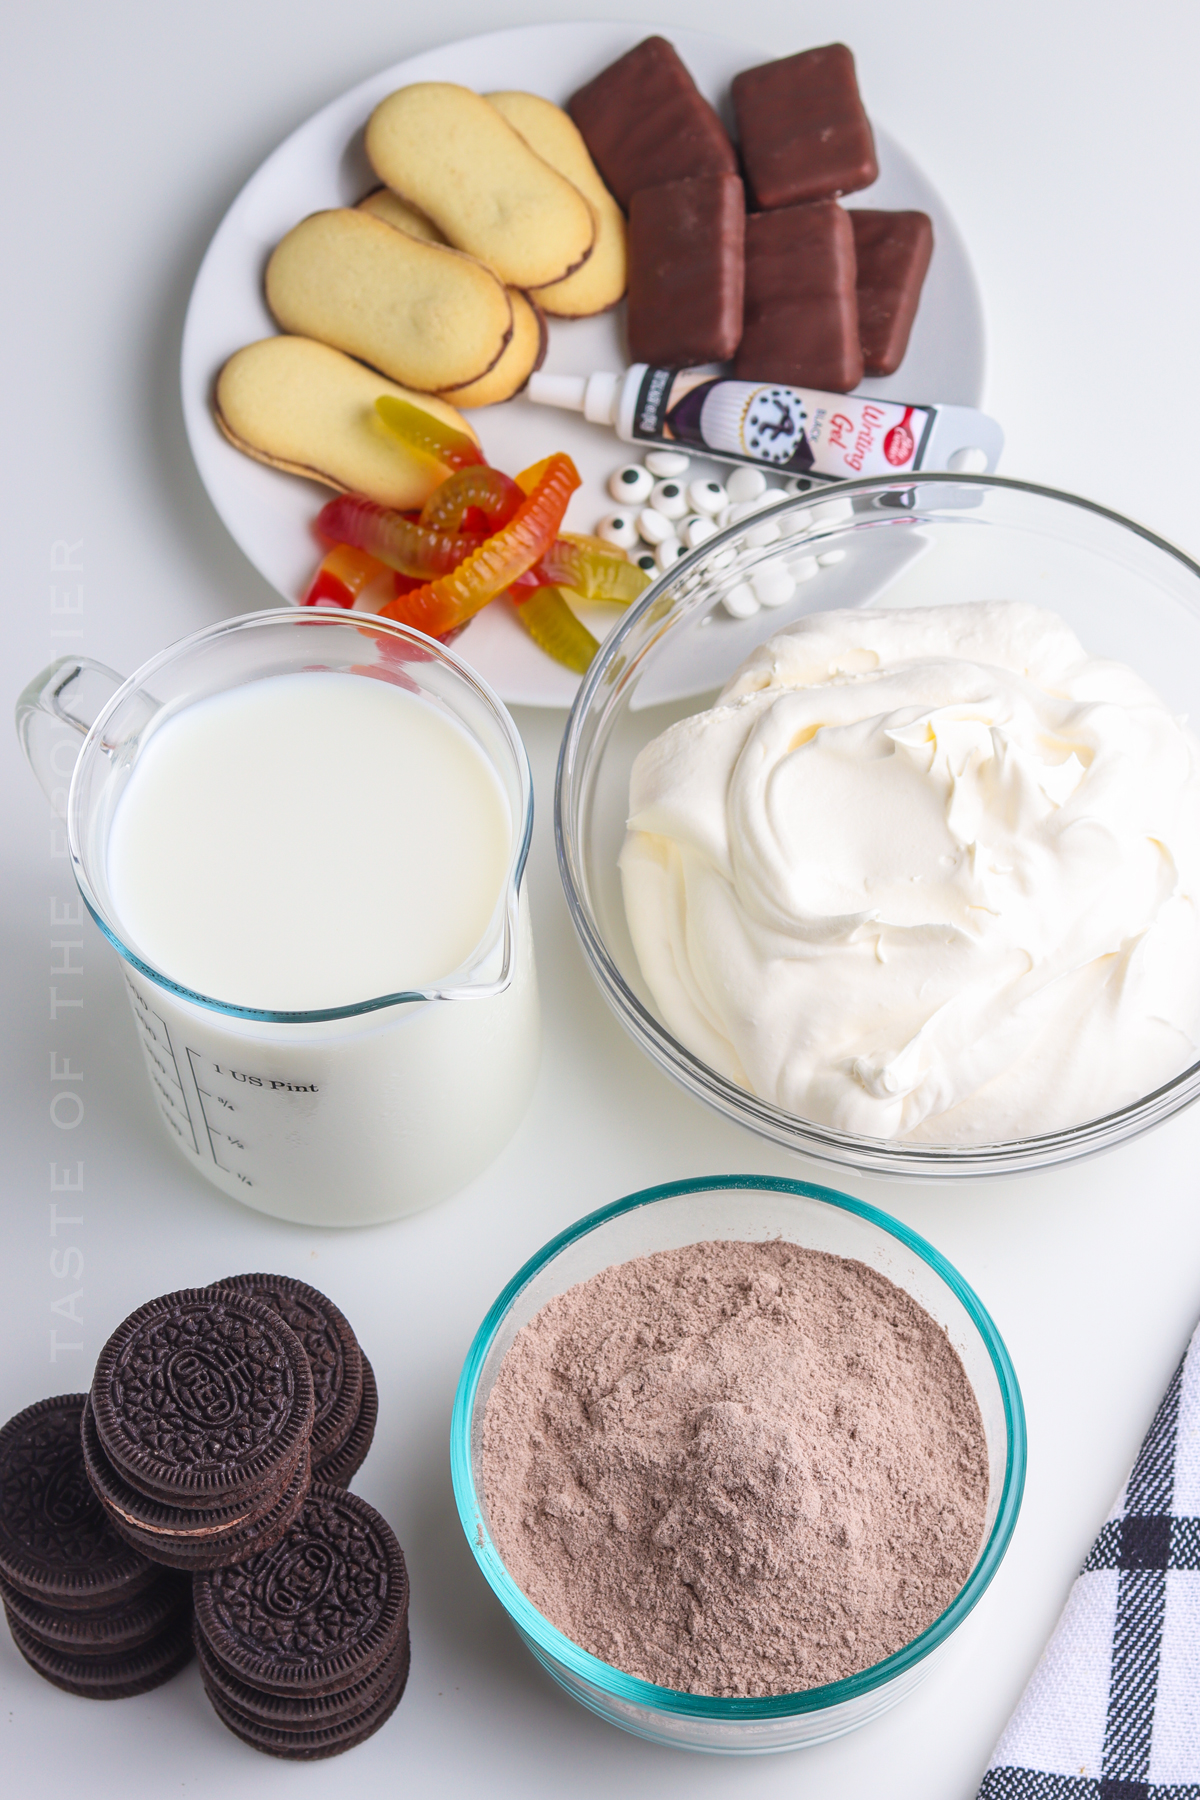
This can be made with homemade stabilized whipped cream. But this recipe won’t work with regular whipped cream. It needs to be stabilized so that it won’t turn the pudding into a soup and the ghosts will hold their shape.
Ghosts in the Graveyard Dessert can be made ahead of time and stored in the fridge until you’re ready to serve it. Simply prepare the base pudding portion of the dessert as directed, then add a layer of plastic wrap on top and store it in the fridge for up to 3 days.
When you’re ready to serve, simply remove it from the fridge, and add the toppings fresh! I don’t recommend adding the crumbs, cookies, or gummy worms before storing them in the fridge. Those ingredients don’t keep well in the refrigerator.
I suppose you can do that if that is all you can find. The pudding will need to be completely cooked, cooled, and chilled before you can proceed to add the whipped topping.
DON’T MISS THESE HOLIDAY E-BOOKS!
This graveyard dessert recipe is SUPER EASY and delicious – and if you’re like me this time of year, then you maybe already have some of these items on hand OR maybe you have never made a cute treat like this before, & you might be a bit nervous – but you’re going to love it. I have made a list below of the things I absolutely can’t live without when it comes to making this holiday recipe. (you can also SHOP MY FAVORITES in my store)
If you love this easy graveyard dessert recipe, you’re going to love these other Halloween treats too. Please click each link below to find the easy, printable recipe!


If you love this recipe for Ghosts in the Graveyard Dessert as much as I do, please write a five-star review, and be sure to help me share on Facebook and Pinterest!

CONNECT WITH YUMMI HAUS!
Be sure to follow me on my social media, so you never miss a post!

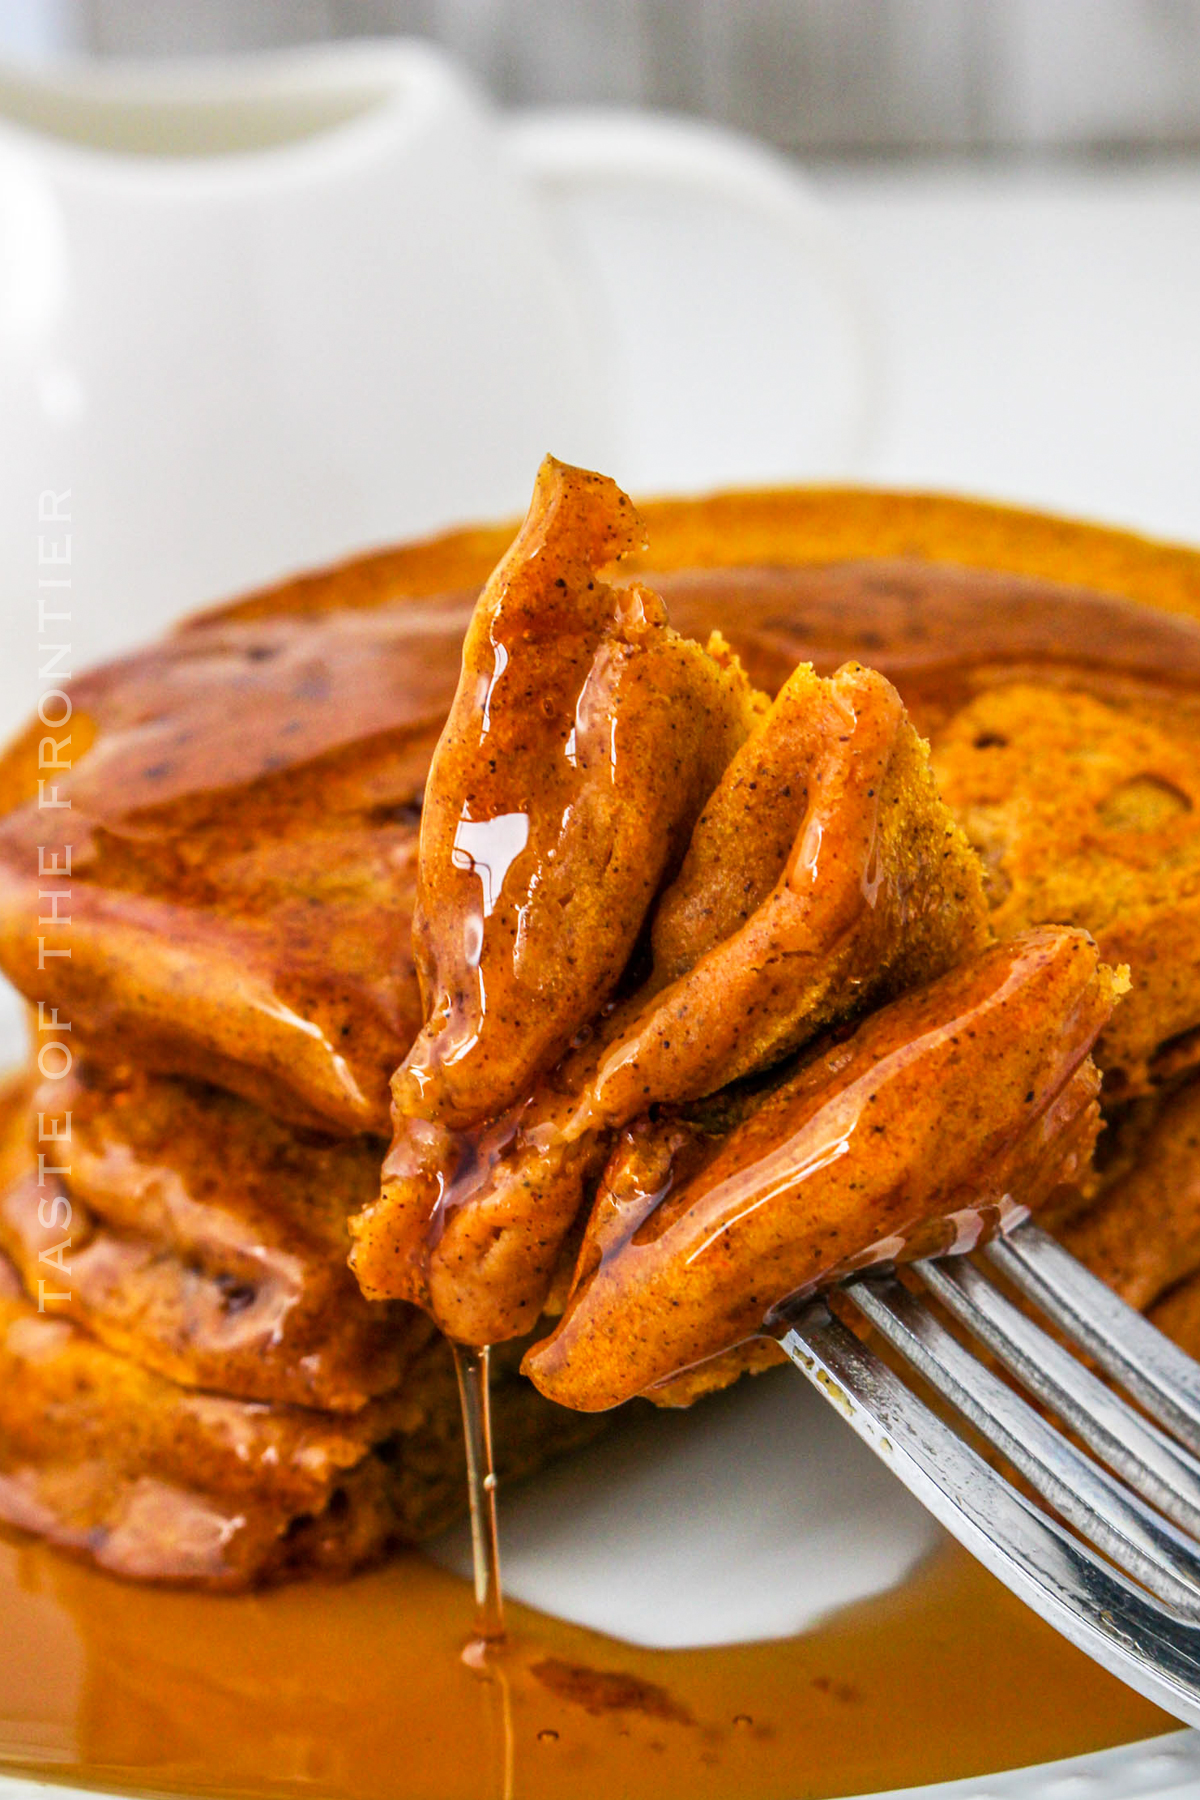
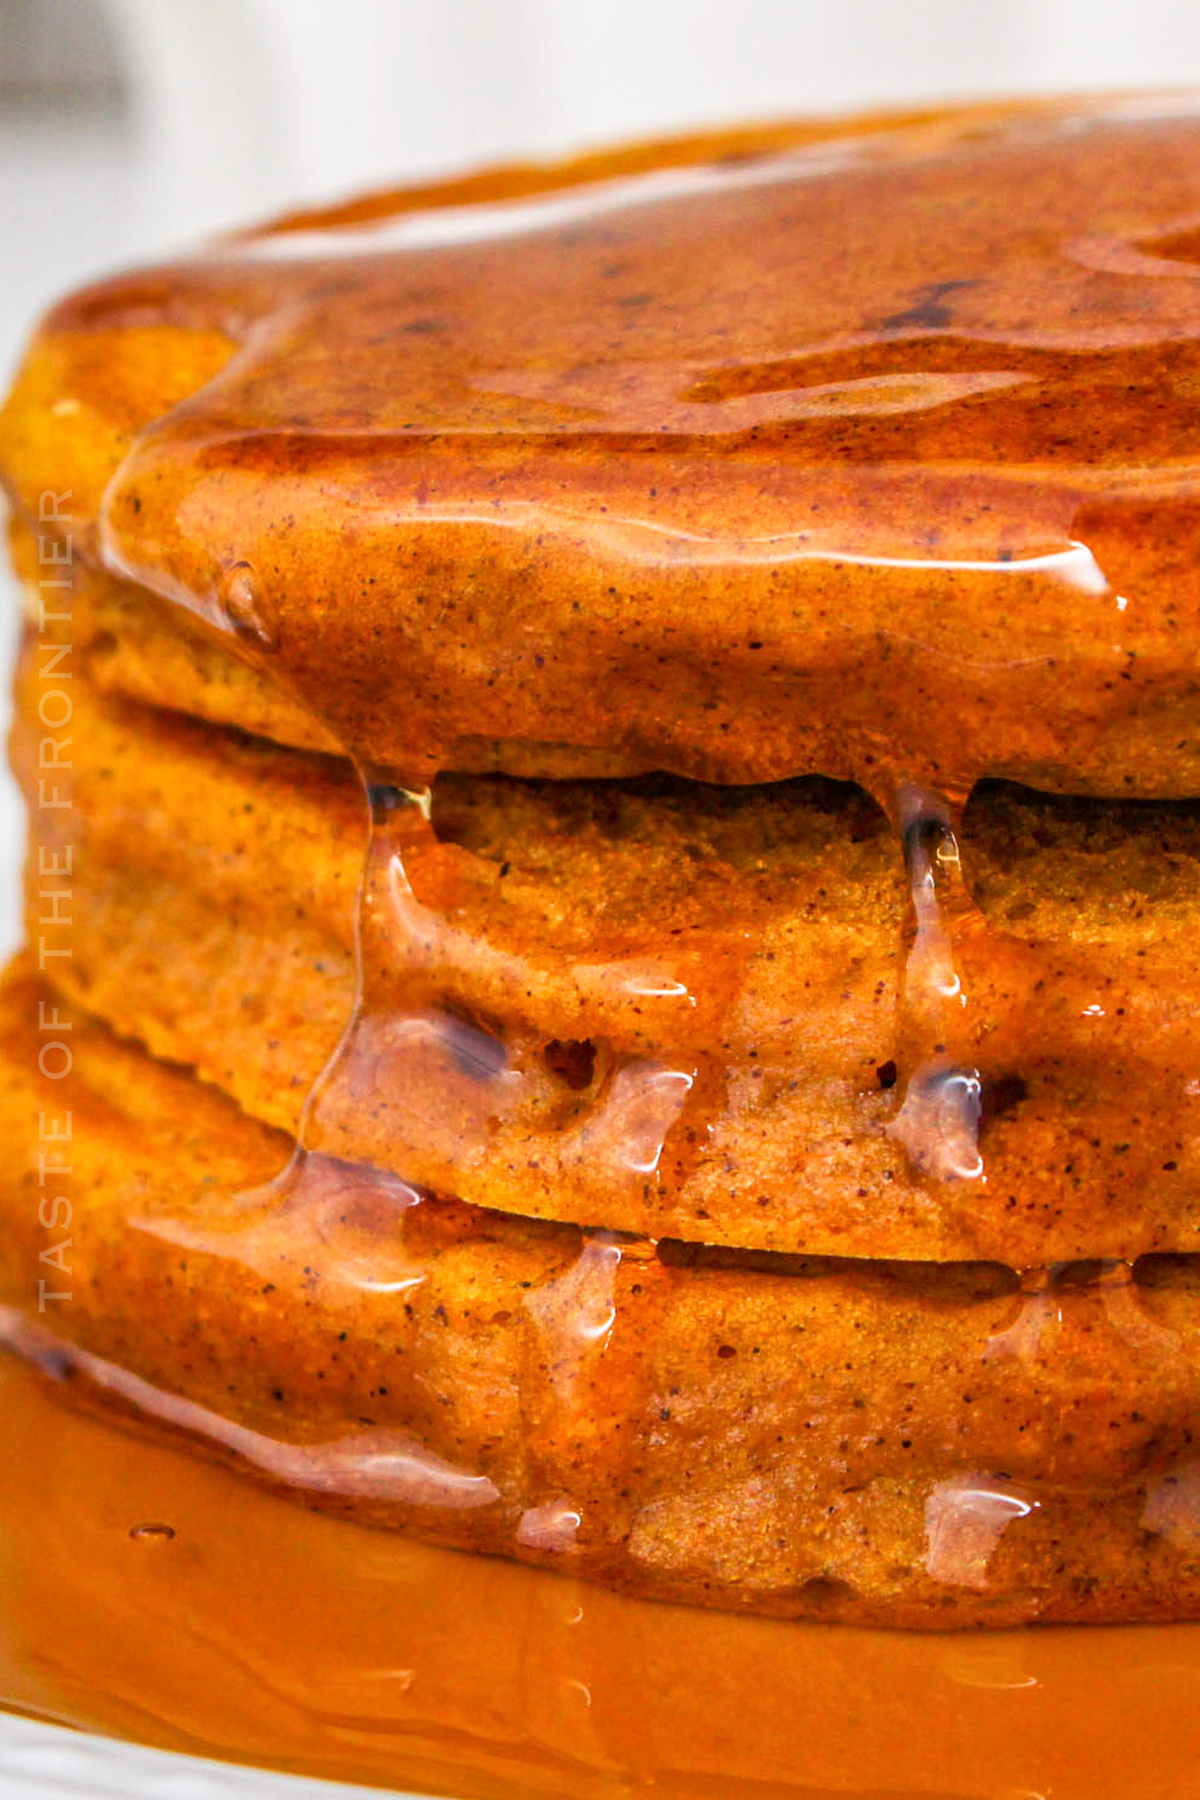
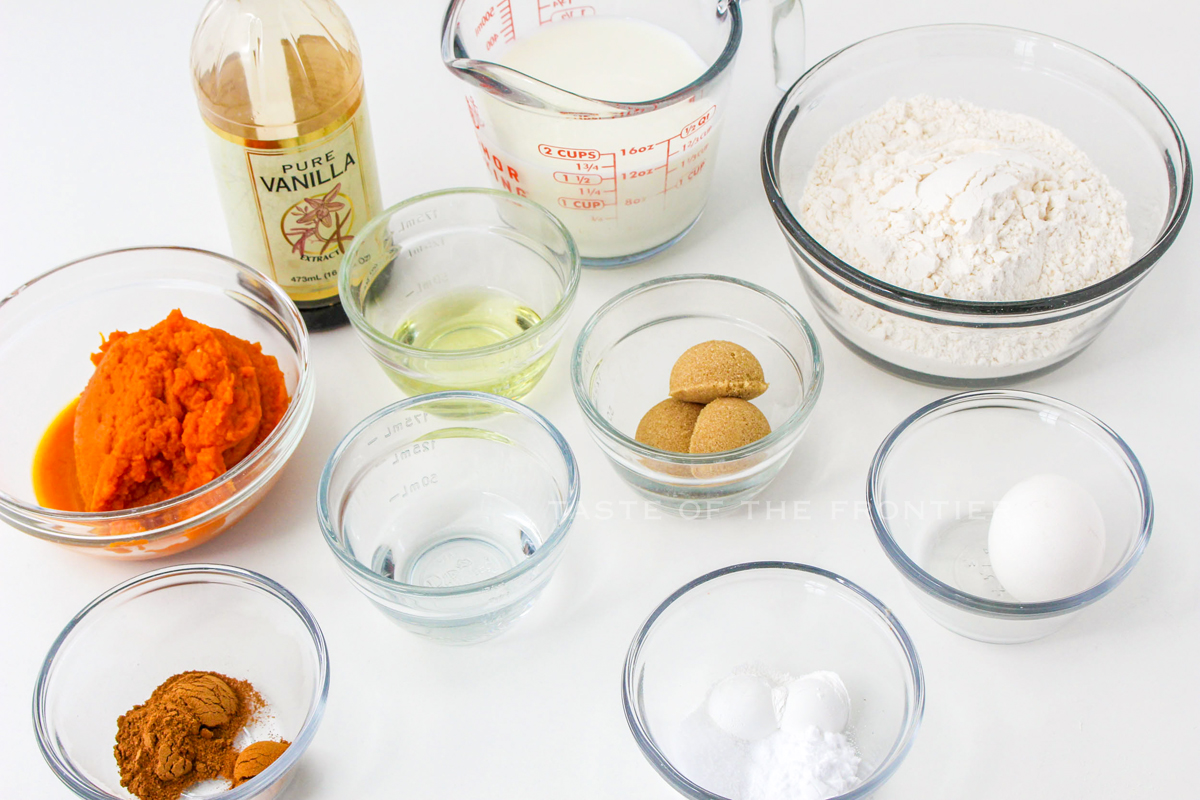
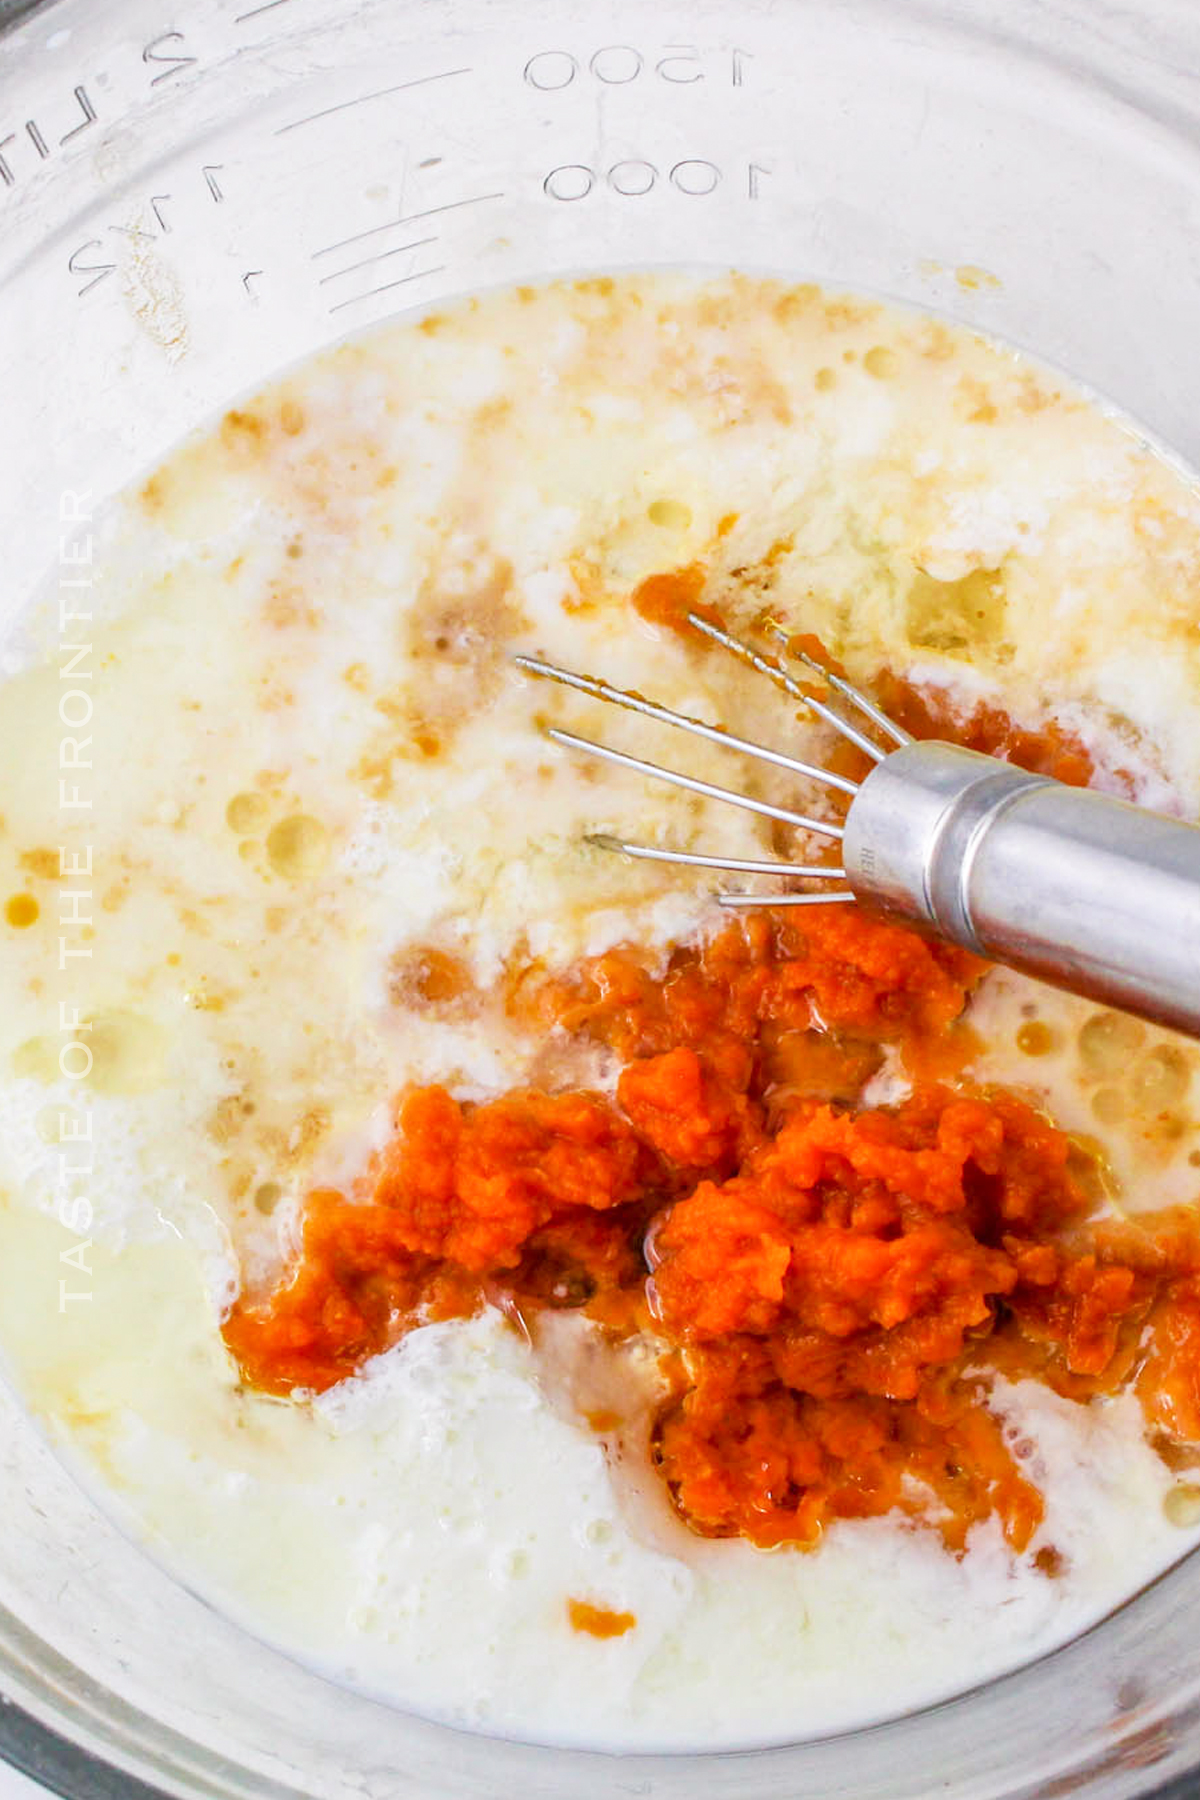
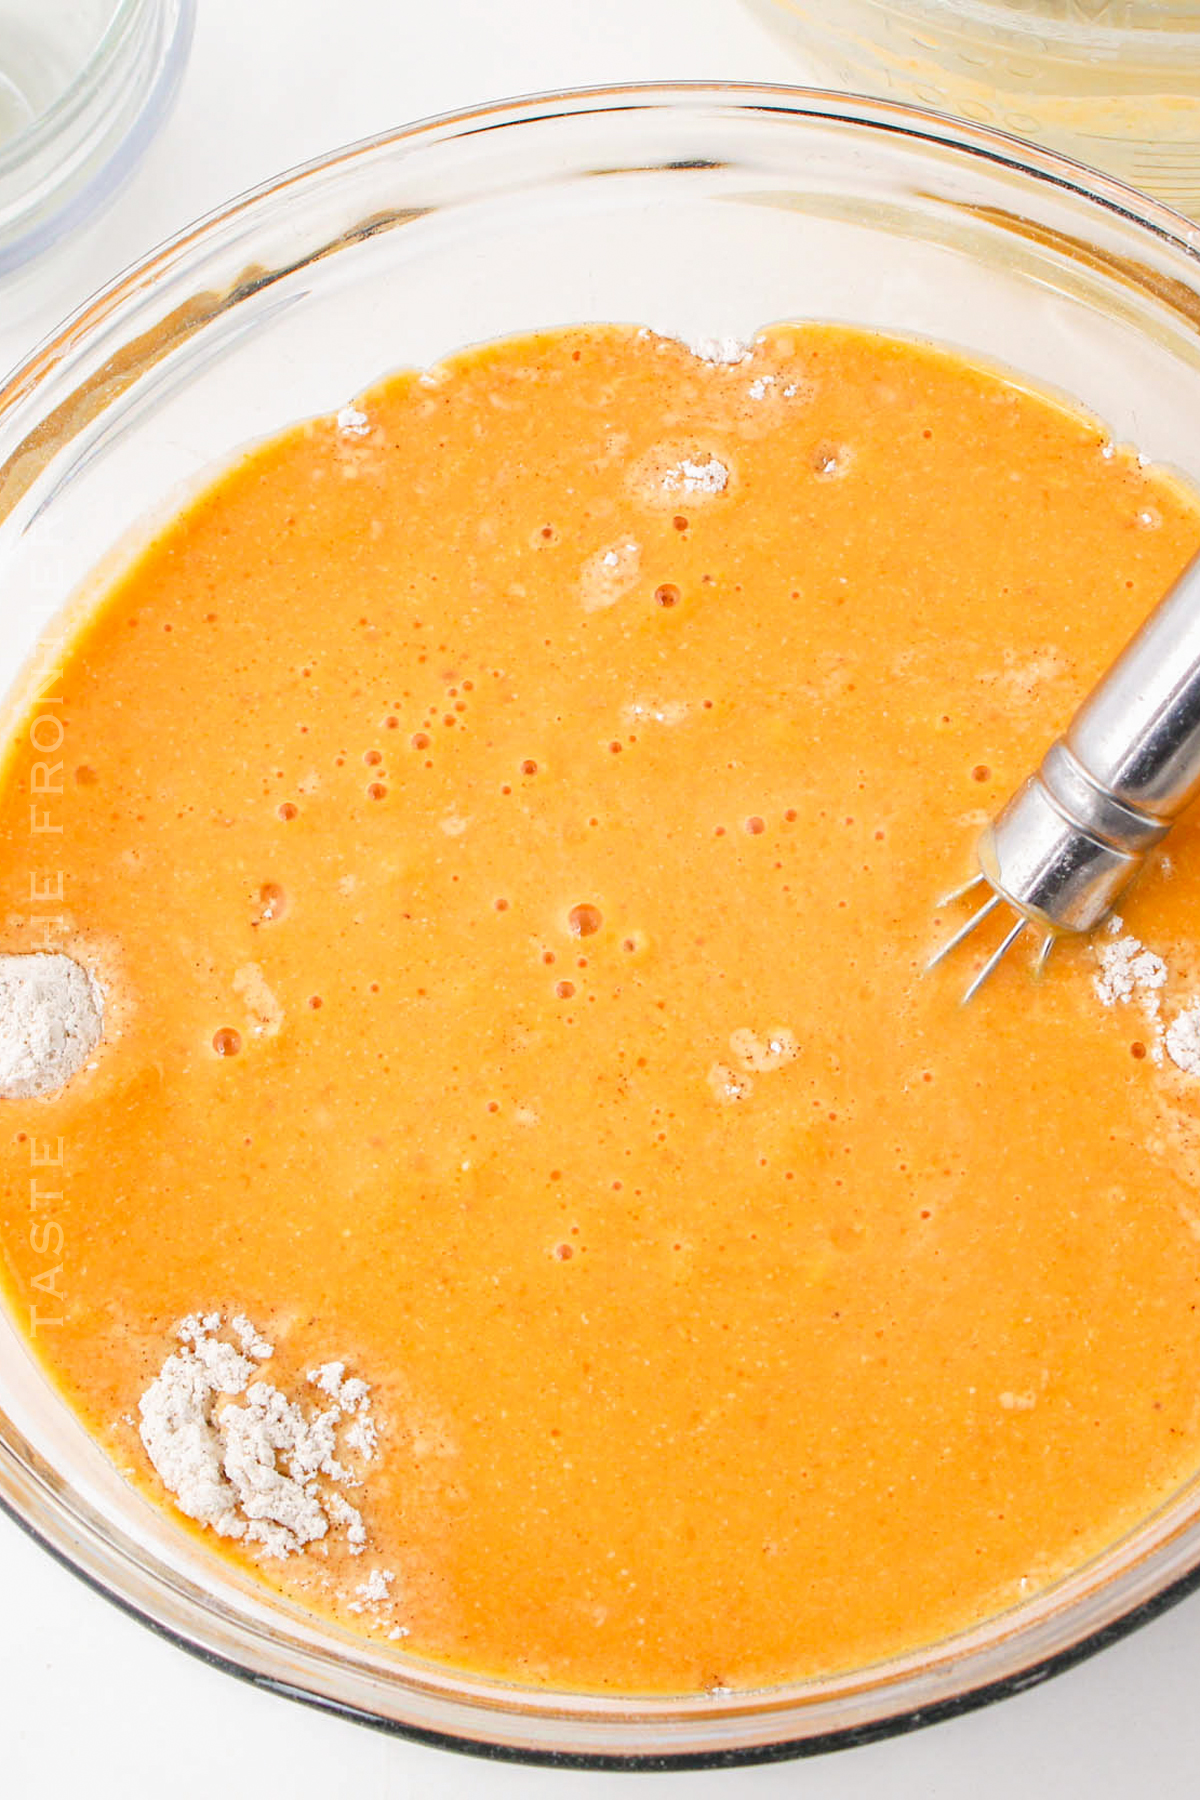
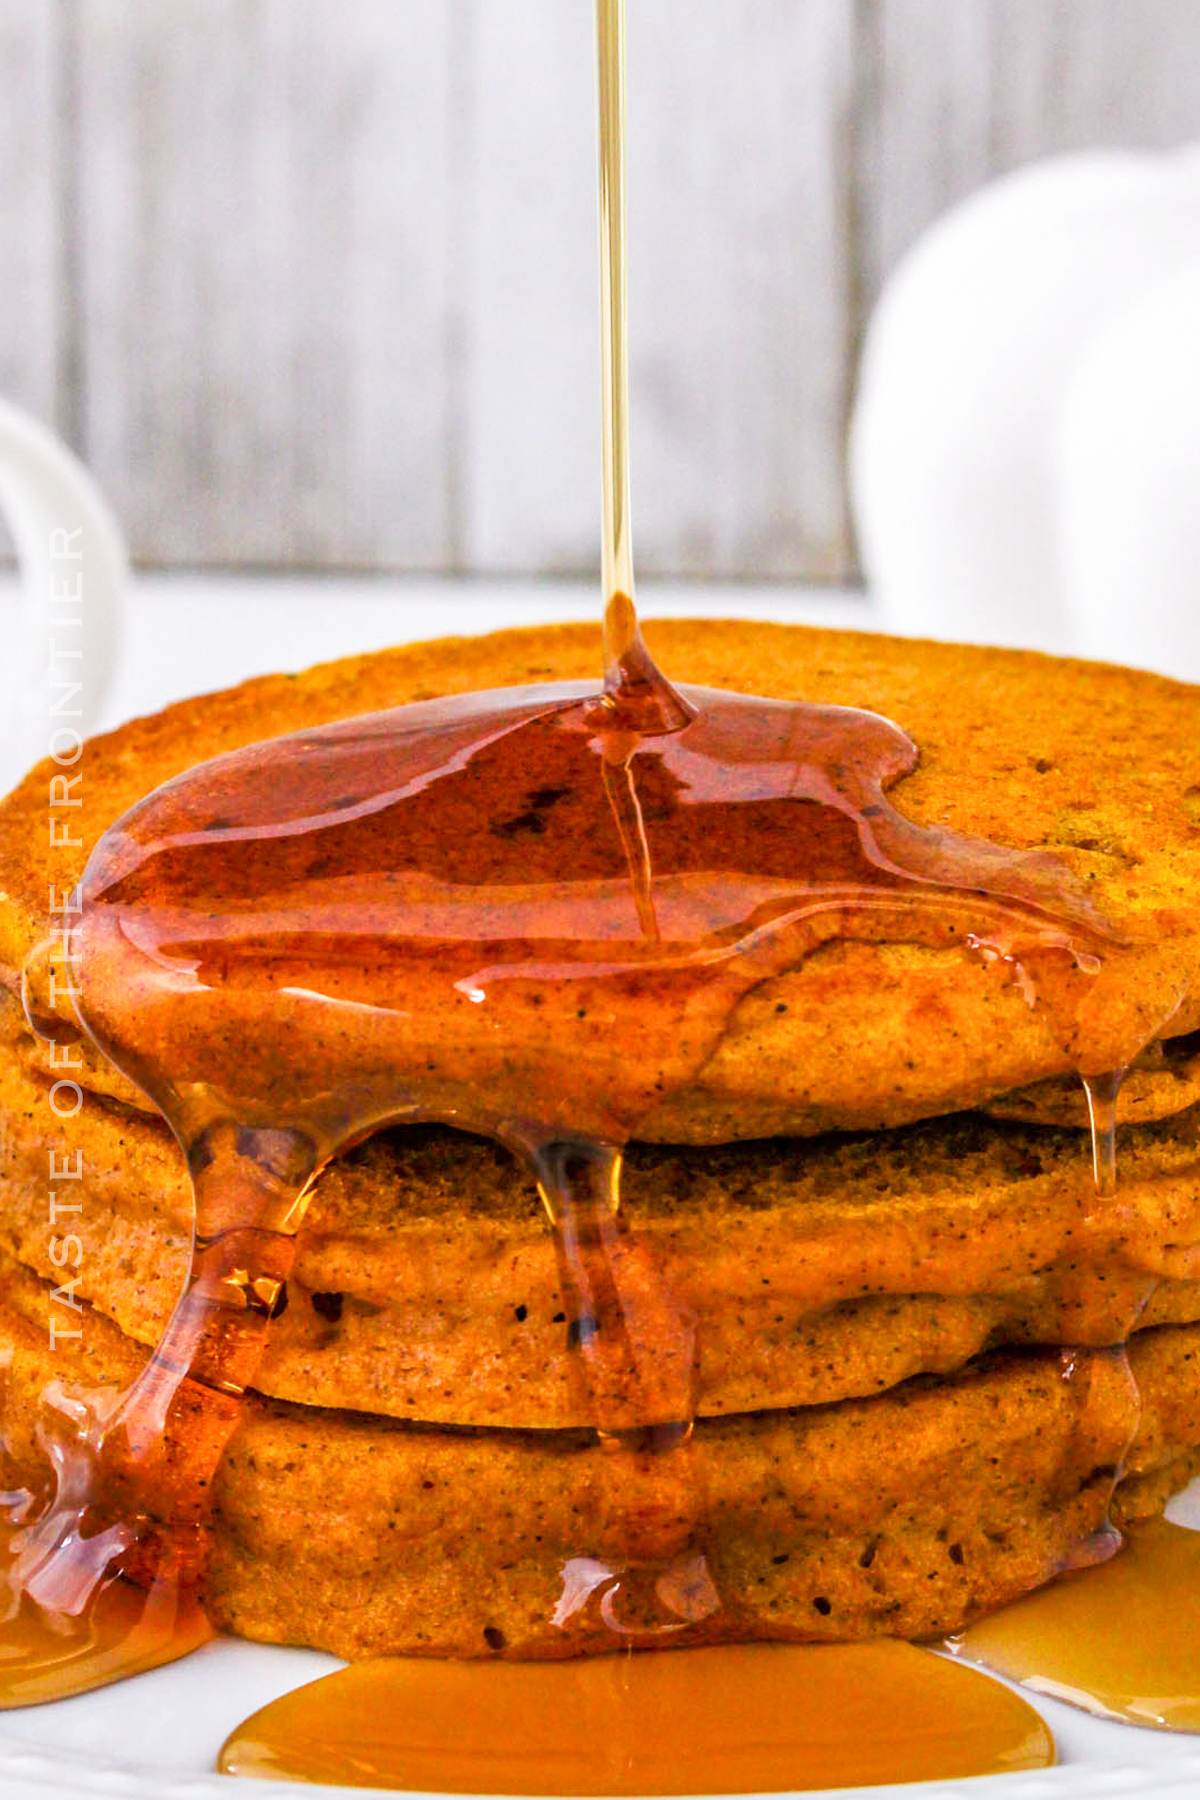
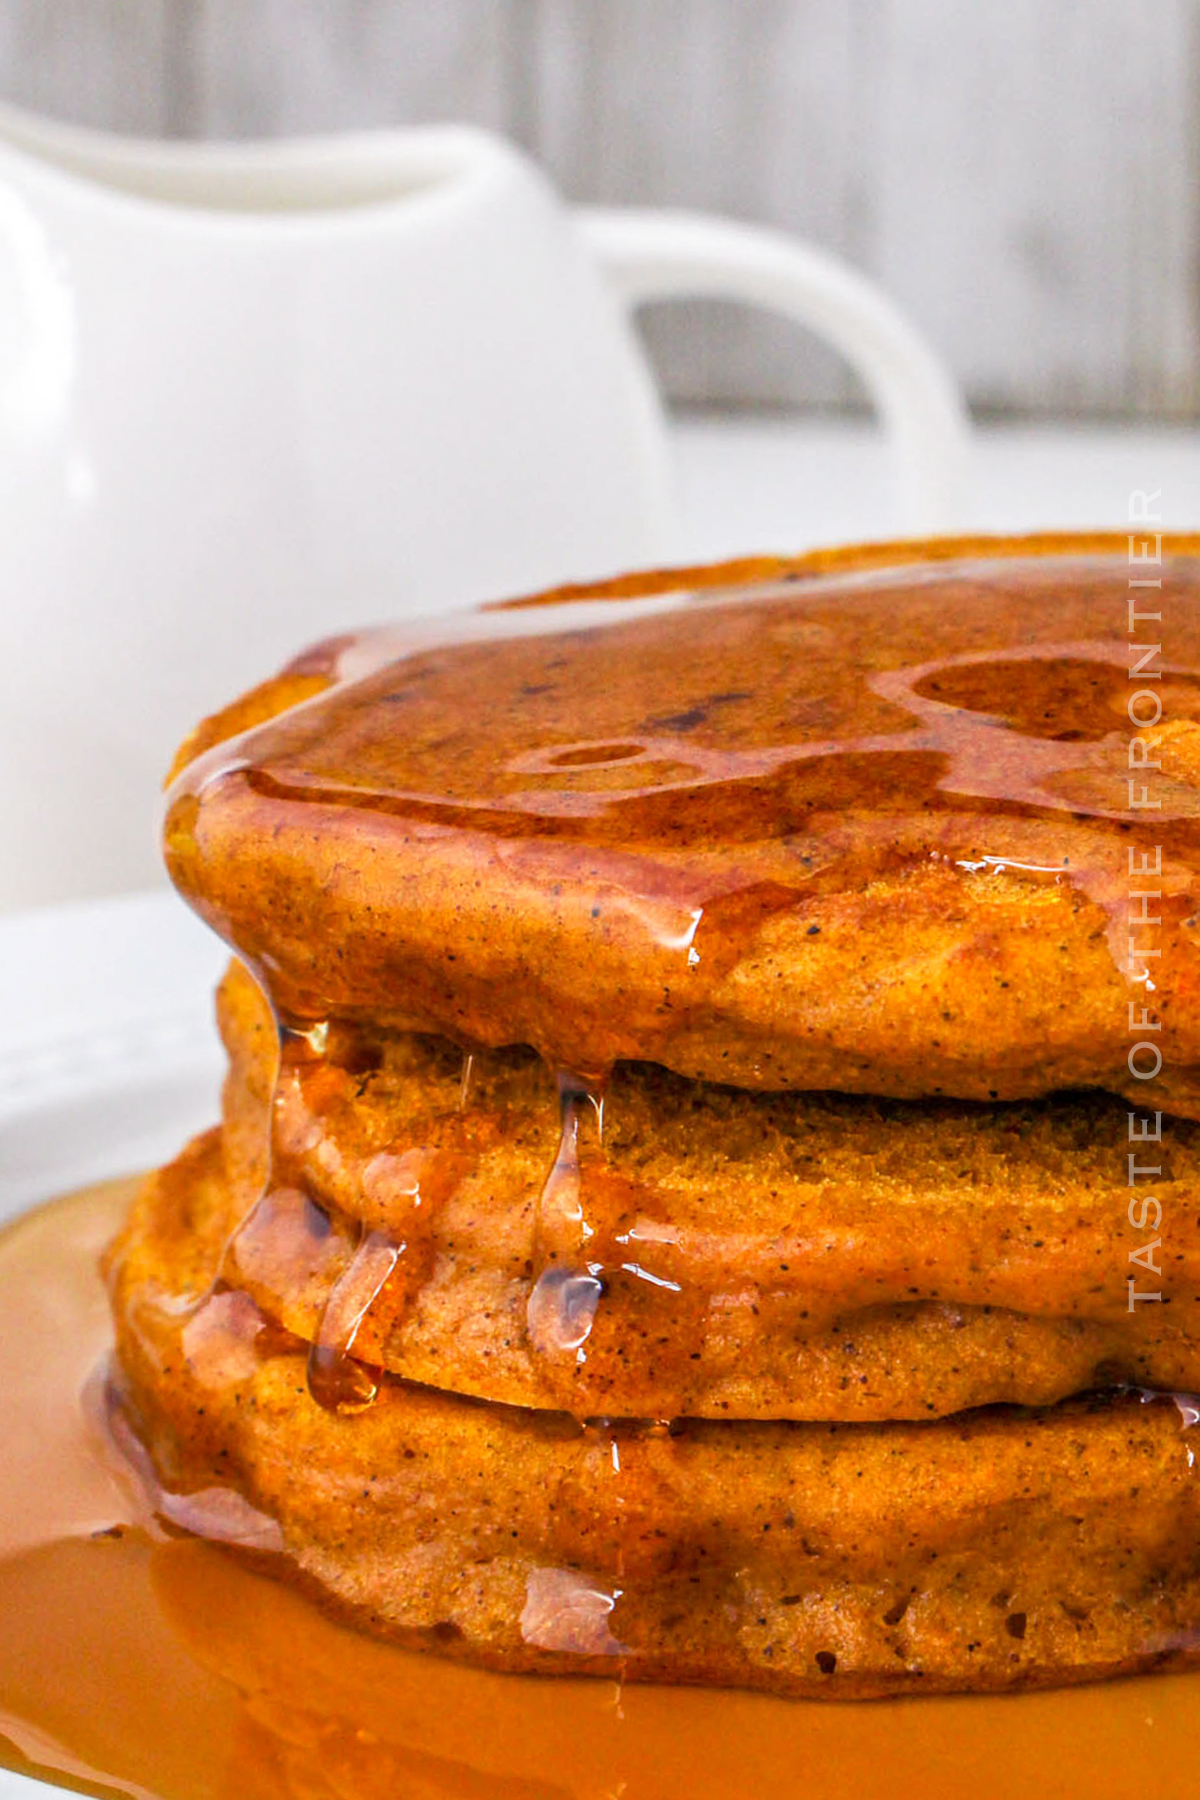
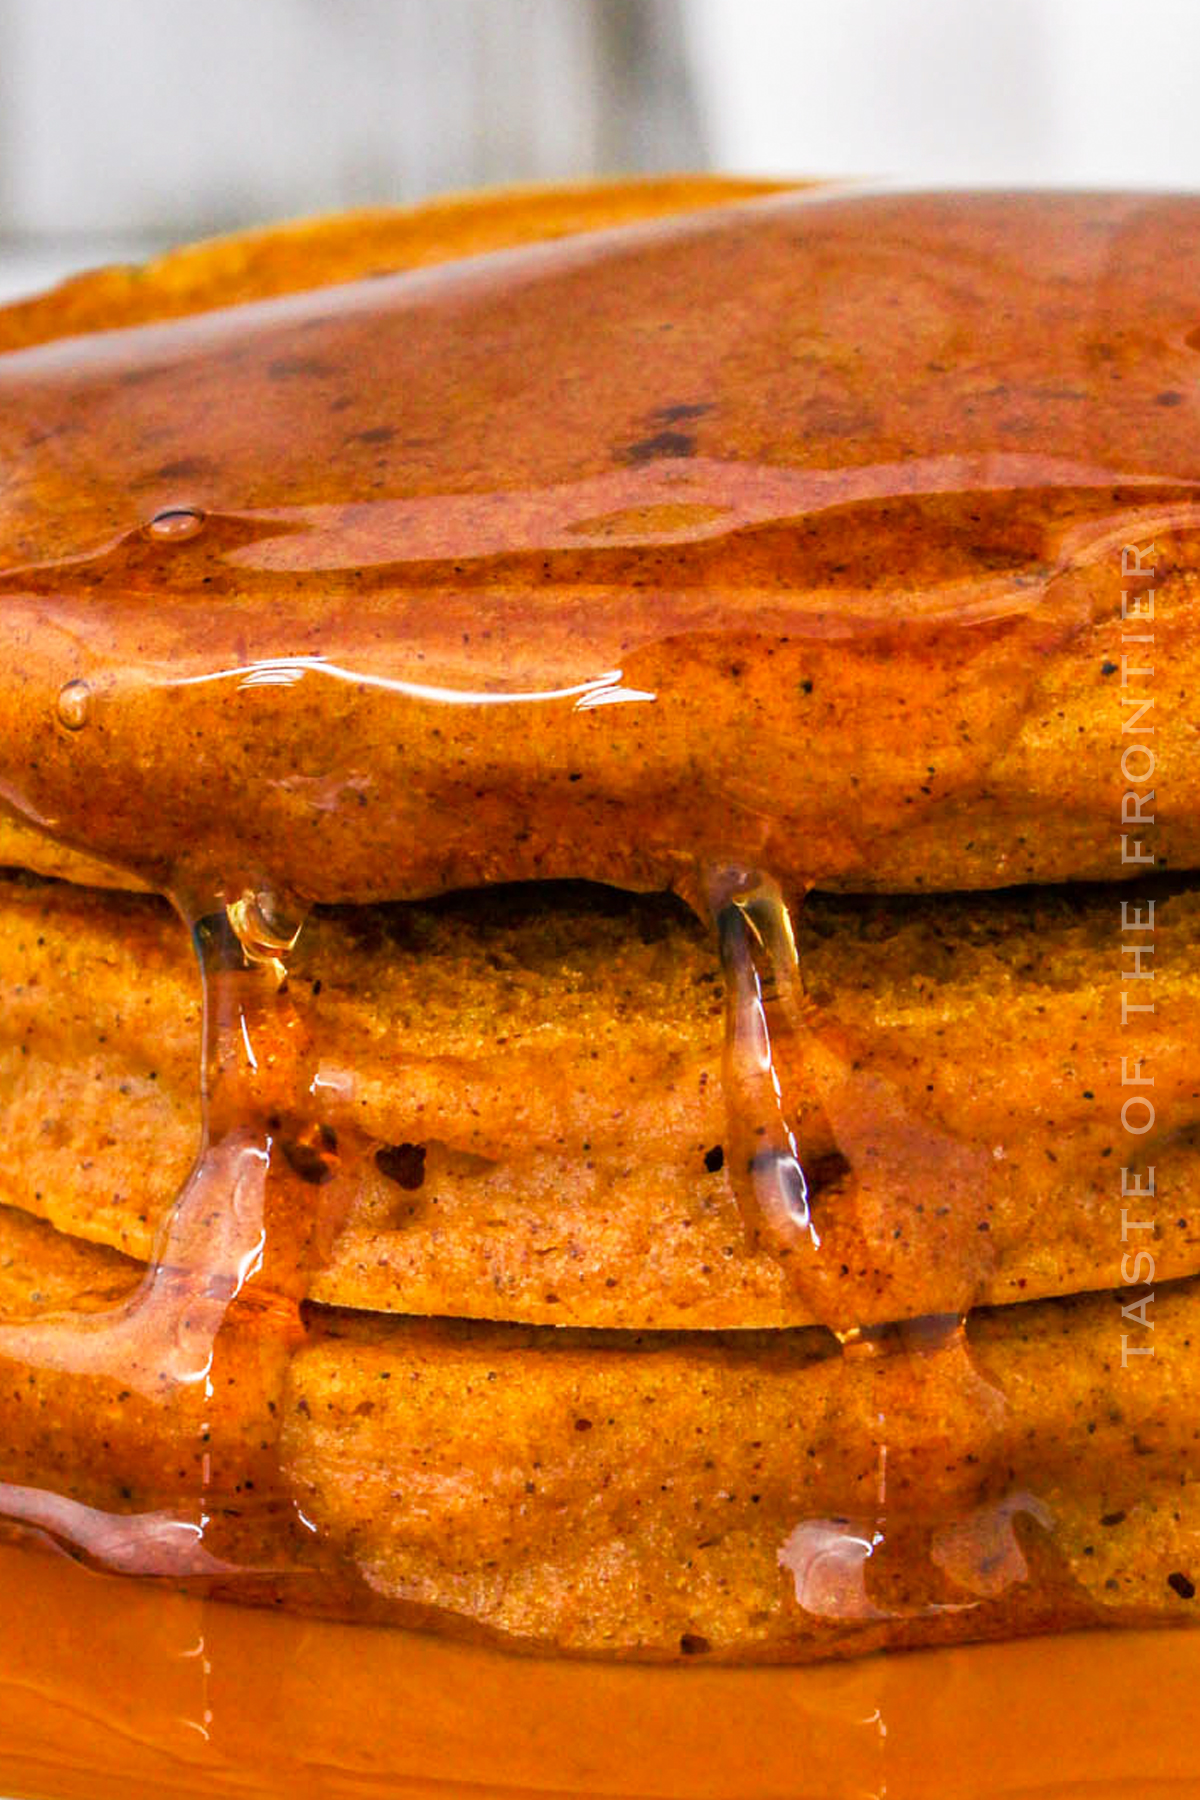
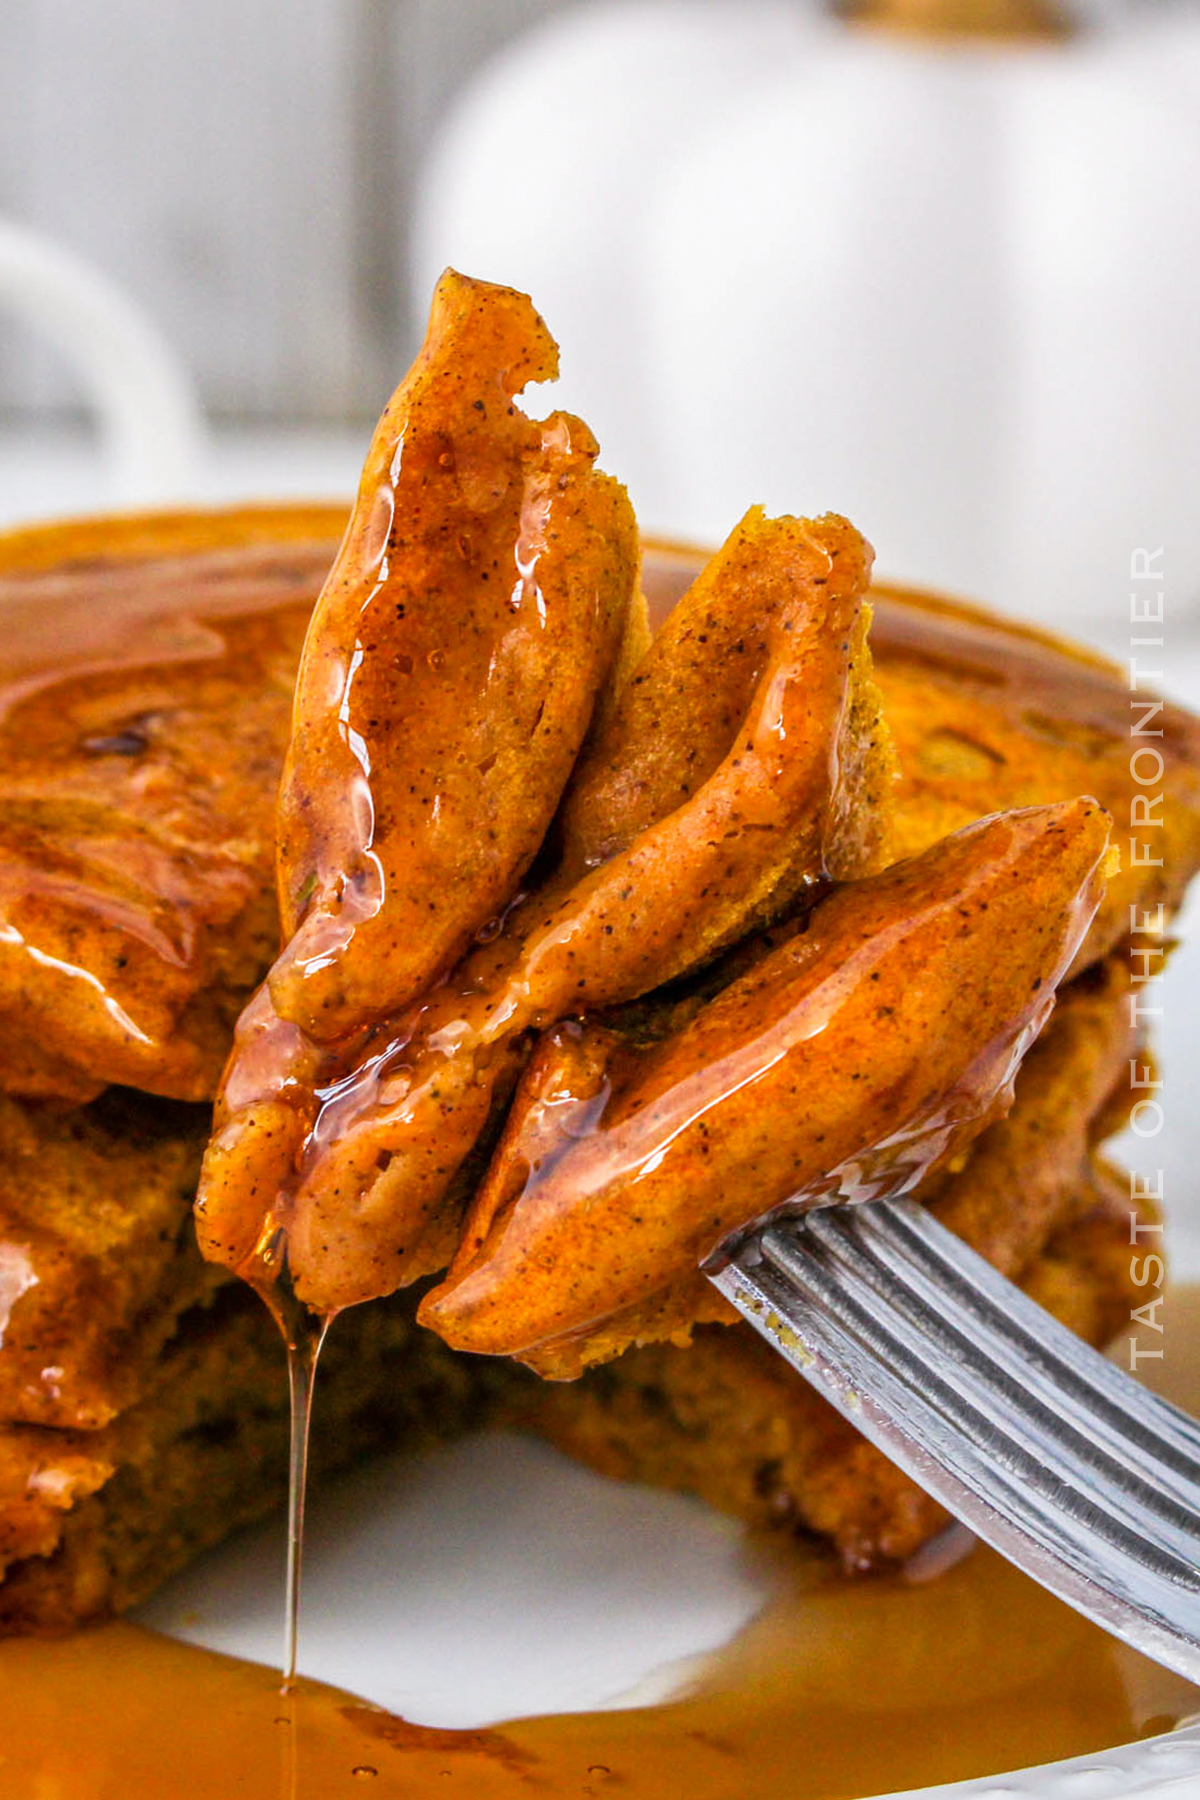
Who doesn’t love pancakes, especially Pumpkin Pancakes? They’re fluffy, they’re delicious, and they’re perfect for a weekend breakfast.
But what if we told you that you could make pumpkin pancakes? These pancakes are perfect for fall, and they’re sure to get your day off to a great start. So give them a try this weekend!
Fall is in the air and that means pumpkin everything! The addition of pumpkin puree makes them incredibly fluffy and delicious. Serve them with a dollop of maple syrup and some crispy bacon, and you’ll be ready to face the day!
Pumpkin pancakes. They’re the perfect way to celebrate fall. And they’re really easy to make – you just need a few basic ingredients.
Plus, you can add your favorite toppings, like nuts, berries, or bananas. All you pumpkin lovers out there will absolutely LOVE this easy breakfast recipe.
Place any leftover pumpkin pancakes in an airtight container and keep refrigerated until ready to serve again. To reheat, vent the container by popping the lid and then microwave for 60-90 seconds or until hot.
The fluffiness of pancakes comes from the baking powder, so it is important that your baking powder is not old. You also want to mix the batter just until the flour is mixed in, as overmixing will increase the gluten, which will result in chewy pancakes instead of fluffy.
Microwave: Reheat in 15-second intervals until hot.
Skillet: Melt butter over medium-low heat, then add pancakes and cook until warm.
Oven: 350°F (177°C) for 10 minutes.
Add additional time if cooking from frozen.

If you did not preheat your pan to a high enough heat or coat it with enough butter then the batter could stick to the pan.
Pancakes freeze wonderfully! It is best to flash freeze them by placing them in a single row on a parchment-lined plate for an hour. Once they have partially frozen, transfer them to a freezer-safe container or ziptop bag and return to the freezer for up to 3 months.
I like to place a piece of parchment or wax paper in-between the pancakes so I can stack them when frozen. This helps when I only want to thaw a couple of them for a smaller breakfast.
Yes – a sugar substitute will work just fine. Just make sure it is a 1:1 swap for the regular version that way the dry and wet mixture ratios aren’t off when mixing all of the ingredients together.
DON’T MISS THESE HOLIDAY E-BOOKS!
This pancake recipe is SUPER EASY and delicious – and if you’re like me, then you maybe already have some of these items on hand OR maybe you have never made homemade pancakes without a mix before, & you might be a bit nervous – but you’re going to love them. I have made a list below of the things I absolutely can’t live without when it comes to making this breakfast recipe. (you can also SHOP MY FAVORITES in my store)
If you love this easy pumpkin pancake recipe, you’re going to love these other pumpkin recipes too. Please click each link below to find the easy, printable recipe!
If you love this recipe for Pumpkin Pancakes as much as I do, please write a five-star review, and be sure to help me share on Facebook and Pinterest!
CONNECT WITH YUMMI HAUS!
Be sure to follow me on my social media, so you never miss a post!
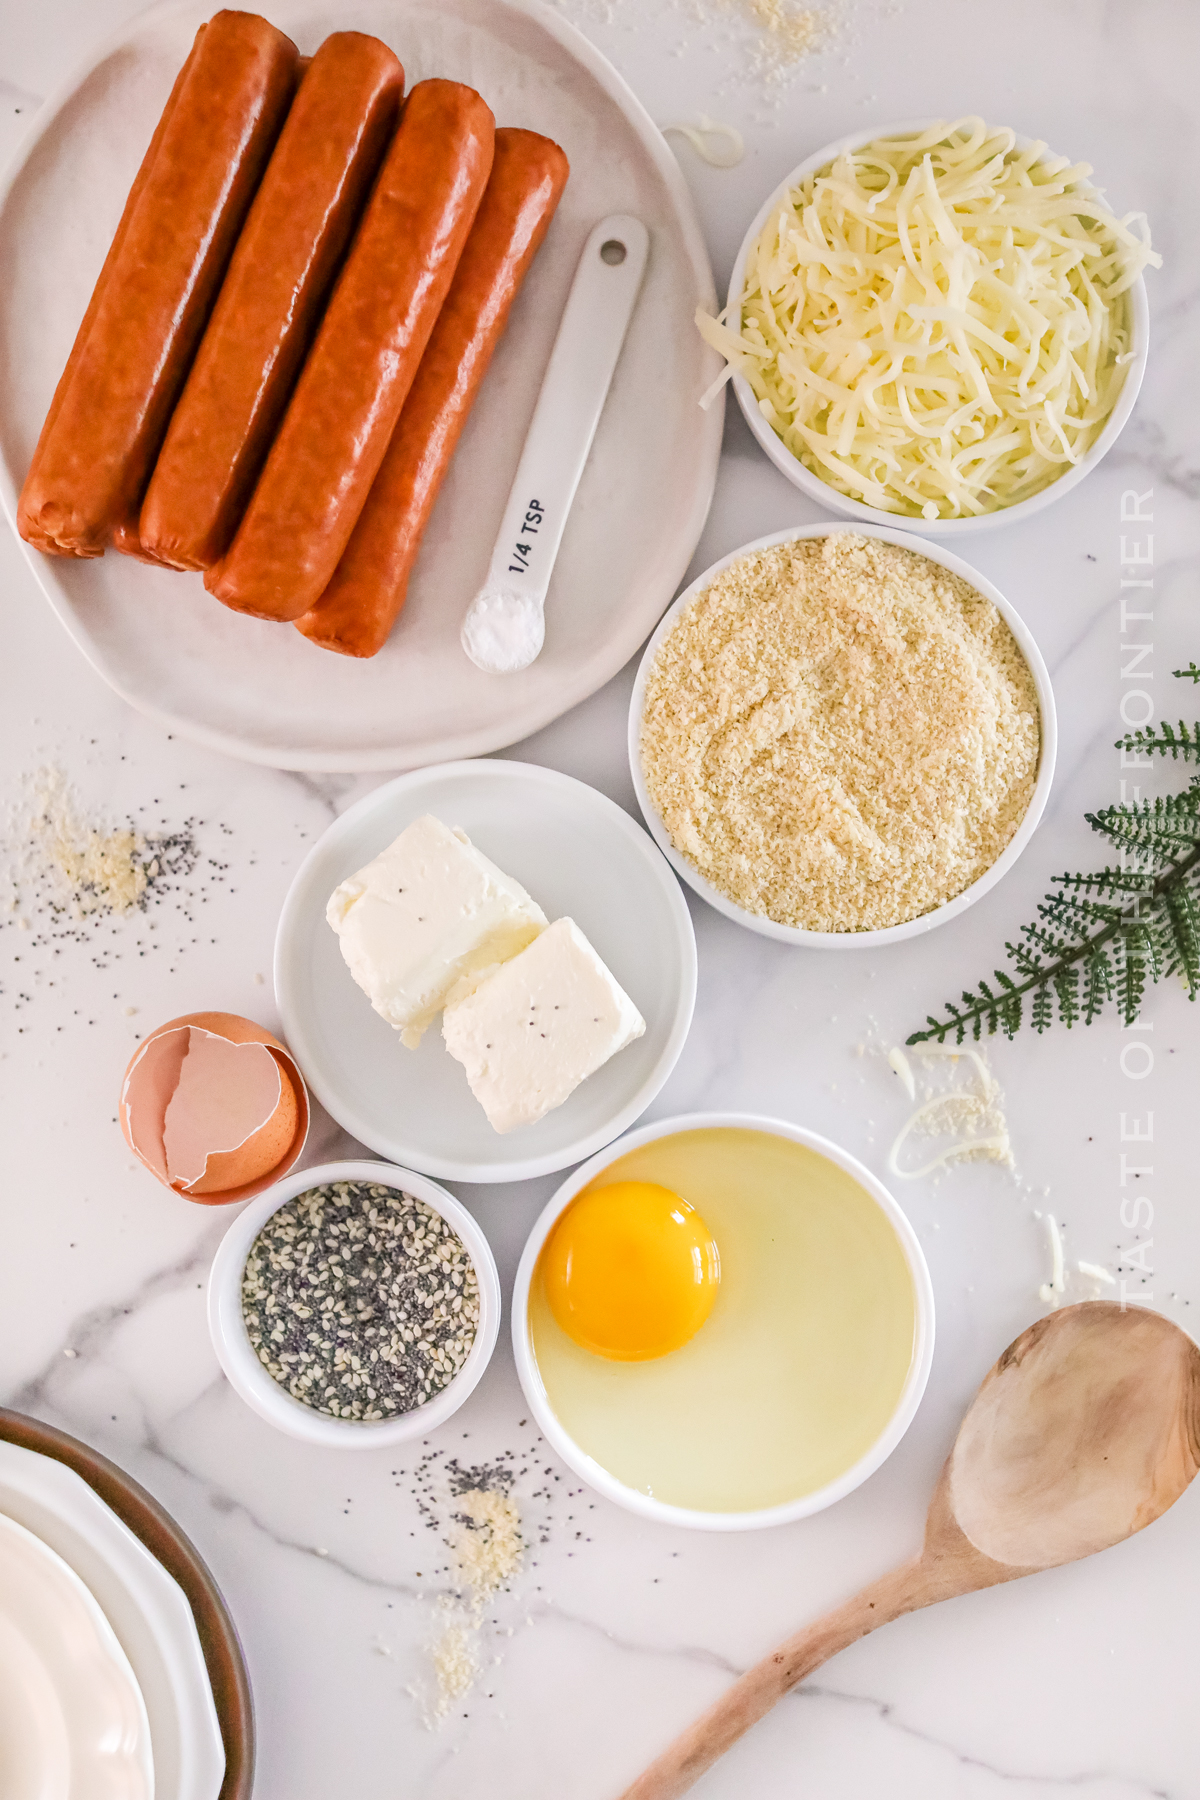
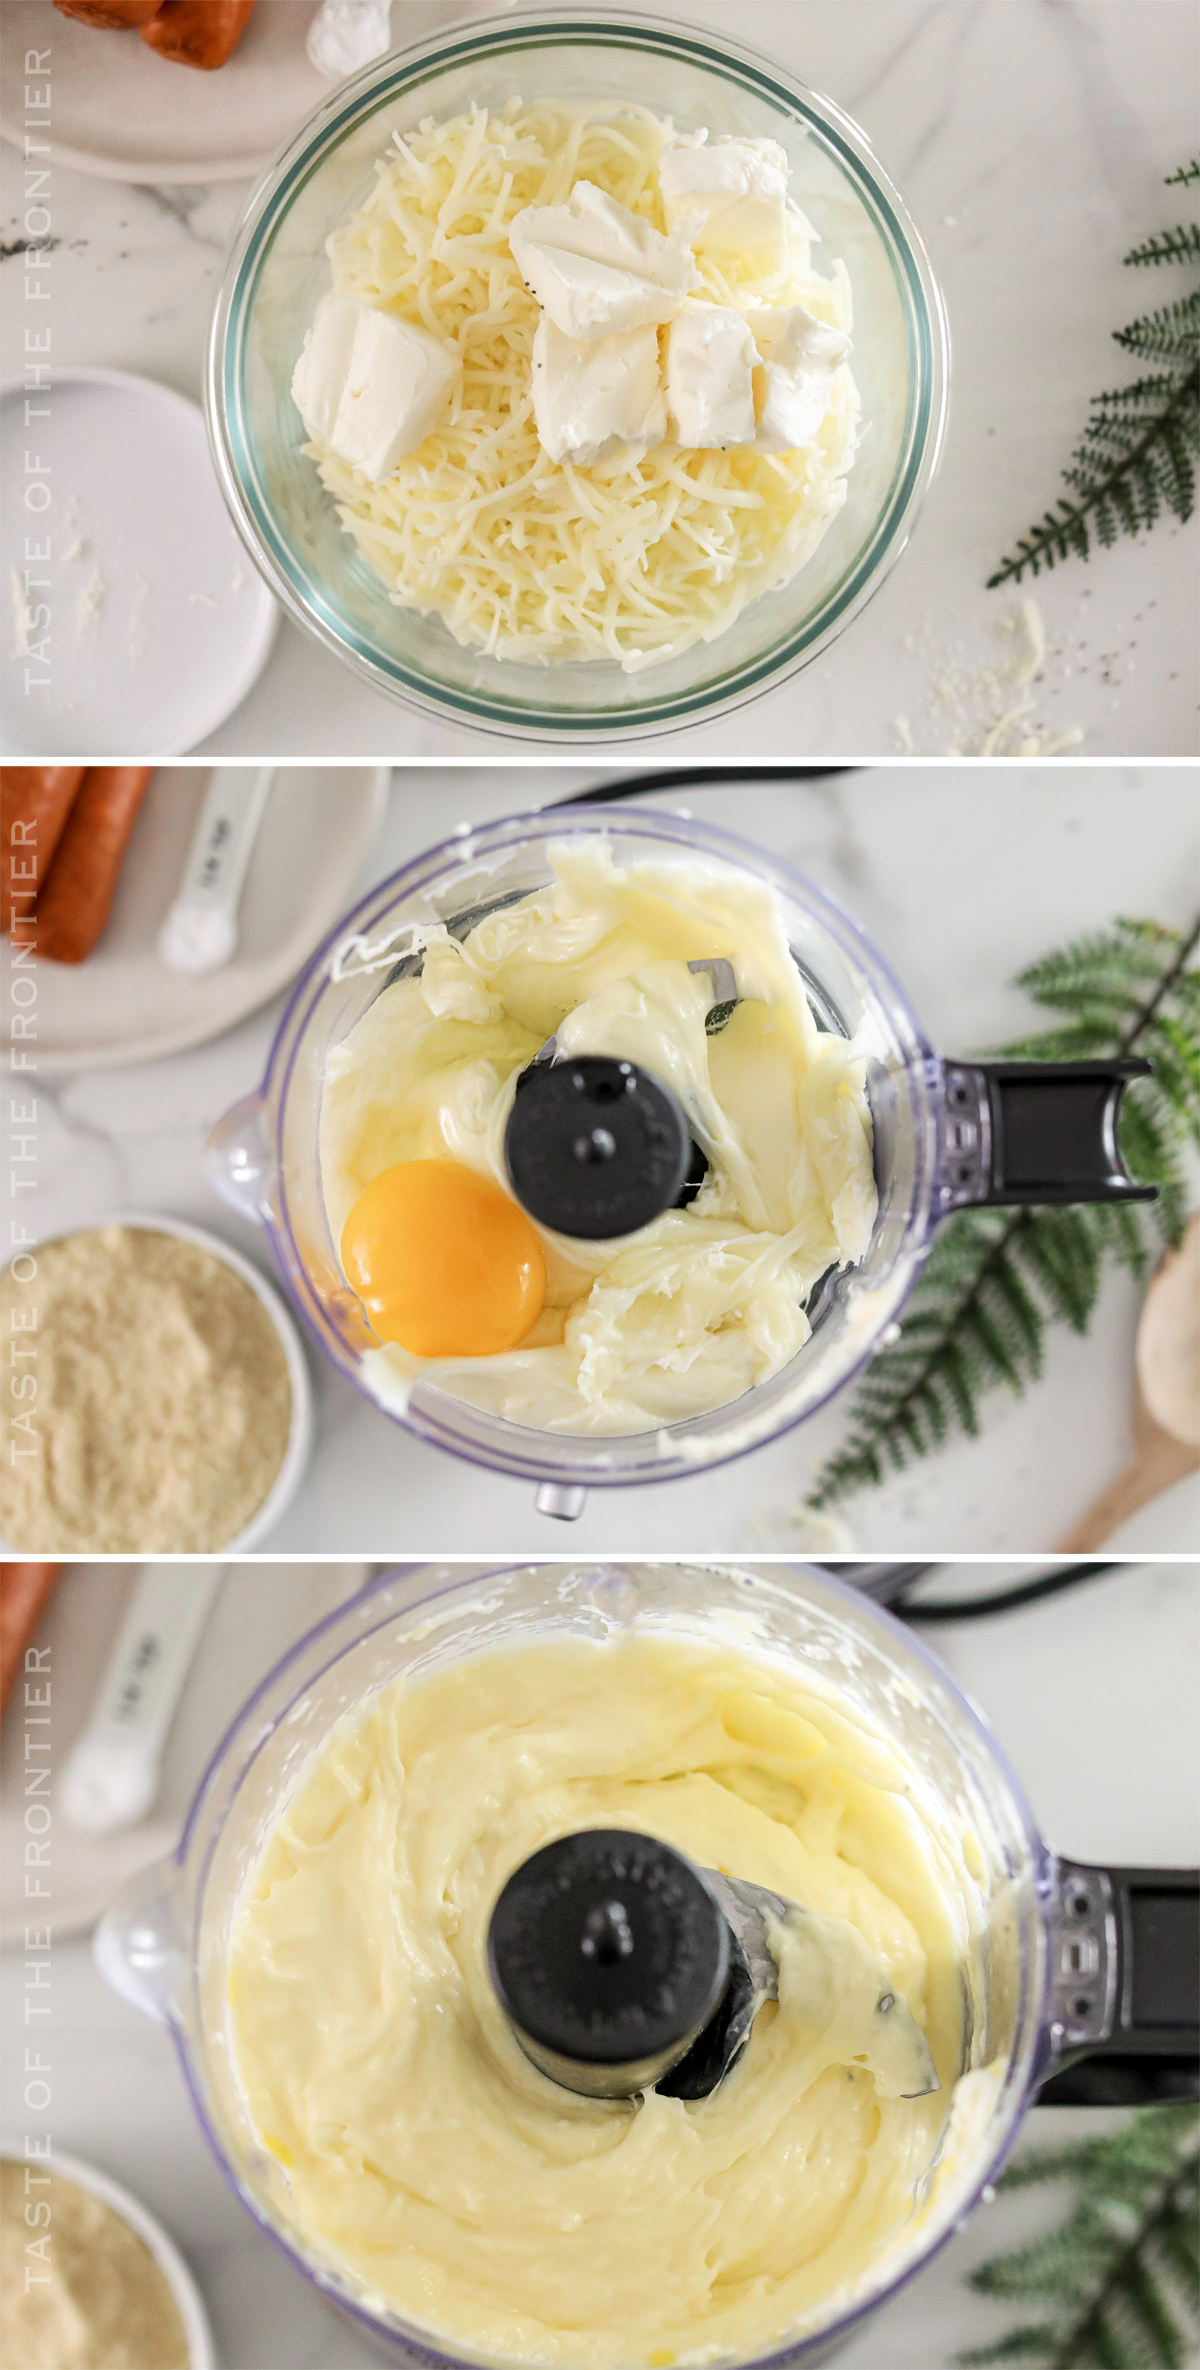
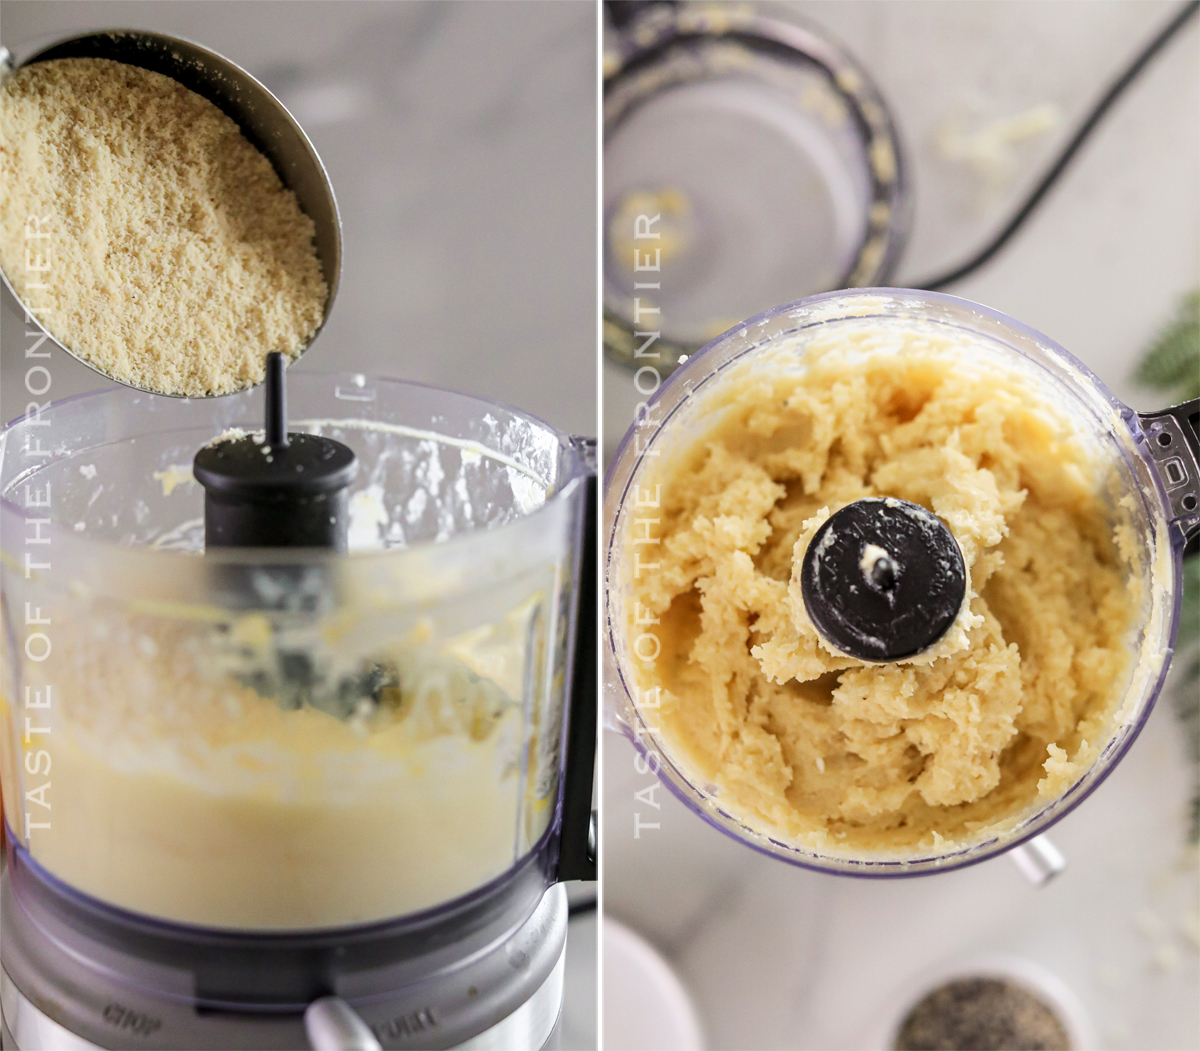
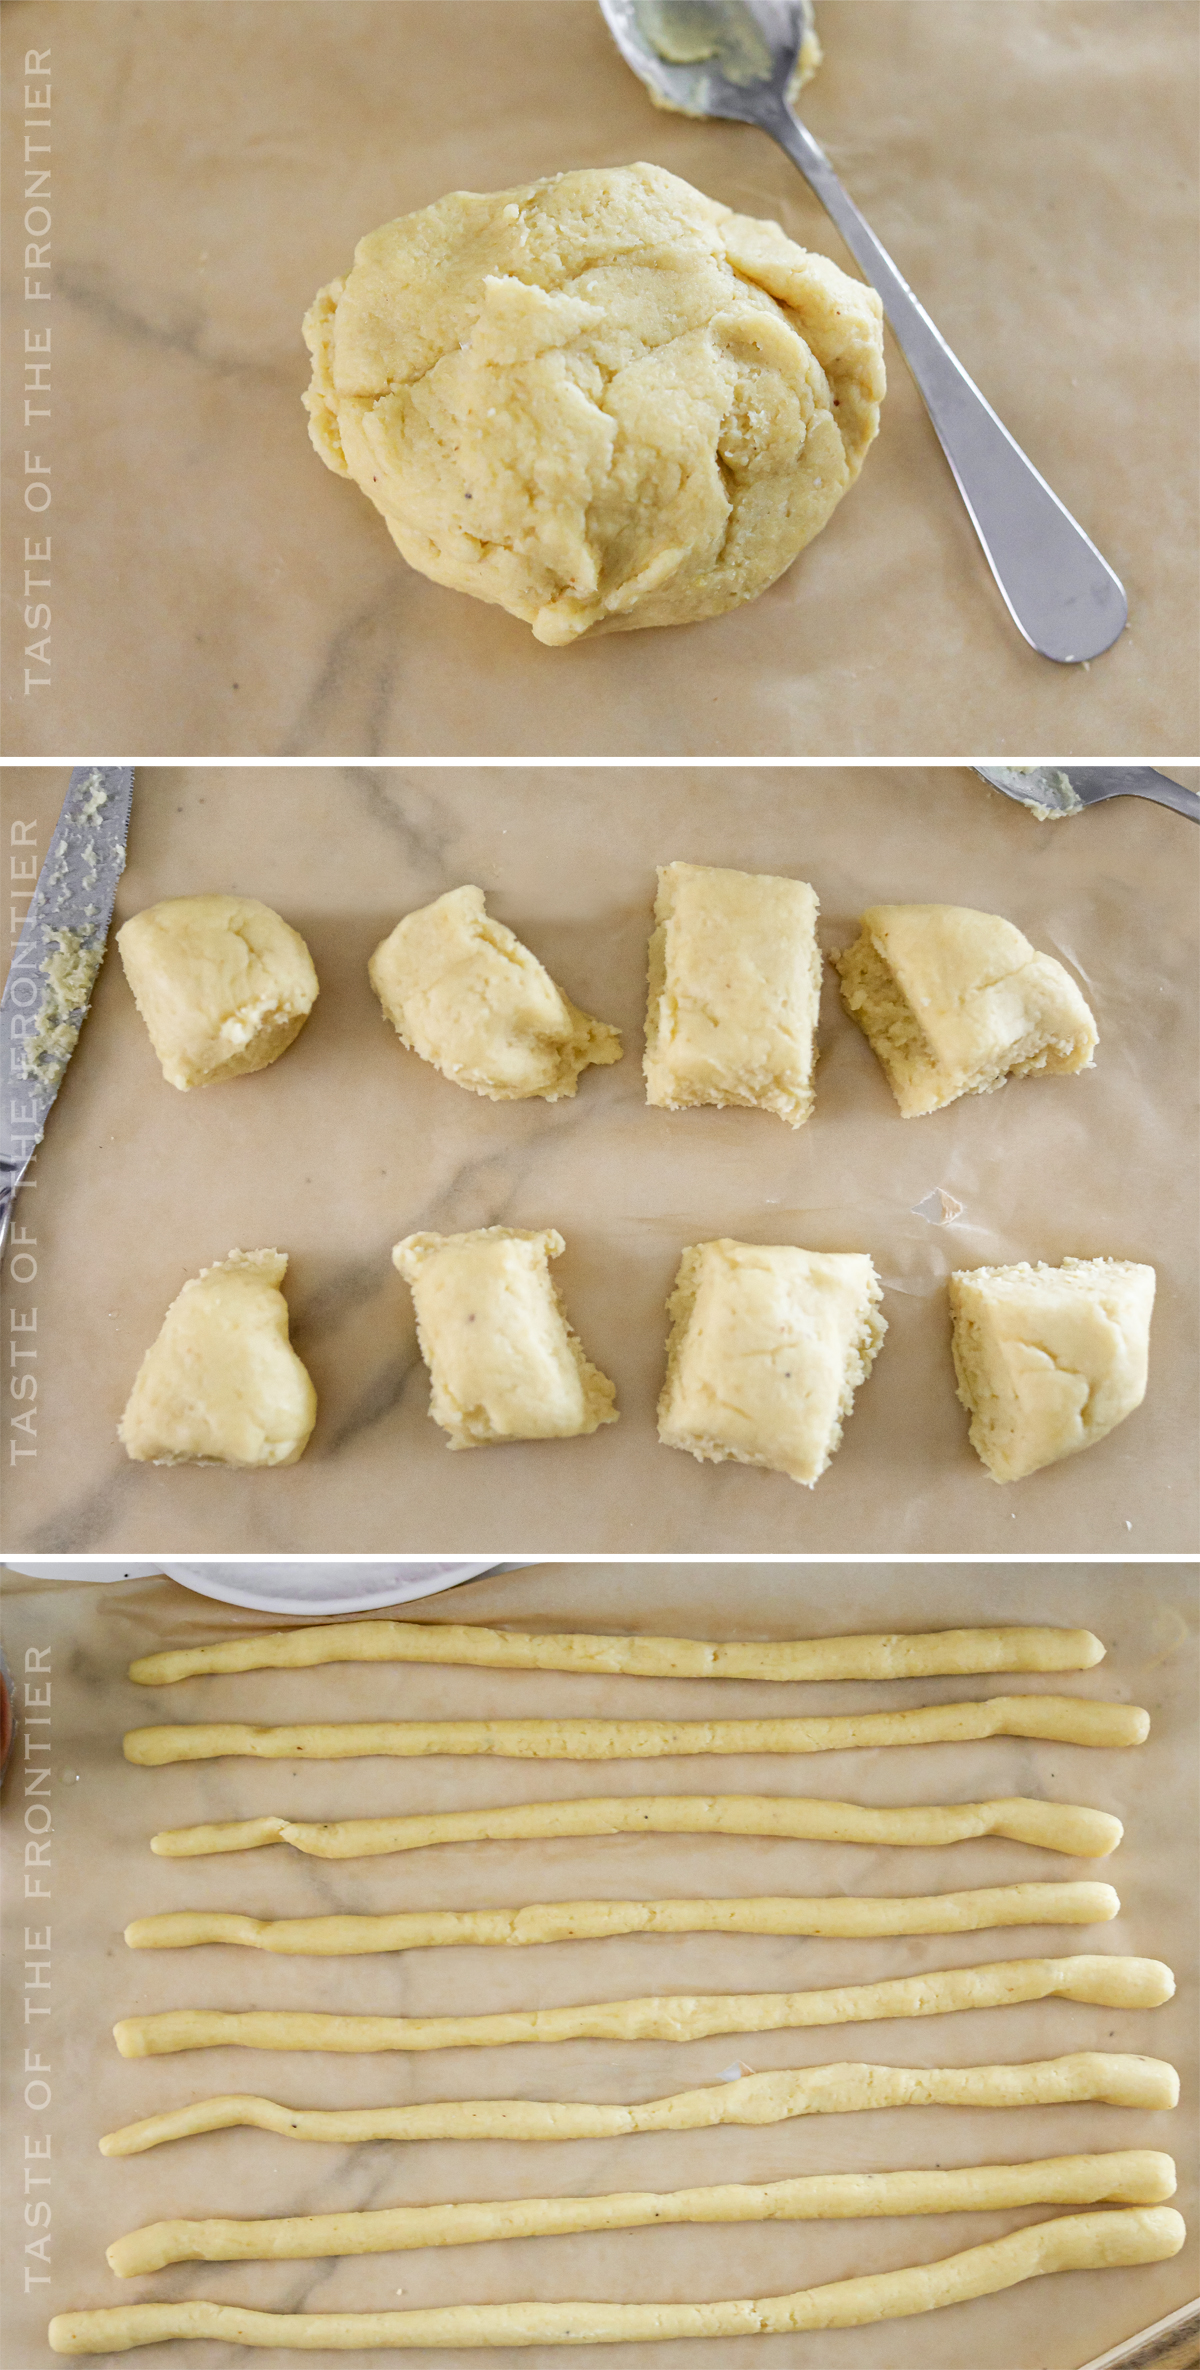
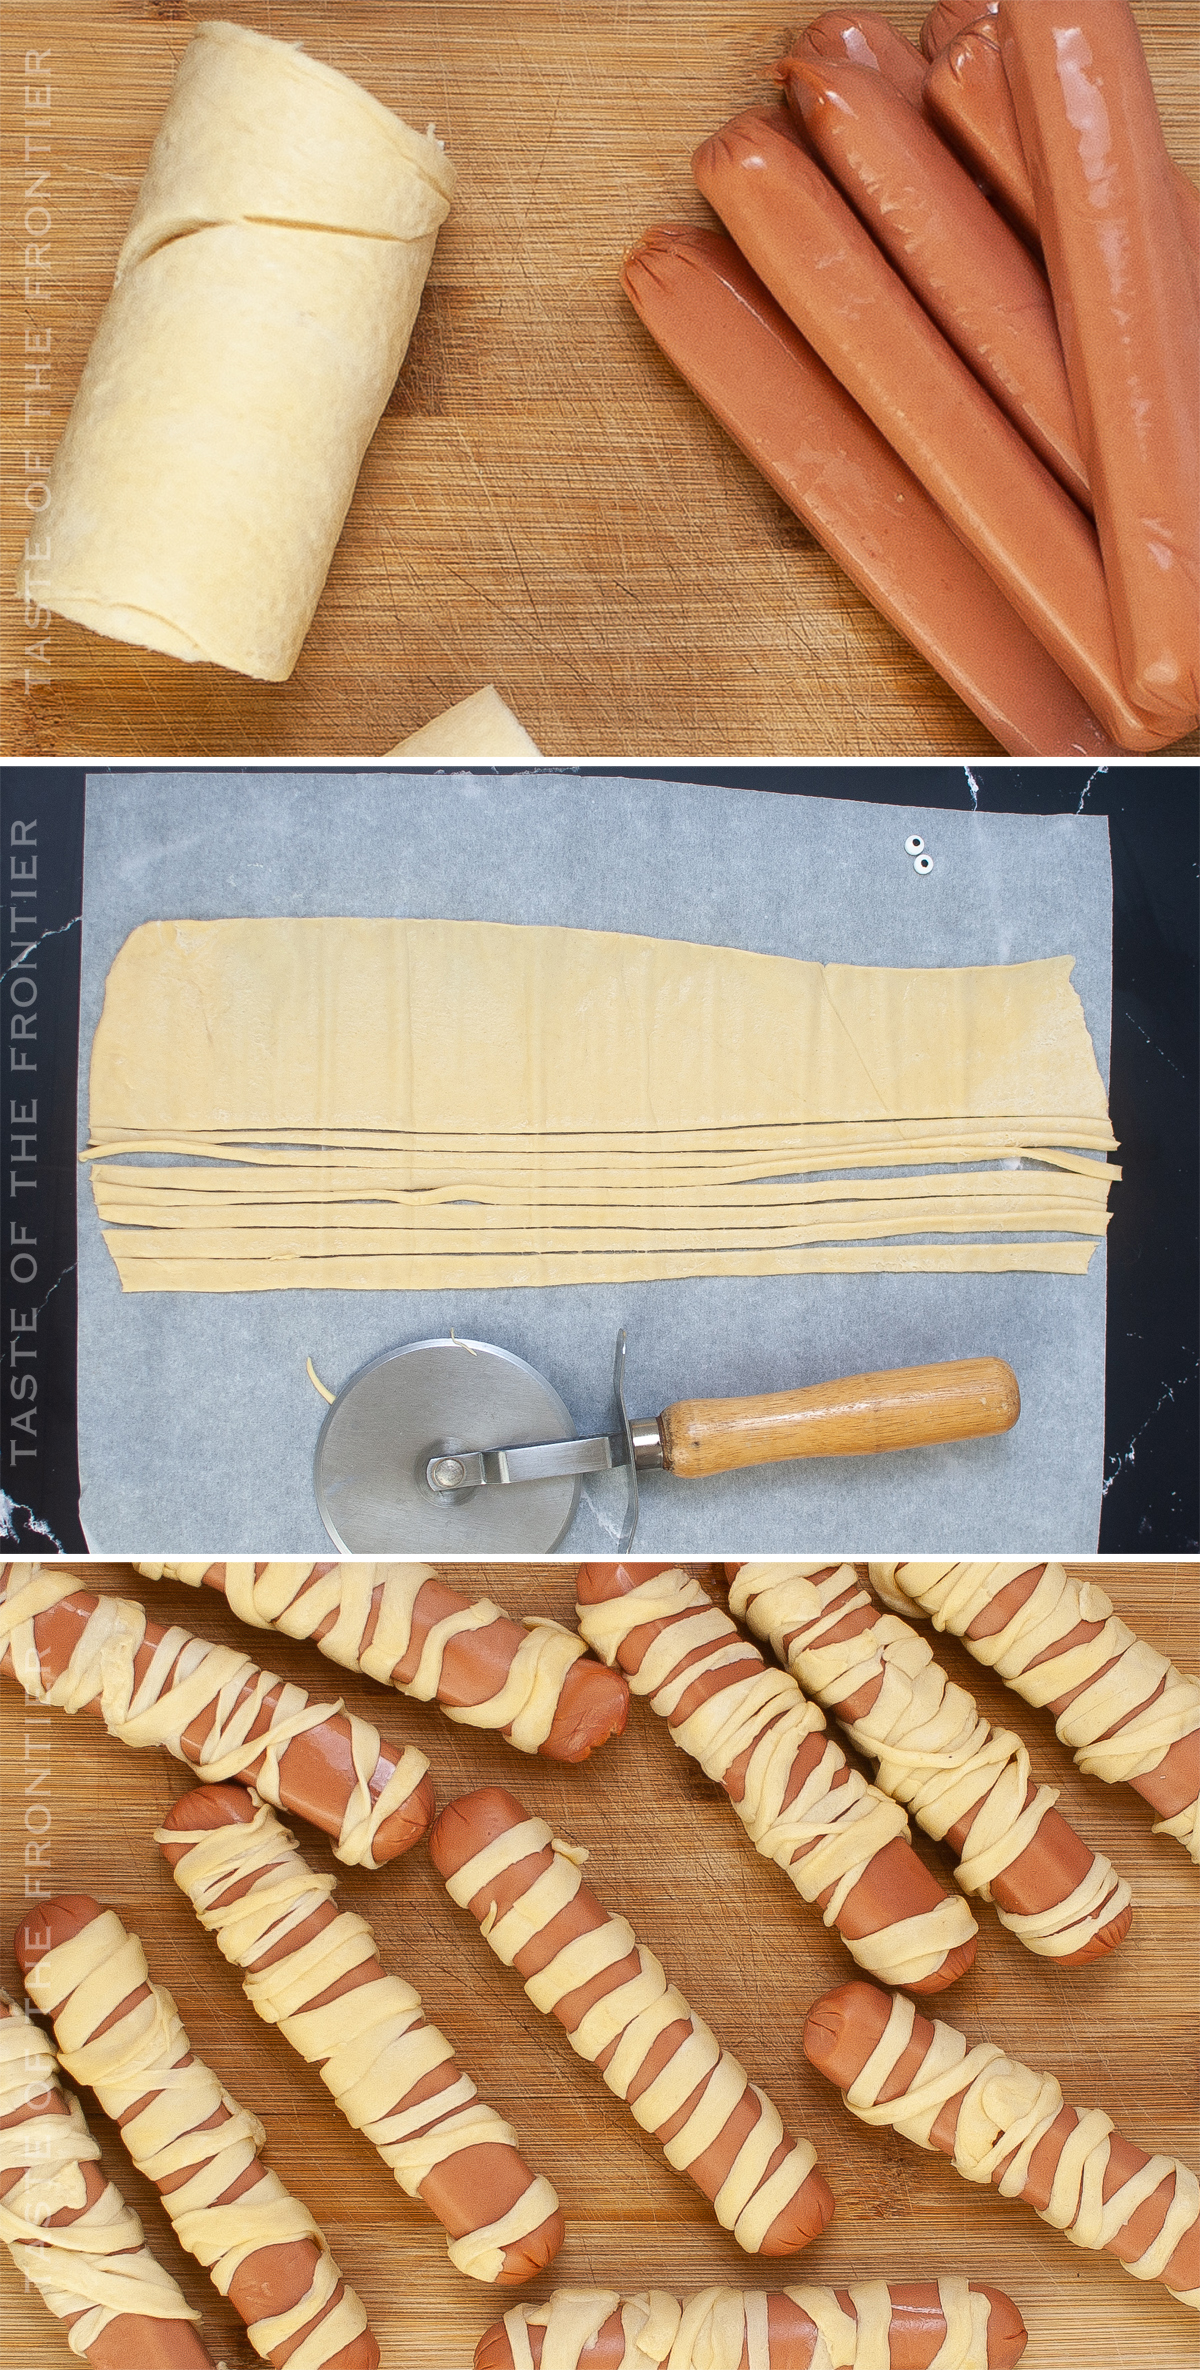
This easy recipe for Pretzel Dogs makes a tasty game-day snack! Included are instructions for standard and low-carb, keto-friendly versions!
Do you love hot dogs, but wish they were a bit more interesting? Well, have I got the recipe for you! Pretzel dogs are the perfect combination of a hot dog and a pretzel, and they’re so easy to make.
Plus, they’re always a hit at parties. So give them a try today!

If you’re like me, you love hot dogs. But sometimes they can get a little boring. That’s where pretzel dogs come in!
This twist on the classic hot dog adds a delicious and slightly salty flavor that will keep you coming back for more. Plus, they’re really easy to make – just follow these simple steps and you’ll be ready to go!
We made sure to include recipes for making them in the oven or air fryer as well as the standard dough recipe using crescent rolls AND a homemade keto-friendly pretzel dough too.

Place your leftover Pretzel Dogs in an airtight container and store them in the fridge for up to 3 days. Reheat them in the oven or microwave before serving.
We recommend no more than 2-3 Pretzel Dogs per person, depending on your appetite.
For best results, reheat your Pretzel Dog in the oven or microwave before serving.
Yes, you can make the Pretzel Dogs ahead of time and store them in the fridge for up to 3 days. Just reheat them before serving.
Bake for 15 -20 minutes or until golden brown. Rotating each hot dog every 3-4 minutes will result in a nice even brown color on all sides of the hot dog.
We recommend using classic yellow mustard, but feel free to experiment with your favorite flavors.
Yes, you can freeze your leftover Pretzel Dogs for up to 2 months. Just thaw them overnight in the fridge before reheating.
Pretzel Dogs are usually served with a side of chips or fries. But feel free to get creative and experiment with other sides like salad, coleslaw, or even macaroni and cheese. Here are some of our favorites to serve with these.

This pretzel dog recipe is SUPER EASY and delicious – and if you’re like me, then you maybe already have some of these items on hand OR maybe you have never made an appetizer like this before, & you might be a bit nervous – but you’re going to love it. I have made a list below of the things I absolutely can’t live without when it comes to making this snack recipe. (you can also SHOP MY FAVORITES in my store)
If you love this easy snack recipe, you’re going to love these other tasty recipes too. Please click each link below to find the easy, printable recipe!

Air Fryer Garlic Parm Chicken Wings

If you love this recipe for Pretzel Dogs as much as I do, please write a five-star review, and be sure to help me share on Facebook and Pinterest!

CONNECT WITH YUMMI HAUS!
Be sure to follow me on my social media, so you never miss a post!

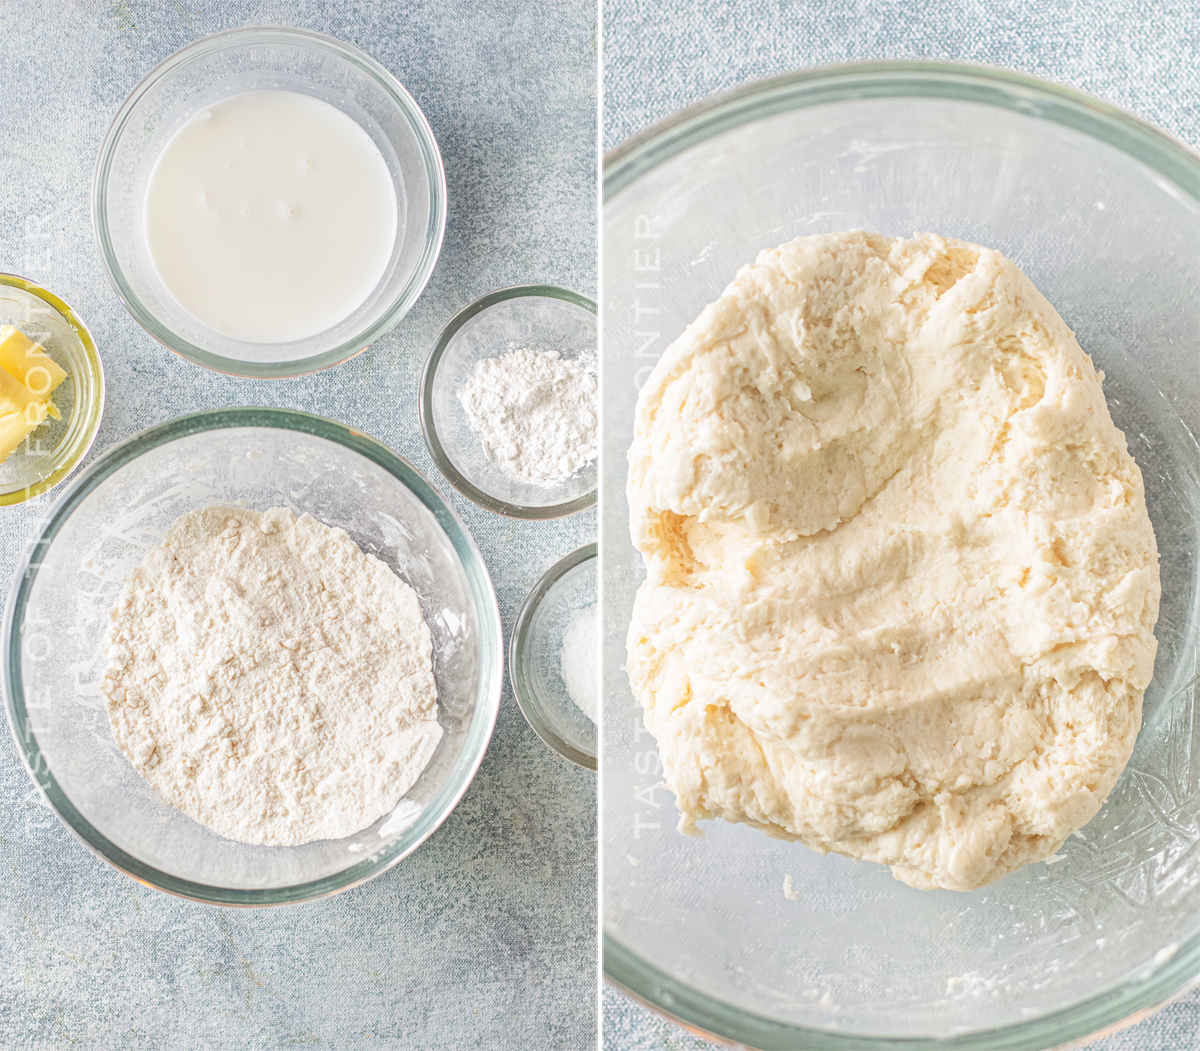
Instant Pot Chicken and Dumplings is an easy comfort food dinner recipe that includes tender chicken and fluffy, homemade dumplings.
Looking for an easy, comforting dish to make in your Instant Pot? This chicken and dumplings recipe is perfect for a busy weeknight!
The best part is, that it only takes about an hour to cook. So you can have a delicious, home-cooked meal on the table in no time.

If you’re like me, you’re always looking for ways to make your favorite dishes a little bit easier. That’s why I love my Instant Pot—it makes cooking a breeze!
Today, I’m going to show you how to make chicken and dumplings in your Instant Pot. It’s so easy and delicious, that you’ll wonder why you haven’t been making it this way all along!

Chicken and dumplings can be stored in the fridge for up to 3 days or in the freezer for up to 2 months. To store, place the cooled chicken and dumplings in an airtight container. When ready to eat, reheat in the oven or microwave until warmed through.
Yes, you can definitely make turkey and dumplings! Just follow the same instructions but use turkey breasts instead of chicken. Yum!
There are a few things that could cause this. One possibility is that you didn’t add enough flour to the dough. Another possibility is that you overworked the dough which made the gluten too tough.
Yes, you can make chicken and dumplings in a slow cooker. Just follow the same instructions but cook on low for 6-8 hours or on high for 3-4 hours.
Note – you will need to saute the veggies in a skillet on the stovetop before adding them to the slow cooker and continuing the process with the chicken and the dumplings.
If you don’t have chicken broth on hand, you can use water or vegetable broth. However, using water will result in a more bland soup. So, if you go this route, you may want to add some additional seasonings to the soup.
Yes, you can certainly make chicken soup without the dumplings. Just follow the same instructions but omit the dumpling dough. You could also add some cooked rice or noodles to the soup instead of dumplings. Enjoy!

Yes, chicken and dumplings can be made ahead of time and stored in the fridge for up to 3 days or in the freezer for up to 2 months.
To store, place the cooled chicken and dumplings in an airtight container. When ready to eat, reheat in the oven or microwave until warmed through. Enjoy!
There are a few ways to make gluten-free dumplings. One option is to use a gluten-free flour blend in place of the regular flour.
Another option is to use potato starch or tapioca flour in place of the regular flour. These egg dumplings will be more delicate but still delicious! Enjoy!
I am currently using an 8-quart pot, but this recipe can be made in the 6-quart pot too. If you have one of the smaller versions (3-quart mini), I recommend cutting this recipe in half.
By today’s definition, they are virtually the same – if you are talking about an electric pressure cooker. However, a traditional pressure cooker and an instant pot are two different cooking methods.
A traditional pressure cooker is a sealed metal container that cooks food quickly by steam under increased atmospheric pressure and heats the pot to boiling point.
An Instant Pot, on the other hand, is an electric-style pressure cooker that uses the same idea for cooking foods but can do so with very little liquid. They are incredibly efficient, safer than a traditional pressure cooker, and super easy to use too. Plus they come with a multitude of other functions making them great for quick meal prep.
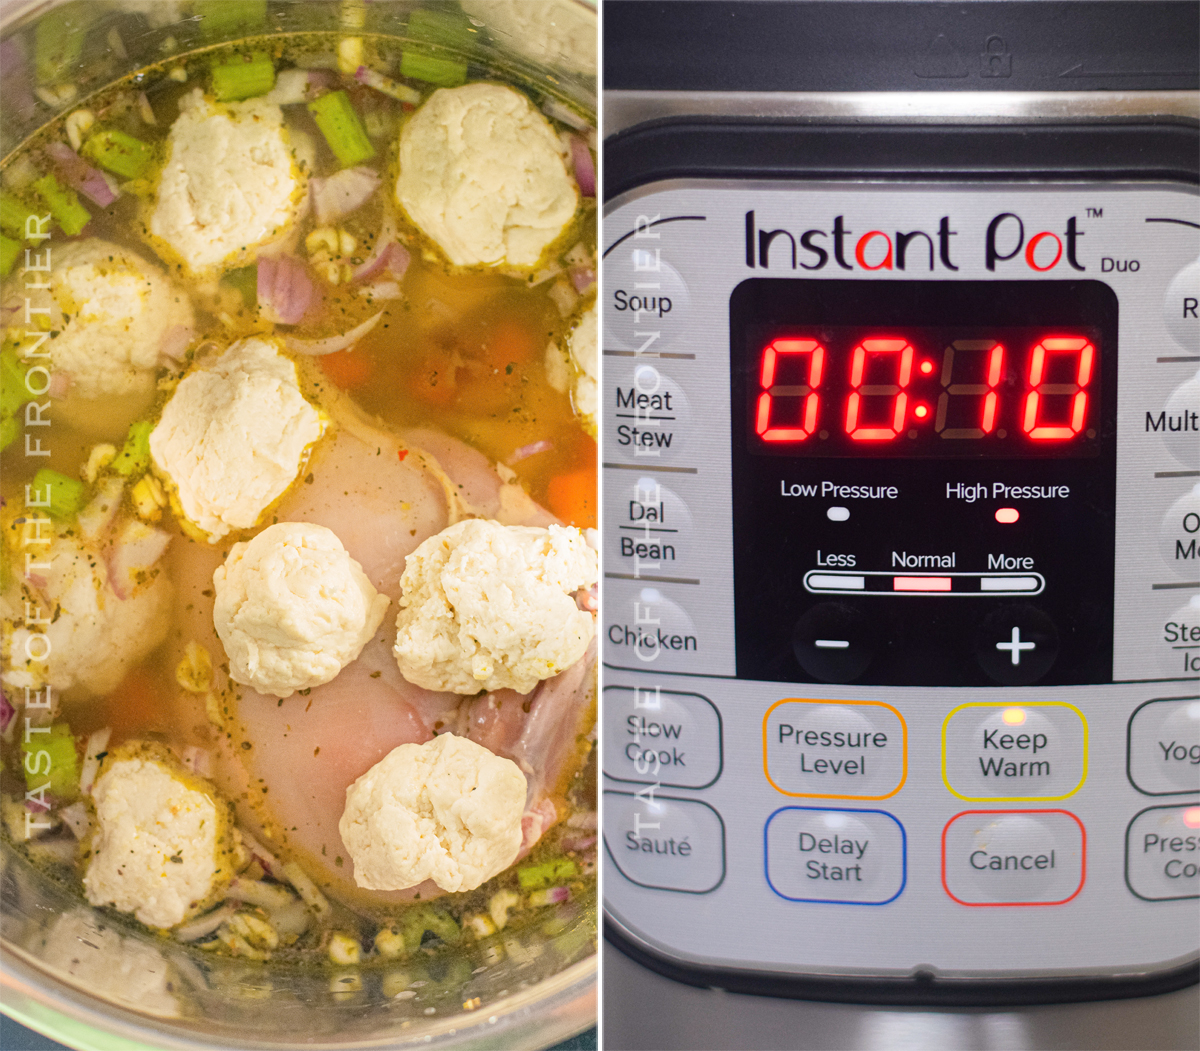
If you love this easy Instant Pot Chicken and Dumplings recipe, you’re going to love these other quick dinners too. Please click each link below to find the easy, printable recipe!


Triple Cheddar Chicken and Pasta
Spinach Stuffed Chicken Parmesan
Chicken Parmesan Grilled Cheese Sandwich
Slow Cooker Chicken Parmesan Soup

If you love this recipe for Chicken and Dumplings made in the Instant Pot as much as I do, please write a five-star review, and be sure to help me share on Facebook and Pinterest!

CONNECT WITH YUMMI HAUS!
Be sure to follow me on my social media, so you never miss a post!

Apple Cinnamon Muffins are a delicious breakfast or snack recipe! This simple muffin is perfect for Fall, and tastes like comfort!
Fall is in the air and that means it’s time for delicious recipes like these apple cinnamon muffins! These are perfect for a quick breakfast or snack. They’re easy to make and taste amazing. You’re going to love them!
This easy recipe is perfect for a morning snack or breakfast on the go. Best of all, they’re freezer-friendly so you can make a batch ahead of time and enjoy them throughout the season.
It’s finally starting to feel like fall, and that means it’s time to start baking all of our favorite autumn-inspired treats! These apple cinnamon muffins are the perfect breakfast or snack for chilly days.
They’re easy to make, and they taste delicious warm out of the oven. Plus, they’re loaded with healthy ingredients like apples and cinnamon. So give them a try this season – you won’t be disappointed!
When stored in an airtight container or ziptop bag, these muffins will keep for up to 5 days at room temperature. If required, you may refrigerate them to extend their shelf life by another few days.
I recommend refrigeration if you live in a hot or humid climate.
Yes! These muffins freeze very well. I recommend waiting until they’ve completely cooled before wrapping them. Then wrap each one individually with plastic wrap.
Then place them in a zip-top bag and freeze for up to 3 months. Thaw in the refrigerator overnight before serving again.
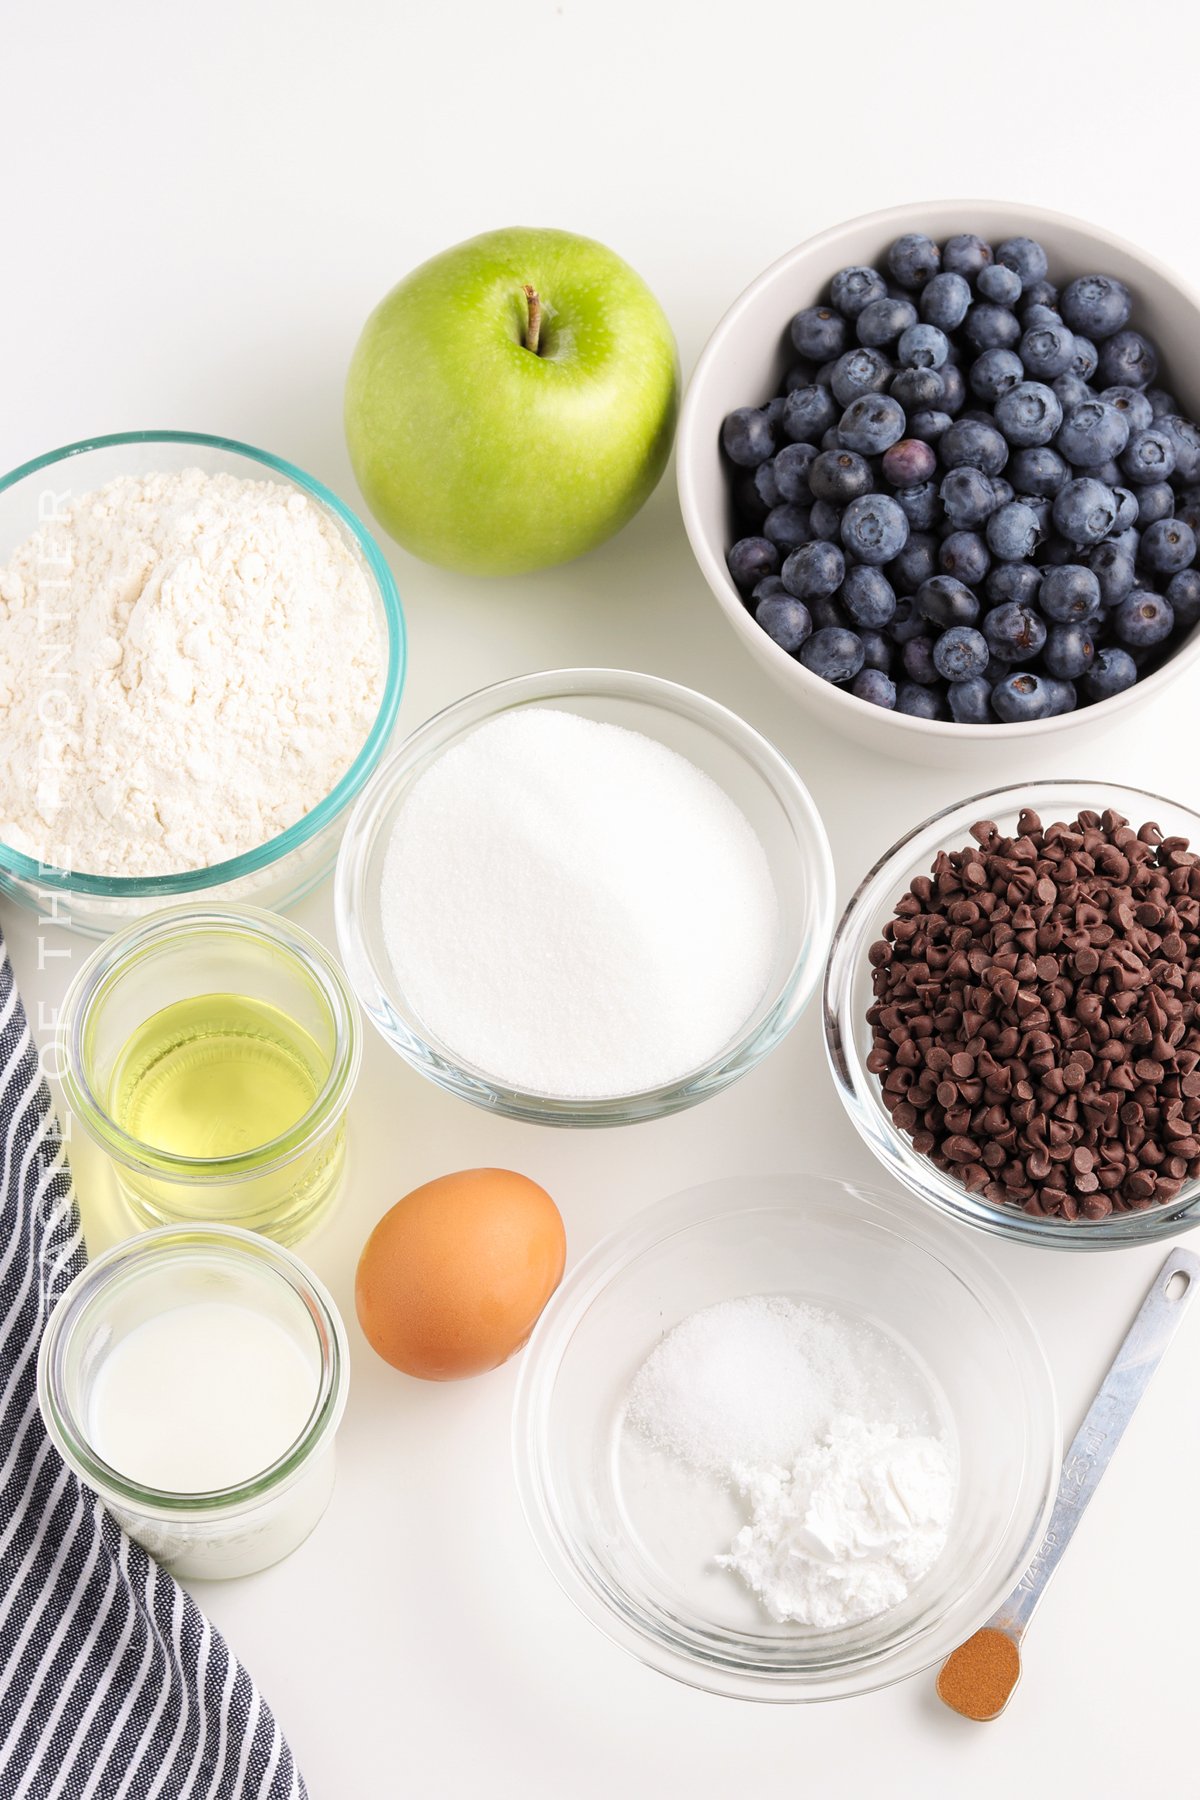
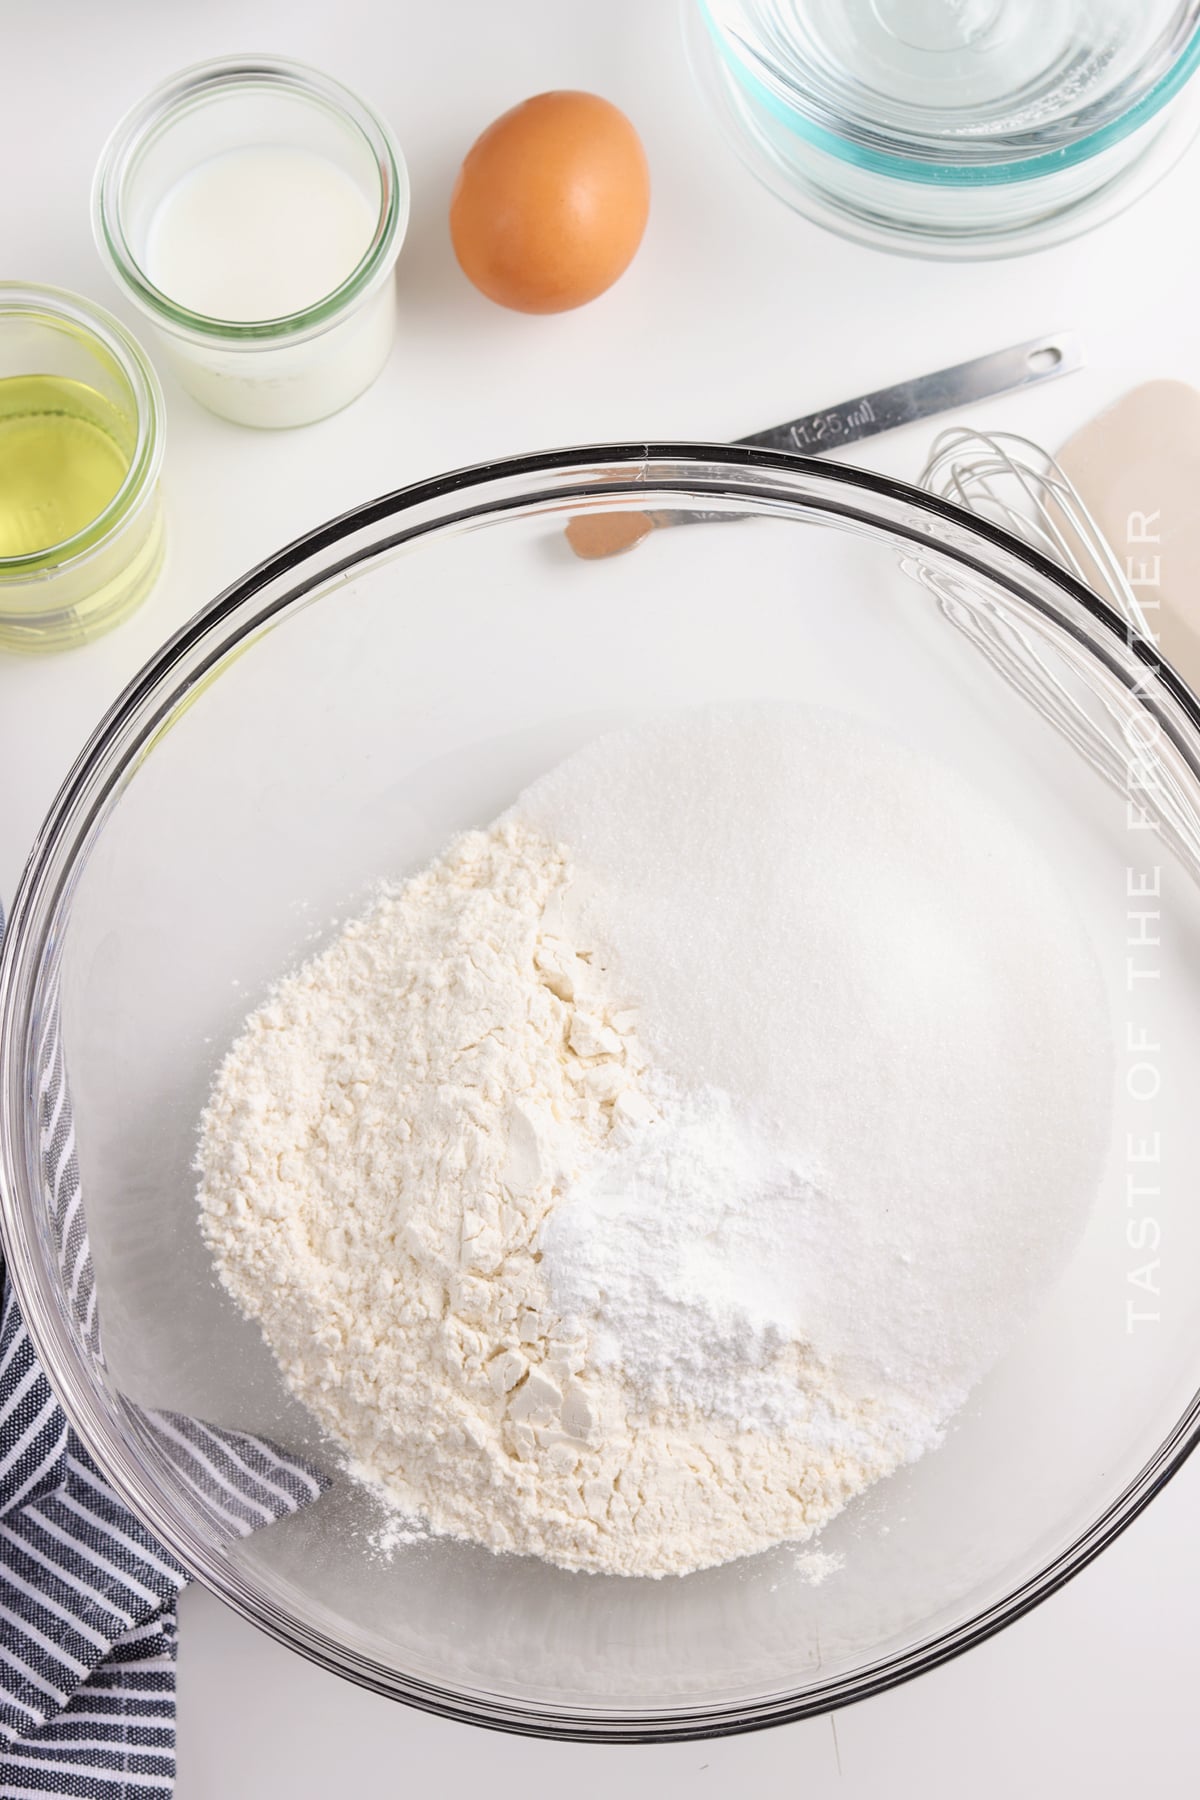
You can certainly make mini muffins by using a mini muffin pan. The bake time will be shorter, so keep an eye on them and check for doneness earlier than the recipe indicates.

No, you don’t need to use paper liners with muffins. They can aid in the prevention of muffin sticking and make cleanup a little easier.
If you don’t have paper liners, you can also grease the muffin pan with some butter or cooking spray. I like to use my own homemade baker’s release.
Bakers release is a combination of oil, flour, and shortening that makes releasing cakes and other baked goods almost effortless.
To make Bakers Release – it is as simple as 1,1 & 1.
Mix the ingredients together – whisking well. Store in an airtight container in the pantry or refrigerator. When ready to use, dip a pastry brush into the mixture and spread it over the cake pan.
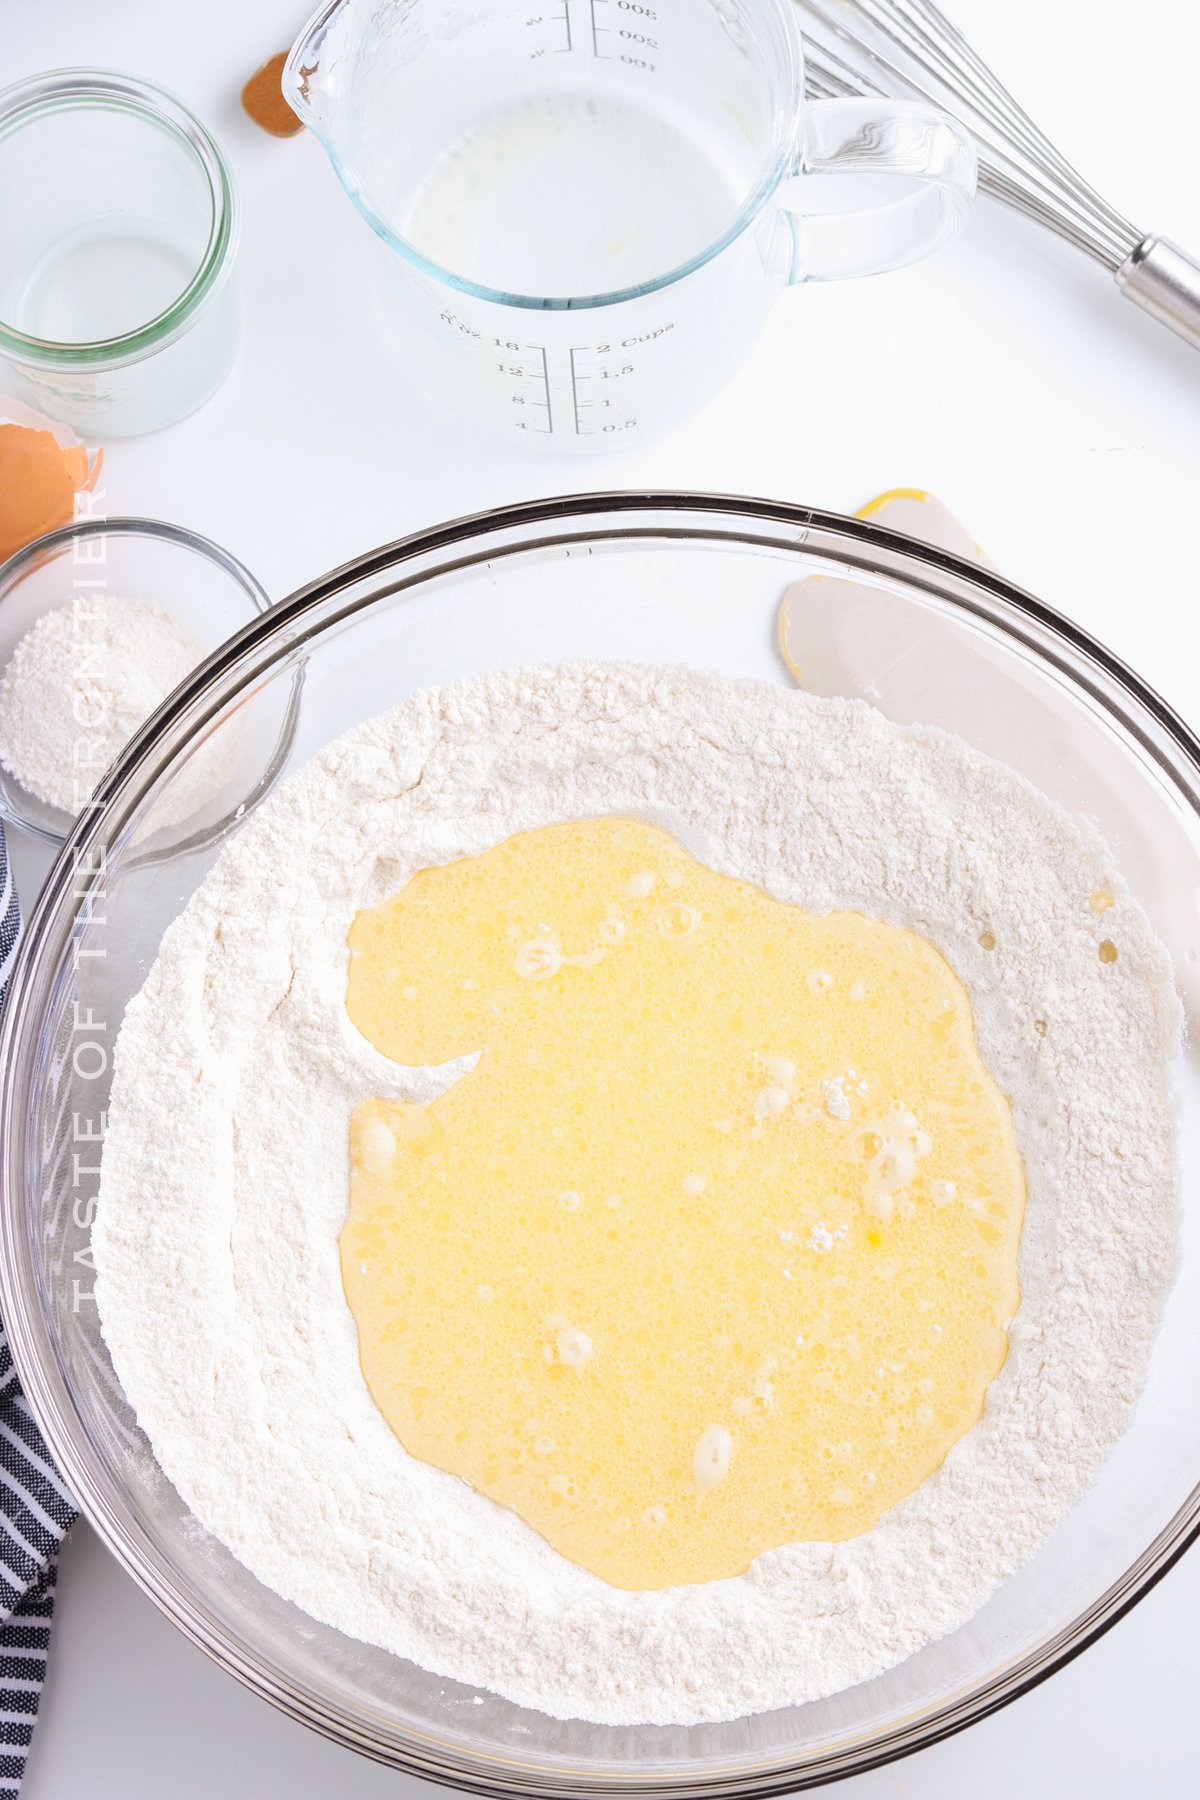
There are a few key ingredients that will help to keep your muffins moist, even when stored. Be sure to use yogurt, milk, or buttermilk in the recipe. Adding oil or melted butter will also add moisture. Finally, don’t overmix the batter – mix just until combined.
Yes, you can use a different flour, but it will affect the texture of the muffins. I would recommend using a 1:1 gluten-free baking flour if you need to make these muffins gluten-free. You could also use whole wheat flour, but the muffins will be denser.
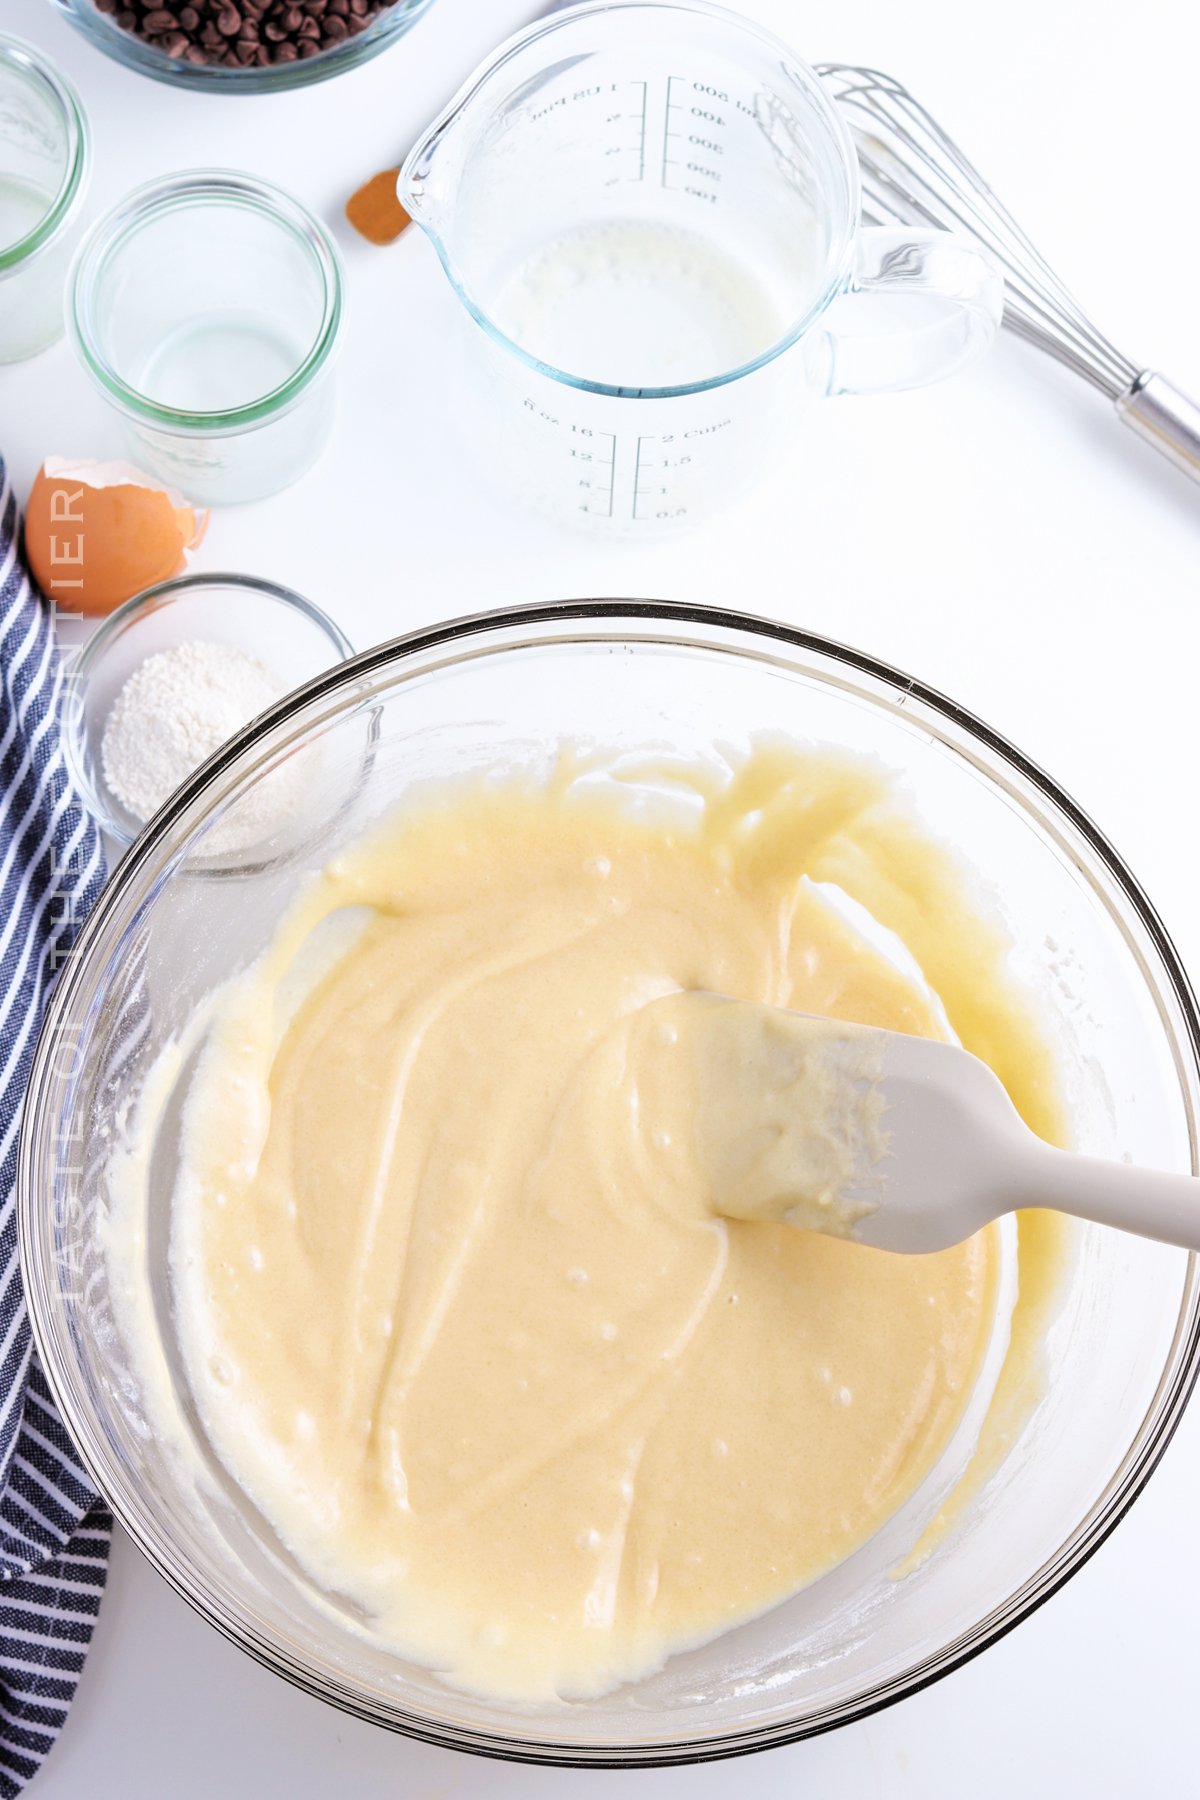
Yes! You can add chocolate chips, blueberries, or any other mix-ins that you like. Be sure to fold them into the batter gently so that they don’t sink to the bottom.
There’s really no limit to what you can serve alongside these muffins – but here is a list of our most-served recipes that we pair with them.
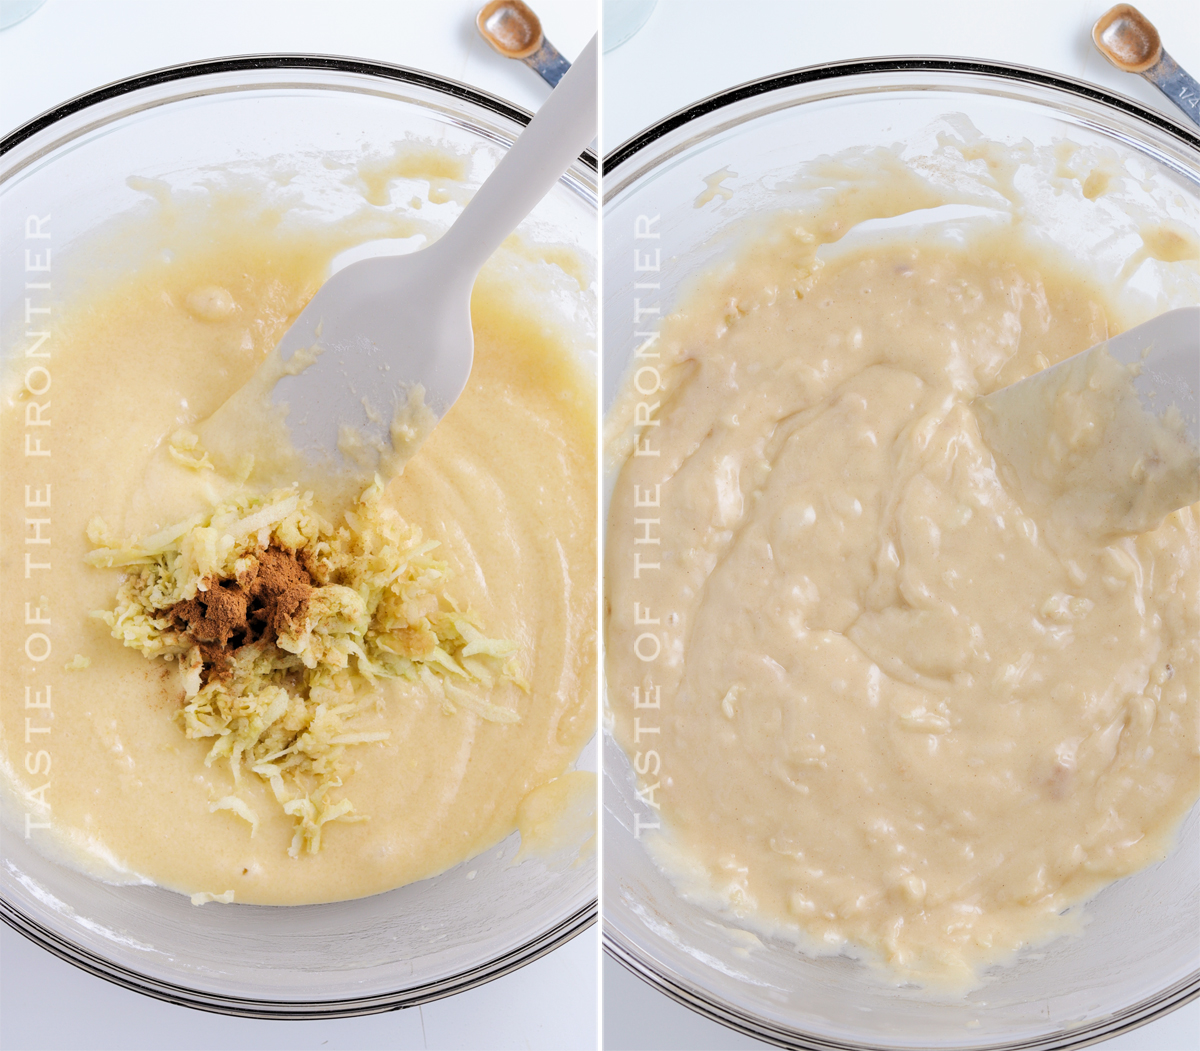
DON’T MISS THESE HOLIDAY E-BOOKS!
This breakfast recipe is SUPER EASY and delicious – and if you’re like me, then you maybe already have some of these items on hand OR maybe you have never made homemade muffins before, & you might be a bit nervous – but you’re going to love them. I have made a list below of the things I absolutely can’t live without when it comes to making this breakfast recipe. (you can also SHOP MY FAVORITES in my store)
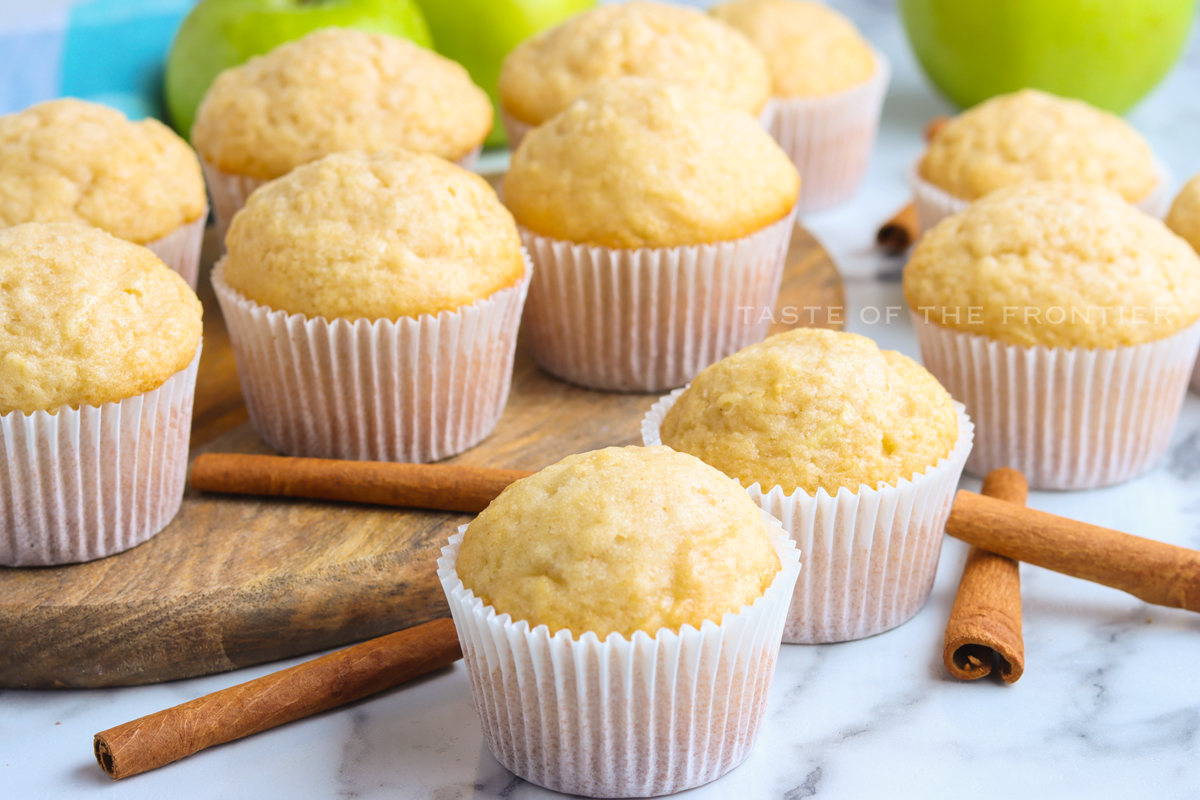
If you love this easy apple muffins recipe, you’re going to love these other muffins too. Please click each link below to find the easy, printable recipe!
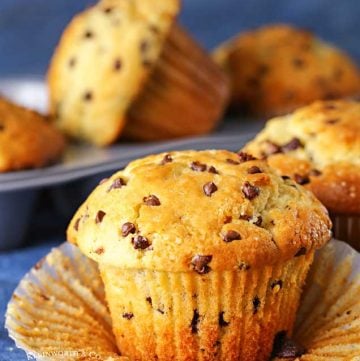
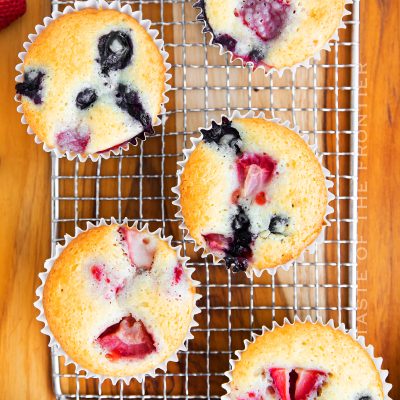
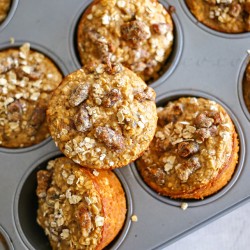


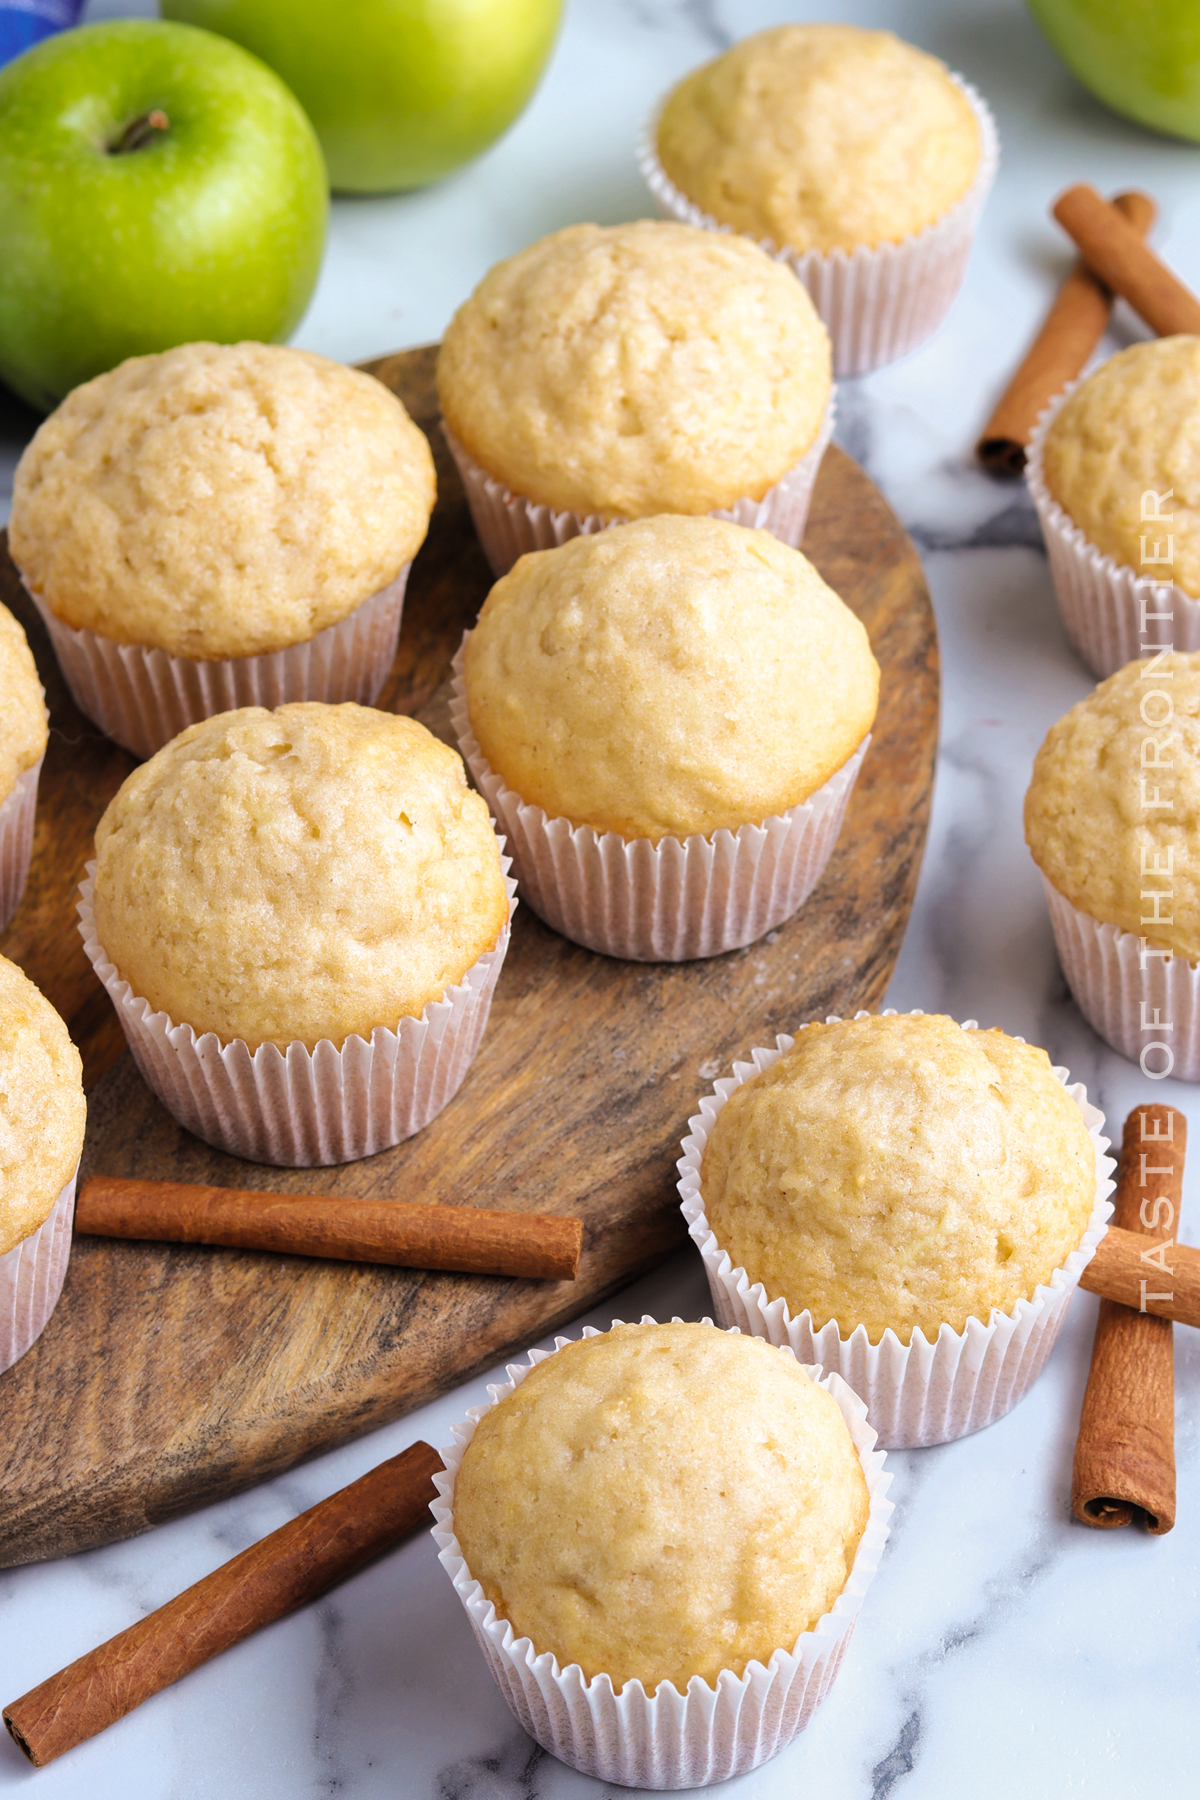
If you love this recipe for Homemade Apple Muffins as much as I do, please write a five-star review, and be sure to help me share on Facebook and Pinterest!

CONNECT WITH YUMMI HAUS!
Be sure to follow me on my social media, so you never miss a post!
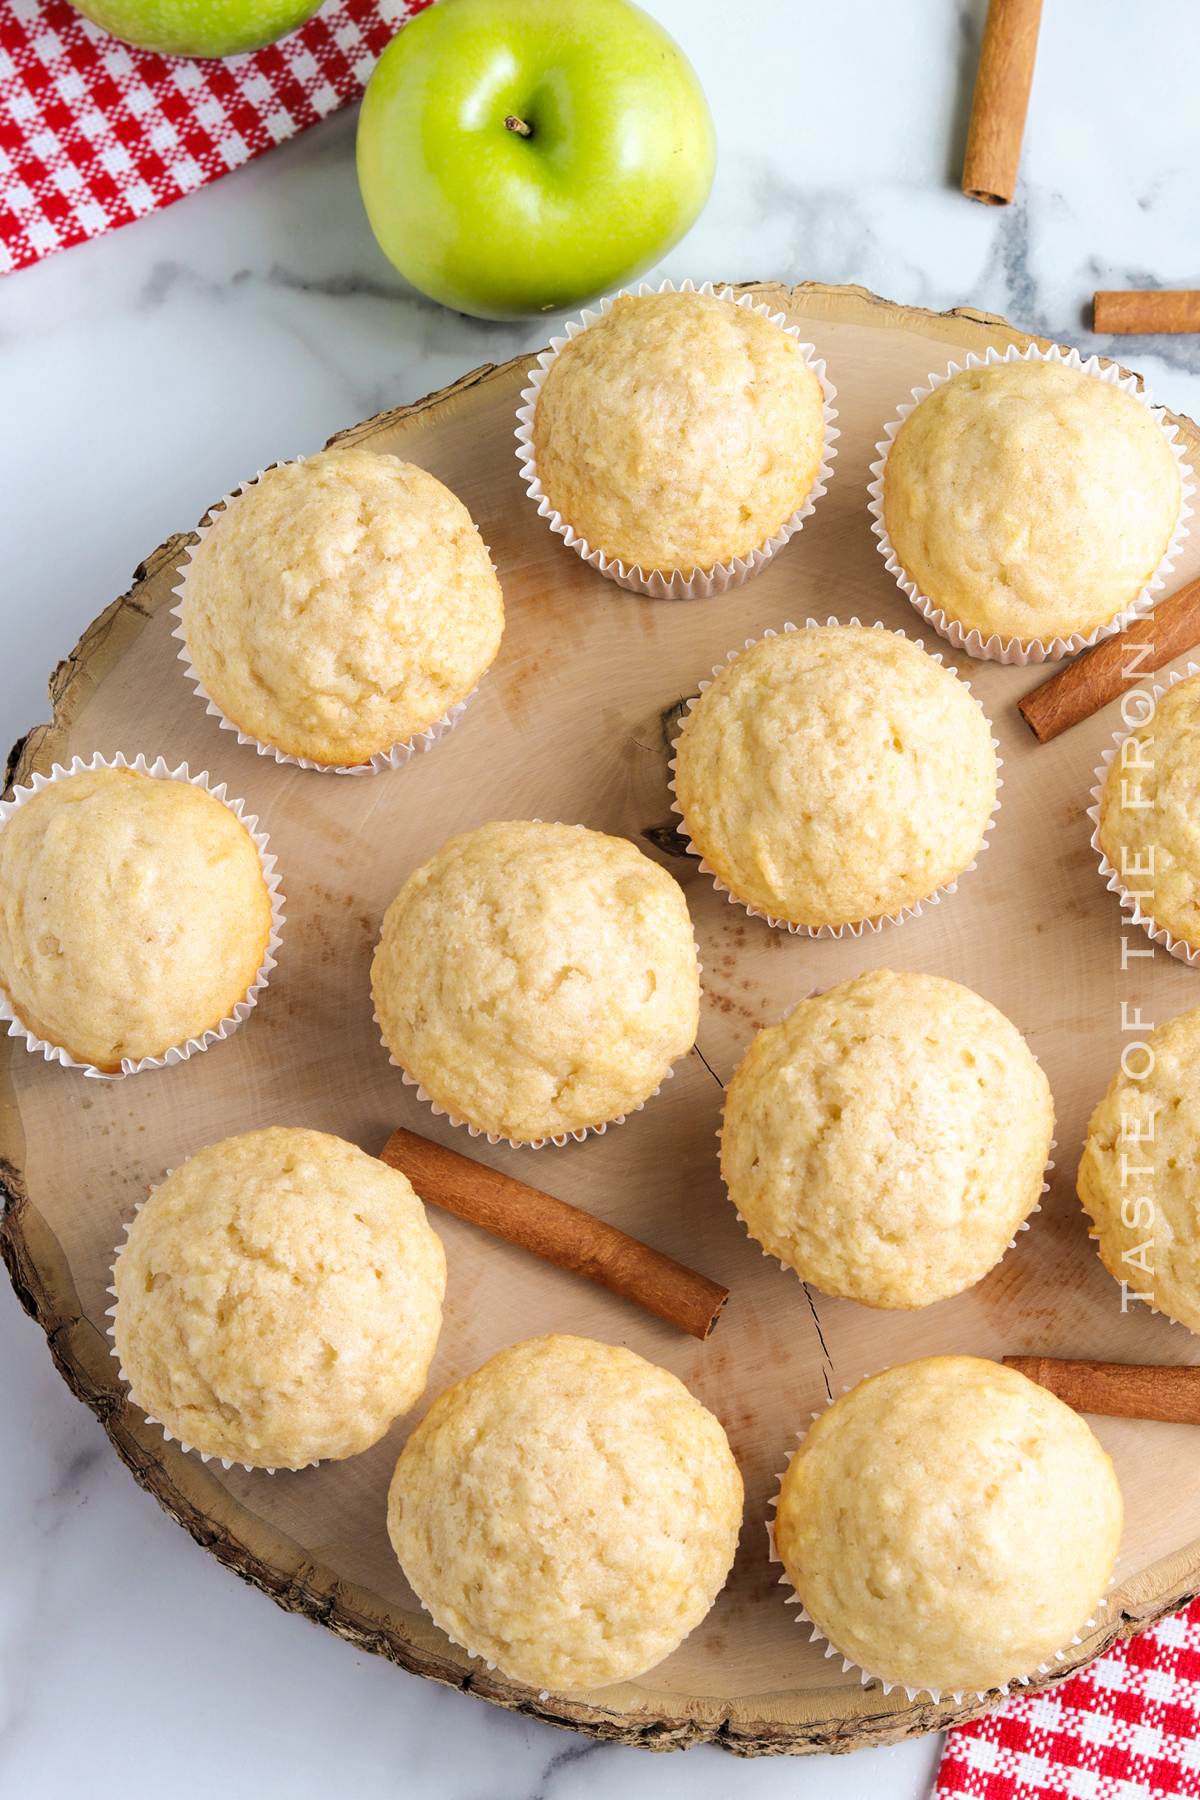
If you’re looking for a quick, easy, and healthy side dish to add to your next meal, look no further than Oven Roasted Asparagus.
This simple recipe takes just minutes to prepare, and the end result is flavorful and nutritious. So why not give it a try? You may just find yourself adding oven-roasted asparagus to your regular menu rotation.
This delicious vegetable is a great addition to any meal, and it’s easy to prepare in the oven. So fire up your oven and roasted some asparagus today!
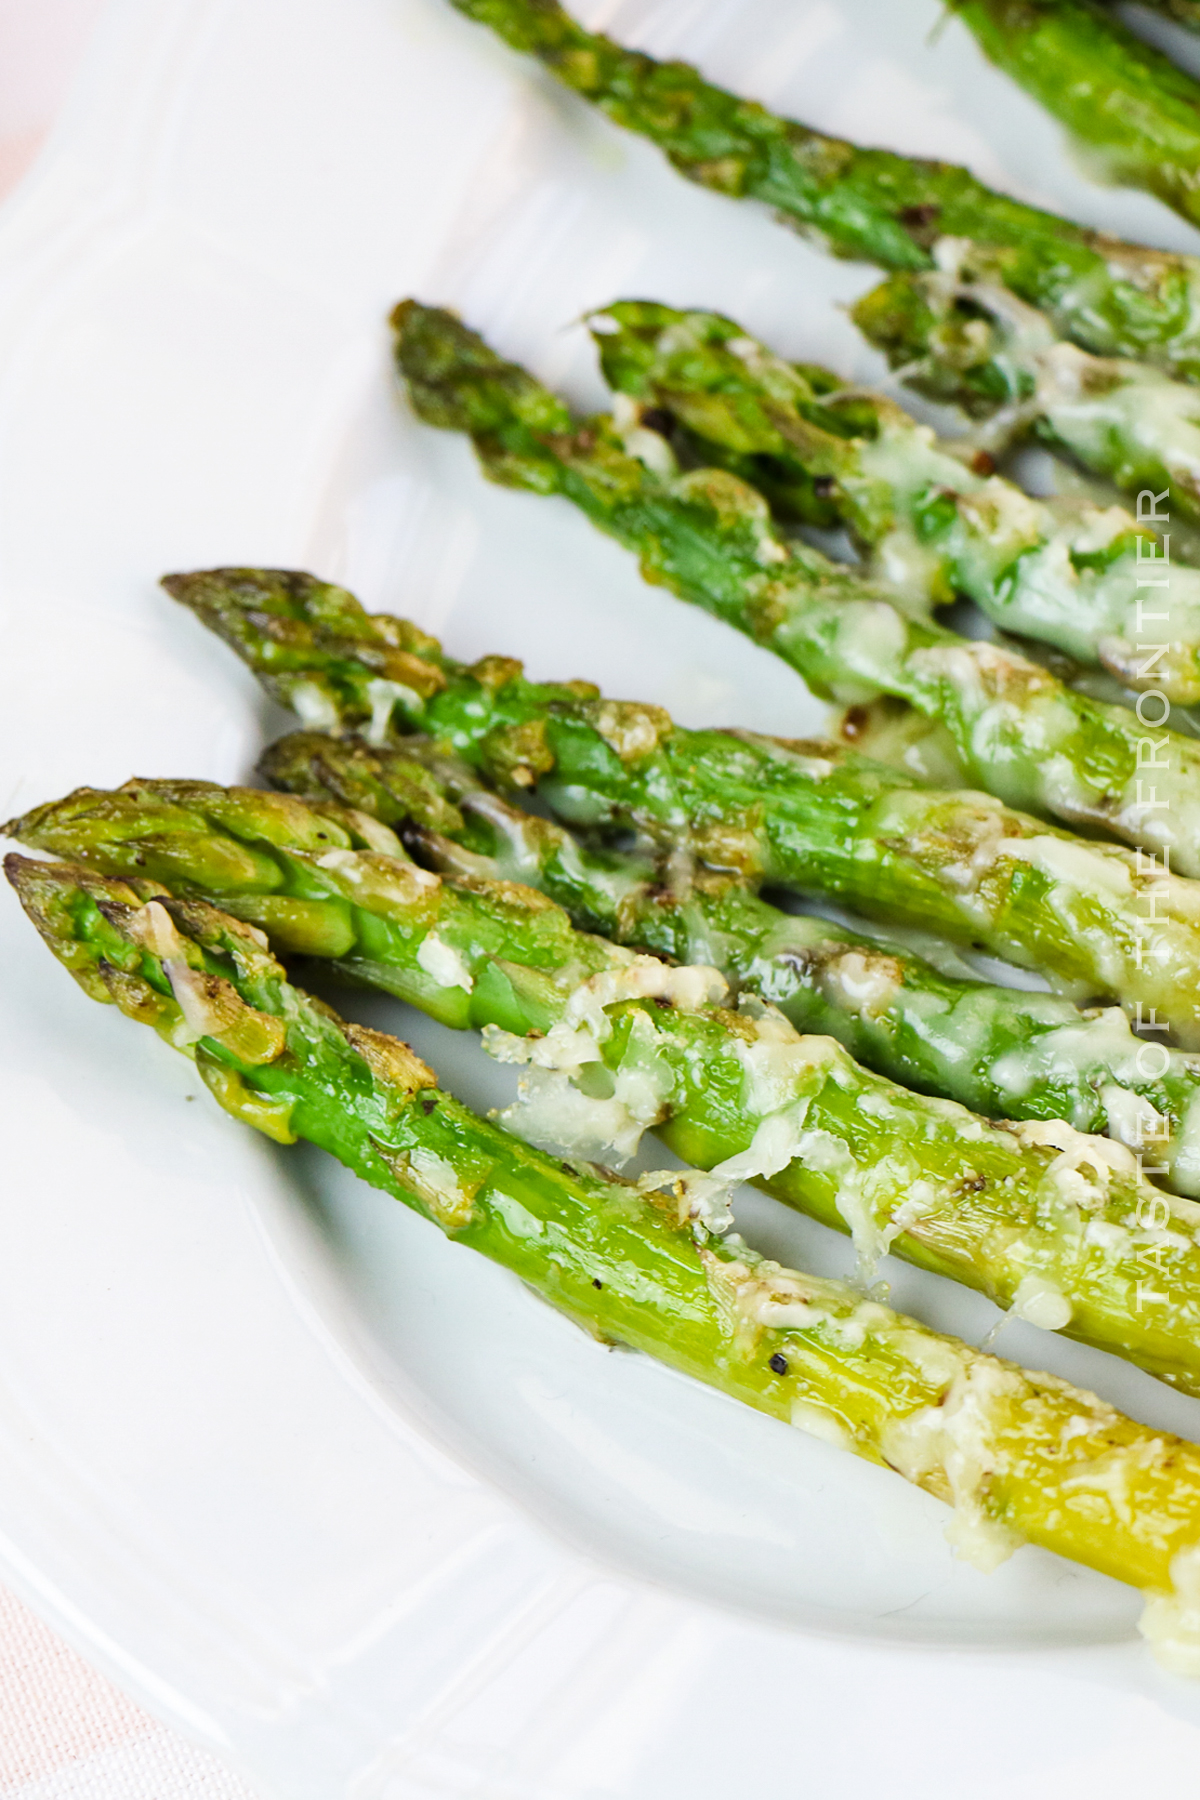
I happen to love it, especially when it’s roasted in the oven. The slight char on the asparagus gives it a delicious flavor and crispy texture.
Plus, it’s really easy to make – all you need is some asparagus, olive oil, salt, and pepper. Give this easy recipe a try next time you have asparagus on hand!

When the asparagus is fork-tender, it’s done. Fork-tender means that a fork can be pushed through one of the spears with only some force.
This implies that they are not limp and falling apart when you poke them with a fork. Rather, they hold together when picked up by one end and do not crumble away when handled carefully.
Here are some ideas for what to serve with roasted asparagus:
As you can see, there are many options for the main dish to serve with roasted asparagus. It really depends on what you and your guests are in the mood for.
If you want something light, chicken or fish might be a good option. If you’re looking for something a little more hearty, try pork or beef. No matter what you choose, your guests are sure to enjoy it!
To cook frozen asparagus in the oven, simply place the spears on a baking sheet and drizzle them with olive oil. Season with salt and pepper to taste. Roast in a preheated oven at 400 degrees until fork-tender, about 10-15 minutes.
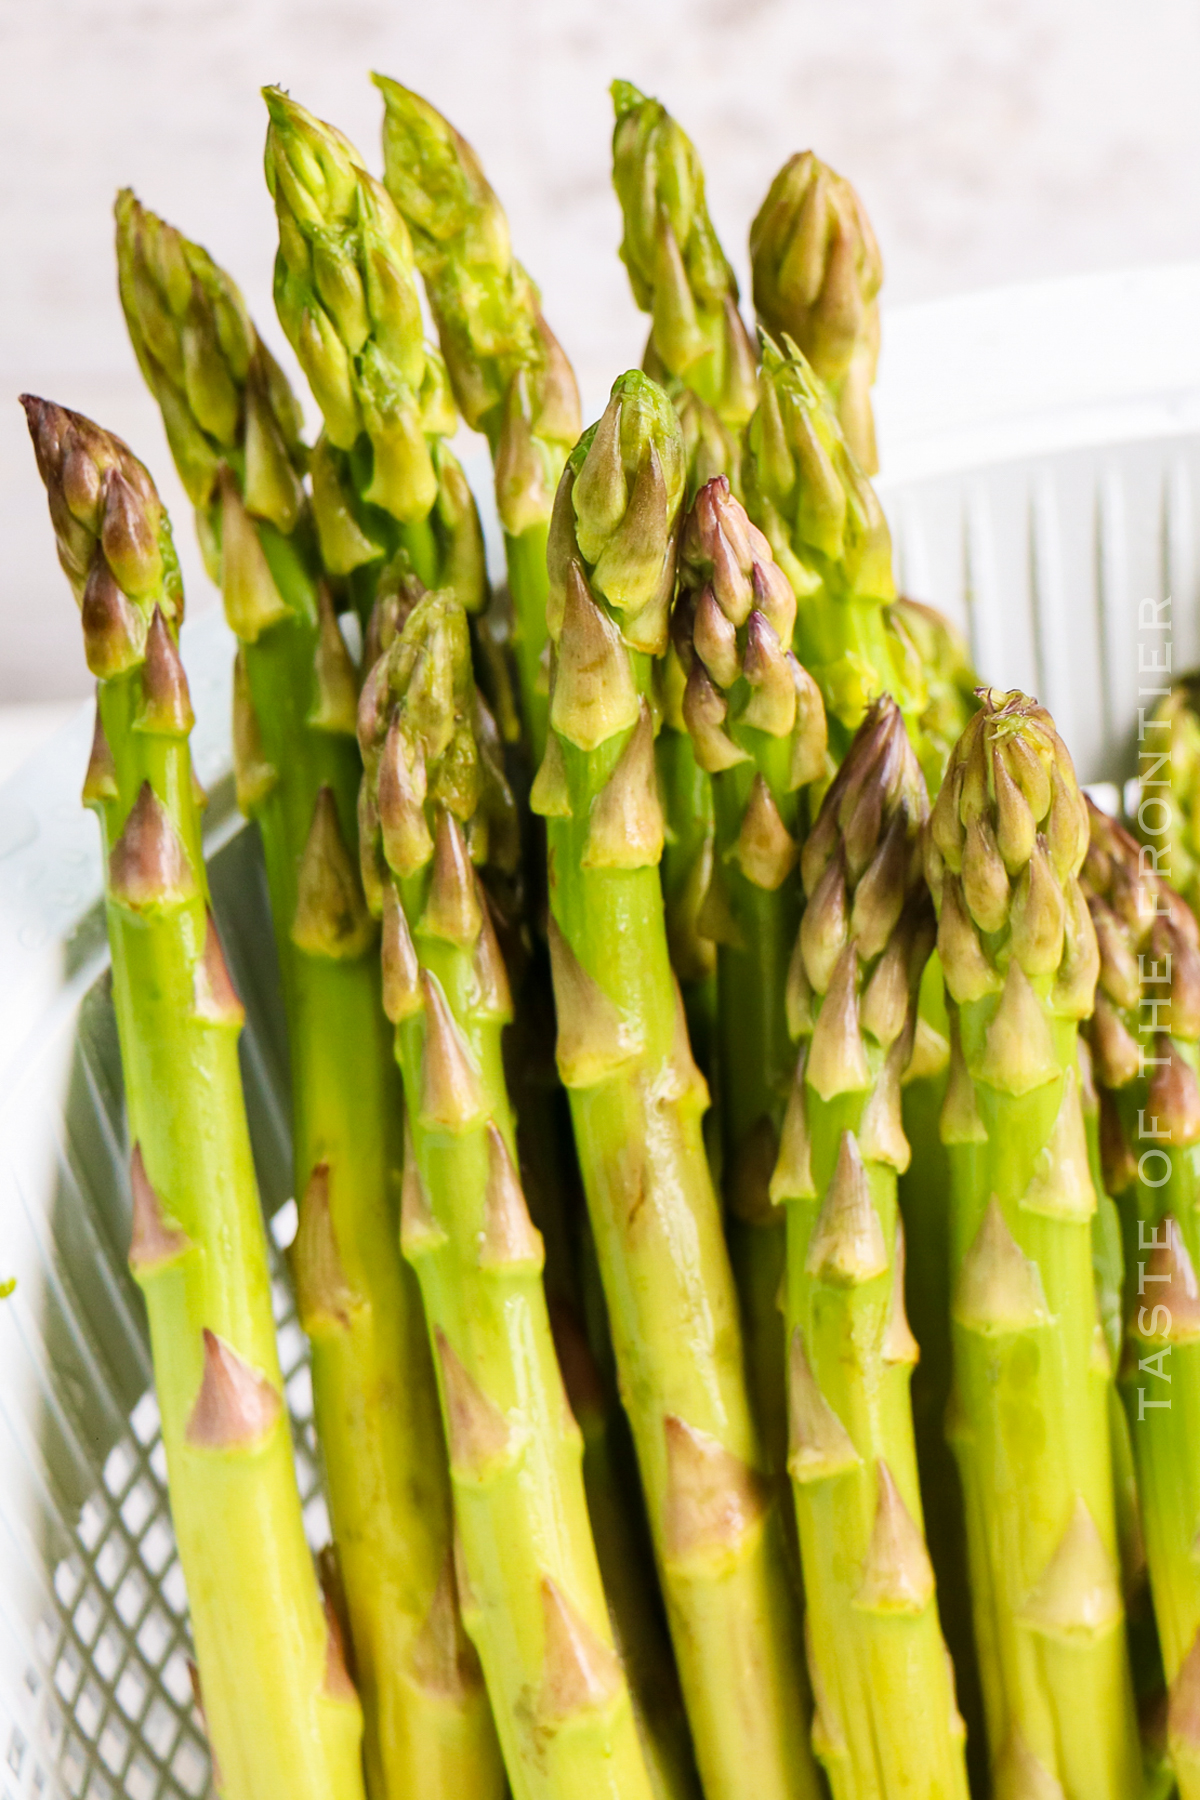
No, you don’t have to peel asparagus. Simply wash the spears under cool water and trim off the tough ends. Then, place them on a baking sheet and drizzle with olive oil. Season with salt and pepper to taste. Roast in a preheated oven at 400 degrees until fork-tender, about 10-15 minutes.
If you have leftovers or want to meal prep roasted asparagus, store it in an airtight container in the fridge. It will last for up to 4 days. Reheat in the oven at 400 degrees until warmed through, or enjoy cold as part of a salad.
As you can see, roasted asparagus is a simple and delicious side dish that can be enjoyed any time of year. Whether you’re serving it alongside a juicy steak or a light salad, your guests are sure to love it! And with easy storage and reheating instructions, you can enjoy it for days to come.
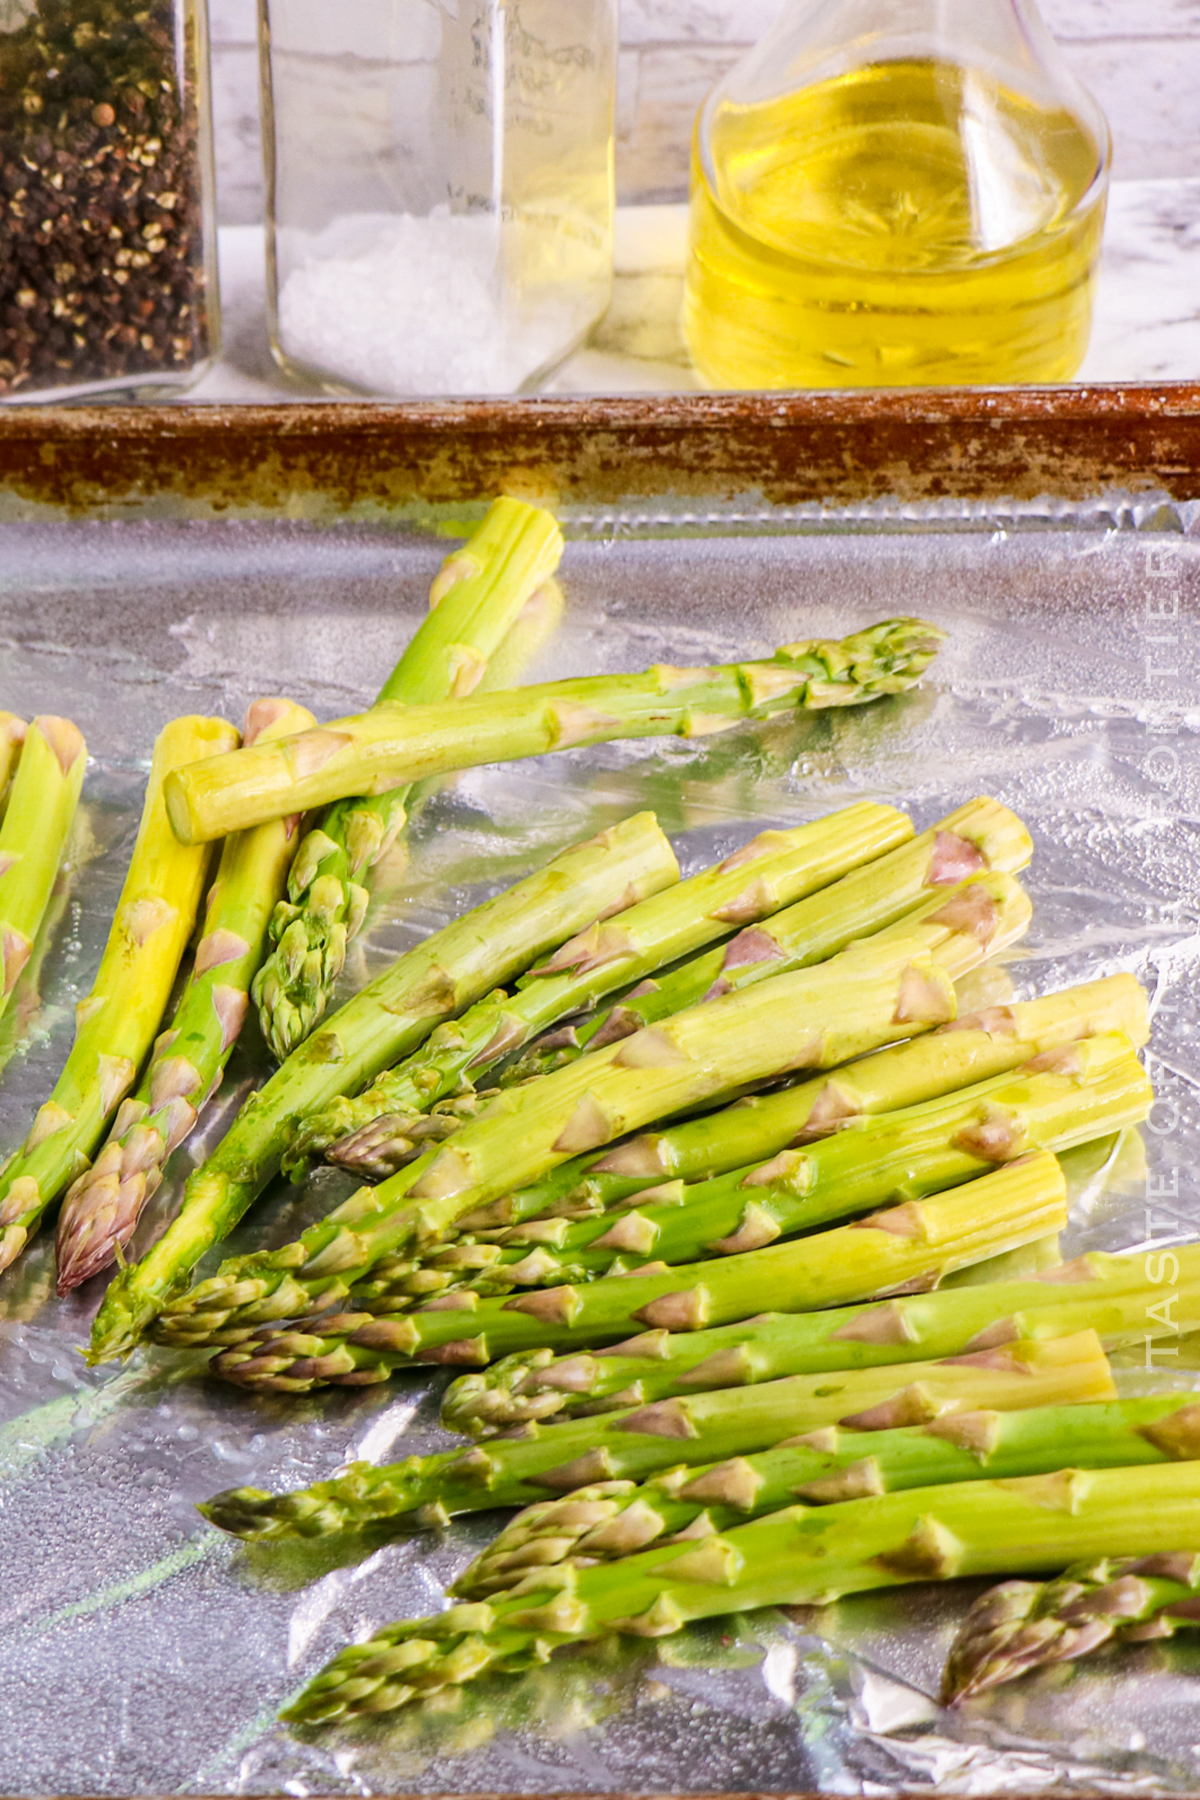
Prepping asparagus for roasting is easy! Simply wash the spears under cool water and trim off the tough ends. Then, place them on a baking sheet and drizzle with olive oil. Season with salt and pepper to taste. Roast in a preheated oven at 425 degrees until fork-tender, about 10-15 minutes.
Now that you know how to prep asparagus for roasting, give it a try! You’ll be surprised at how easy and delicious it is. And with just a few simple ingredients, you can enjoy this healthy and flavorful side dish any time of year.
I don’t recommend freezing. The asparagus tends to get a bit soggy – not exactly what you want to add to your meal. Toss any leftovers into a casserole or soup the next day.
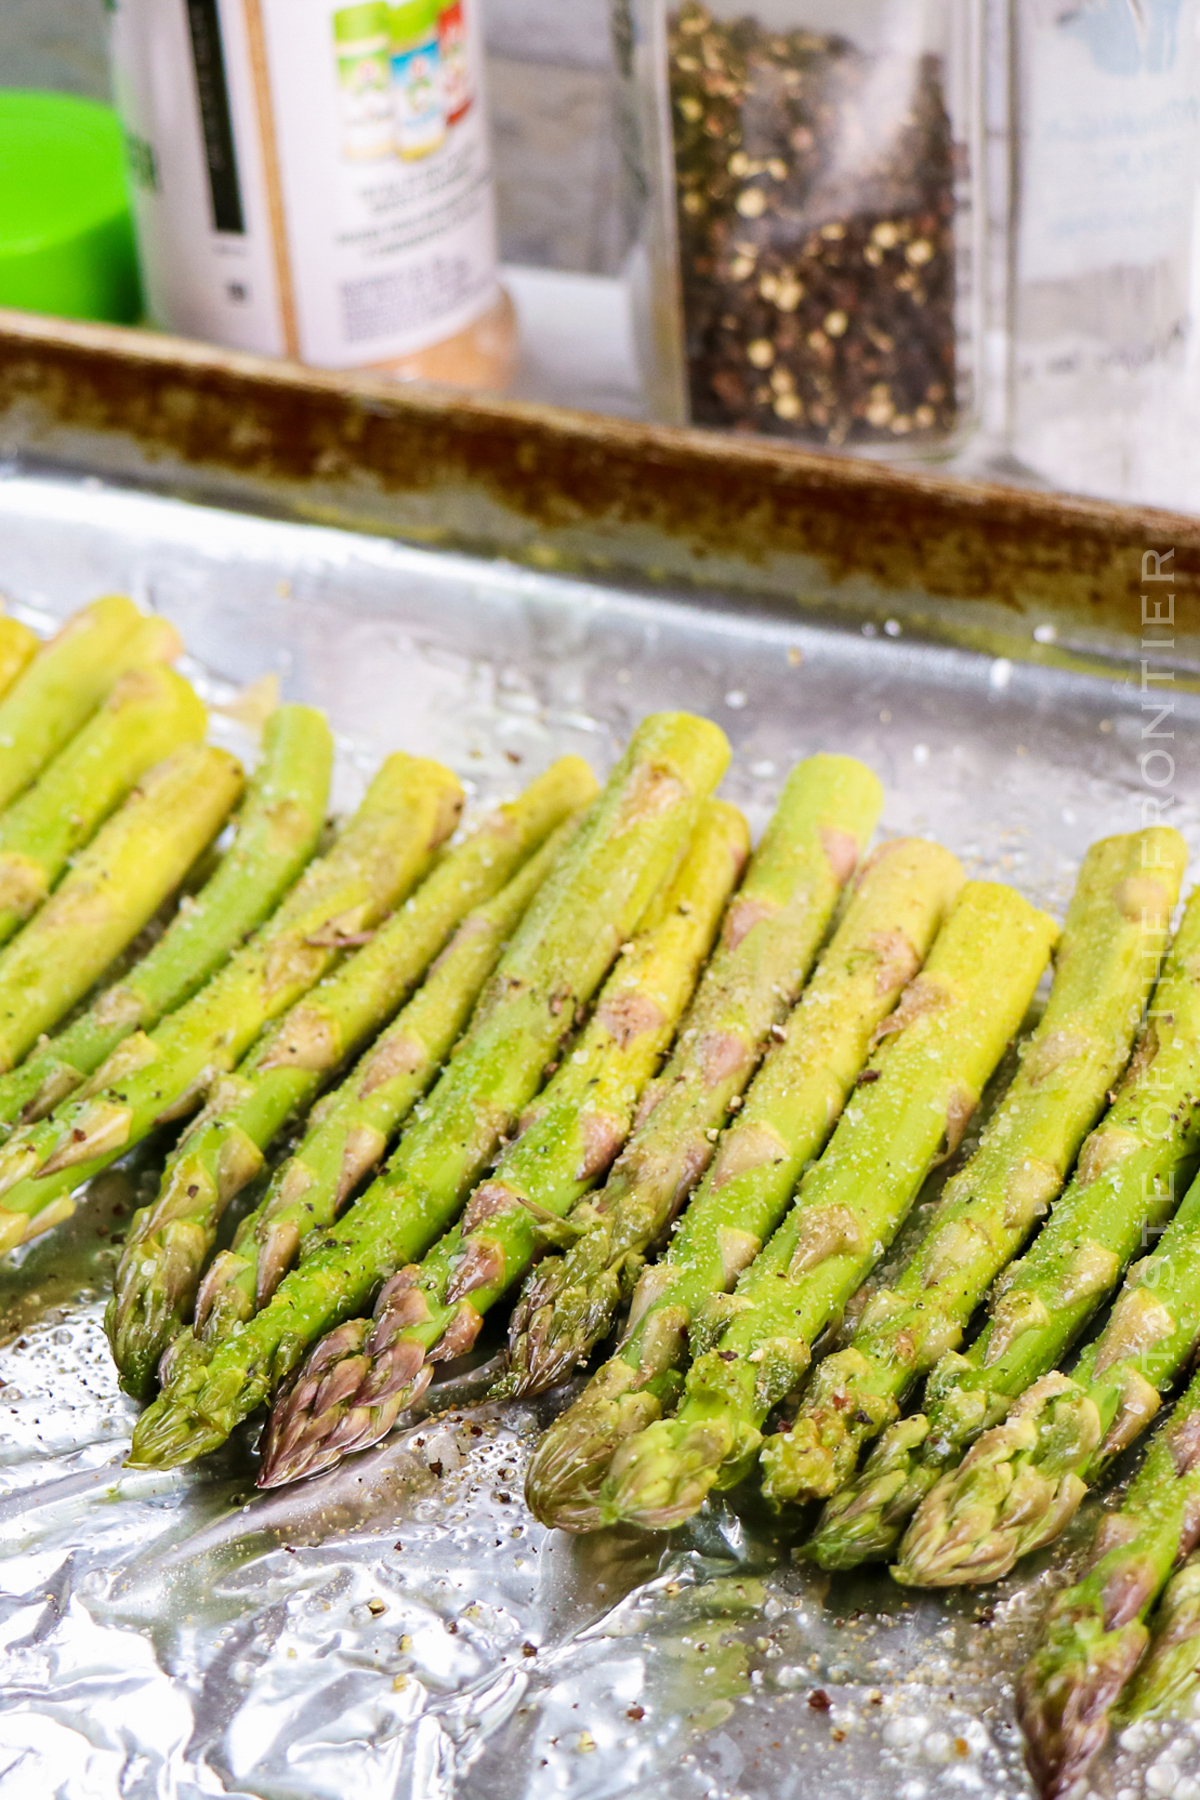
To broil asparagus, place the spears on a baking sheet and drizzle with olive oil. Season with salt and pepper to taste. Place the baking sheet under the broiler and cook for 10-15 minutes, or until fork-tender. Enjoy immediately!
Oven-roasted asparagus is a simple and delicious side dish that can be enjoyed any time of year. With just a few simple ingredients, you can have this healthy and flavorful dish on the table in no time. And because it’s roasted in the oven, clean-up is a breeze!
Roasting time will vary depending on the thickness of the asparagus spears. Thinner spears will roast more quickly, while thicker spears will take a bit longer. Generally speaking, you’ll want to roast the asparagus for 10-15 minutes at a temperature of 425 degrees.
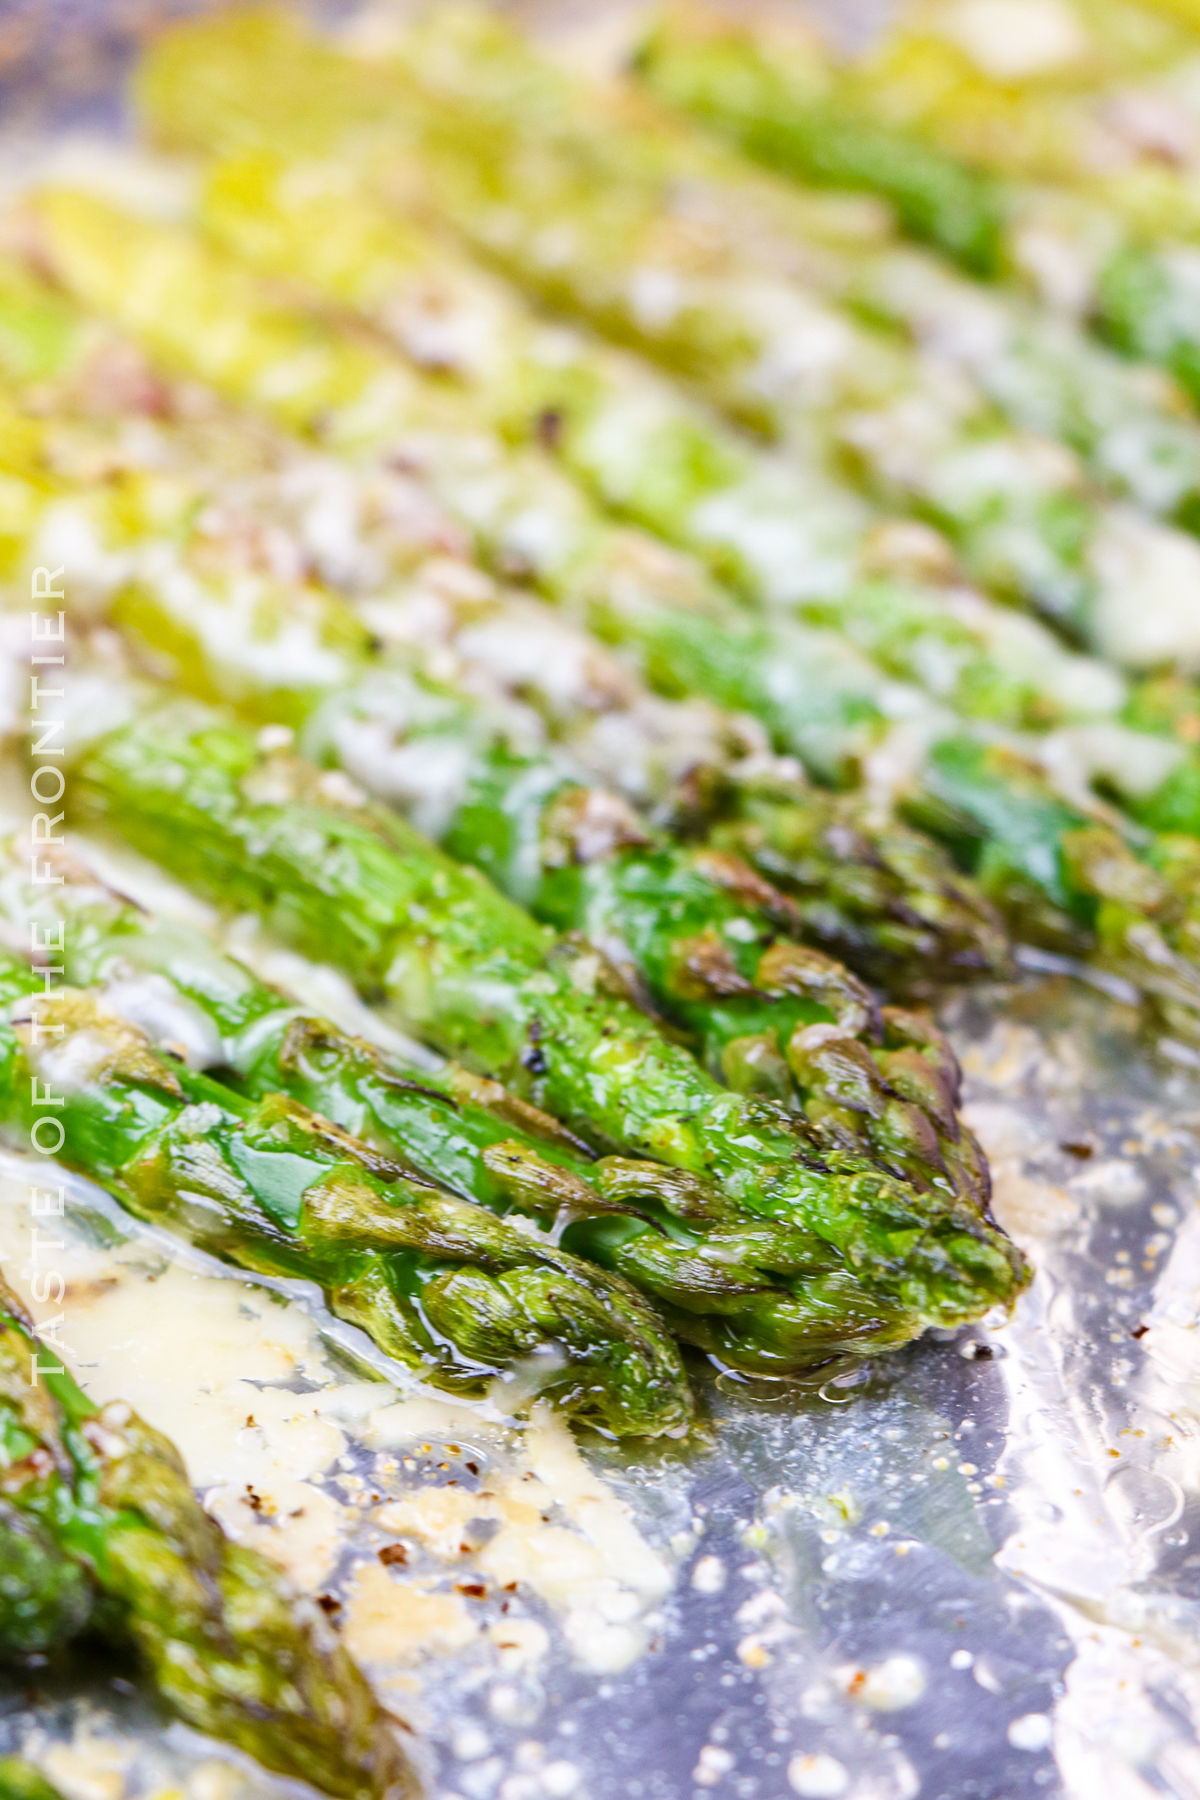
If you like your asparagus crispy, simply roast it at a higher temperature. For best results, roast the spears at 425 degrees for 10-15 minutes. They will be slightly charred on the outside and tender on the inside – perfect for those who like a little crunch in their asparagus!
Yes, you can roast asparagus ahead of time. Simply store it in an airtight container in the fridge and reheat it when you’re ready to enjoy.
For best results, roast asparagus at a temperature of 425 degrees. This will ensure that the spears are cooked through, but still tender and juicy.
As you can see, oven-roasted asparagus is a simple and delicious side dish that can be enjoyed any time of year. With just a few simple ingredients, you can have this healthy and flavorful dish on the table in no time.
And because it’s roasted in the oven, clean-up is a breeze! So what are you waiting for? Give it a try today!

DON’T MISS THESE HOLIDAY E-BOOKS!
This easy asparagus recipe is SUPER SIMPLE and delicious – and if you’re like me, then you most likely already have some of these items on hand OR maybe you have never made roasted asparagus before, & you might be a bit nervous – but you’re going to love it. I have made a list below of the things I absolutely can’t live without when it comes to making this side dish recipe.
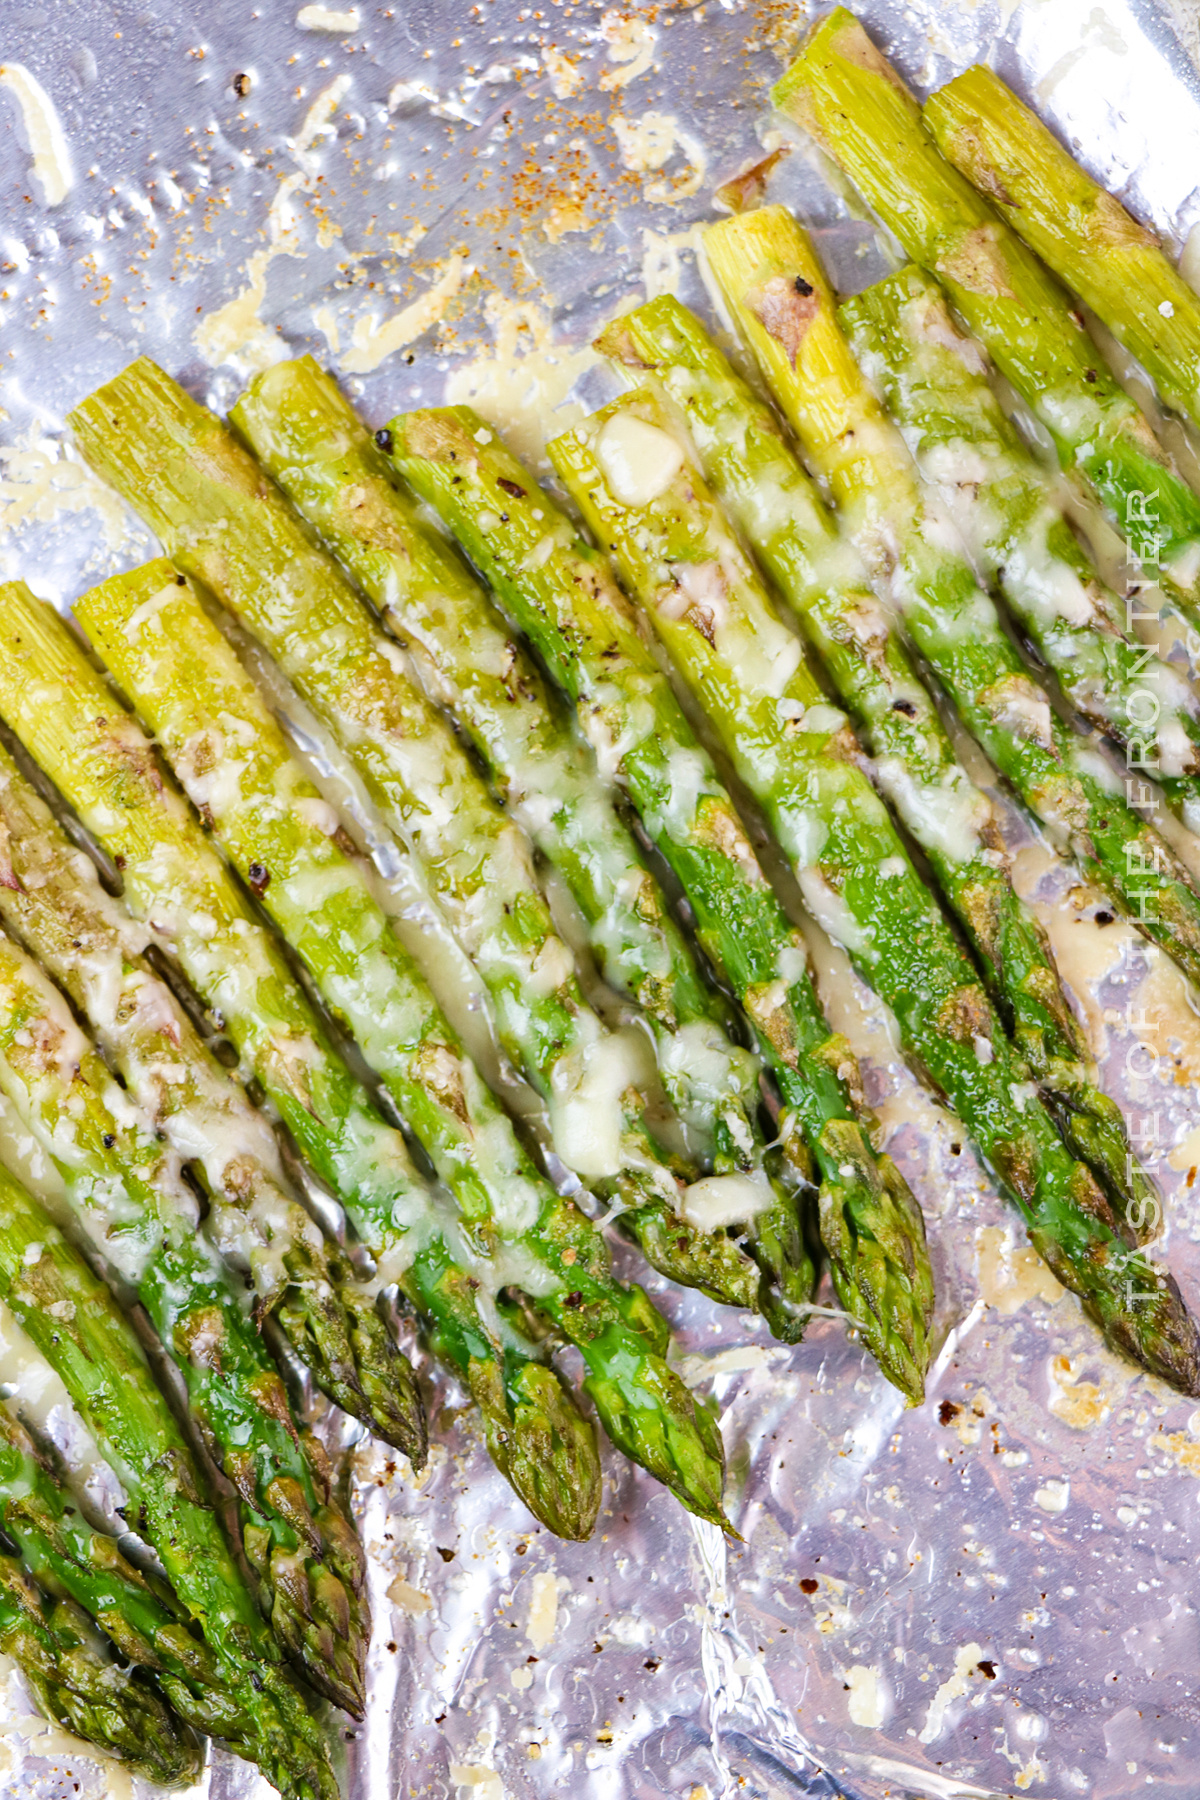
If you love this easy asparagus recipe, you’re going to love these other veggie ideas too. Please click each link below to find the easy, printable recipe!
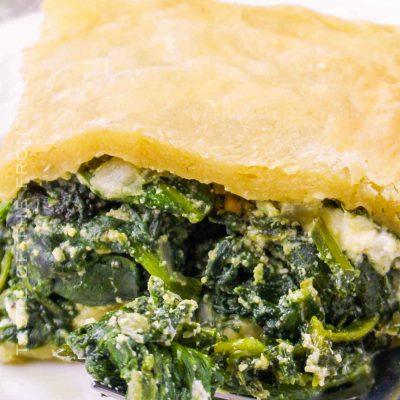
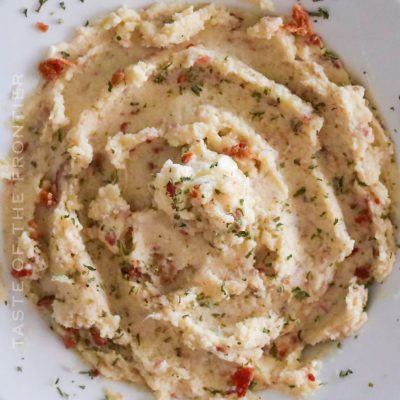

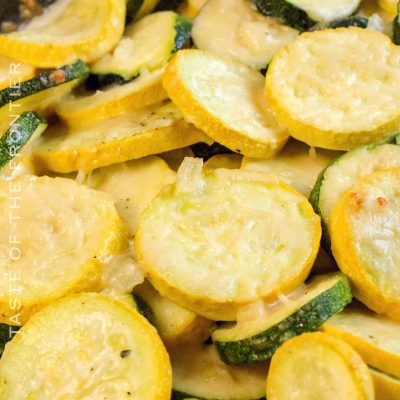
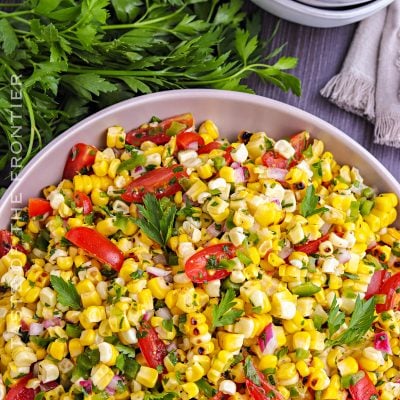

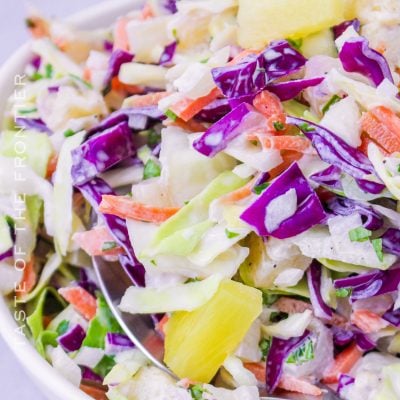
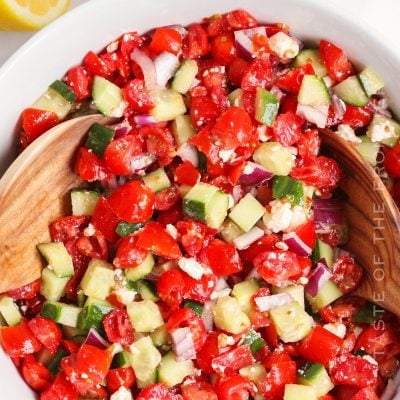
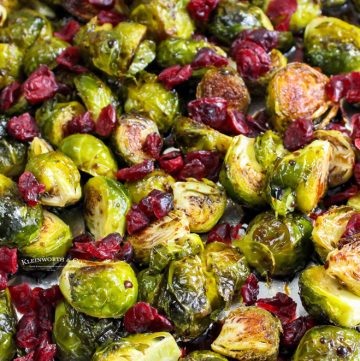
If you love this recipe for Roasted Asparagus as much as I do, please write a five-star review, and be sure to help me share on Facebook and Pinterest!

CONNECT WITH YUMMI HAUS!
Be sure to follow me on my social media, so you never miss a post!
A traditional Greek spinach pie, this Spanakopita Recipe is easy to make and can be served as an appetizer or a main dish.
Have you ever had spanakopita? It’s a Greek dish made of spinach and feta cheese, wrapped in phyllo dough. It’s delicious, and it’s surprisingly easy to make at home.
Here I’ll show you how to make a simple spanakopita recipe. So if you’re looking for a new and tasty dish to add to your repertoire, be sure to check out this recipe!

When planning my menu for the holidays, I usually start testing recipes in the late summer to early fall. Most of the time I have a list of things that I want to either try for the first time, an old recipe from grandma’s book that needs a bit of work, or something that we have been making for forever that just needs to be photographed.
This spinach pie was a recipe that I found in grandma’s book that I remembered from childhood. So I had some friends over to help me whip it up and then enjoy it later that day.
I’m so glad I did – this recipe is such a classic that should be at every holiday table. I know you’ll love it as much as we do.
Traditionally, spanakopita is a Greek dish made with phyllo dough, spinach, and feta cheese. The dough is layered with the spinach and cheese filling, then baked until golden brown. While there are many variations of this dish, the classic version is still one of the most popular.
Whether you’re looking for a traditional spanakopita recipe or something with a modern twist, this recipe is sure to please. From easy spanakopita pies to bite-sized phyllo cups, there’s something for everyone. Give it a try and see for yourself!
There are many similar recipes to spanakopita, such as tiropita (a cheese pie), bougatsa (a custard-filled pastry), and various other pies and pastries made with phyllo dough. If you’re looking for something similar to spanakopita but with a different flavor profile, these recipes are worth trying.
Bougatsa: This custard-filled pastry is popular in Greece and Cyprus. It is made with phyllo dough that is filled with a semolina custard and baked until golden brown.
Tiropita: Tiropita is a cheese pie that is popular in Greece and other parts of the Balkans. It is made with phyllo dough that is filled with a variety of cheeses, such as feta, kasseri, and kefalotyri.
Pites: Pites are pies that are popular in Greece and the Balkans. They can be made with a variety of fillings, including meats, vegetables, and cheeses.
Pastries: There are many types of pastries that are popular in Greece, such as baklava, kataifi, and galaktoboureko. These desserts are made with phyllo dough and typically have a sweet filling, such as honey or syrup.
Phyllo dough and puff pastry dough are both types of dough that are used in a variety of recipes, such as pies, pastries, and tarts. They are similar in that they are both light and flaky, but there are some key differences between them.
Phyllo dough is made with flour, water, and fat, but no yeast. This dough is rolled out very thin and is used in many Greek and Middle Eastern dishes.
Puff pastry dough is made with flour, water, fat, and yeast. This dough is also rolled out very thin, but it has a higher fat content than phyllo dough. This makes puff pastry dough more puff and flaky than phyllo dough.
Both types of dough can be used in a variety of recipes, but they will produce different results. If you’re looking for a light and flaky dough, phyllo dough is the way to go. If you’re looking for a dough that is more puffy and flaky, puff pastry dough is the way to go.
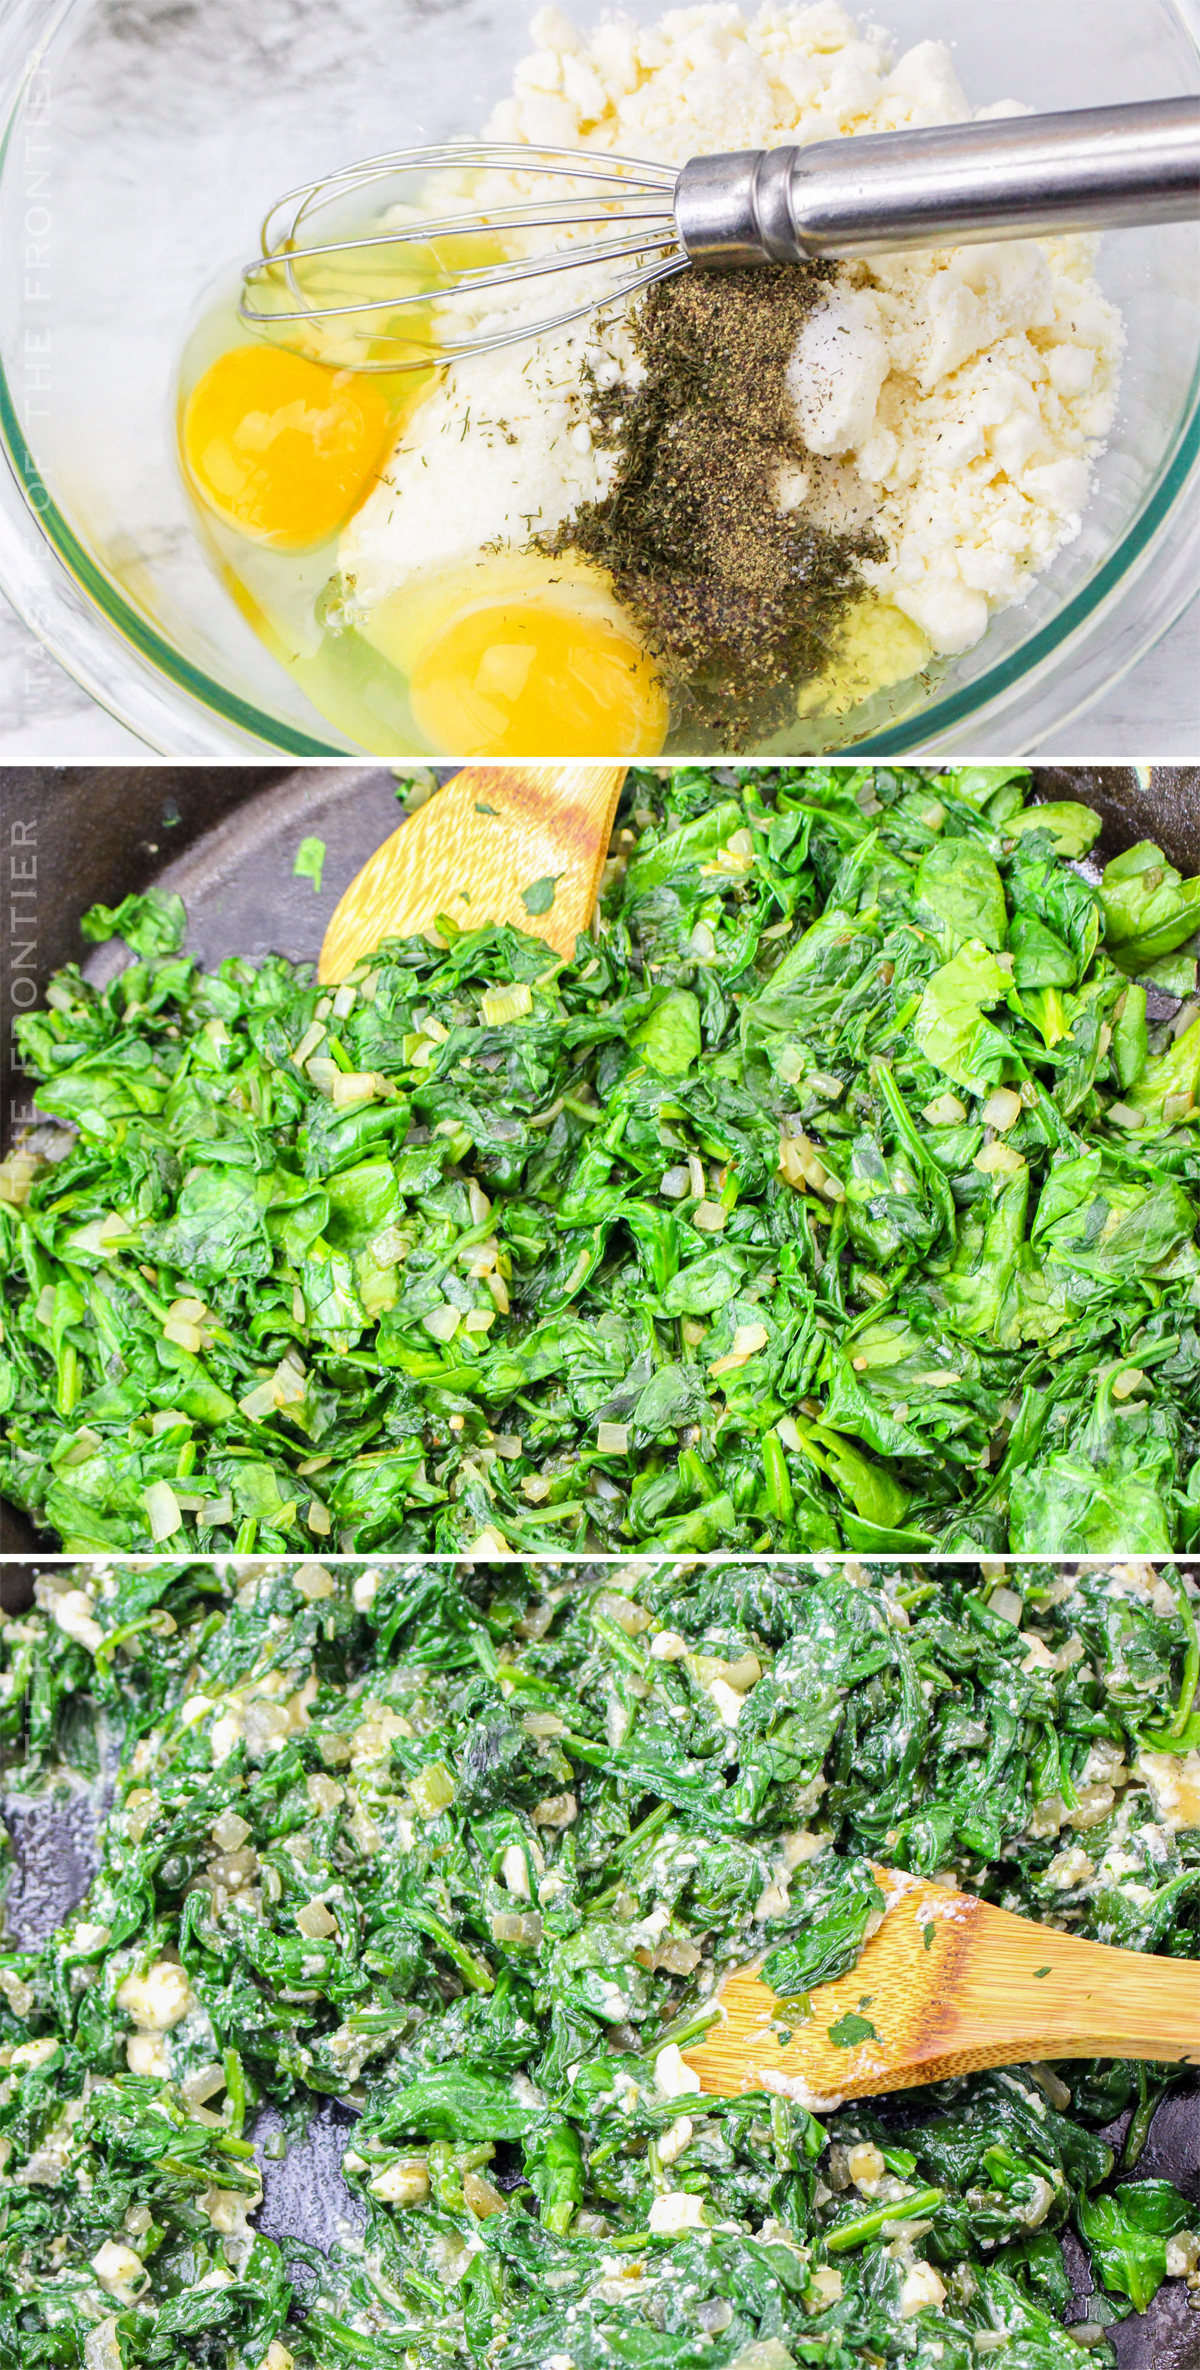
Yes – traditionally this recipe would be made with phyllo dough. So you can definitely swap it out if you can find it in the store. We made it here with puff pastry because it is so much easier to find when shopping these days.
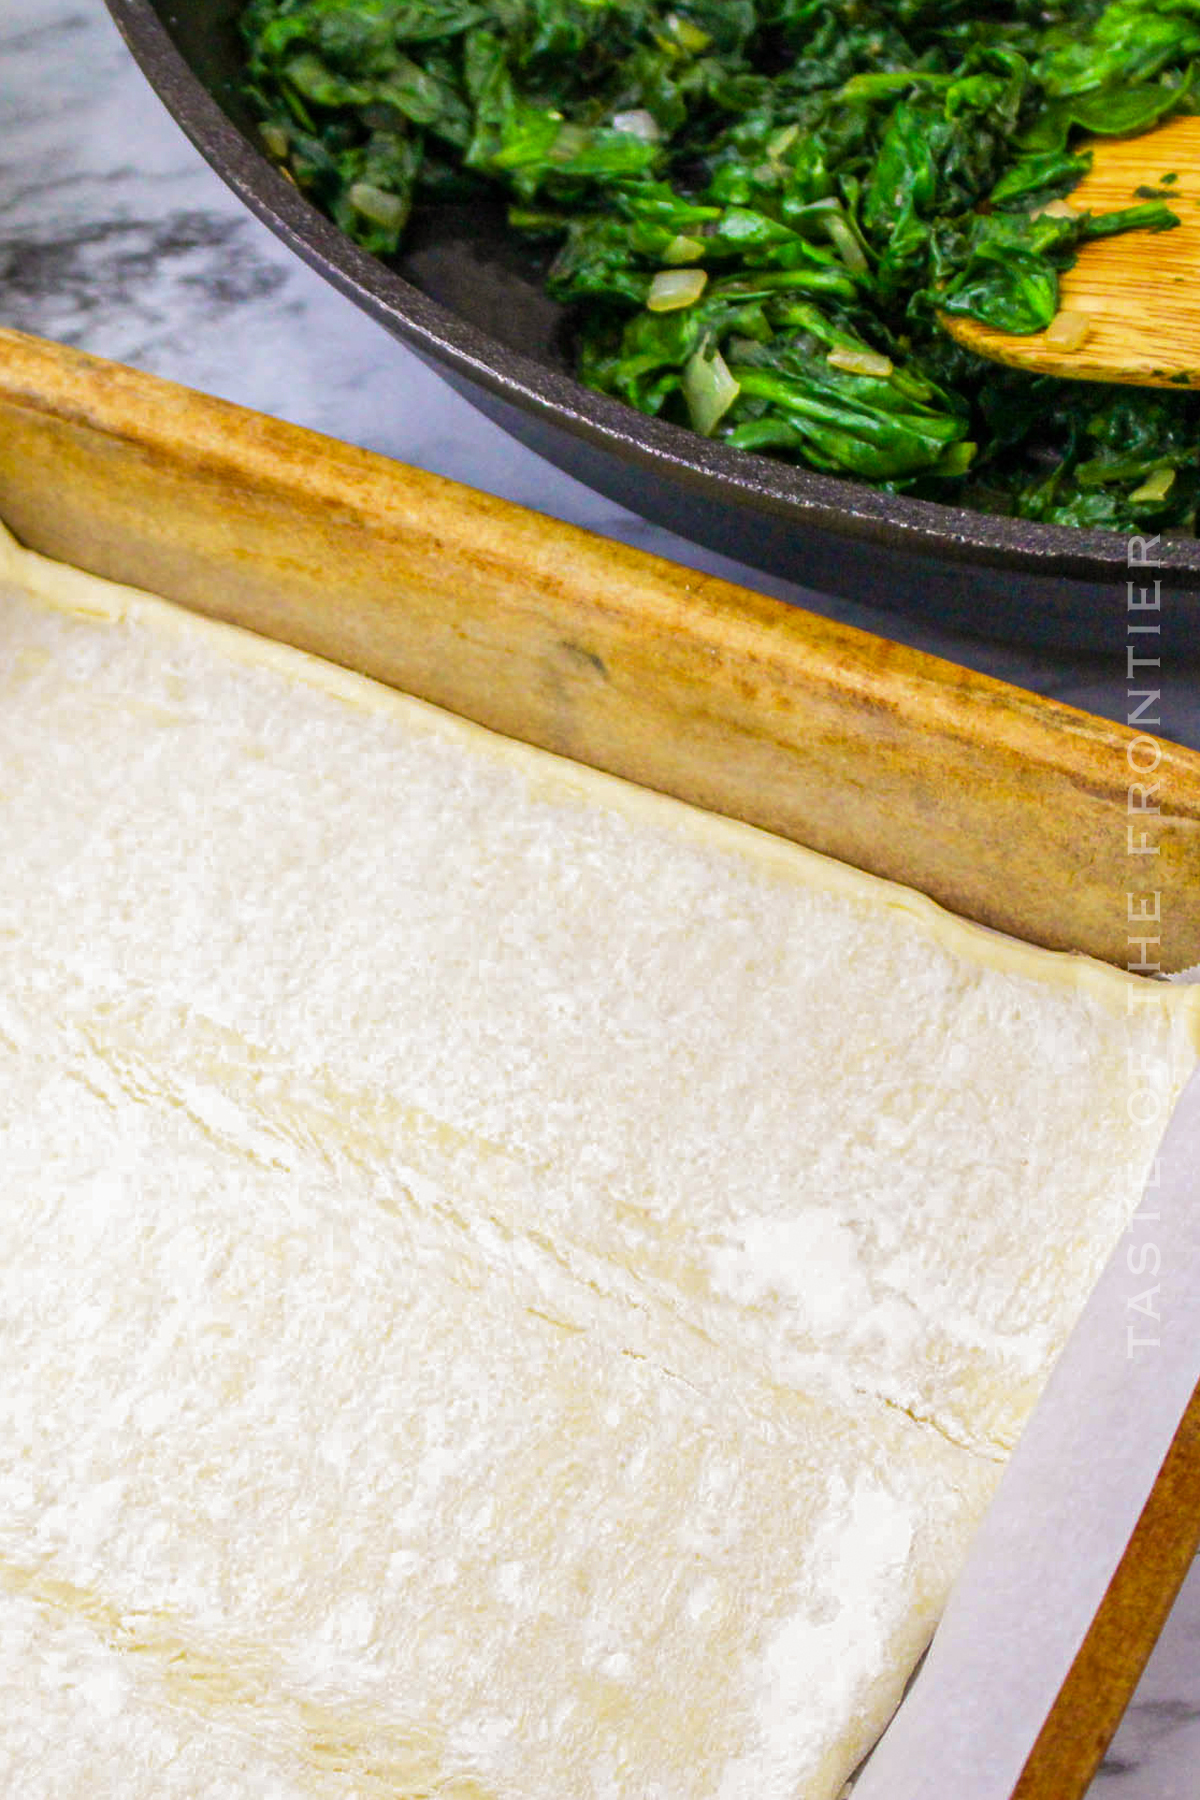
Here are some tips to help you make the perfect spanakopita:
With these tips in mind, you’re sure to make the perfect spanakopita. Give it a try and see for yourself!
Spanakopita is typically served as a main dish, but it can also be served as an appetizer or side dish. If you’re serving spanakopita as a main dish, it goes well with a salad and some crusty bread. See the below list for our favorites.
If you’re serving it as an appetizer or side dish, it goes well with a variety of dipping sauces, such as tzatziki or hummus.
No matter how you serve it, spanakopita is sure to be a hit! Give it a try and see for yourself.
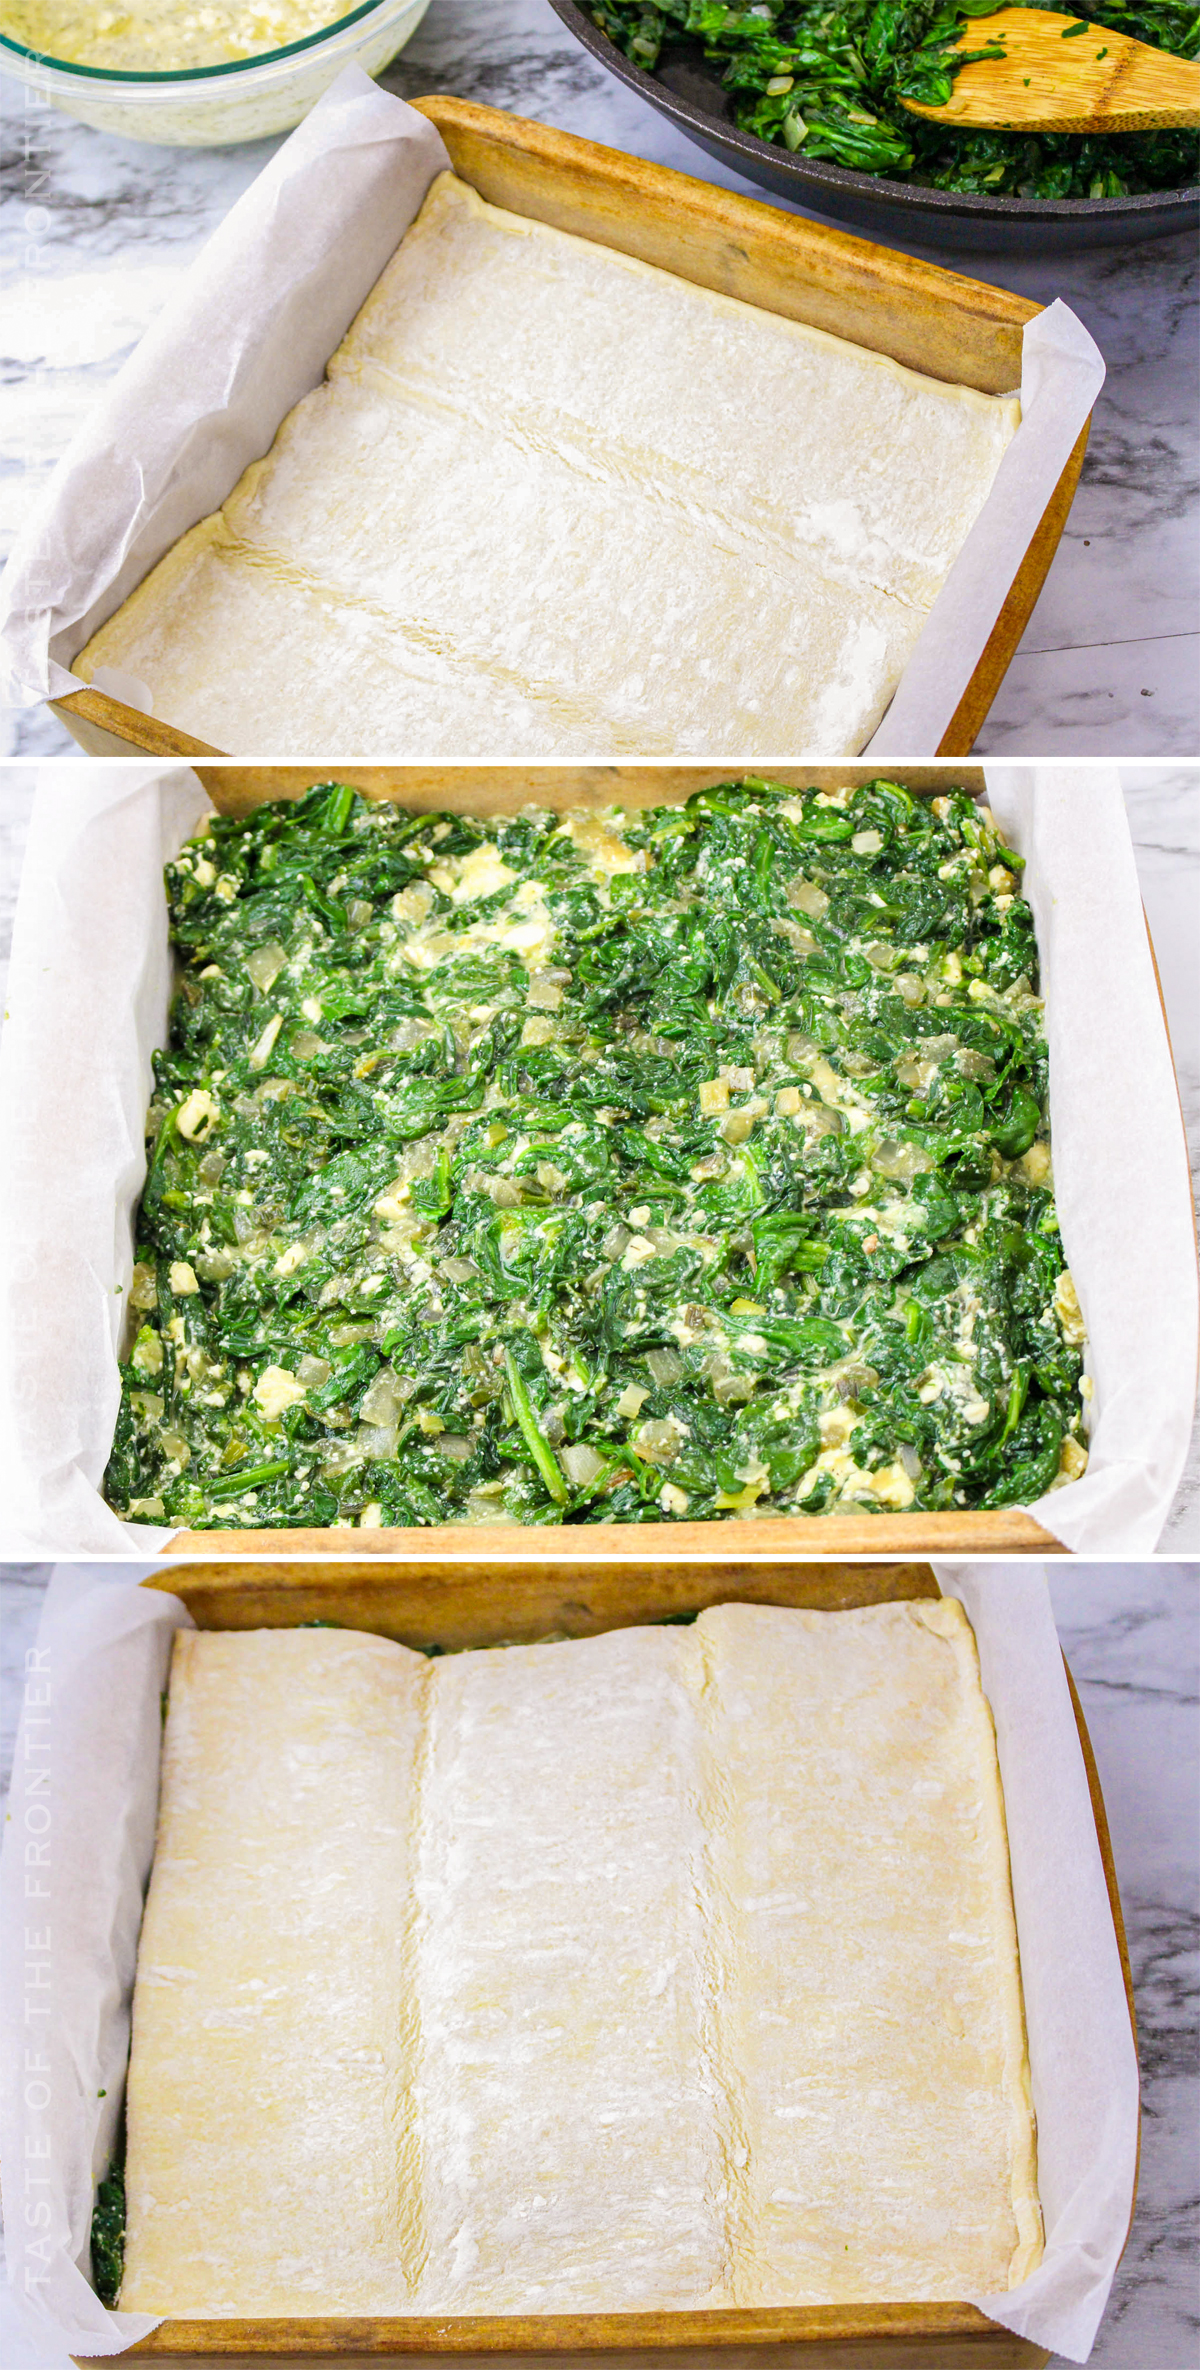
DON’T MISS THESE HOLIDAY E-BOOKS!
This Spanakopita recipe is SUPER EASY and delicious – and if you’re like me this time of year, then you maybe already have some of these items on hand OR maybe you have never made homemade spinach pie filling before, & you might be a bit nervous – but you’re going to love it. I have made a list below of the things I absolutely can’t live without when it comes to making this tasty recipe. (you can also SHOP MY FAVORITES in my store)
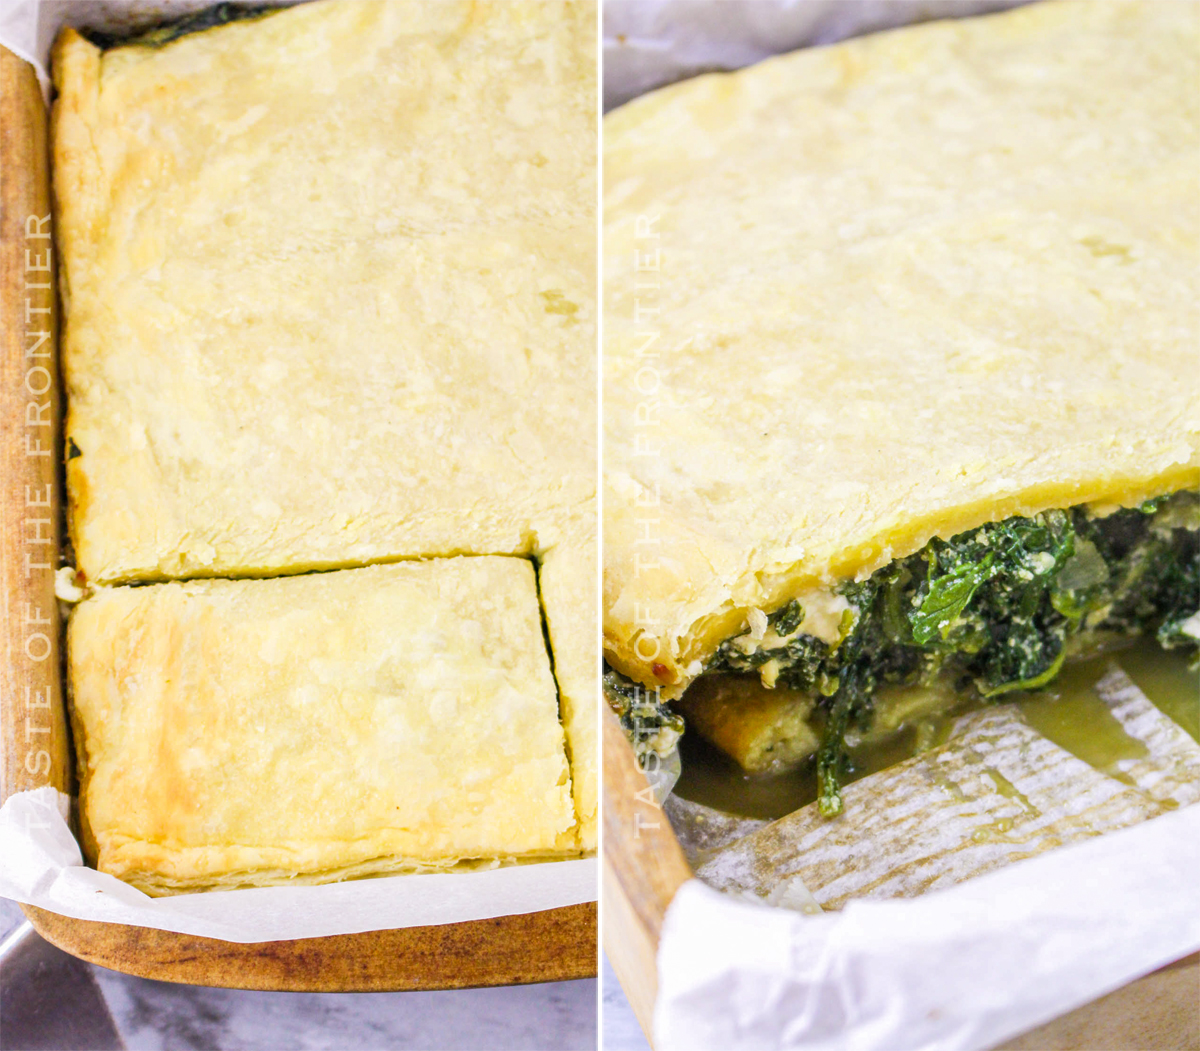
If you love this easy spinach pie recipe, you’re going to love these other great recipes too. Please click each link below to find the easy, printable recipe!
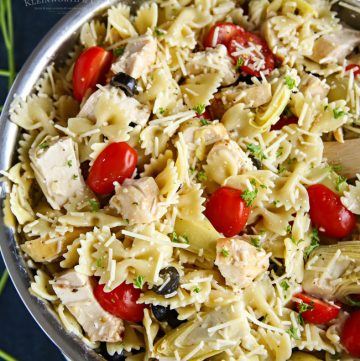


If you love this recipe for Homemade Spanakopita Recipe as much as I do, please write a five-star review, and be sure to help me share on Facebook and Pinterest!
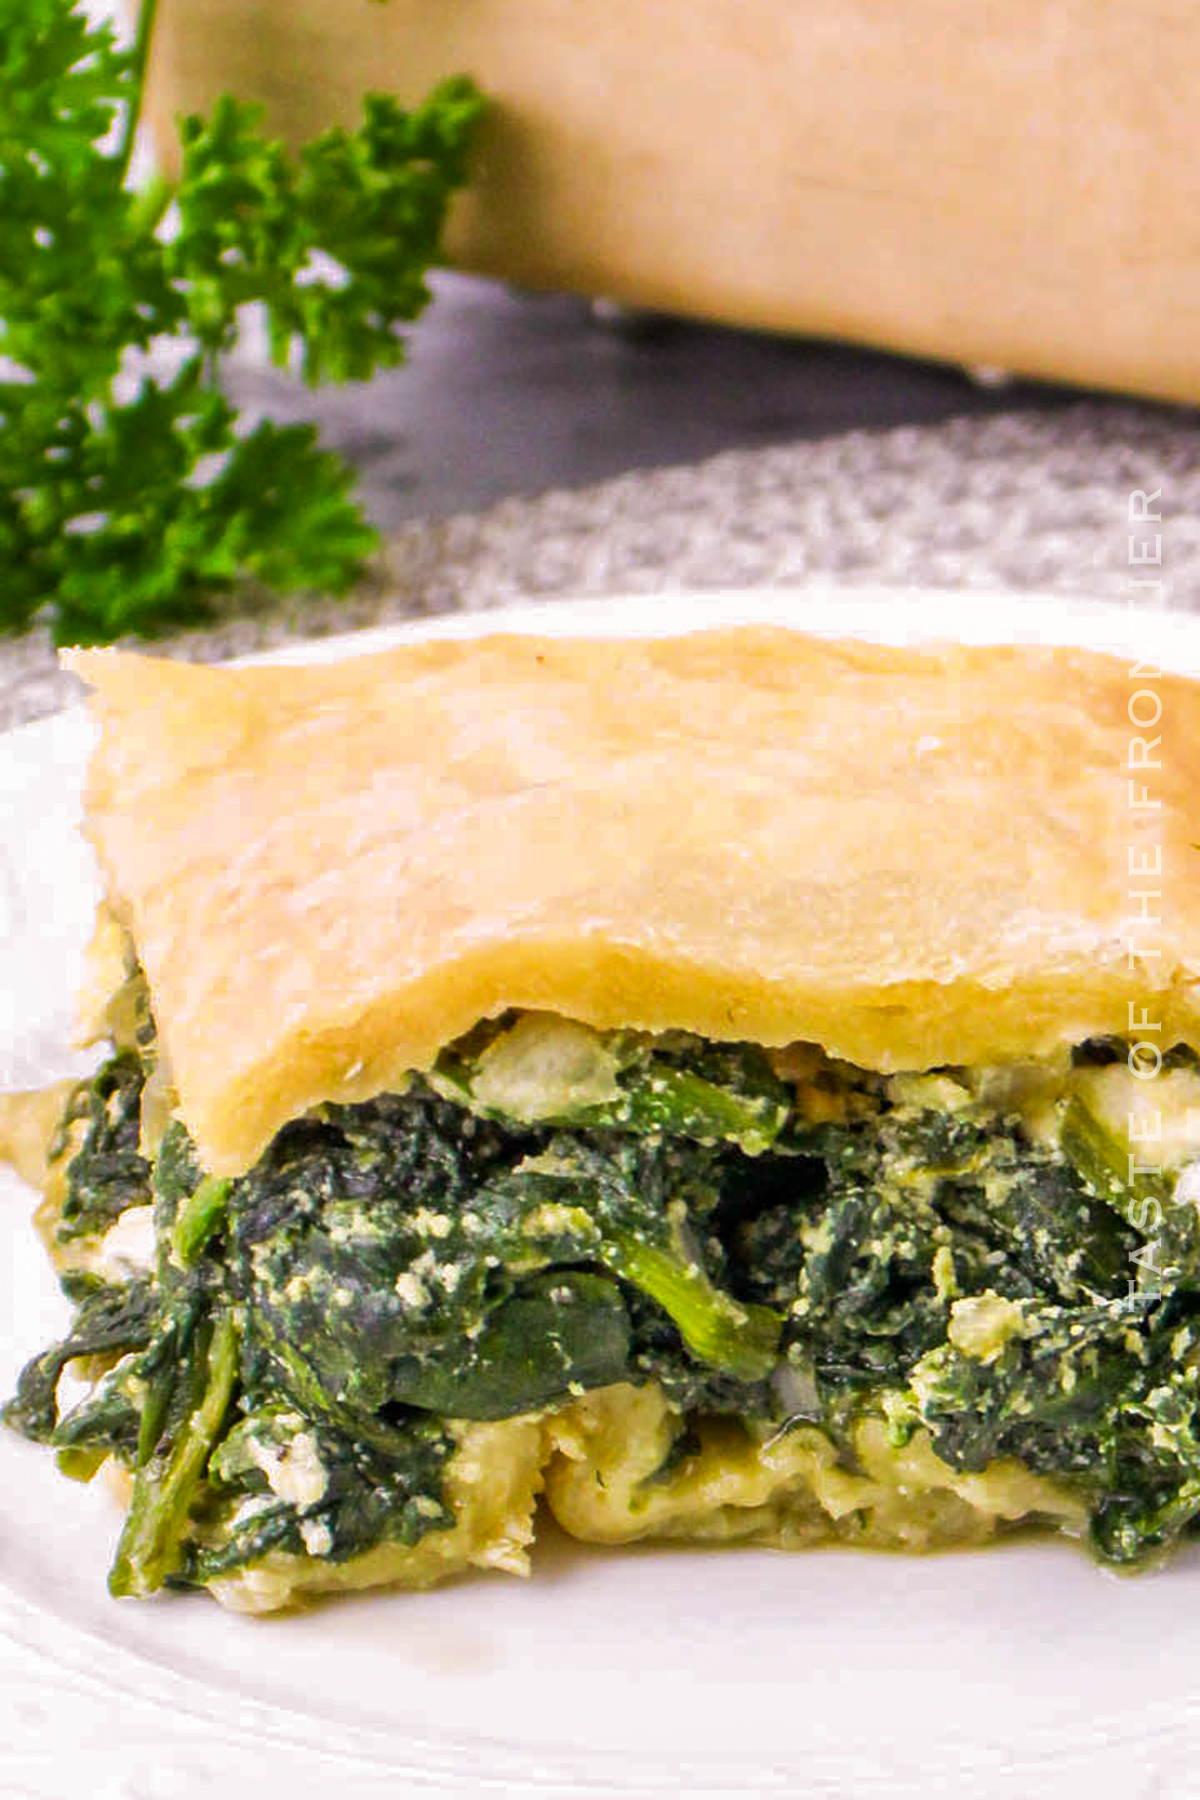
CONNECT WITH YUMMI HAUS!
Be sure to follow me on my social media, so you never miss a post!
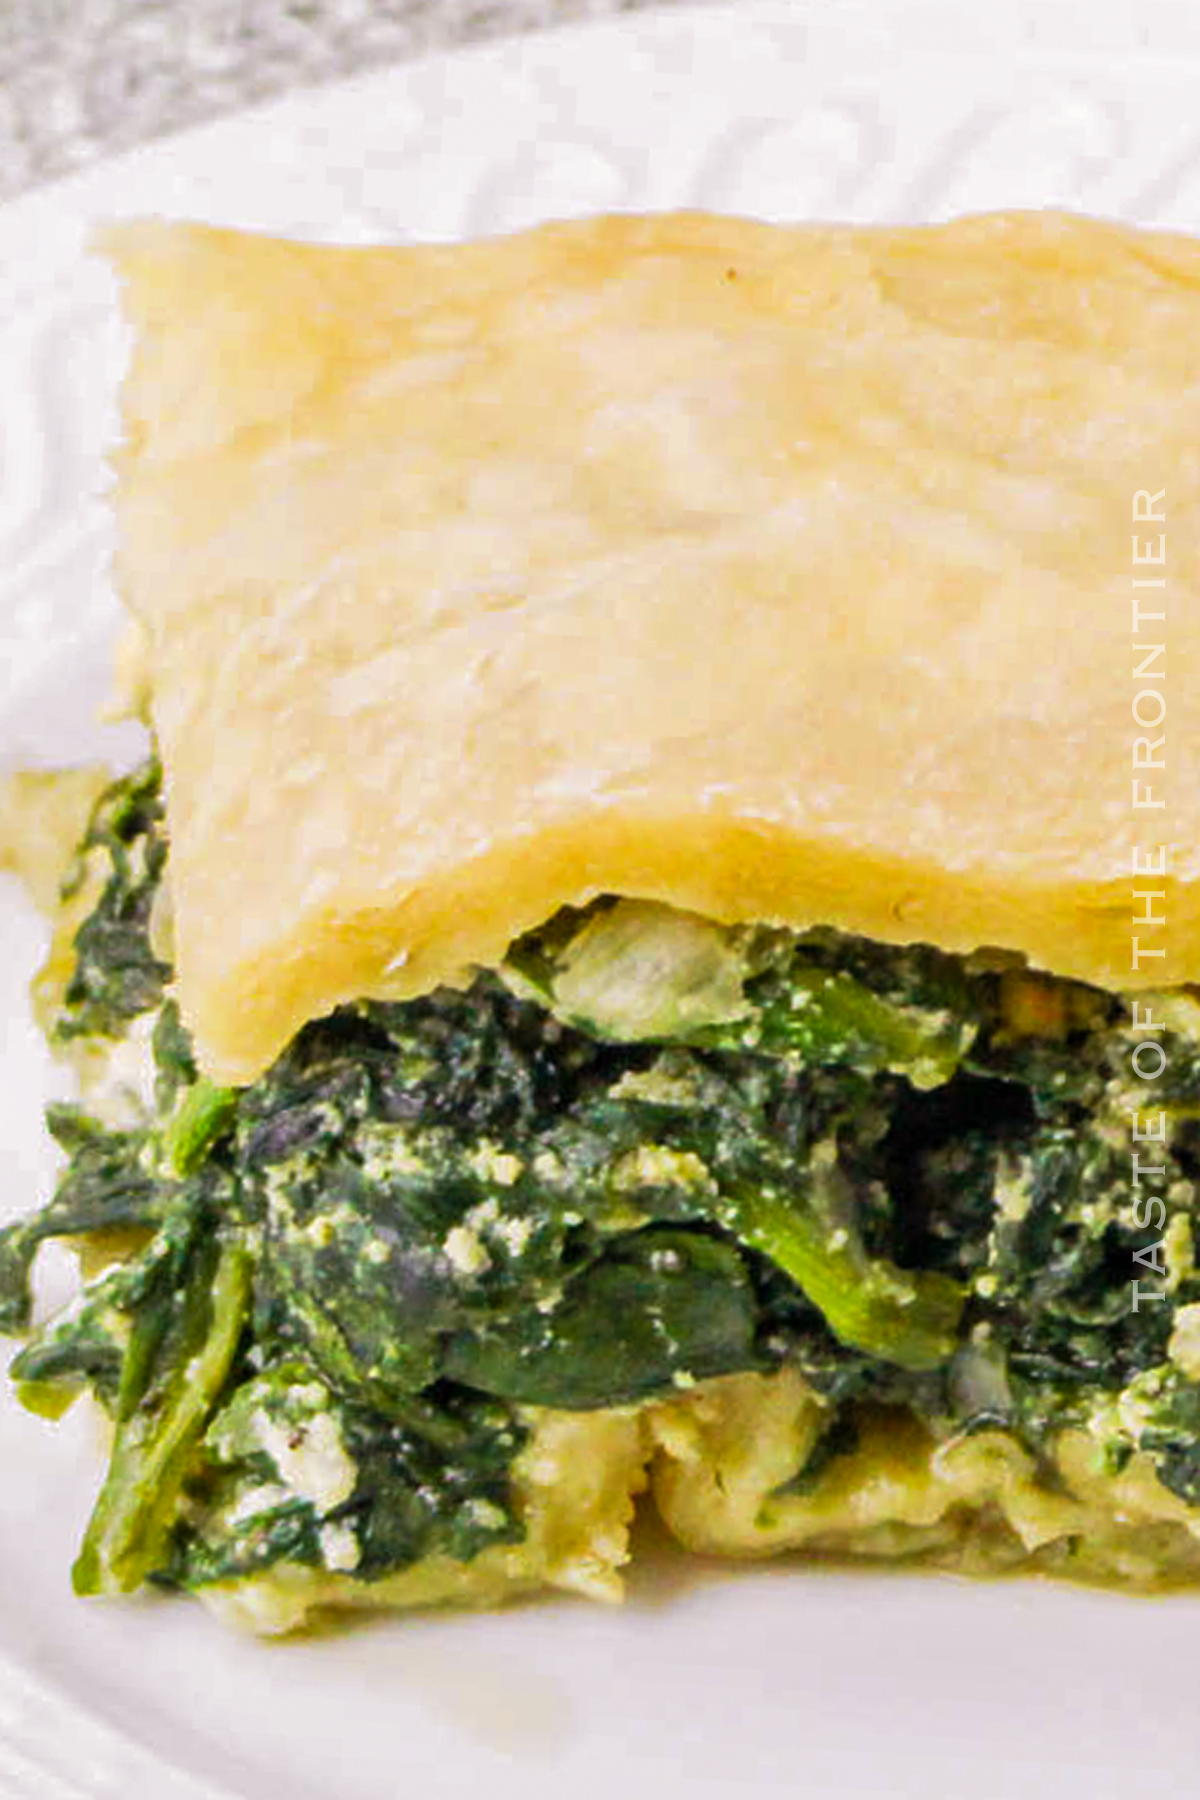
Fall is in the air and that means one thing – apple season! This Apple Cider Donut Cake is a delicious way to enjoy it. It’s perfect for a cozy autumn weekend morning or paired with a scoop of vanilla ice cream for dessert.
The cake is soft and moist, with the perfect hint of apple cider flavor. And the frosting is just icing on the cake (pun intended)! So grab your cider and get baking!
The best part is that this cake starts with a cake mix base, making the prep super quick and easy. You’ll love the taste and texture of this scrumptious treat.
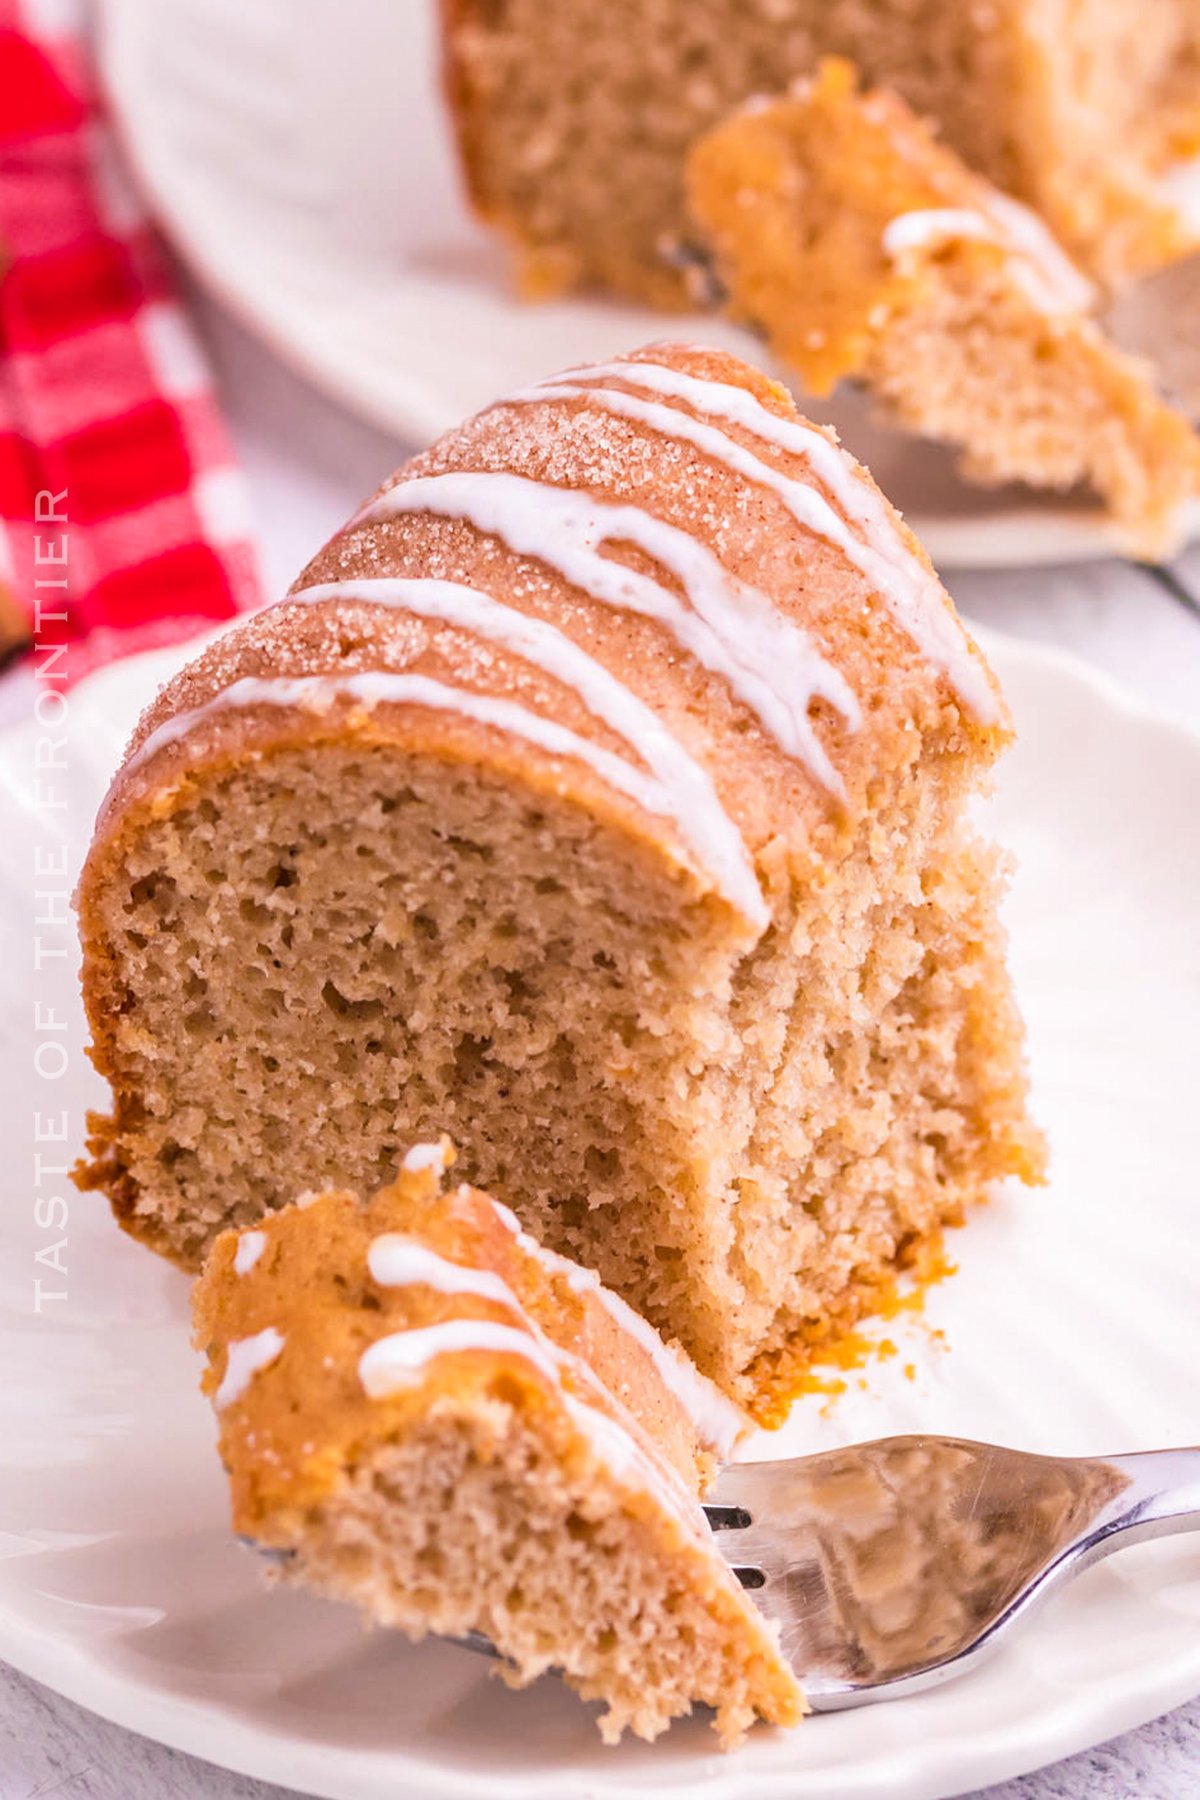
When it comes to fall, apple cider is where it’s at. We are absolutely bursting with apples here on the property. When fall comes around there is no shortage of ideas about what to do with all these apples.
Because we can only drink or store so much cider, I’m always making recipes to use it up and this cake is a perfect example. The sweetness and spice of the cider make this cake absolutely heavenly.
If you love all the flavors of fall – you will love this cake.

Yes, I do it often. Once baked – this cake can be frozen at all stages of the creation process. I like to remove a freshly baked and cooled cake from the pan, wrap it tightly in plastic wrap and freeze it for later use. (this is also handy when you want to work with cold cakes to keep the frosting from getting too soft.)
You can also gently wrap the completely decorated cake and freeze it until you need it.
FOR BEST RESULTS – WAIT TO ADD THE CINNAMON/SUGAR COATING UNTIL THE CAKE IS THAWED AND READY TO BE SERVED. The sugar will moisten in the damp environment of the freezer, causing it to seep and soak into the cake instead of keeping the desired texture for this cake.
Just make sure to thaw it in the fridge the night before as it does taste best when not frozen. I also like to leave it at room temperature for 1-2 hours before serving so the frosting is more creamy than stiff.
Basically, a bundt cake is a cake that is baked in a bundt pan. A bundt pan is a round, donut-shaped cake pan that was inspired by a traditional European cake known as Gugelhupf.
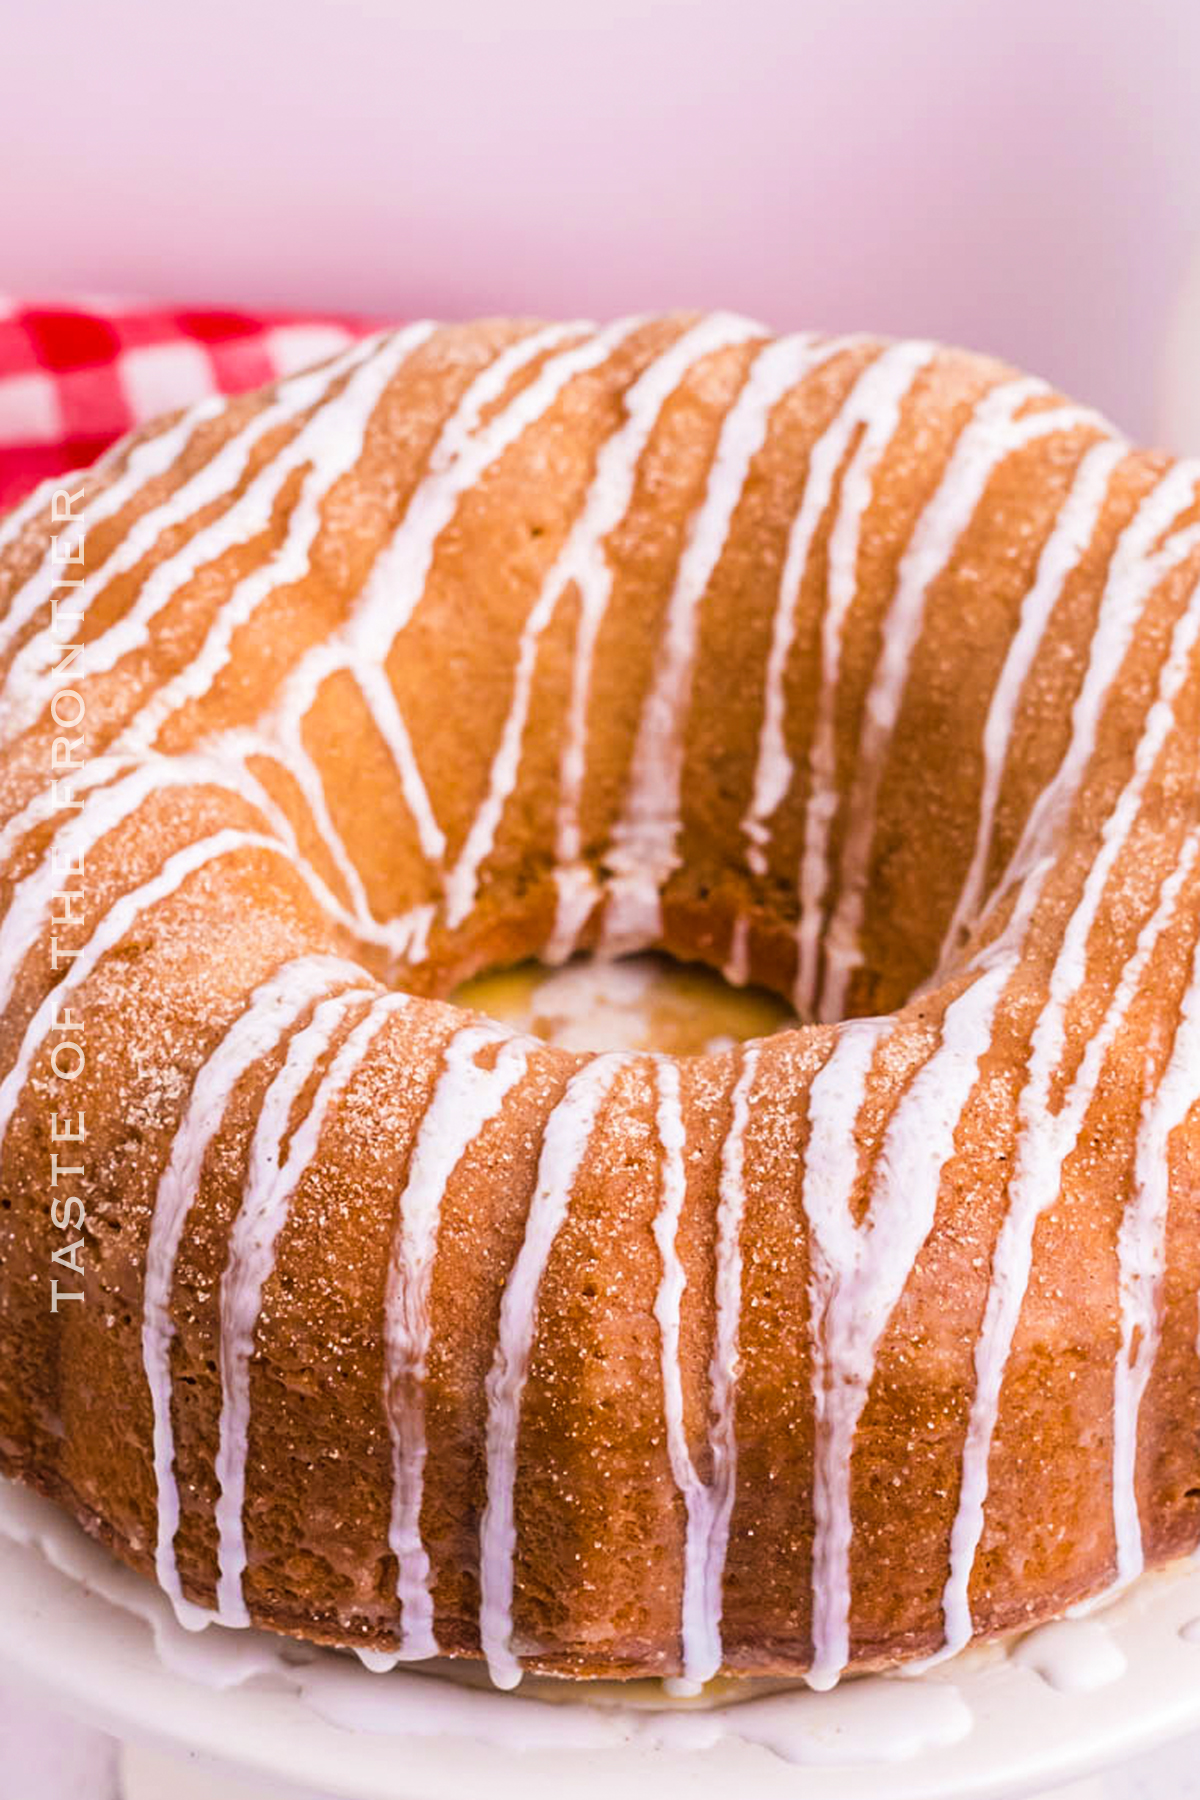
Typically in the fall, you can find gallons of cider at the market, farmer’s market, pumpkin patches, and so many other places. Anything you find there will work just fine for this recipe.
If you are blessed, like we are, to have apple trees on your property or you visit the local orchard and use those apples to make your own fresh cider – that will work too.
Yes, apple juice will work. It might be a bit thinner than what you find with cider – so that could change the consistency of the batter and how the batter bakes.
Also, cider is packed full of spices and additional flavors that apple juice does not have. The cake will be lacking some of those great flavors if you use apple juice.
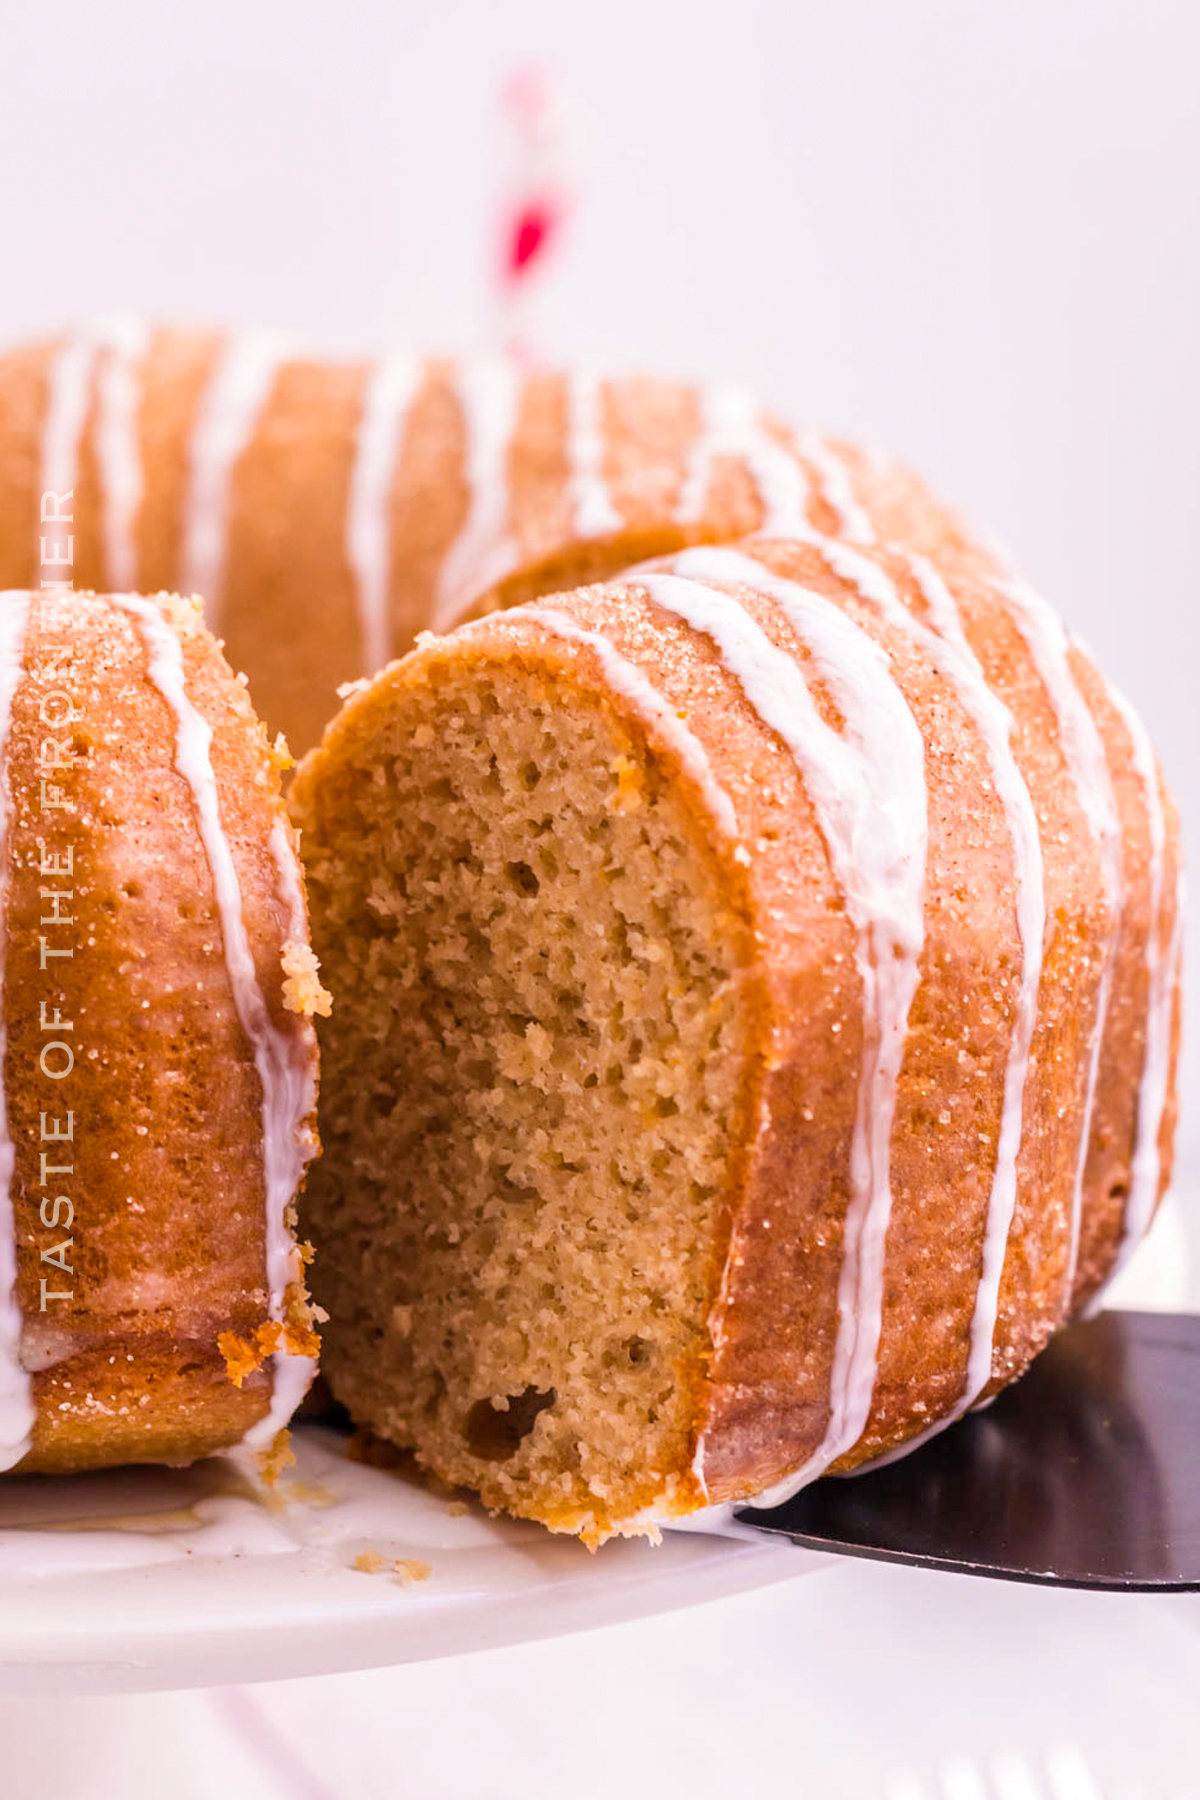
If you try to flip the cake while it is still hot or even warm, it hasn’t had a chance to firm up yet. Flipping a warm cake increases the likelihood of the cake not releasing from the pan entirely, falling apart, or breaking when it is flipped.
Trust me – it is a big fat bummer to have this cake you are so excited about and then have only half of it come out properly, The whole thing is a wash and you have to turn it into something like truffles instead.
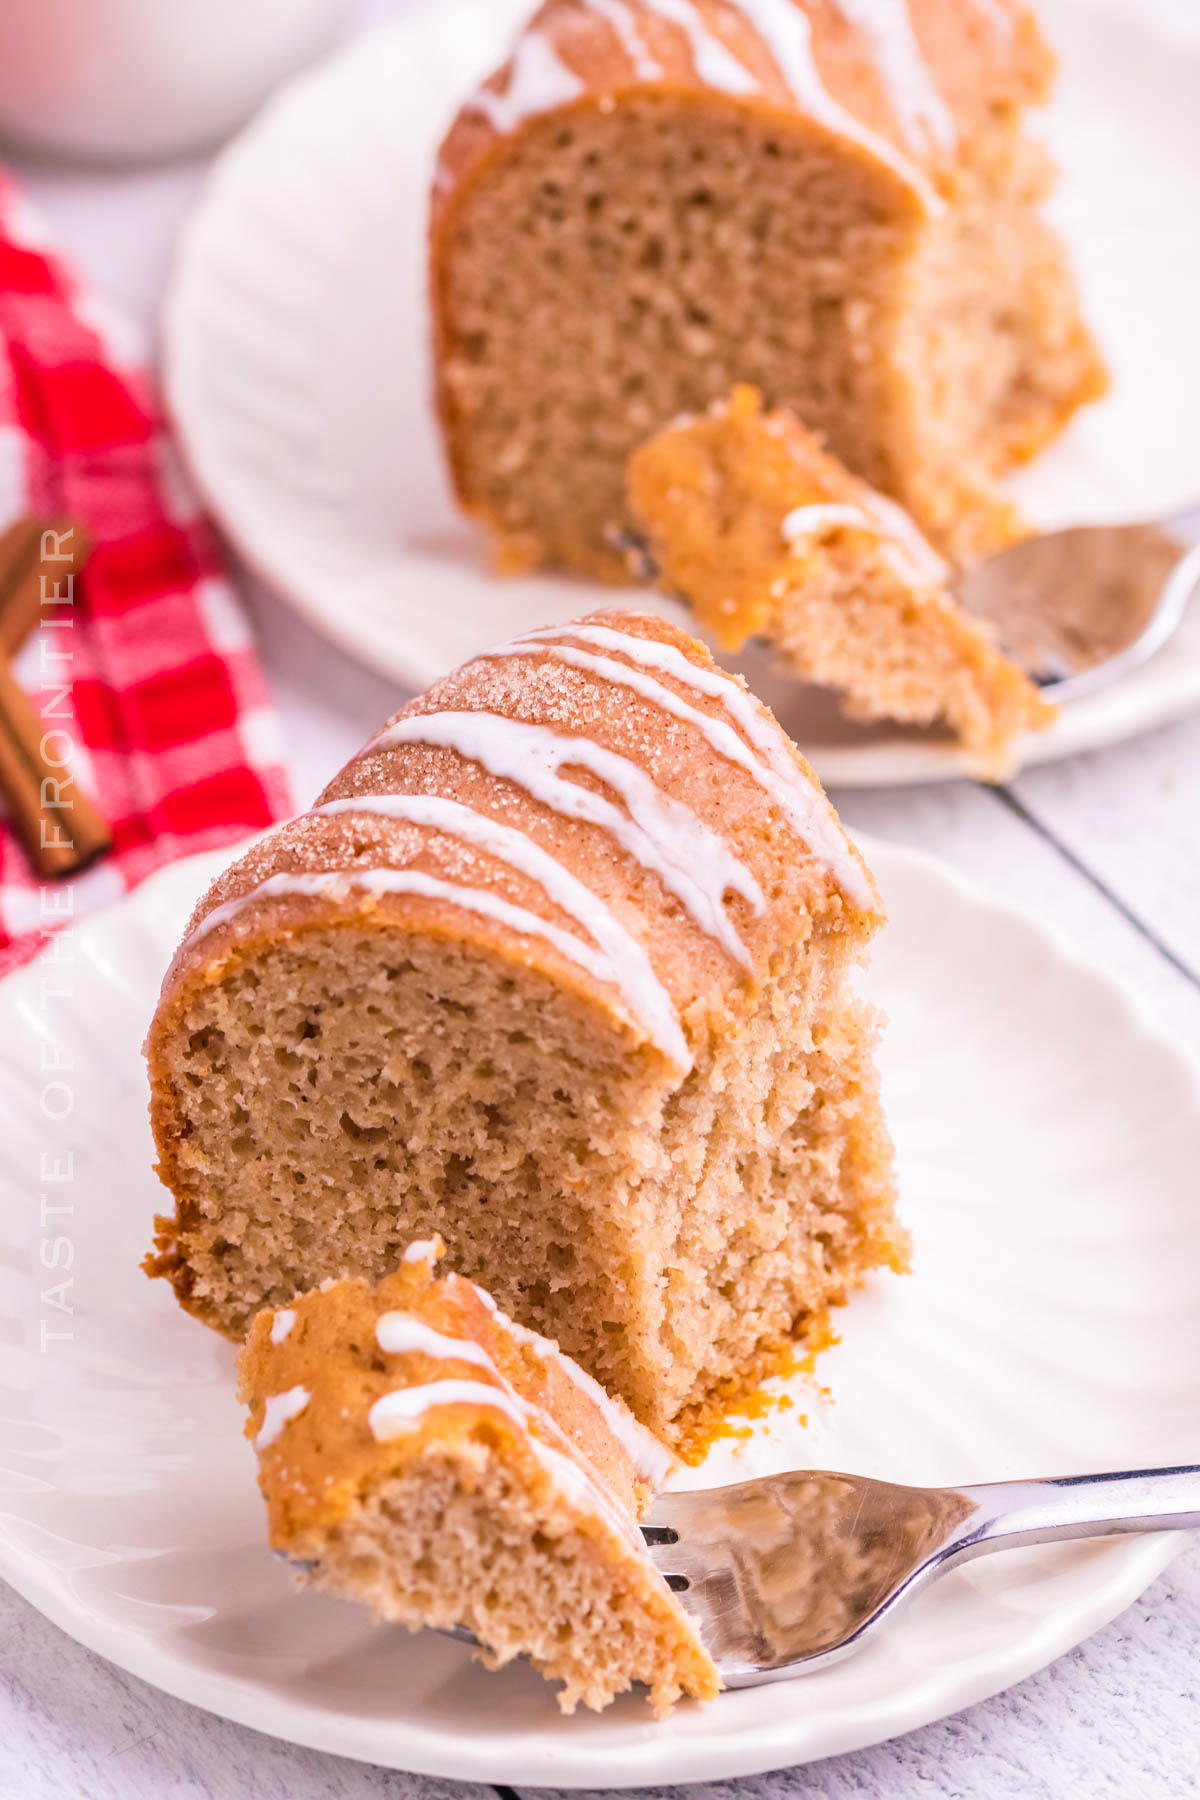
You should make sure that you grease and flour your pan really well or heavily coat it with a flour and grease/cooking-spray mixture to keep the cake from sticking. (such as Baker’s Joy) The ridges in the pan are most susceptible to this and they are the most delicate parts of the cake.
Make sure that you really work your grease into these crevices for the best results.
I like to use Baker’s Release because it yields the best results, in my opinion.
Bakers release is a combination of oil, flour, and shortening that makes releasing cakes and other baked goods almost effortless.
To make Bakers Release – it is as simple as 1,1 & 1.
Mix the ingredients together – whisking well. Store in an airtight container in the pantry or refrigerator. When ready to use, dip a pastry brush into the mixture and spread it over the cake pan.
This cake can be made in a 13×9 baking pan. Bake for 20-25 then do the toothpick test to check for doneness.
This cake can also be made into cupcakes. Fill each well 3/4 of the way full and bake for 15-20 then do the toothpick test to check for doneness.
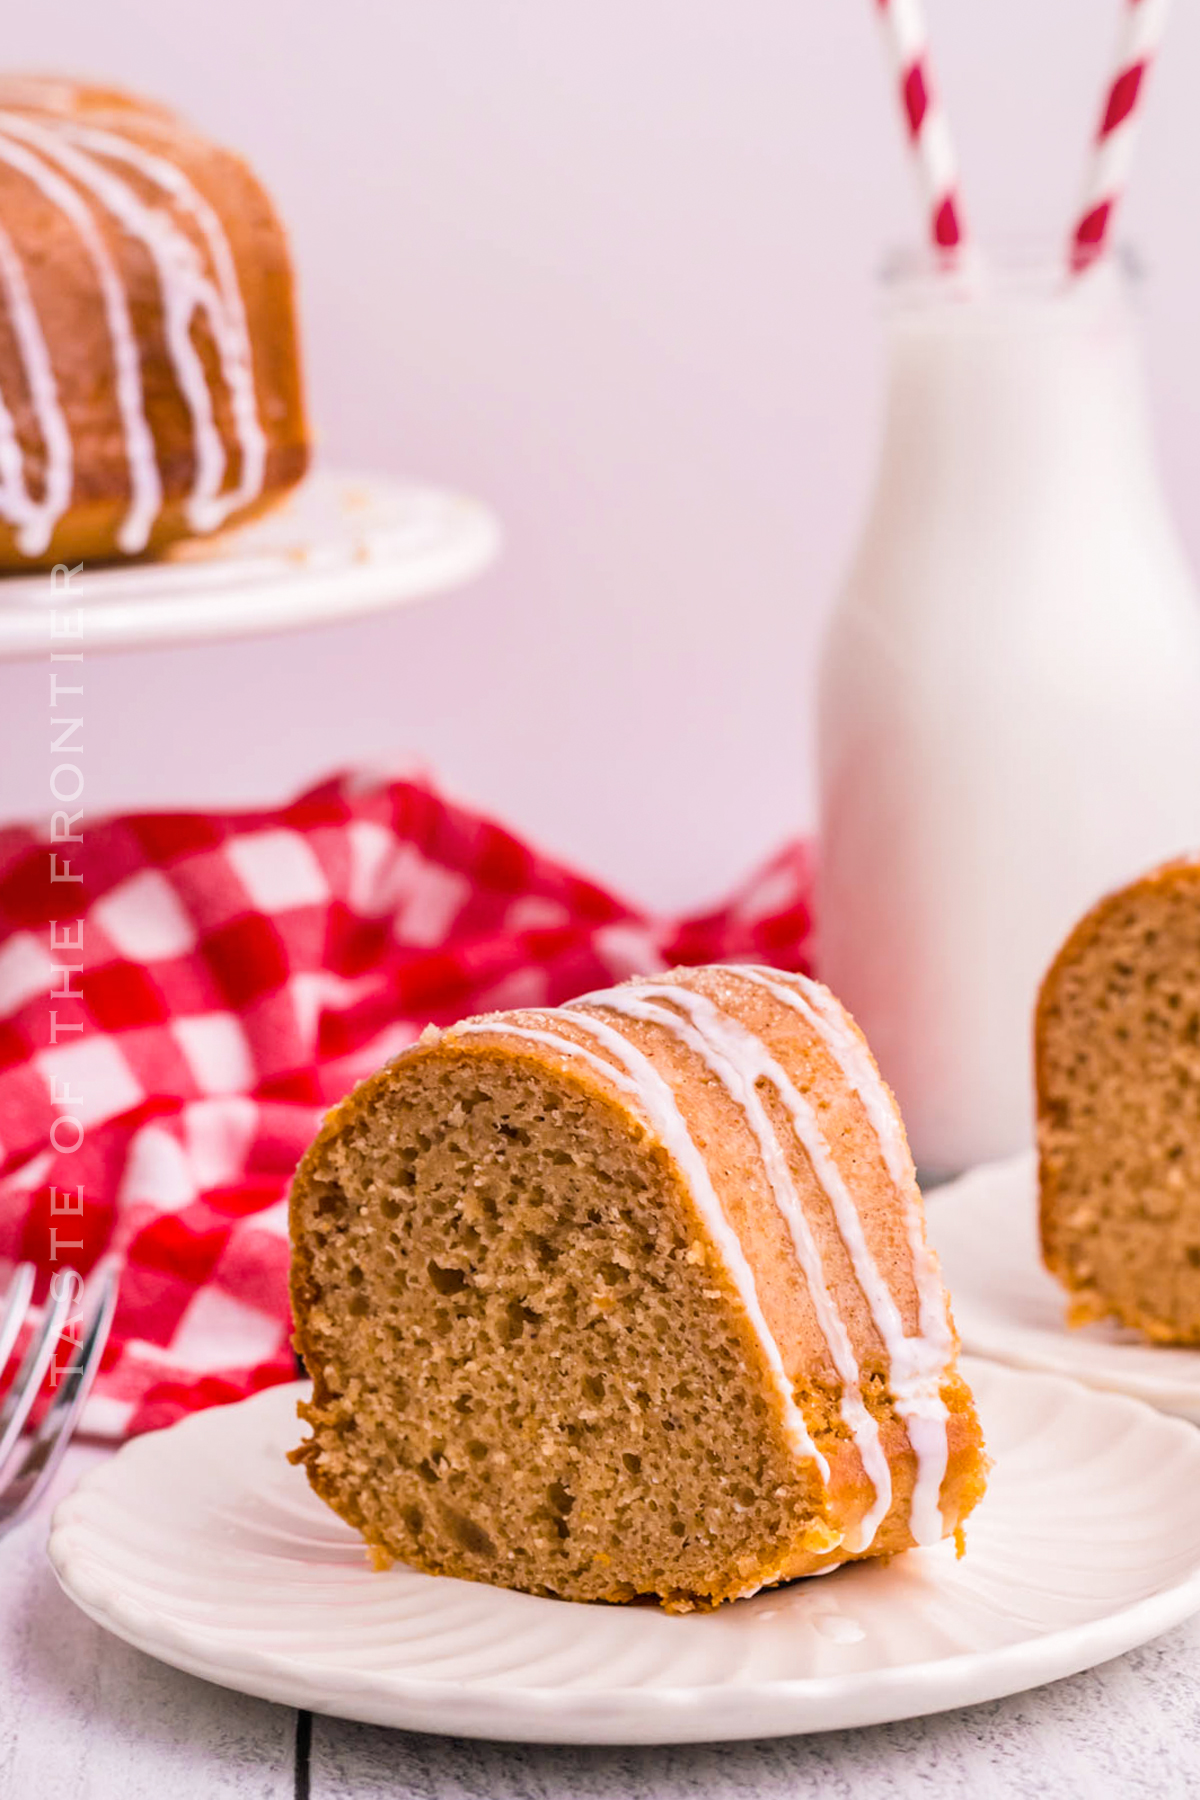
DON’T MISS THESE HOLIDAY E-BOOKS!
This apple cider bundt cake recipe is SUPER EASY and delicious – and if you’re like me, then you maybe already have some of these items on hand OR maybe you have never made a bundt cake before, & you might be a bit nervous – but you’re going to love it. I have made a list below of the things I absolutely can’t live without when it comes to making this cake recipe. (you can also SHOP MY FAVORITES in my store)
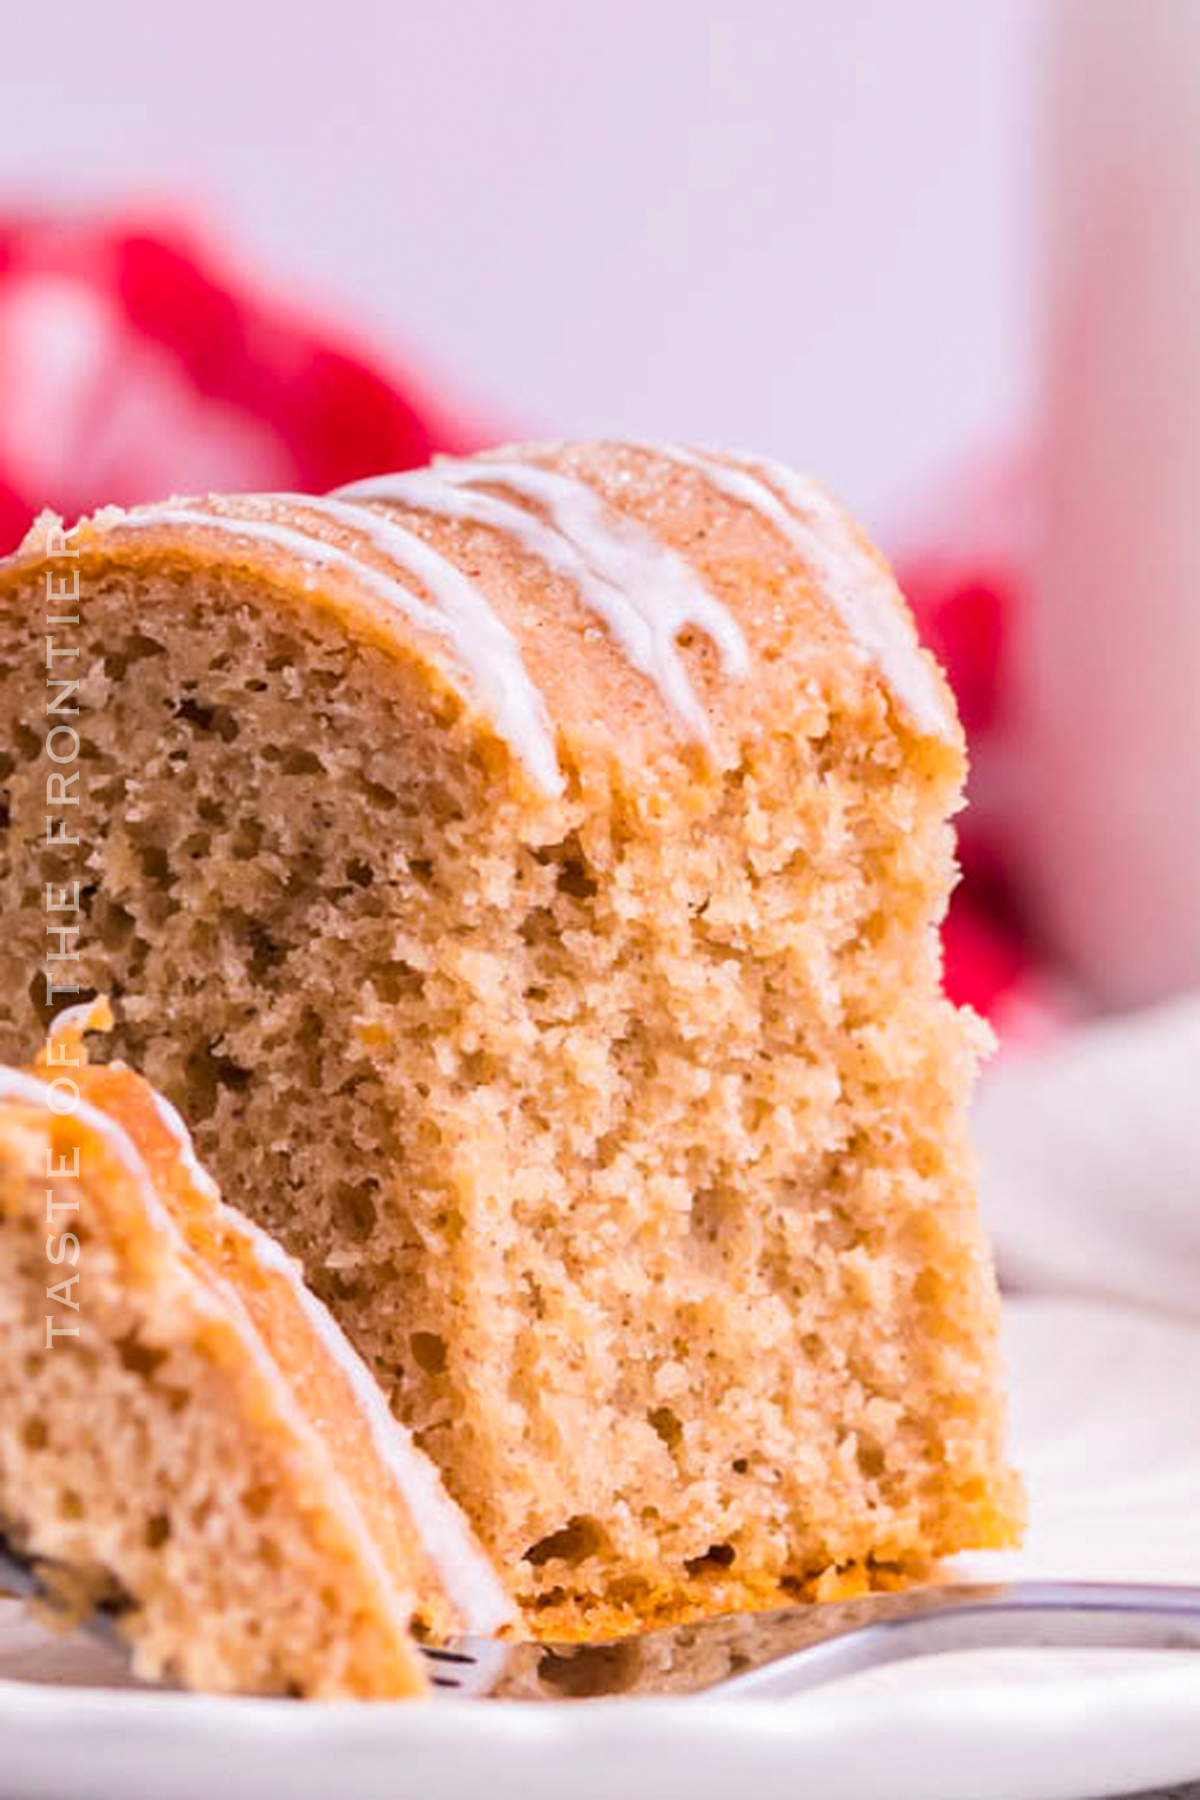
If you love this easy bundt cake recipe, you’re going to love these other cake ideas too.. Please click each link below to find the easy, printable recipe!

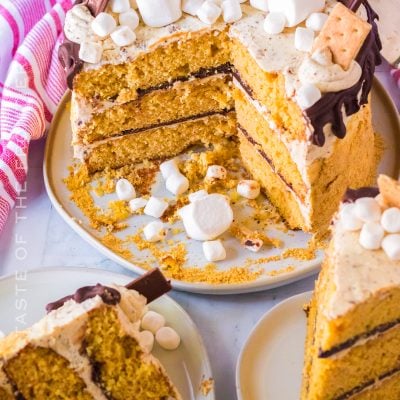
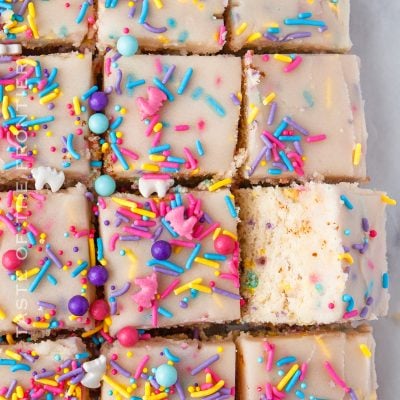
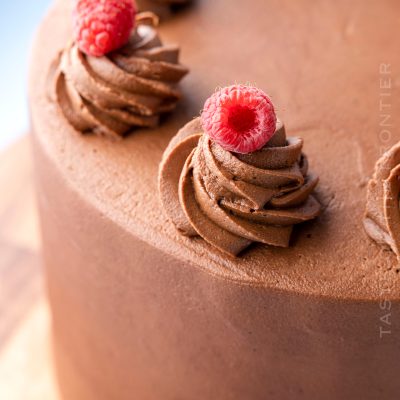

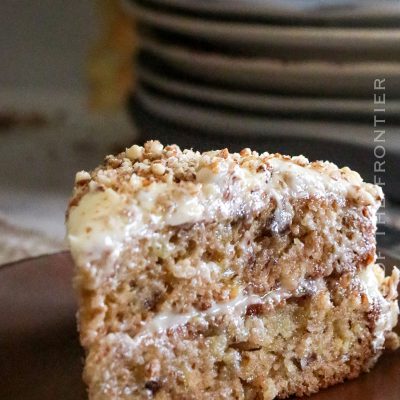
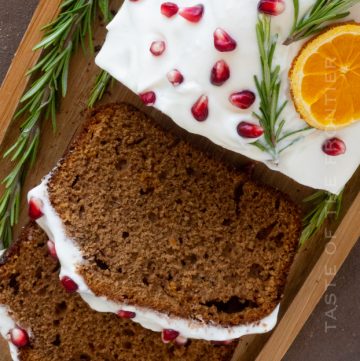
Pumpkin Bundt Cake with Cheesecake Filling

If you love this recipe for Homemade Apple Cider Donut Cake as much as I do, please write a five-star review, and be sure to help me share on Facebook and Pinterest!
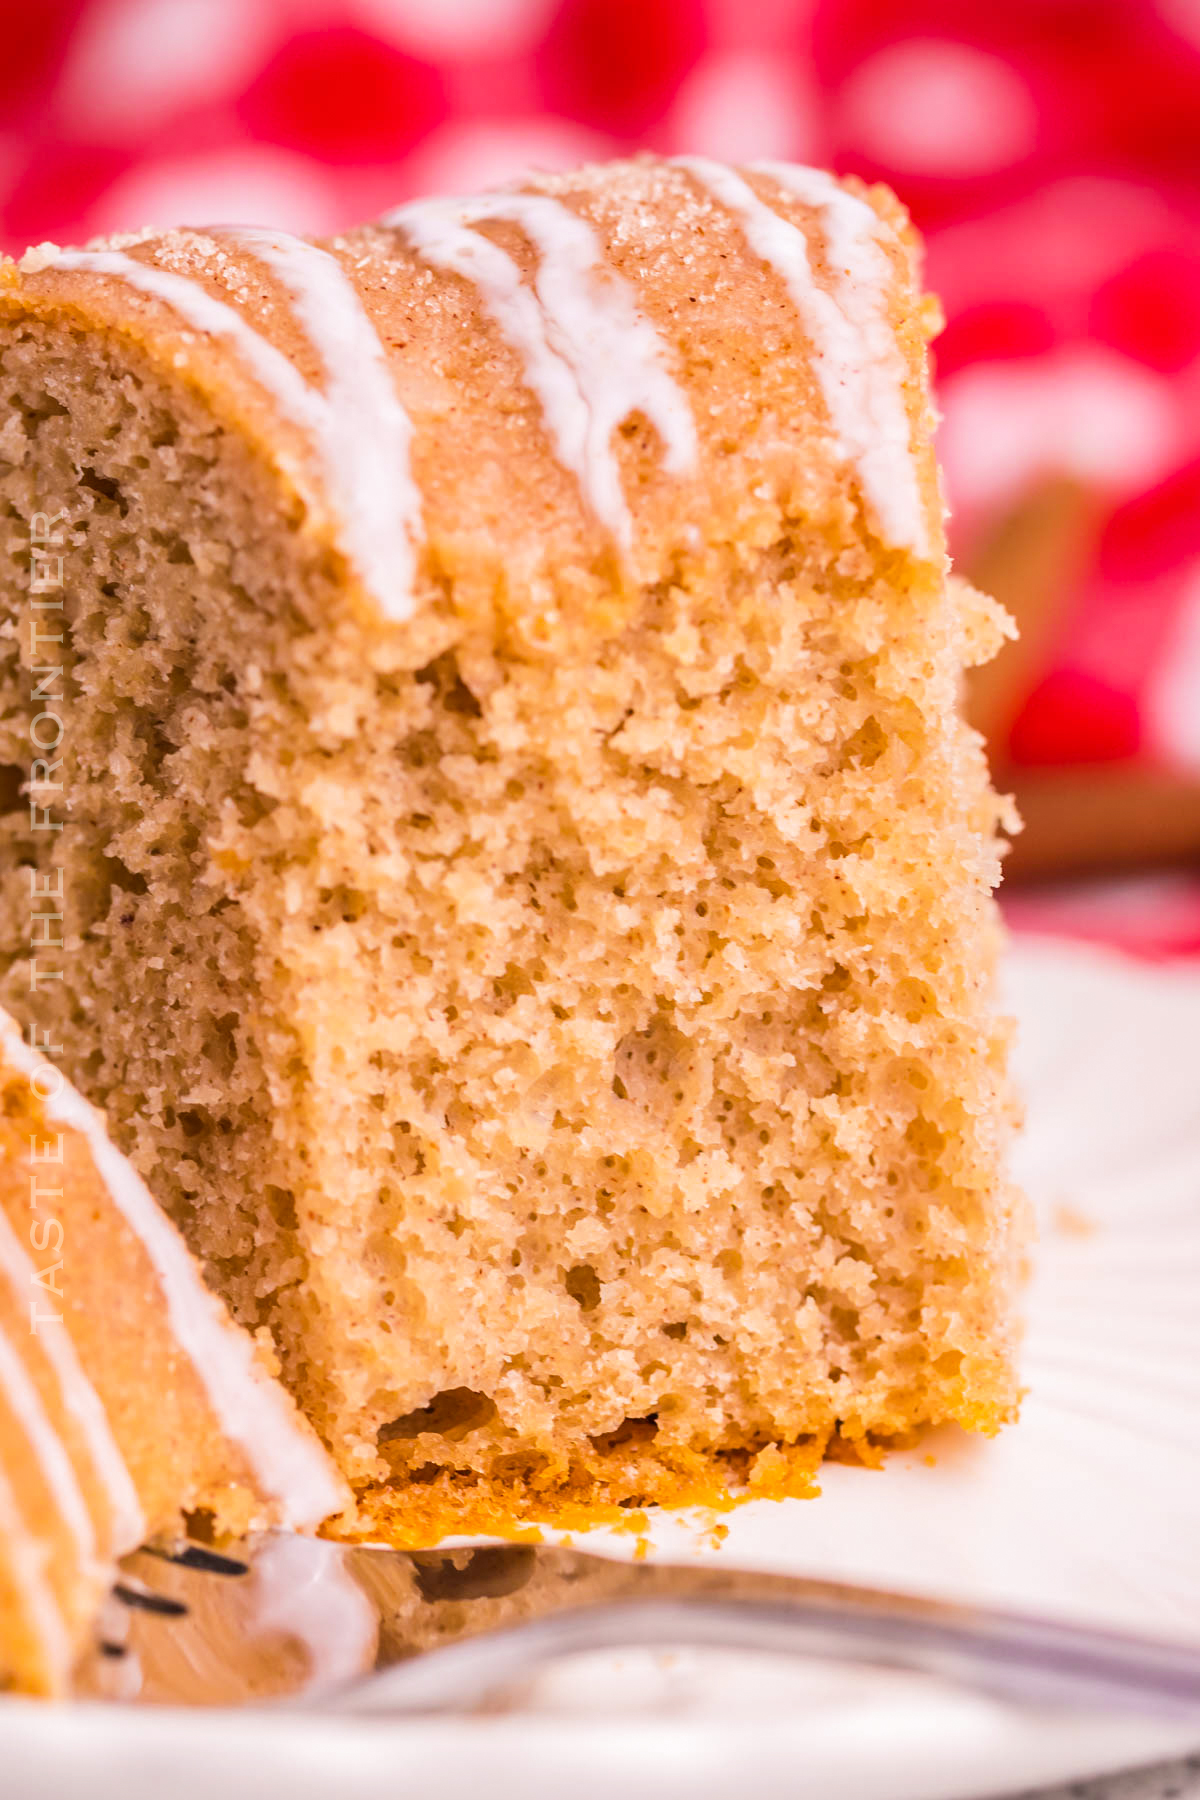
CONNECT WITH YUMMI HAUS!
Be sure to follow me on my social media, so you never miss a post!
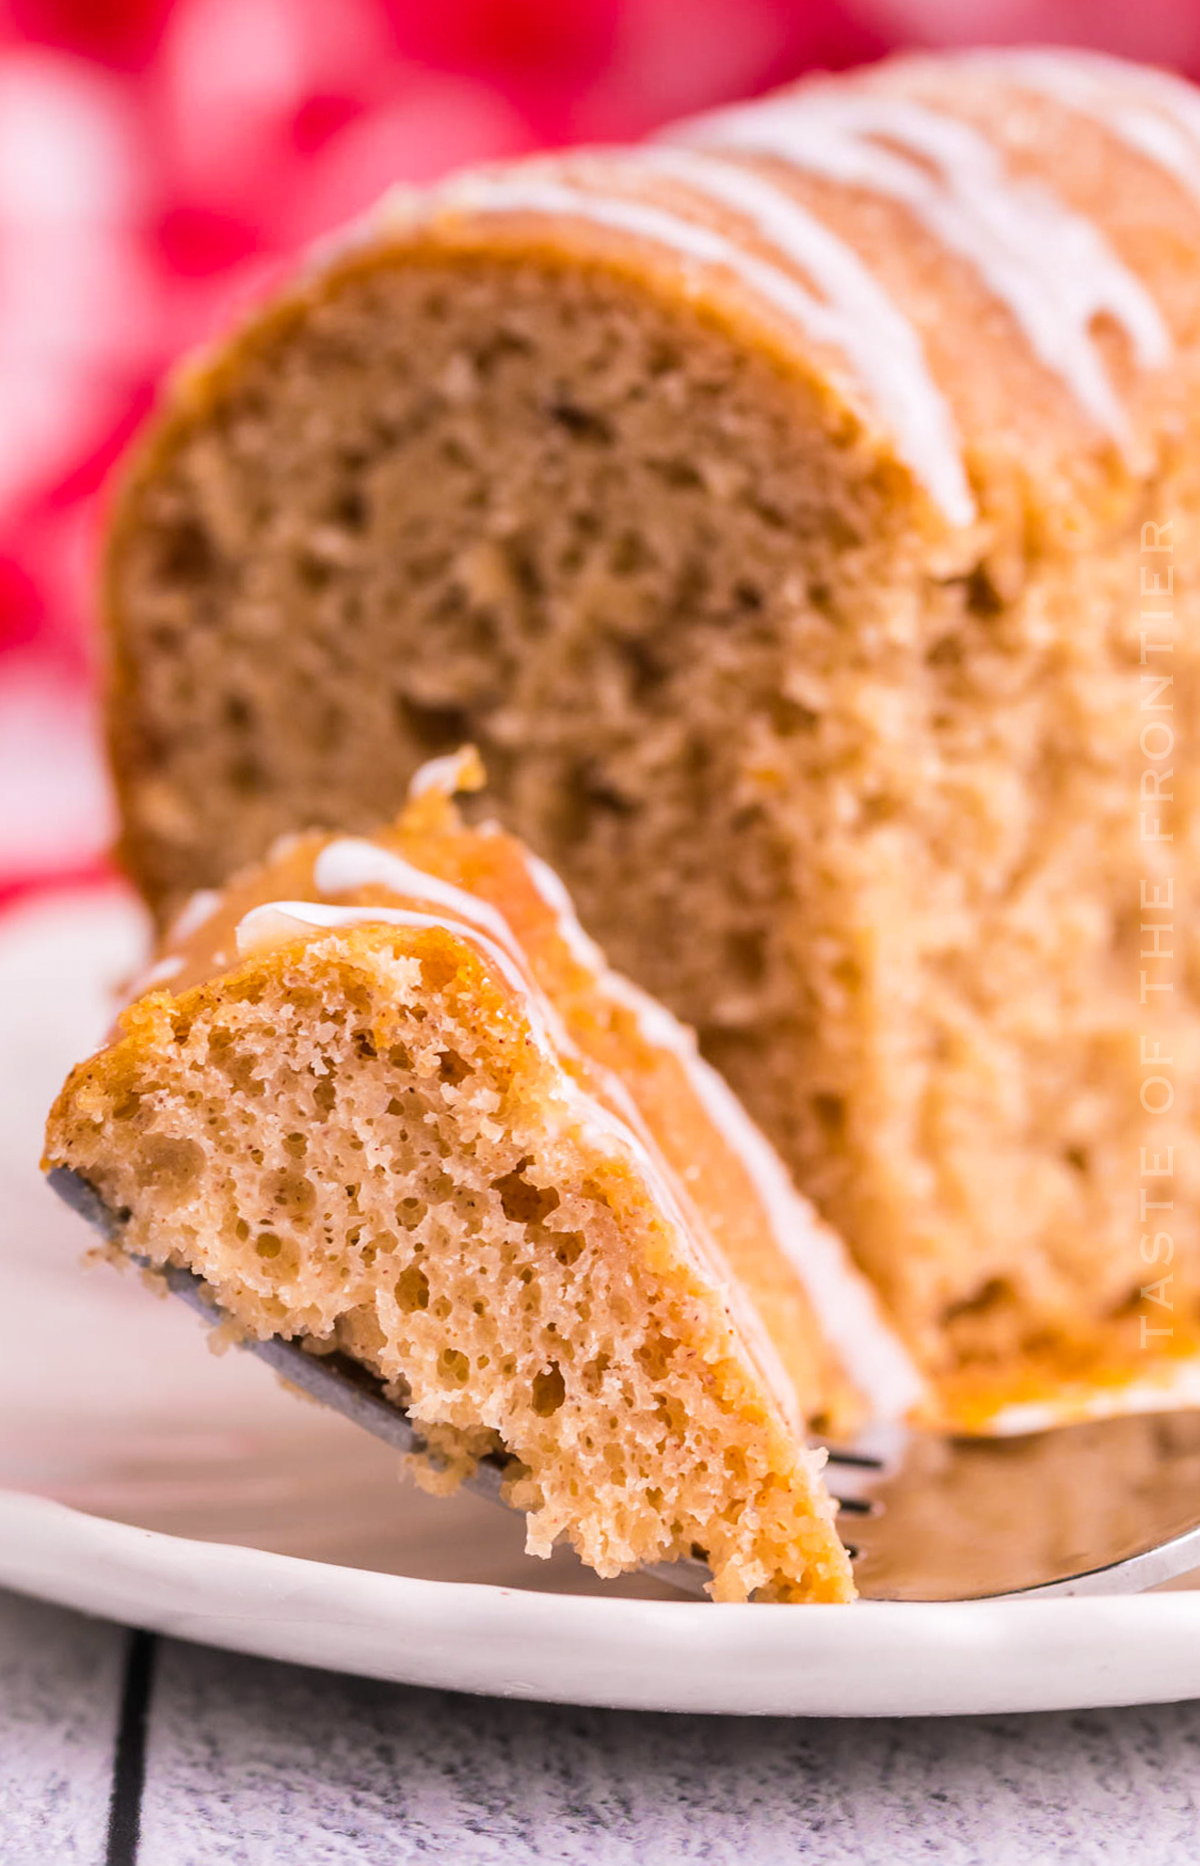
Cauliflower Mash is a great low-carb alternative to mashed potatoes. It’s easy to make, and you can customize the flavor however you like.
Is there anything better than a delicious, comforting bowl of mashed potatoes? Well, believe it or not, there is—cauliflower mash!
This healthier alternative is just as creamy and satisfying as the real thing, and best of all, it’s easy to make. So ditch the potatoes and give this tasty side dish a try!

This year we are going low-carb for our holiday sides – so we are ditching our famous garlic mashed potatoes and opting for this cauliflower mash recipe instead.
Try adding some garlic, herbs, or cheese for extra flavor. Cauliflower mash is a healthy and delicious side dish that everyone will love!

Cauliflower mash is a healthy alternative to mashed potatoes. It is made by pureeing cooked cauliflower with milk, butter, and seasonings. This dish is a great way to sneak some extra vegetables into your diet. It can be served as a side dish or as a main course.
Cauliflower mash is a healthy alternative to mashed potatoes. It is lower in calories and carbohydrates. Additionally, it is a good source of fiber and vitamins. This dish can help you reach your health goals while still enjoying delicious food.
Yes, this dish does taste like cauliflower. However, the flavors of the heavy cream, butter, bacon, cheese, and seasonings help to mask the cauliflower flavor. It is the closest thing we have made to the real thing.
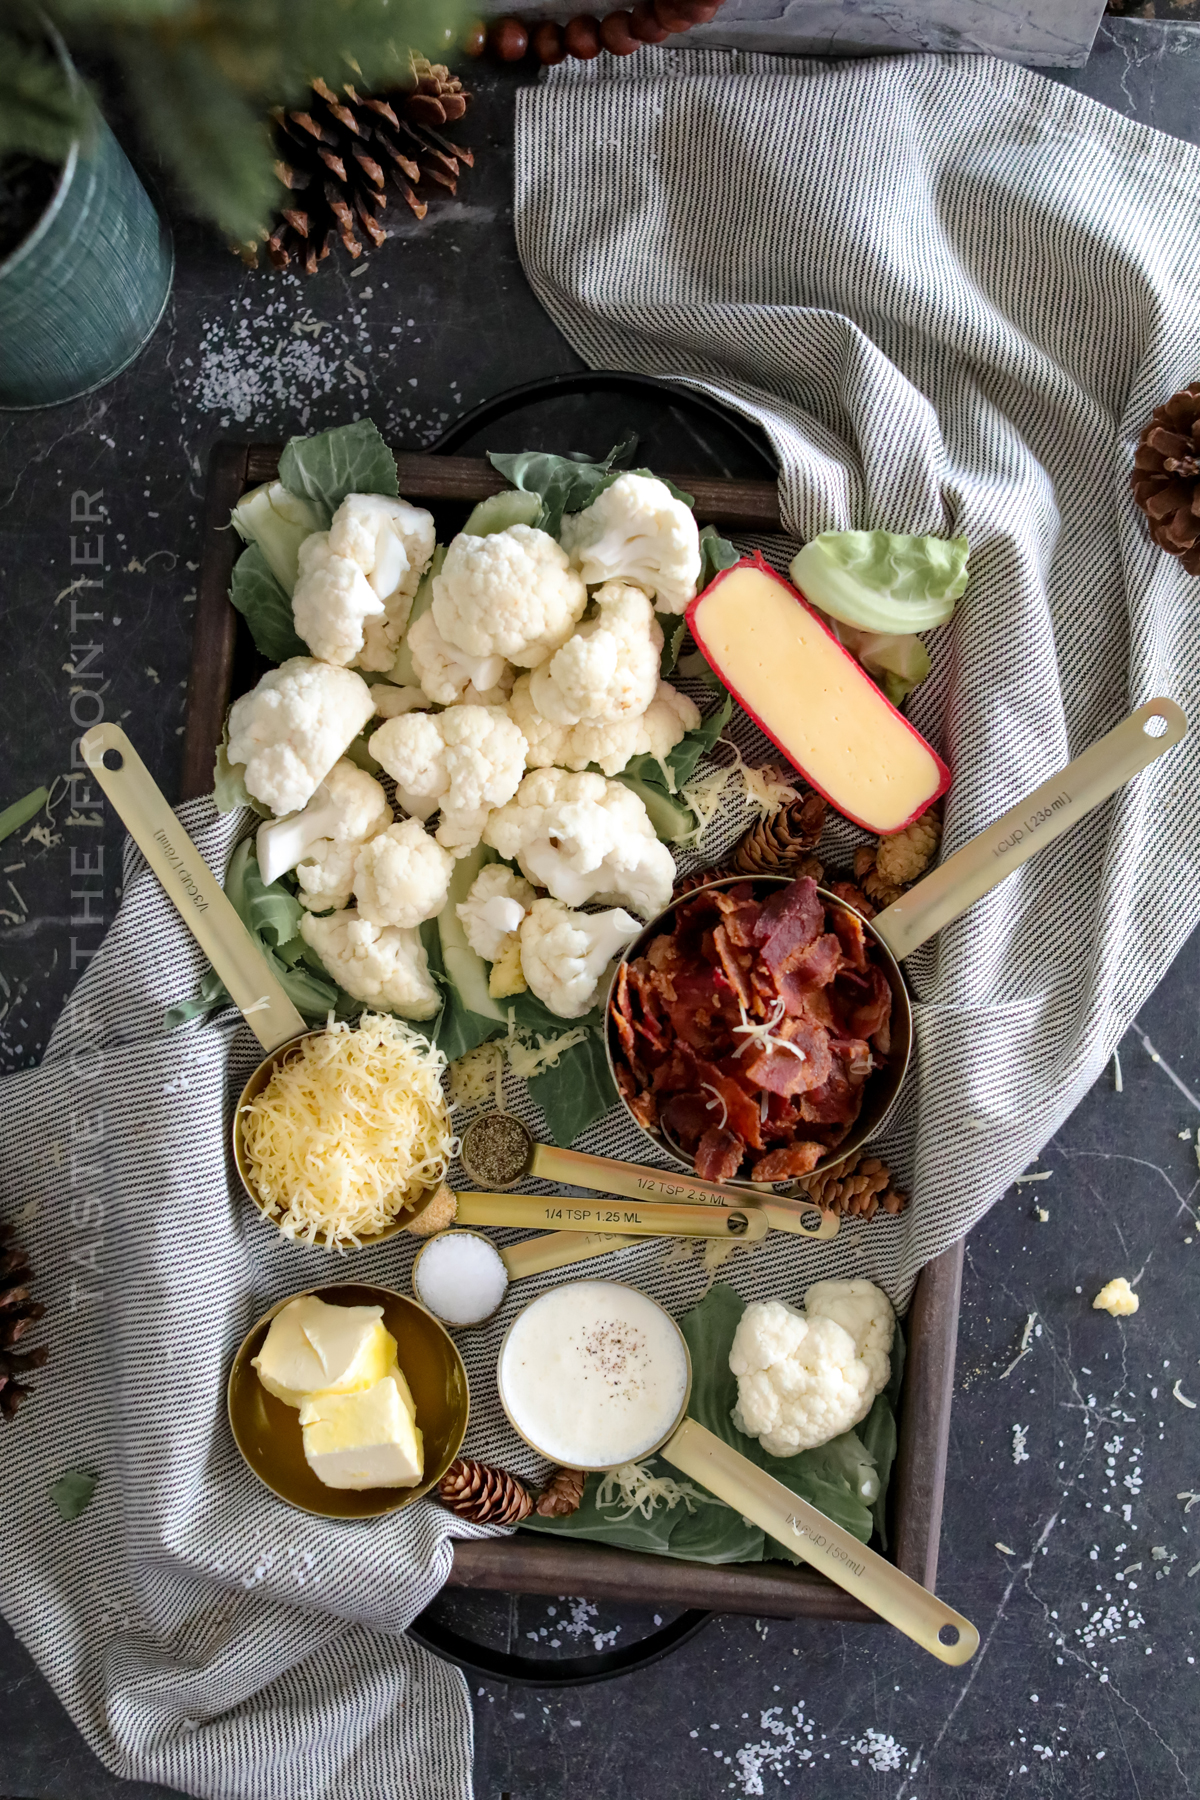
This delicious side can be stored in the fridge for up to 3 days. Simply place it in a covered container and refrigerate. Reheat it in the microwave or on the stovetop before serving. Enjoy!
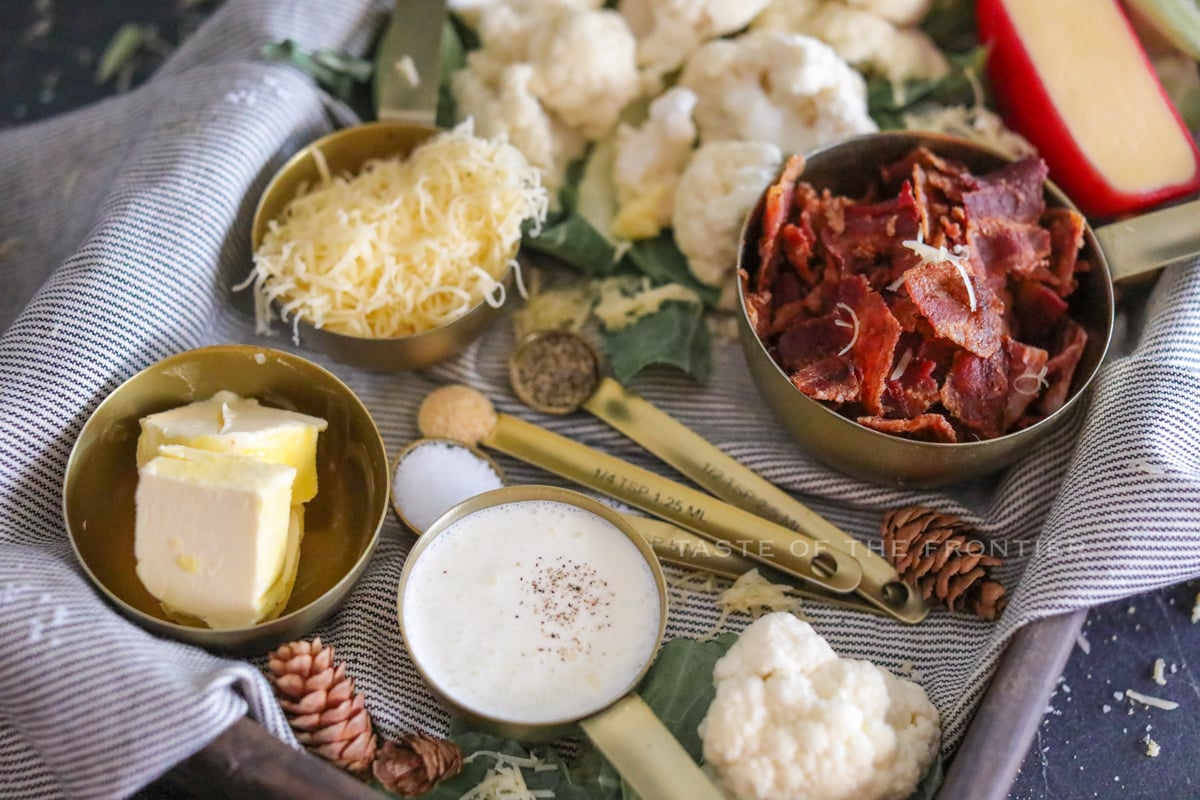
When choosing a cauliflower, look for one that is white in color and has compact florets. Avoid any cauliflower that has brown spots or is starting to turn yellow. These are signs that the cauliflower is old and will not taste as good.
You can use whatever you have on hand. However, for the very best texture and the creamiest “mashed potatoes” consistency – you will want to use a food processor or a blender that offers the same power and blades as what you would find in a food processor.
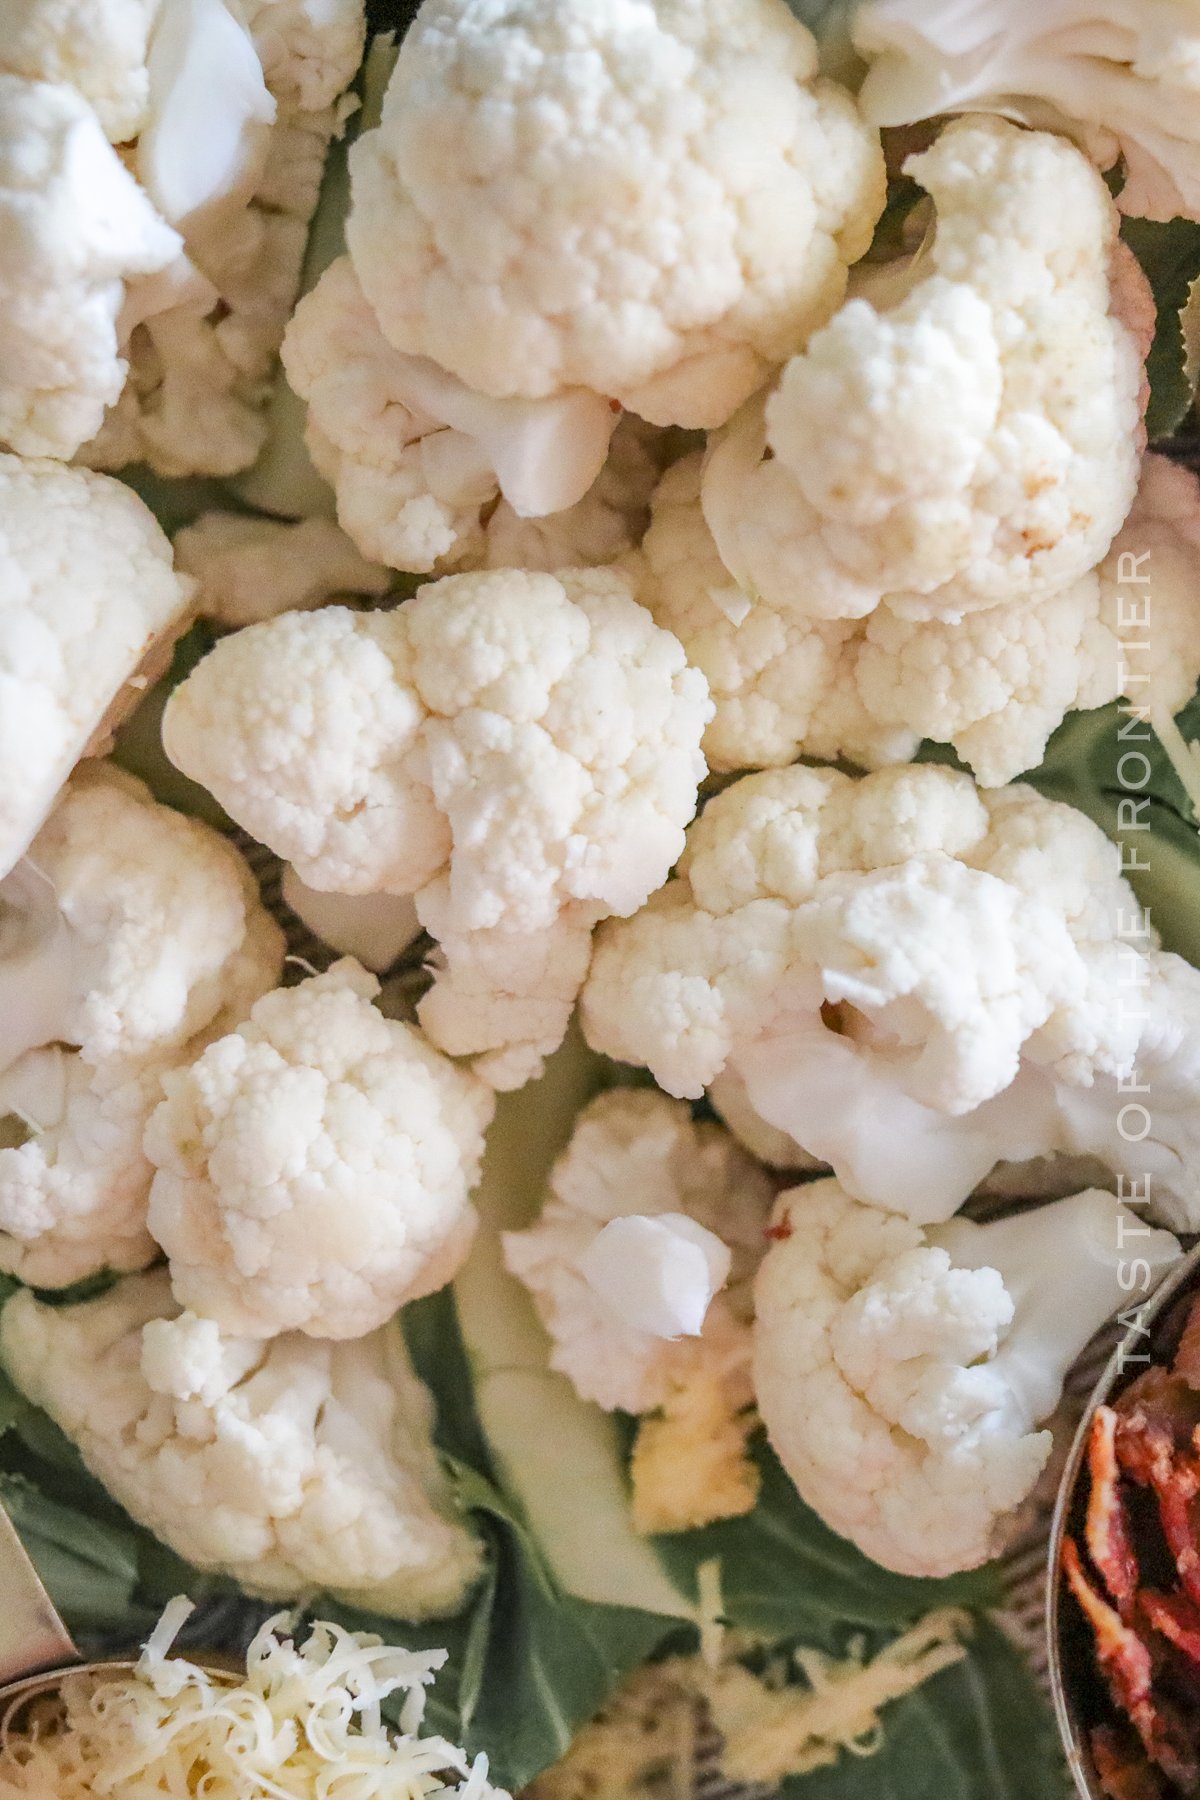
You bet! If you would like to omit the bacon you can do that. Swap out the heavy cream, butter, and cheese for your favorite vegan alternatives.
Yes – one of my favorite things to swap is replacing the heavy cream with either sour cream or mayo. I already use those when making my mashed potatoes – so why not add them to my mashed cauliflower too? It makes the creamy texture so close to the real thing – I know you’ll love it.

Cauliflower mash can be served as a side dish or as a main course. If you are serving it as a side, try pairing it with roasted chicken or grilled salmon. If you are serving it as a main, try topping it with sauteed mushrooms or caramelized onions. Here are some of our favorite recipes to serve with this dish.
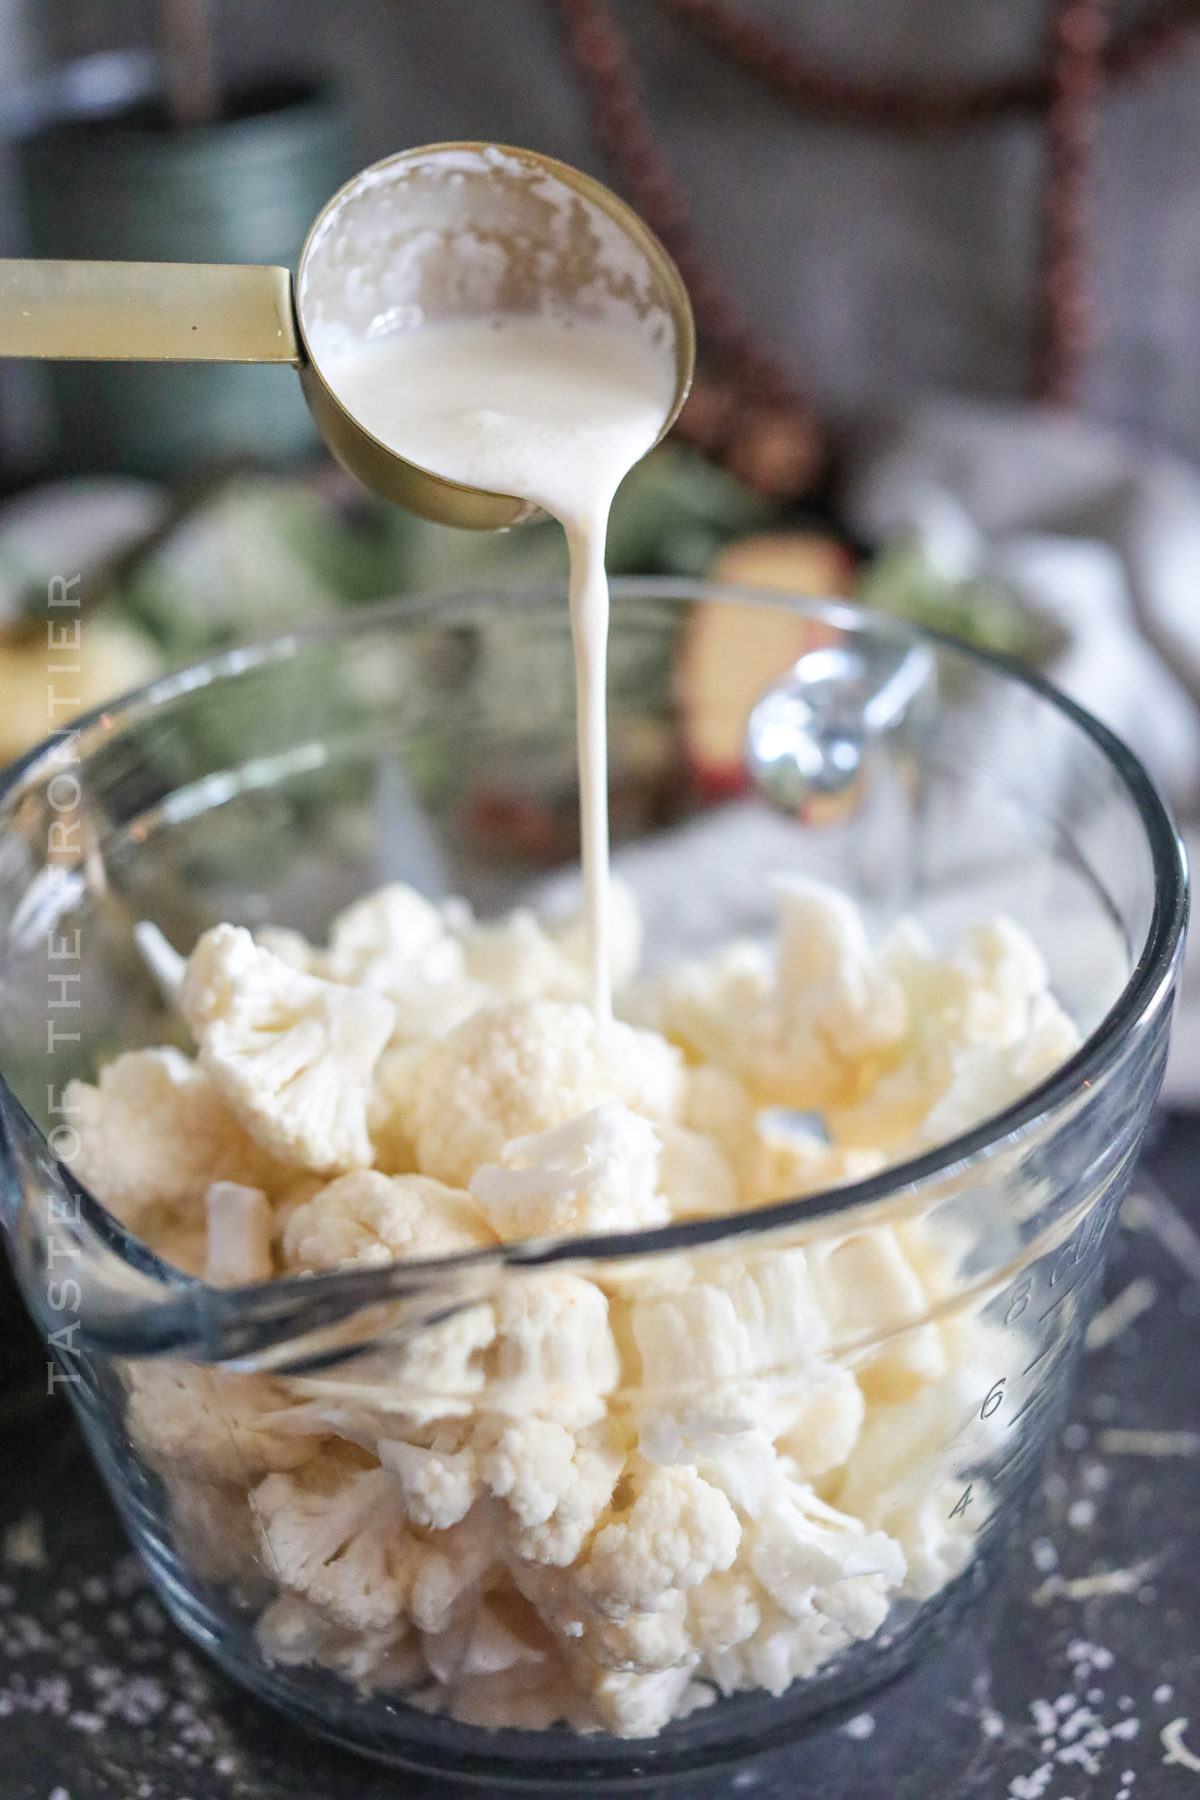
Yes – if you want to steam the cauliflower on the stovetop, instead of in the microwave – that will work just fine. Steam it until it is just soft enough to mash and continue with the remainder of the recipe.
If you are in a pinch, you can use frozen cauliflower for this recipe. Simply cook the florets according to the package instructions. Then, add them to a blender or food processor with the rest of the ingredients. Blend until smooth and enjoy!
Yes, this recipe can be made ahead of time. Simply cook the cauliflower and store it in the fridge. When you are ready to eat, simply add it to a blender or food processor with the rest of the ingredients. Blend until smooth and continue with the rest of the recipe!
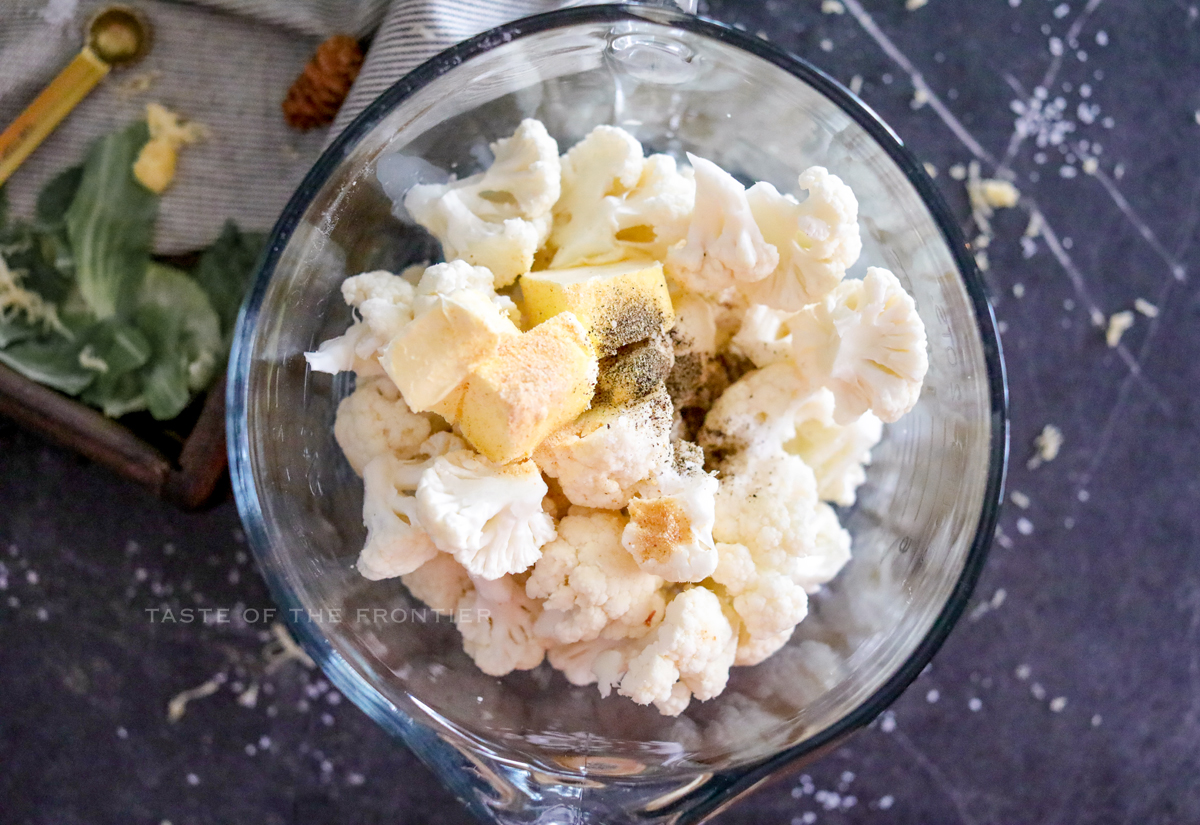
DON’T MISS THESE HOLIDAY E-BOOKS!
This veggie alternative to mashed potatoes is SUPER EASY and delicious – and if you’re like me this time of year, then you maybe already have some of these items on hand OR maybe you have never made this type of side dish before, & you might be a bit nervous – but you’re going to love it. I have made a list below of the things I absolutely can’t live without when it comes to making this side dish recipe. (you can also SHOP MY FAVORITES in my store)
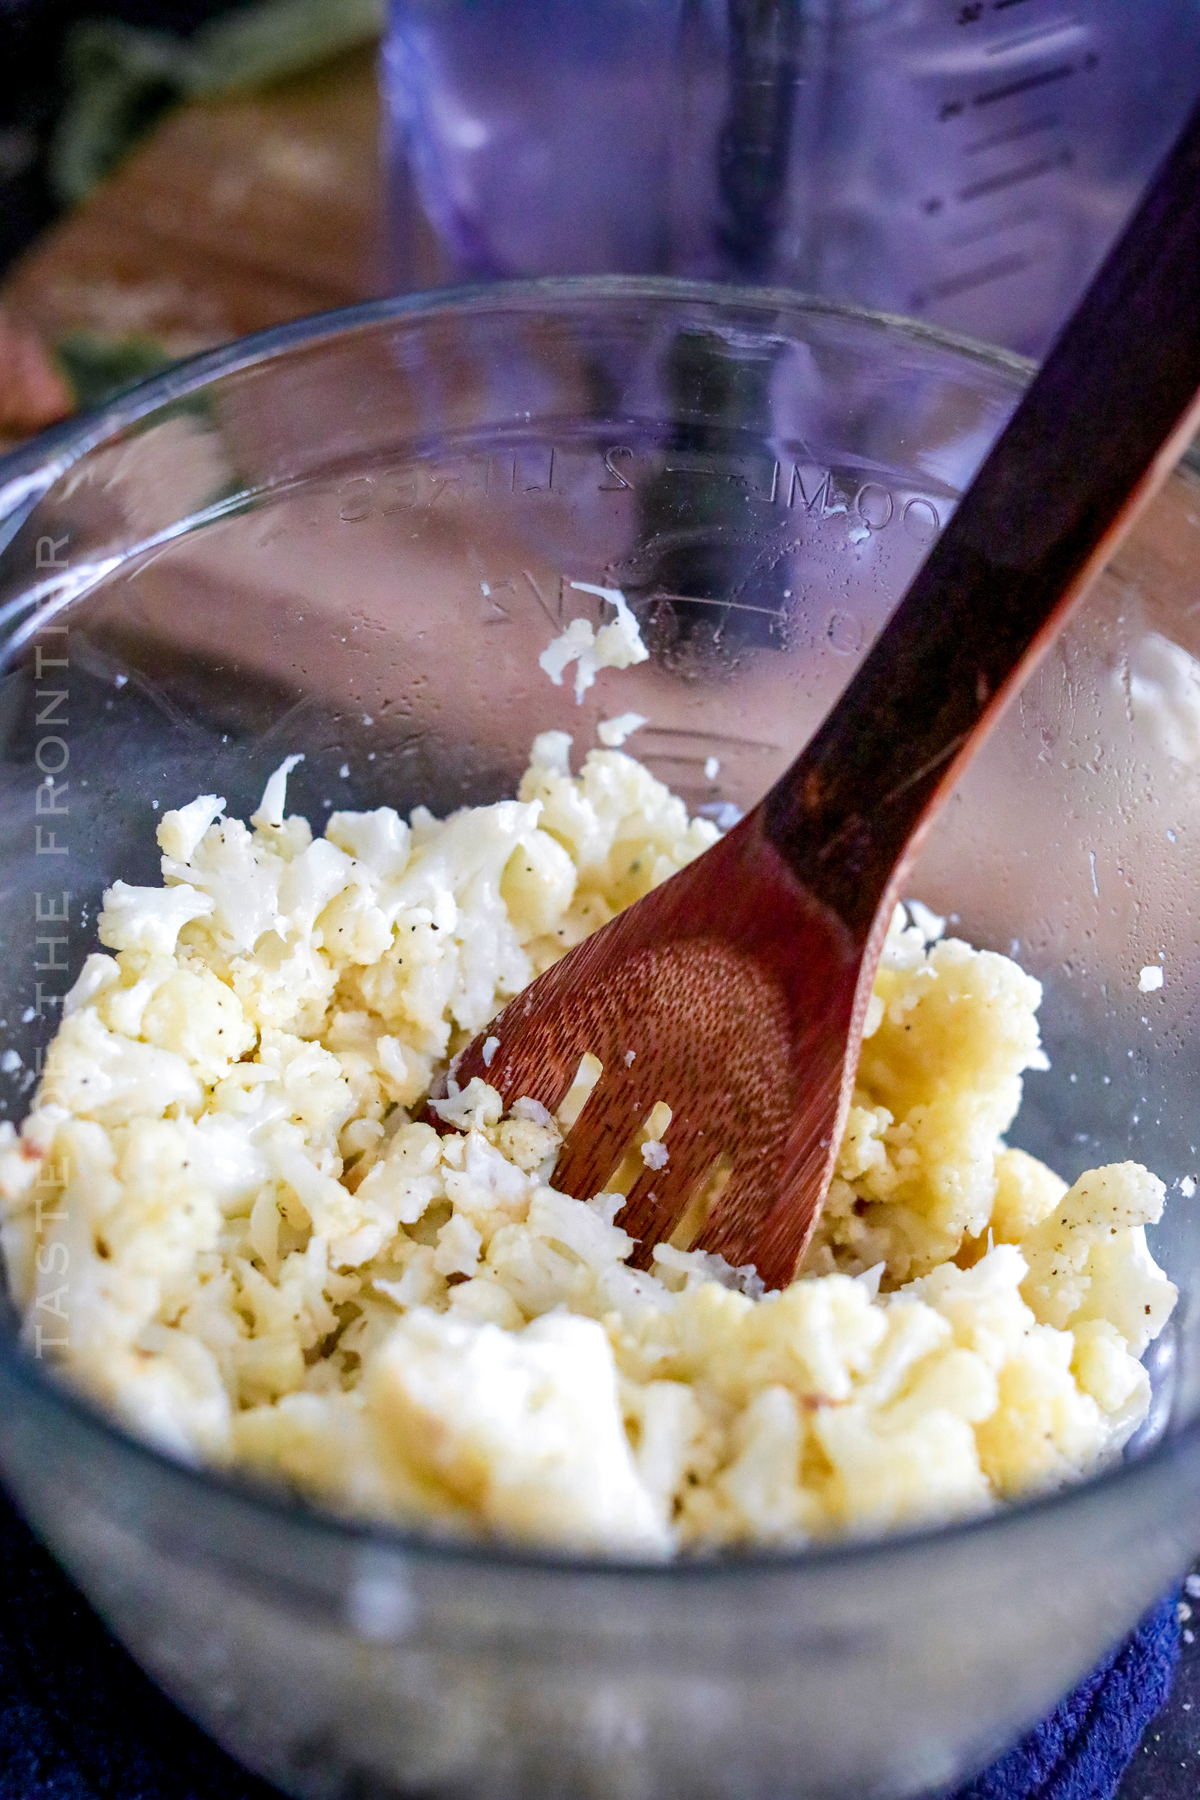
If you love this easy Cauliflower Mash recipe, you’re going to love these other side dish recipes too. Please click each link below to find the easy, printable recipe!


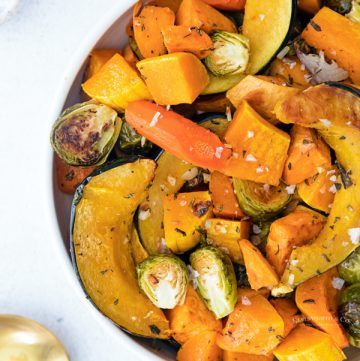
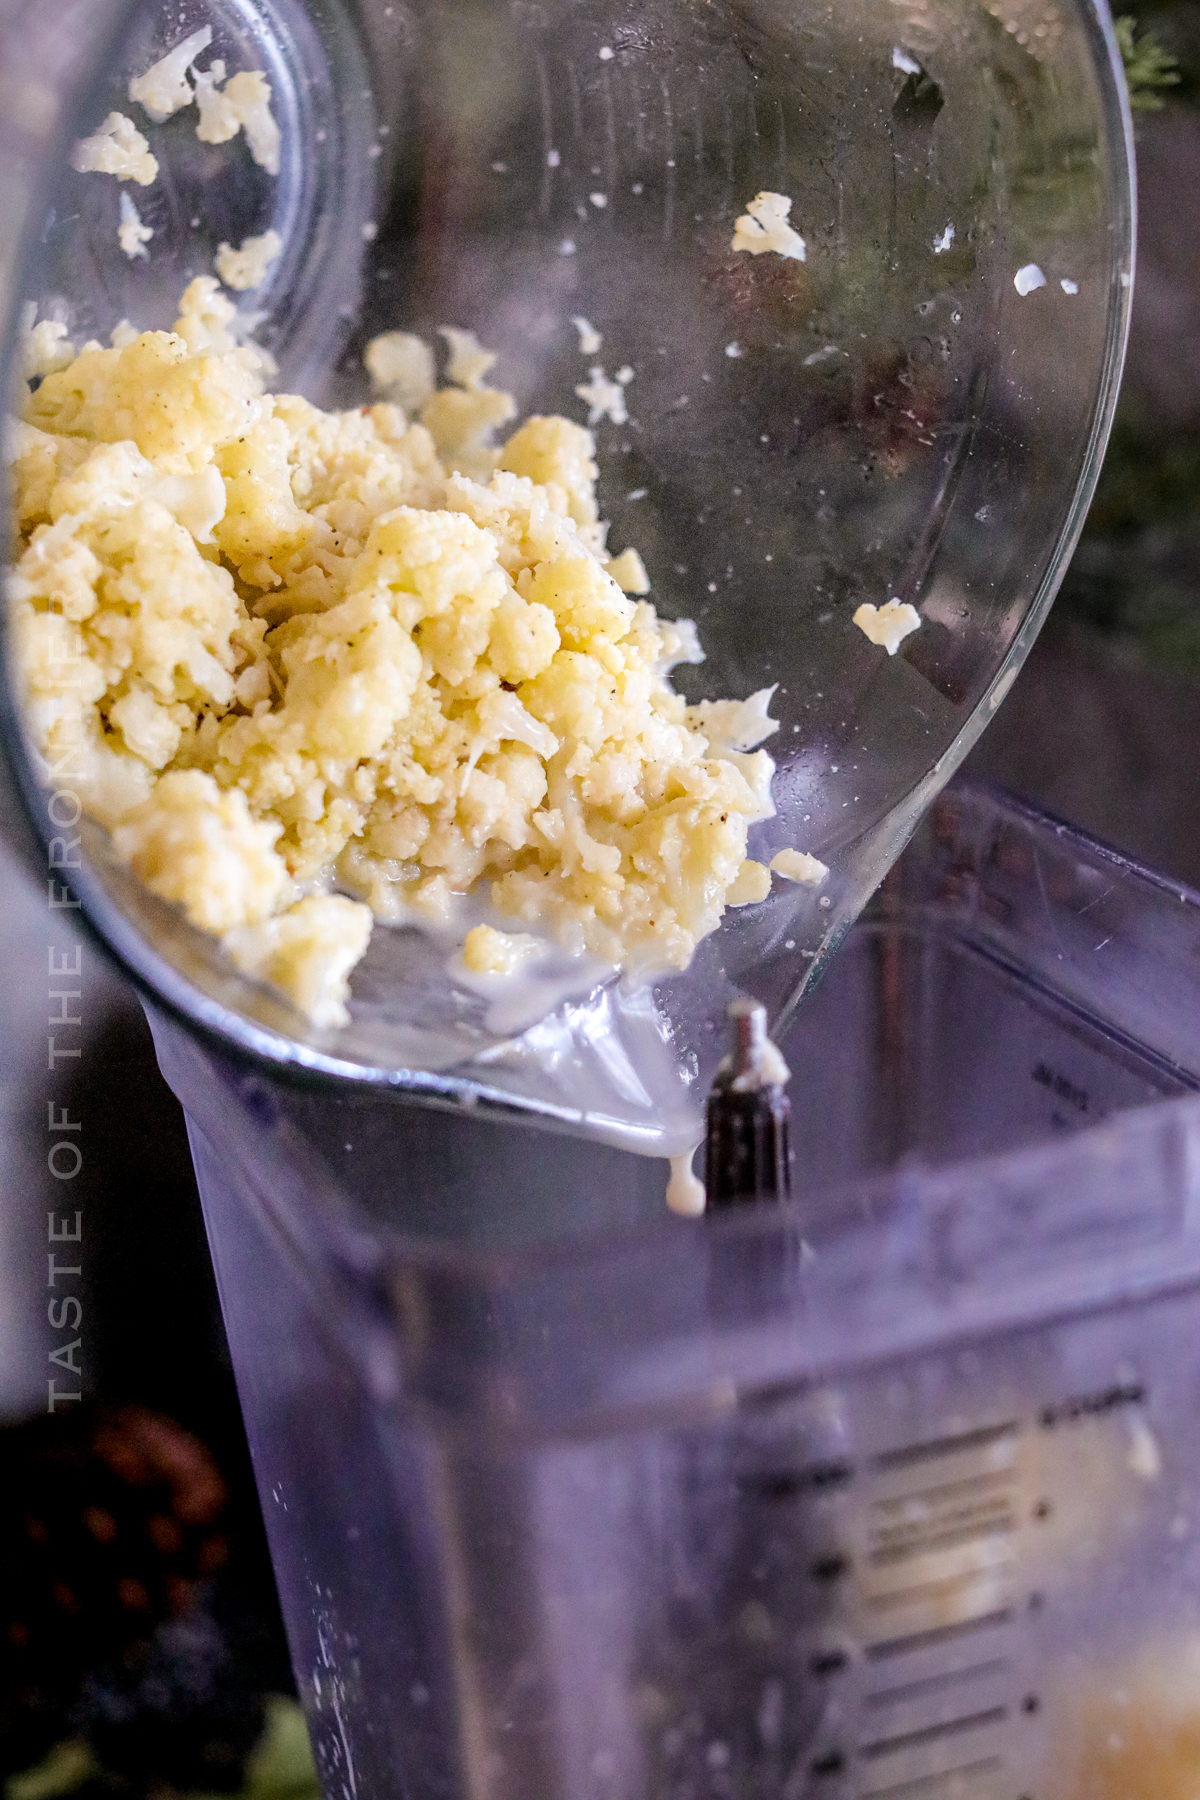
If you love this recipe for Cauliflower Mash as much as I do, please write a five-star review, and be sure to help me share on Facebook and Pinterest!

CONNECT WITH YUMMI HAUS!
Be sure to follow me on my social media, so you never miss a post!

Kung Pao chicken is a favorite Chinese dish that is simple to make at home. This recipe calls for just a few ingredients, and it can be ready in under 30 minutes. It’s a delicious dinner that’s quick to make and everyone loves it.
Kung Pao Chicken is a healthy and tasty option for an easy weeknight dinner. You can’t beat the exceptional flavor and how quickly you can make something that tastes THIS GOOD in under 30 minutes.
You will definitely want to give this recipe a try tonight!
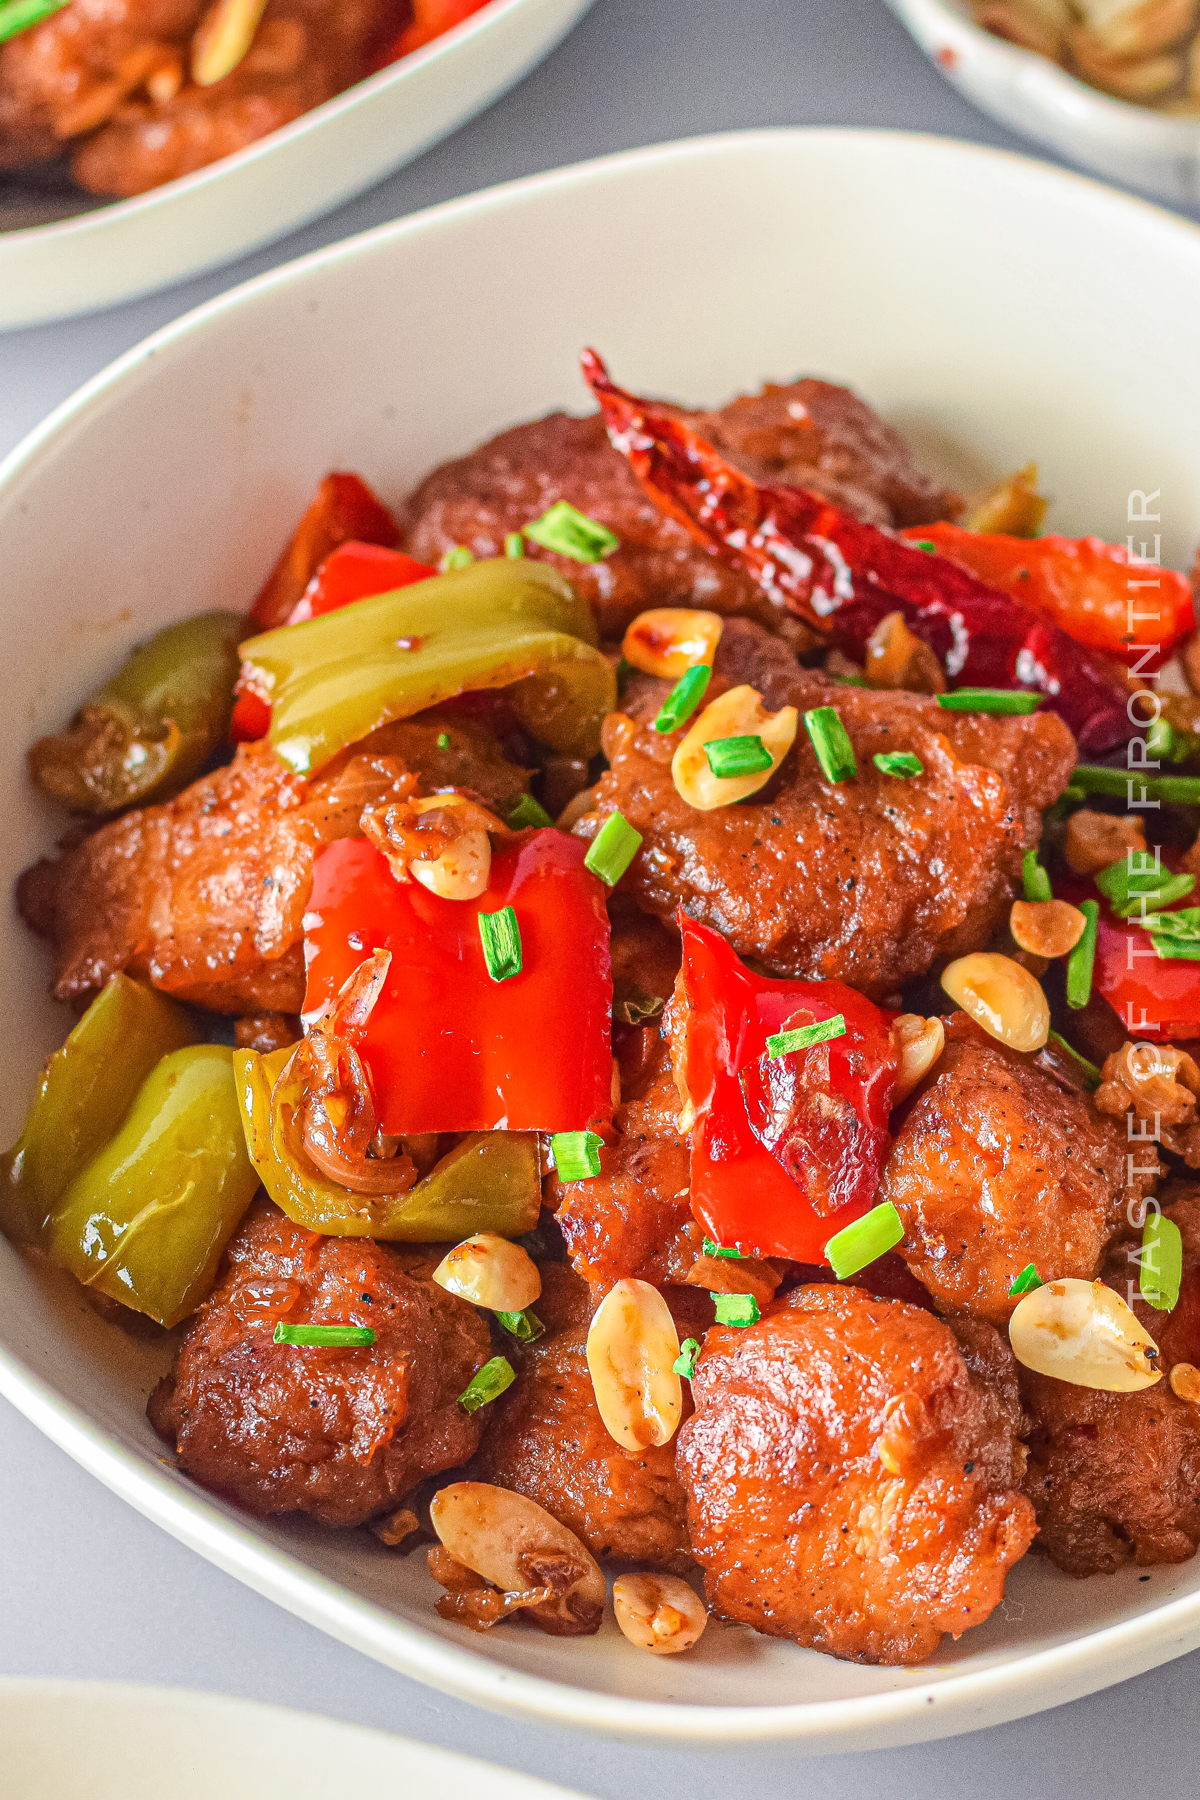
When it comes to getting take-out – Kung Pao Chicken is always on our order. But since we moved out of the city, it is really hard to not only get take-out but also get our favorite dishes.
While we do have a place in the nearby town, they don’t offer Kung Pao on the menu, which leaves me to make our own.
Fortunately, this one is super simple to make and everyone loves it. It’s faster to make this than it is to place an order and drive over to get it – which I love.
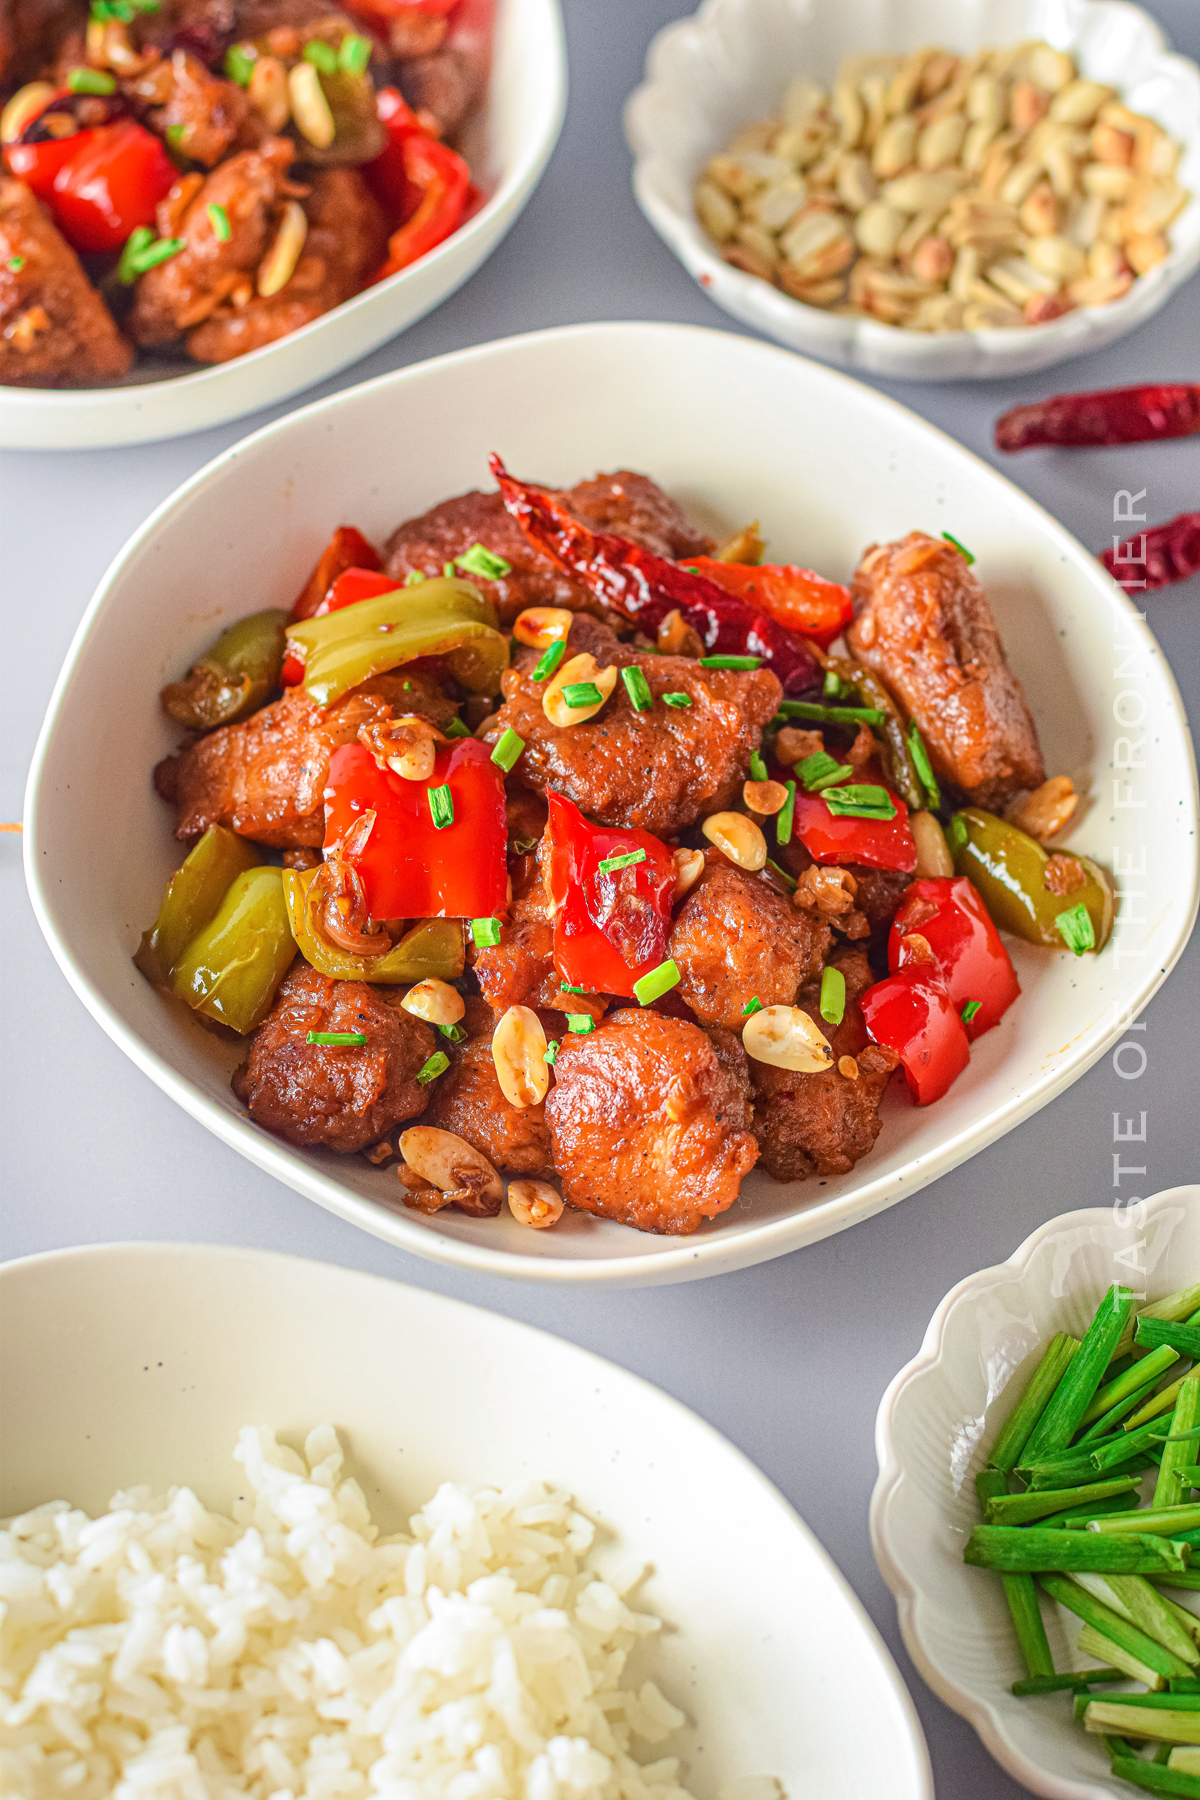
Kung Pao chicken is a stir-fry dish made with chicken, peanuts, vegetables, and chili peppers. The dish is believed to have originated in the Sichuan province of China and gets its name from the Kung Pao sauce that is used as a key ingredient.
There are many different ways to make Kung Pao chicken, but the dish typically features chicken that has been marinated in a mixture of soy sauce, rice wine, and cornstarch. The chicken is then stir-fried with peanuts, vegetables, and chili peppers in a Kung Pao sauce made from vinegar, soy sauce, sugar, and chili peppers.
Kung Pao chicken is often served over rice or noodles and is a popular dish in Chinese restaurants around the world. It can be made with different types of meat, such as shrimp or beef, and there are also vegetarian versions of the dish that use tofu in place of chicken.
Kung Pao chicken is spicy, sweet, and savory all at the same time, and it is a delicious way to enjoy a classic Chinese dish. If you are looking for a new recipe to try, Kung Pao chicken is a great option that is sure to please everyone at the table.
This chicken stores well. Just place any leftovers in an airtight container and keep refrigerated for up to 3 days. To reheat, pop the corner of the lid, add a small splash of water, and microwave until hot.
The chicken won’t be quite as crispy as when it was fresh – but still quite delicious.
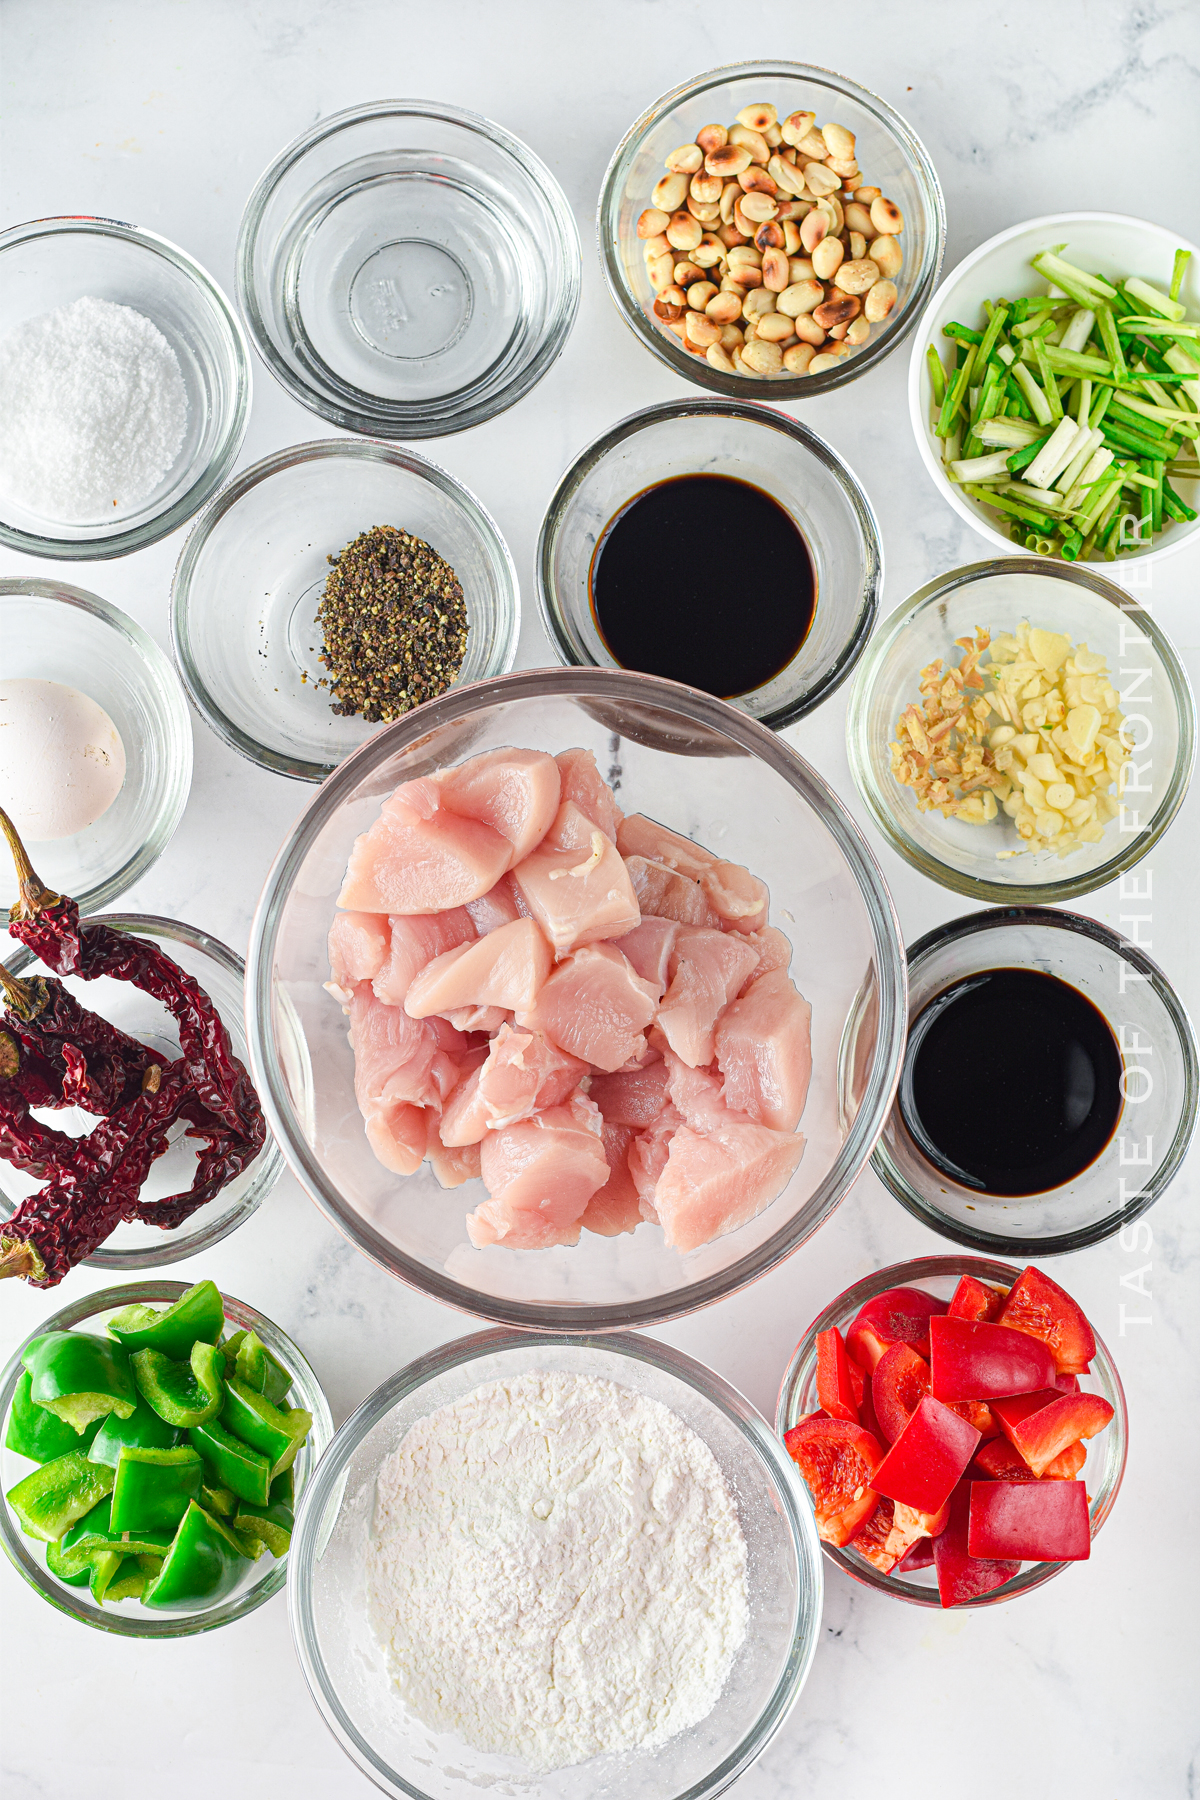
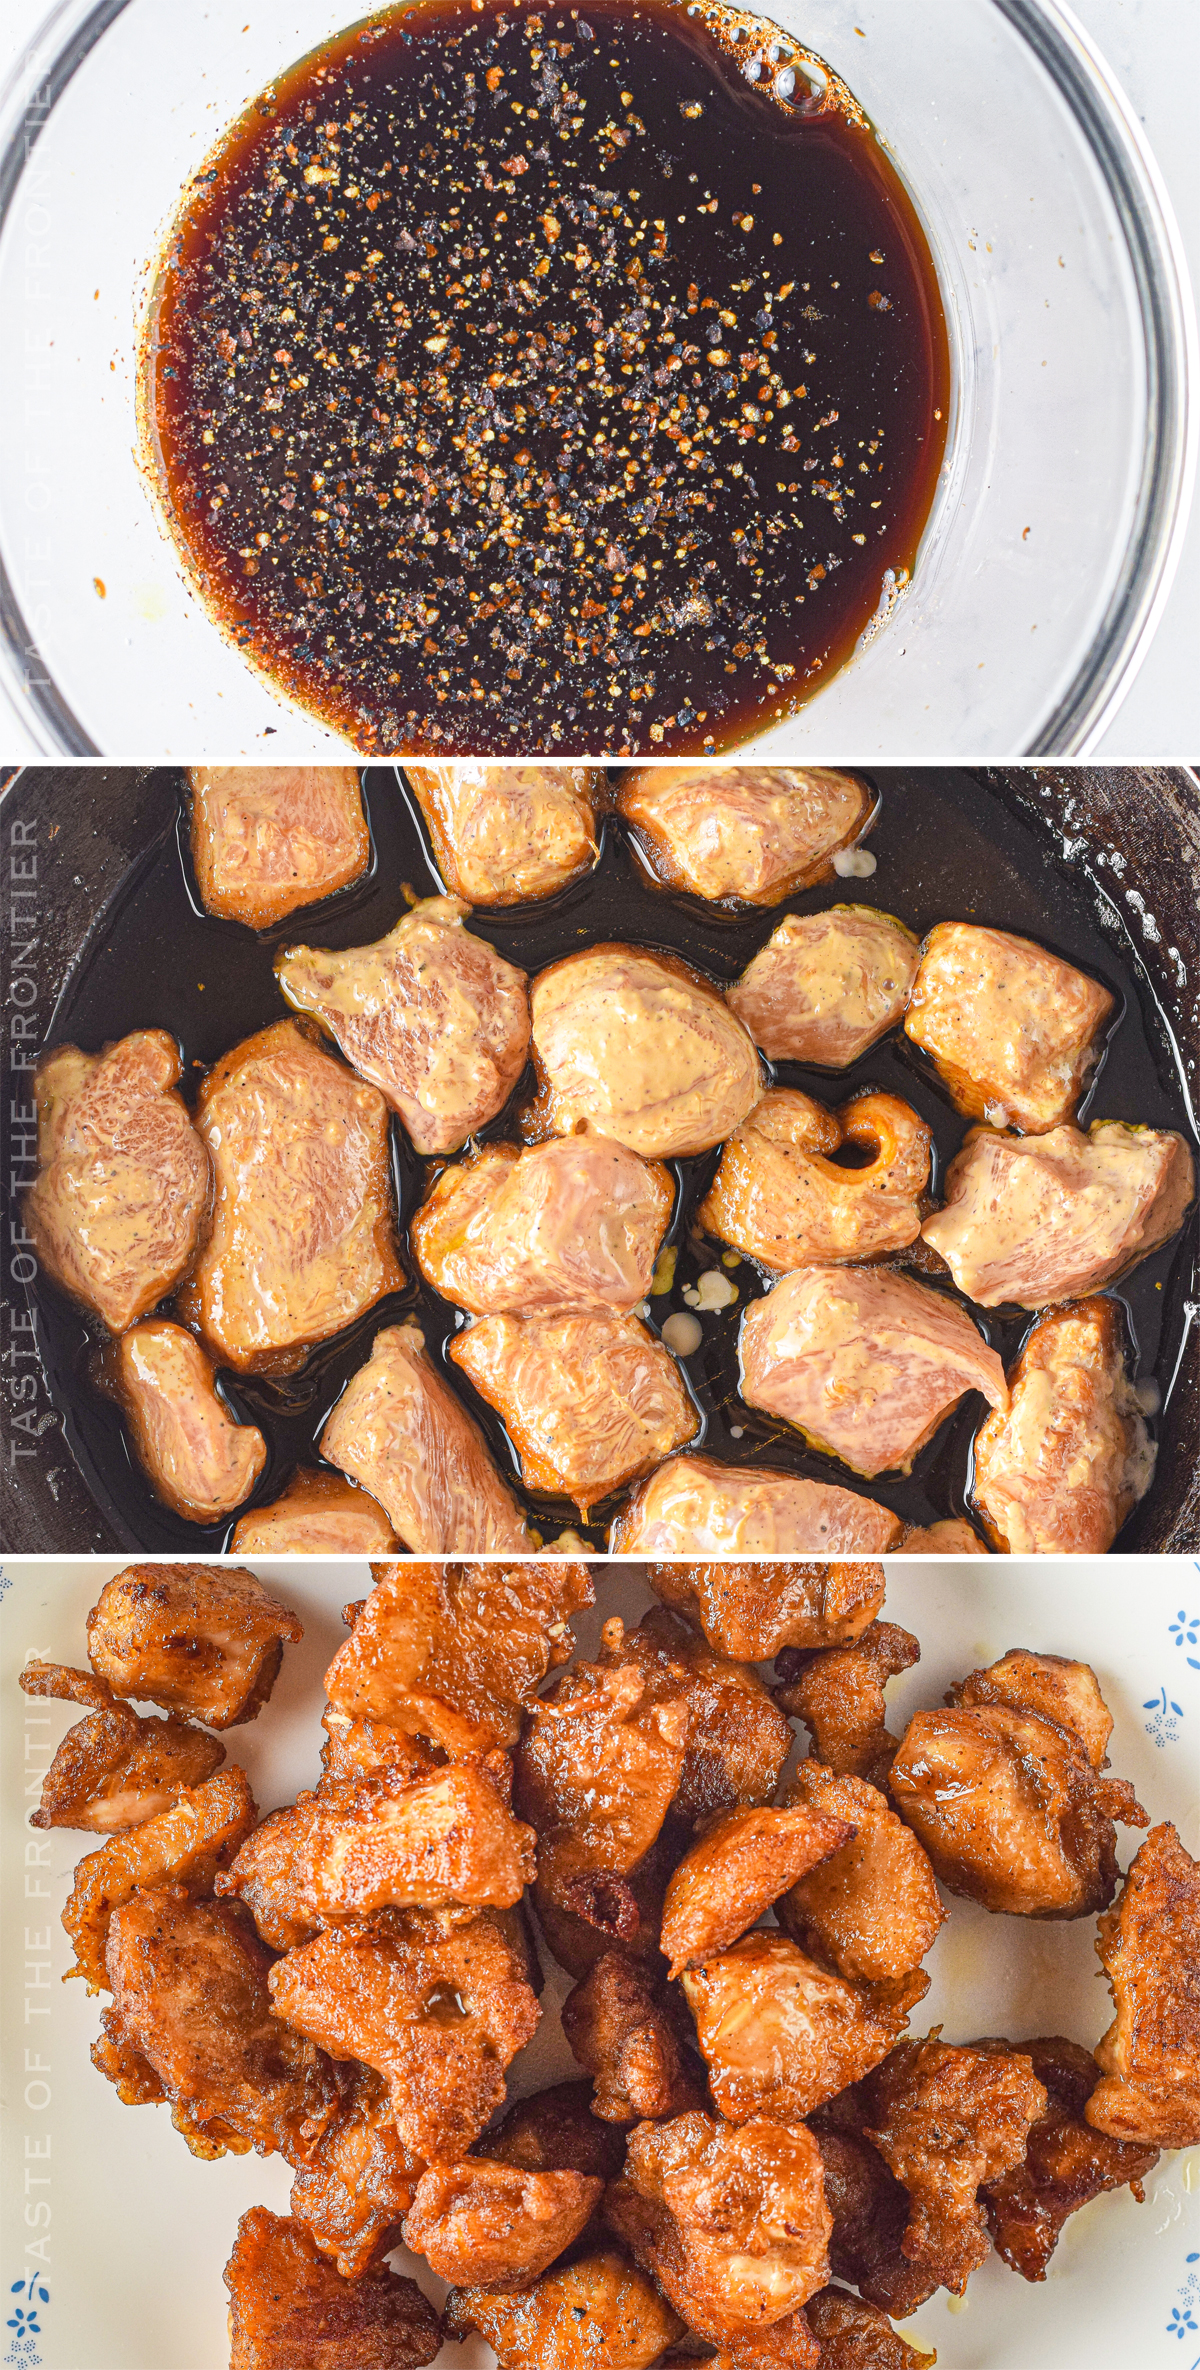
Store-bought minced garlic is a perfectly acceptable alternative to fresh cloves of garlic. Generally, I am more likely to have this on hand than fresh garlic since it is jarred and stored in the refrigerator.
However, I would discourage relying on garlic powder as a substitute in this recipe since it will not have the same ability to incorporate its flavor throughout the dish.
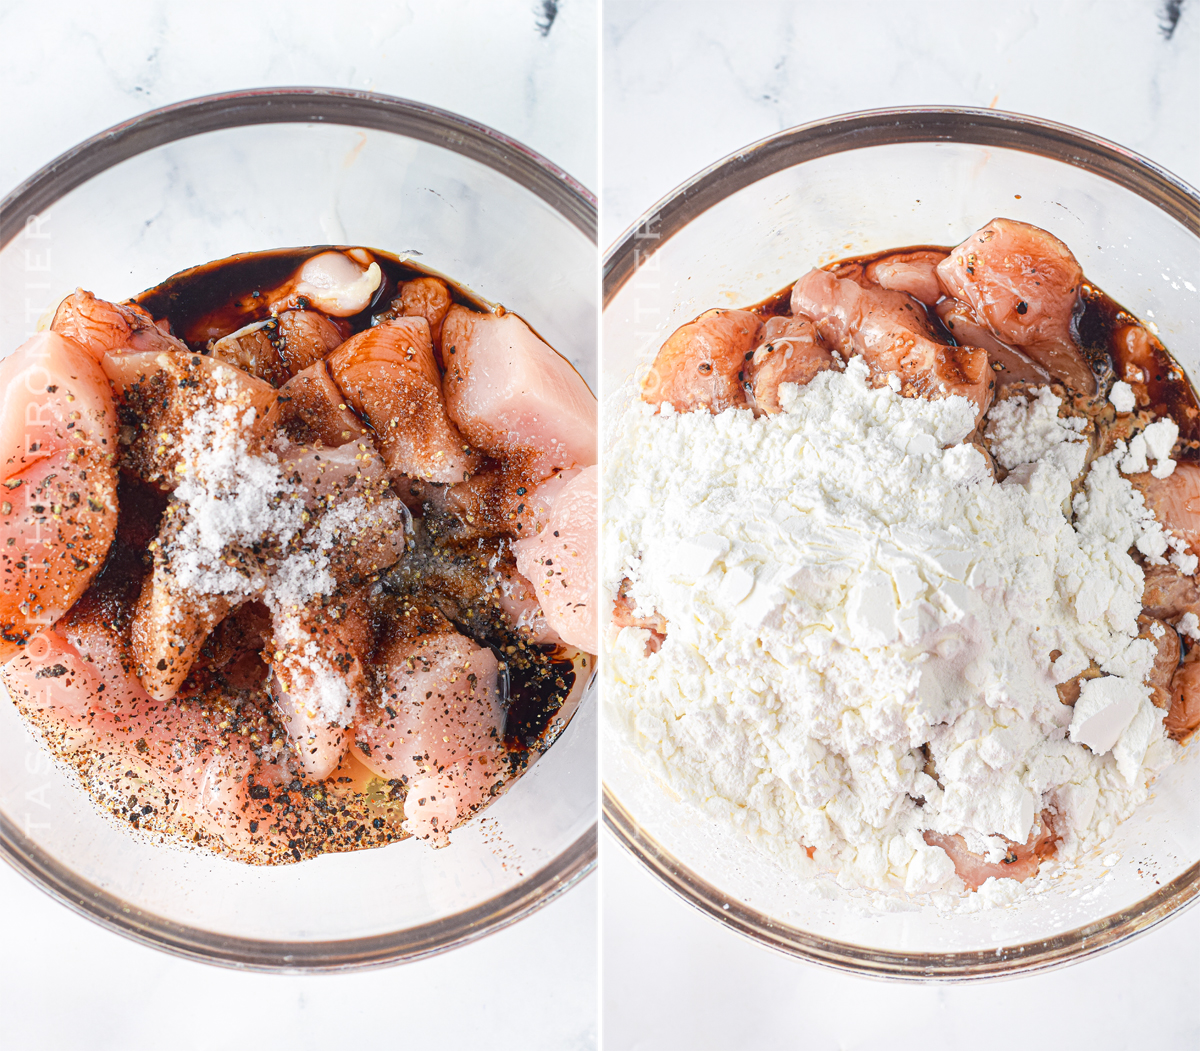
Yes – you can make this dinner ahead of time. But keep in mind that the coating on the chicken will not be as crispy once you reheat it.
The level of spice in Kung Pao chicken can vary depending on how it is made. Some recipes call for a lot of chili peppers, while others use just a few. If you are sensitive to spice, you can always change it up when making it.
Kung Pao chicken is typically made with a mixture of dried chili peppers, fresh chili peppers, and Sichuan peppercorns. These ingredients give the dish its characteristic heat, but they can also be adjusted to taste. If you want your Kung Pao chicken to be extra spicy, you can add more chili peppers or use a hotter variety of pepper.
On the other hand, if you want to tone down the spice, you can remove some of the chili peppers or use a milder variety. You can also make your Kung Pao chicken without any peppers at all.
No matter how you like your Kung Pao chicken, it is sure to be a delicious and easy way to enjoy a classic Chinese dish. Give it a try the next time you are in the mood for something new and exciting!
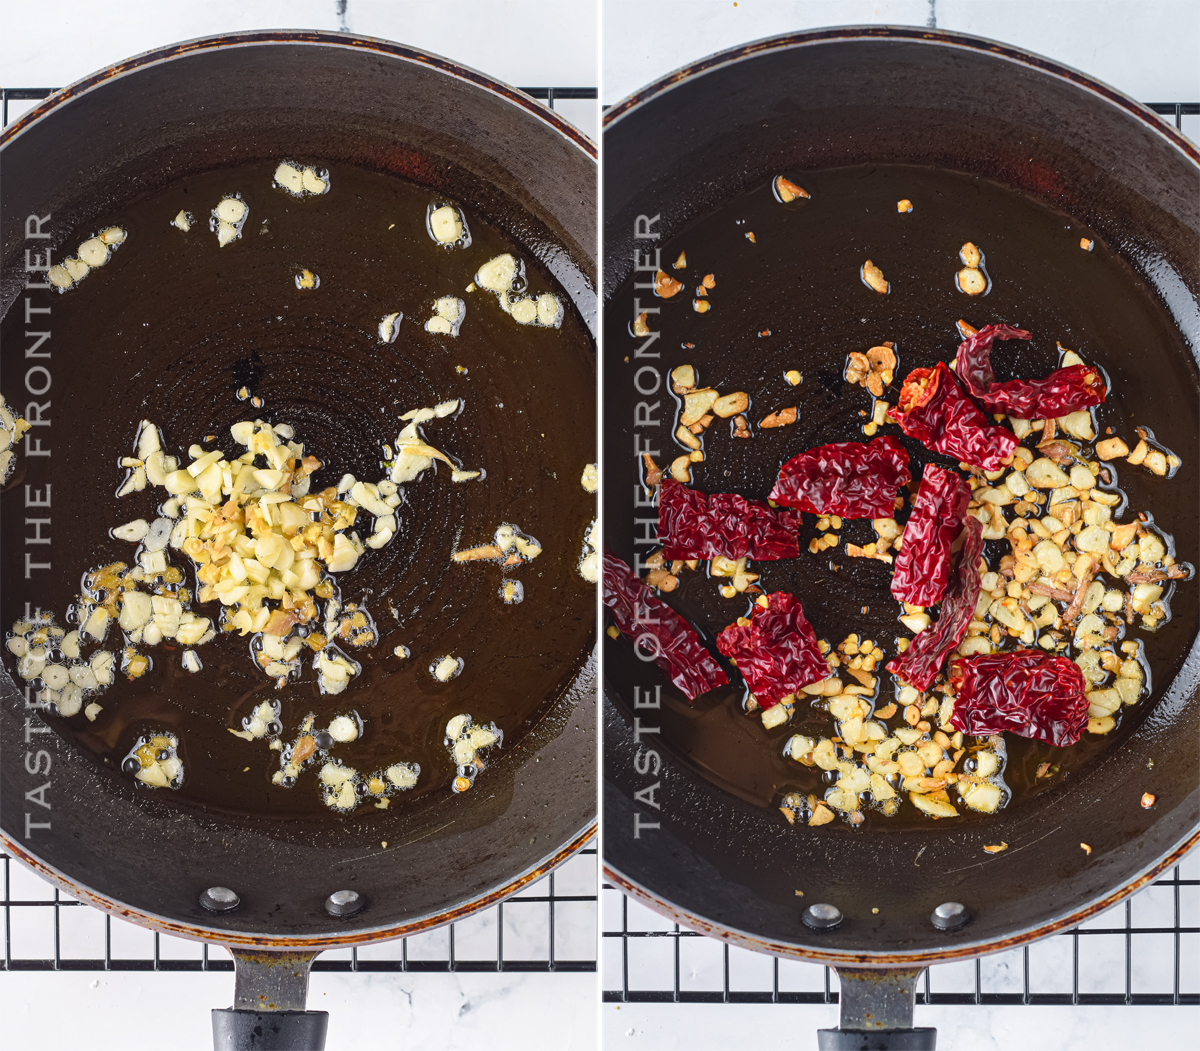
Kung Pao chicken is typically served over rice or noodles. For a complete meal, you can also add some steamed vegetables on the side.
If you want to keep it simple, Kung Pao chicken goes great with plain white rice. If you are looking for something a little fancier, try serving it over a bed of sautéed vegetables or some lo mein noodles.
No matter what you serve it with, Kung Pao chicken is a delicious and easy way to enjoy a classic Chinese dish. Give it a try the next time you are in the mood for something new and exciting! Here are some of our favorites we make alongside this dish.
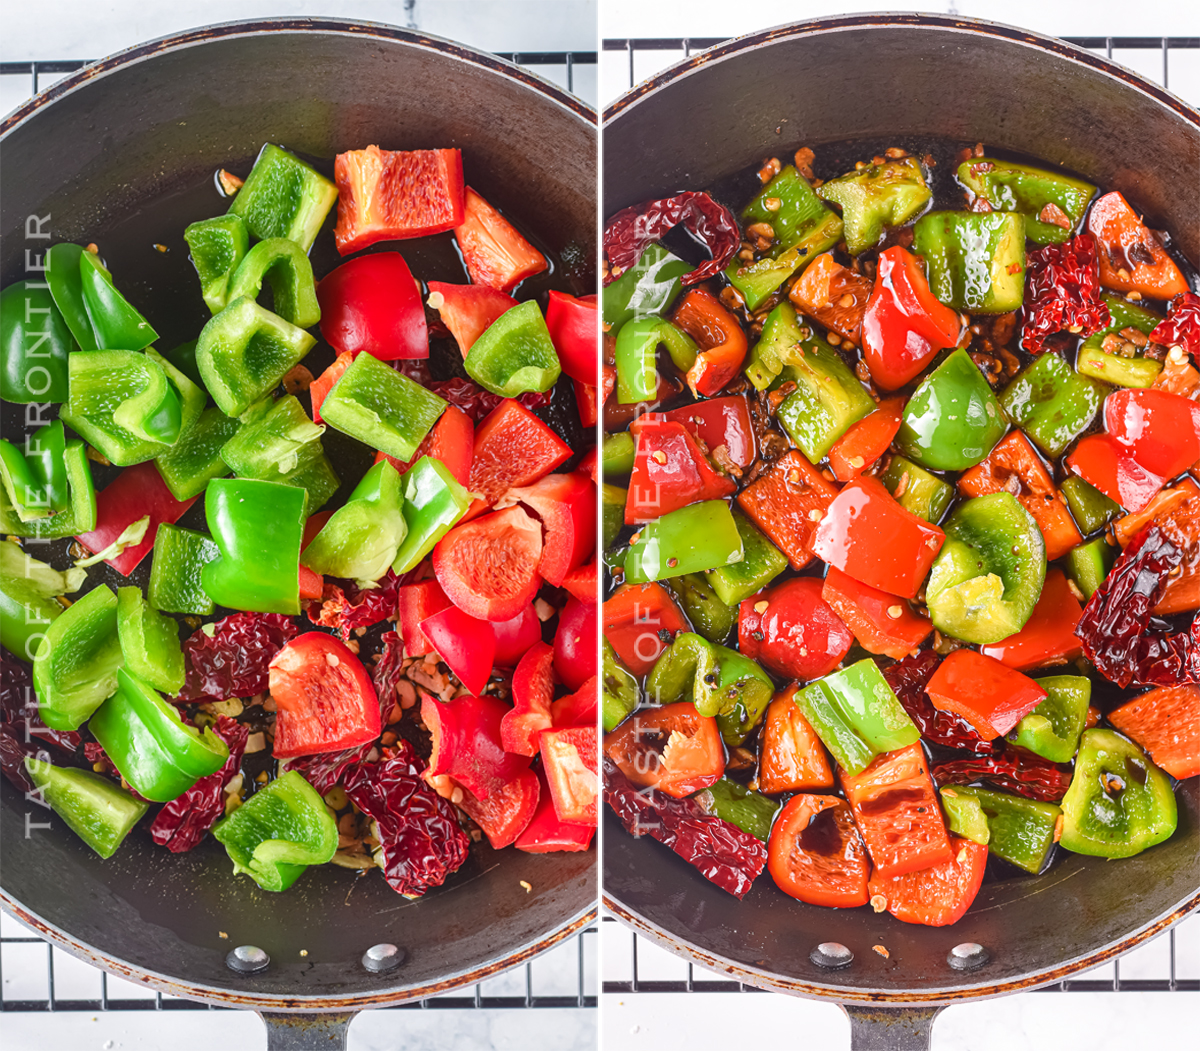
This Kung Pao chicken recipe is SUPER EASY and delicious – and if you’re like me, then you maybe already have some of these items on hand OR maybe you have never made homemade Chinese food recipes before, & you might be a bit nervous – but you’re going to love it. I have made a list below of the things I absolutely can’t live without when it comes to making this savory dinner recipe. (you can also SHOP MY FAVORITES in my store)
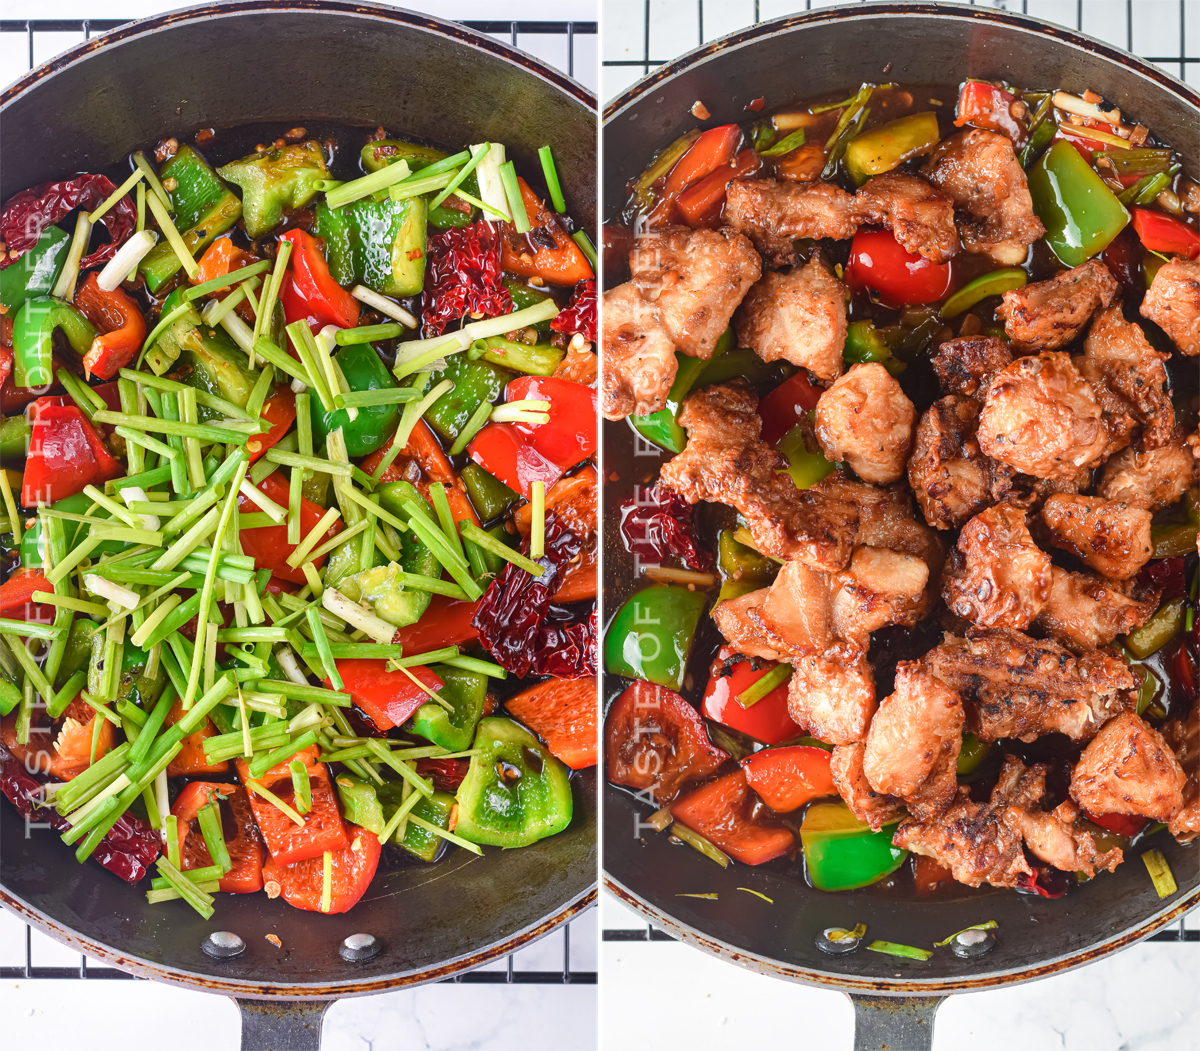
If you love this simple Kung Pao Chicken recipe, you’re going to love these other homemade Asian-inspired dishes too. Please click each link below to find the easy, printable recipe!


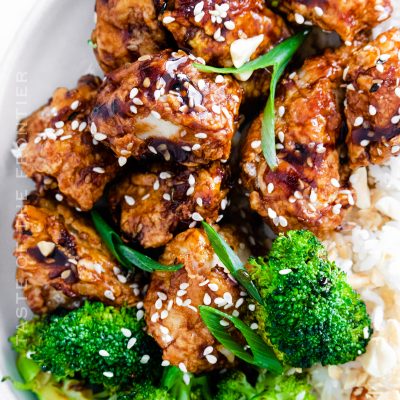
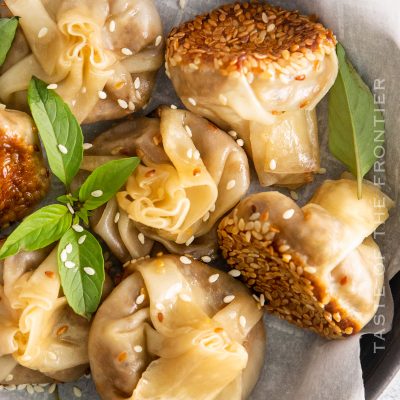
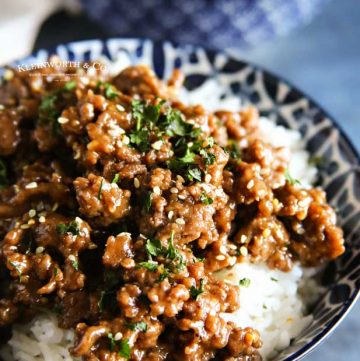

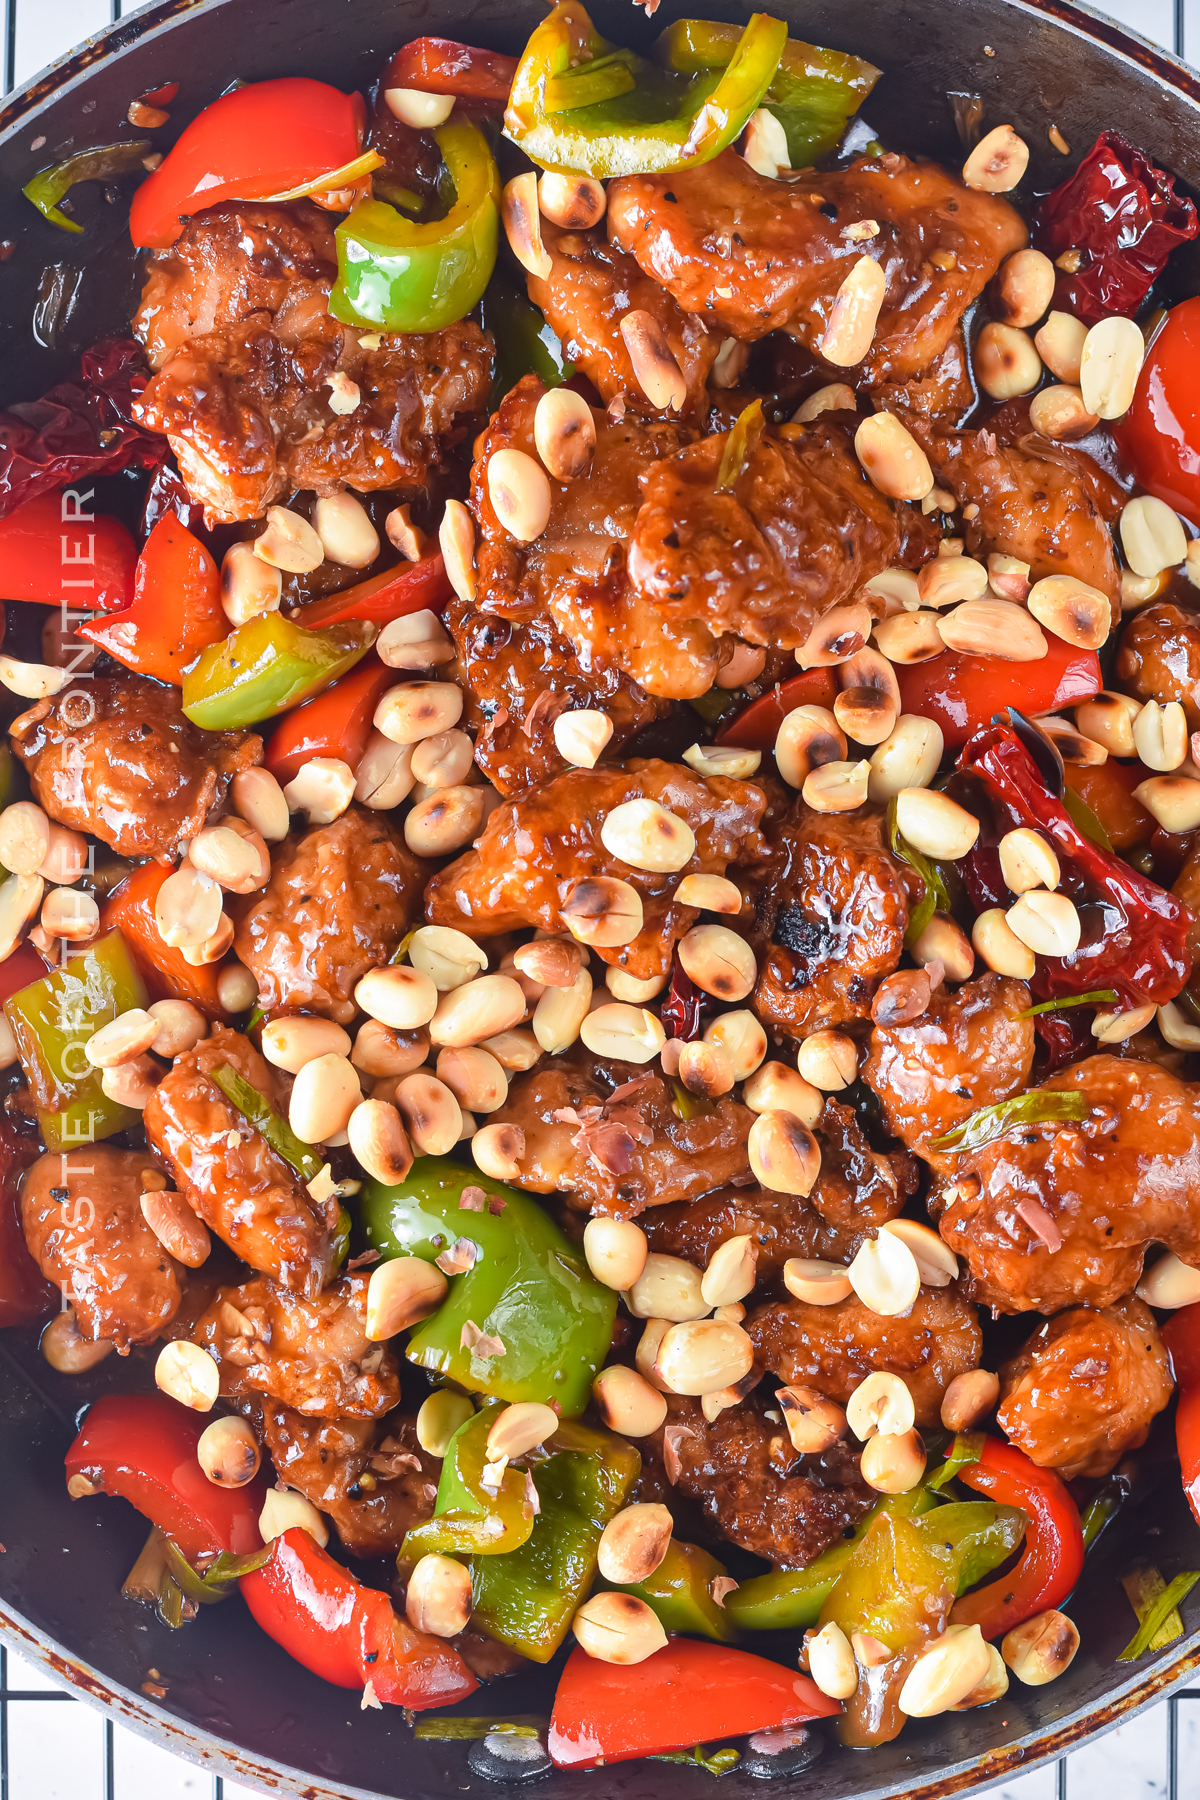
If you love this recipe for Homemade Kung Pao Chicken as much as I do, please write a five-star review, and be sure to help me share on Facebook and Pinterest!
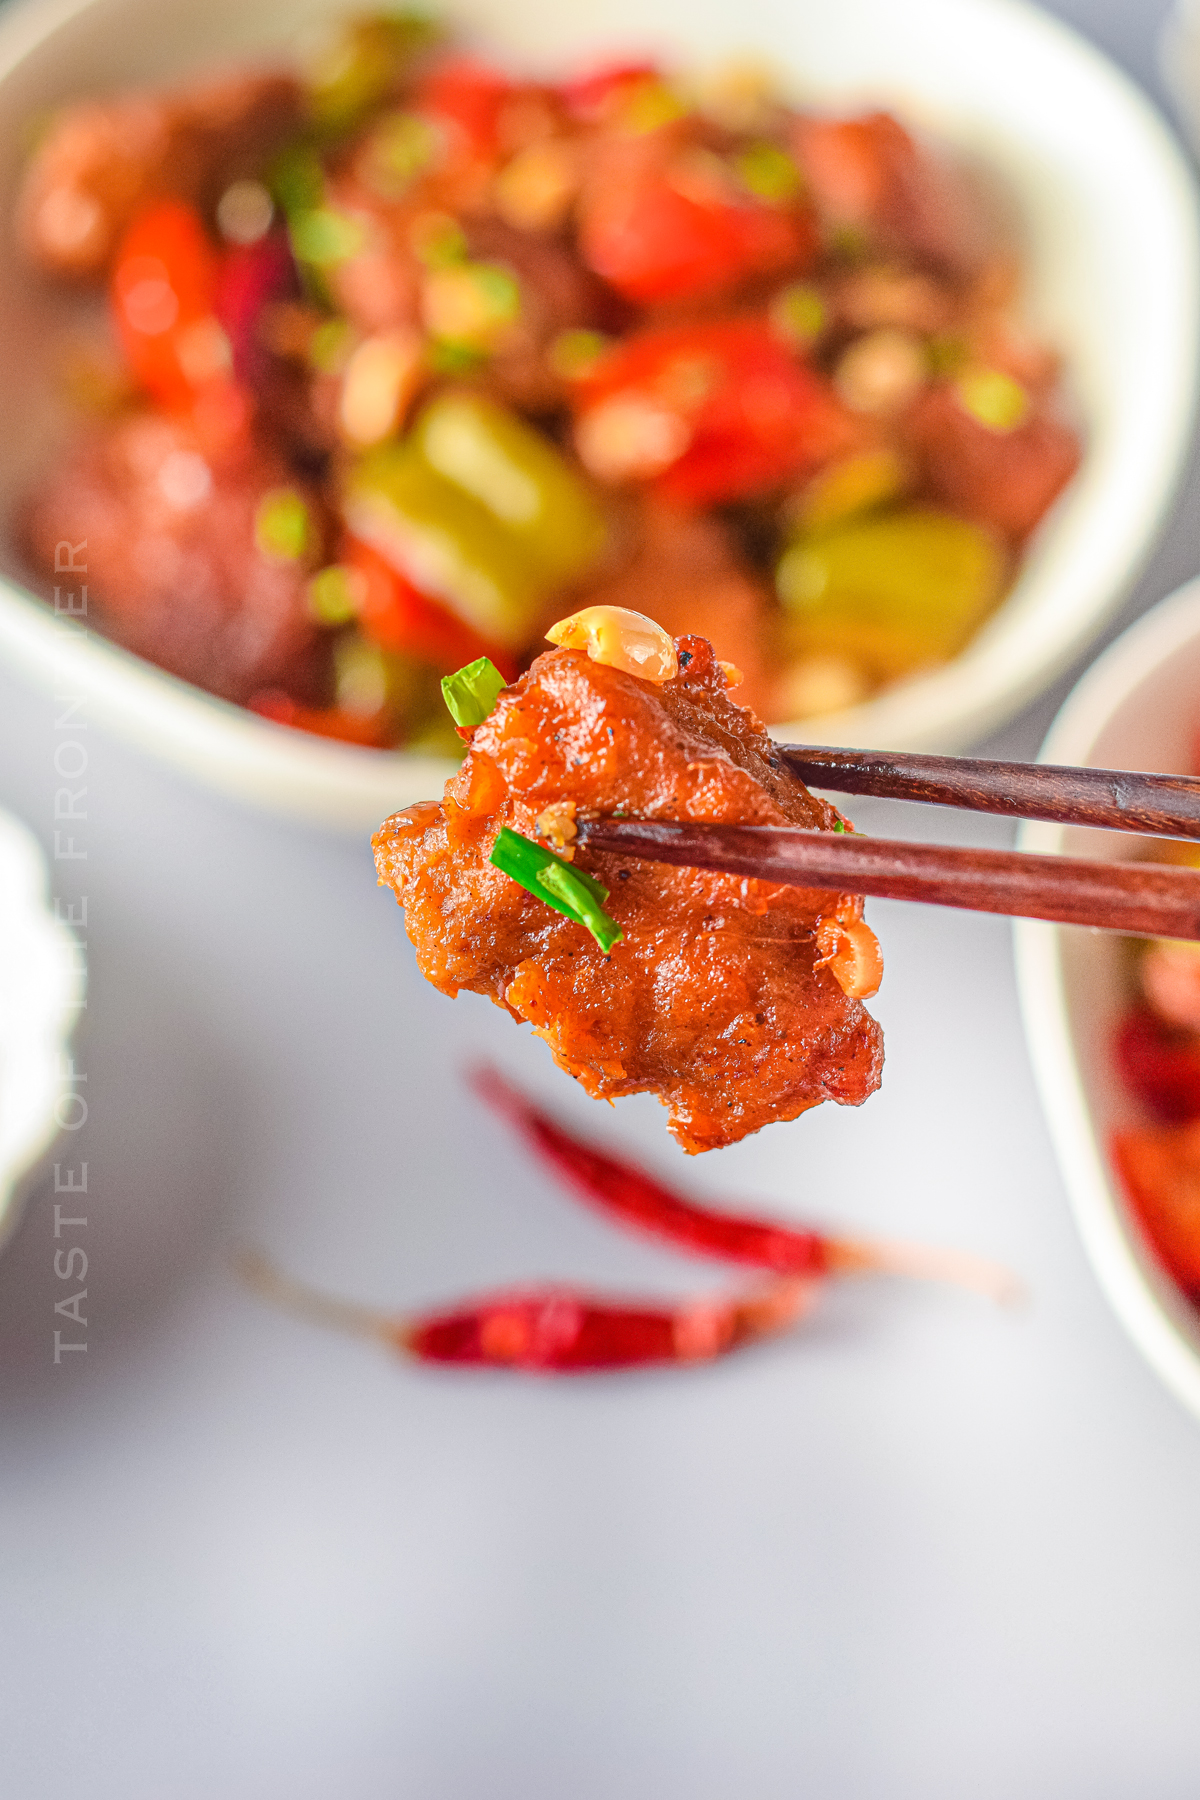
CONNECT WITH YUMMI HAUS!
Be sure to follow me on my social media, so you never miss a post!
Enjoy a classic favorite at home with our Homemade Big Mac, featuring juicy beef patties, fresh lettuce, and a soft sesame seed bun, all topped with our creamy, tangy Homemade Big Mac Sauce.
Biting into a juicy burger with melty cheese, crispy lettuce, and a tangy special sauce is an experience we all know and love. This Homemade Big Mac brings all the flavors of the classic fast food favorite right to your own kitchen.
As expensive as things are getting these days, you’d have to be a little bit crazy not to want a homemade version. Am I right? With perfectly seasoned beef patties, a homemade Big Mac sauce, and all the classic toppings, this burger is sure to satisfy your cravings. And since you’re making your own Big Mac, you can make it how you want it.
View postMuffins are a great way to start your day, and this Basic Muffin Recipe is one of the easiest you’ll find. With just a few simple ingredients, you can have fresh muffins in no time! PLUS you can add your favorite mix-ins for even more variety!
Try it out with different mix-ins, or top them with your favorite frosting or glaze. No matter how you make them, muffins are always a delicious breakfast treat.
You absolutely can’t go wrong with this simple base muffin recipe. It will be all you need to start and then the sky is the limit when it comes to changing them up for a whole lot of variety.
View post